What to know
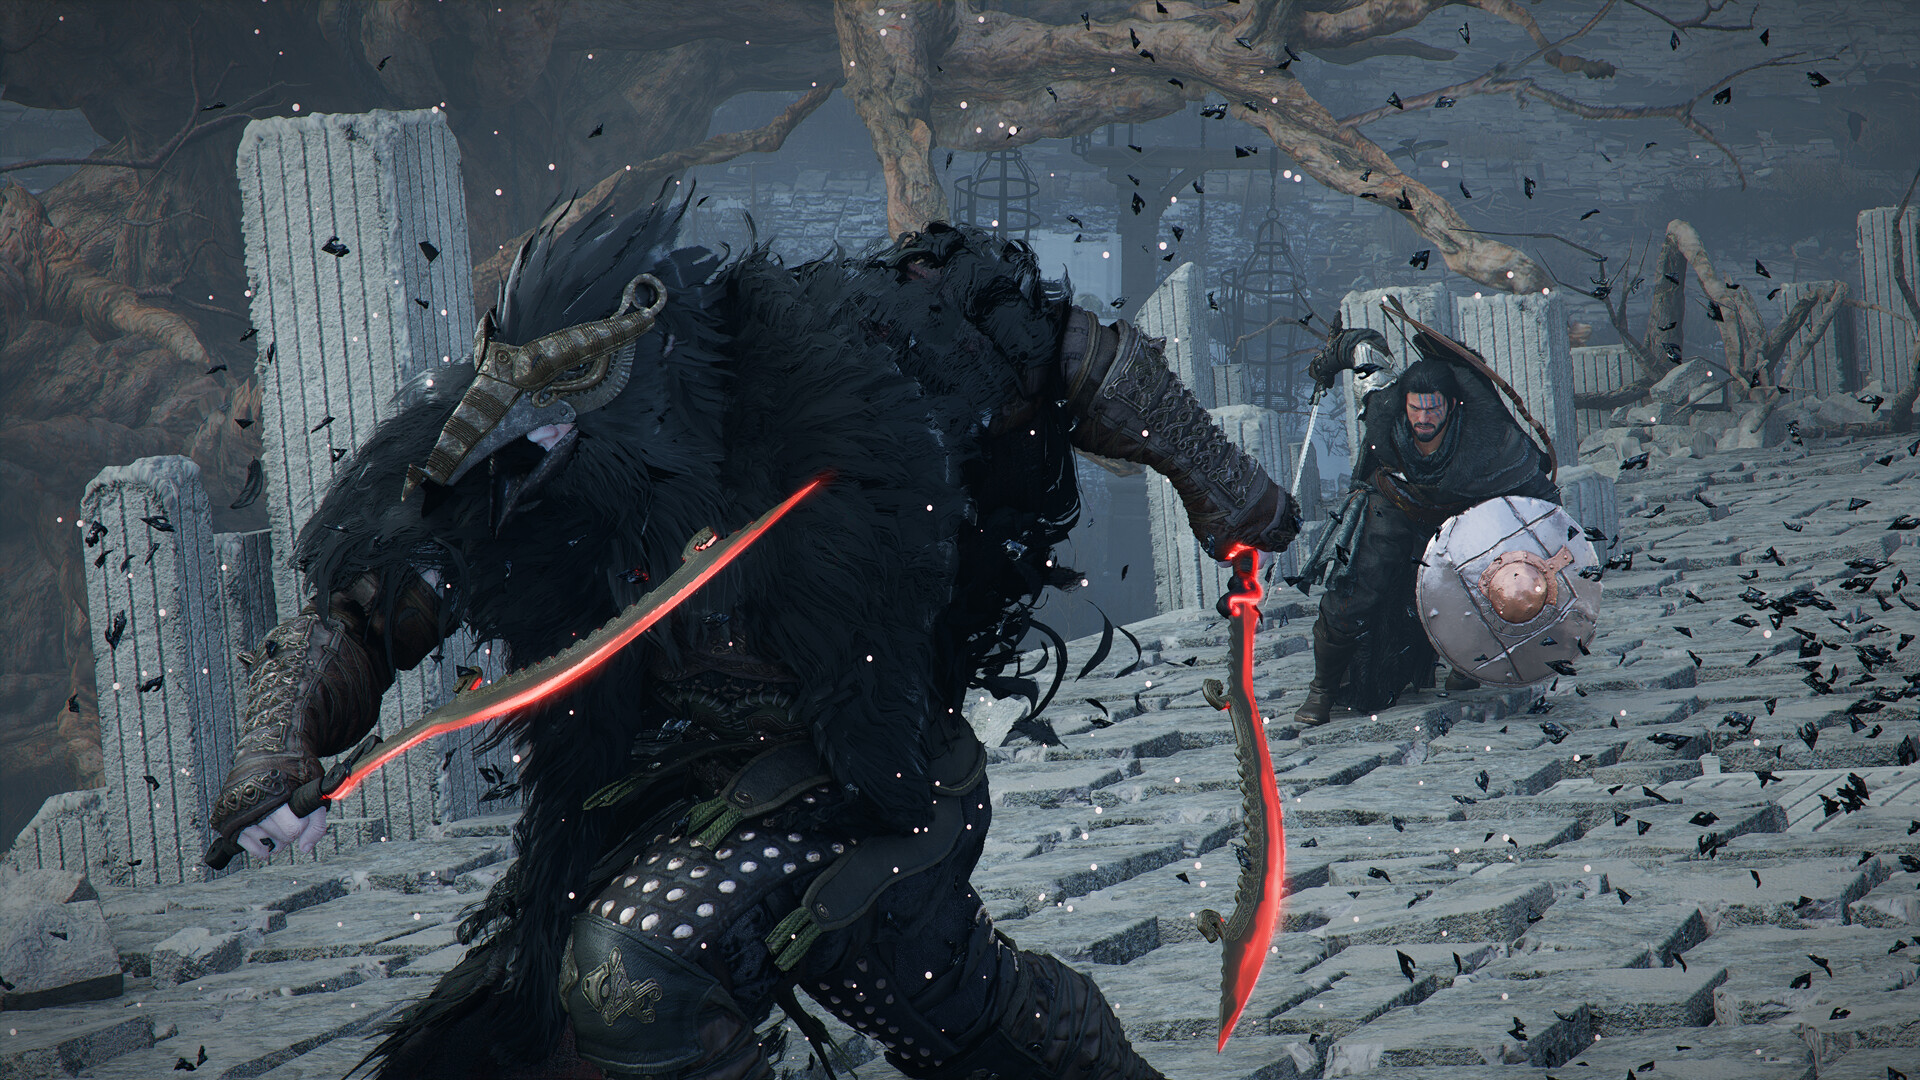
- Overwhelming Beings are late-game bosses designed to test your full build and combat mastery.
- Each boss drops unique, high-tier weapons, Abyss Gear, and accessories.
- Preparation—gear, skills, and consumables—is more important than raw aggression.
- All three bosses are located in Pailune but differ heavily in combat style.
If you are stepping into the endgame of Crimson Desert, these three Overwhelming Beings represent one of the biggest progression checkpoints. You are expected to combine mechanical skill with optimized builds and smart resource management. Going in blindly will almost always result in failure, but with the right preparation and awareness, these fights become highly rewarding challenges.
Here is a quick overview of all three Overwhelming Beings in Crimson Desert:
| Boss Name | Location | Difficulty | Key Rewards | Combat Style |
|---|---|---|---|---|
| Beloth the Darksworn | Hoenmark Ruins, Pailune | Very High | Frost Spike Abyss Gear | Fast melee pressure |
| Ator (Archon of Antumbra) | Cloister of Ruination, Pailune | Very High | Weapon, Orb, Helm, Ring | Hybrid magic + melee |
| The Forgotten General | The General’s Tomb, Odeck (Pailune) | Very High | Weapon + Abyss Gear | Slow but heavy hitter |
Preparation tips before facing Overwhelming Beings
Gear optimization for survivability and damage
Your weapon should be fully refined before attempting these fights, as damage output directly impacts how long you need to survive. Jewelry that boosts attack and critical rate provides consistent passive value, making long encounters much more manageable.
Equipping the Kuku Watcher Pack is highly recommended, since it spawns sentry bots that help build stun on bosses, giving you valuable damage windows.
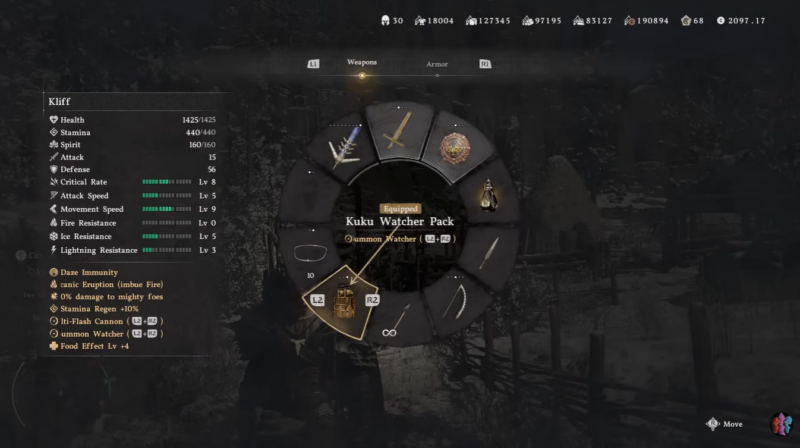
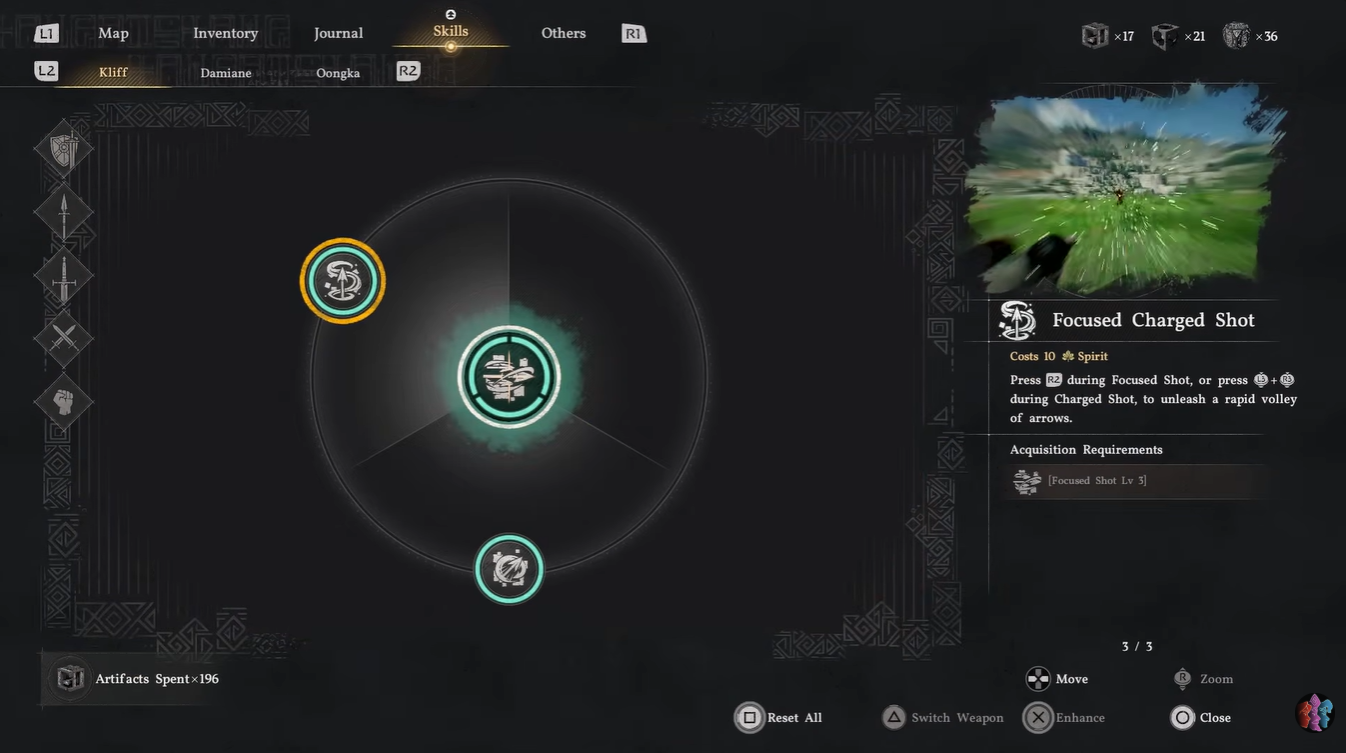
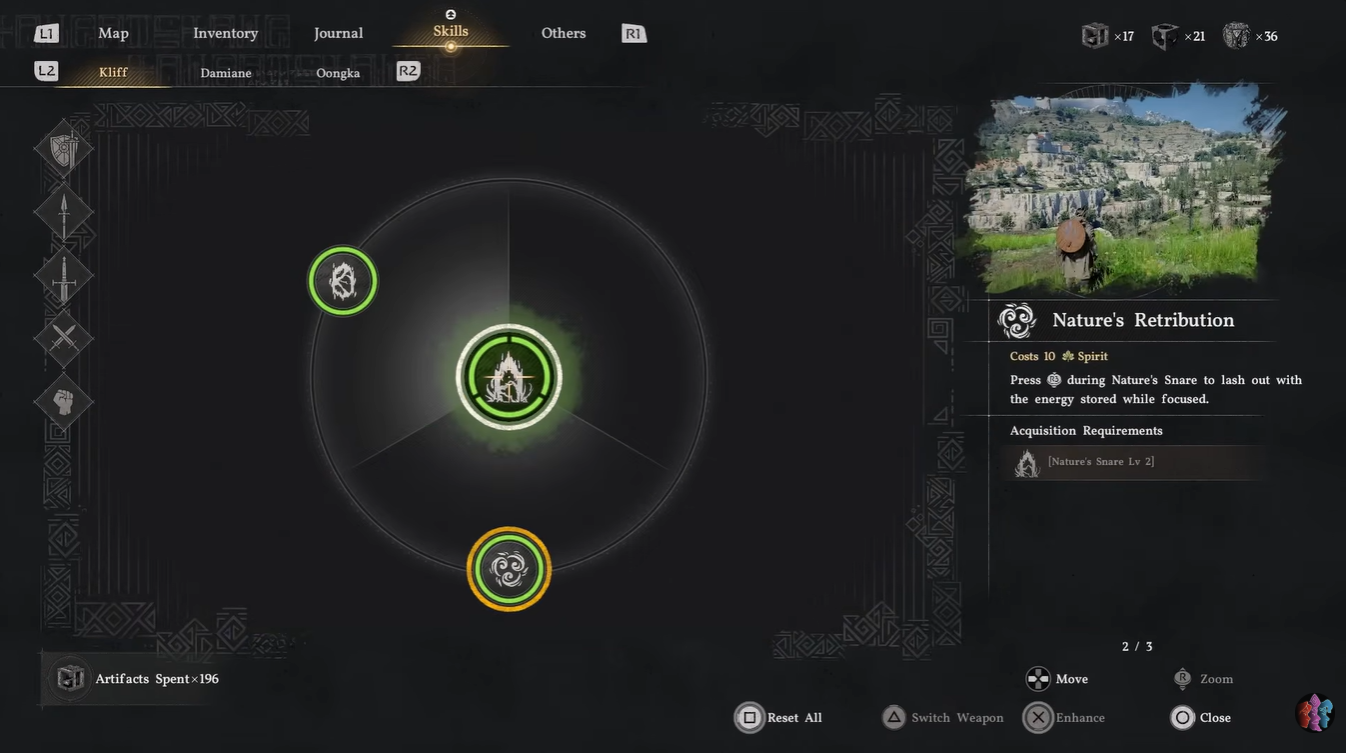
Skill setup for control and efficiency
A balanced skill loadout gives you flexibility during unpredictable fights. Focus Shot allows you to apply pressure from a distance while building stun, while Force Palm becomes your main damage tool during openings.
Keen Senses improves survivability by enhancing dodge timing, and Nature’s Retribution lets you reflect projectiles, turning defense into offense.
Consumables to sustain long encounters
These fights are endurance battles, so you need consistent resource recovery. Spirit restoration food ensures you can keep using abilities, while Palmar pills help sustain your combat flow during extended engagements.
Core combat strategy to follow
Your primary goal is to maximize stun windows, as this is when bosses become vulnerable. Ending combos with turning slashes and following up with palm strikes helps interrupt bosses and maintain pressure.
Managing stamina carefully is critical, since running out at the wrong moment often leads to unavoidable damage.
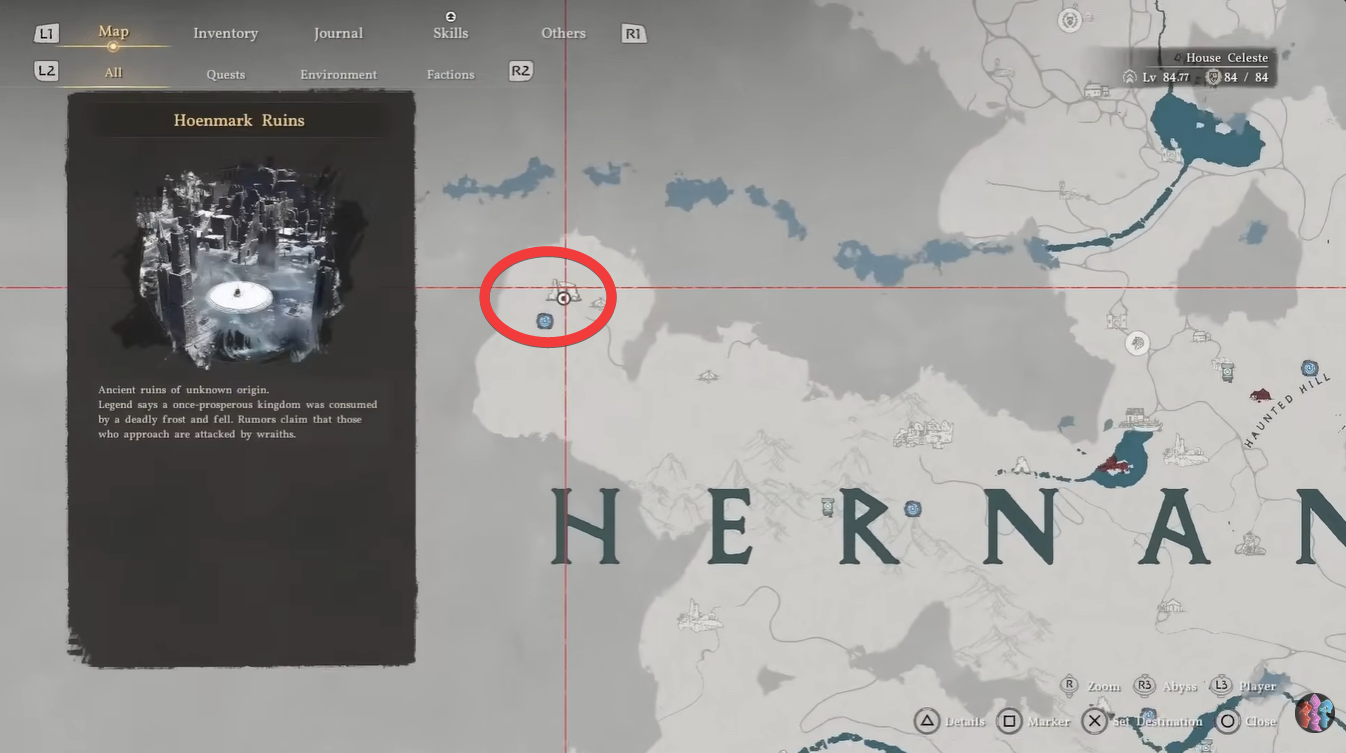
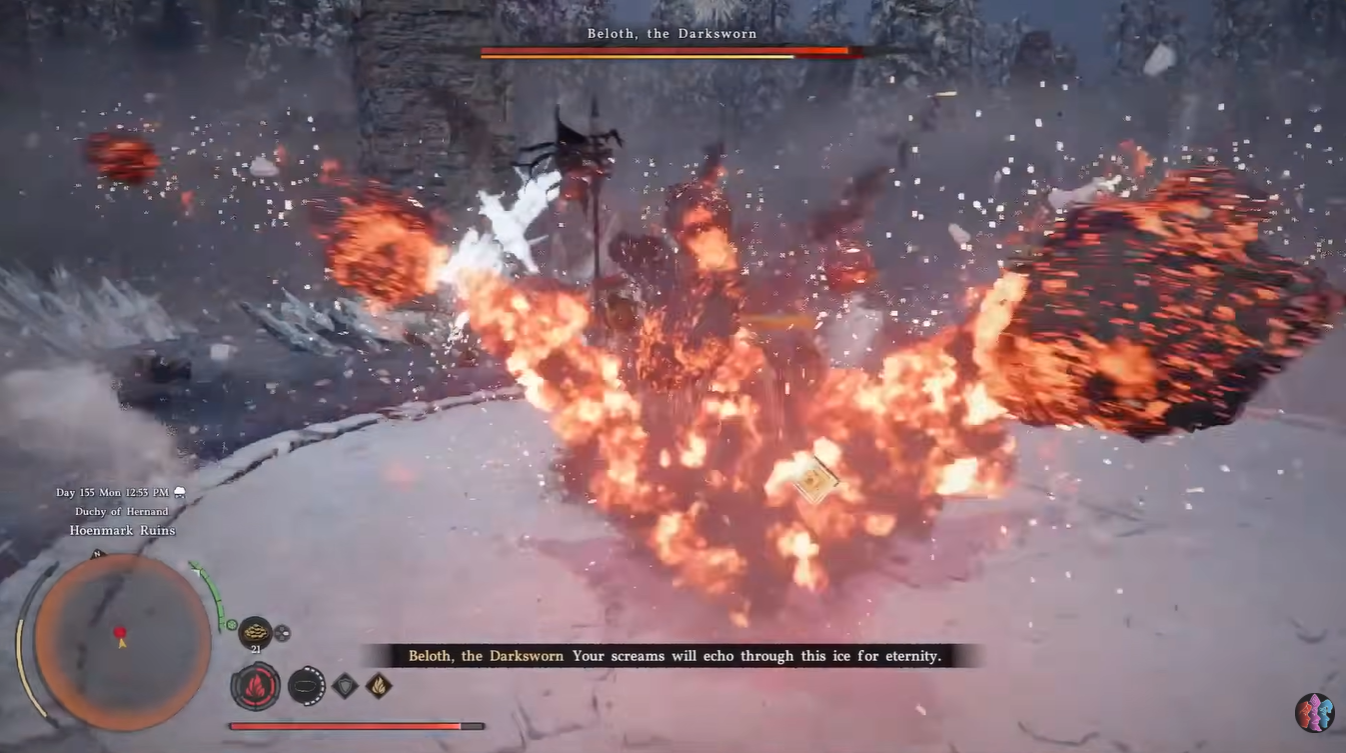
Beloth the Darksworn breakdown
Location and encounter overview
You will find Beloth in Hoenmark Ruins, Pailune, an open battlefield that gives you space but also leaves you exposed. Expect constant aggression from the moment the fight begins, as Beloth rarely gives you time to reset.
What to expect during the fight
Beloth relies on fast melee combos and relentless pressure, forcing you into defensive play. His attack chains can quickly overwhelm you if you overcommit.
The fight revolves around pacing, where you must balance offense and defense carefully while waiting for brief recovery windows.
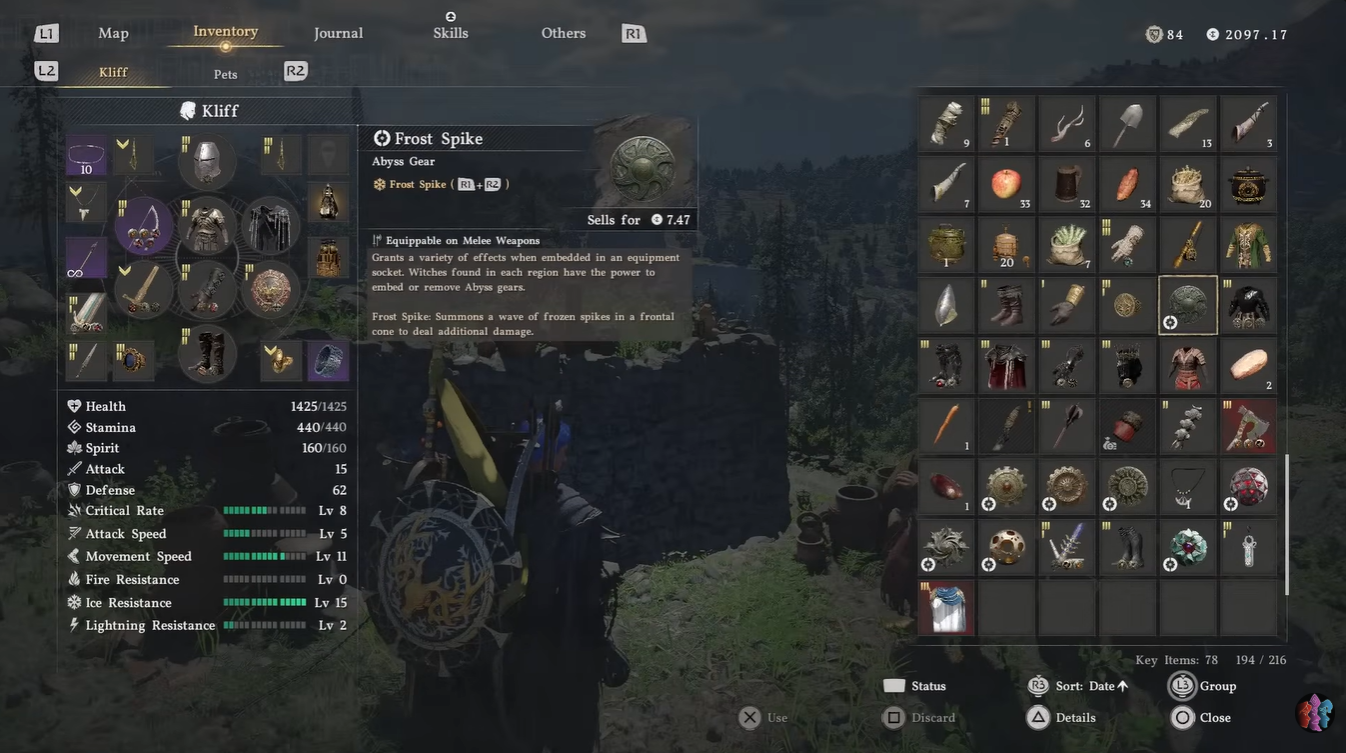
Rewards from Beloth
| Reward | Type | Effect |
|---|---|---|
| Frost Spike | Abyss Gear | Summons frozen spikes in a frontal cone |
| Plate Armor of Shadows set | Armor set | One of the best armor sets in Crimson Desert |
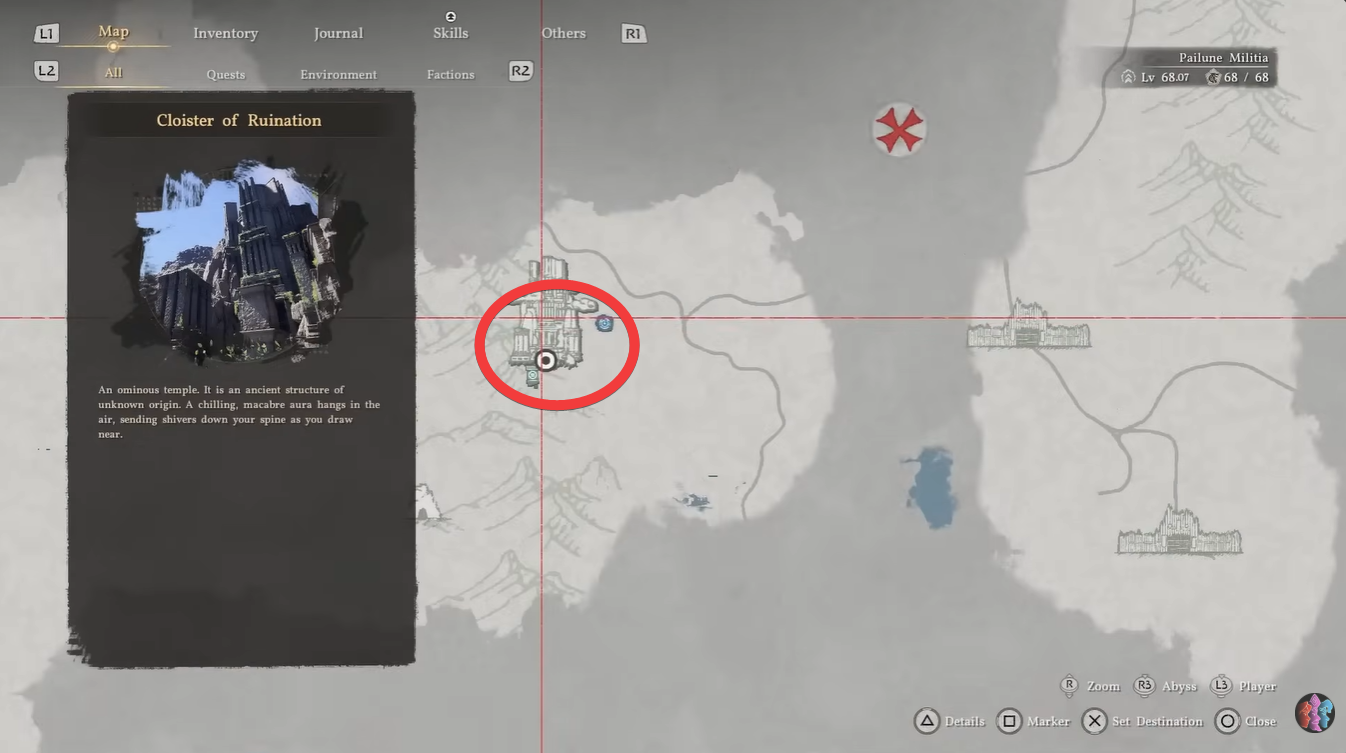
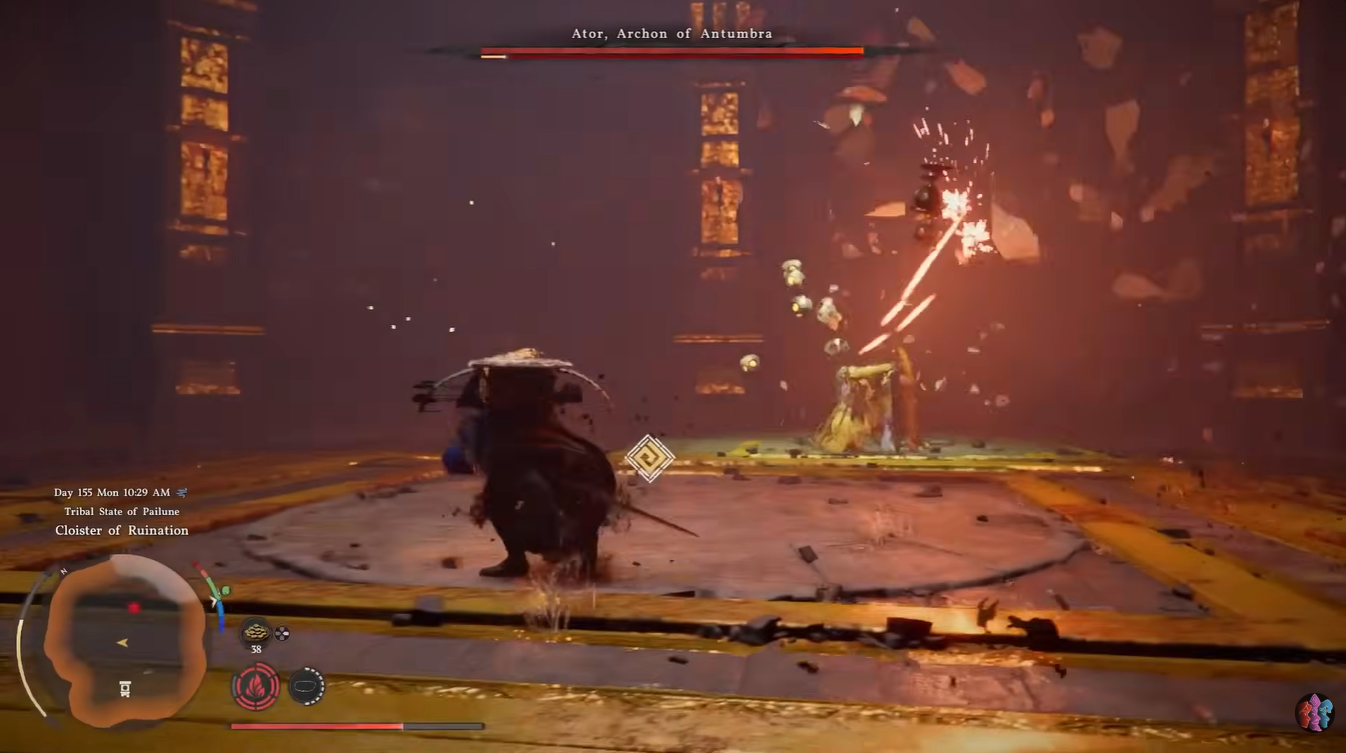
Ator the Archon of Antumbra breakdown
Location and encounter overview
Ator is located in the Cloister of Ruination, Pailune, a more enclosed environment that limits your movement. The fight feels more tactical due to mixed attack patterns and tighter space.
What to expect during the fight
Ator combines melee combat with magical abilities, making him unpredictable. His tracking orb attacks can pressure you from multiple angles.
You will need to constantly adjust positioning, switching between aggressive and defensive play depending on his attack patterns.
Rewards from Ator
| Reward | Type | Effect |
|---|---|---|
| Darkbringer | Two-Handed Weapon | High attack scaling and damage |
| Ator’s Orb | Abyss Gear | Summons tracking orbs that deal damage |
| Ator’s Will Helm | Armor | Defense boost + Daze immunity |
| Seal of Pitch-Black Darkness | Ring | Stamina regeneration + bonuses |

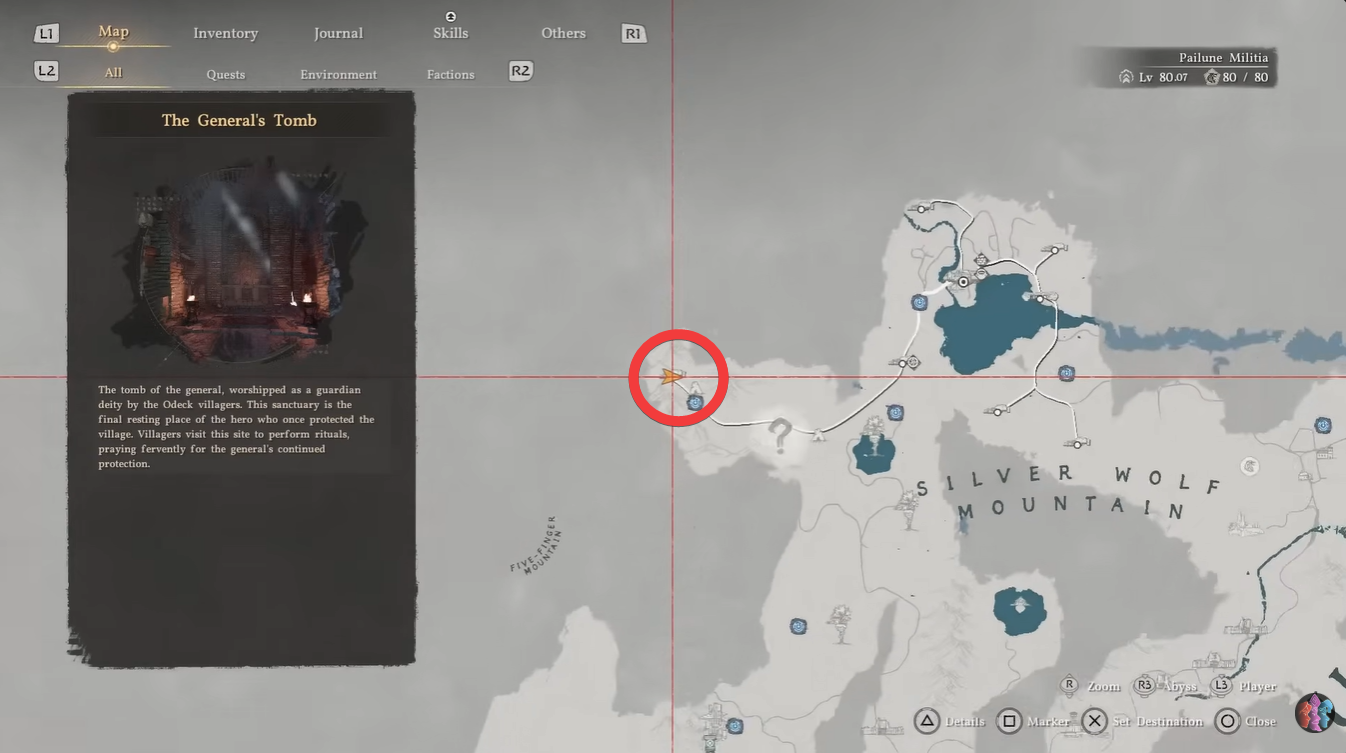
The Forgotten General breakdown
Location and encounter overview
The Forgotten General resides in The General’s Tomb in Odeck, Pailune, a confined space that emphasizes close combat. This setting increases the danger, as you have less room to reposition.
What to expect during the fight
This boss is slower but extremely powerful, with attacks that deal heavy damage if you misjudge timing.
The fight rewards patience over aggression, as rushing in will almost always get you punished. Learning his attack timing is the key to success.

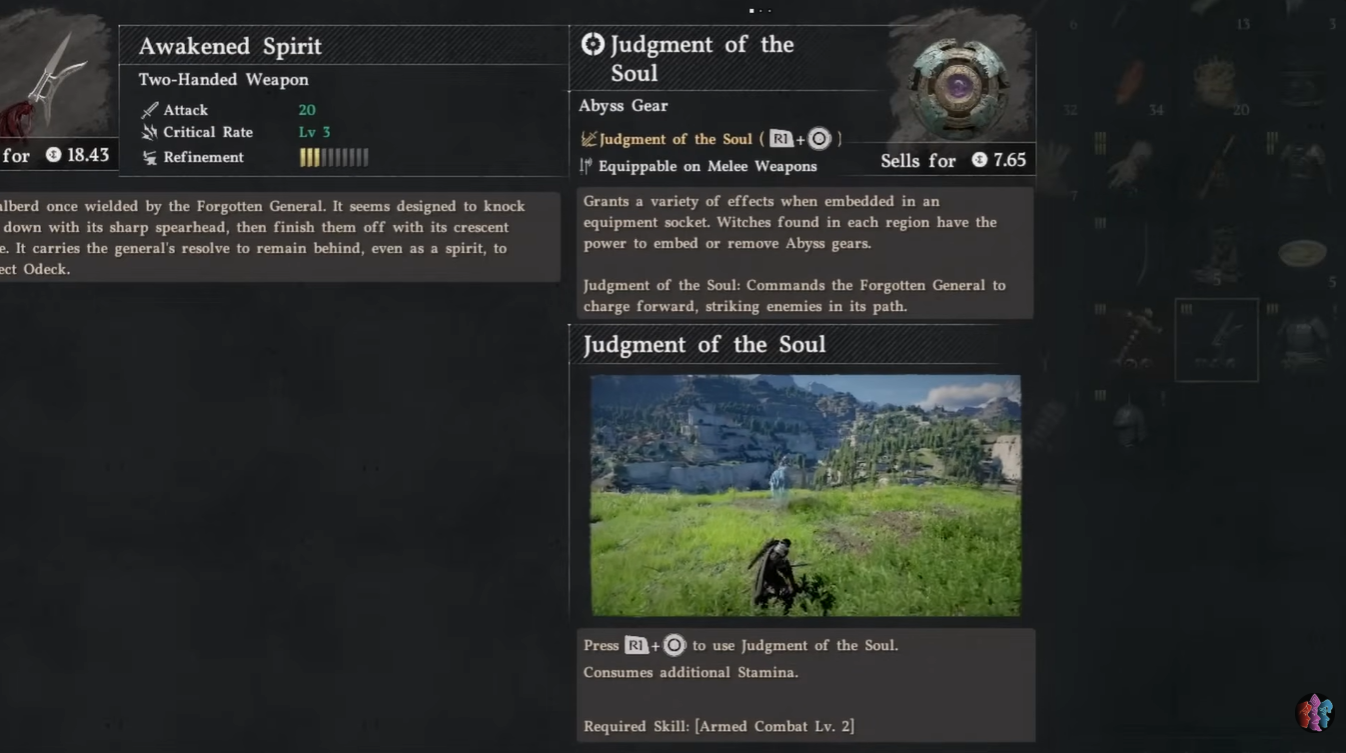
Rewards from The Forgotten General
| Reward | Type | Effect |
|---|---|---|
| Awakened Spirit | Weapon | High burst damage potential |
| Judgement of Soul | Abyss Gear | Powerful offensive ability |
| Odeck’s Protector Armor Set | Complete armor set | High resistance and stamina regen |
Conquering all Overwhelming Beings
Defeating these bosses marks a turning point in your progression. The rewards you earn are not just upgrades—they redefine your build potential.
You gain access to stronger abilities, better survivability, and faster combat efficiency, allowing you to tackle harder content with confidence.
These encounters are designed to challenge every aspect of your gameplay, from preparation to execution. Once you overcome them, you will feel a noticeable jump in your overall strength and combat confidence.
With the right setup and a disciplined approach, these “Overwhelming Beings” become some of the most rewarding fights in Crimson Desert.