
What to know
- The Dimensional Labyrinth is a multi-stage Abyss puzzle requiring Force Palm and Axiom mechanics.
- You must activate four silver circles to restore blue energy lines across the structure.
- Rectangular Axiom cores are essential to complete the central Abyss Core system.
- Traversal tools like grappling and controlled descent are key to reaching all puzzle layers.
You will encounter the Dimensional Labyrinth Abyss puzzle as one of the more intricate restoration challenges in Crimson Desert. It blends traversal, timing, and energy-link mechanics into a layered environment that demands both observation and precision. Understanding how each silver circle interacts with the central Abyss Core is the key to solving it efficiently.
Crimson Desert Dimensional Labyrinth puzzle location and mechanics
The Dimensional Labyrinth Abyss is located deep within the late-stage progression path of Crimson Desert, and you will reach it by following a specific sequence of regions. You need to progress through Spire of the Sun, then move into Nest of Valor, continue toward Throne of Truth, and finally access the Dimensional Labyrinth area, where the Abyss puzzle is situated.
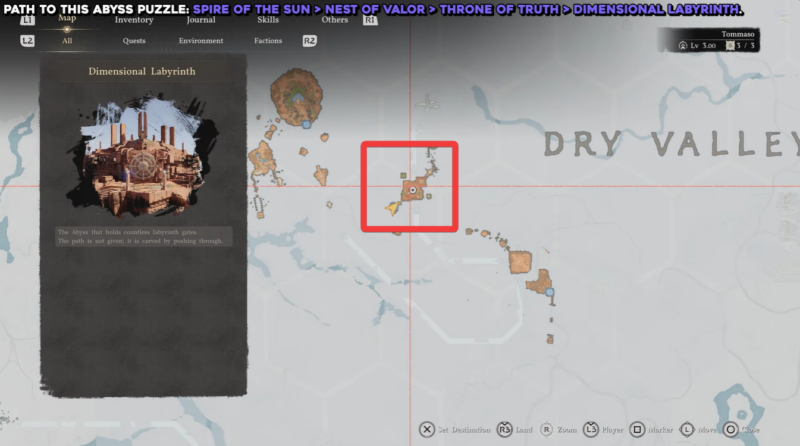
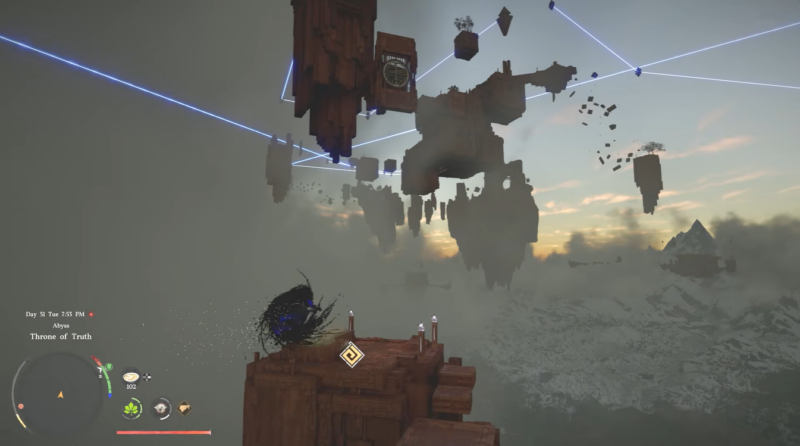
The entrance is typically elevated and connected to floating or layered structures, so expect to rely on traversal abilities like flight and grappling to reach the main core section where the puzzle begins.
| Element | Details |
|---|---|
| Puzzle Type | Abyss Restoration |
| Region Path | Spire of the Sun → Nest of Valor → Throne of Truth → Dimensional Labyrinth |
| Core Mechanic | Force Palm + Axiom Core Placement |
| Key Objectives | Activate 4 silver circles, restore blue lines |
| Reward | Abyss Artifact |
| Difficulty | Moderate to Complex |
Each silver circle acts as a trigger node, and using Force Palm correctly at these nodes activates or redirects energy lines. Meanwhile, rectangular Axiom cores must be physically moved and aligned near the central Abyss Core to stabilize the system.
You will need to balance exploration and sequencing, because activating nodes out of order or missing a core interaction can stall progress.
How to solve the Dimensional Labyrinth Abyss puzzle in Crimson Desert
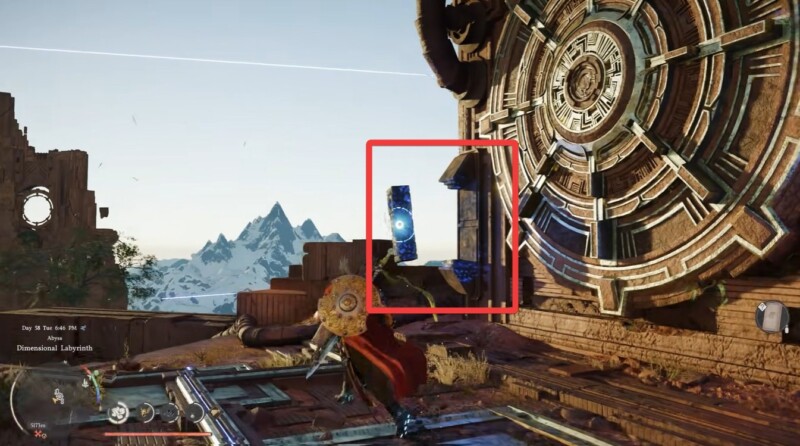
Step 1
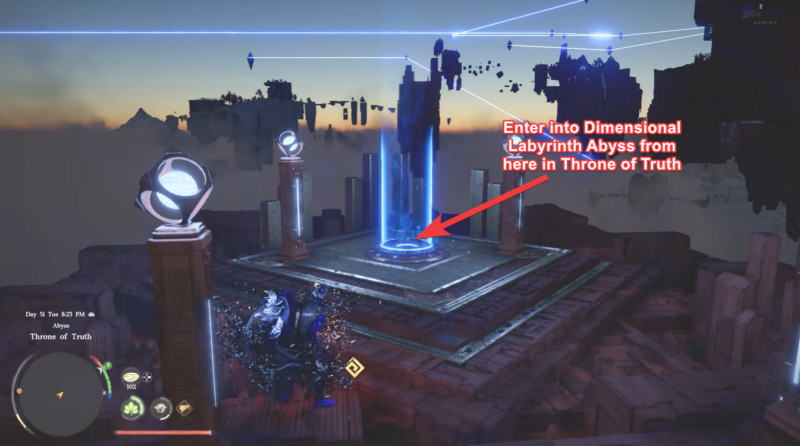
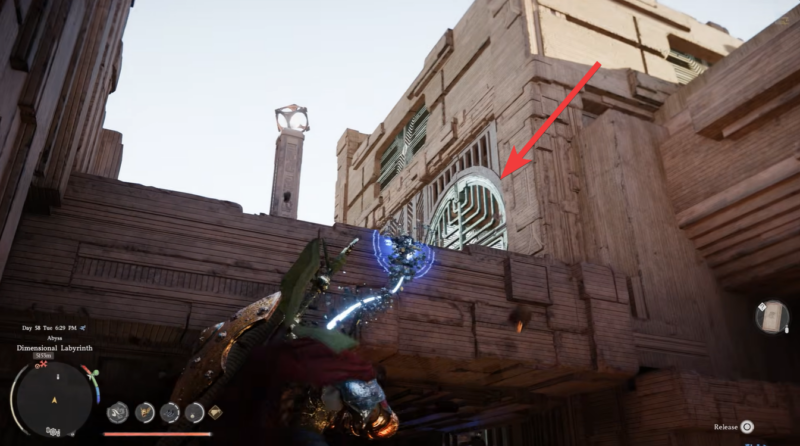
Fly toward the main core area and locate the first silver circle.
Position yourself carefully and use Force Palm to connect the initial blue energy lines, which unlock access to the inner structure.

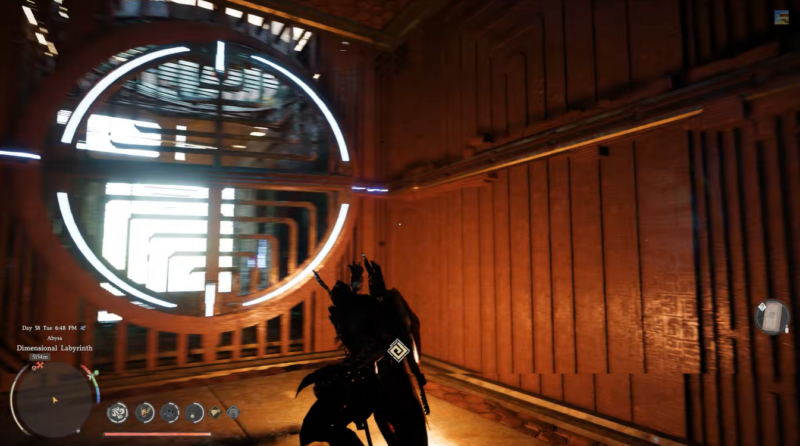
Step 2
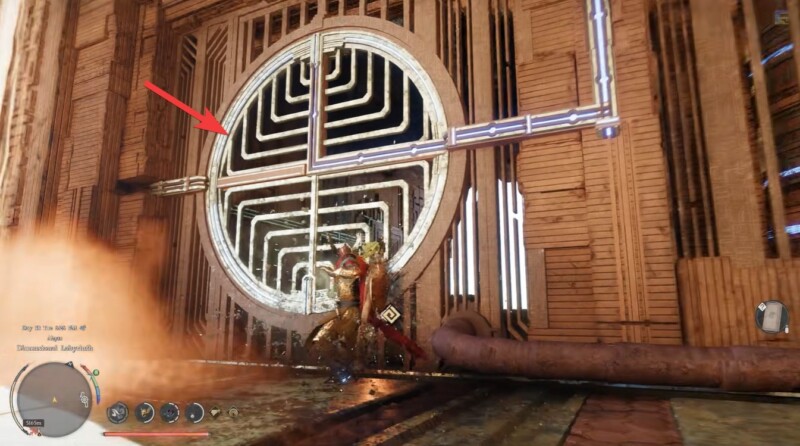
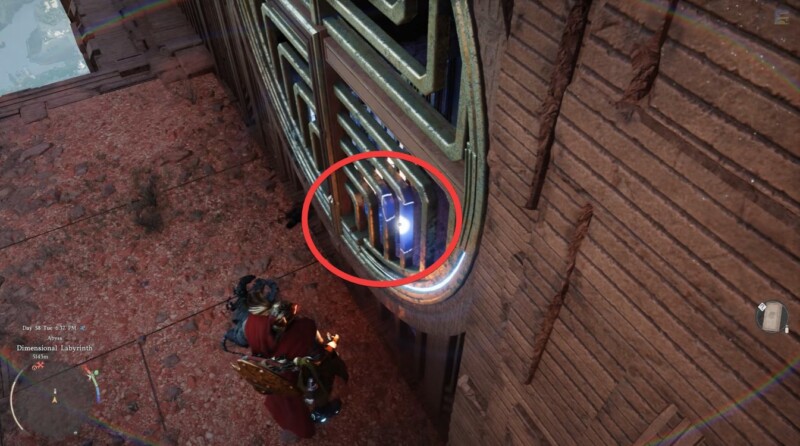
Enter the building and locate the second silver circle.
Use Force Palm again to activate the next set of blue lines, extending the energy network deeper into the labyrinth.
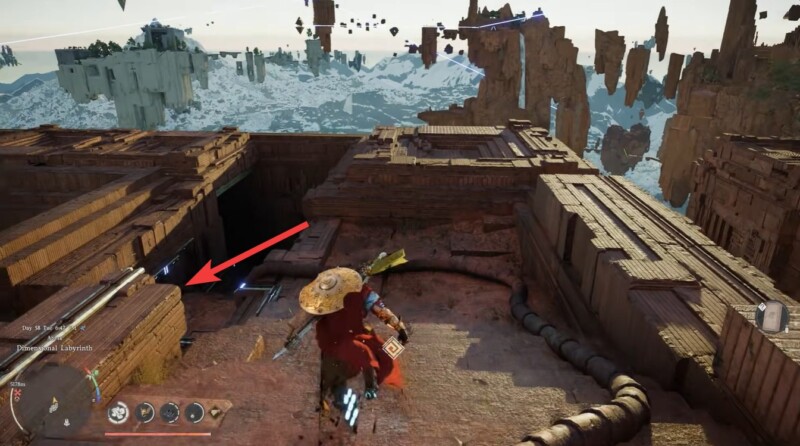
Step 3
Use your grapple to reach the higher platform.
Traversal is essential here, so make sure your positioning is accurate. Once above, search for the third silver circle, which is located near key puzzle components.
Step 4
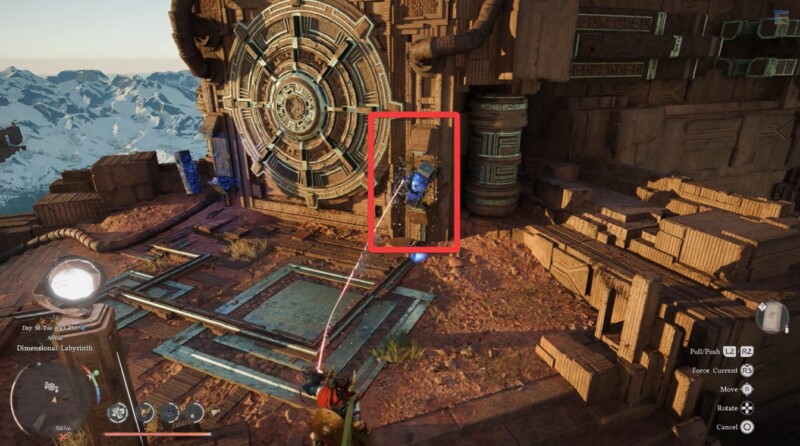
Identify the rectangular Axiom cores near the third node.
These cores are crucial. Use Axiom abilities to manipulate and move them, ensuring they are positioned close to the active mechanism.
Step 5
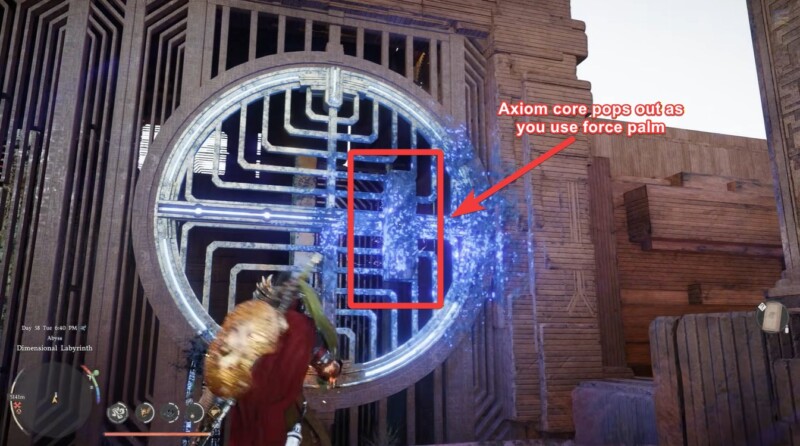
Activate the third silver circle using Force Palm once the core is nearby.
This action will trigger the system to eject and stabilize the core, while also completing another segment of the blue energy lines.
Step 6
Carry and place the rectangular Axiom core near the main Abyss Core.
Placement matters here, so align it carefully. This begins restoring the central mechanism.
Step 7
Repeat the process for the second rectangular core.
Locate it, move it using Axiom, and position it correctly near the Abyss Core to further stabilize the system.
Step 8
Descend toward the lower section to find the fourth silver circle.
This part may require careful navigation. Look for a safe path downward rather than jumping blindly.
Step 9
Use Force Palm on the fourth silver circle to complete the final blue line connections.
At this stage, all energy pathways should now be fully restored.
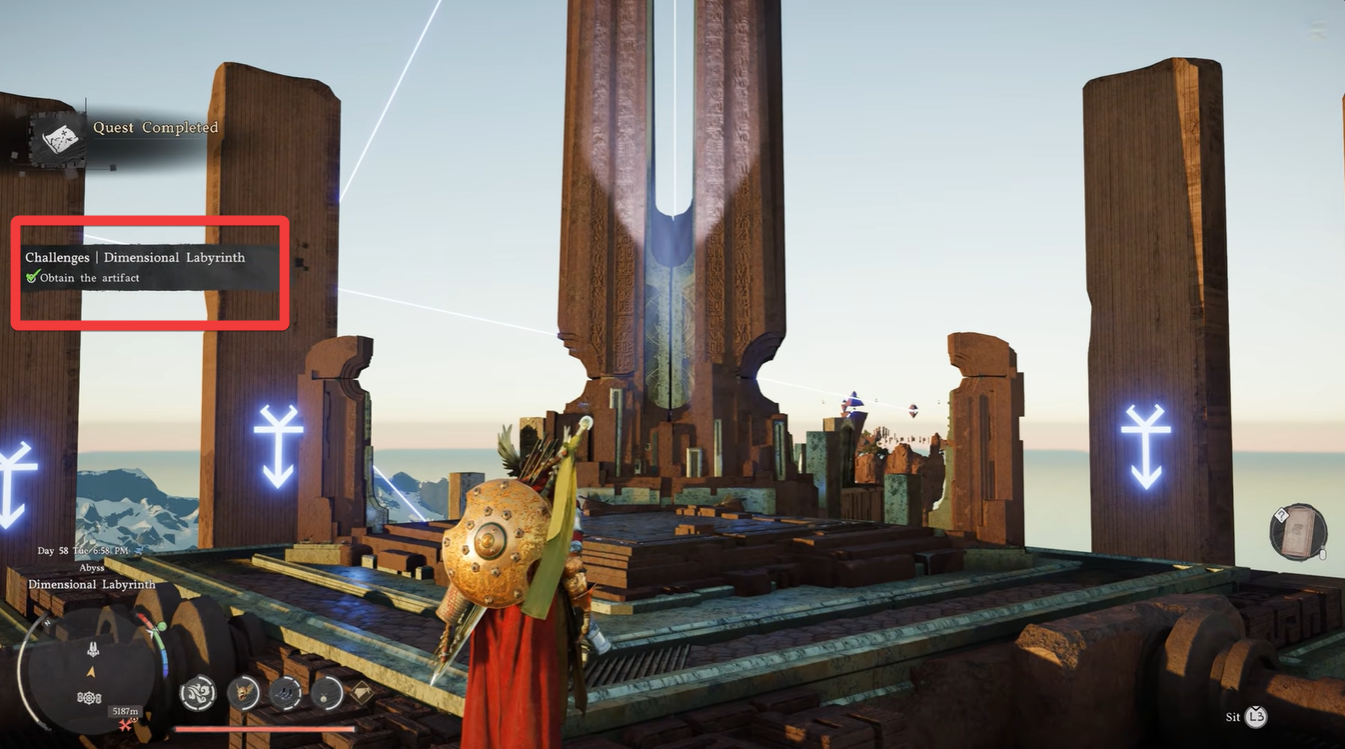
Step 10
Return to the main Abyss Core and use Force Palm one final time.
This completes the restoration process and rewards you with the Abyss Artifact, marking the puzzle as solved.

Reward breakdown for completing Dimensional Labyrinth Abyss
The Dimensional Labyrinth puzzle is notable because it forces you to combine movement, timing, and logic into one cohesive challenge. Unlike simpler Abyss tasks, this one requires you to actively manage both energy systems and physical objects.
| Reward | Description |
|---|---|
| Abyss Artifact | Core reward obtained after full restoration |
| Progression Unlock | Advances Abyss-related exploration |
| Experience Gain | Moderate progression boost |
You will notice that each mechanic builds upon the previous one, gradually increasing complexity. The need to revisit areas, reposition cores, and maintain awareness of vertical space makes it feel dynamic rather than linear.
Another standout aspect is how Force Palm and Axiom abilities are used together, reinforcing their importance in later gameplay sections. By the time you complete this puzzle, you will have a much stronger grasp of advanced interaction mechanics.


