What to know
- Beloth The Darksworn is a Chapter 7 boss tied to the “Wraith in the Frost” questline.
- Ice resistance and positioning are more important than raw damage output.
- Using pillars for cover is the safest and most consistent strategy.
- Defeating the boss rewards the Plate Helm of the Shadows and Frost Spike.
Facing Beloth The Darksworn in Crimson Desert can feel overwhelming at first, especially with the constant freezing mechanic and high burst damage attacks. However, once you understand the boss’s patterns and prepare properly, the fight becomes much more manageable. You don’t need perfect reflexes—just a smart setup and patience.
| Aspect | Details |
|---|---|
| Location | Hoenmark Ruins (North area) |
| Quest Requirement | Wraith in the Frost (Chapter 7) |
| Prerequisite | 100% completion of Chapter 6 |
| Main Threat | Ice damage + one-shot spear attack |
| Recommended Build | Ice resistance + two-handed weapon |
| Core Strategy | Pillar cover + hit-and-retreat combat |
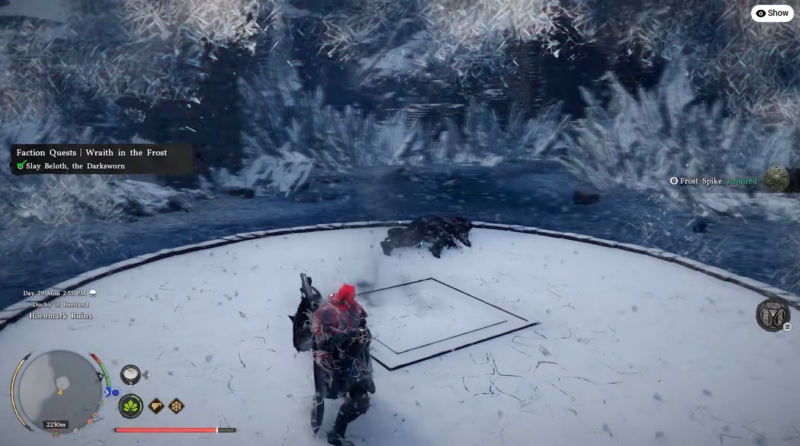
Crimson Desert Beloth The Darksworn location
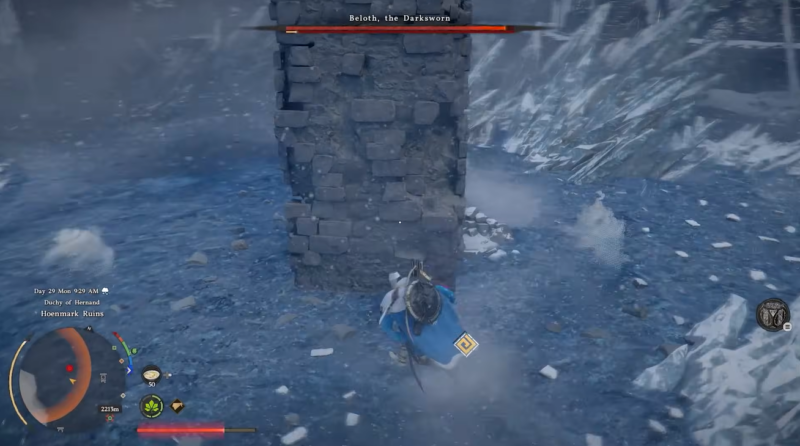
You will find Beloth The Darksworn just north of Hoenmark Ruins, during the Wraith in the Frost quest in Chapter 7. The arena is an icy battlefield with multiple pillars scattered around, which are not just environmental details—they are essential tools for survival. Understanding this terrain is key because the fight is designed around using cover effectively.
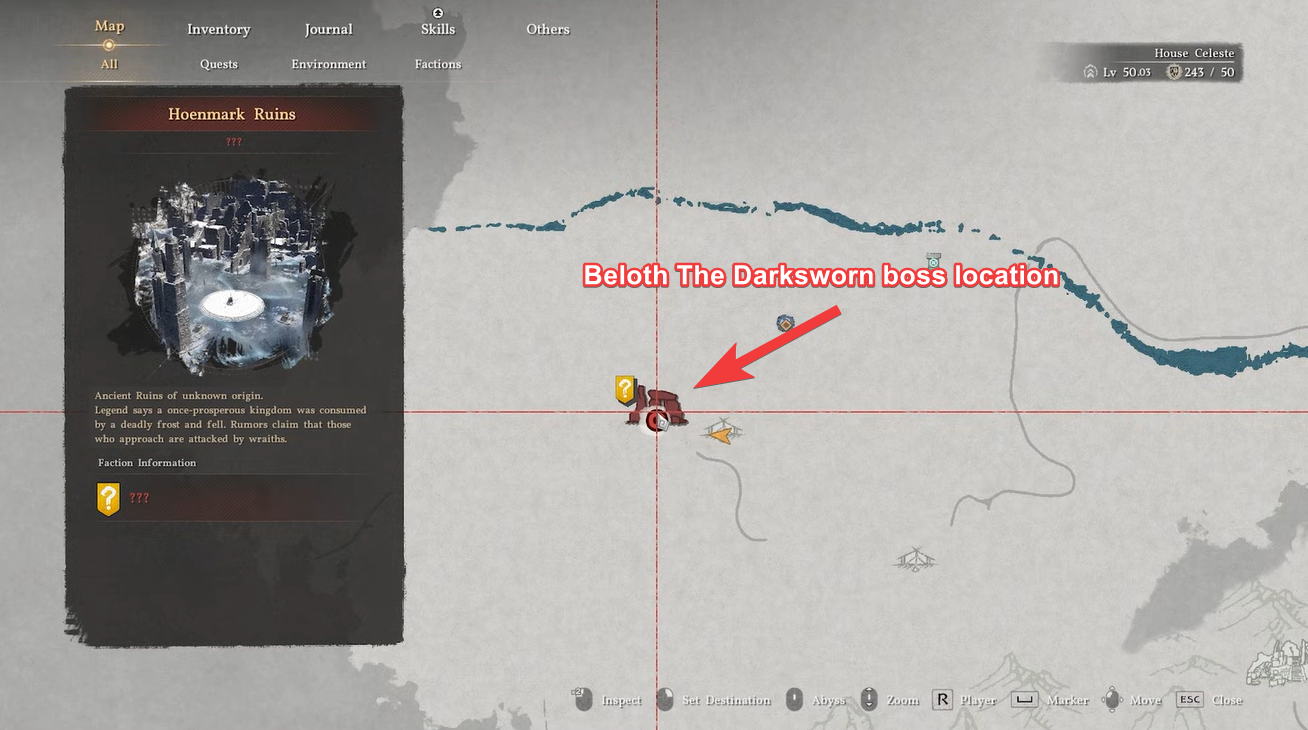
Before you even reach the boss, make sure you’ve completed Chapter 6 fully, otherwise the encounter will not trigger.
Beloth boss fight build and preparation
Before stepping into the arena, you should focus heavily on survivability rather than raw damage. Ice resistance is the single most important stat for this encounter, as you’ll constantly take environmental cold damage.

Using armor like the Hwando set or similar ice-resistant gear significantly reduces pressure during the fight. If you lack full sets, even partial resistance gear helps stabilize your health over time.
Your weapon choice also plays a major role. A two-handed weapon is recommended because it gives you better reach and safer poke damage from behind cover. If you have access to Crow’s Pursuit (from Tauria Curved Sword), it becomes even easier to deal damage from a distance without overcommitting.

Consumables shouldn’t be ignored either. Bringing maximum food ensures passive healing, which offsets constant cold damage. Additionally, Palmer Pills act as a safety net, allowing you to recover from mistakes without restarting the entire fight.
Beloth attack mechanics and phases explained
Beloth’s difficulty comes from combining environmental pressure with punishing attacks. You are not just fighting the boss—you are fighting the cold itself.

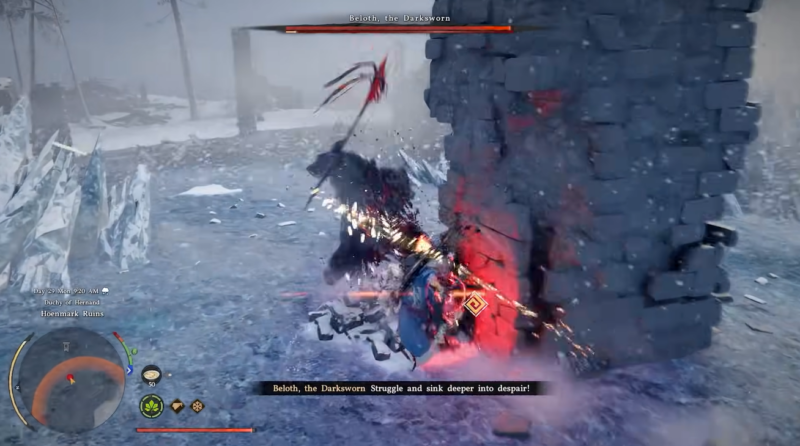
The freezing mechanic will periodically immobilize you. When this happens, you must spam the sprint button immediately to break free, ideally while already positioned behind cover. If you freeze in the open, you risk taking massive damage or even dying instantly.
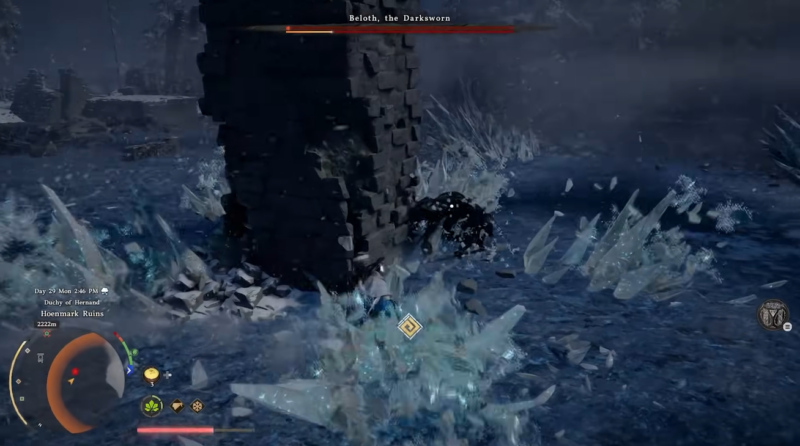
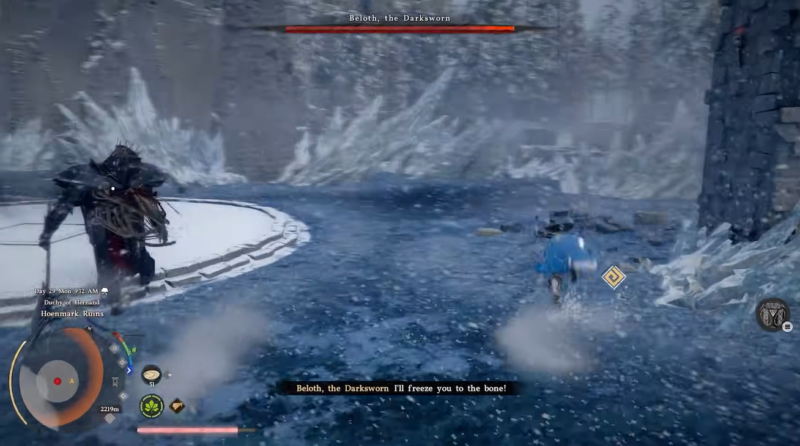
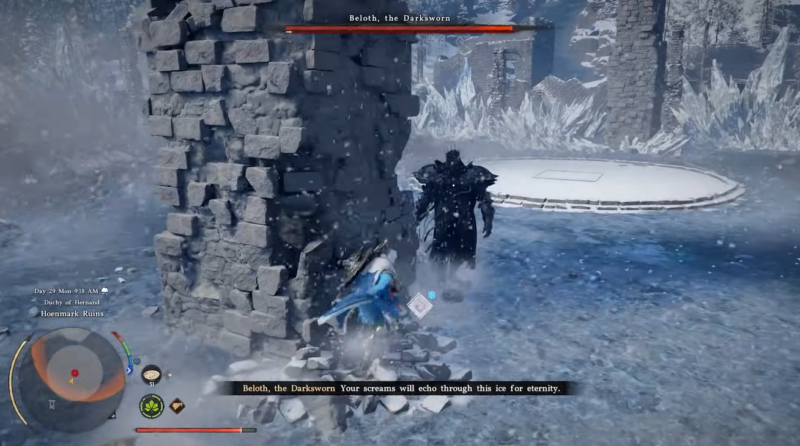
Beloth mainly relies on two attack patterns. The first is a rapid combo ending in an ice slam, which deals heavy area damage. The second is the spear lunge, which is extremely dangerous and can one-shot you if it connects directly.
Recognizing these patterns early is critical because they define your attack windows.
How to defeat Beloth The Darksworn in Crimson Desert
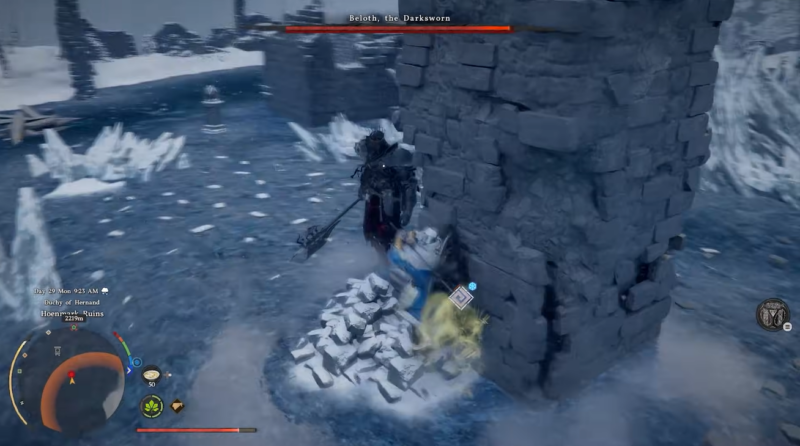
The safest and most consistent way to defeat Beloth is by using the environment to your advantage. The pillars in the arena are your primary defense tool, and this fight is designed around them.
Step 1
Position yourself near a pillar as soon as the fight begins. Do not engage the boss in open space, as this dramatically increases your risk of getting hit by the spear lunge.
Step 2
Stay behind the pillar and wait for Beloth to initiate attacks. Let the pillar absorb incoming damage, especially during his combo chains and slam attacks.
Step 3
After an attack finishes, briefly step out and strike with your two-handed weapon. Keep your attacks short and controlled, then immediately retreat behind cover.
Step 4
Watch for the spear lunge attack. This is your best opportunity to deal significant damage, as Beloth is briefly vulnerable after missing the attack.
Step 5
Manage stamina carefully. Use force slam attacks when possible to daze the boss, creating a window for heavy damage output.
Step 6
Repeat the cycle patiently. Do not rush the fight, as greed is the most common cause of failure in this encounter.
Crimson Desert Beloth The Darksword drops
| Reward | Description |
|---|---|
| Plate Helm of The Shadows (expected) | High-defense helm with strong utility |
| Shadows Plate Set (expected) | Part of a powerful defensive gear set |
| Frost Spike | Unique reward obtained upon victory |
These rewards make the fight worthwhile, especially if you’re building a durable character focused on survivability and resistance.
Why Beloth’s pillar method works for a quick win
What makes this approach effective is that it reduces reliance on reflex-heavy gameplay. Instead of trying to dodge every attack perfectly, you are controlling the fight using positioning and timing.
By staying behind pillars, you neutralize most of Beloth’s offensive power. Combined with ice resistance and passive healing, the fight becomes a steady battle of attrition rather than a chaotic survival test.
Defeating Beloth becomes much easier once you shift your mindset from aggression to control. You don’t need to overpower the boss—you just need to outlast and outmaneuver him. With proper preparation, careful positioning, and patience, this once-intimidating fight turns into a manageable and rewarding challenge.