What to know
- Gear Pouches are inventory upgrade collectibles; there are 3 total in the game.
- Each pouch is found in a different facility: Testing, Preservation, and Communications.
- Some pouches require a key (Old Key) to unlock a cabinet or locker.
- They are not missable if you explore thoroughly, but it’s easy to skip them if you rush.
In Code Violet, Gear Pouches are key inventory upgrades that let you carry more weapons, attachments, and consumables as the game ramps up. There are three Gear Pouches hidden across different facilities, and grabbing the first one even unlocks the Gear Up trophy. This guide walks you through the exact locations of all Gear Pouches so you can upgrade your inventory early and avoid missing these useful upgrades.
All Gear Pouches in Code Violet
| Pouch # | Location |
|---|---|
| Gear Pouch 1 | Testing Facility – R&D Room |
| Gear Pouch 2 | Preservation Facility – Thermal Regulation Wing |
| Gear Pouch 3 | Communications Facility – Storage area |
Gear Pouch 1 – Testing Facility
Gear Pouch 1 is the first one and appears early in the game, in the Testing Facility.
Step 1: Reach the R&D Room
From Maternity Ward Level 2, follow the main path until you reach the collapsed rubble on the right. Go through the opening into the R&D Room.
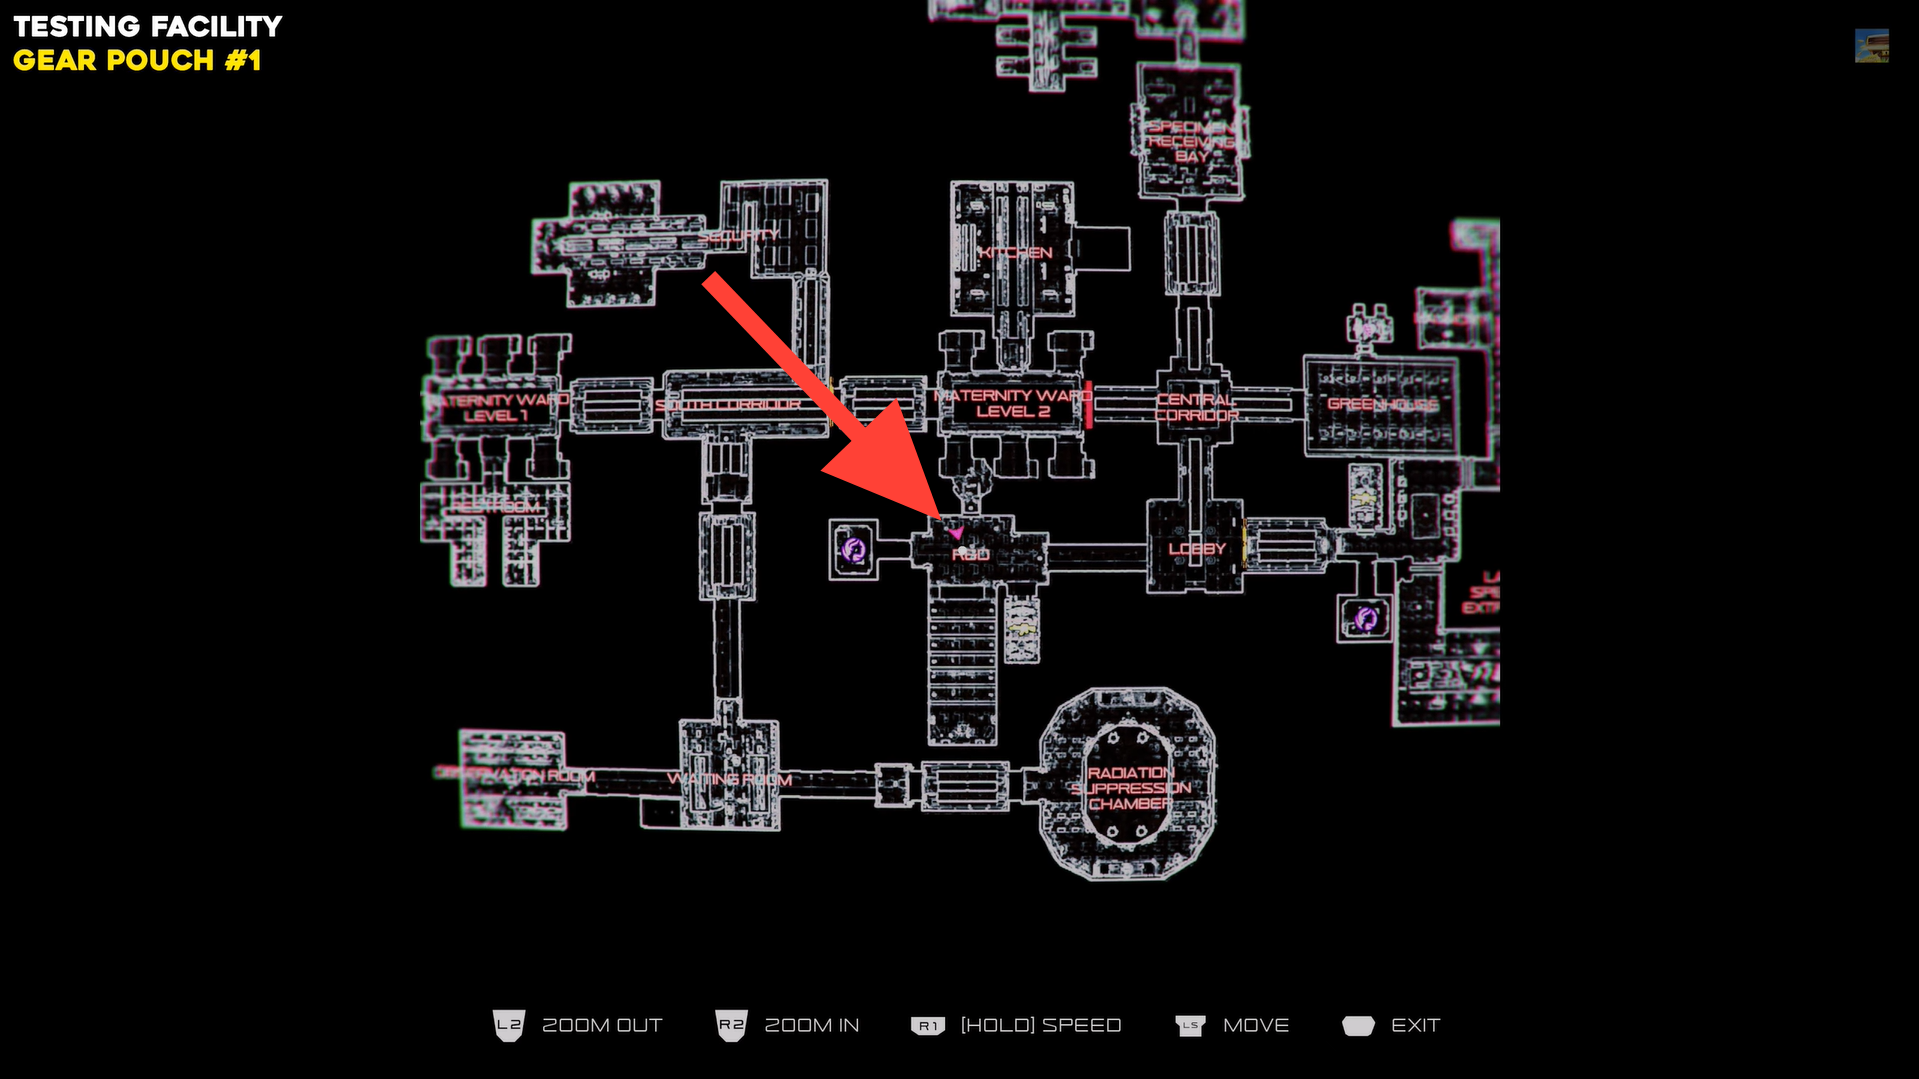

Reach the R&D Room. Image credits: TeamKill Media / YouTube: 100% Guides
Step 2: Find and collect the Gear Pouch
Check the dining table straight ahead to find Mites (200), Black Light, UV Power, and Gear Pouch 1. Pick up the first pouch to expand your inventory, this also unlocks the Gear Up trophy for upgrading your inventory.
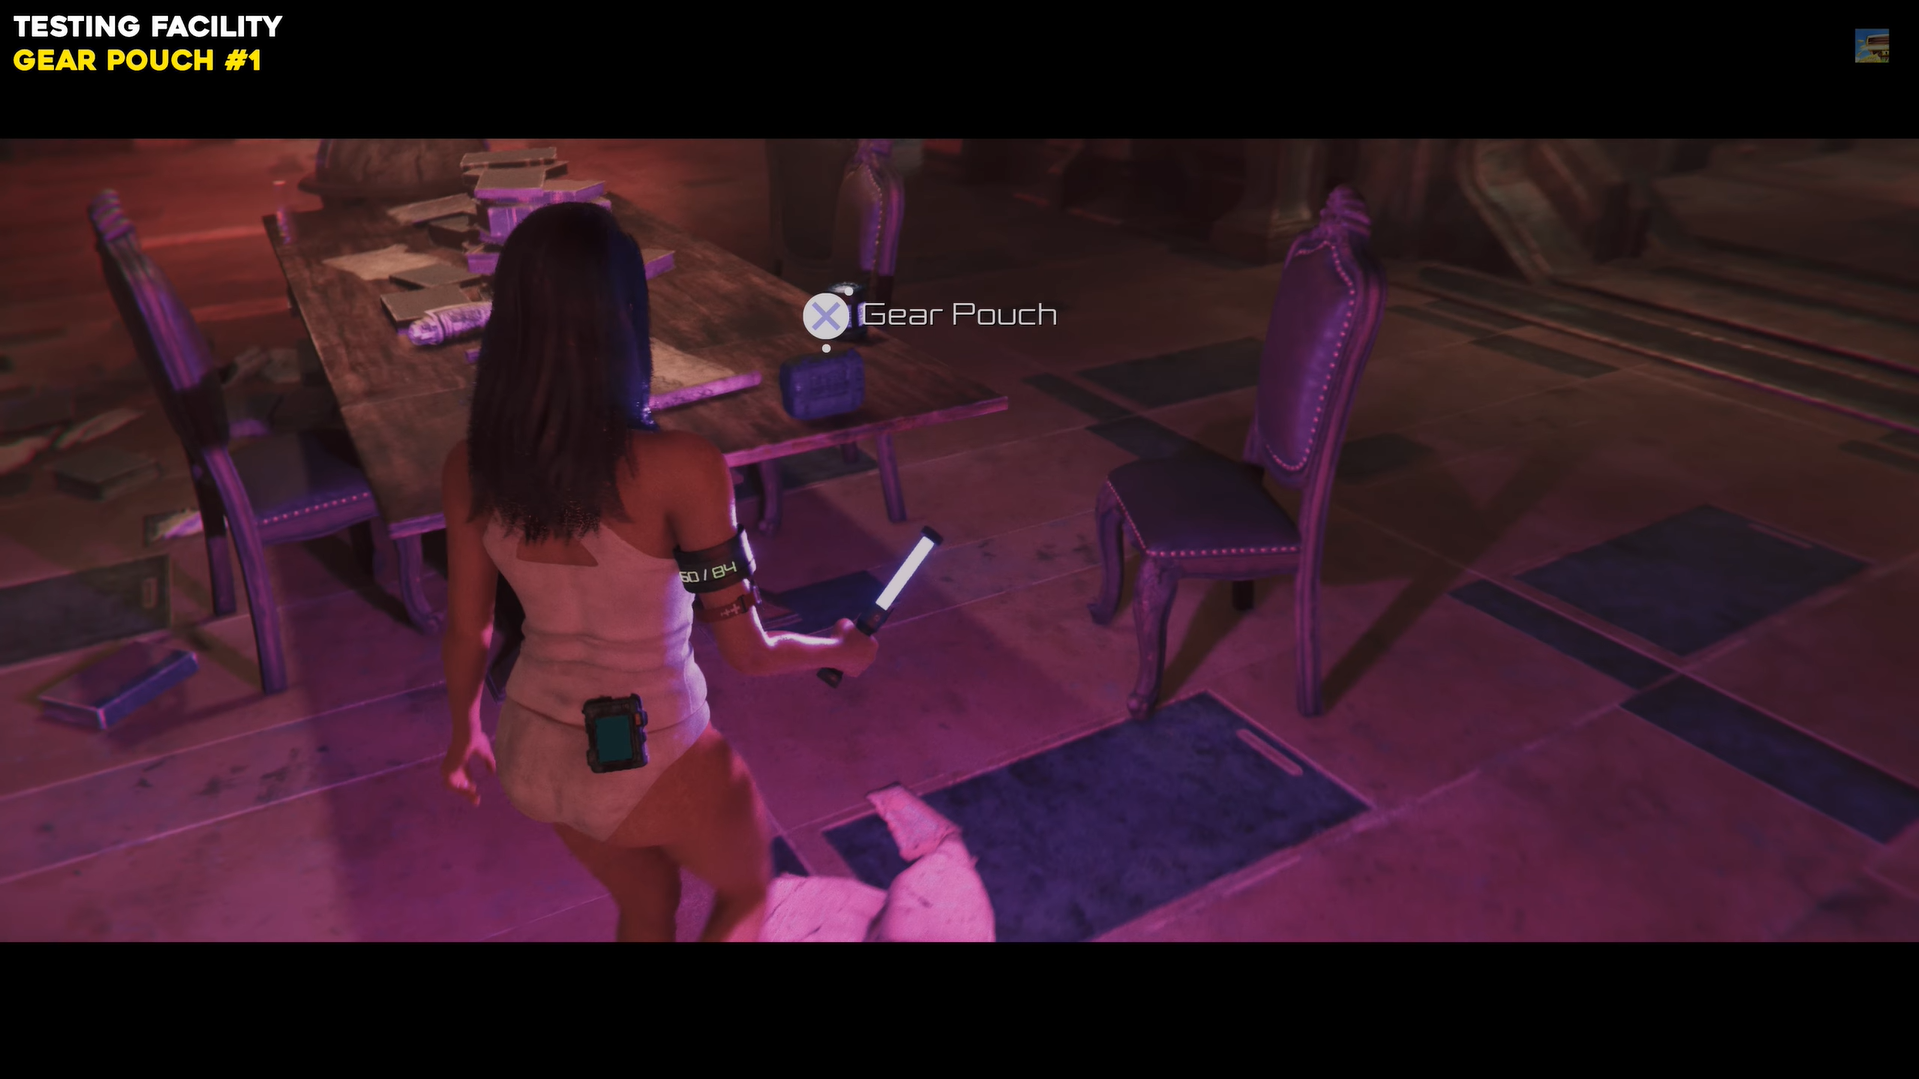
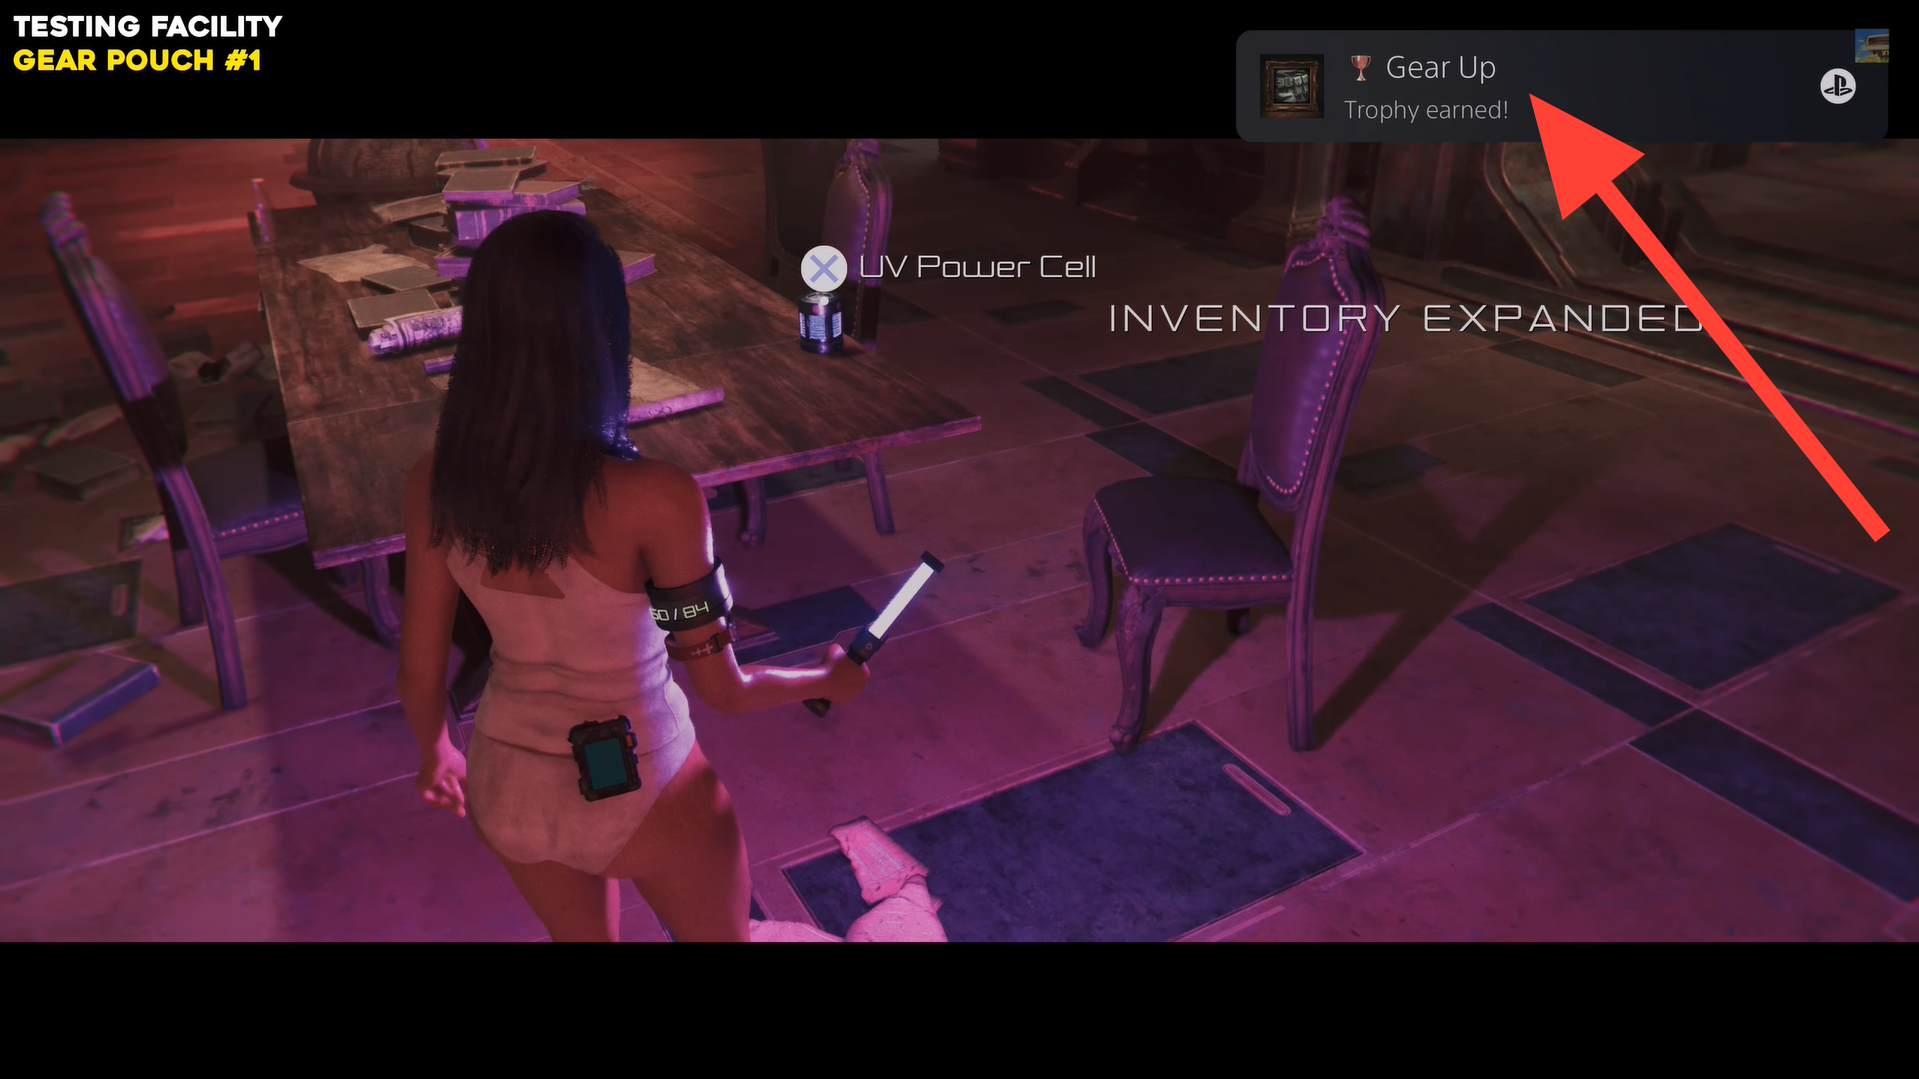
Find and collect the Gear Pouch. Image credits: TeamKill Media / YouTube: 100% Guides
Gear Pouch 2 – Preservation Facility
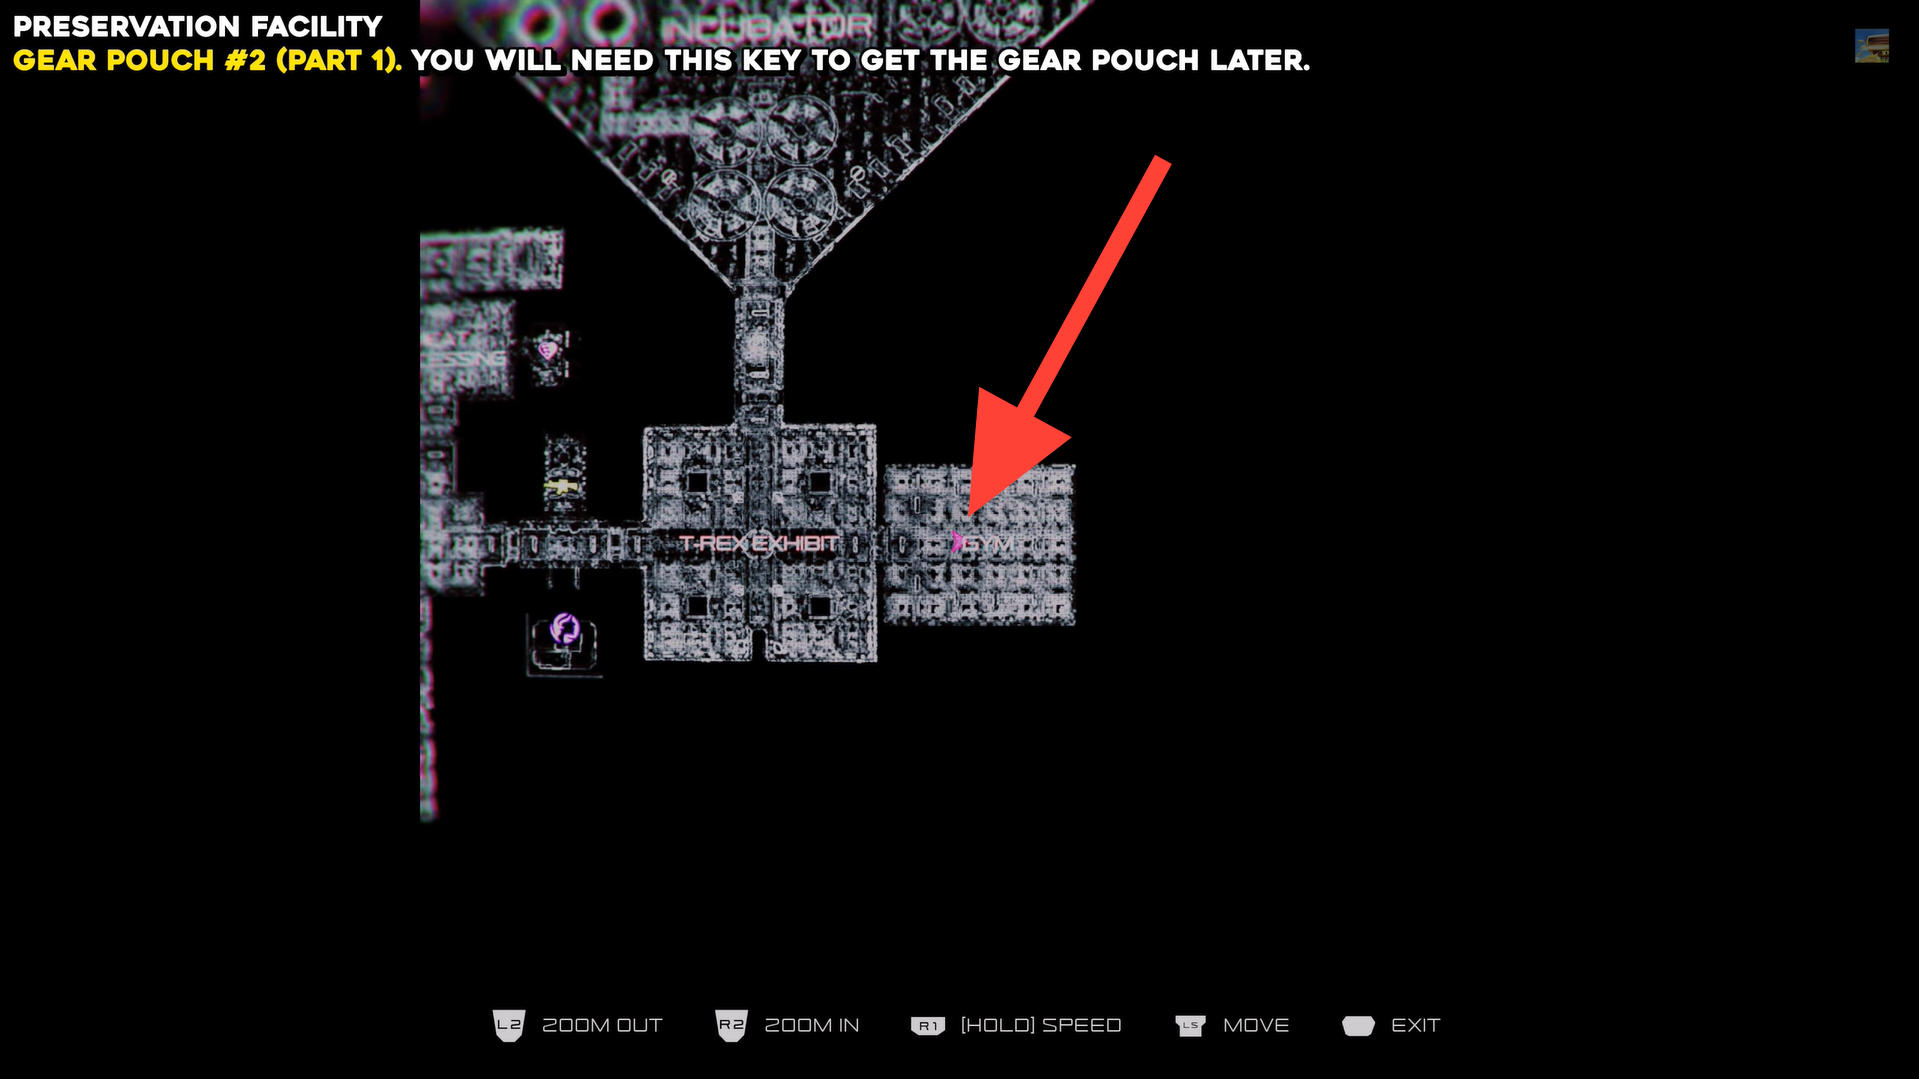
Gear Pouch 2 is in the Preservation Facility and requires a key from the gym area.
Step 1: Get the Old Key
In the Gym area, find the inclined bench press and collect the Old Key.
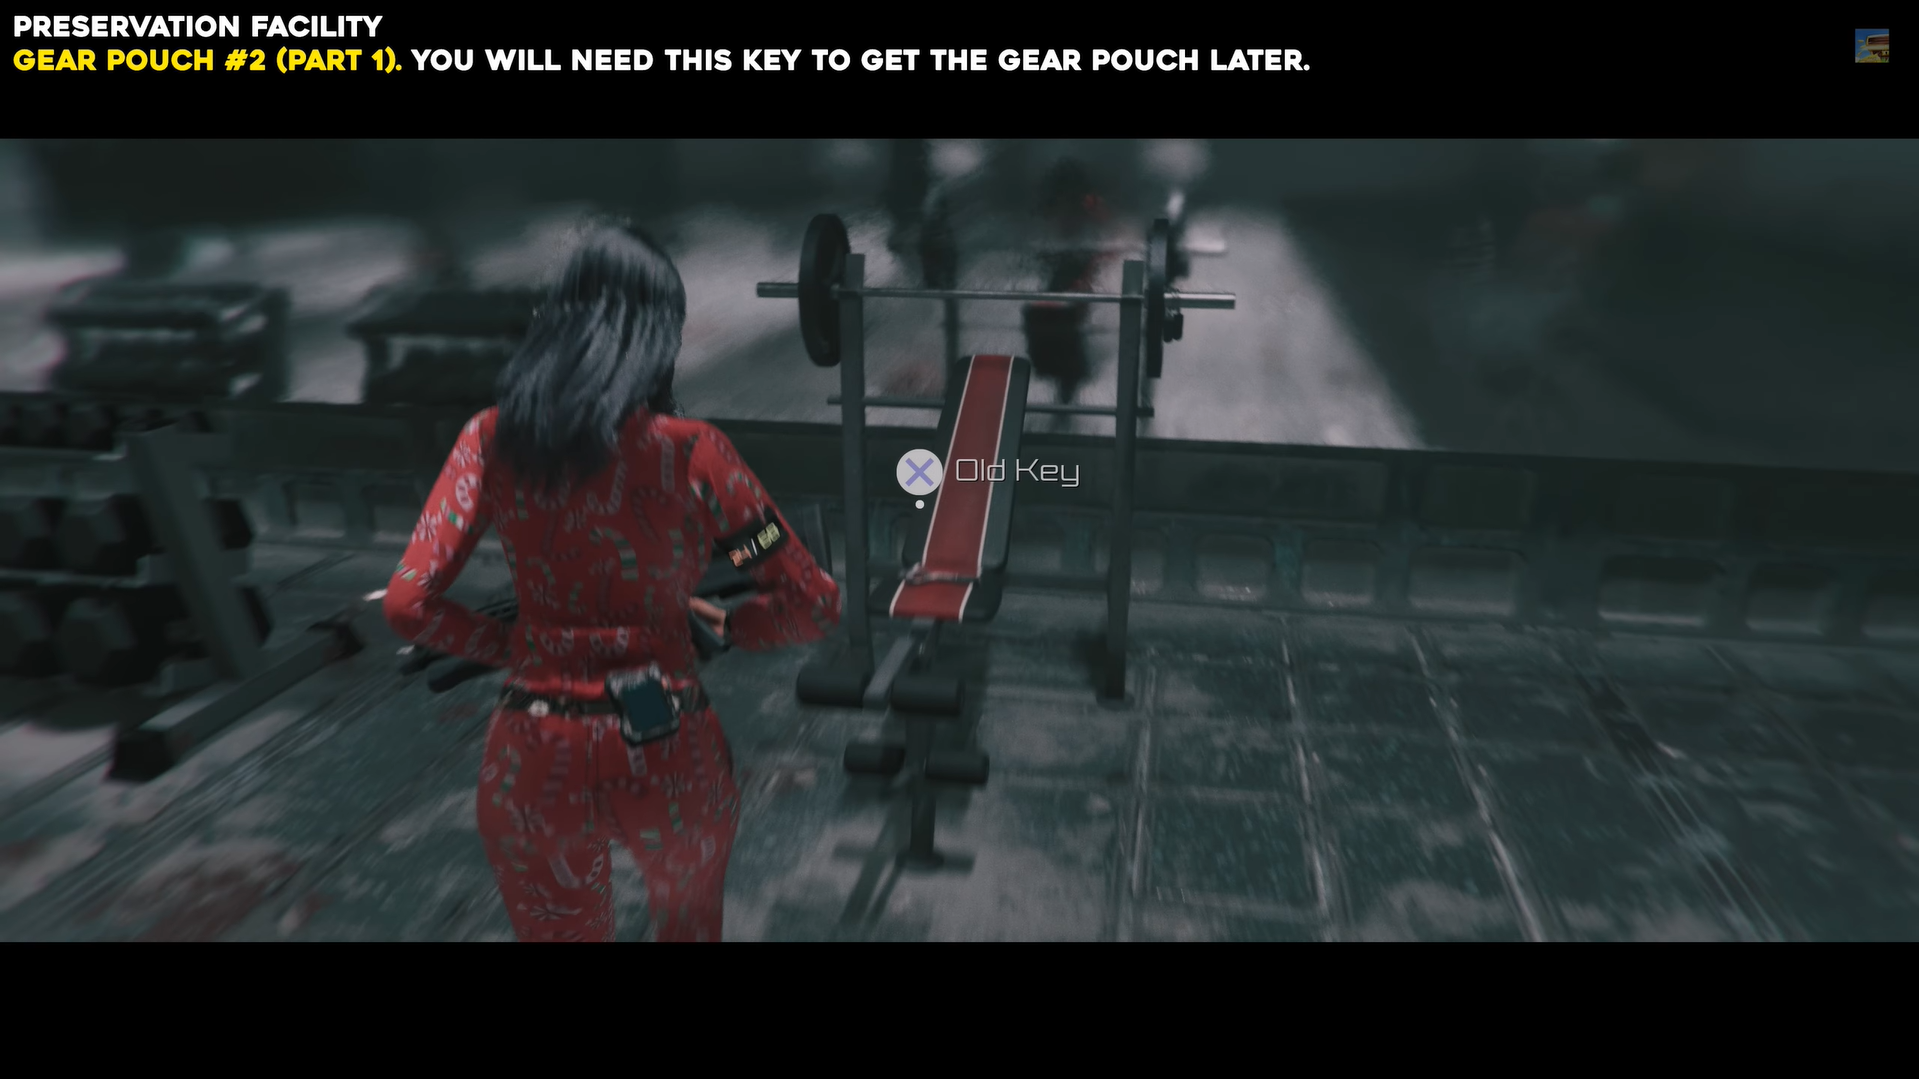
Get the Old Key. Image credits: TeamKill Media / YouTube: 100% Guides
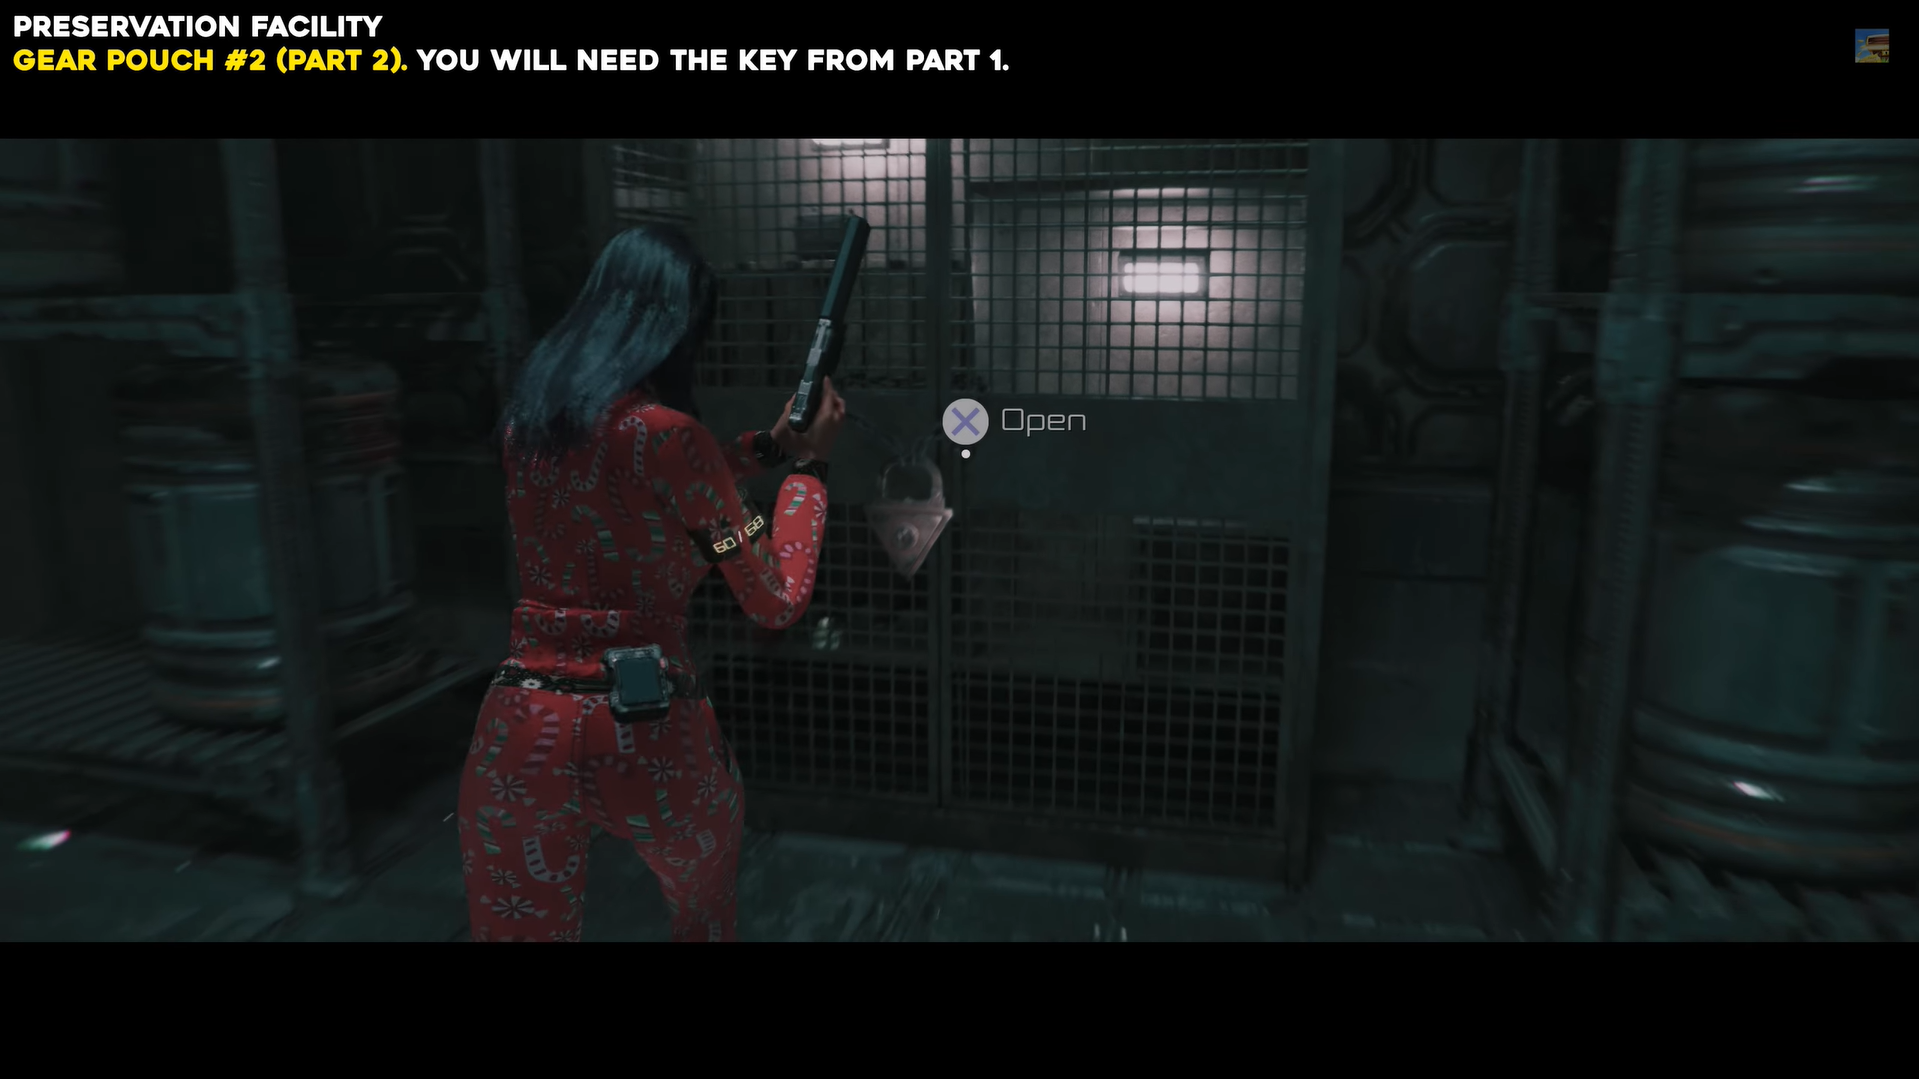
Step 2: Reach the Thermal Regulation Wing and unlock the cabinet
Leave the Gym and follow the path to the Thermal Regulation Wing, then find the locked cabinet in a side corridor and use the Old Key to open it.
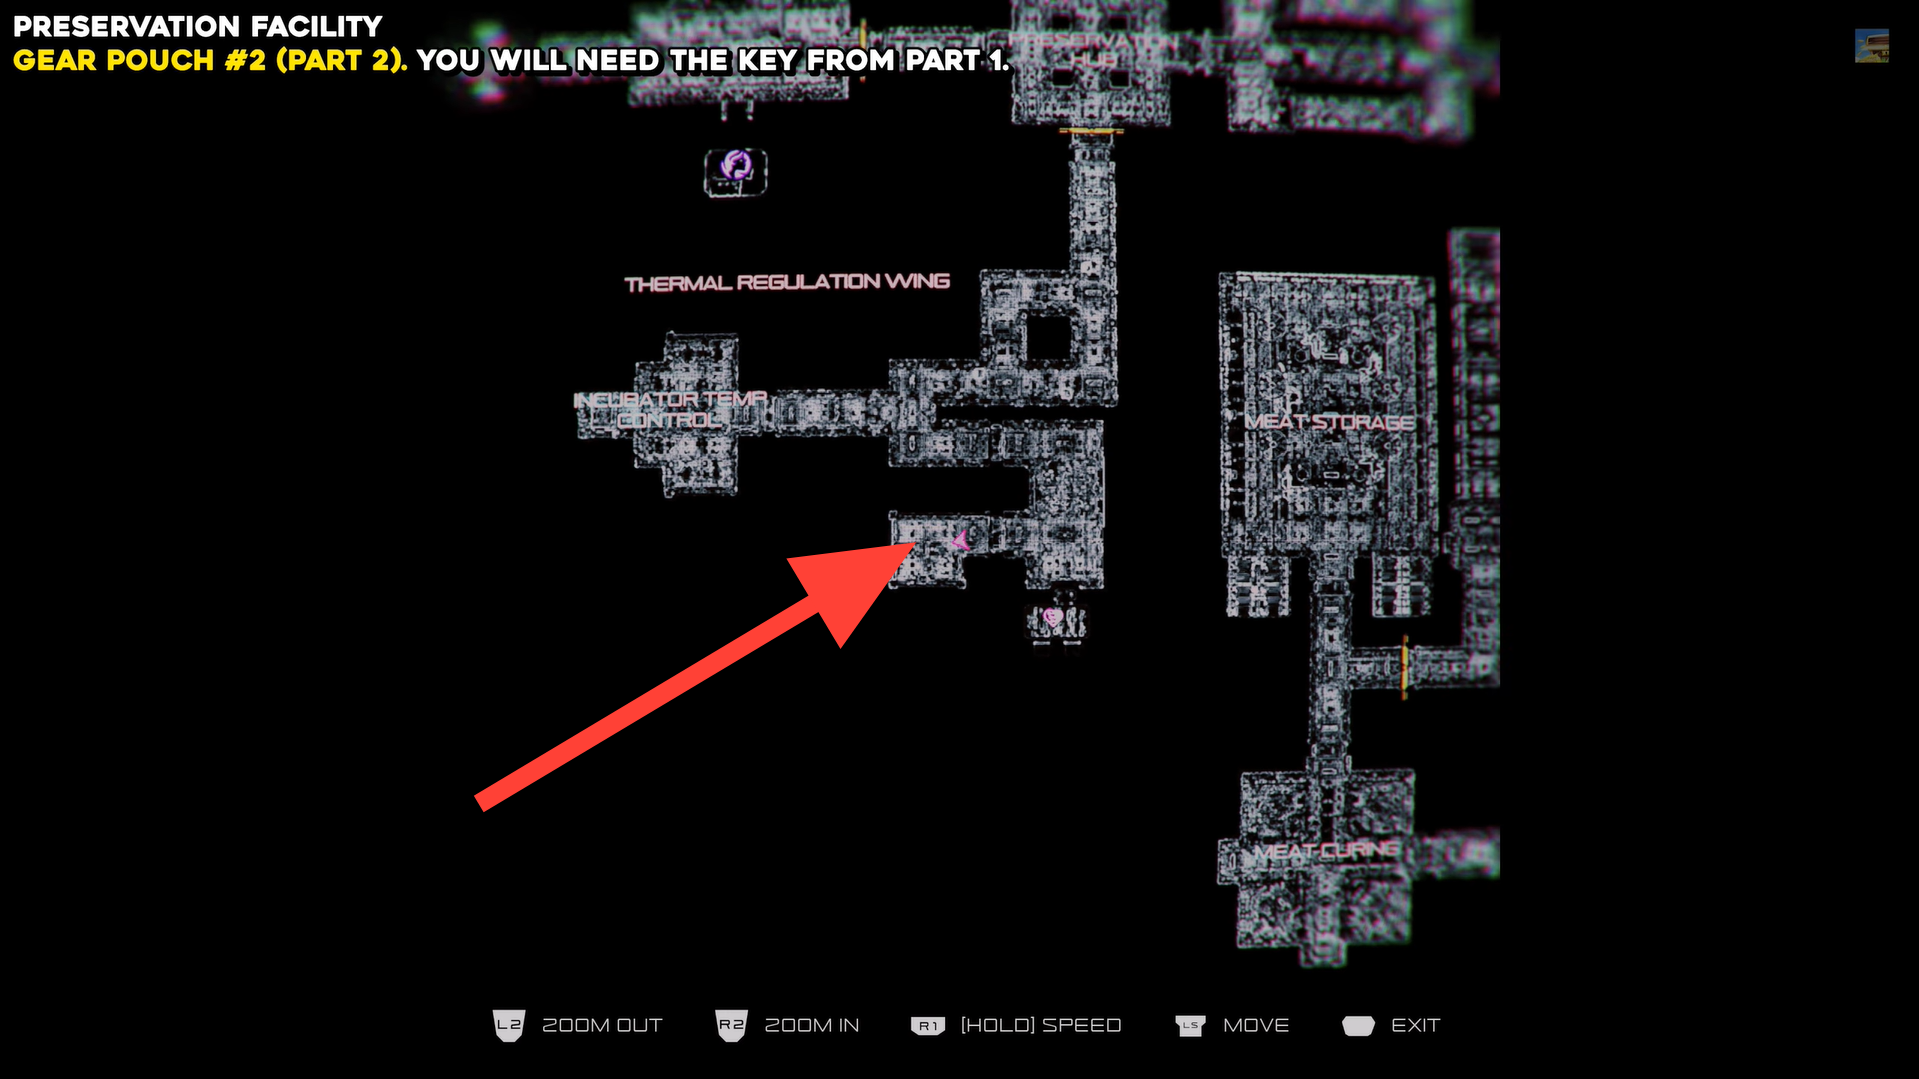
Reach the Thermal Regulation Wing and unlock the cabinet. Image credits: TeamKill Media / YouTube: 100% Guides
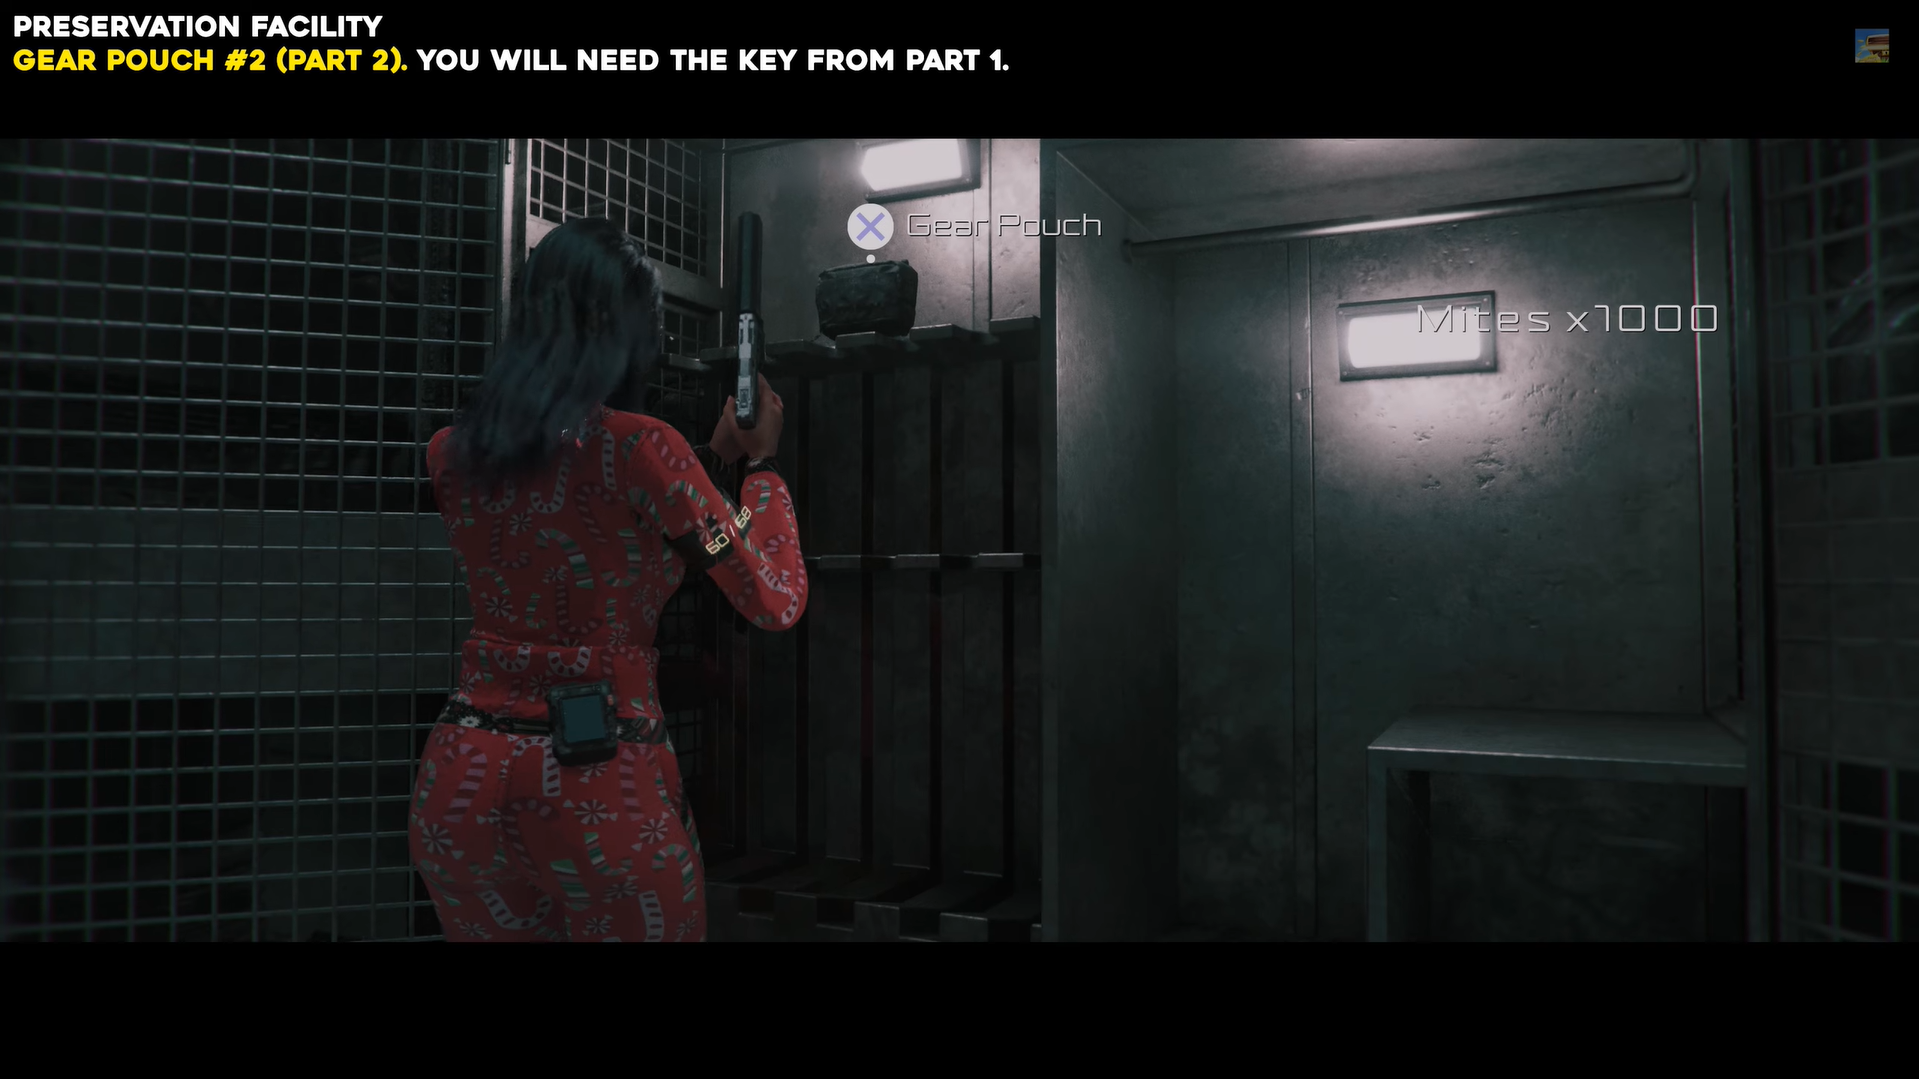
Step 3: Collect Gear Pouch 2
Inside, pick up Gear Pouch 2 along with some Mites.
Gear Pouch 3: Communications Facility
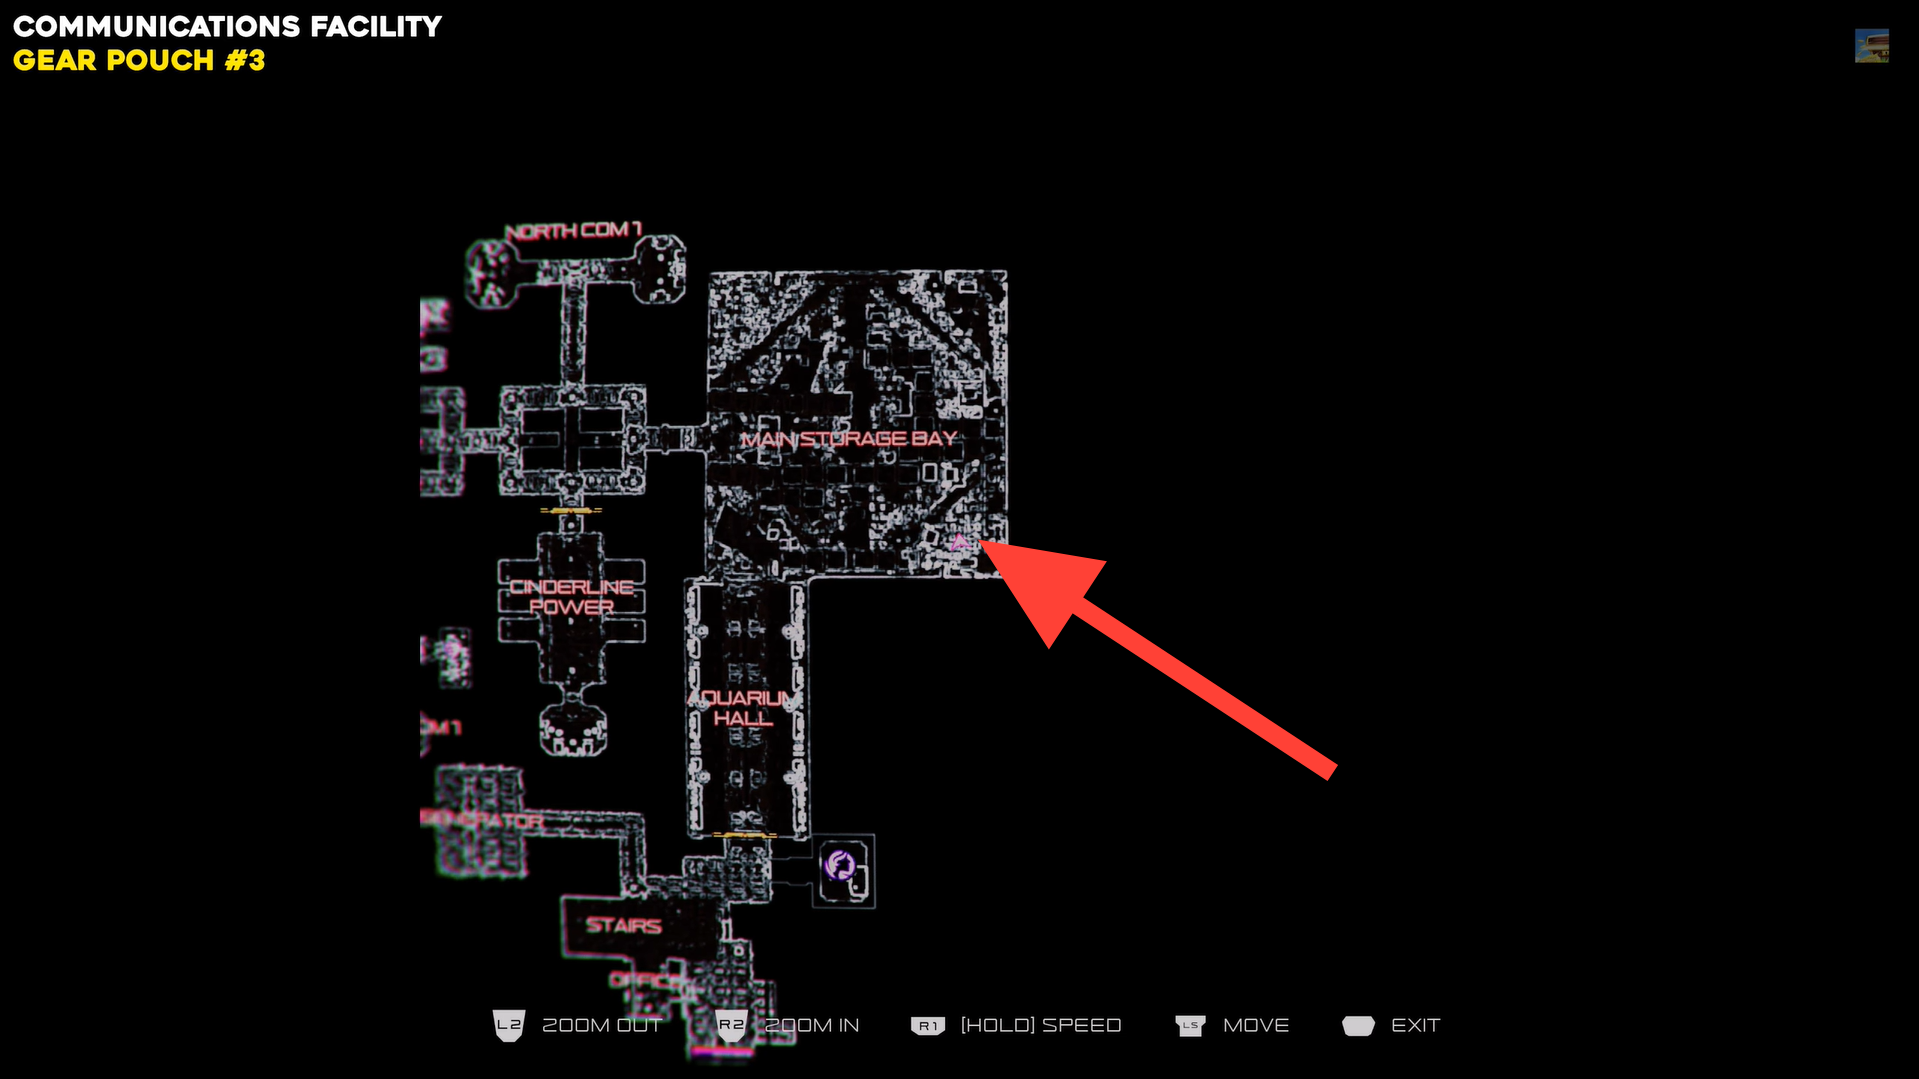
Gear Pouch 3 is in the Communications Facility and needs another Old Key from a storage area.
Step 1: Use the forklift
In the Main Storage Bay, go to the southeast corner and use the forklift to climb crates. Pick up the Old Key from the floor.
Use the forklift. Image credits: TeamKill Media / YouTube: 100% Guides
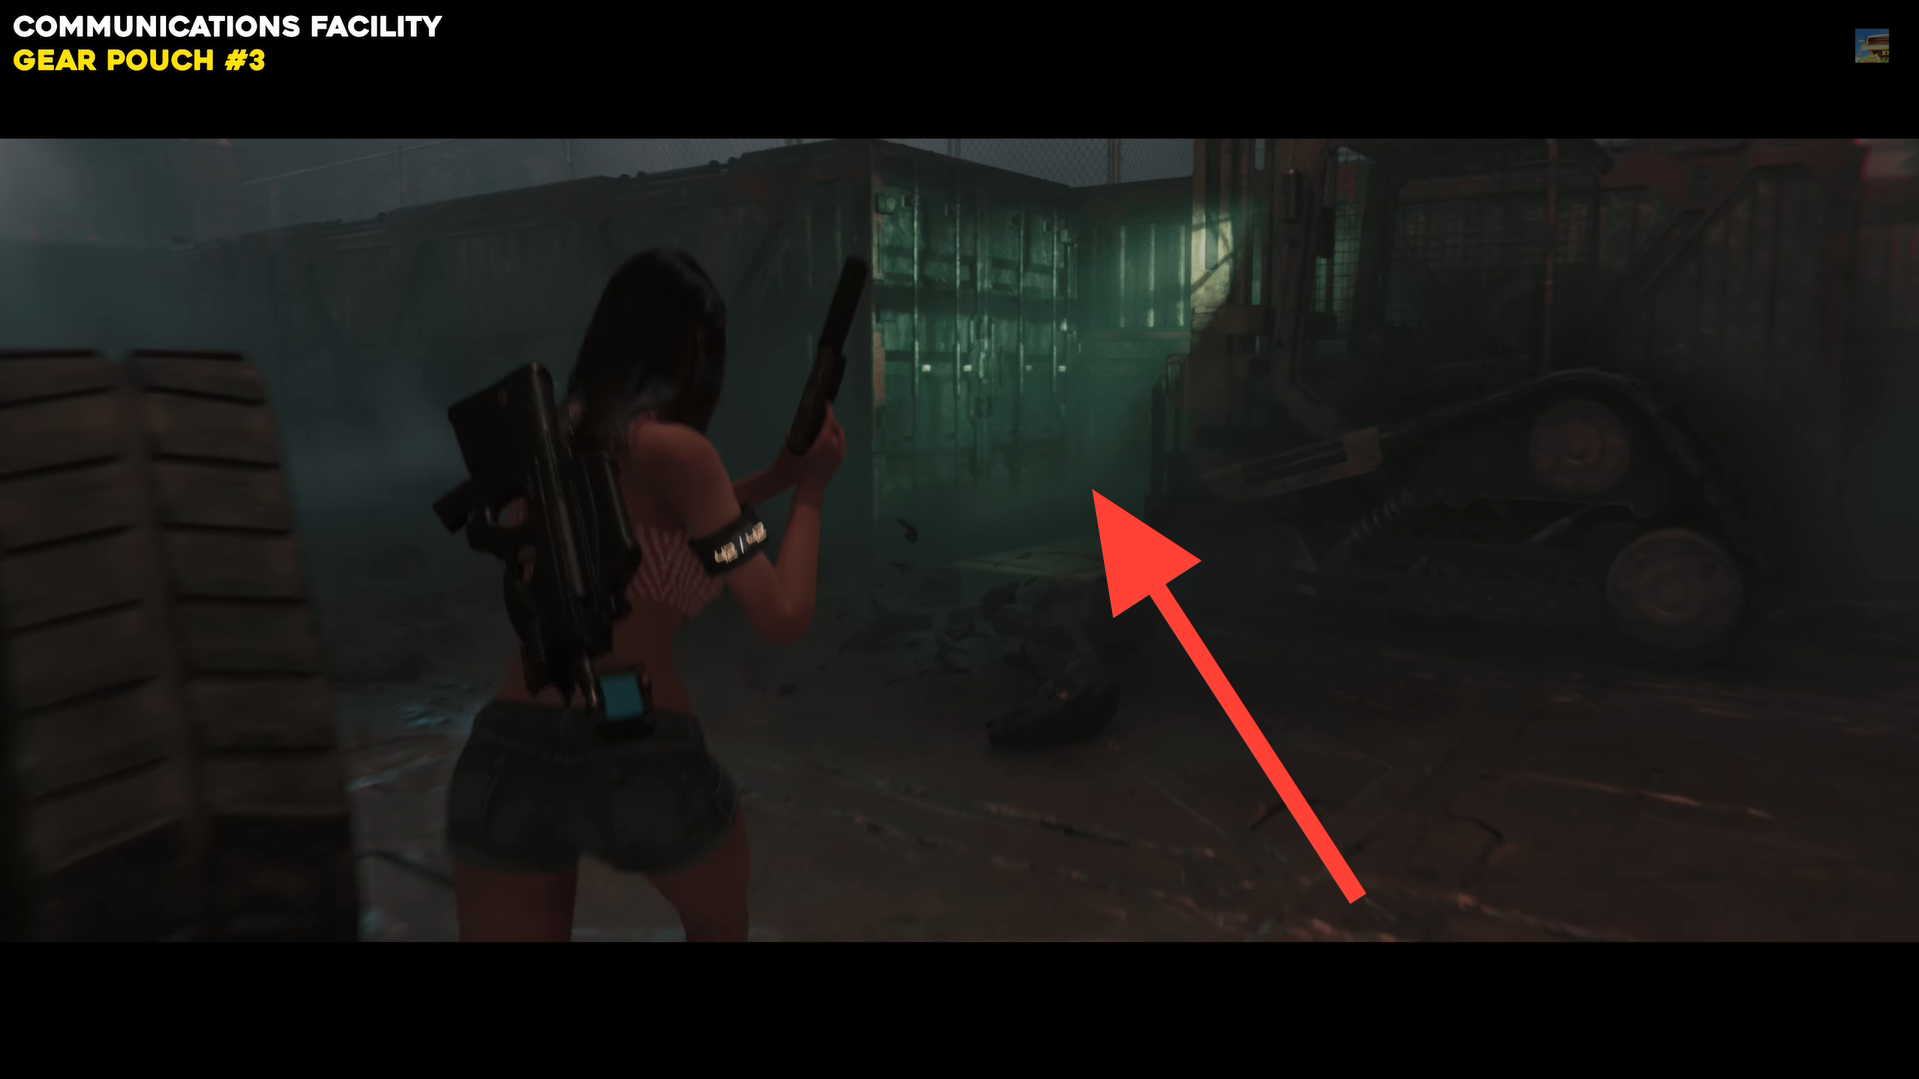
Step 2: Pick up the Old Key
Drop down into the area ahead with the blue bucket and mop on the floor. Check the far-right corner to find the Old Key.
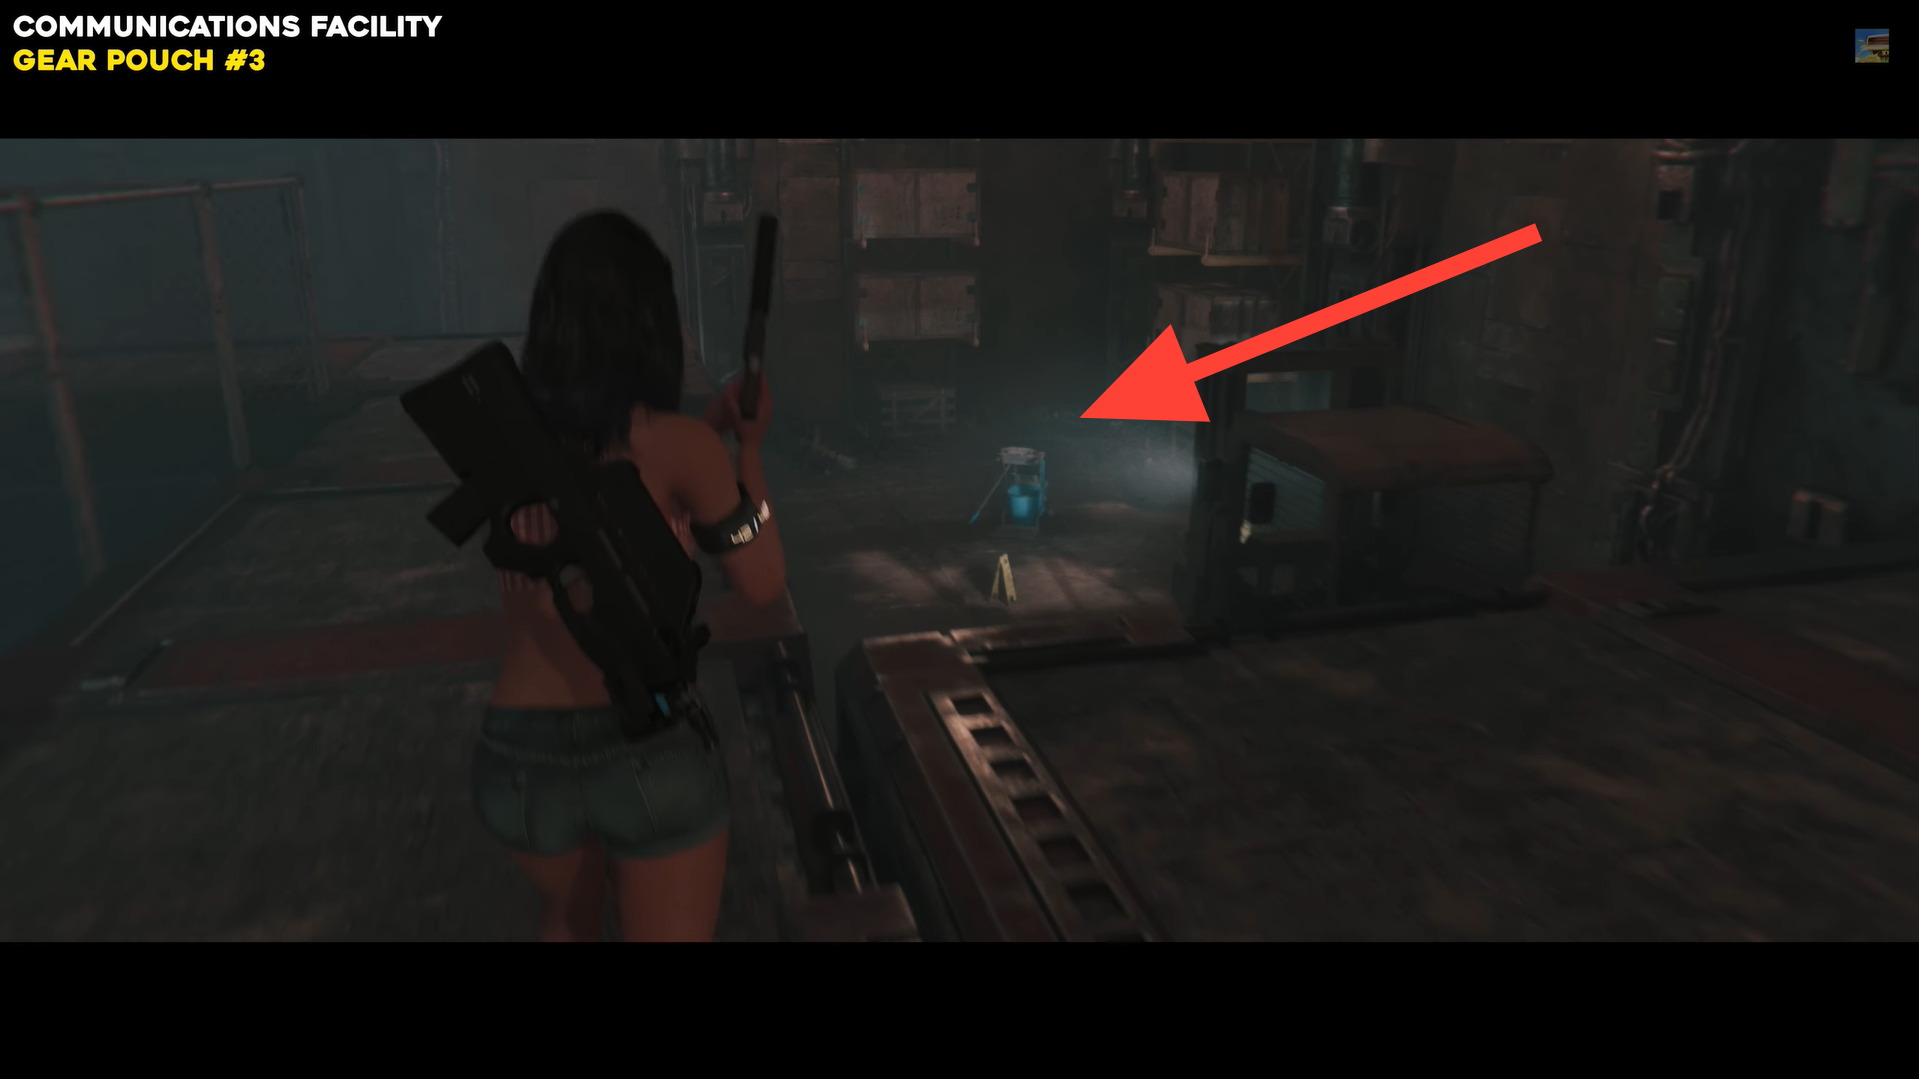

Pick up the Old Key. Image credits: TeamKill Media / YouTube: 100% Guides
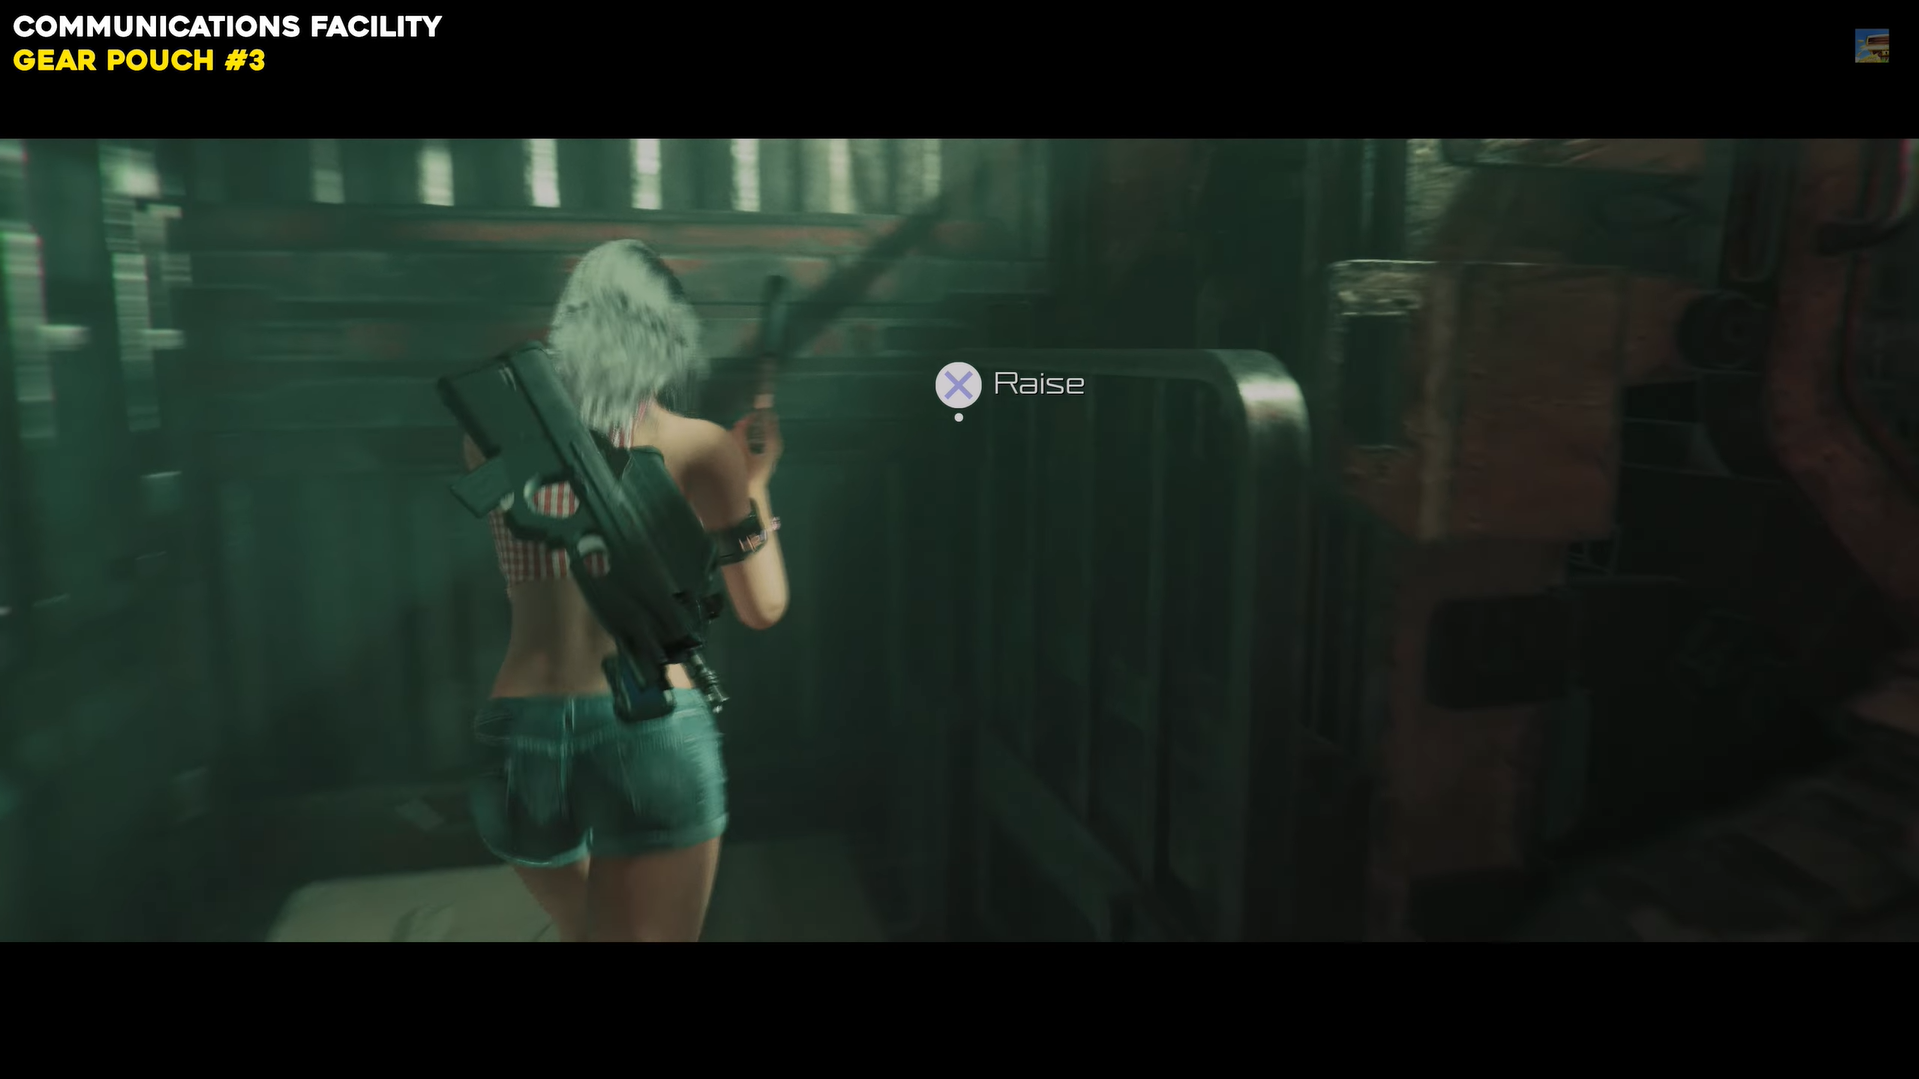
Go through the northern wall door, follow the path right → left → right, then turn right before the laser corridor into a small side room.
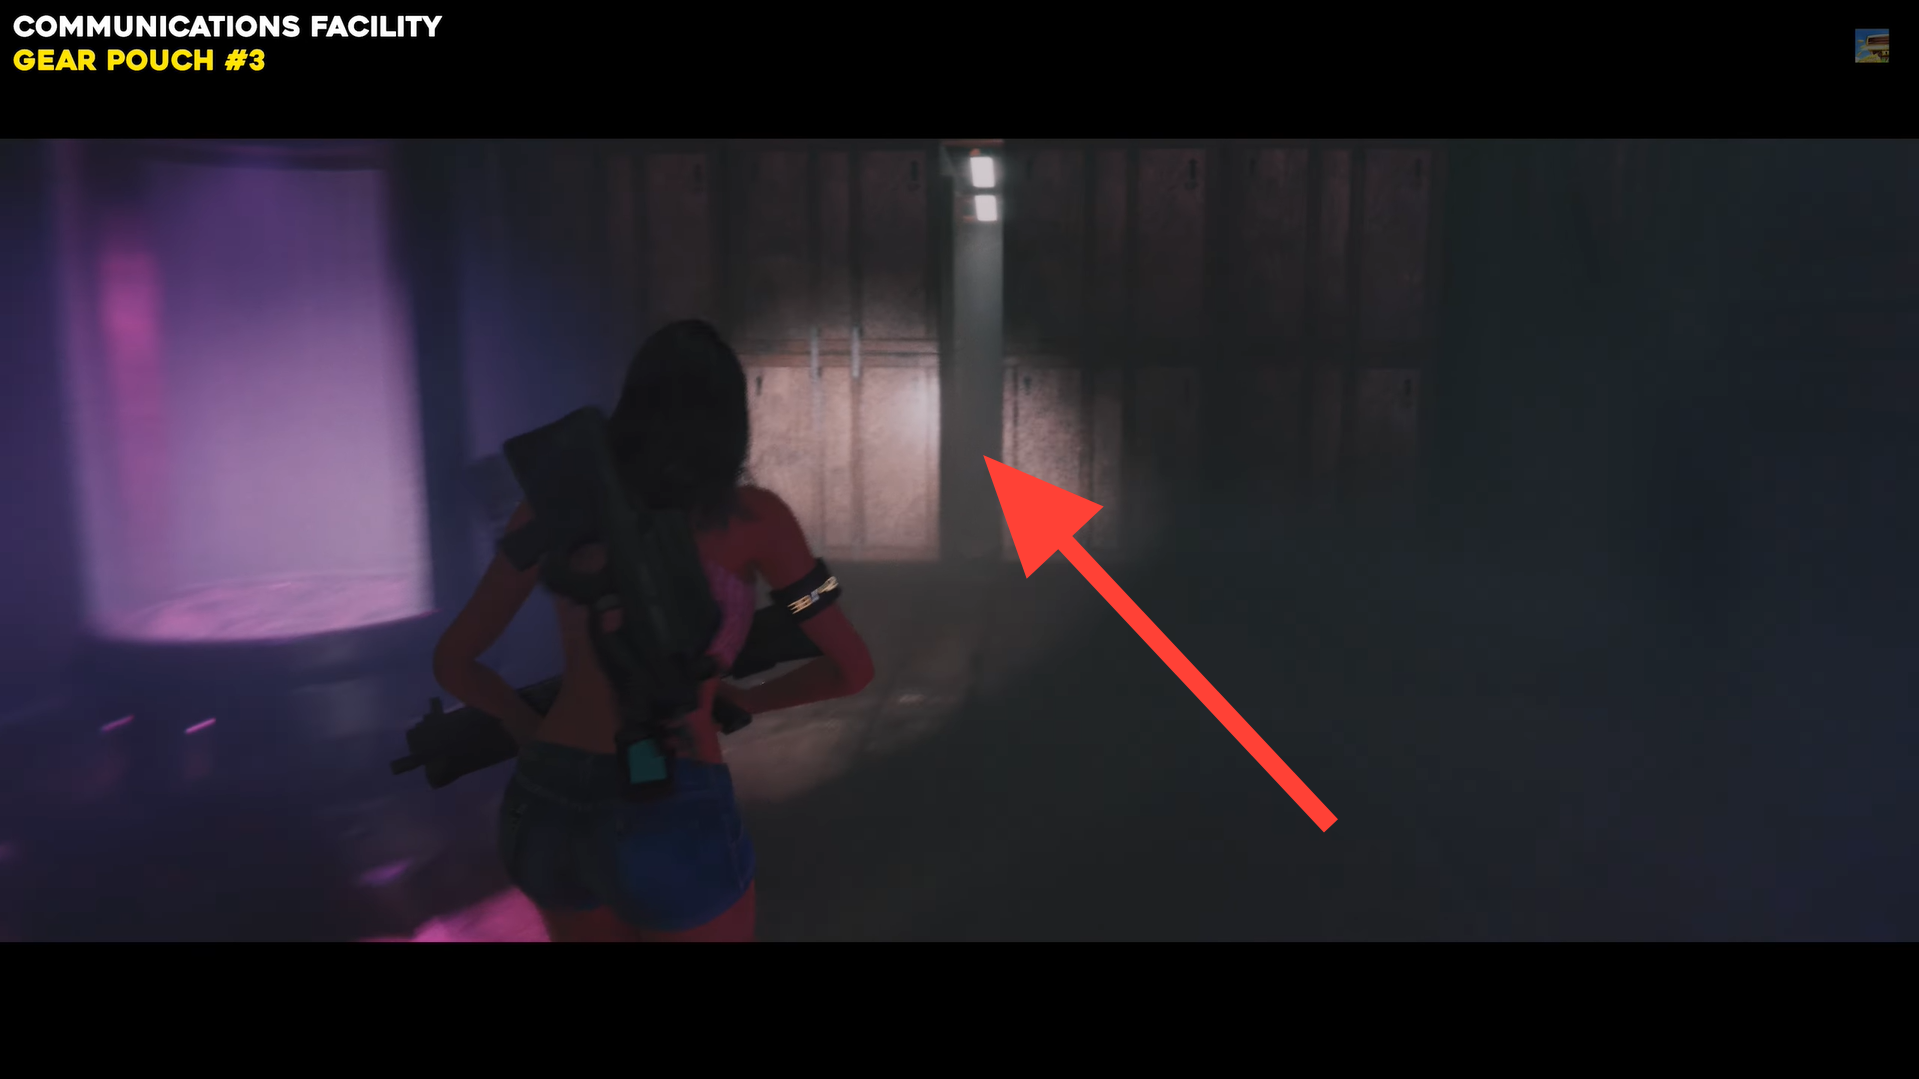
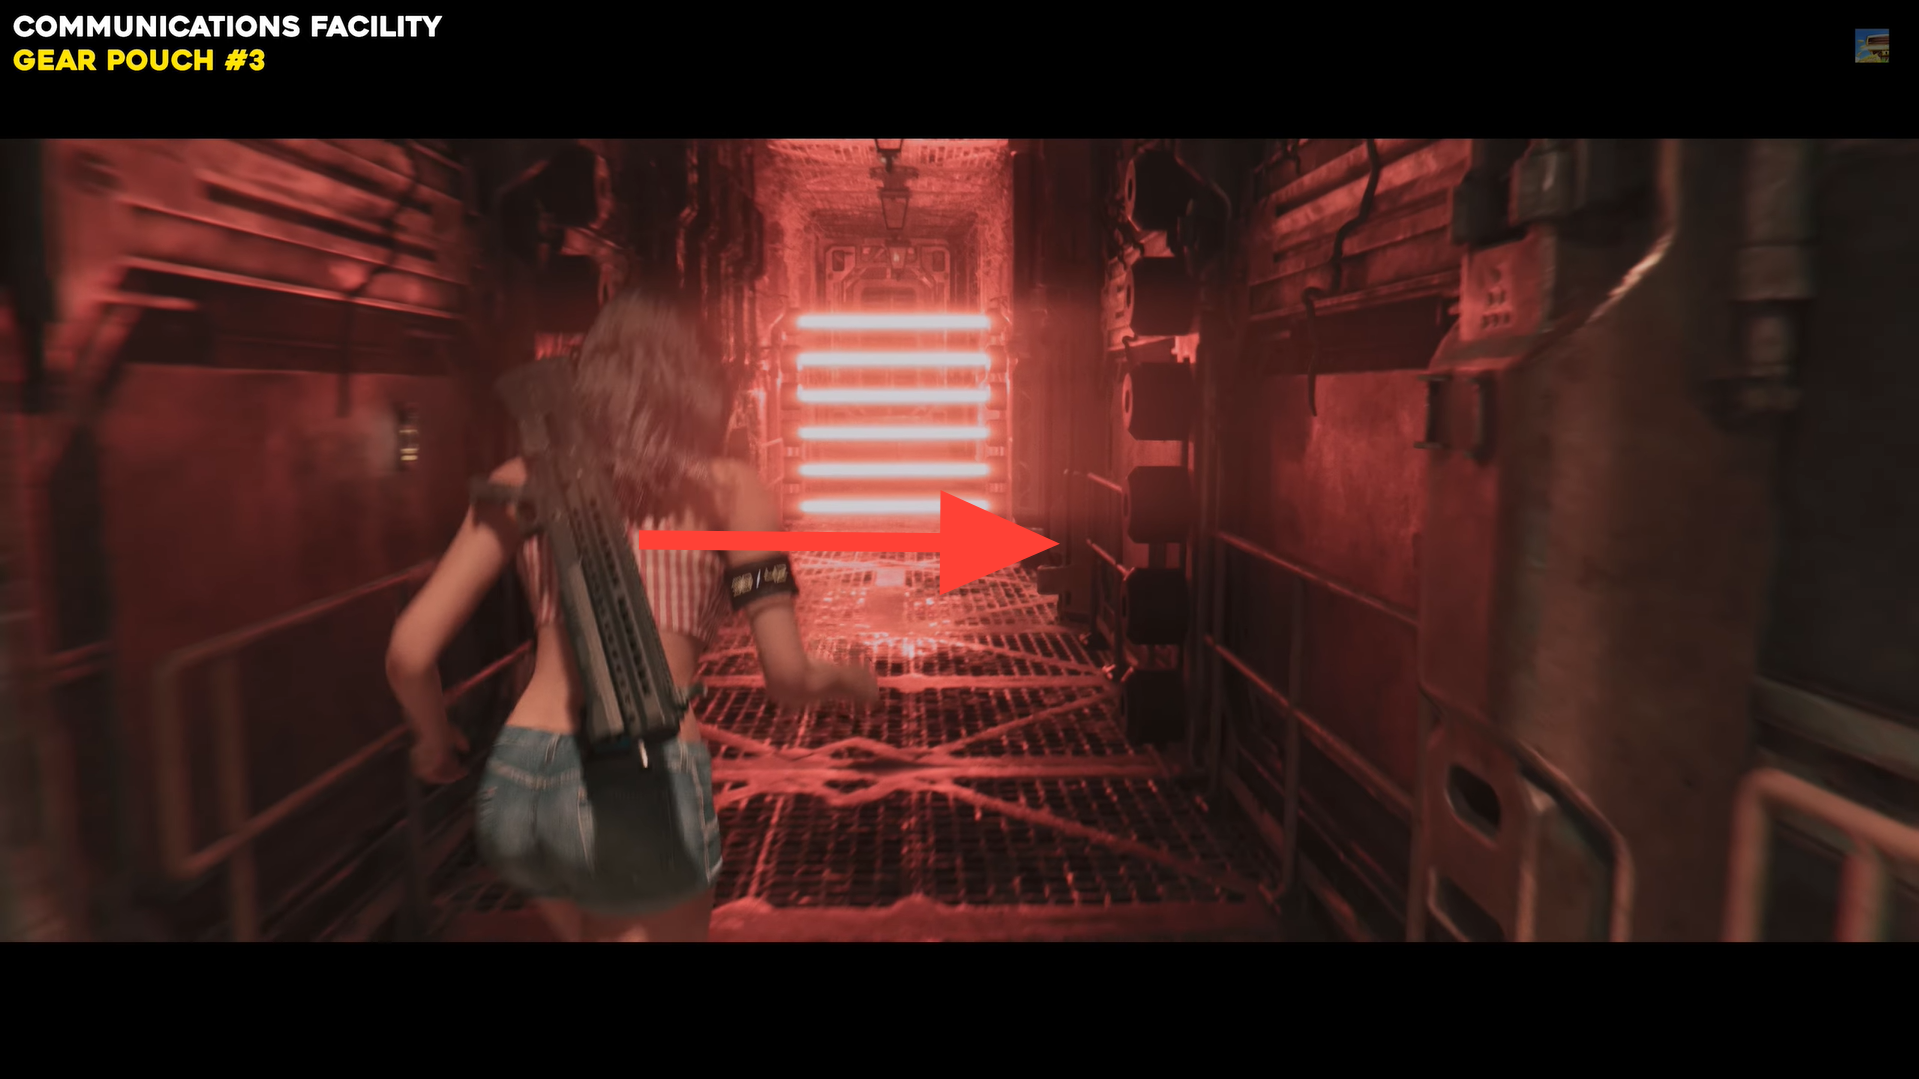
Navigate to the Side Room. Image credits: TeamKill Media / YouTube: 100% Guides
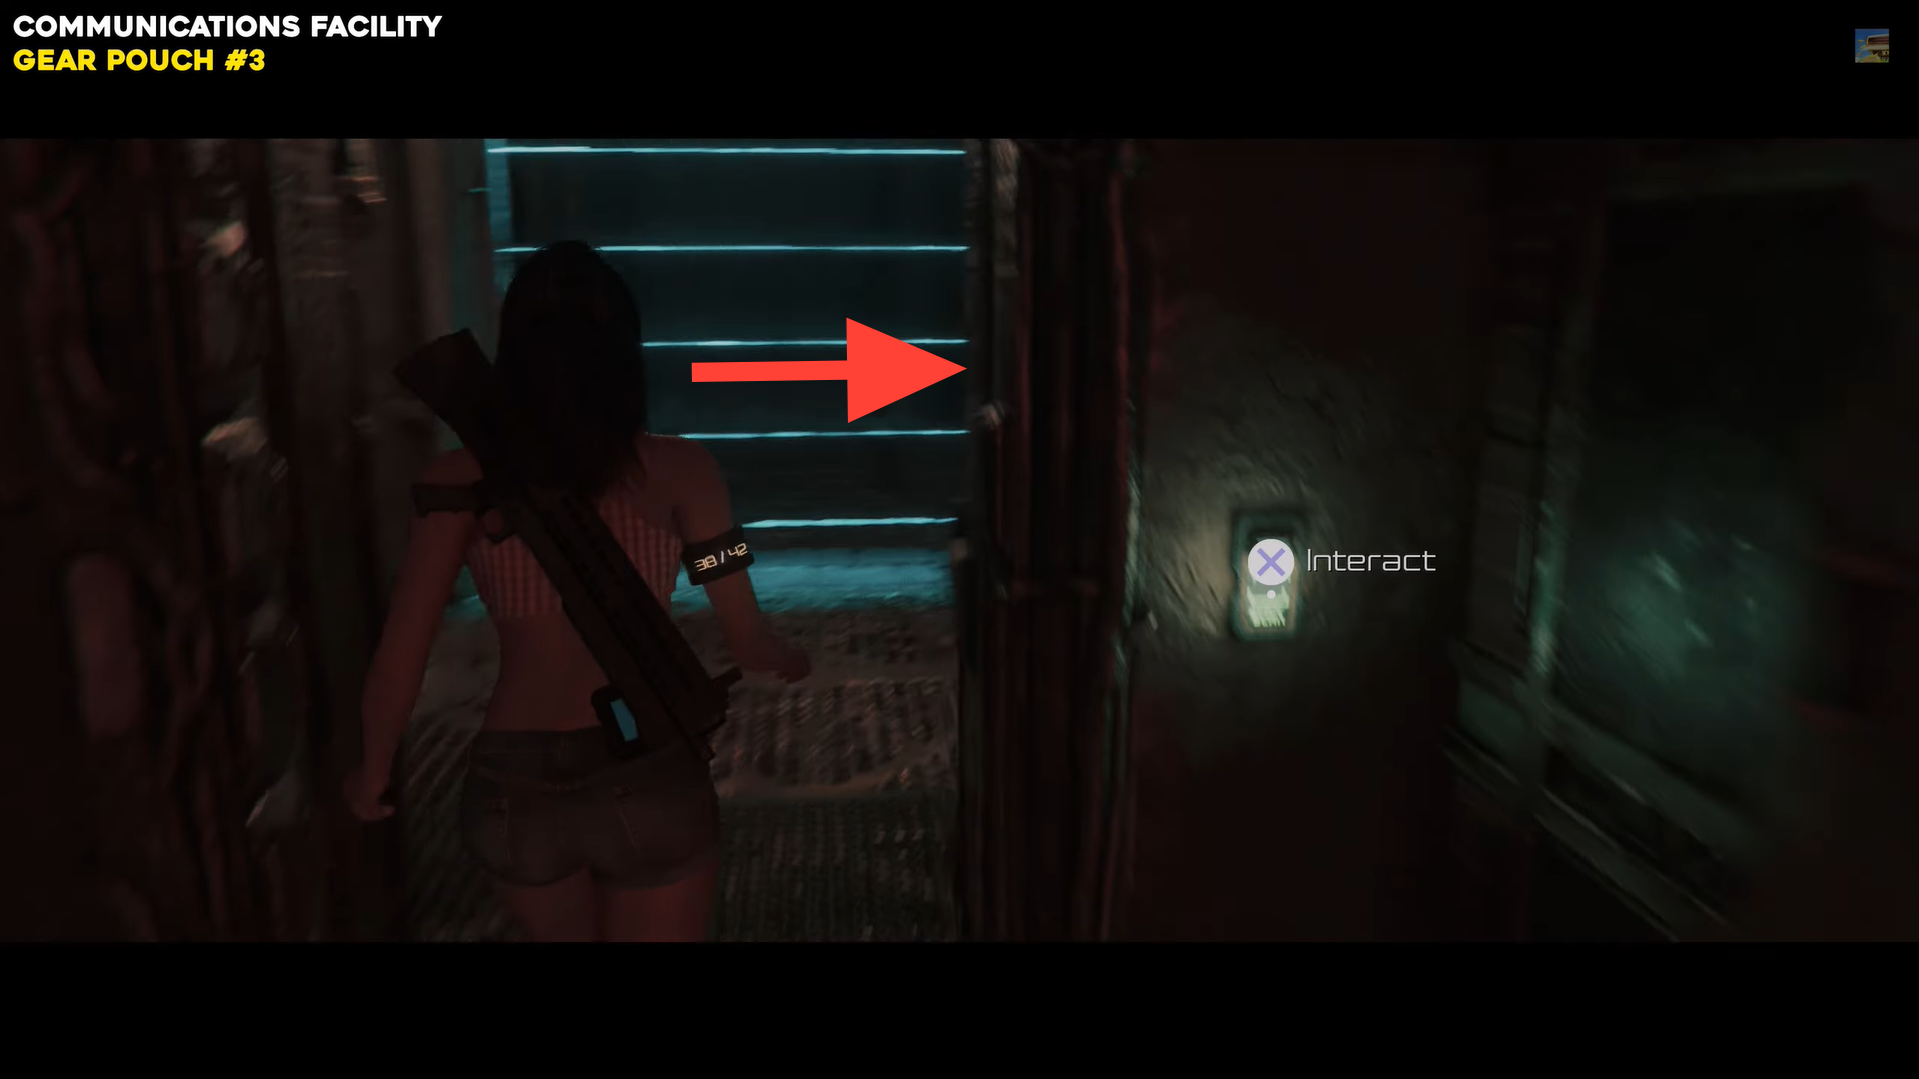
Step 4: Unlock the cabinet and collect Gear Pouch 3
Use the Old Key to open the locked cabinet on the left side of the room, then pick up Gear Pouch 3 and any Mites inside.
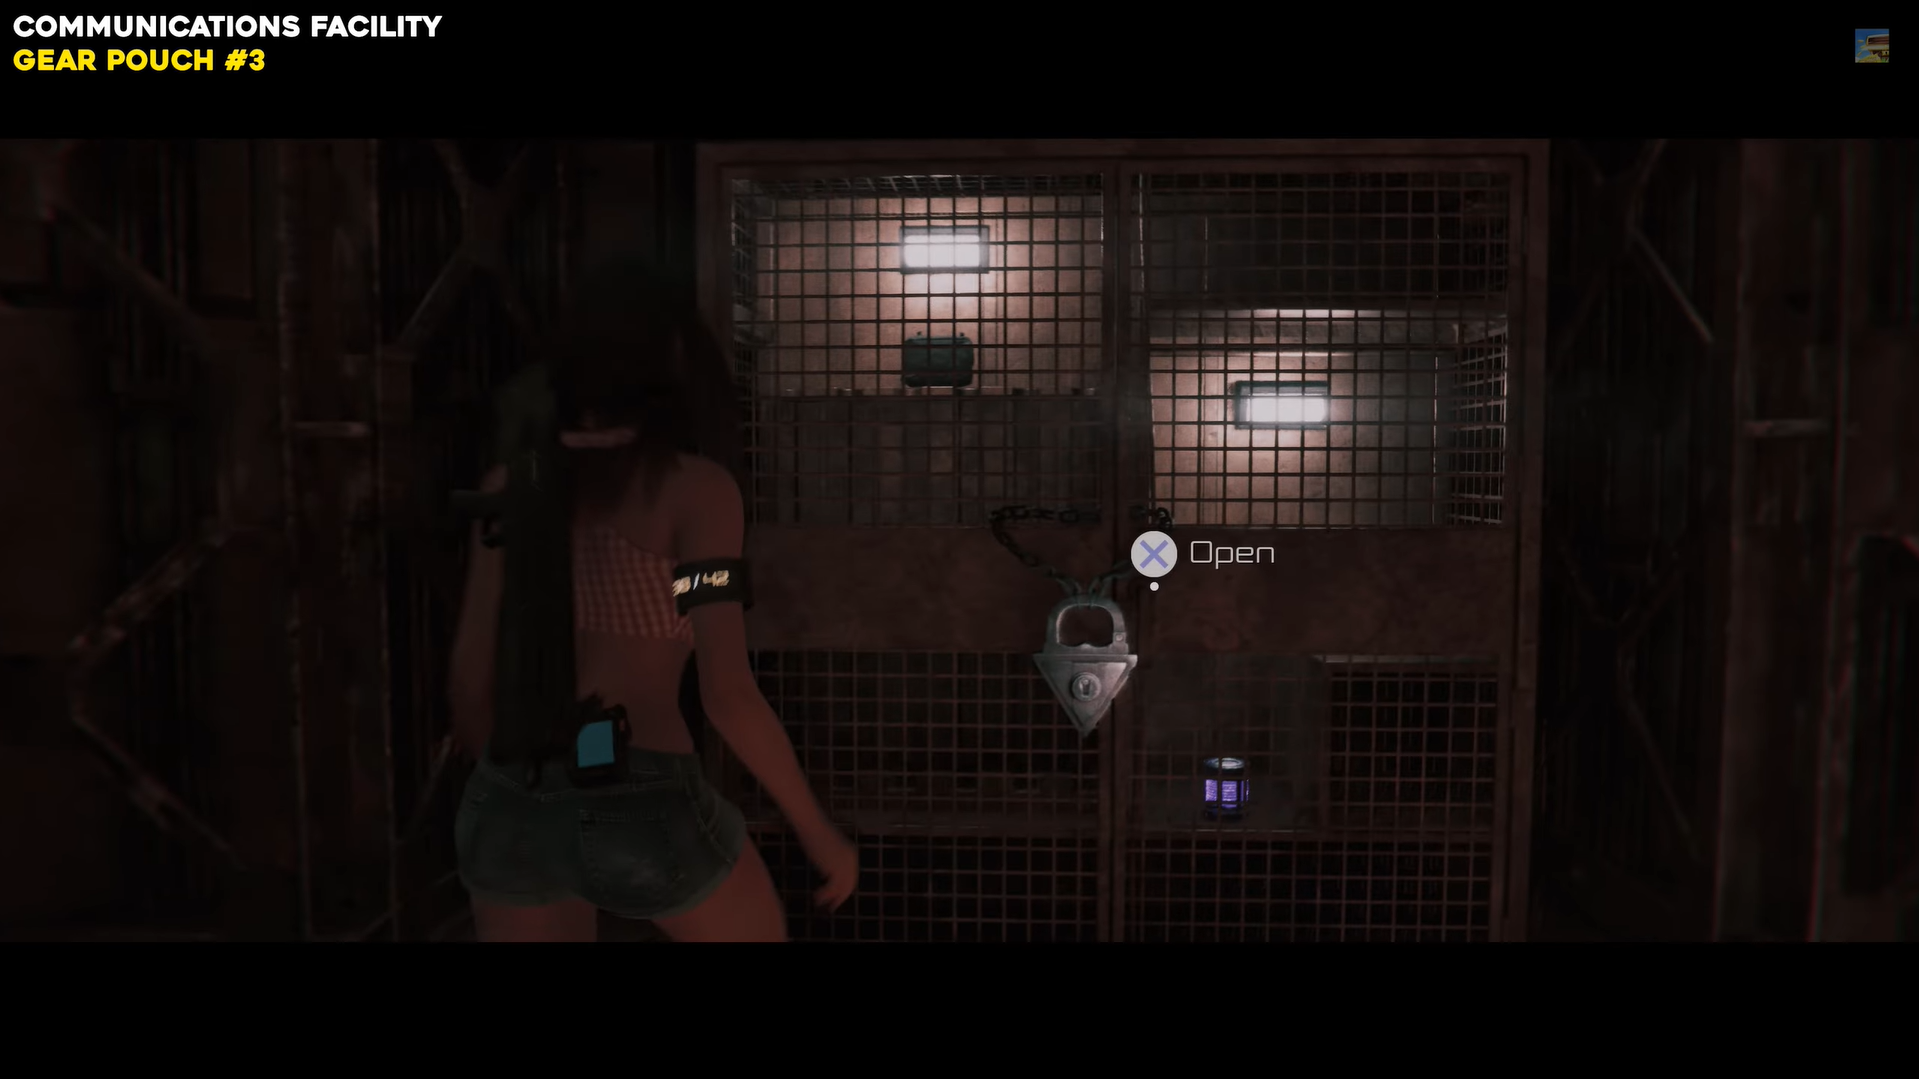
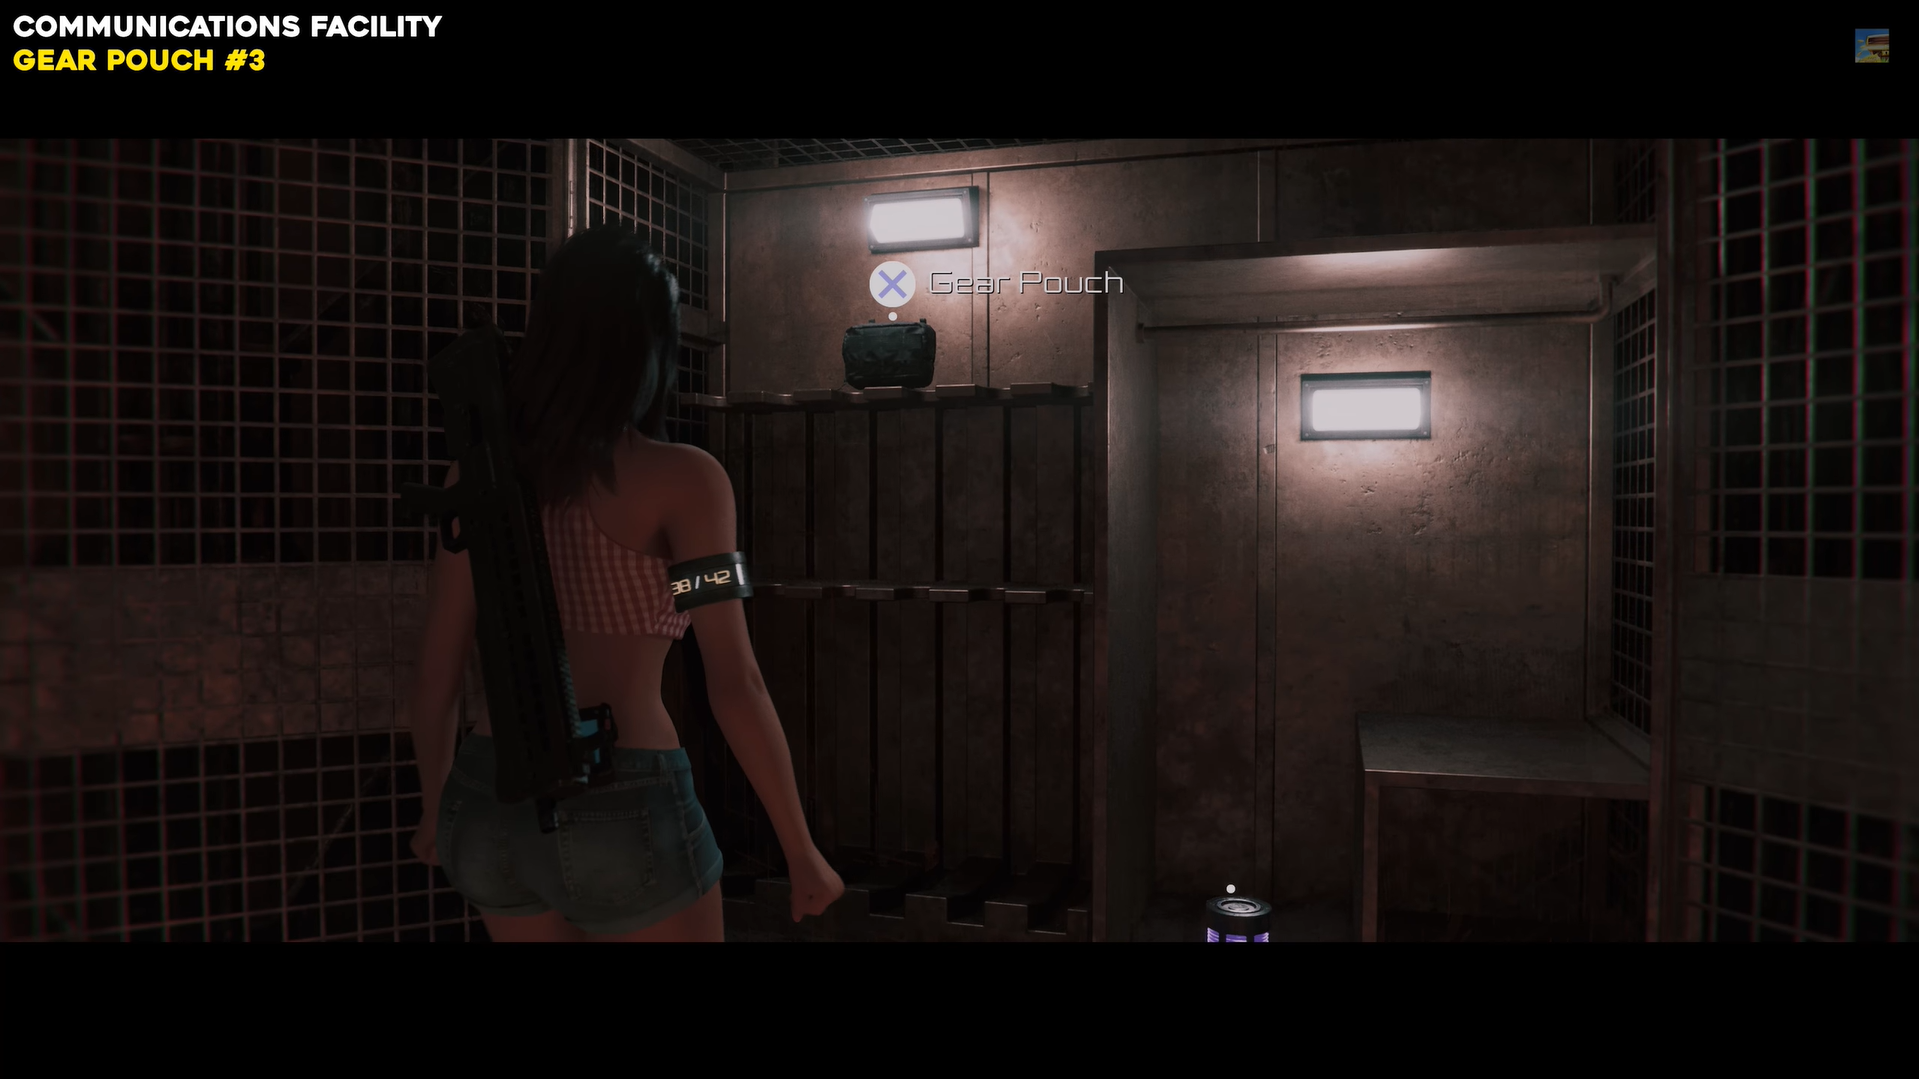
Unlock the cabinet and collect Gear Pouch 3. Image credits: TeamKill Media / YouTube: 100% Guides
Inventory fully upgraded
Once you’ve collected all three Gear Pouches, your inventory is fully expanded, giving you more space for weapons, attachments, and consumables. If you think you missed one, a little backtracking is well worth it, these small upgrades make later encounters far smoother and more manageable.
Thanks for reaching the end! Share your experience or doubts in the comments below—we read them closely and try to reply as quickly as possible.