- What to know
- All outfits available in Code Violet
- Tech Queen outfit
- Smart Suit outfit
- Breathless Beauty outfit
- Dino Hunter outfit
- Lady in the Red Dress outfit
- Vintage Sweater Girl outfit
- Ba Donka Donk outfit
- Life of the Party outfit
- Not Fast, But Furious outfit
- Girl, Hold my Poodle outfit
- Wild Thing outfit
- Sugarplum outfit
- Argh, Black Tides outfit
- Great Jeans outfit
- Huntress outfit
- Be a Legend outfit
- Purrfectly Cat’s Meow & Biker Chick outfit
- All Outfit Locations in Code Violet
What to know
- There are 18 outfits total, all hidden in separate side paths off the main areas.
- Each outfit is behind a secret door that opens only after you shoot a specific white energy bulb nearby.
- The outfits are not missable if you explore thoroughly; you can grab them all in one playthrough.
- No special requirements or DLC are needed; all outfits are available in the base game.
Code Violet features 18 hidden outfits, each unlocked by shooting a white energy bulb in the main areas. None are missable, explore every room carefully, follow the revealed paths, and you can collect them all in a single playthrough.
All outfits available in Code Violet
| Outfit name | Location area |
|---|---|
| Tech Queen | Security Room, Testing Facility |
| Smart Suit | R&D Room, Testing Facility |
| Breathless Beauty | Emergency Monitoring Room, Testing Facility |
| Dino Hunter | Laundry Room, Testing Facility |
| Lady in the Red Dress | Plasma Heating Control Room, Preservation Facility |
| Vintage Sweater Girl | Meat Storage Room, Preservation Facility |
| Ba Donka Donk | Incubator Temp Control, Preservation Facility |
| Life of the Party | Cinderline Power Room, Communication Facility |
| Not Fast, But Furious | Right of Server Room, Communication Facility |
| Girl, Hold my Poodle | East side of Server Room, Communication Facility |
| Wild Thing | Storage, Bioengineering Lab |
| Sugarplum | Hydrolift Room, Bioengineering Lab |
| Argh, Black Tides | Clone Monitoring Room, Bioengineering Lab |
| Great Jeans | Waste Processing, Disposal Facility |
| Huntress | Coolant Rooms, Disposal Facility |
| Be a Legend | Storage Room, Disposal Facility |
| Purrfectly Cat’s Meow & Biker Chick | Starbridge |
Tech Queen outfit
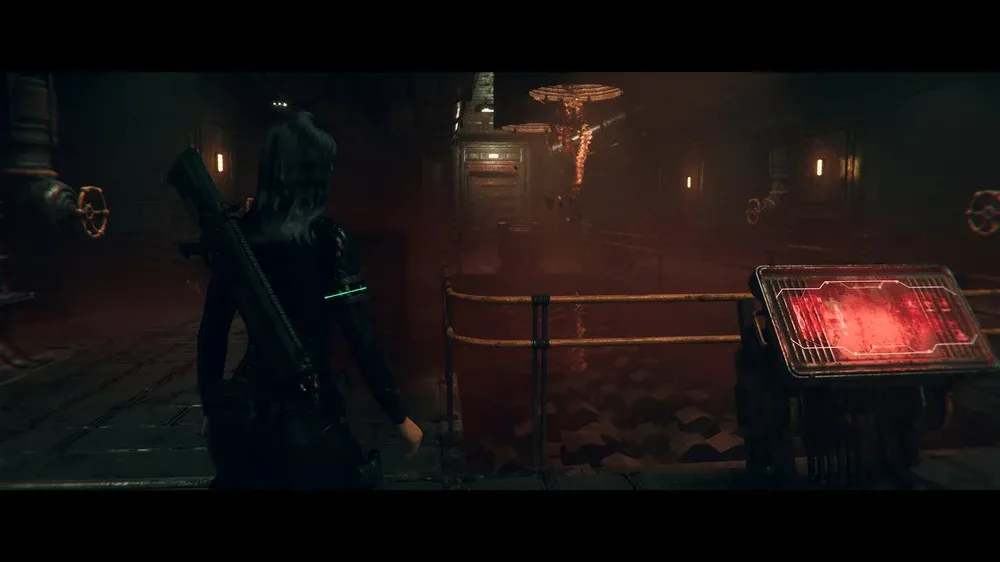
Head to the Security Room inside the Testing Facility, move to the east side, and shoot the bright white bulb on the door’s top-left to unlock the path.
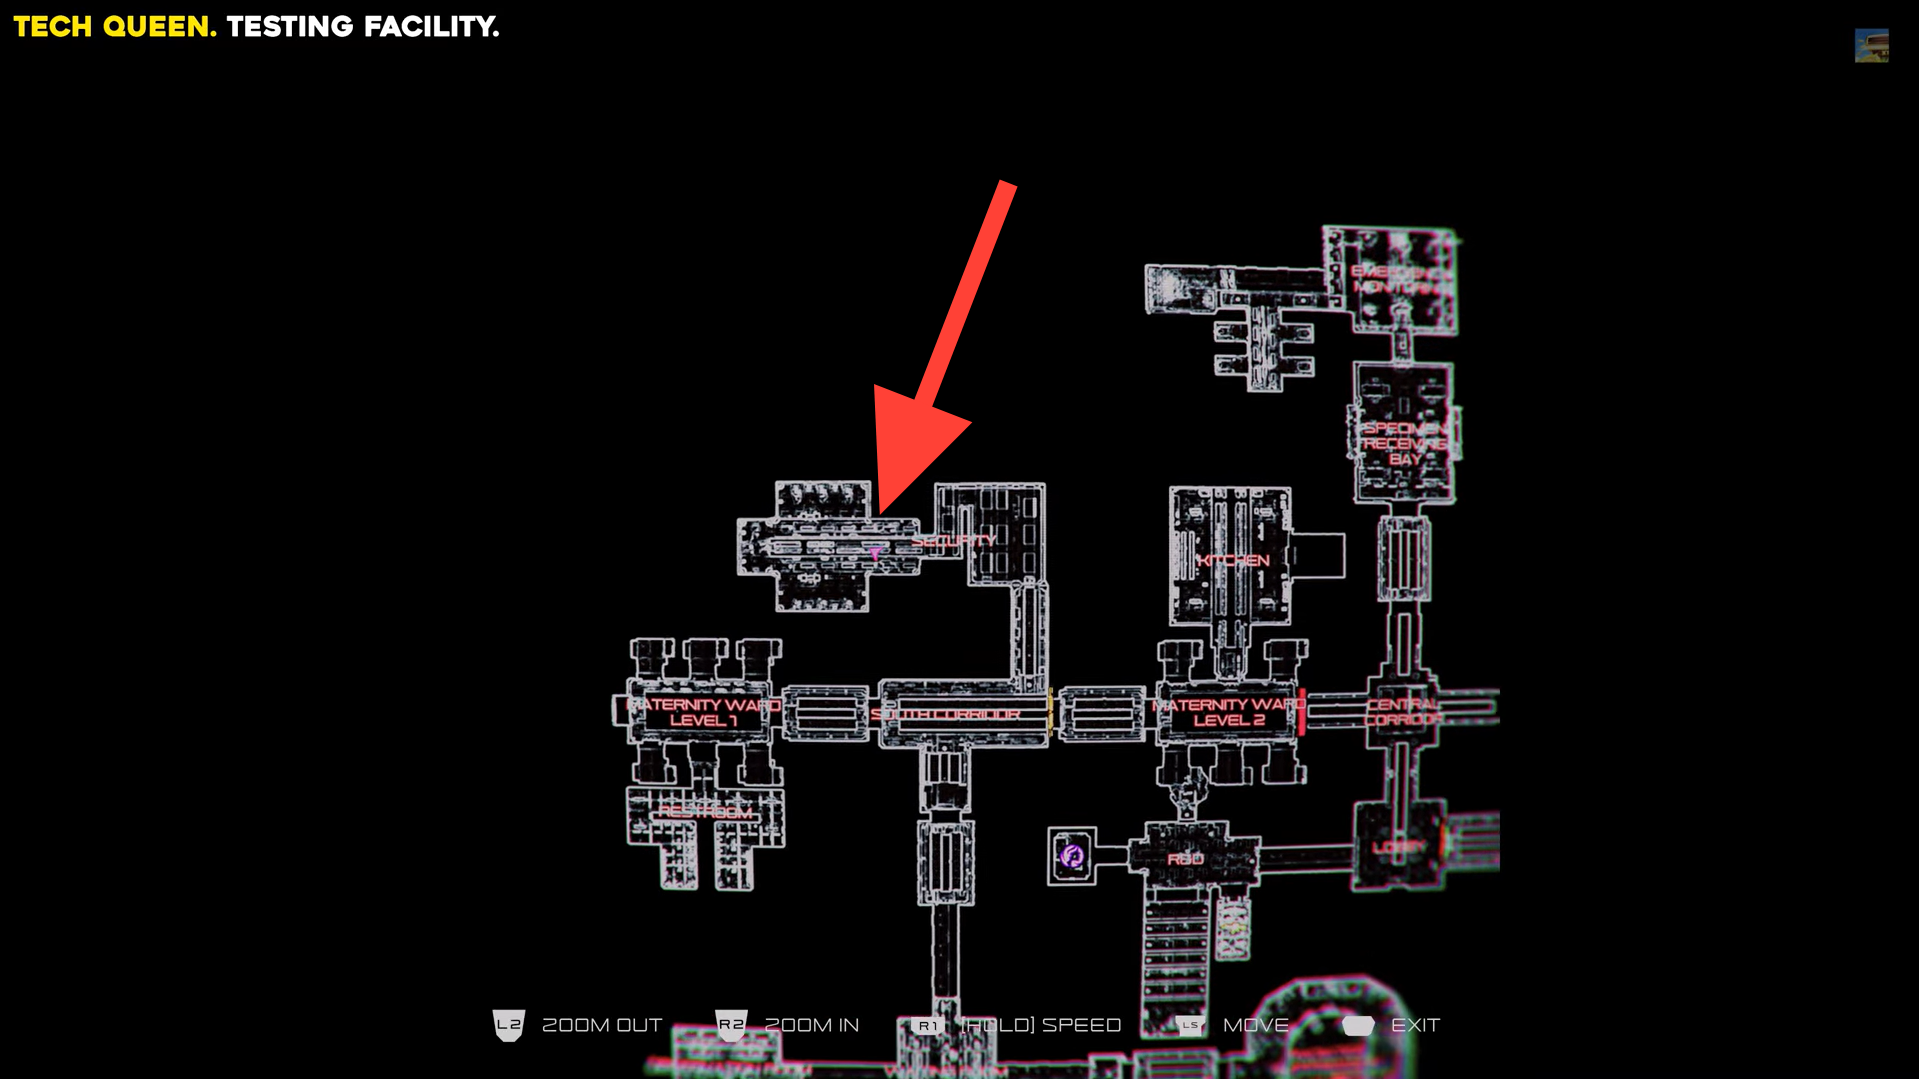
Tech Queen outfit location. Image credits: TeamKill Media / YouTube: 100% Guides
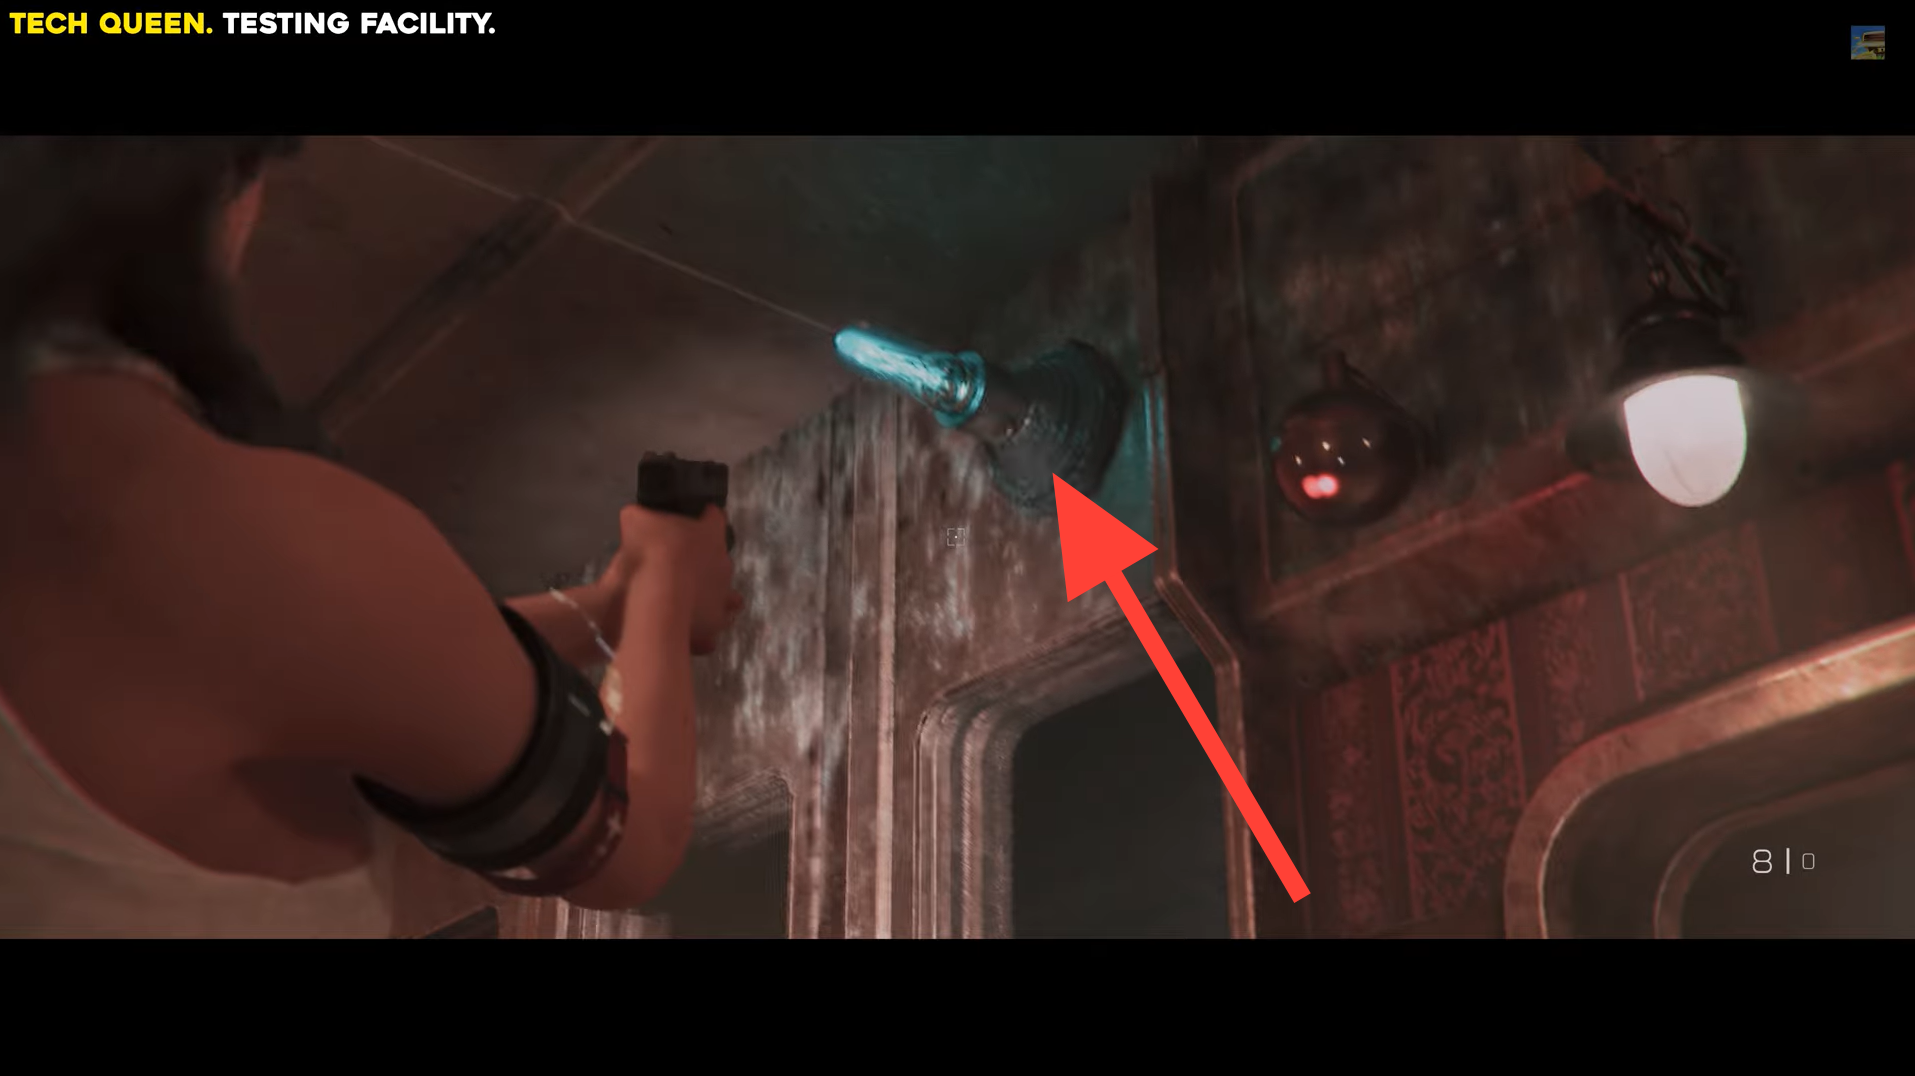
Enter the room, head through the South Corridor into the Waiting Room, then turn right and follow the linear path until the camera switches to a fixed angle, the Tech Queen outfit is at the end.
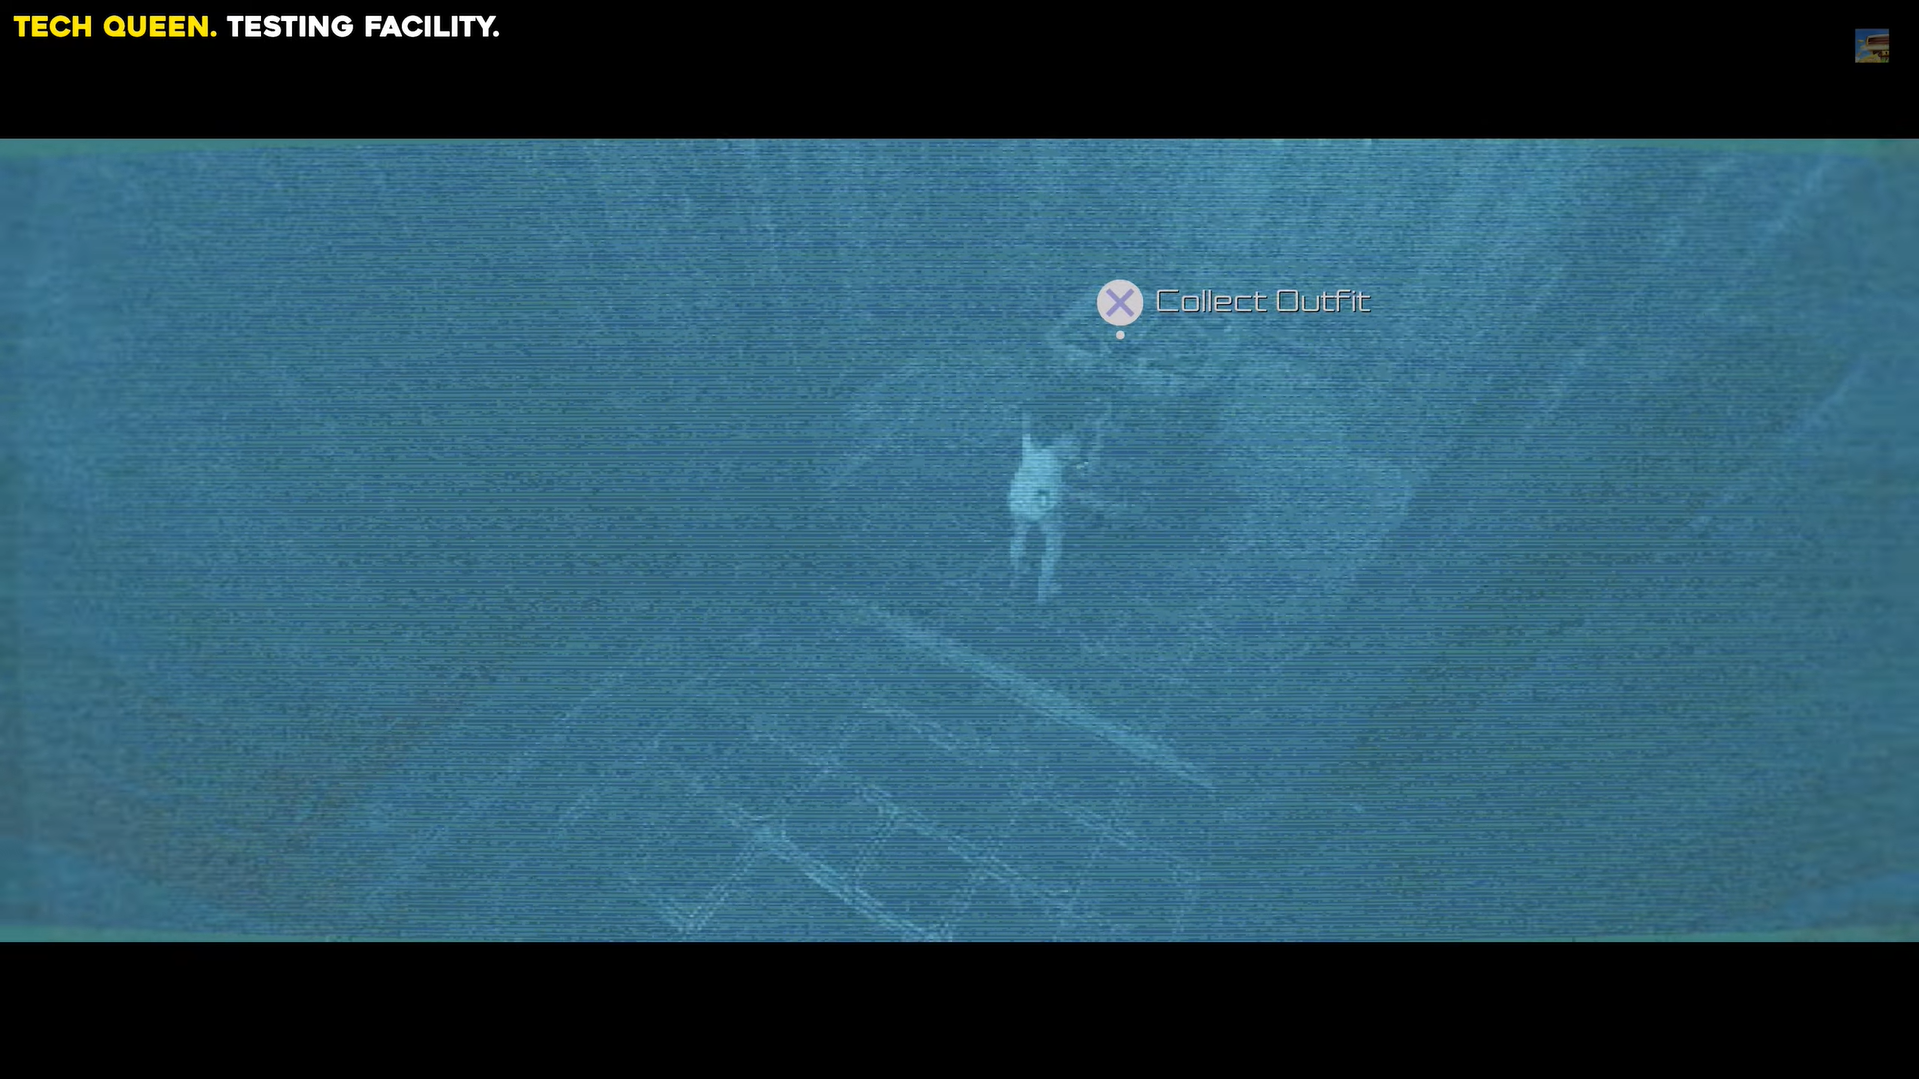
Enter the South Corridor, turn right, follow the path to the end. Image credits: TeamKill Media / YouTube: 100% Guides
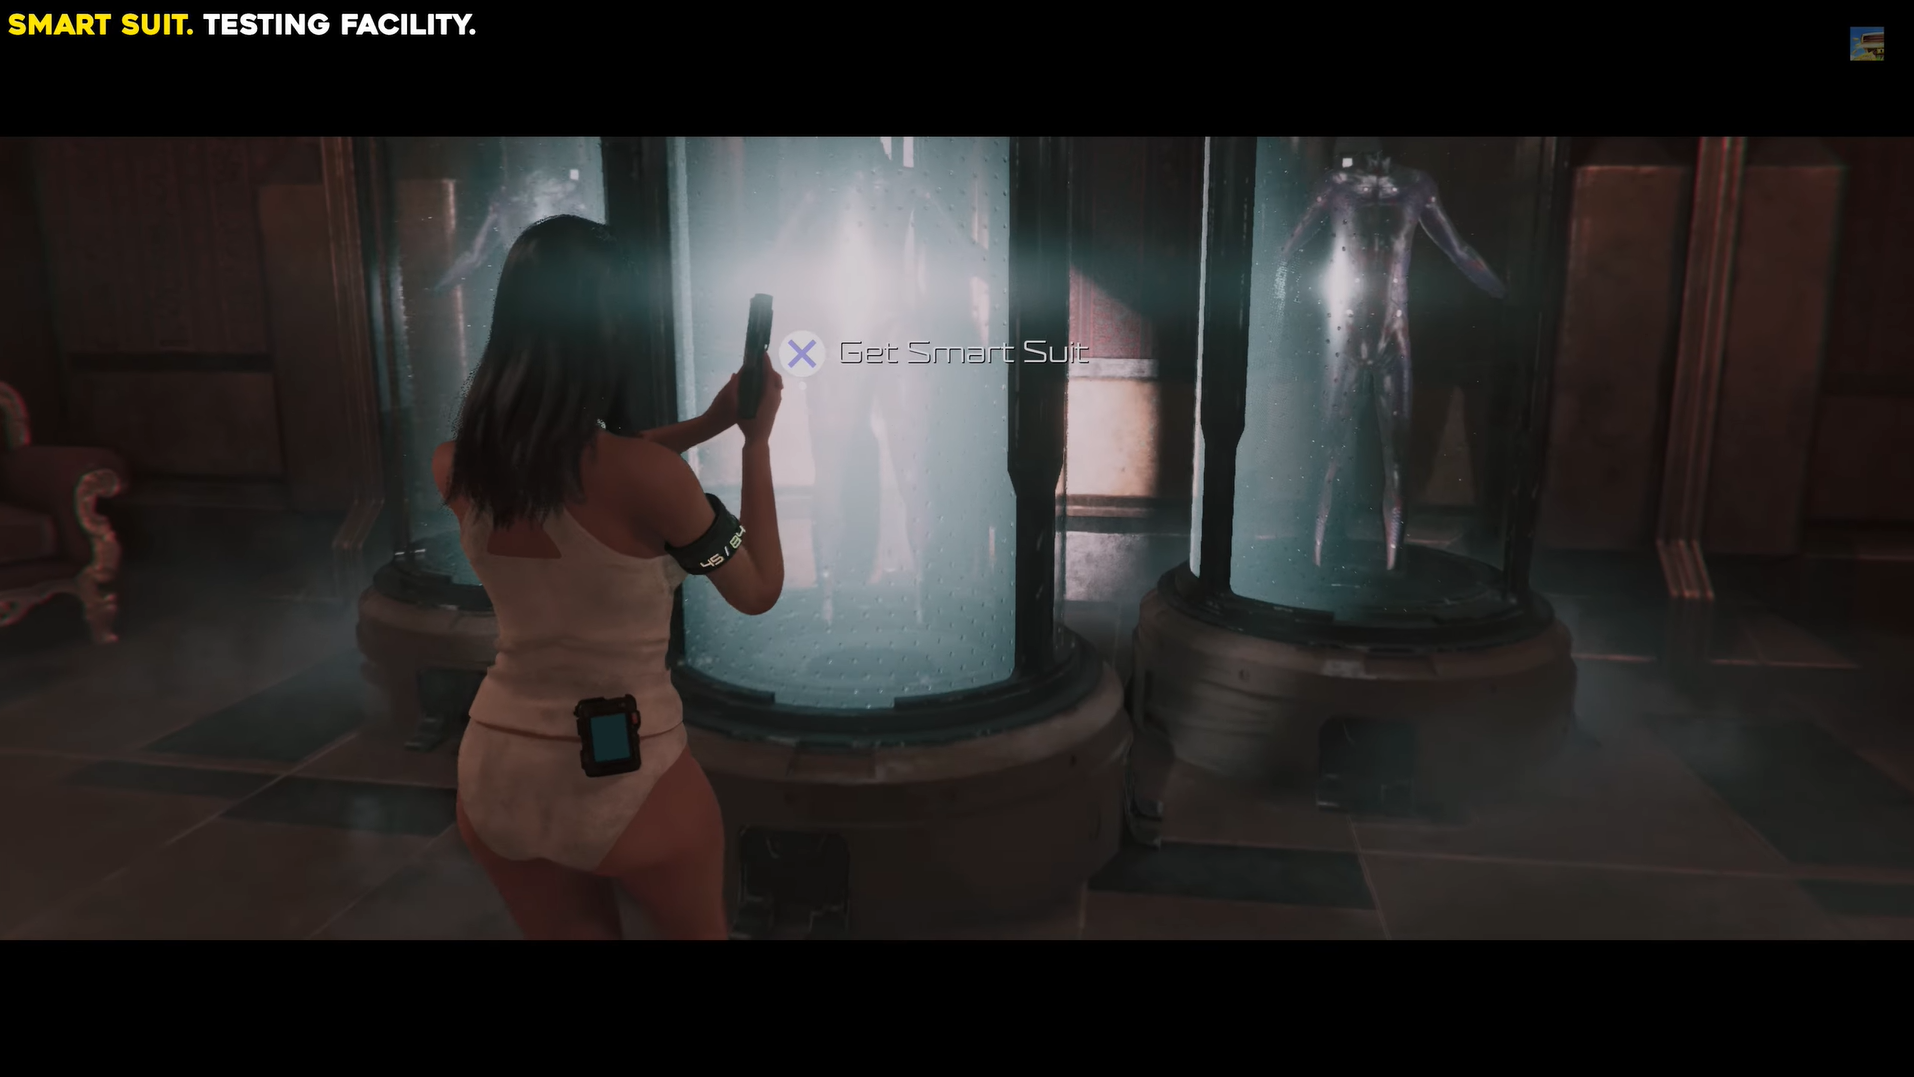
Smart Suit outfit
Head to the RGD room in the Testing Facility, where you’ll face a laser grid.
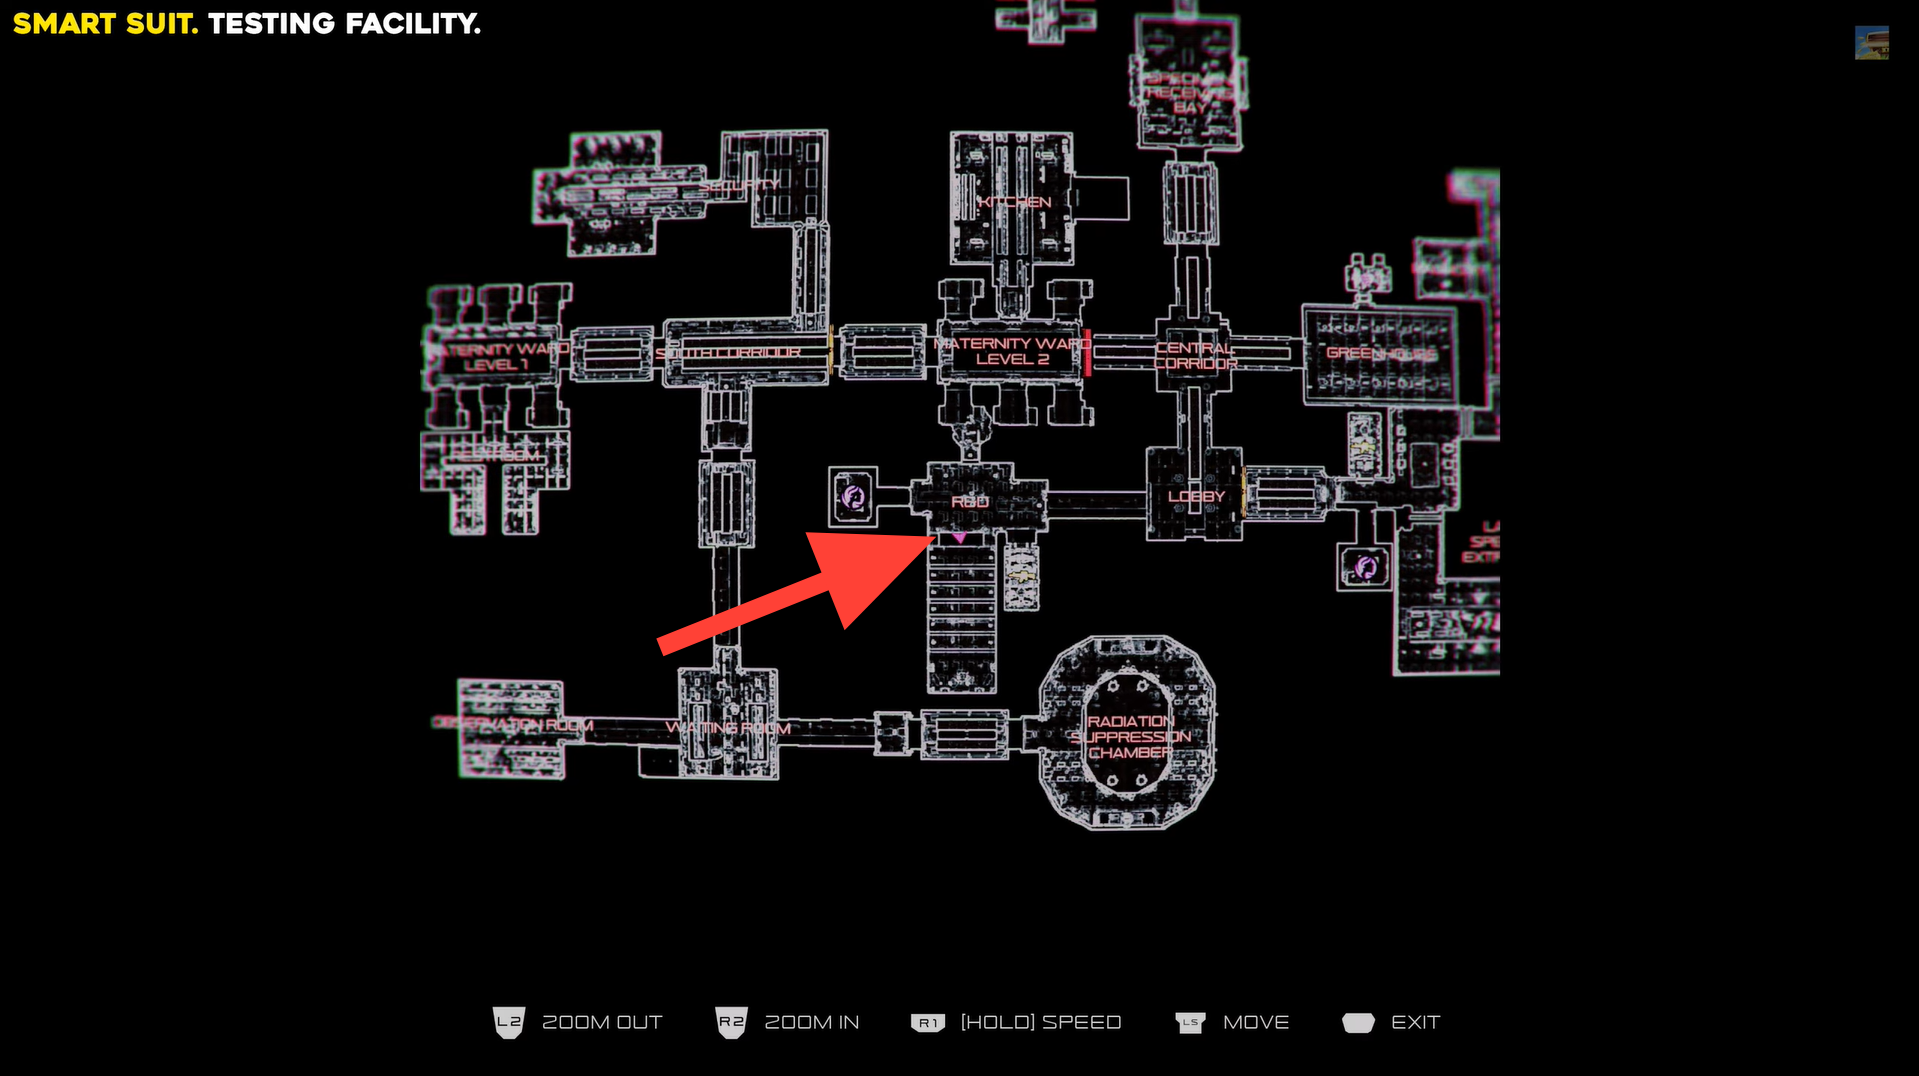
Smart Suit location. Image credits: TeamKill Media / YouTube: 100% Guides
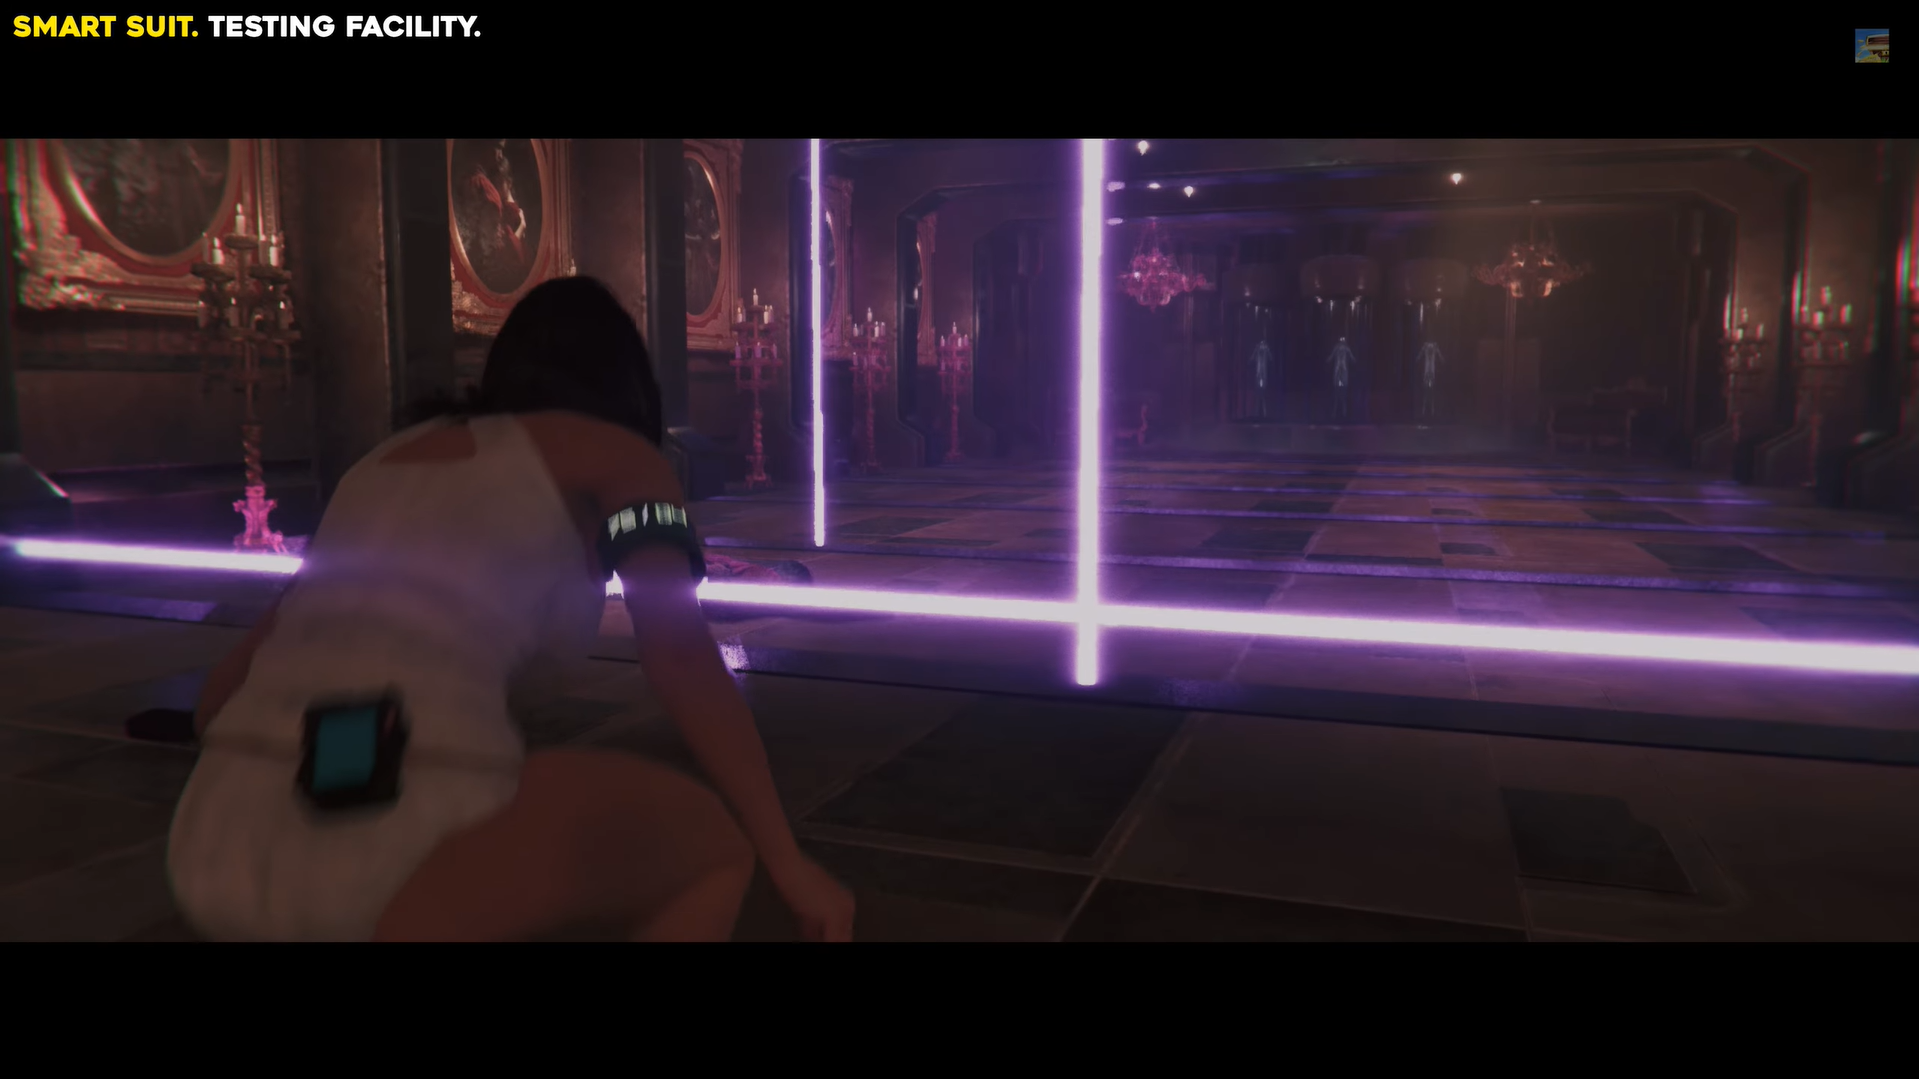
Move to the far end of the room, look up near the glass chambers, and shoot the green energy bulb to disable the lasers.
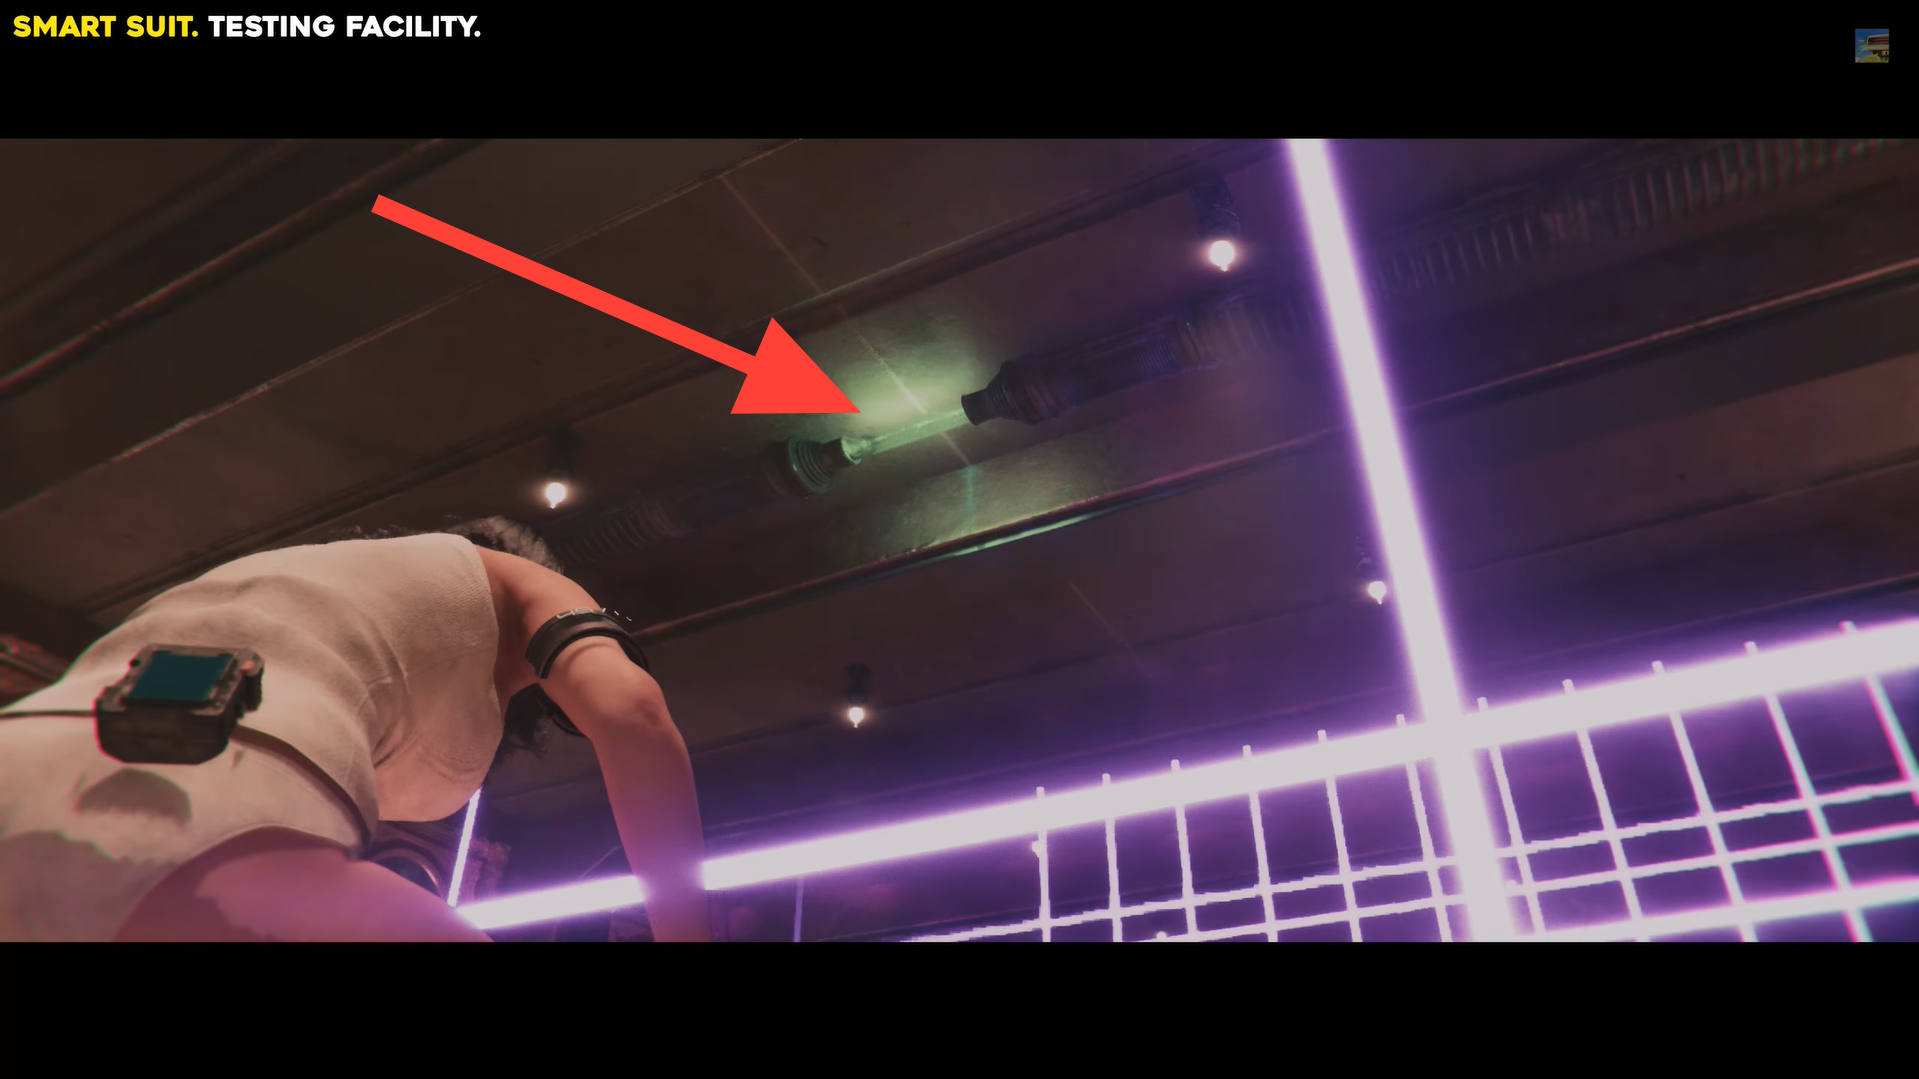
Interact with the glass chambers to collect the Smart Suit.
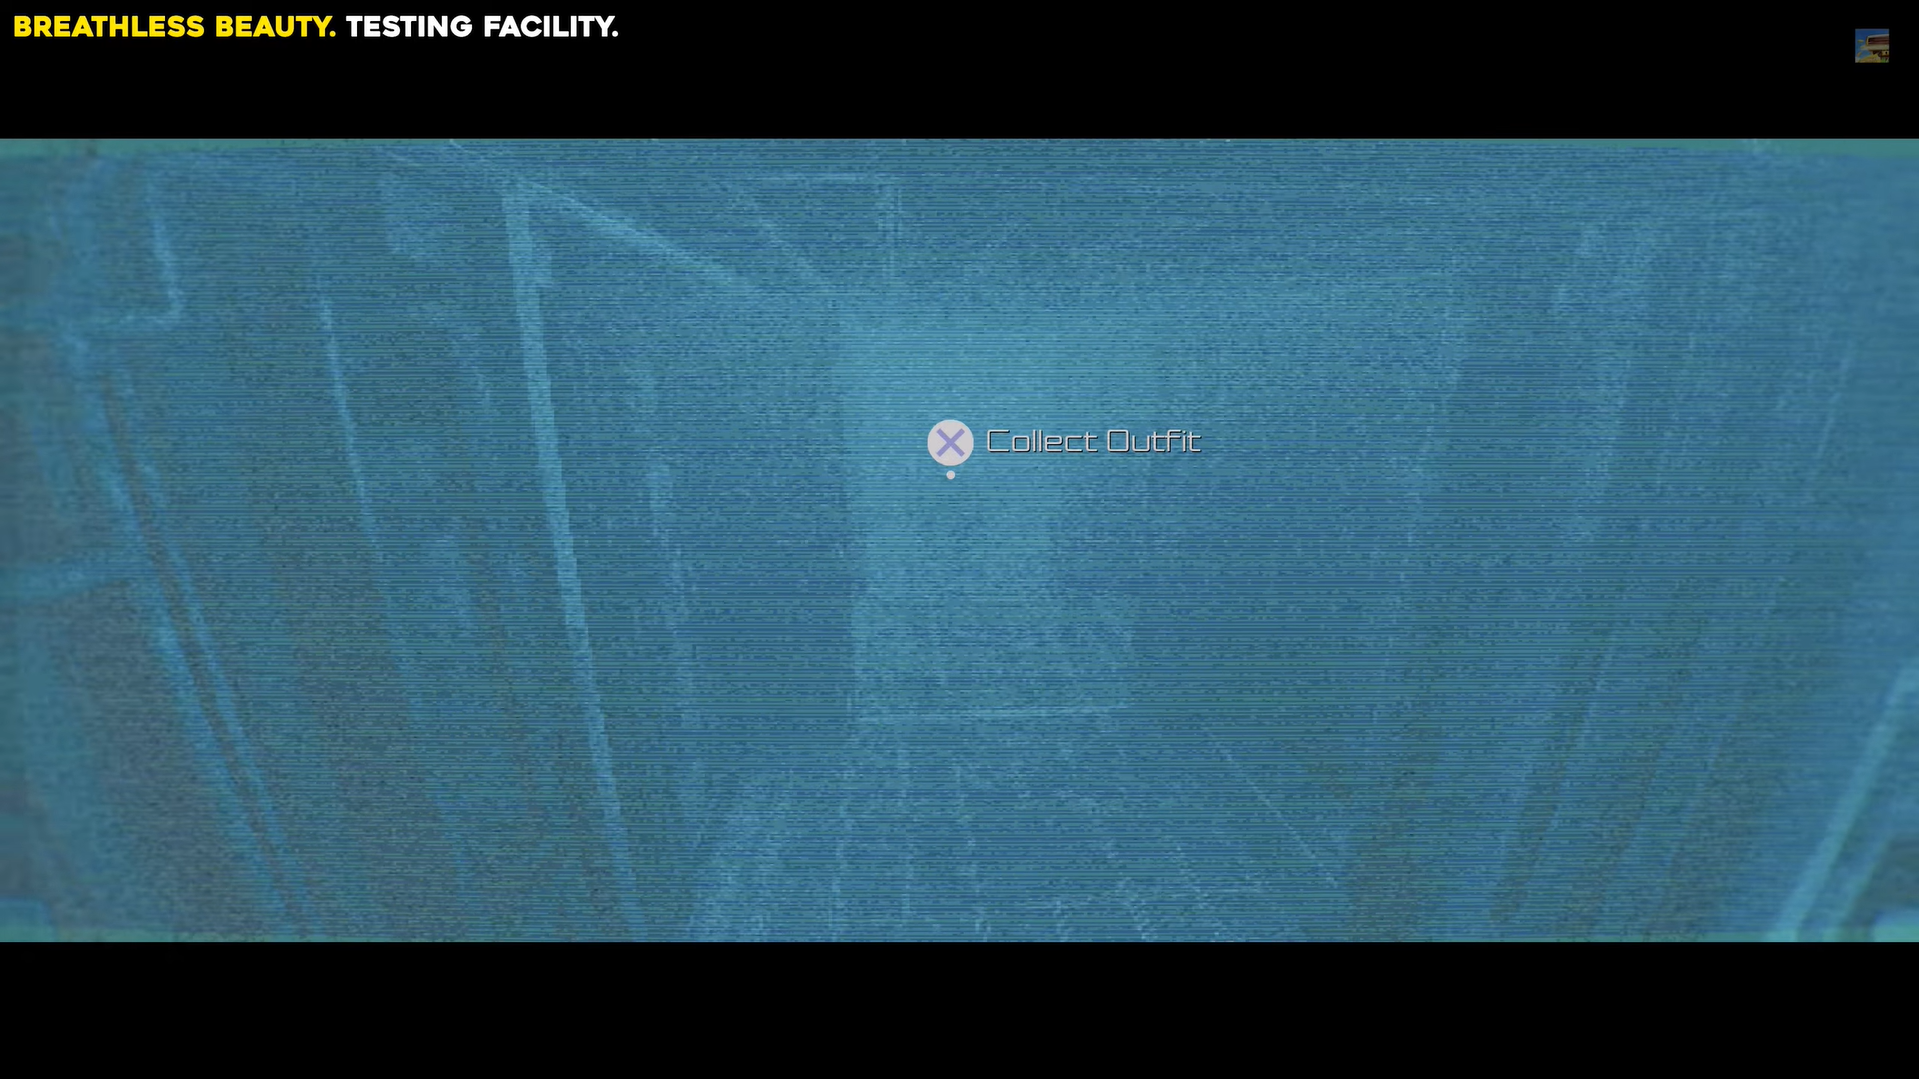
Breathless Beauty outfit
Enter the Emergency Monitoring Room in the Testing Facility and head to the southwest corner.
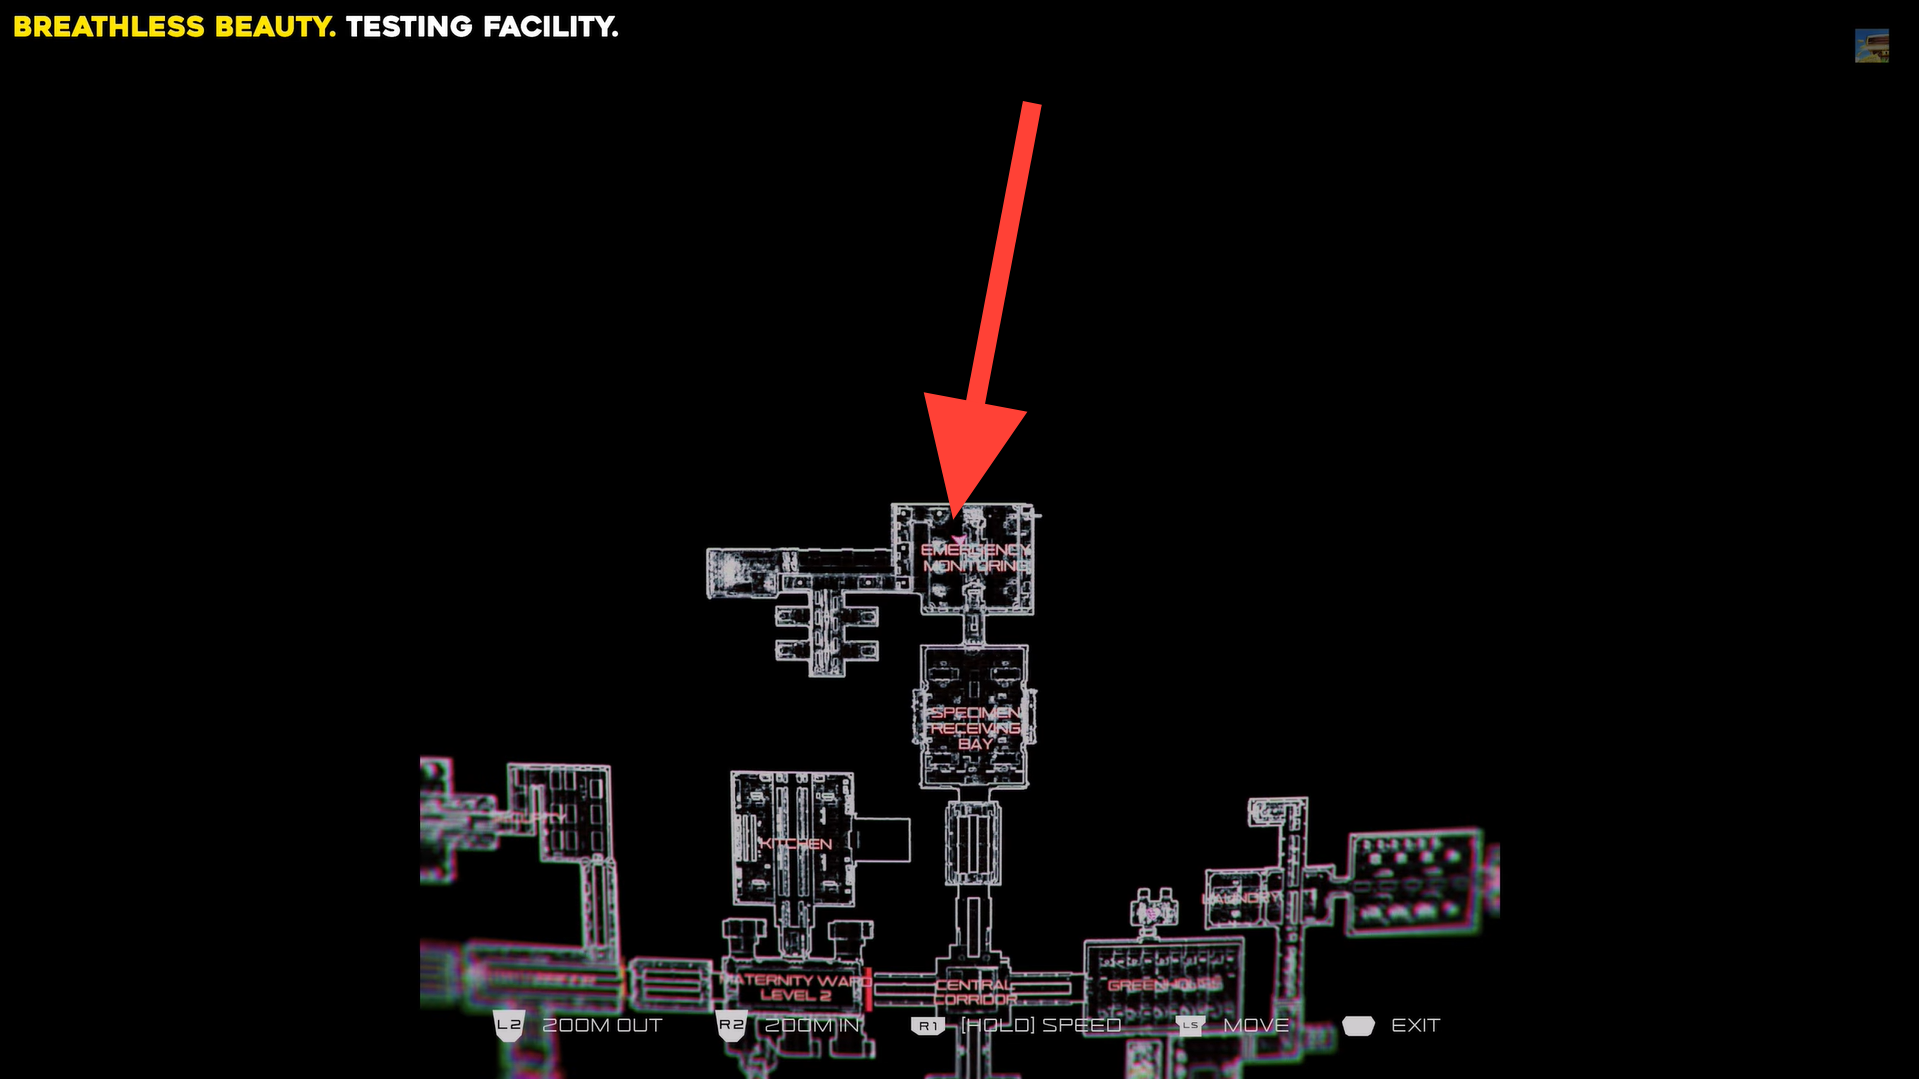
Shoot the white energy bulb on the wall, then exit via Specimen Receiving Bay into the Central Corridor and Lobby.
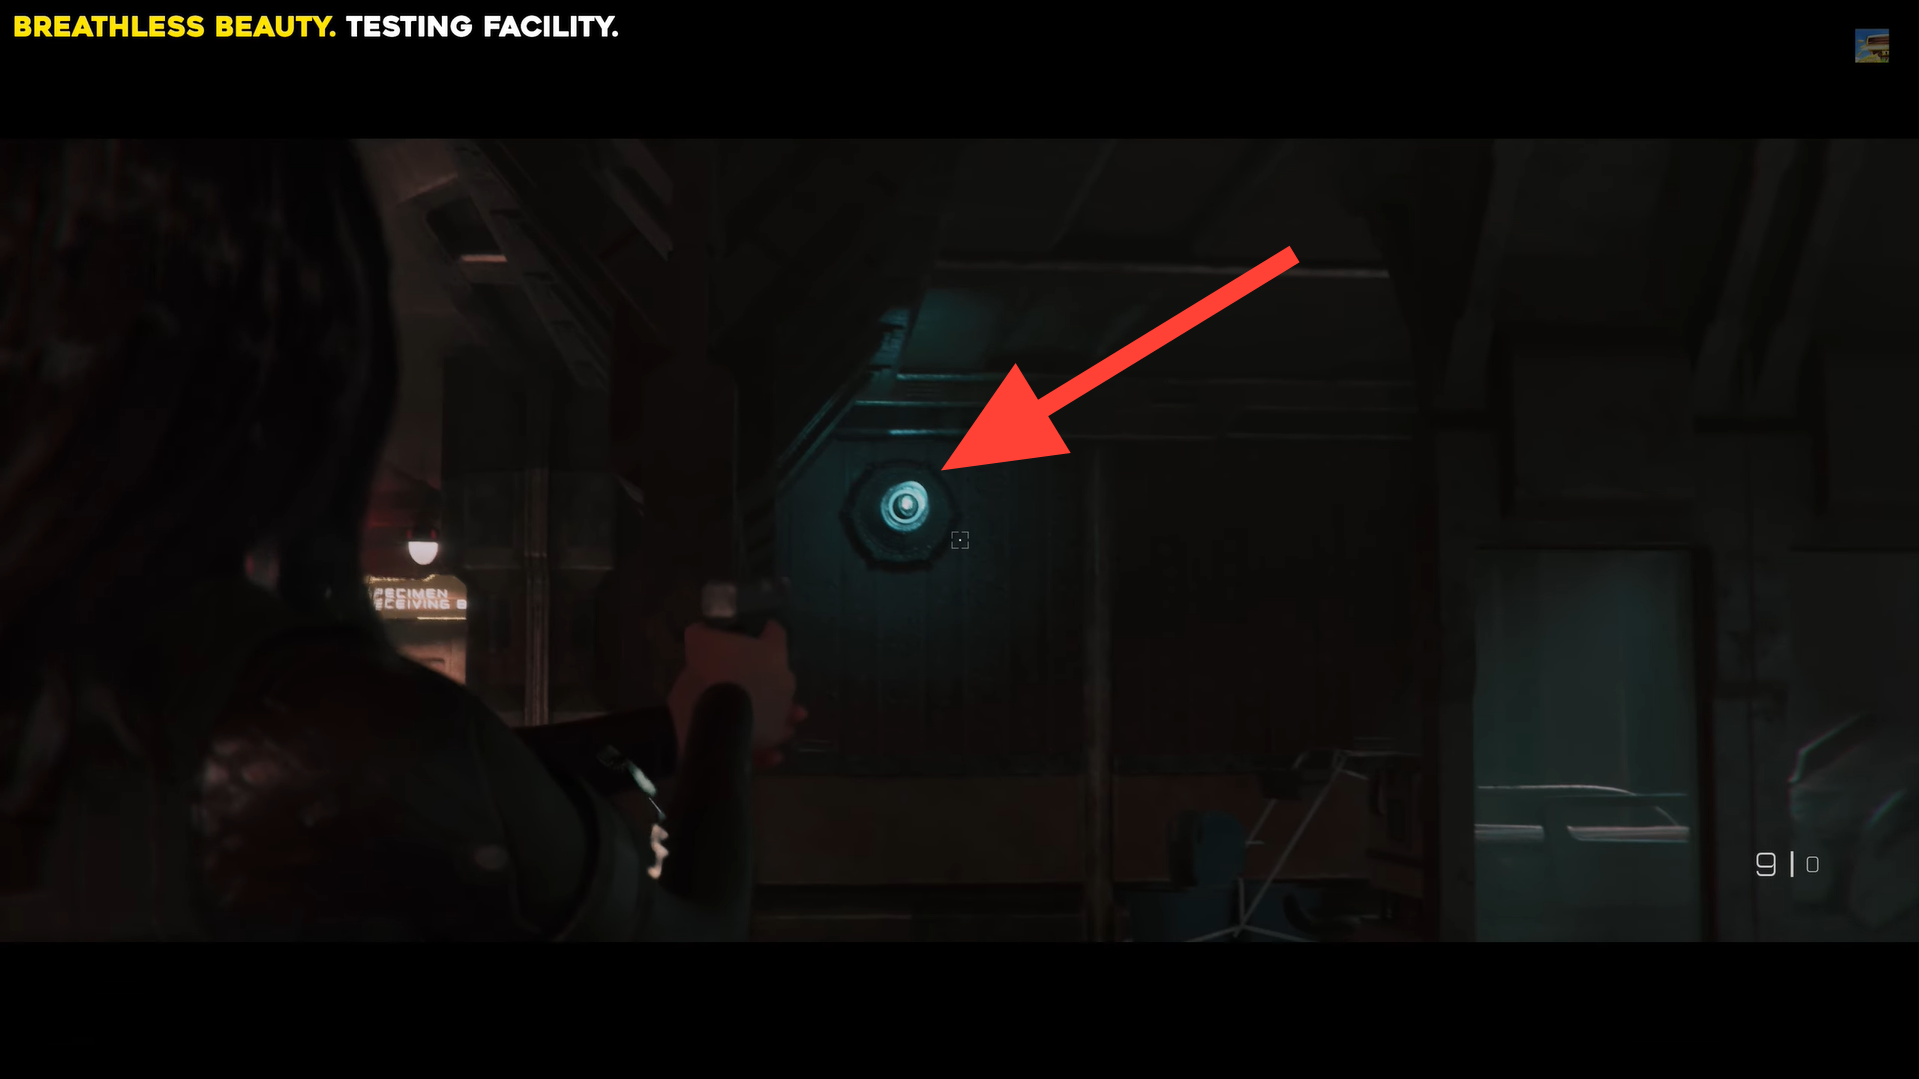
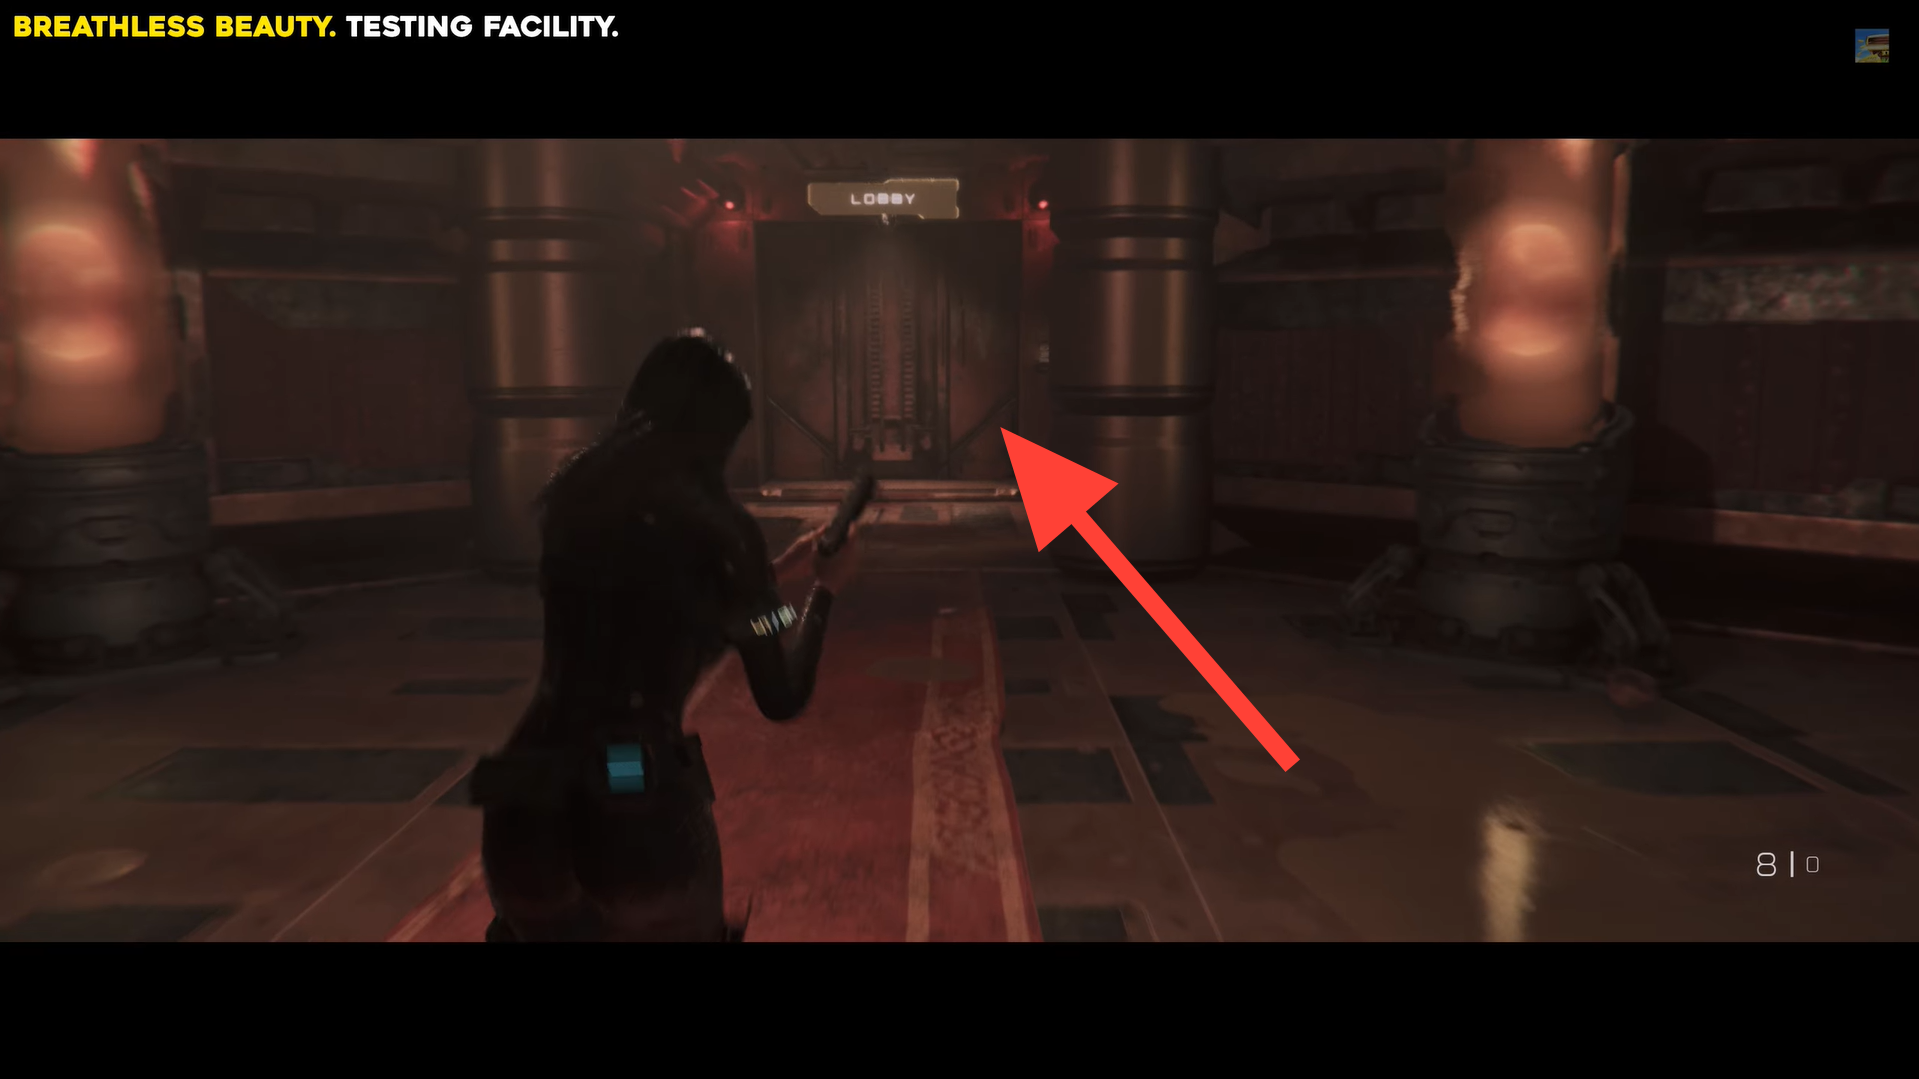
Shoot the white bulb, then exit into the Central Corridor and Lobby. Image credits: TeamKill Media / YouTube: 100% Guides
In the Lobby, move straight until the camera switches to a fixed angle, then turn right to find the Breathless Beauty outfit.
Dino Hunter outfit
Head to the Laundry Room in the Testing Facility and move to the west section with the laundry machines.
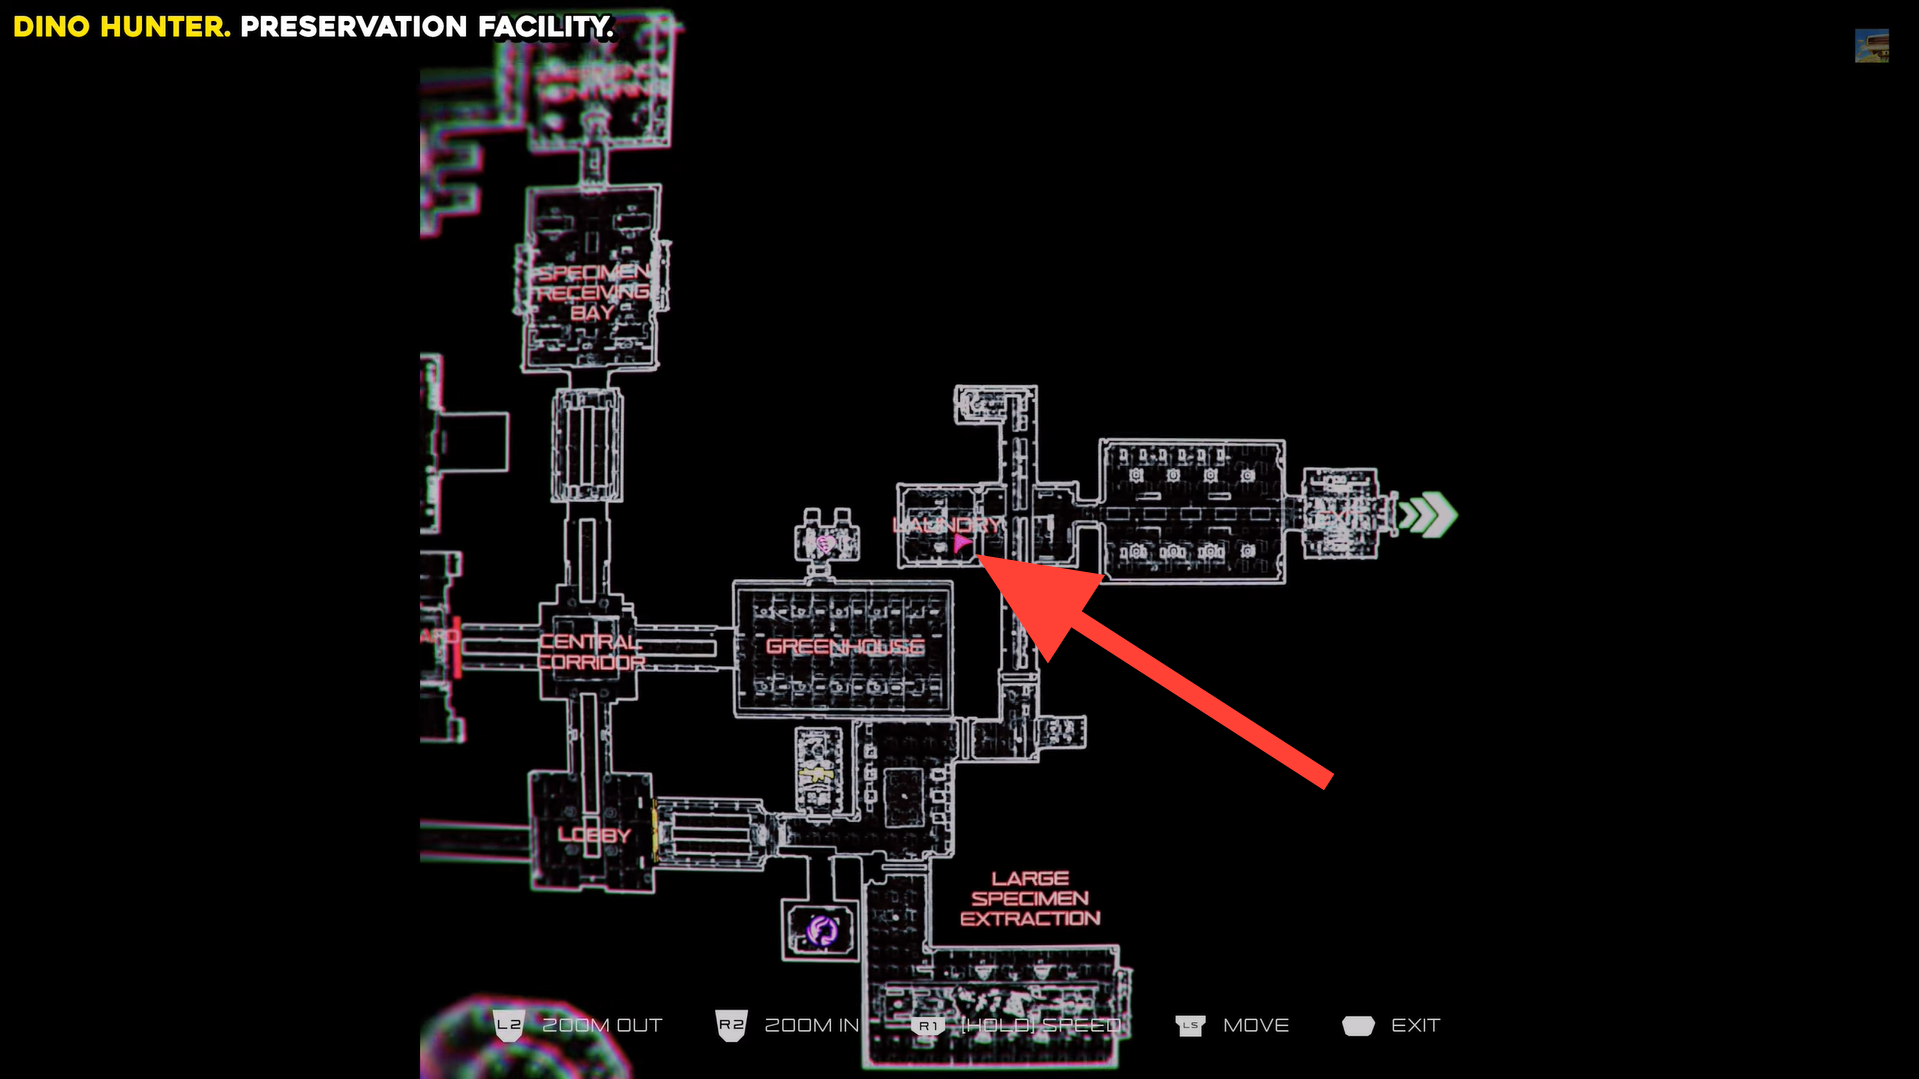
Shoot the white bulb on the wall to the right of the machines, then enter the door beside it.
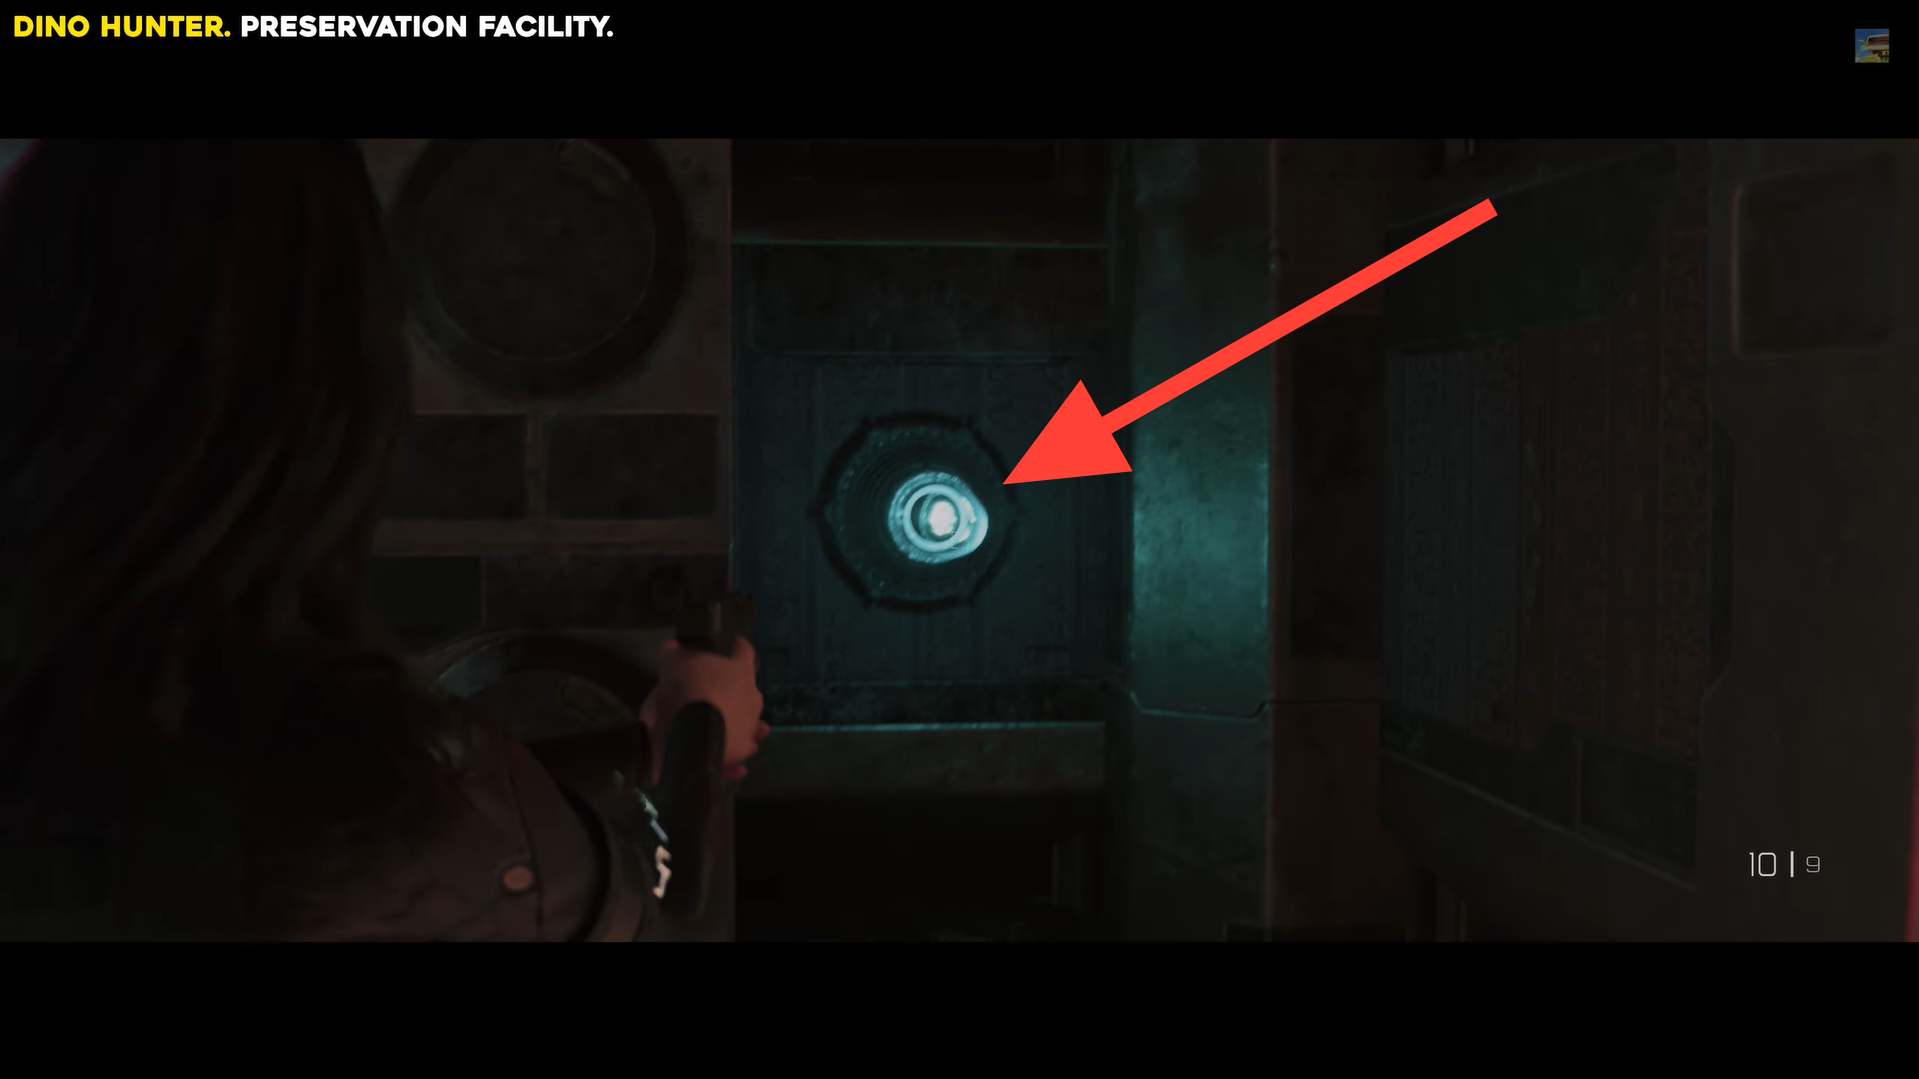
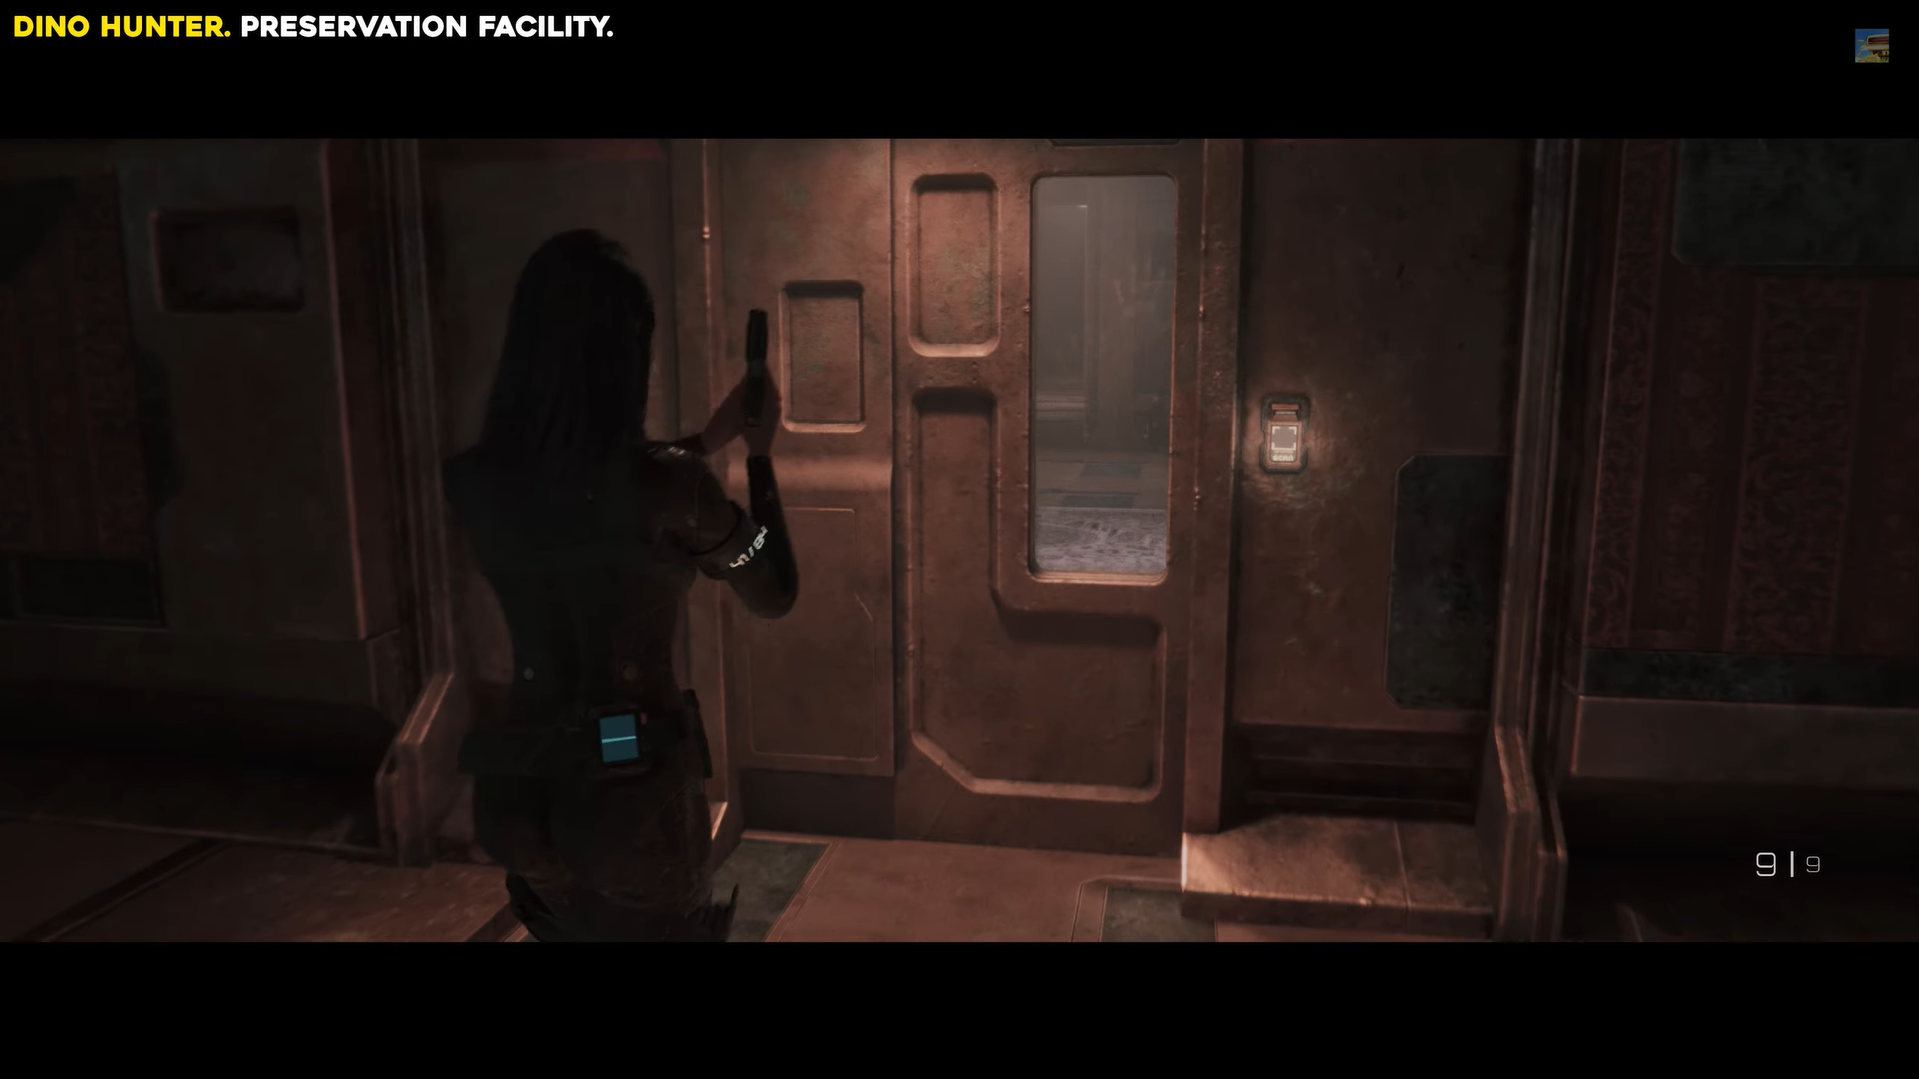
Shoot the white bulb, then enter the door beside it. Image credits: TeamKill Media / YouTube: 100% Guides
Go through the next right-side door, continue straight, then turn left into the fixed-camera area, the Dino Hunter outfit is at the end.
Go through the next right-side door, continue straight, then turn left into the fixed-camera area, the Dino Hunter outfit is at the end. Image credits: TeamKill Media / YouTube: 100% Guides
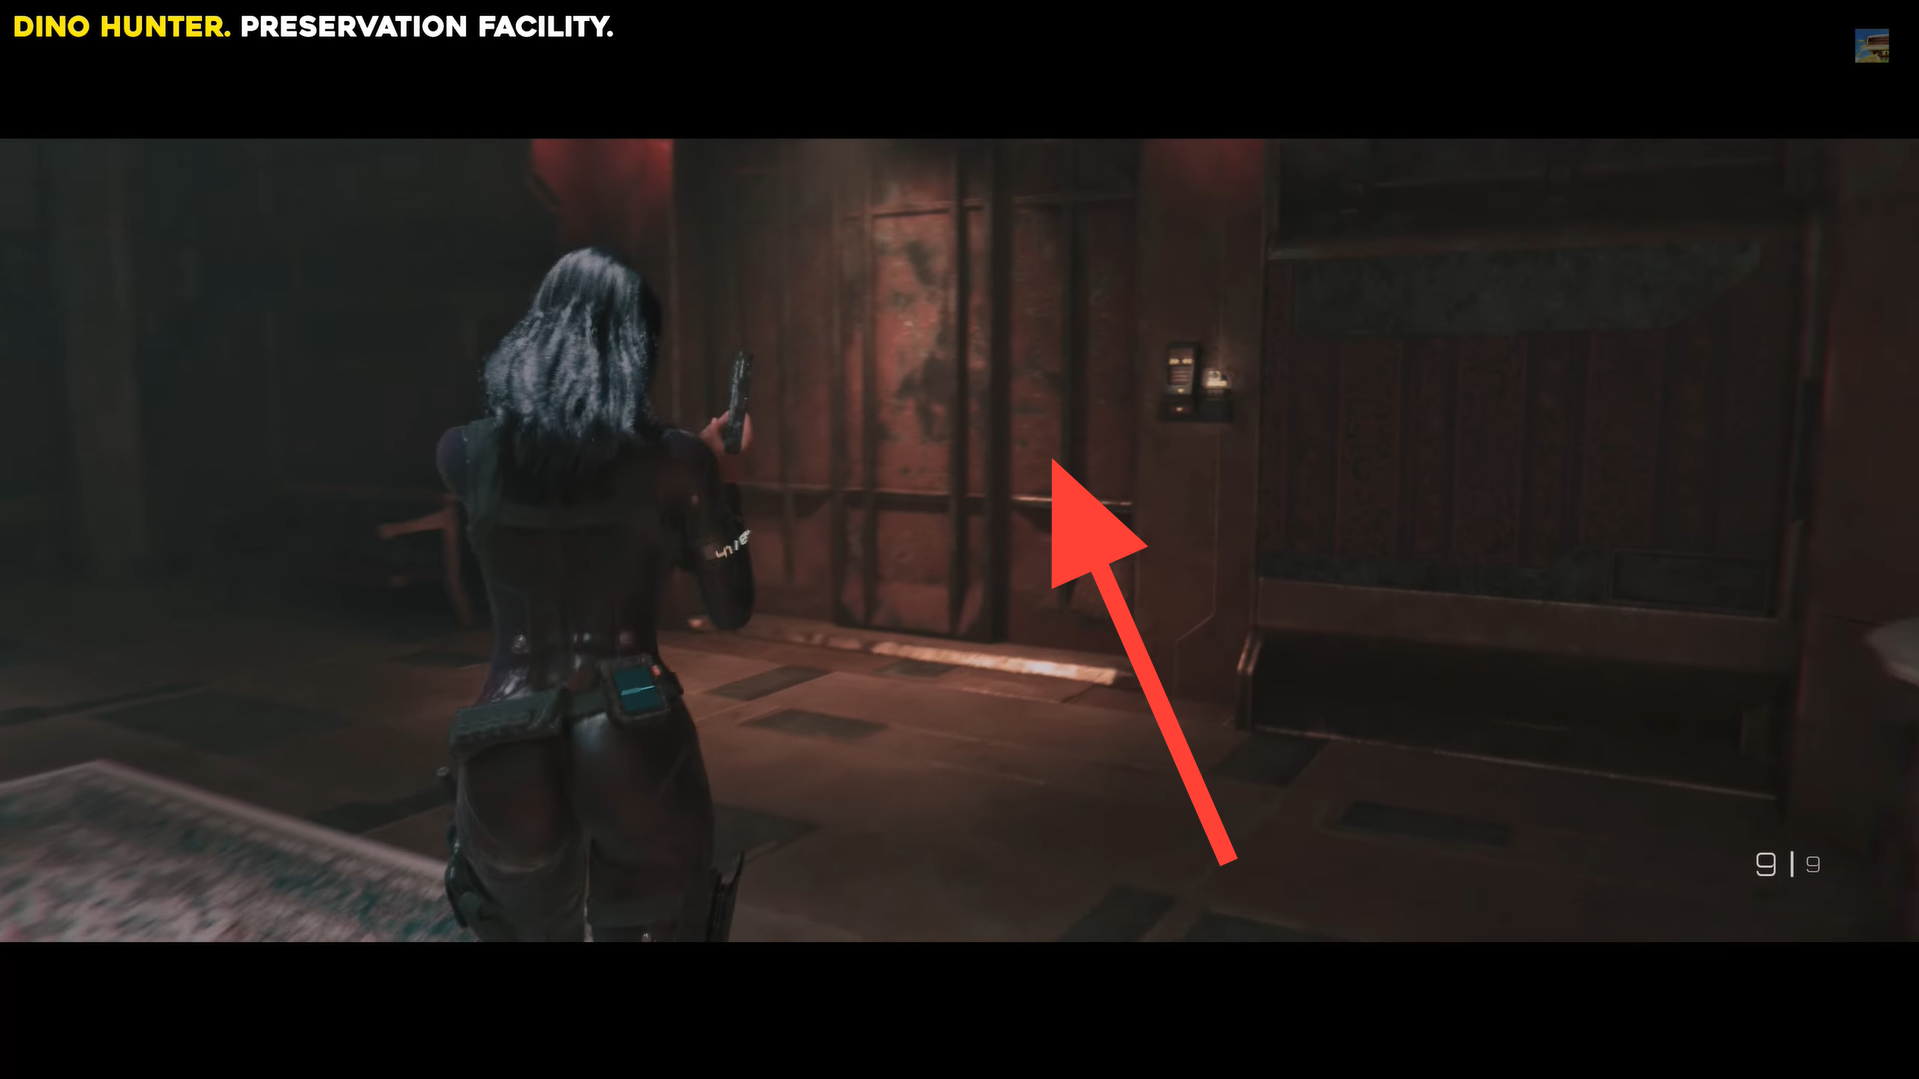
Lady in the Red Dress outfit
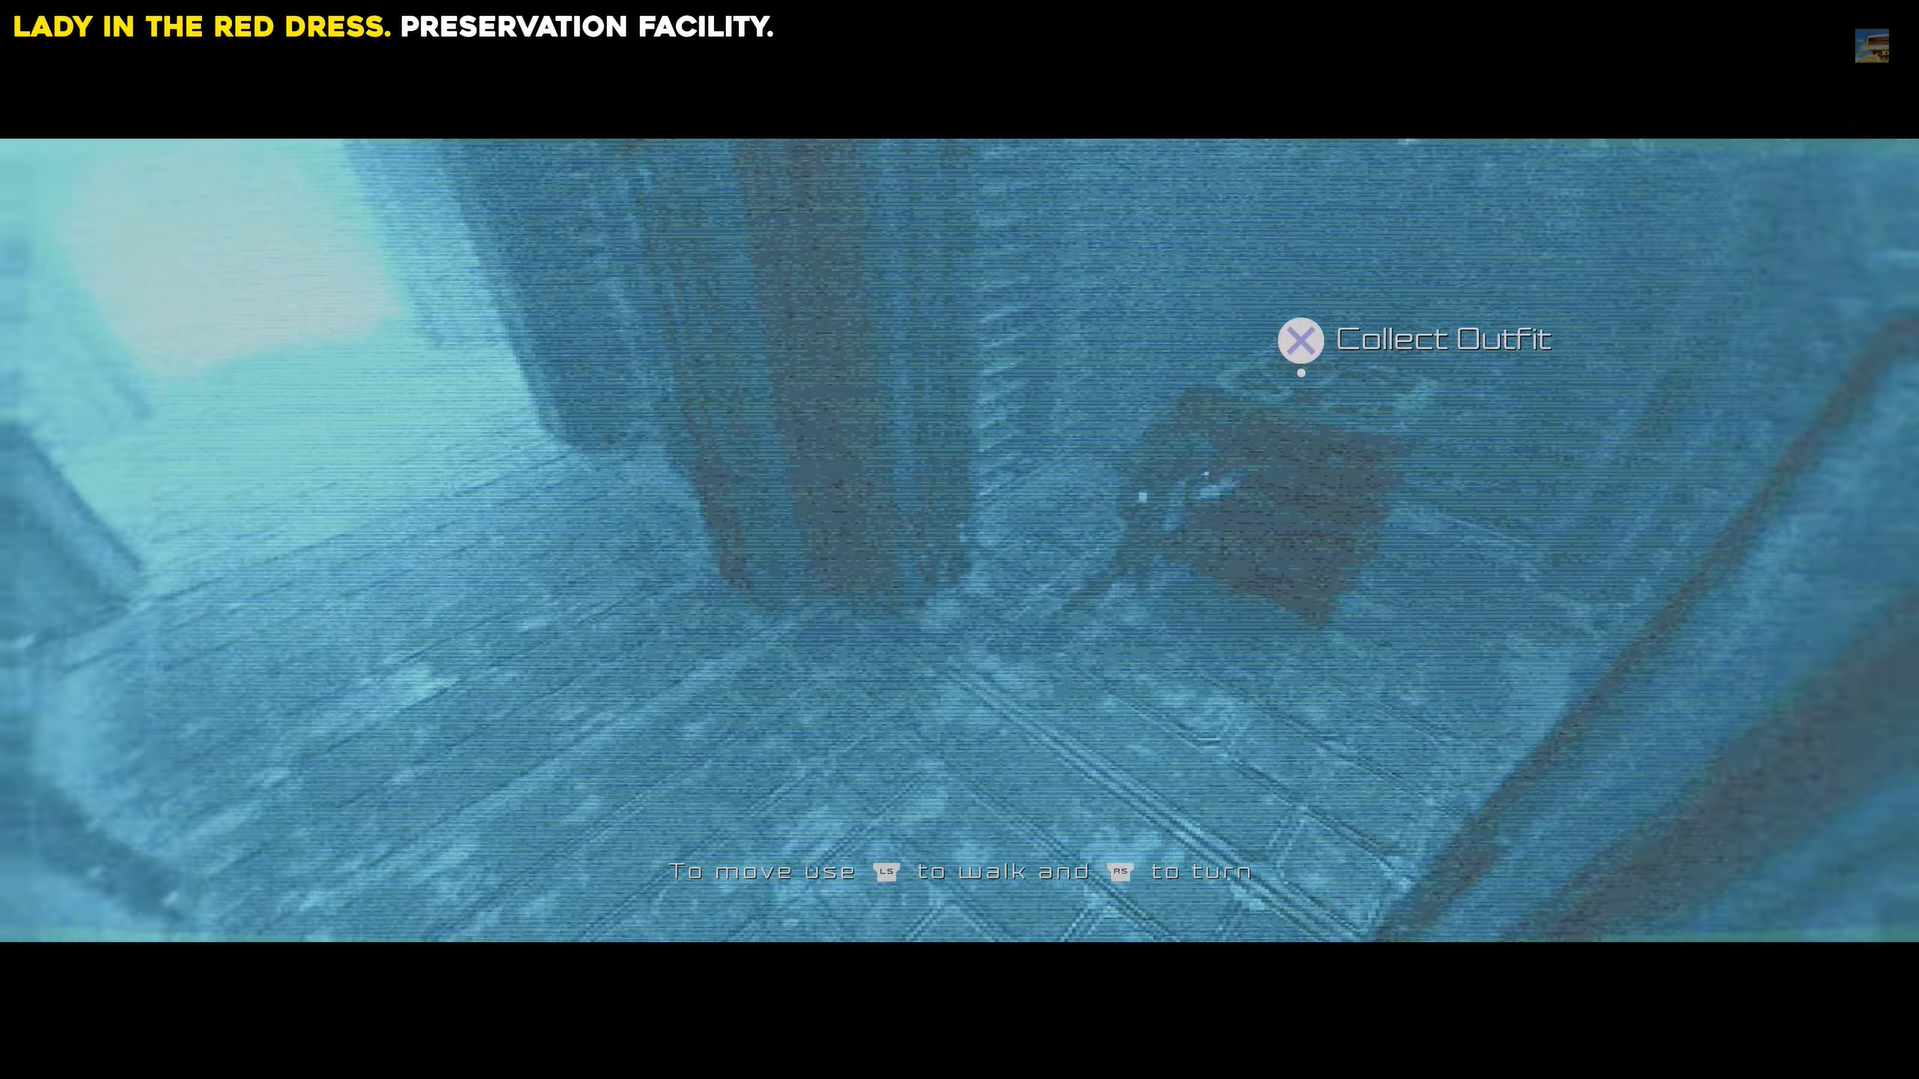
In the Plasma Heating Control Room of the Preservation Facility, find the Raptor Exhibit door, shoot the white bulb on its top-left, then enter and follow the path to the Lobby.
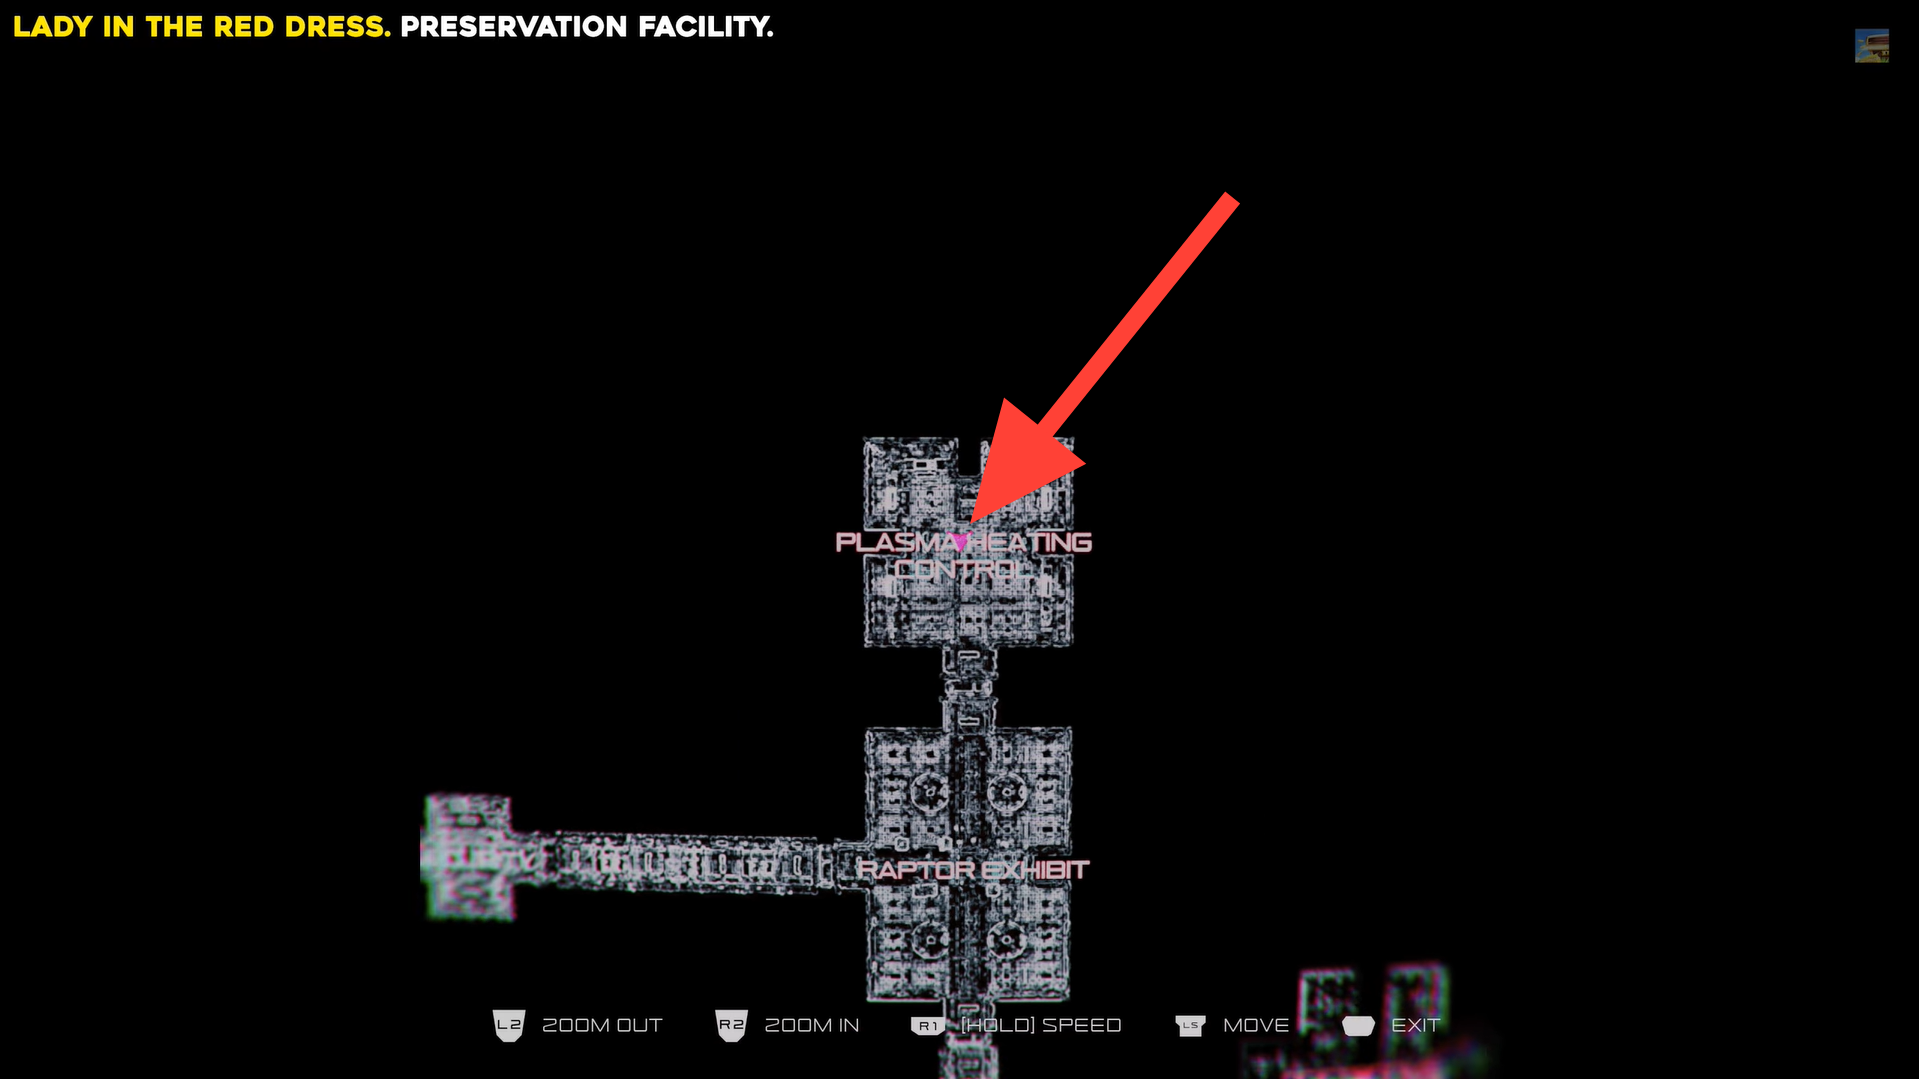
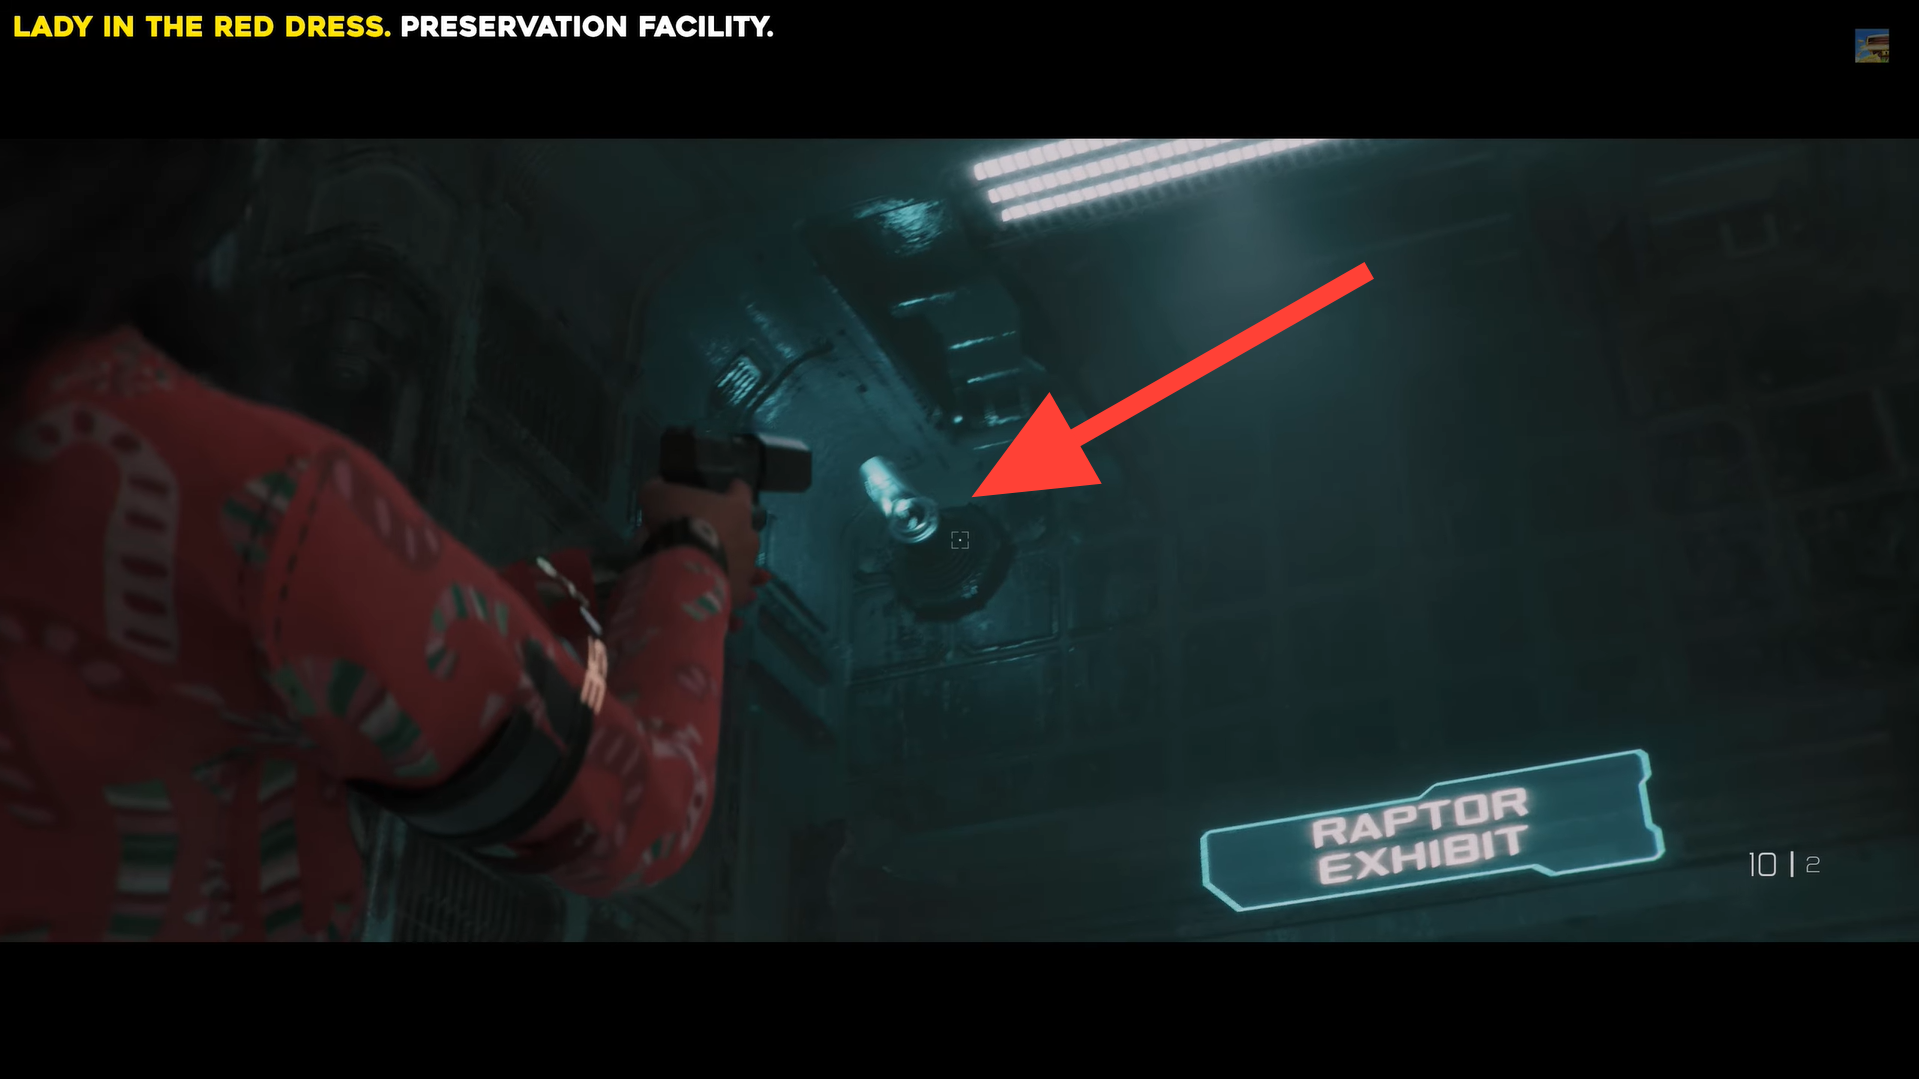
Lady in the Red Dress outfit location. Image credits: TeamKill Media / YouTube: 100% Guides
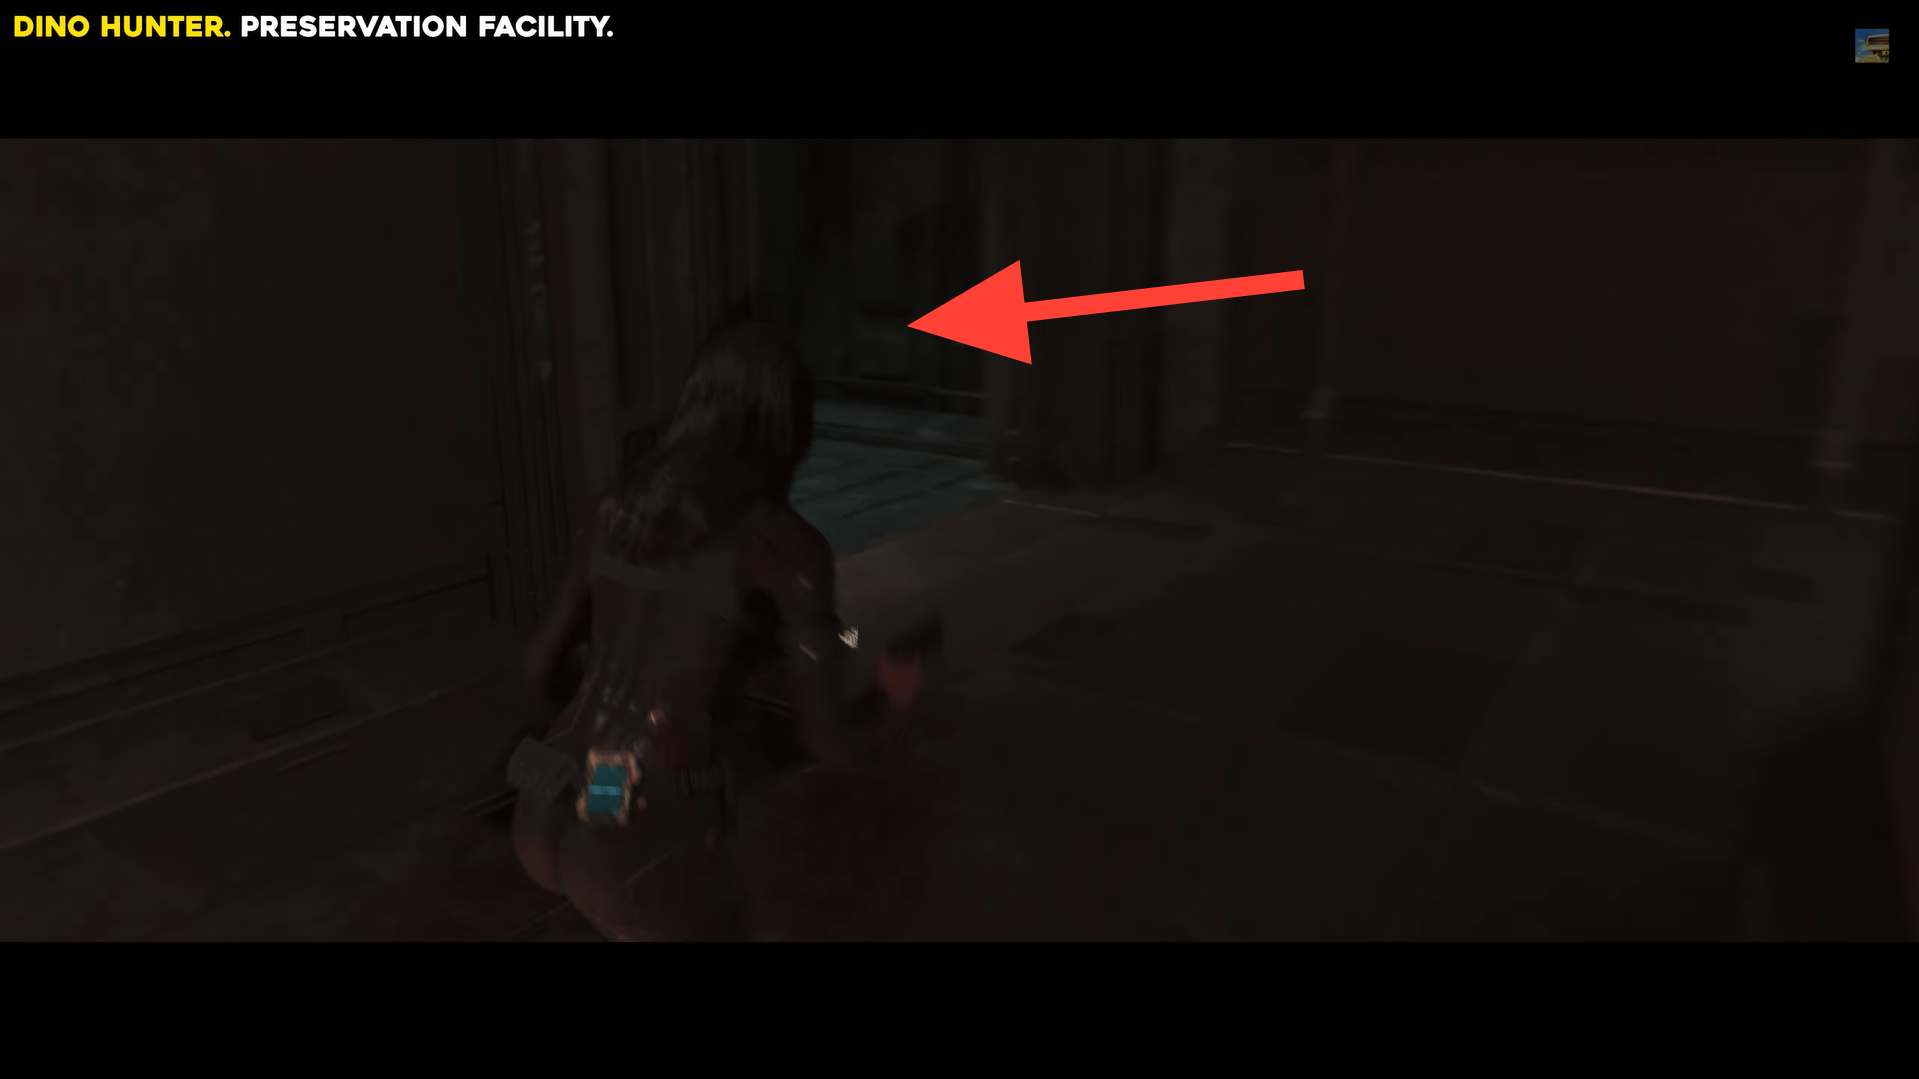
In the Lobby, go straight and turn left into the Preservation Hub, then follow the linear route to the Incubator.
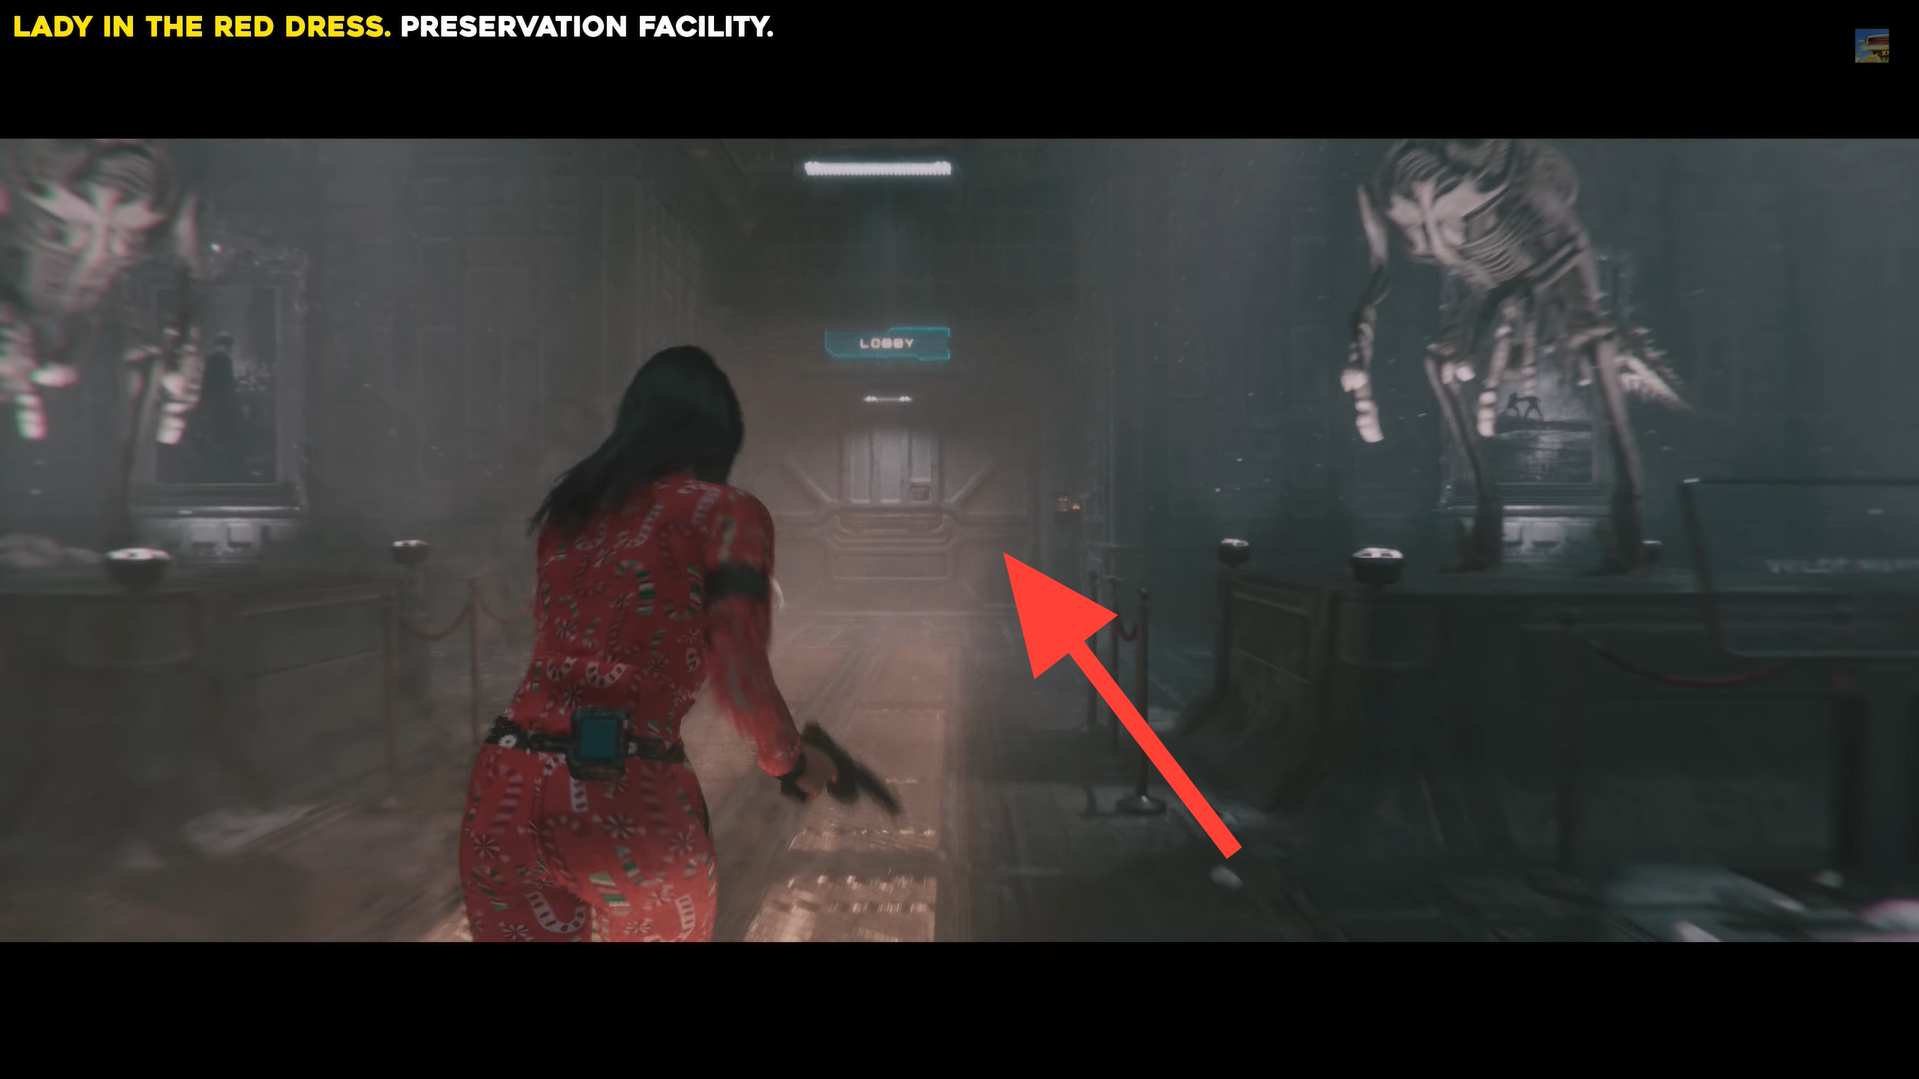
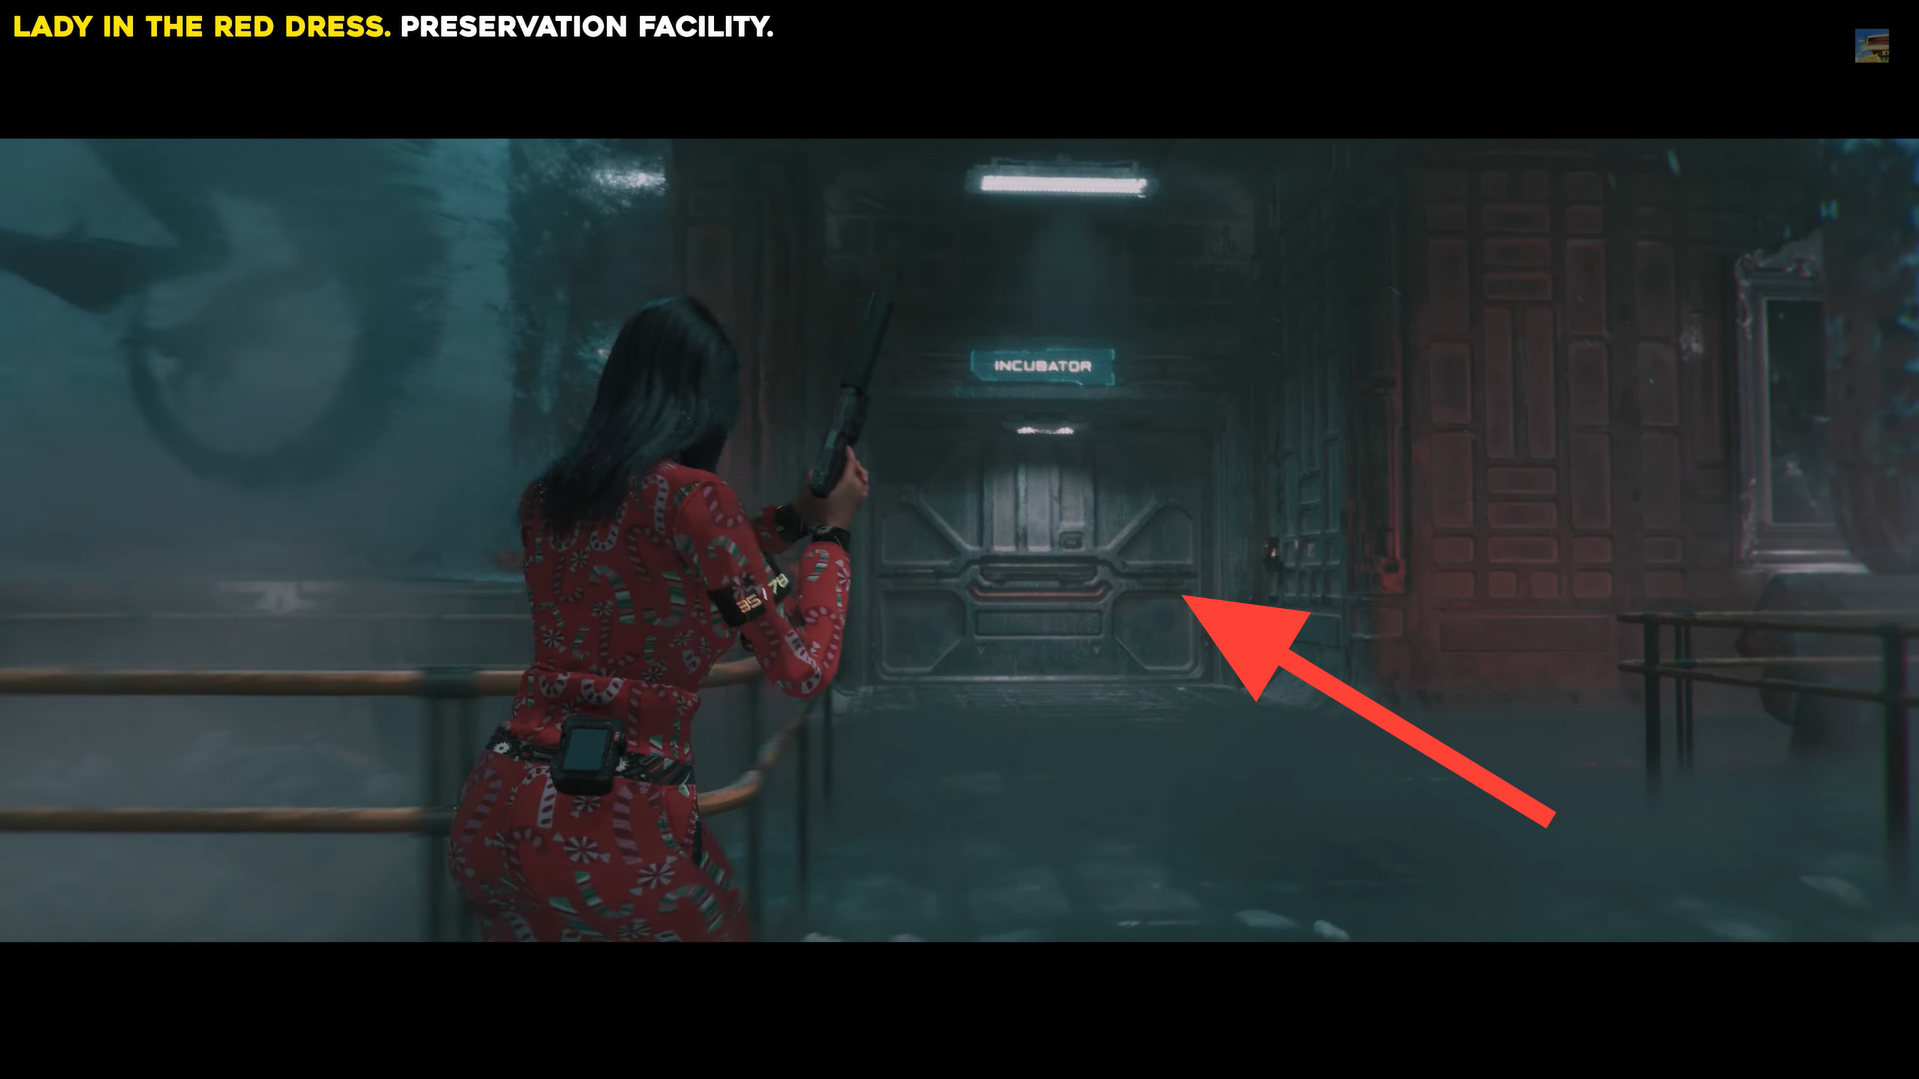
In the Lobby, go straight, turn left into the Preservation Hub, and follow to the Incubator. Image credits: TeamKill Media / YouTube: 100% Guides
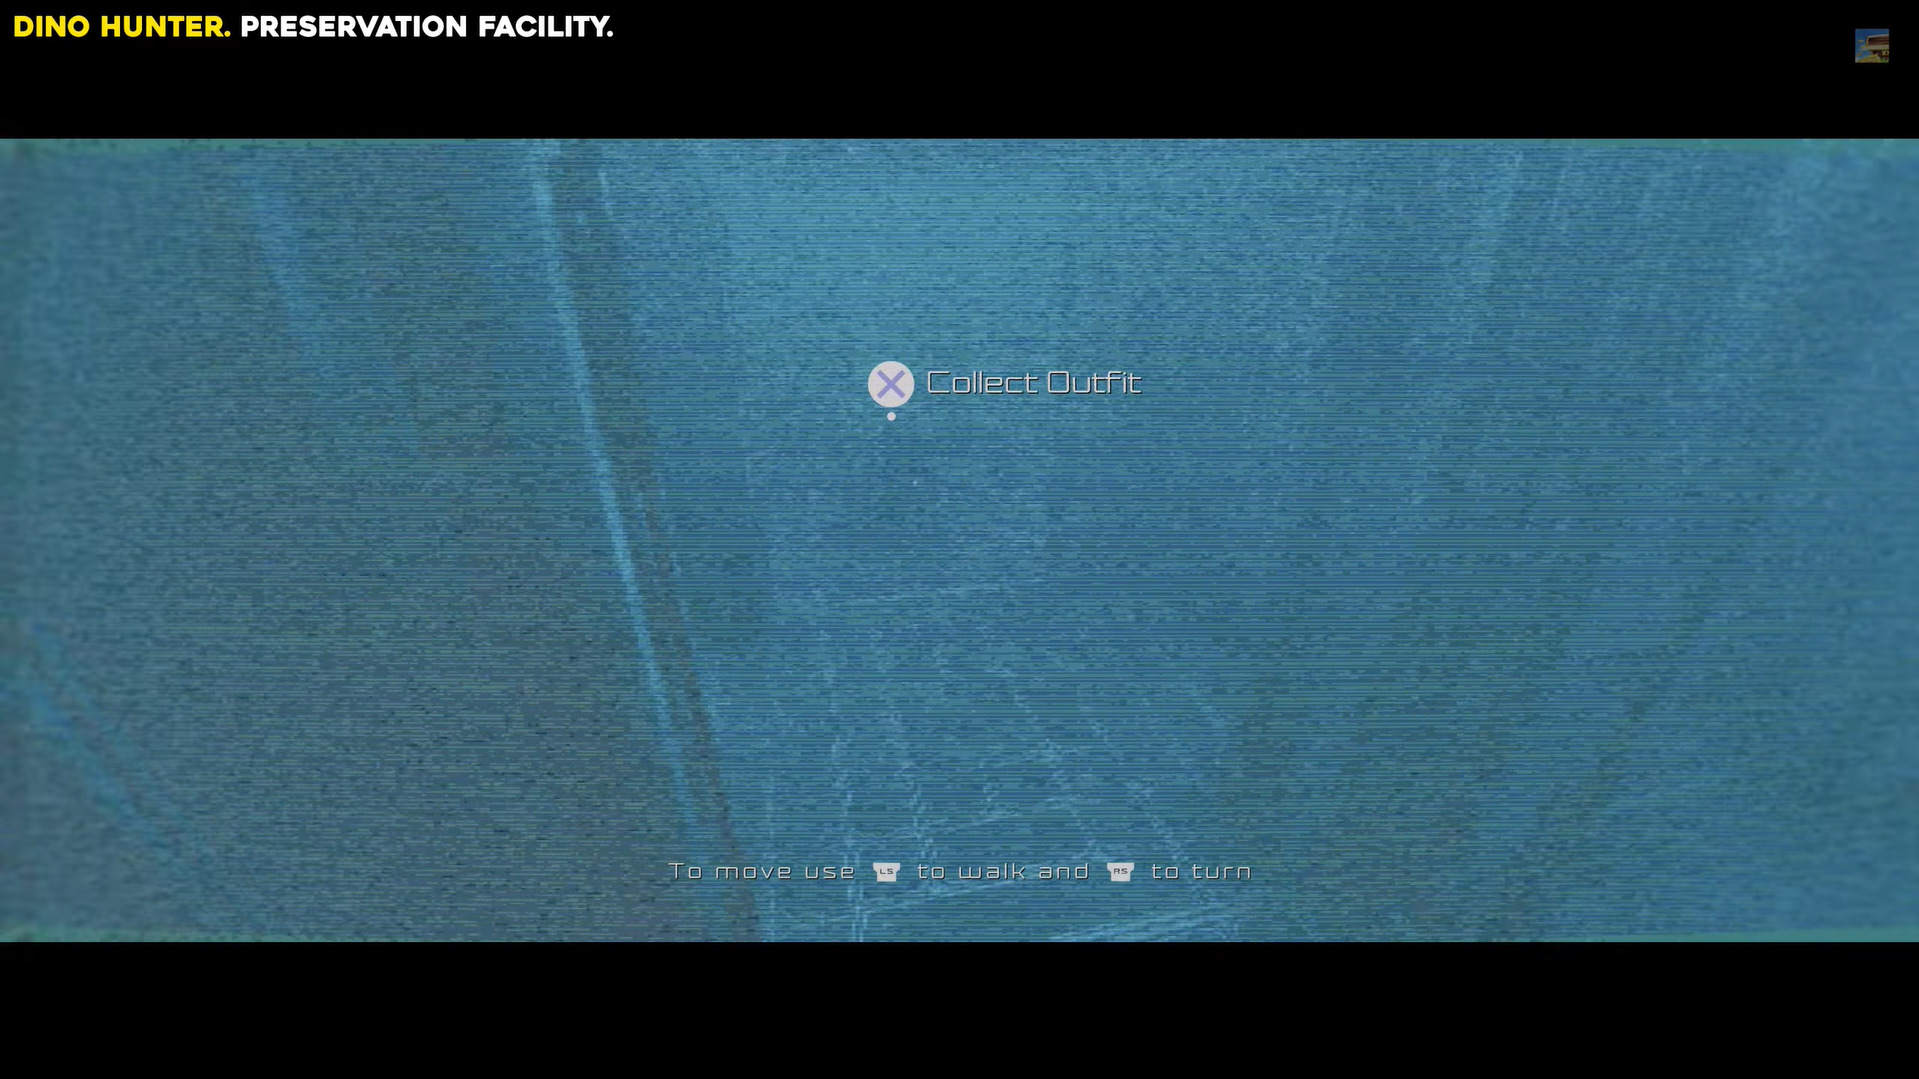
Inside the Incubator, turn left, then left again into the fixed-camera section—the red dress is on the left side.
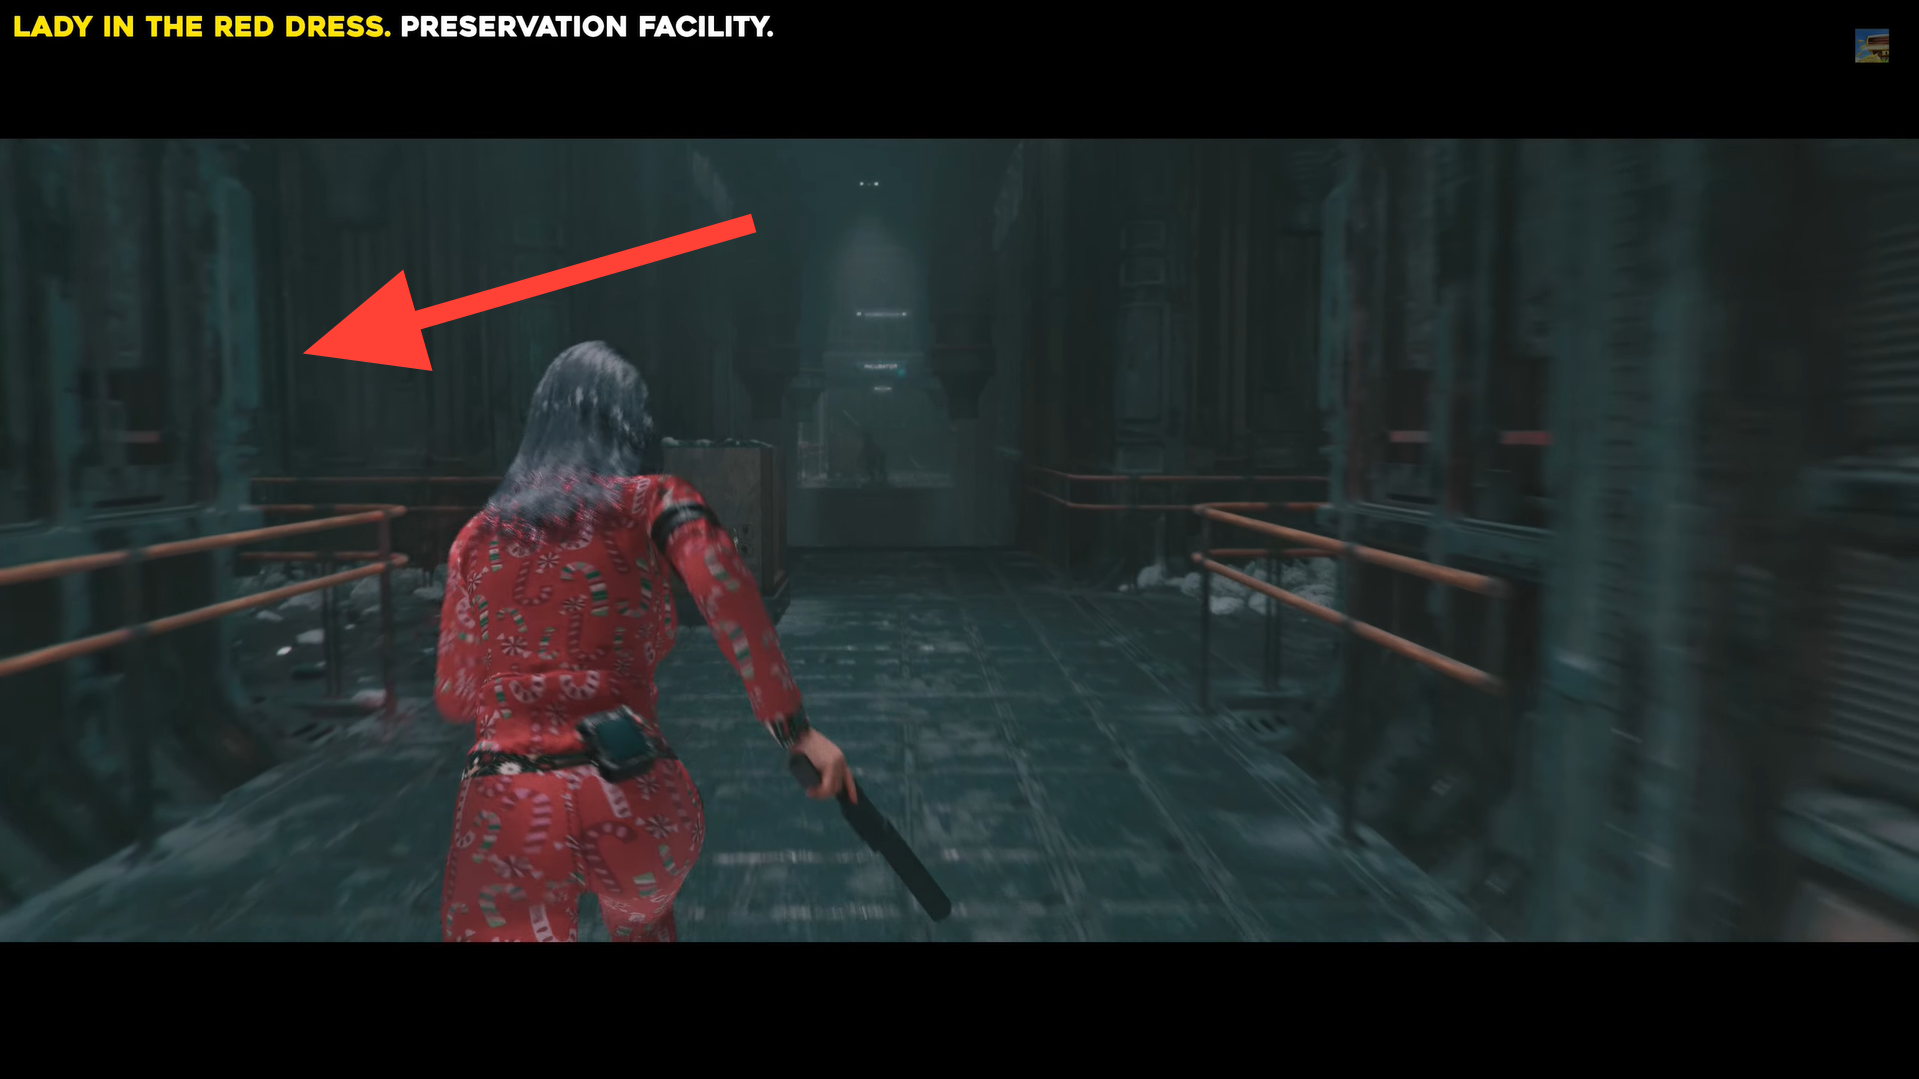
In the Incubator, turn left twice into the fixed-camera section. Image credits: TeamKill Media / YouTube: 100% Guides
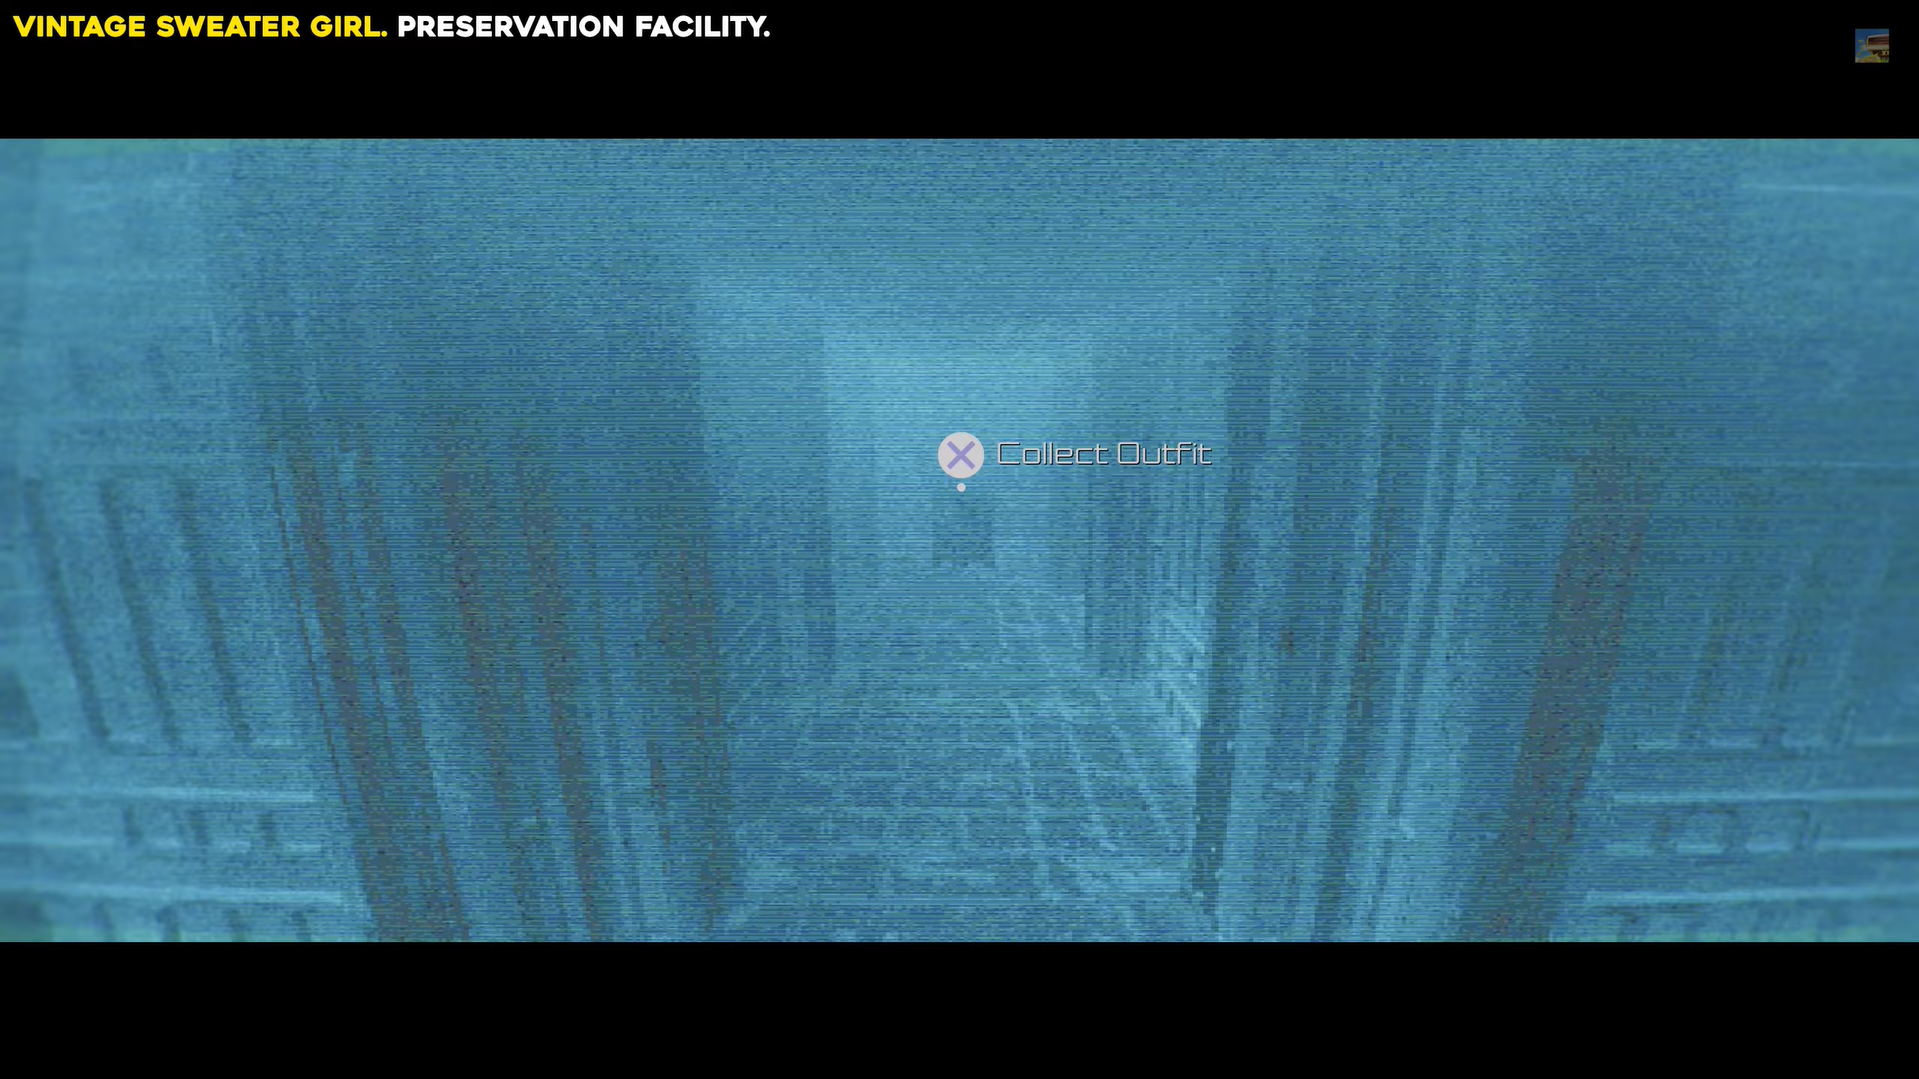
Vintage Sweater Girl outfit
In the Meat Storage Room of the Preservation Facility, head to the southwest corner, shoot the white bulb on the wall, then exit into Meat Curing.
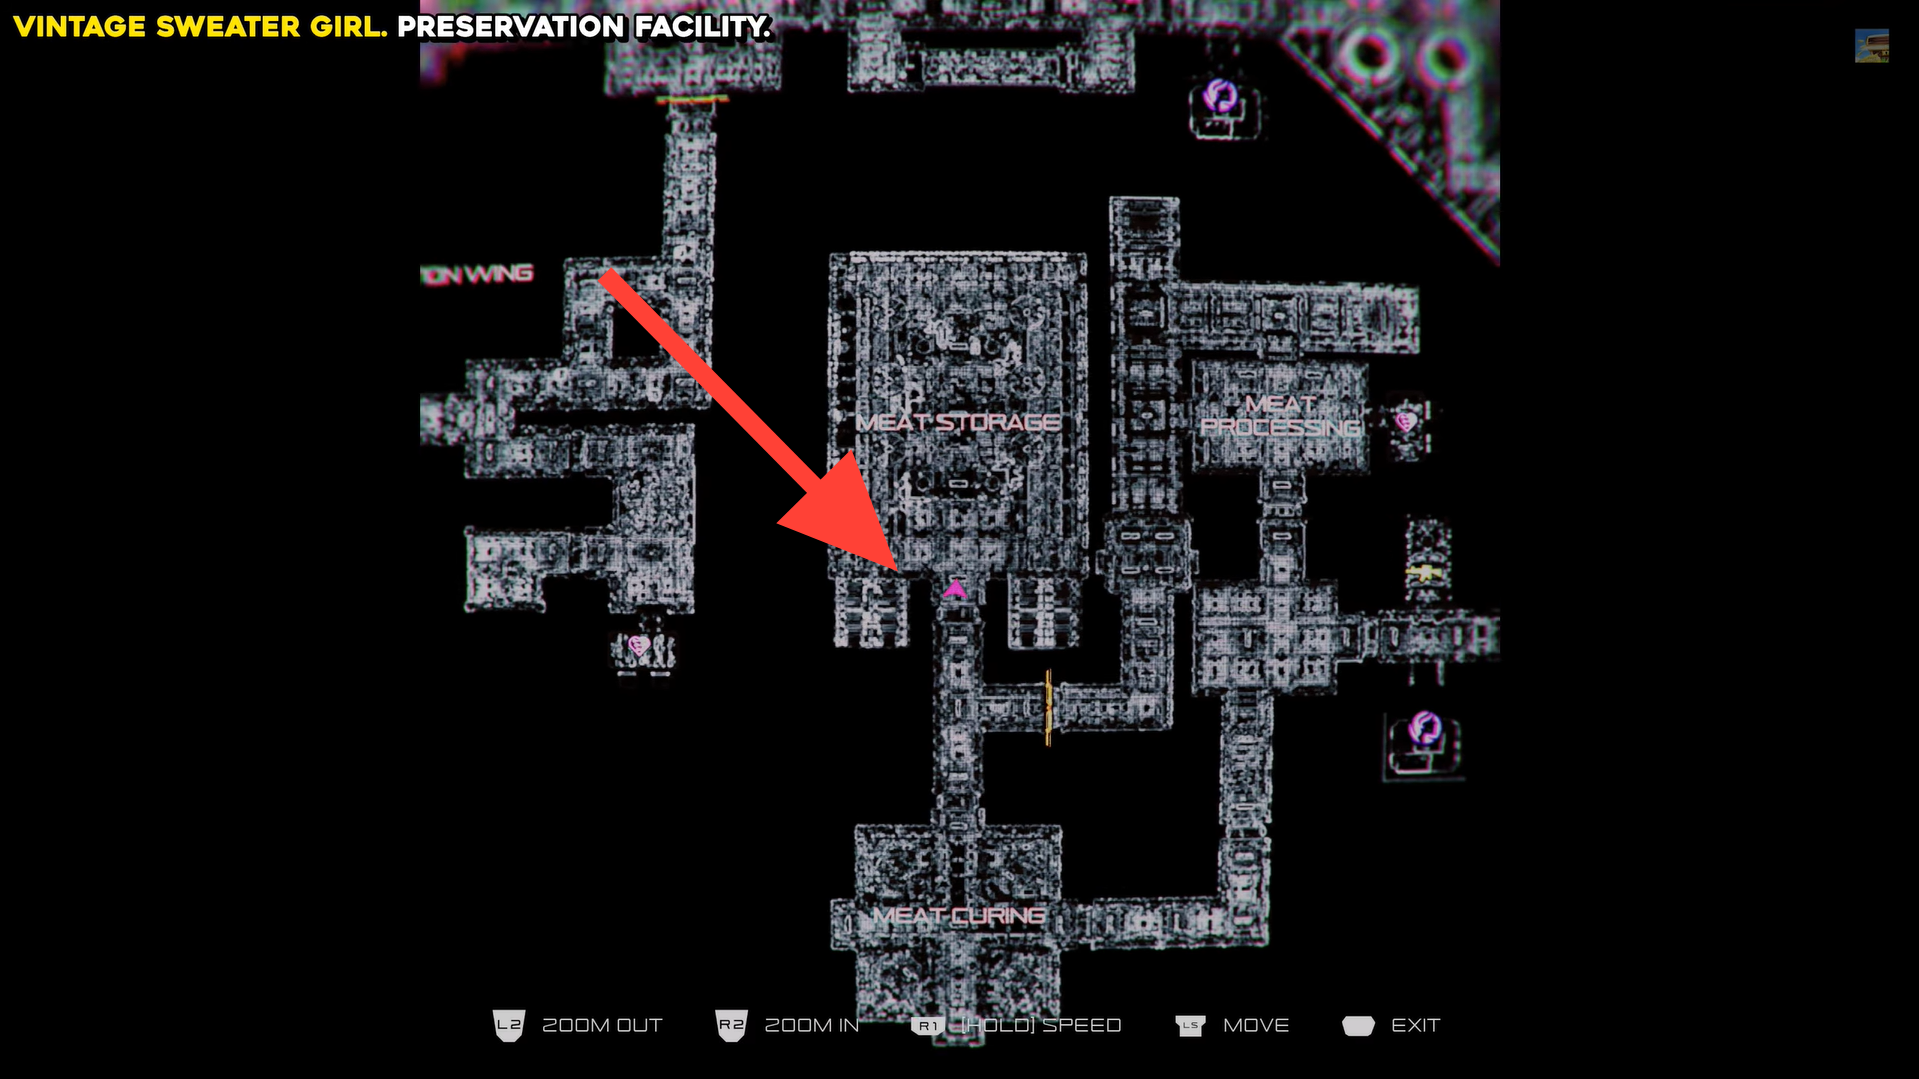
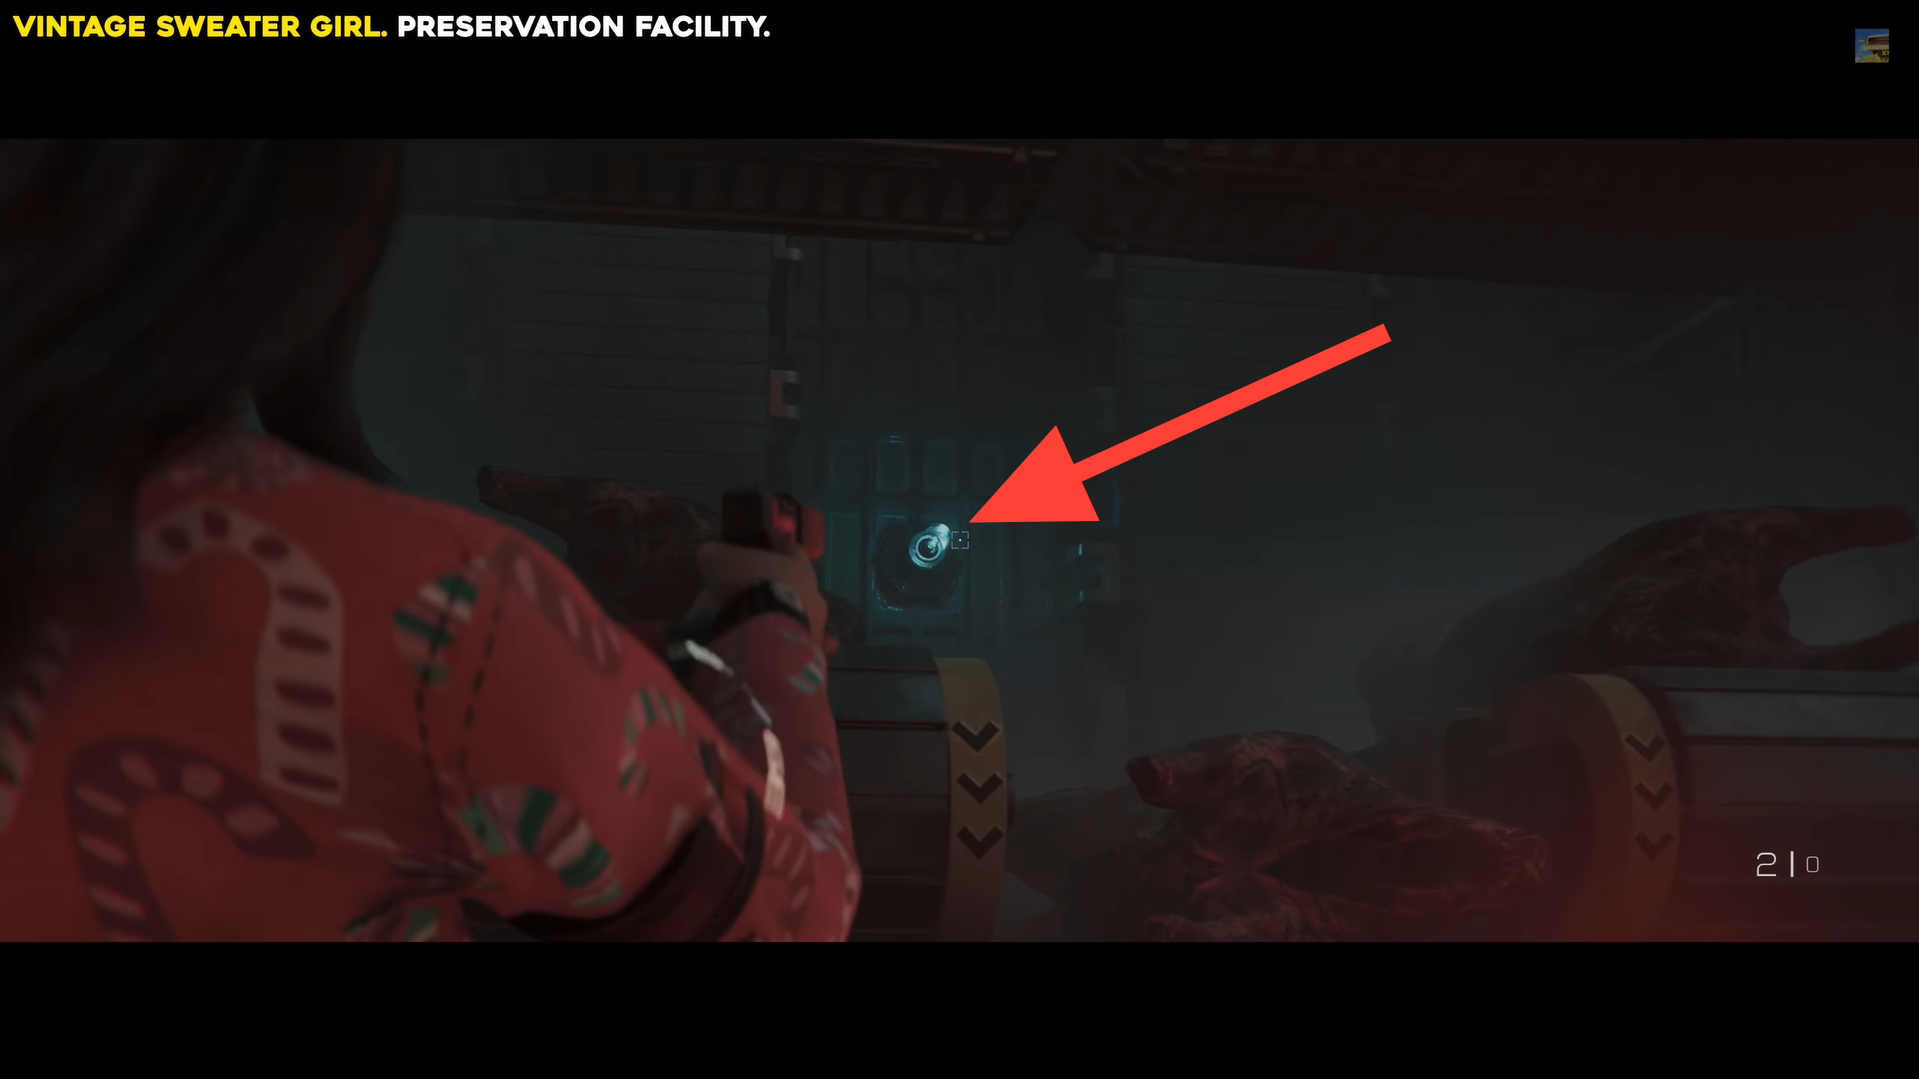
Vintage Sweater Girl outfit location. Image credits: TeamKill Media / YouTube: 100% Guides
In Meat Curing, walk forward and turn left into Meat Processing, then follow the straight path to the fixed-camera area to grab the outfit.
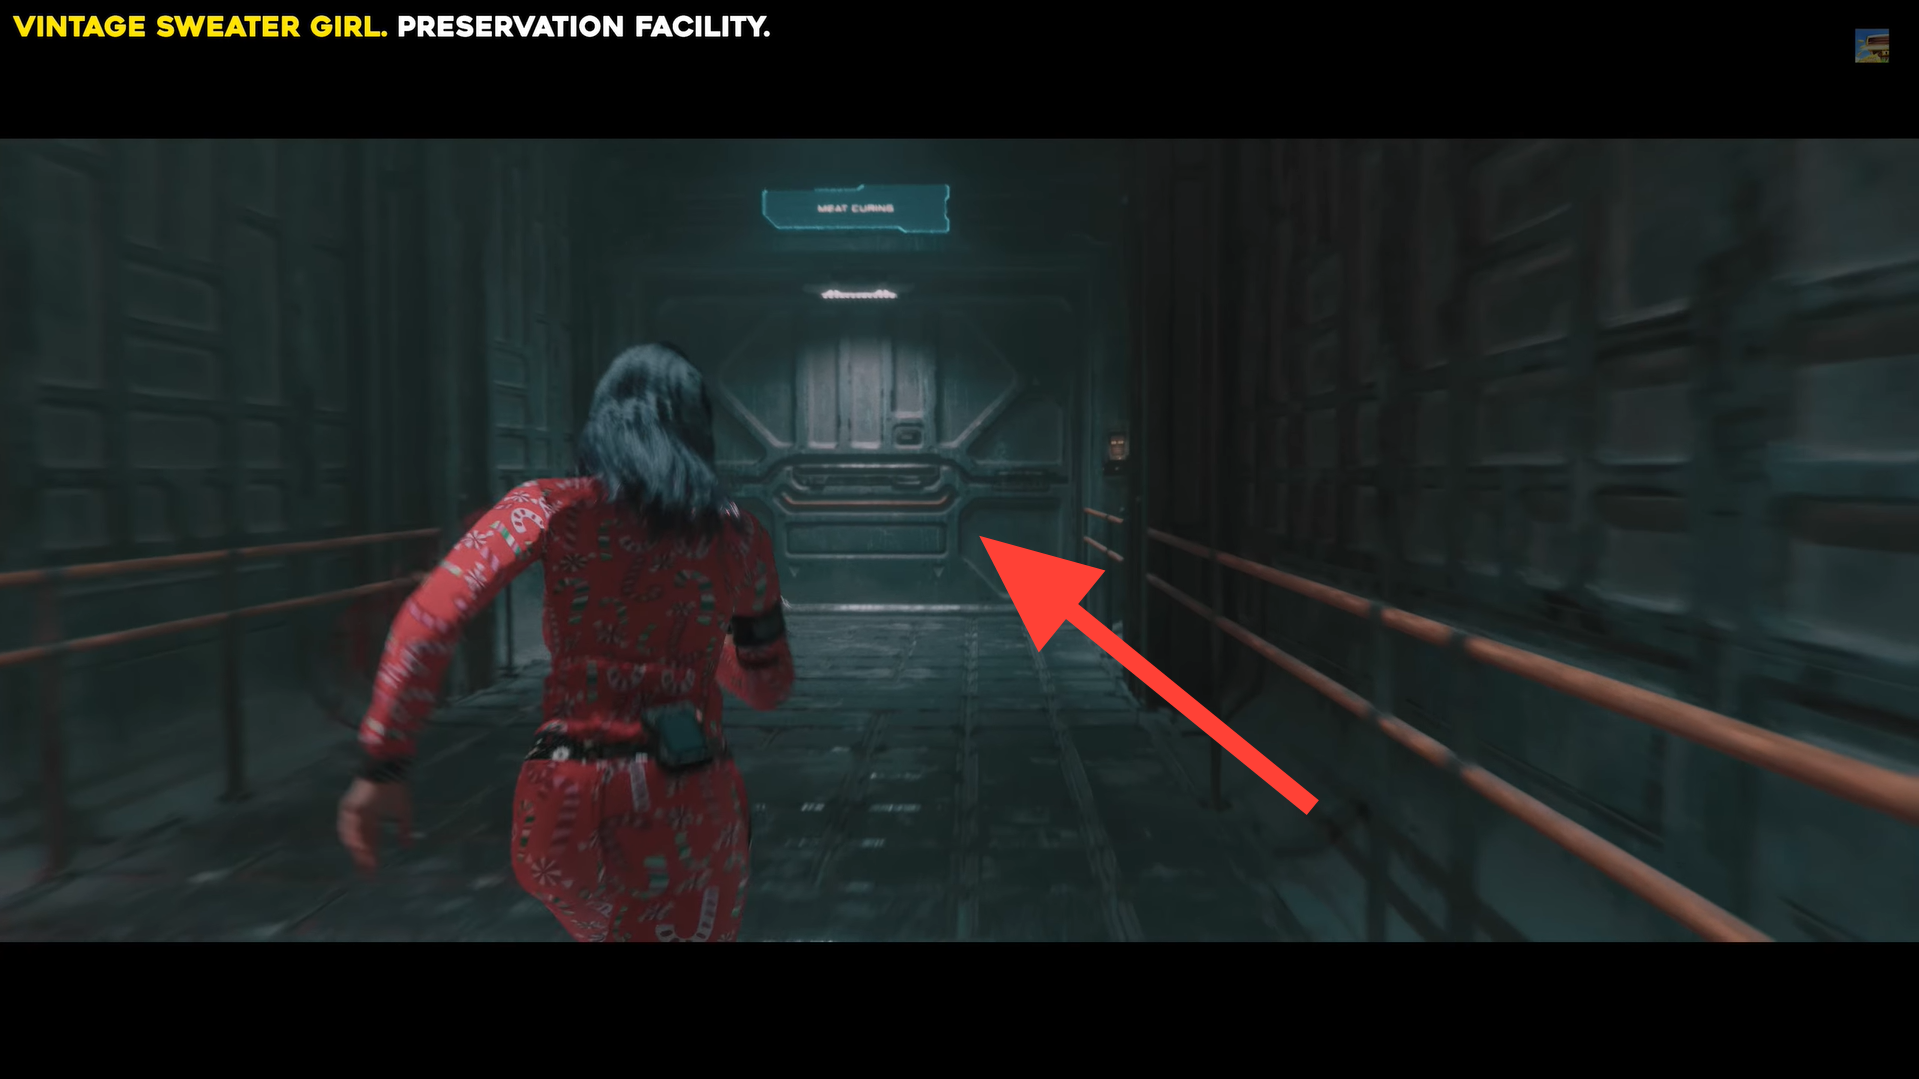
In Meat Curing, go left into Meat Processing and follow to the fixed-camera area. Image credits: TeamKill Media / YouTube: 100% Guides
Ba Donka Donk outfit
In the Thermal Regulation Wing of the Preservation Facility, move east of the Incubator Temp Control room, shoot the white bulb on the door’s top-left, then go through the door beneath the broken light.
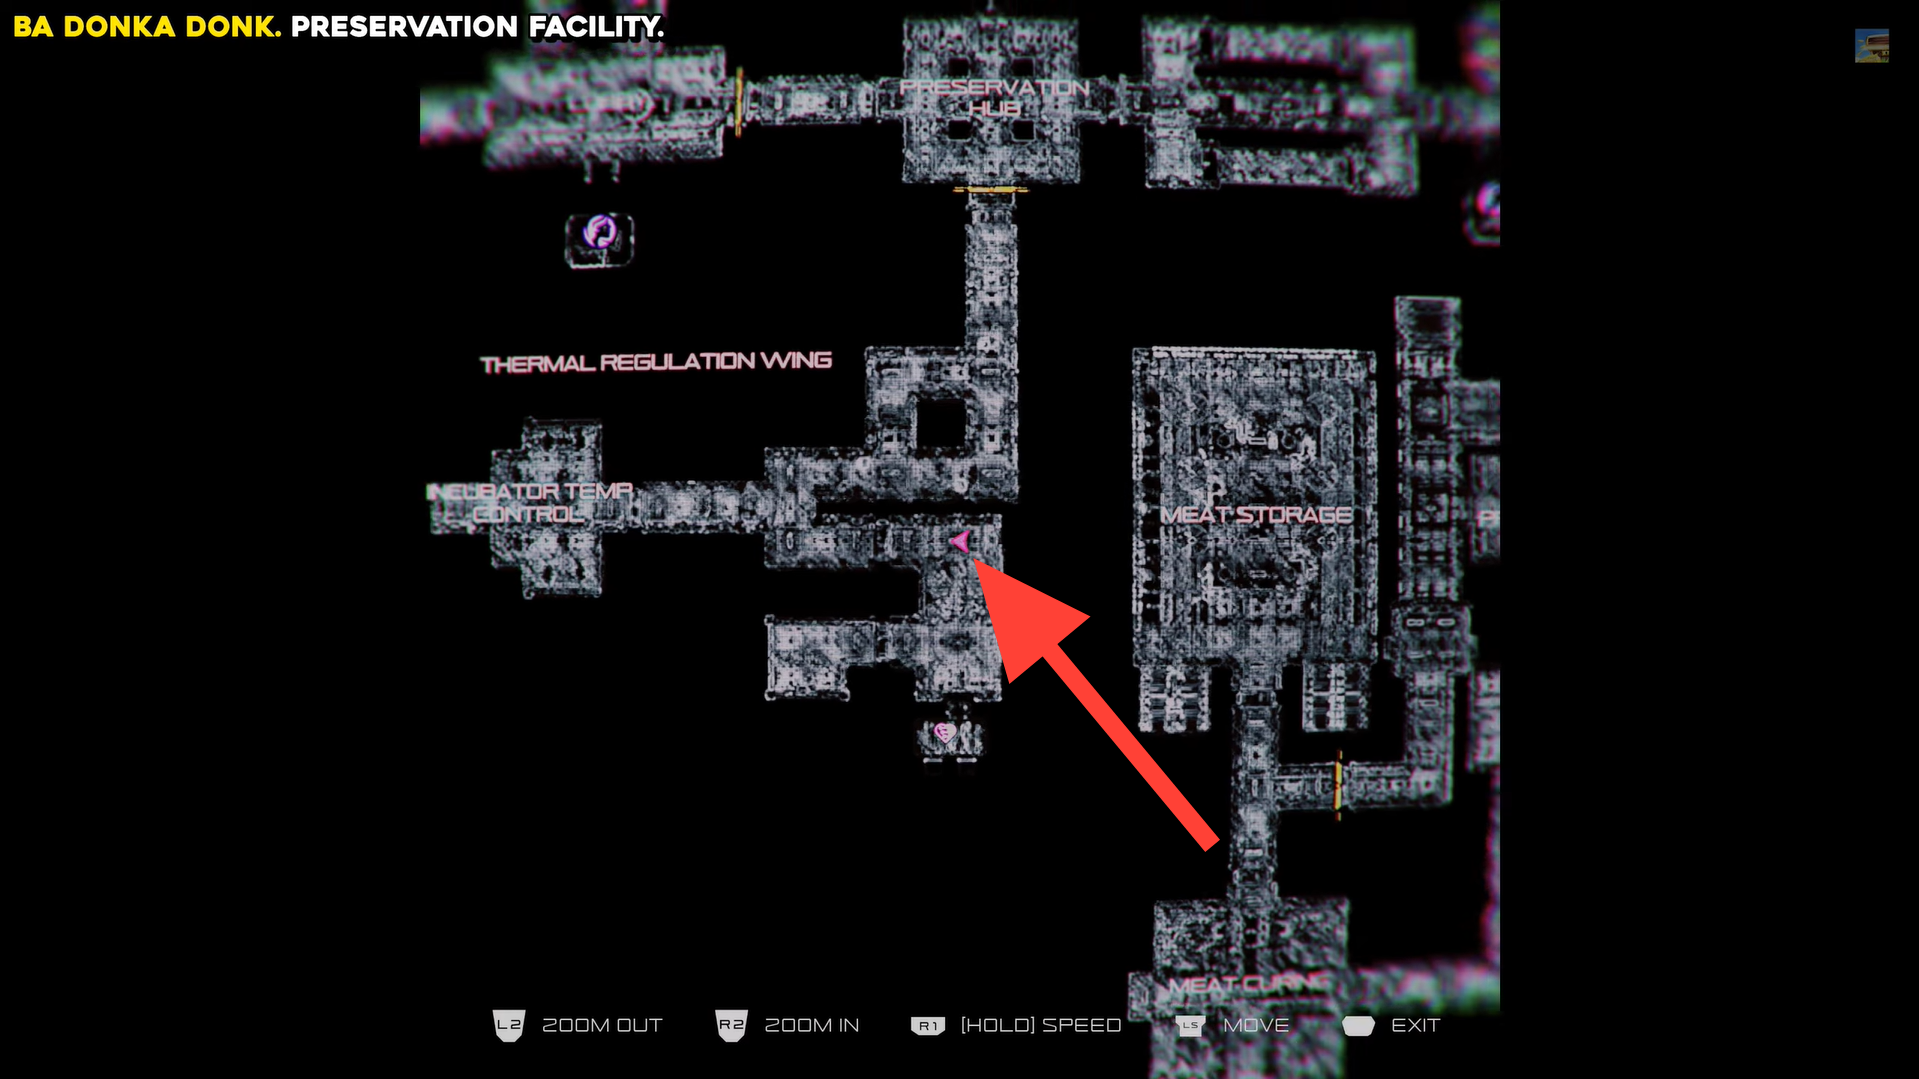
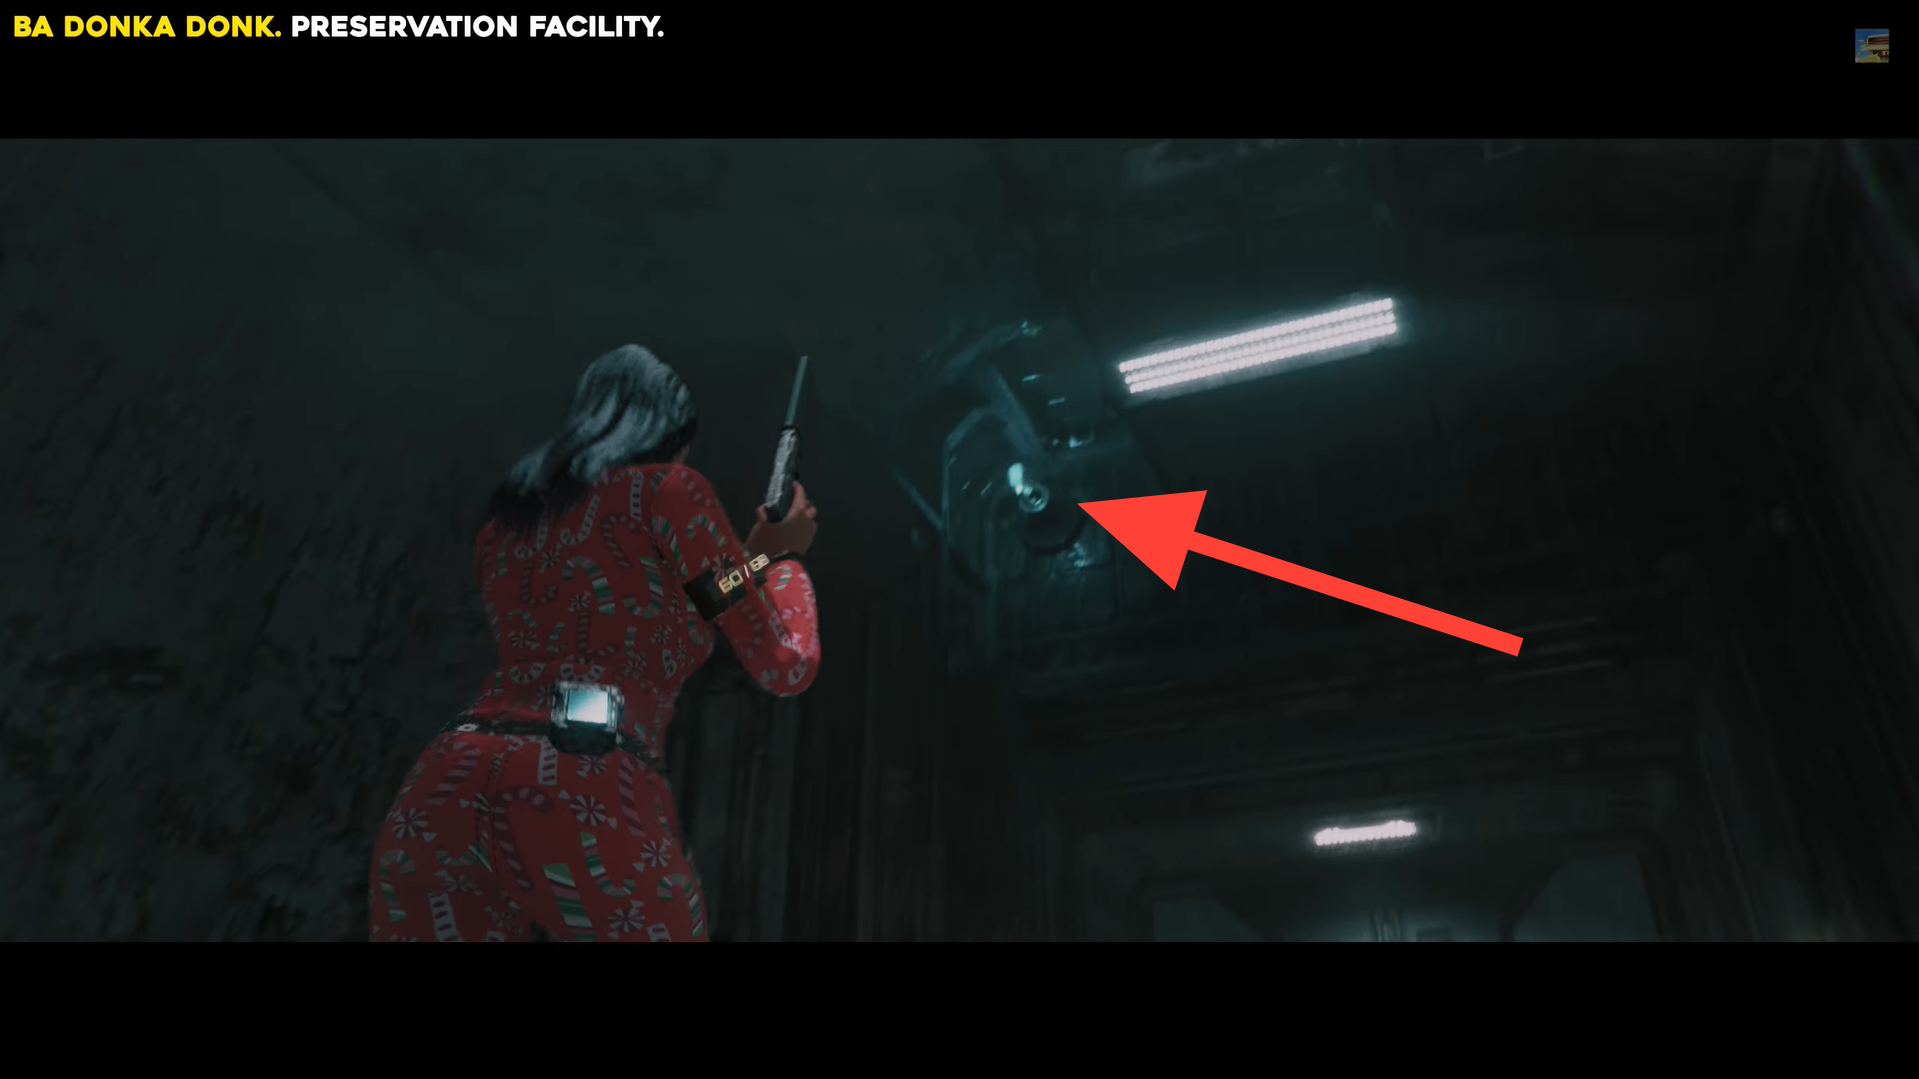
Ba Donka Donk outfit location. Image credits: TeamKill Media / YouTube: 100% Guides
Turn right twice, go down the stairs on the left, pass through the doorway next to the painting into the fixed-camera area, and follow the path to the end to collect the Ba Donka Donk outfit.
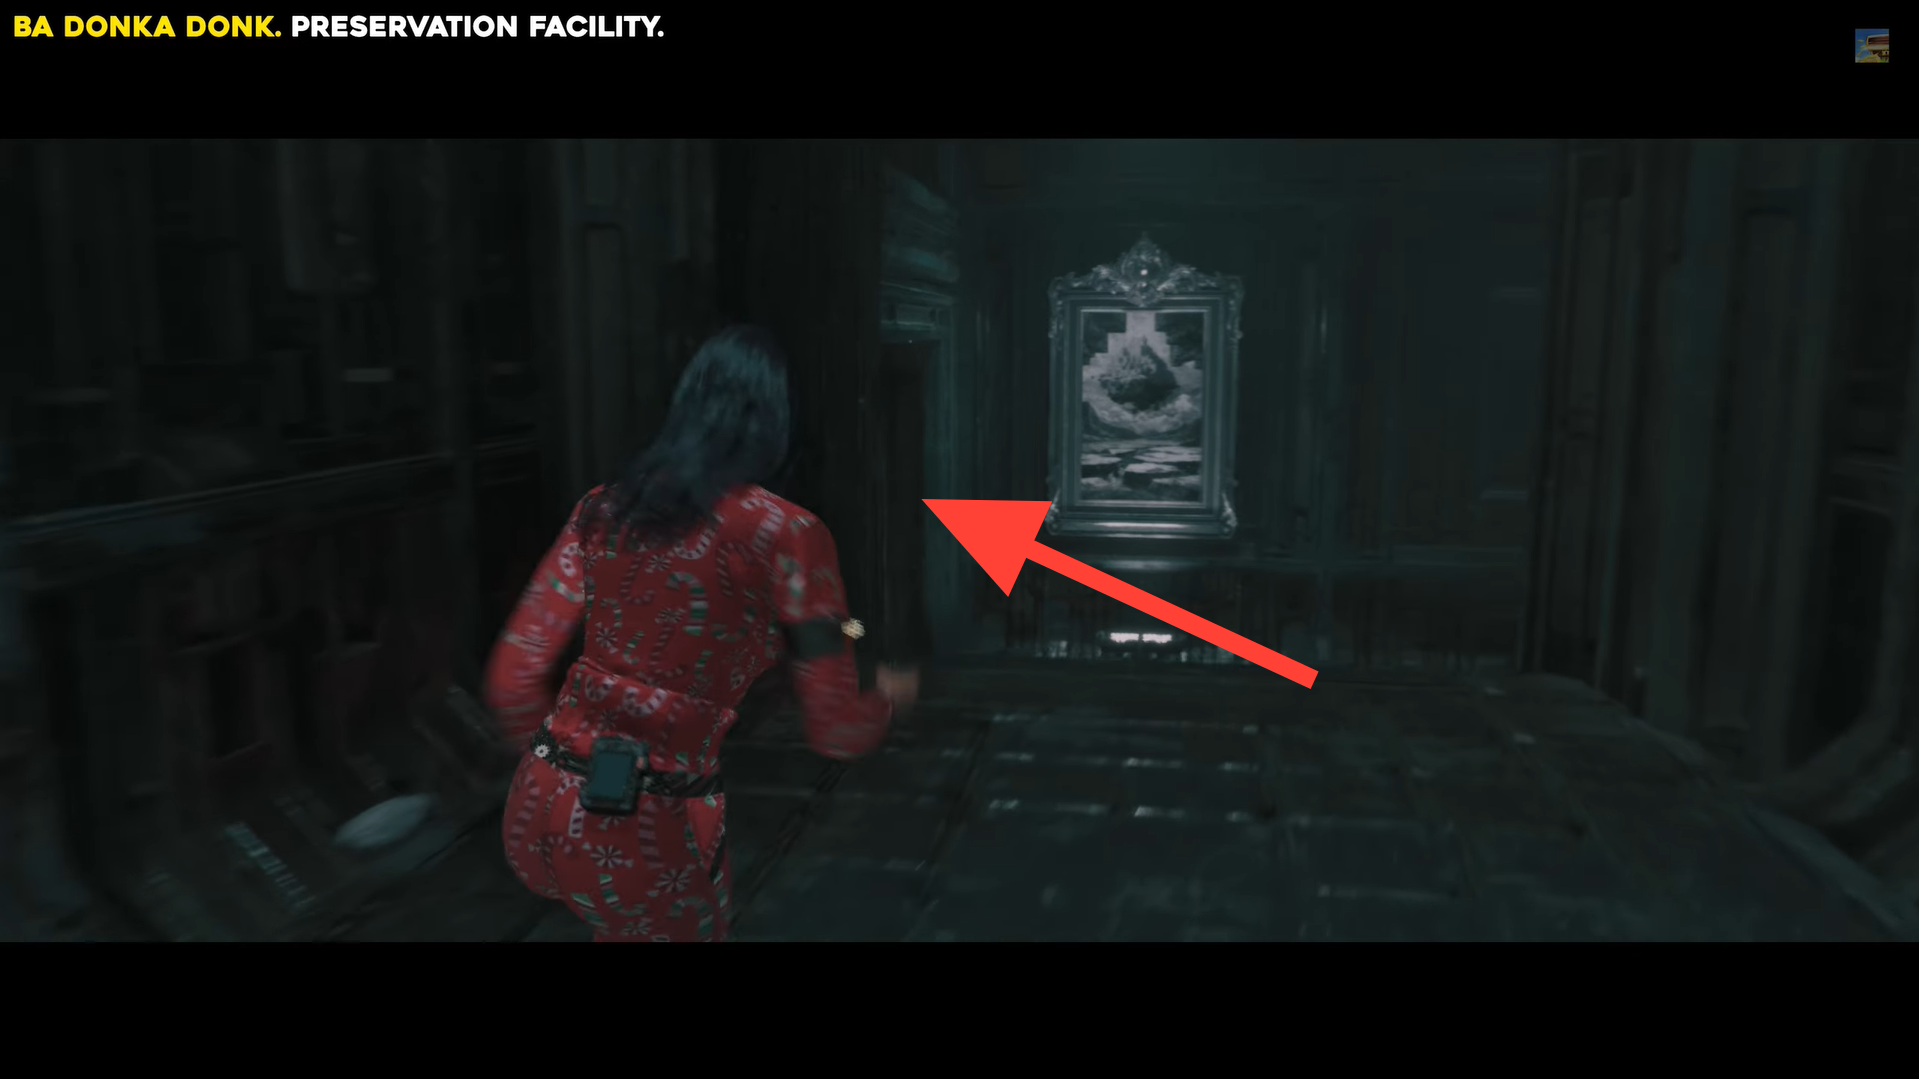
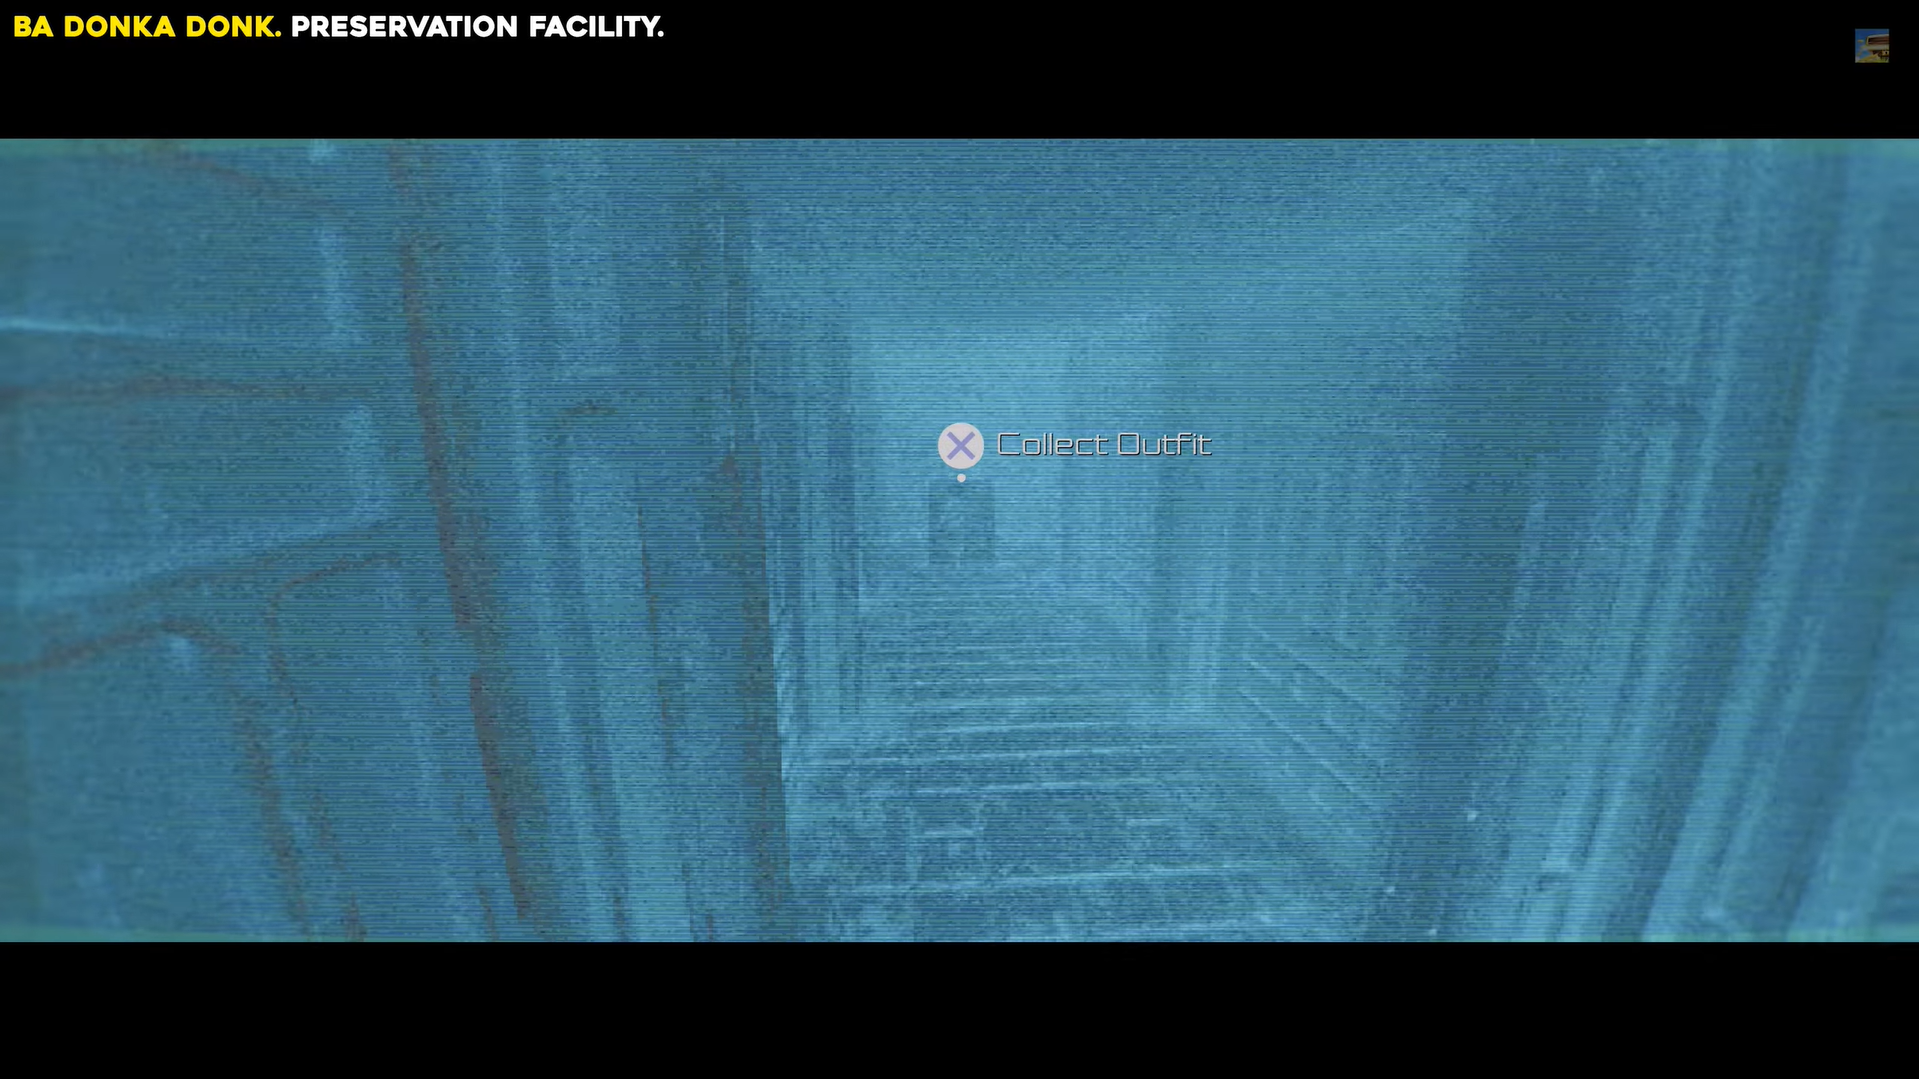
Turn right twice, down the stairs, then through the doorway into the fixed-camera area. Image credits: TeamKill Media / YouTube: 100% Guides
Life of the Party outfit
Head to the far end of the Cinderline Power Room in the Communication Facility, shoot the white bulb above the door, then go through the door beneath the broken light and continue straight.
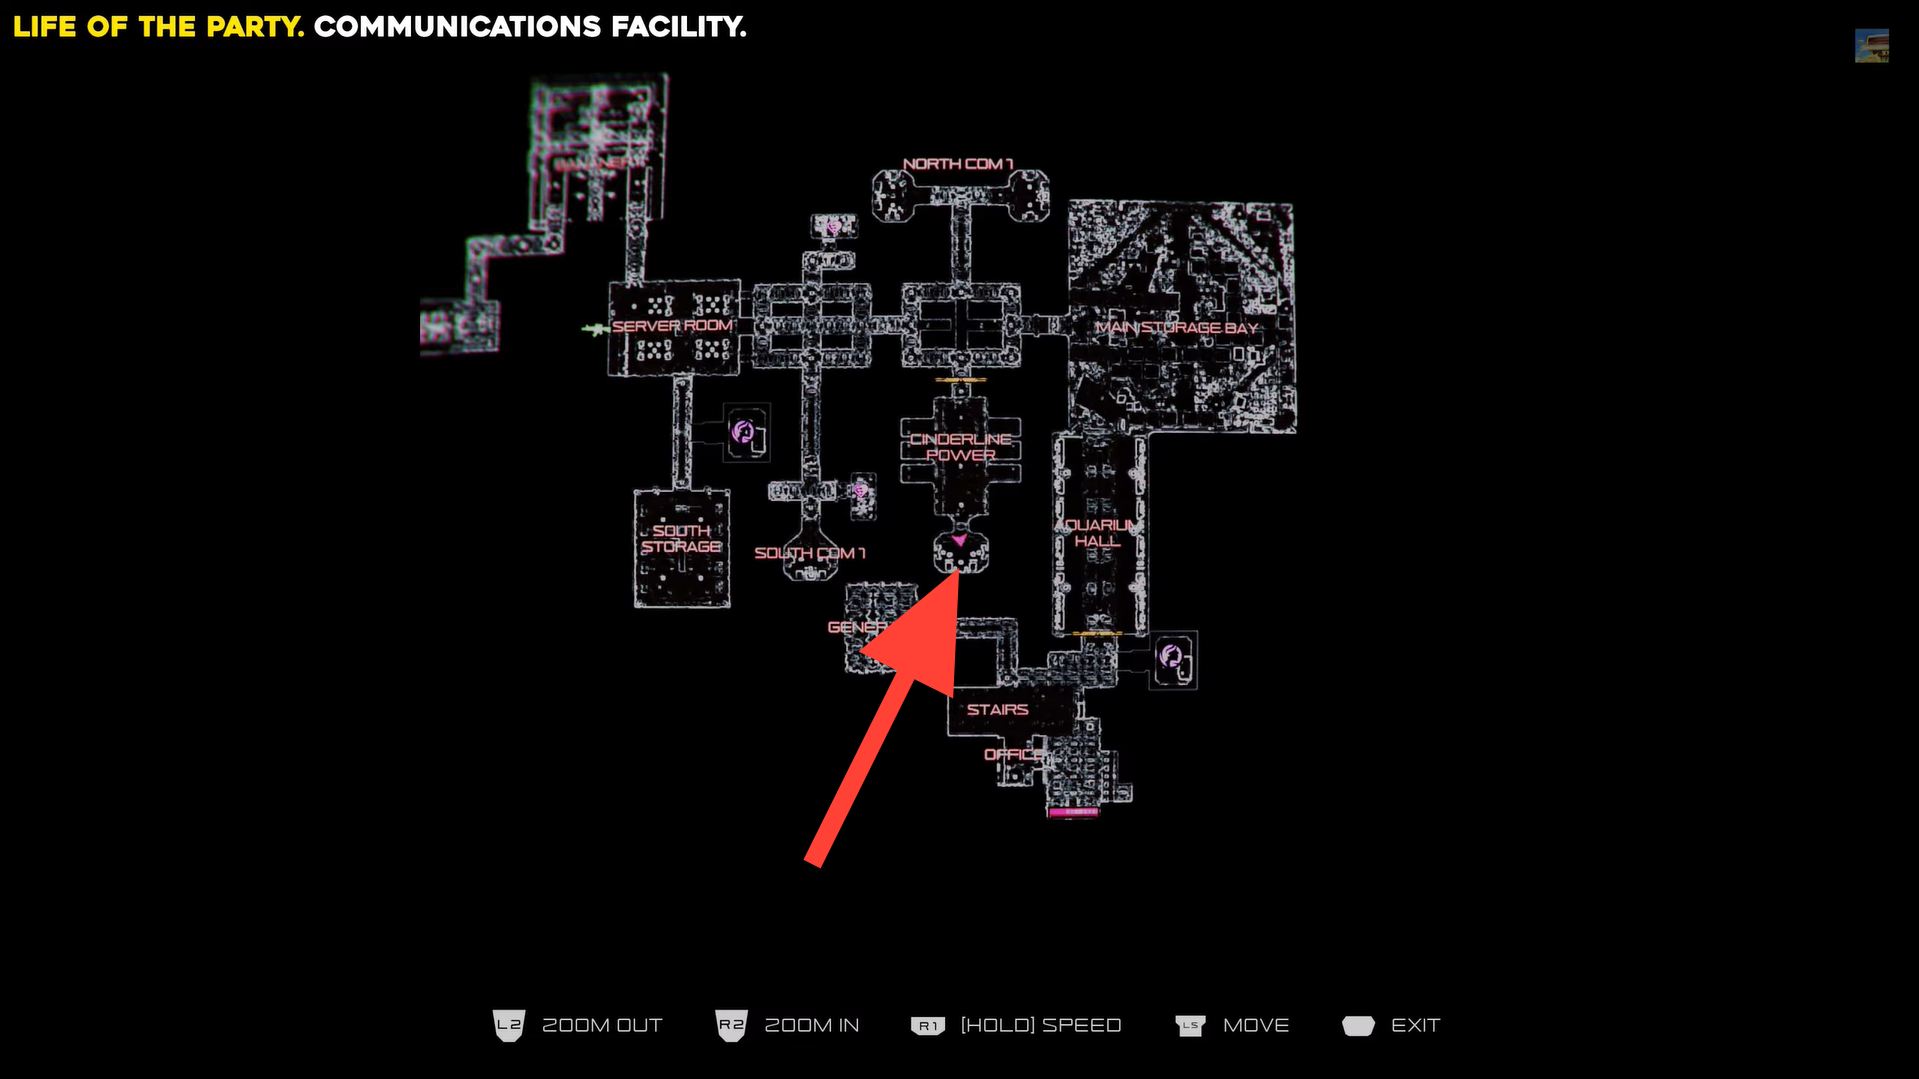

Life of the Party outfit location. Image credits: TeamKill Media / YouTube: 100% Guides
Continue straight, pass through the vents and a few doors until you reach the fixed-camera area, then follow the path to grab the Life of the Party outfit.
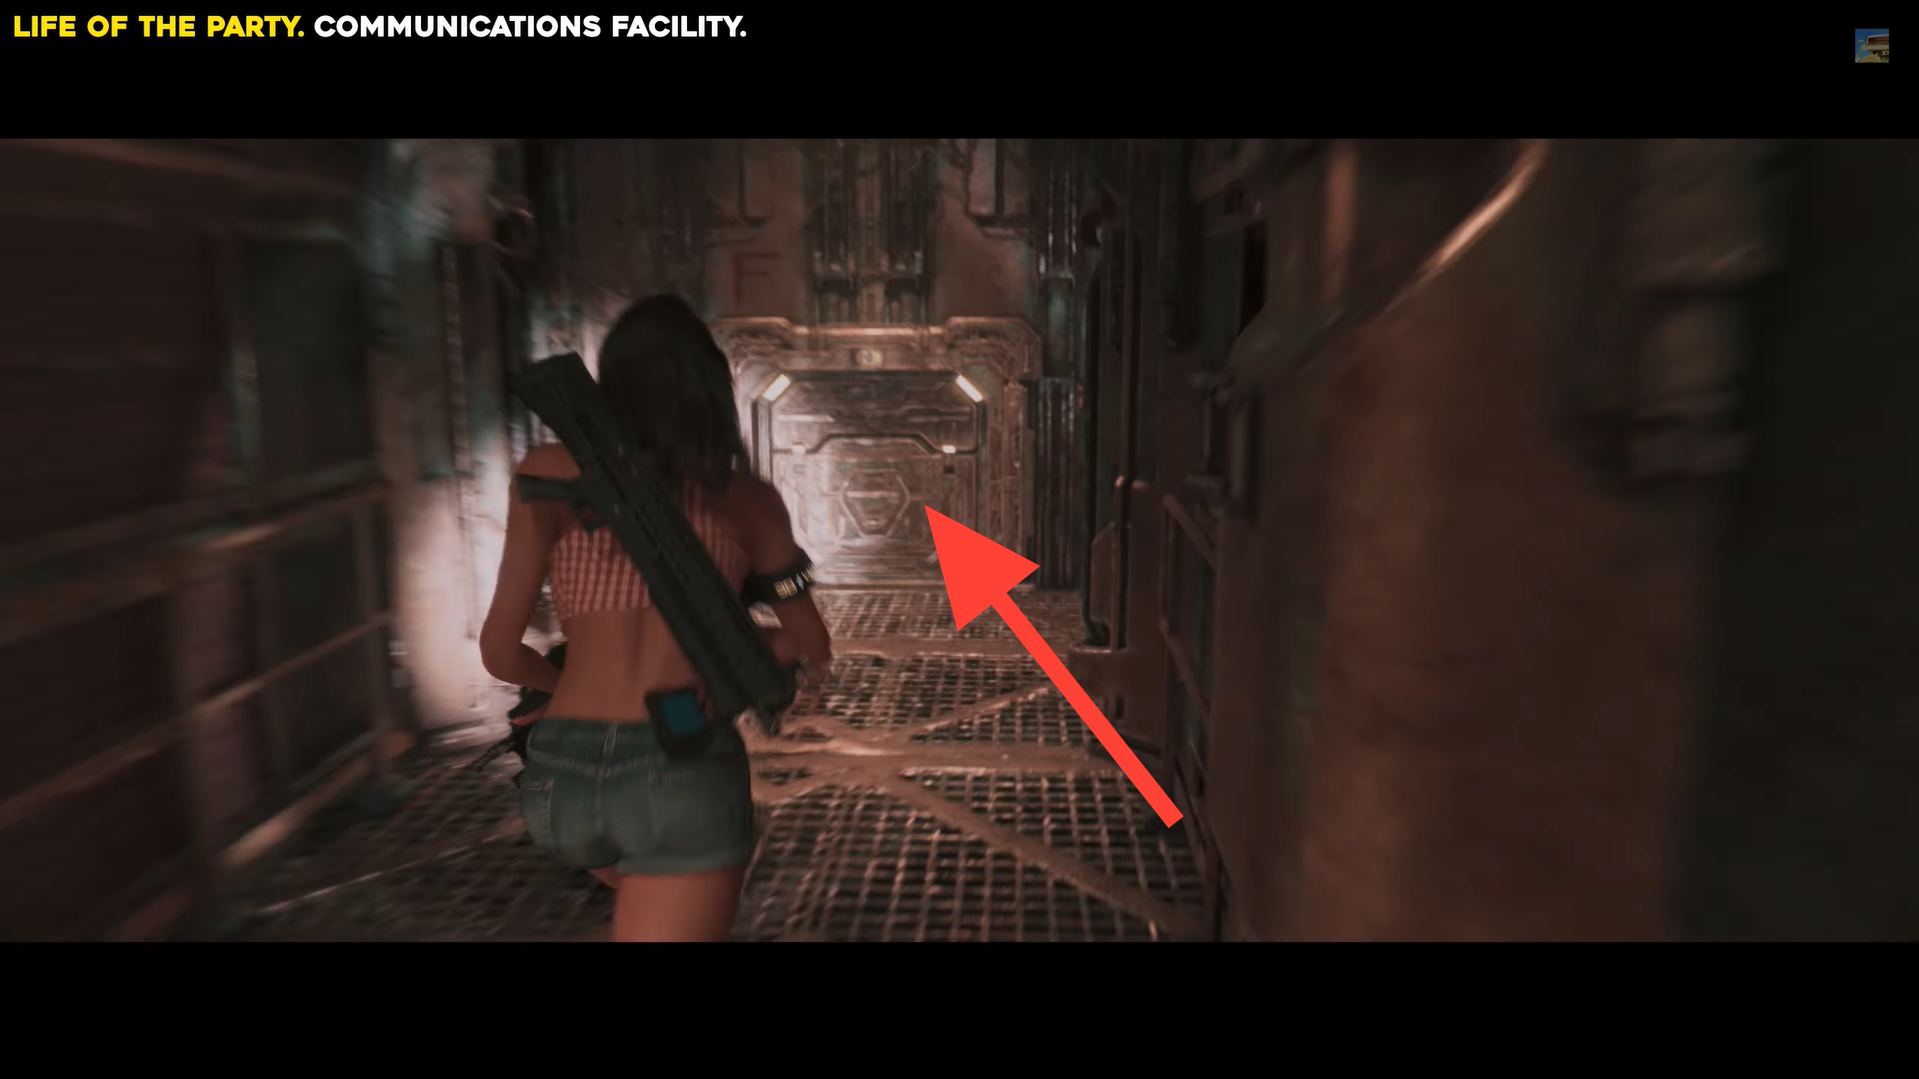
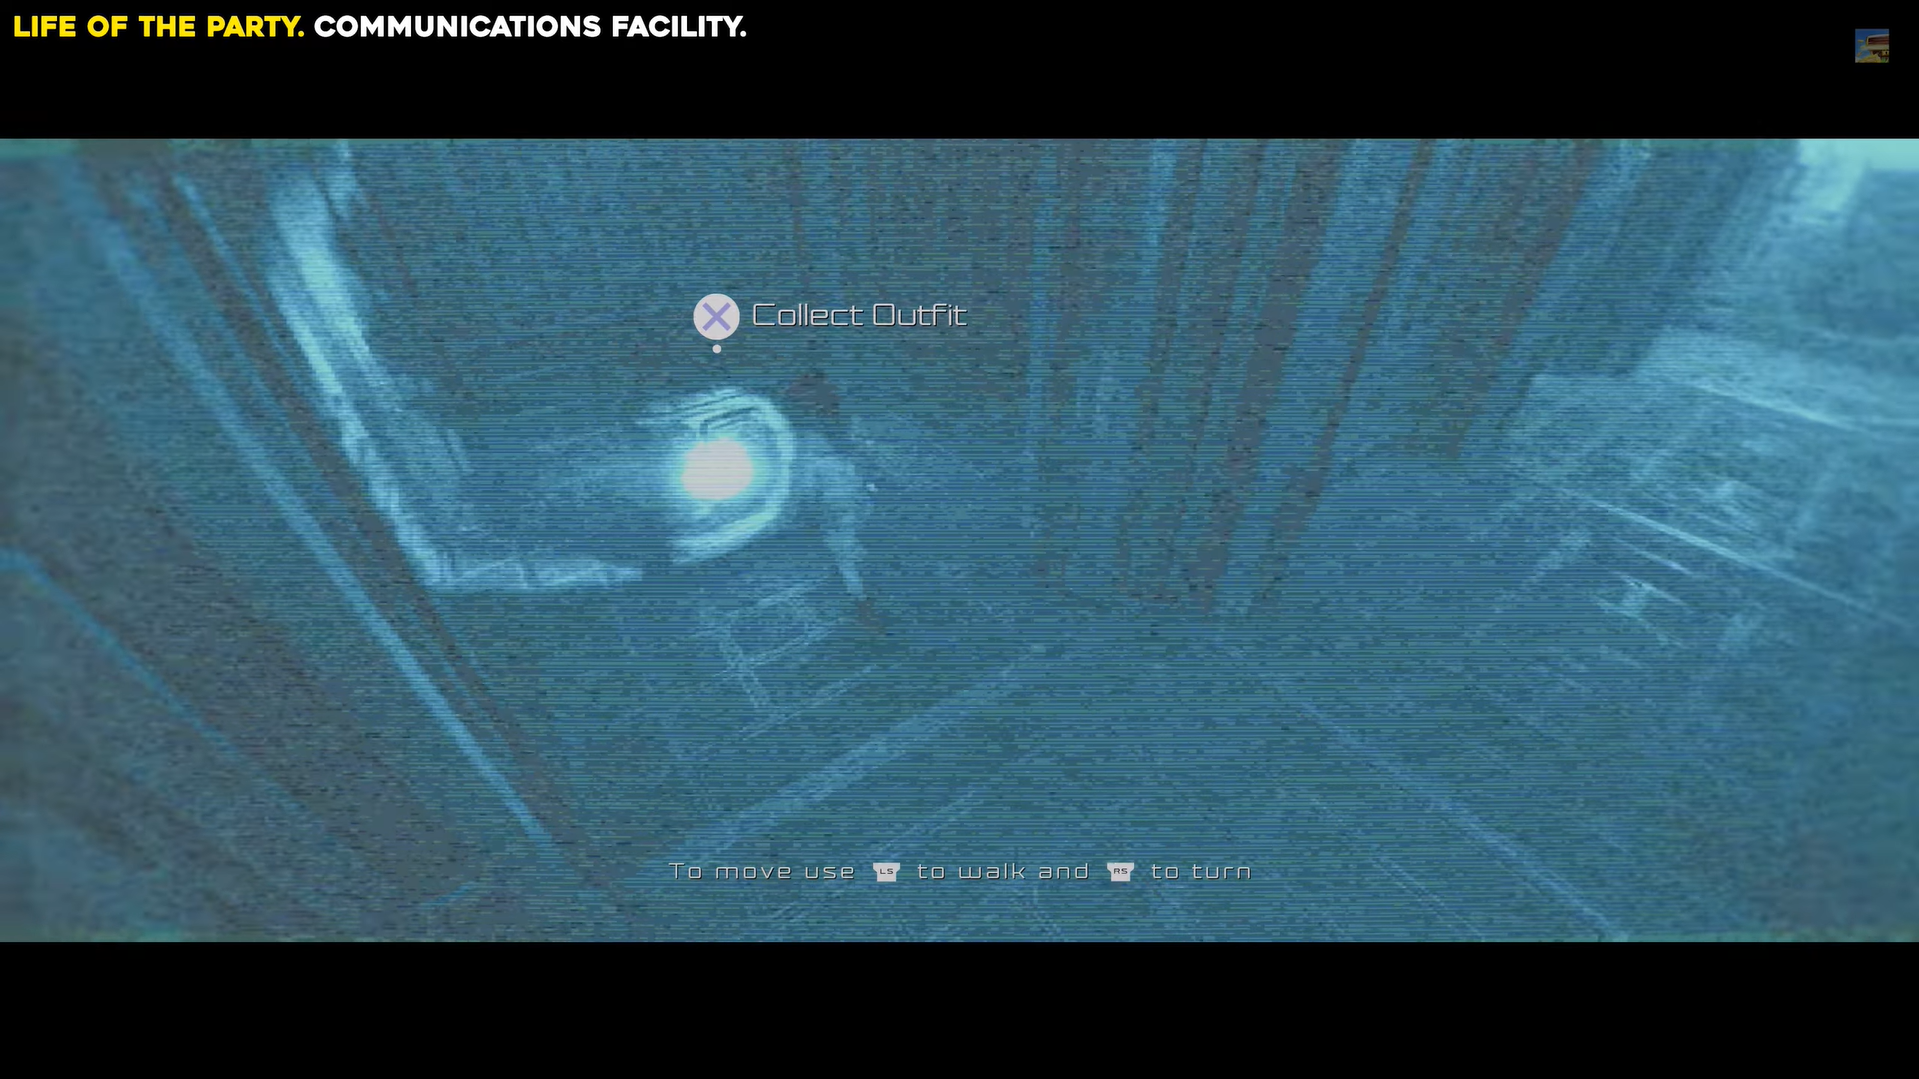
Go straight through the vents and doors into the fixed-camera area. Image credits: TeamKill Media / YouTube: 100% Guides
Not Fast, But Furious outfit
Head to the room just right of the Server Room in the Communication Facility, shoot the white bulb above the door, then enter and continue straight through several doors.
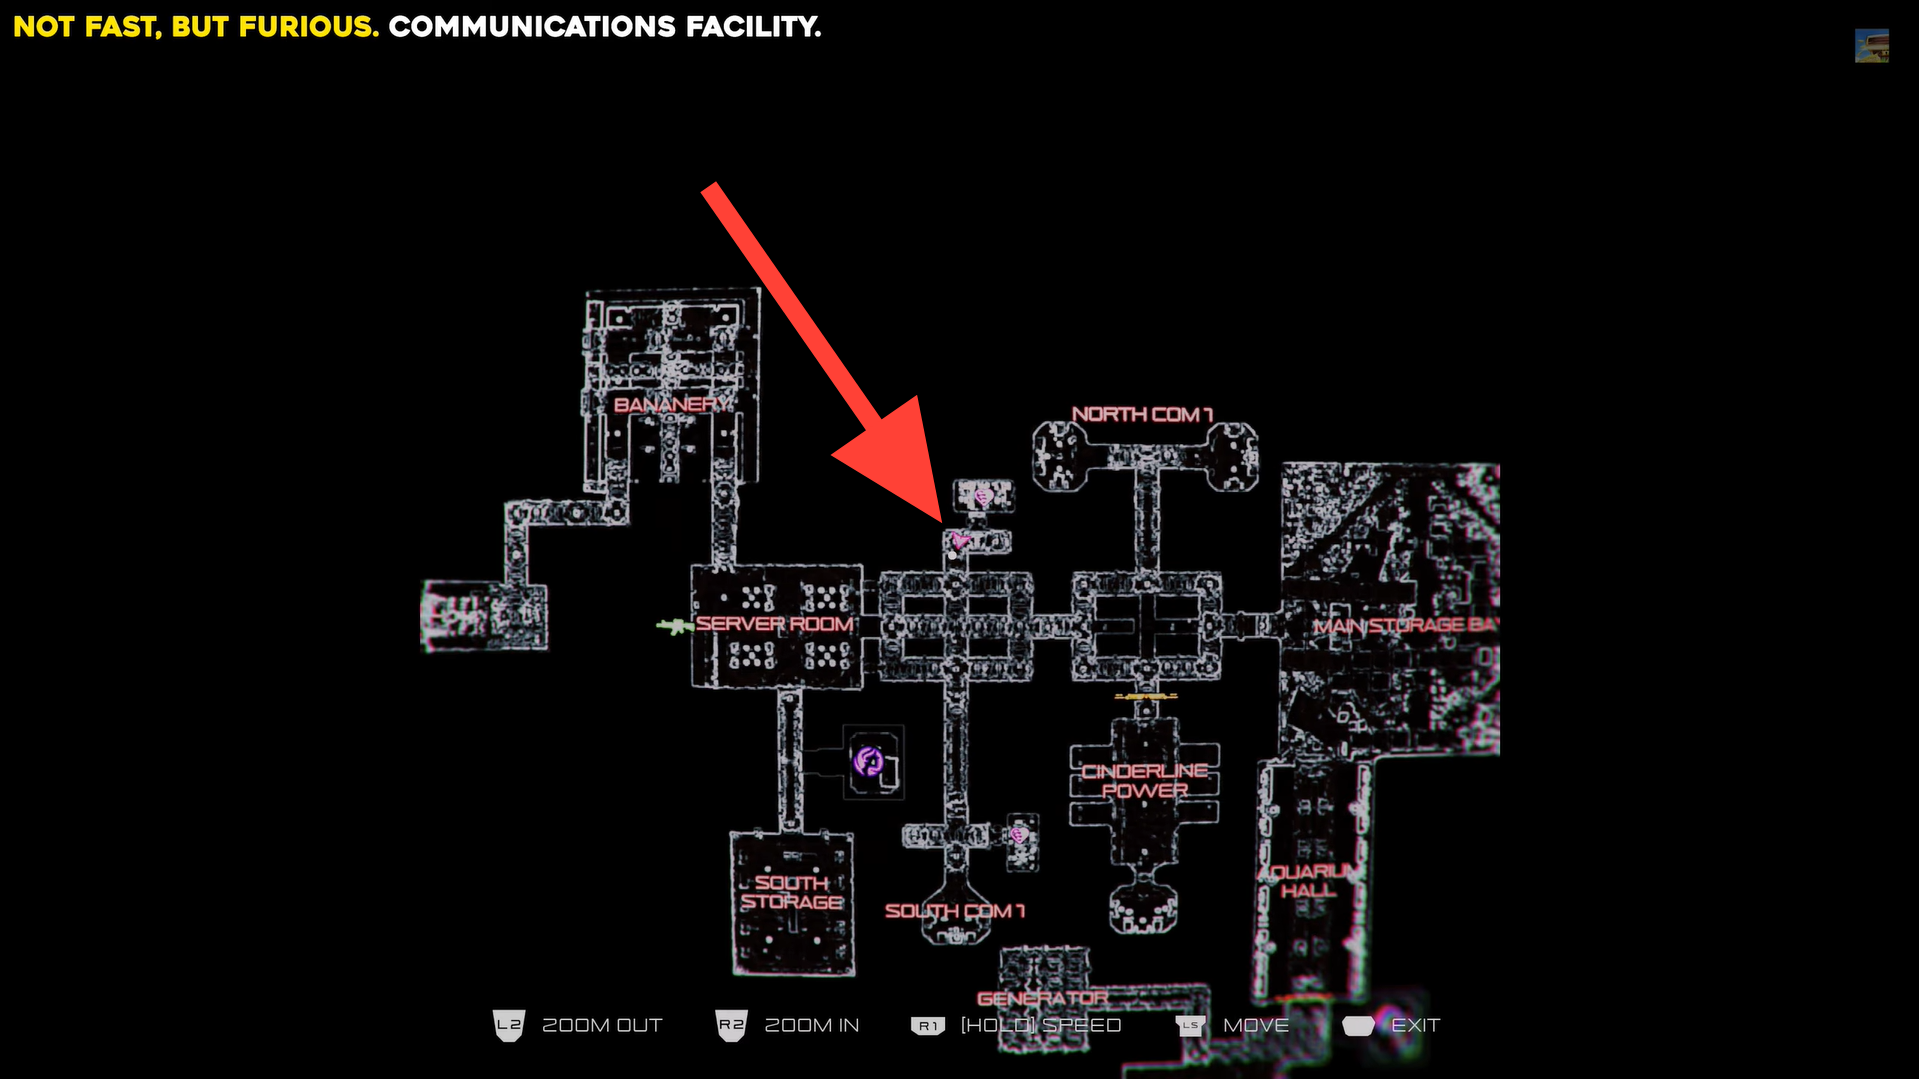
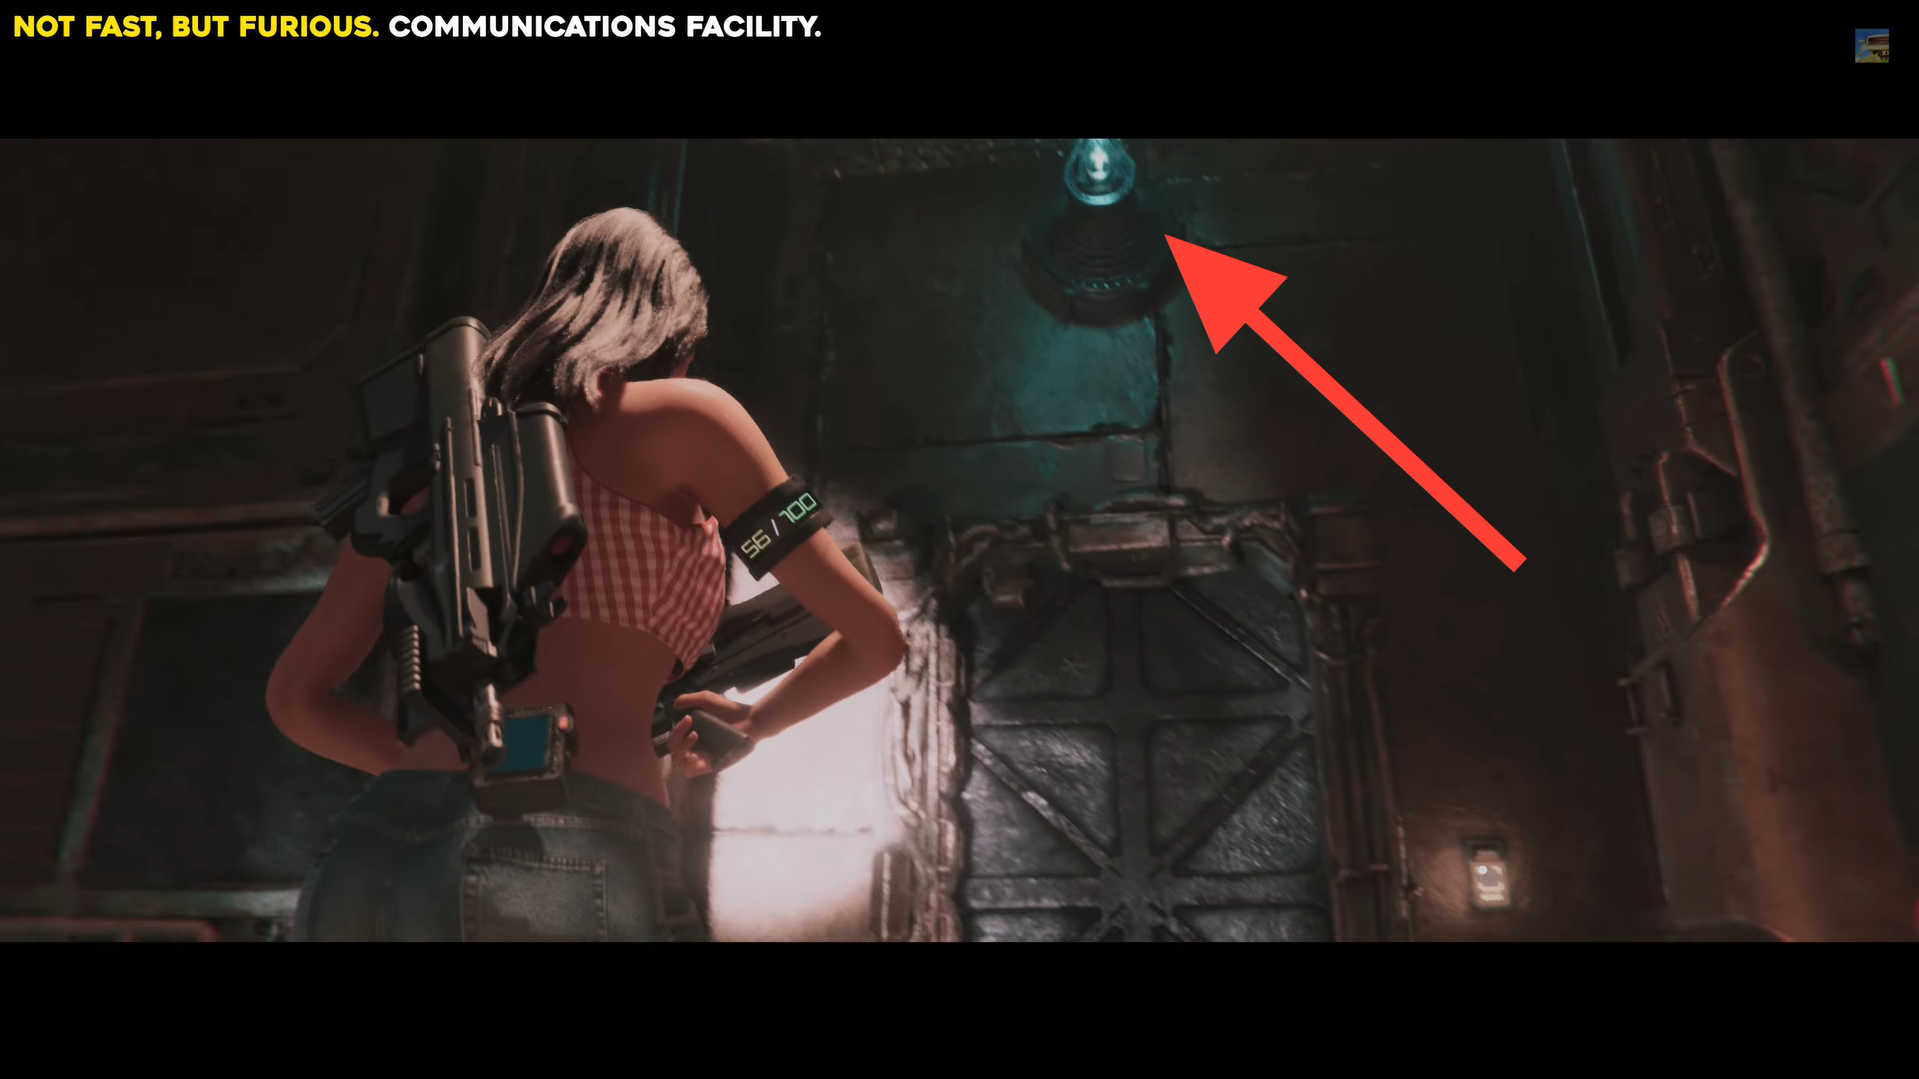
Not Fast, But Furious outfit location. Image credits: TeamKill Media / YouTube: 100% Guides
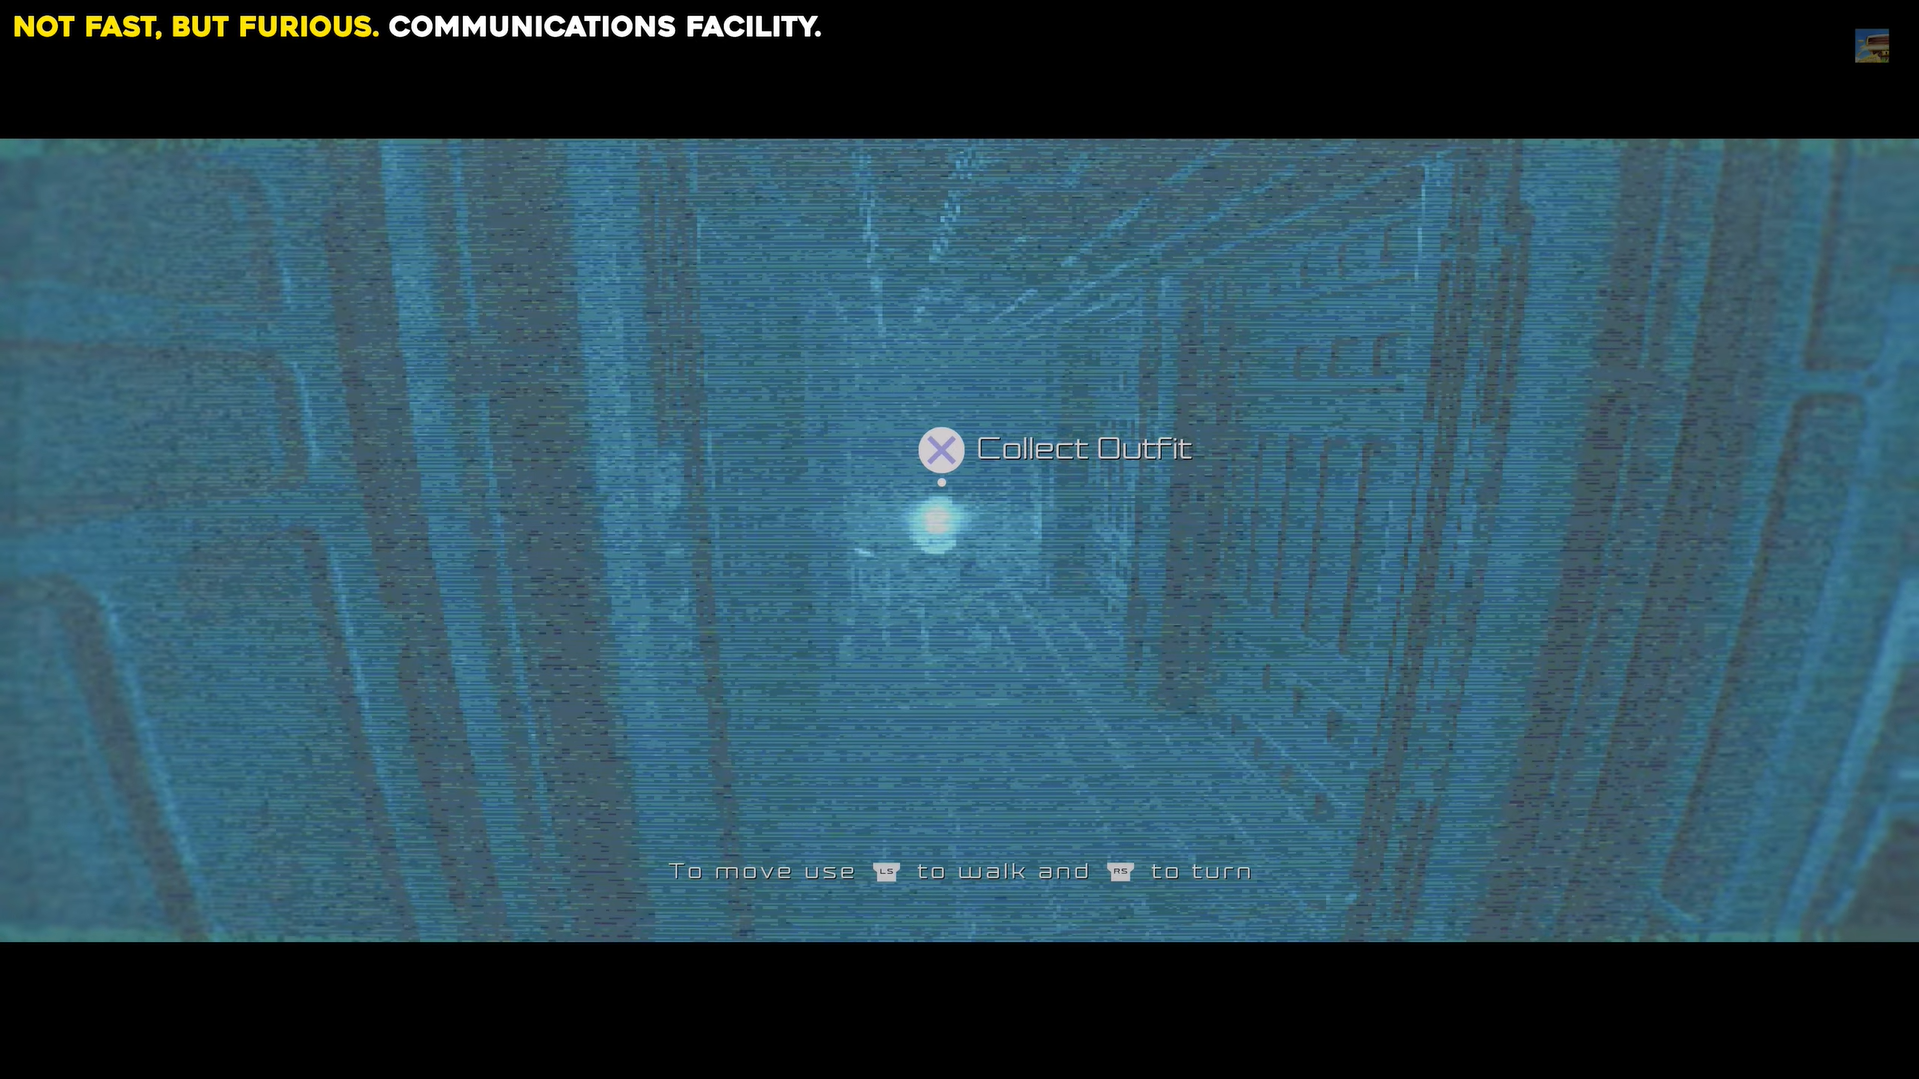
At the fork, take the right path, the Not Fast, But Furious outfit is at the end.
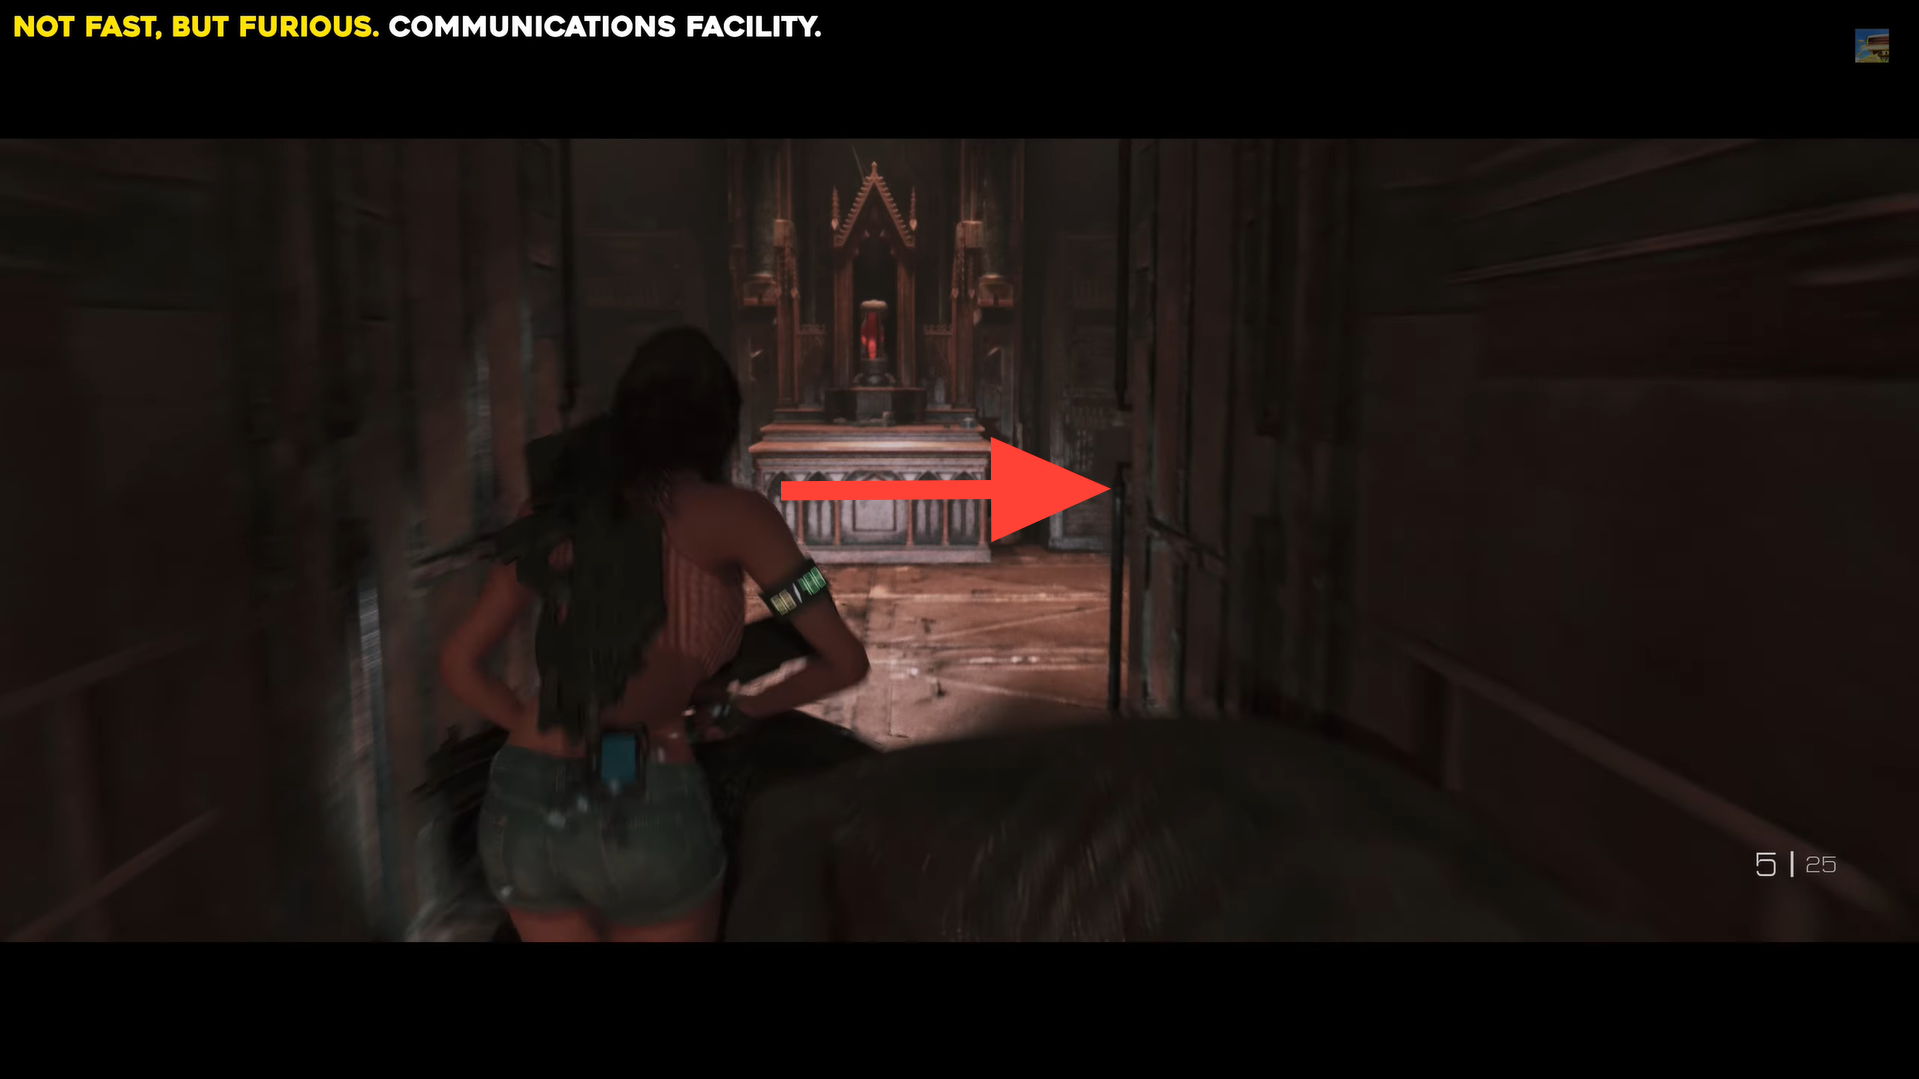
At the fork, take the right path. Image credits: TeamKill Media / YouTube: 100% Guides
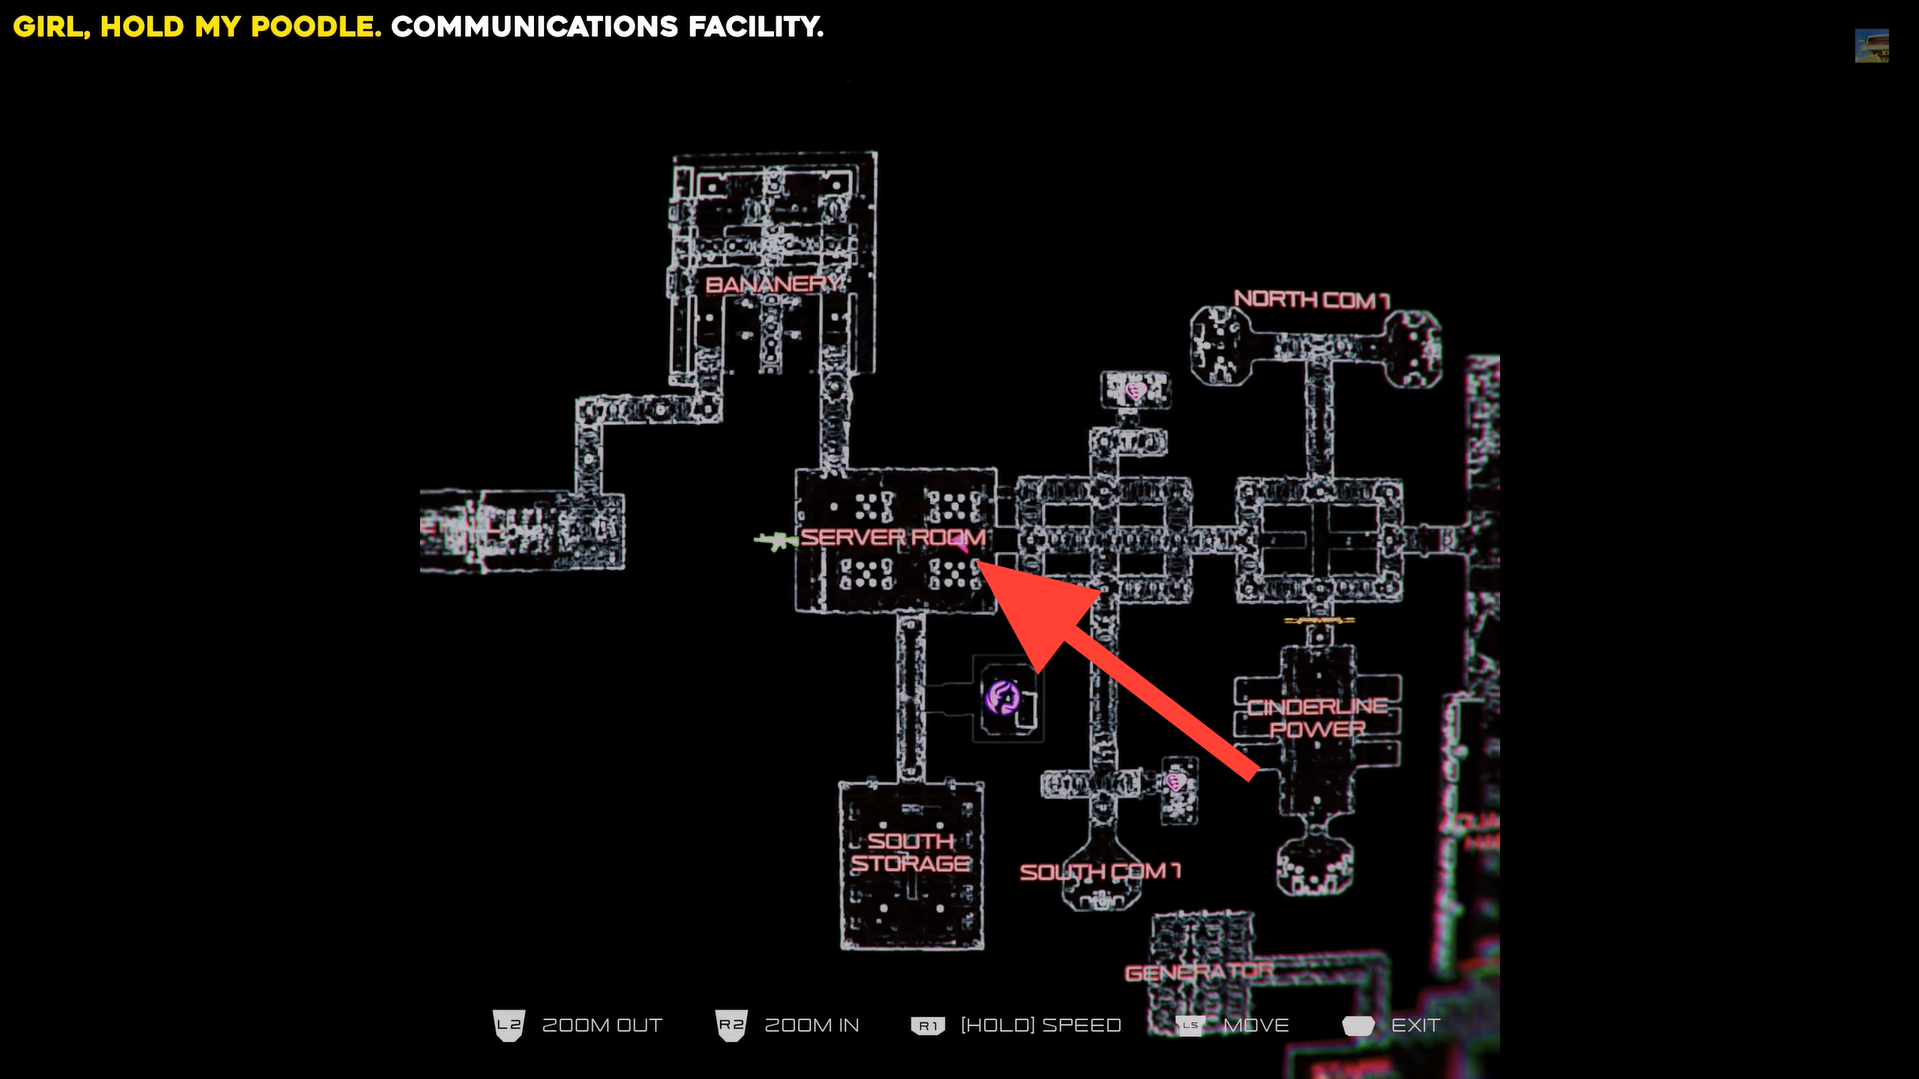
Girl, Hold my Poodle outfit
Head to the east side of the Server Room in the Communication Facility and look up at the ceiling above the servers.
Shoot the blue bulb, then follow the path south of the room until you reach a storage room.
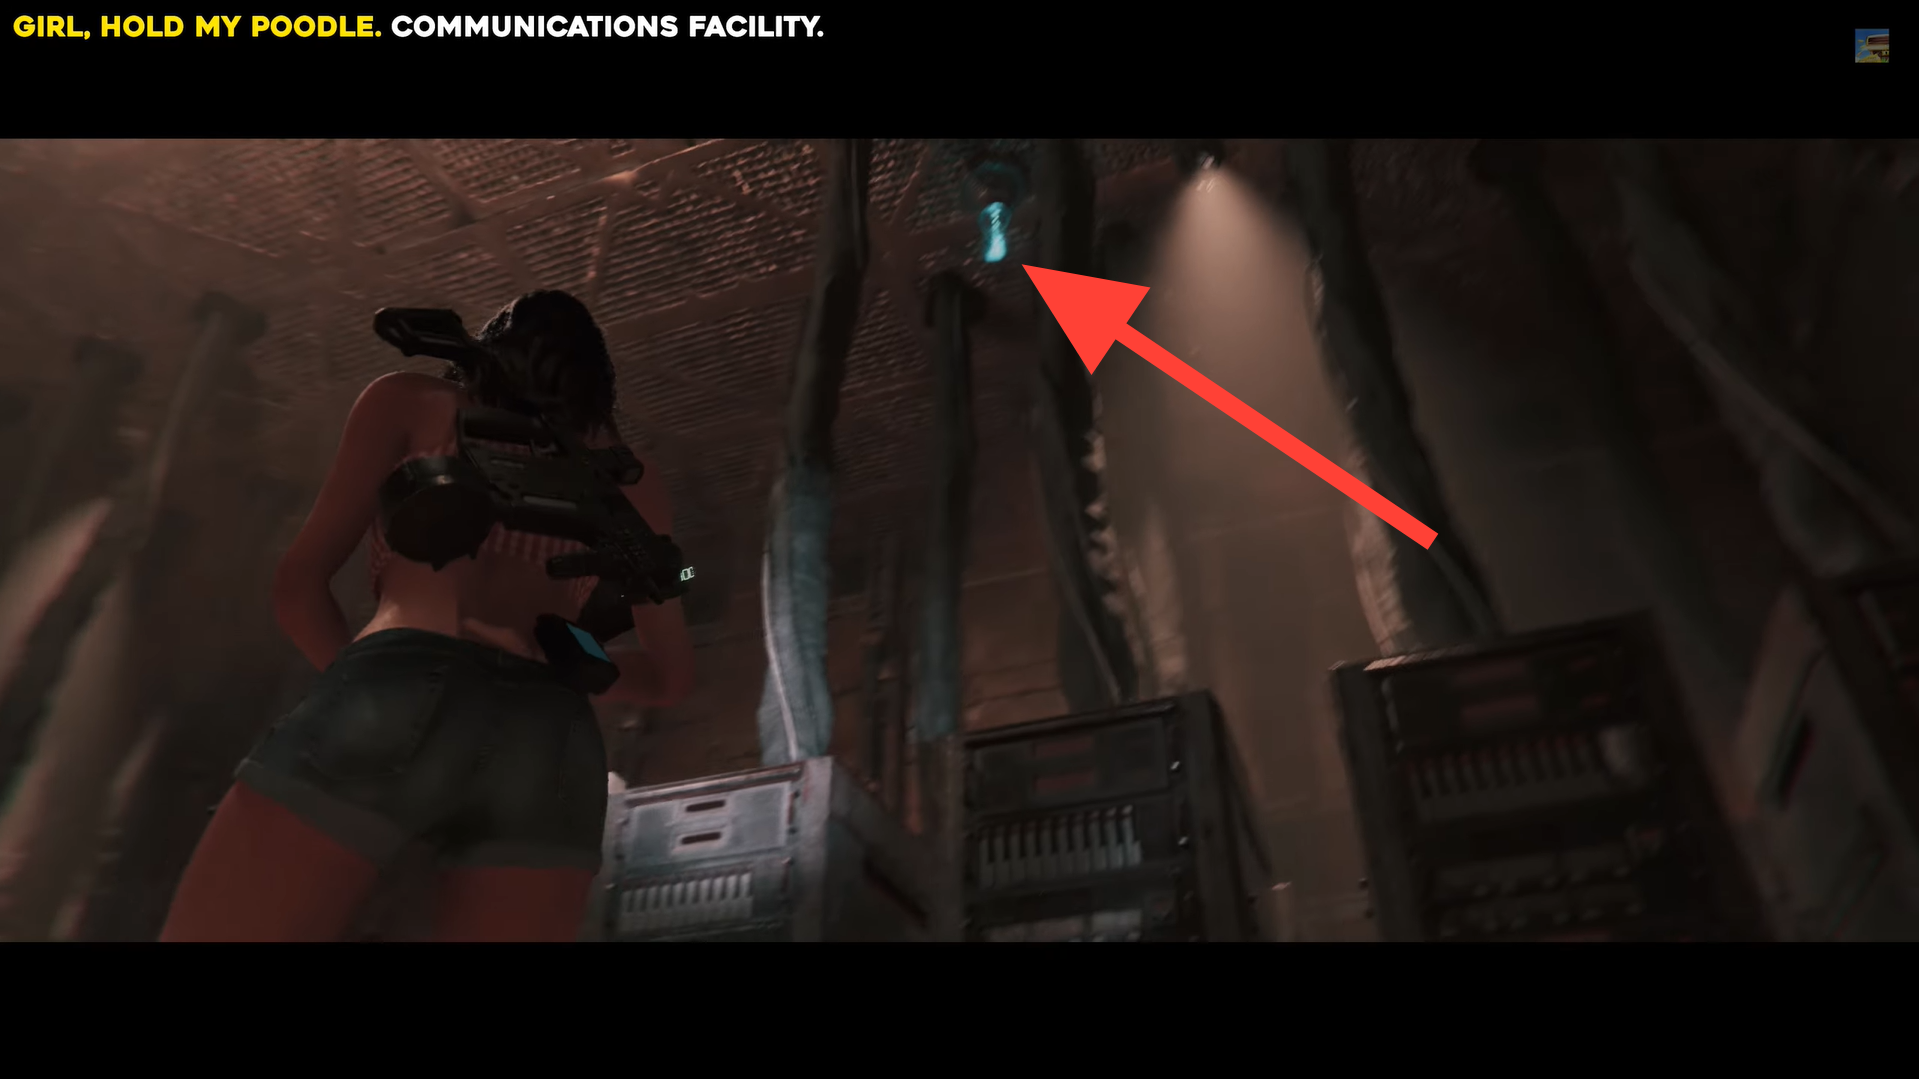
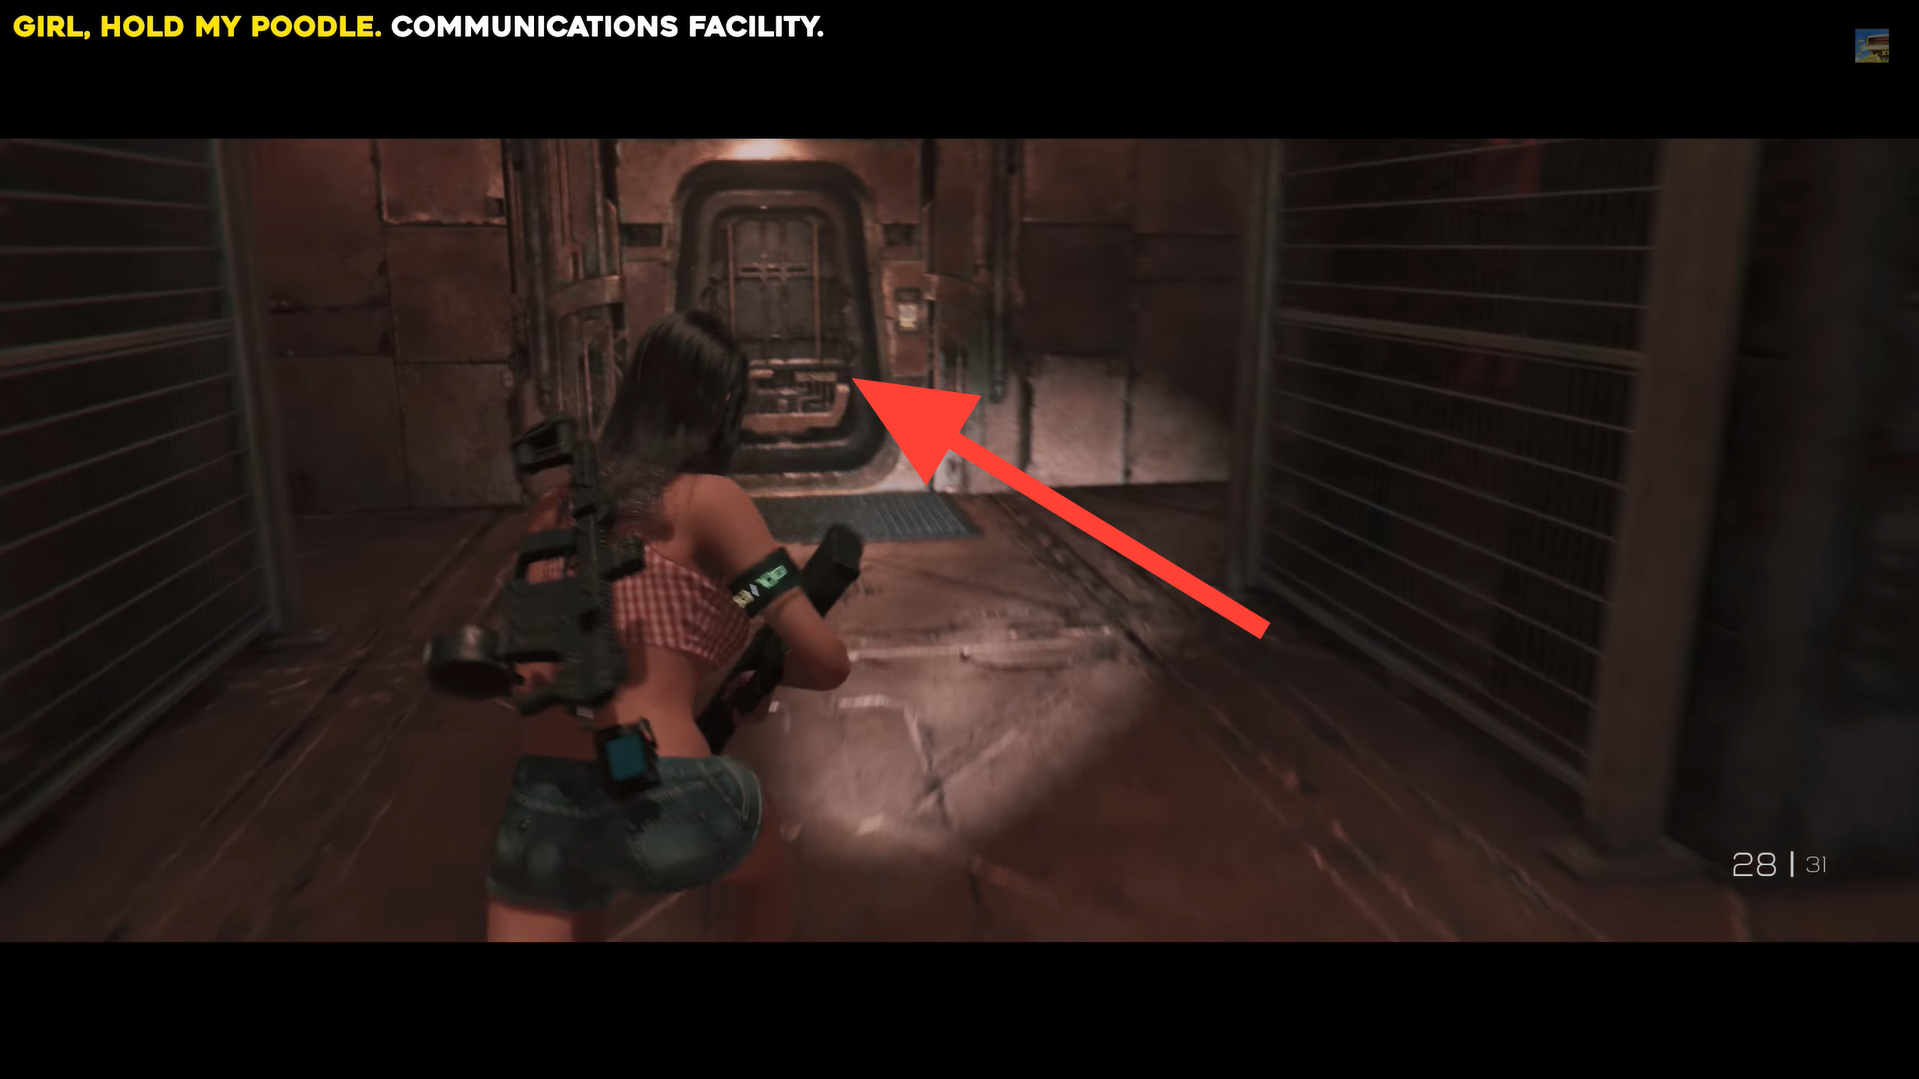
Shoot the blue bulb, then follow the south path to the storage room. Image credits: TeamKill Media / YouTube: 100% Guides
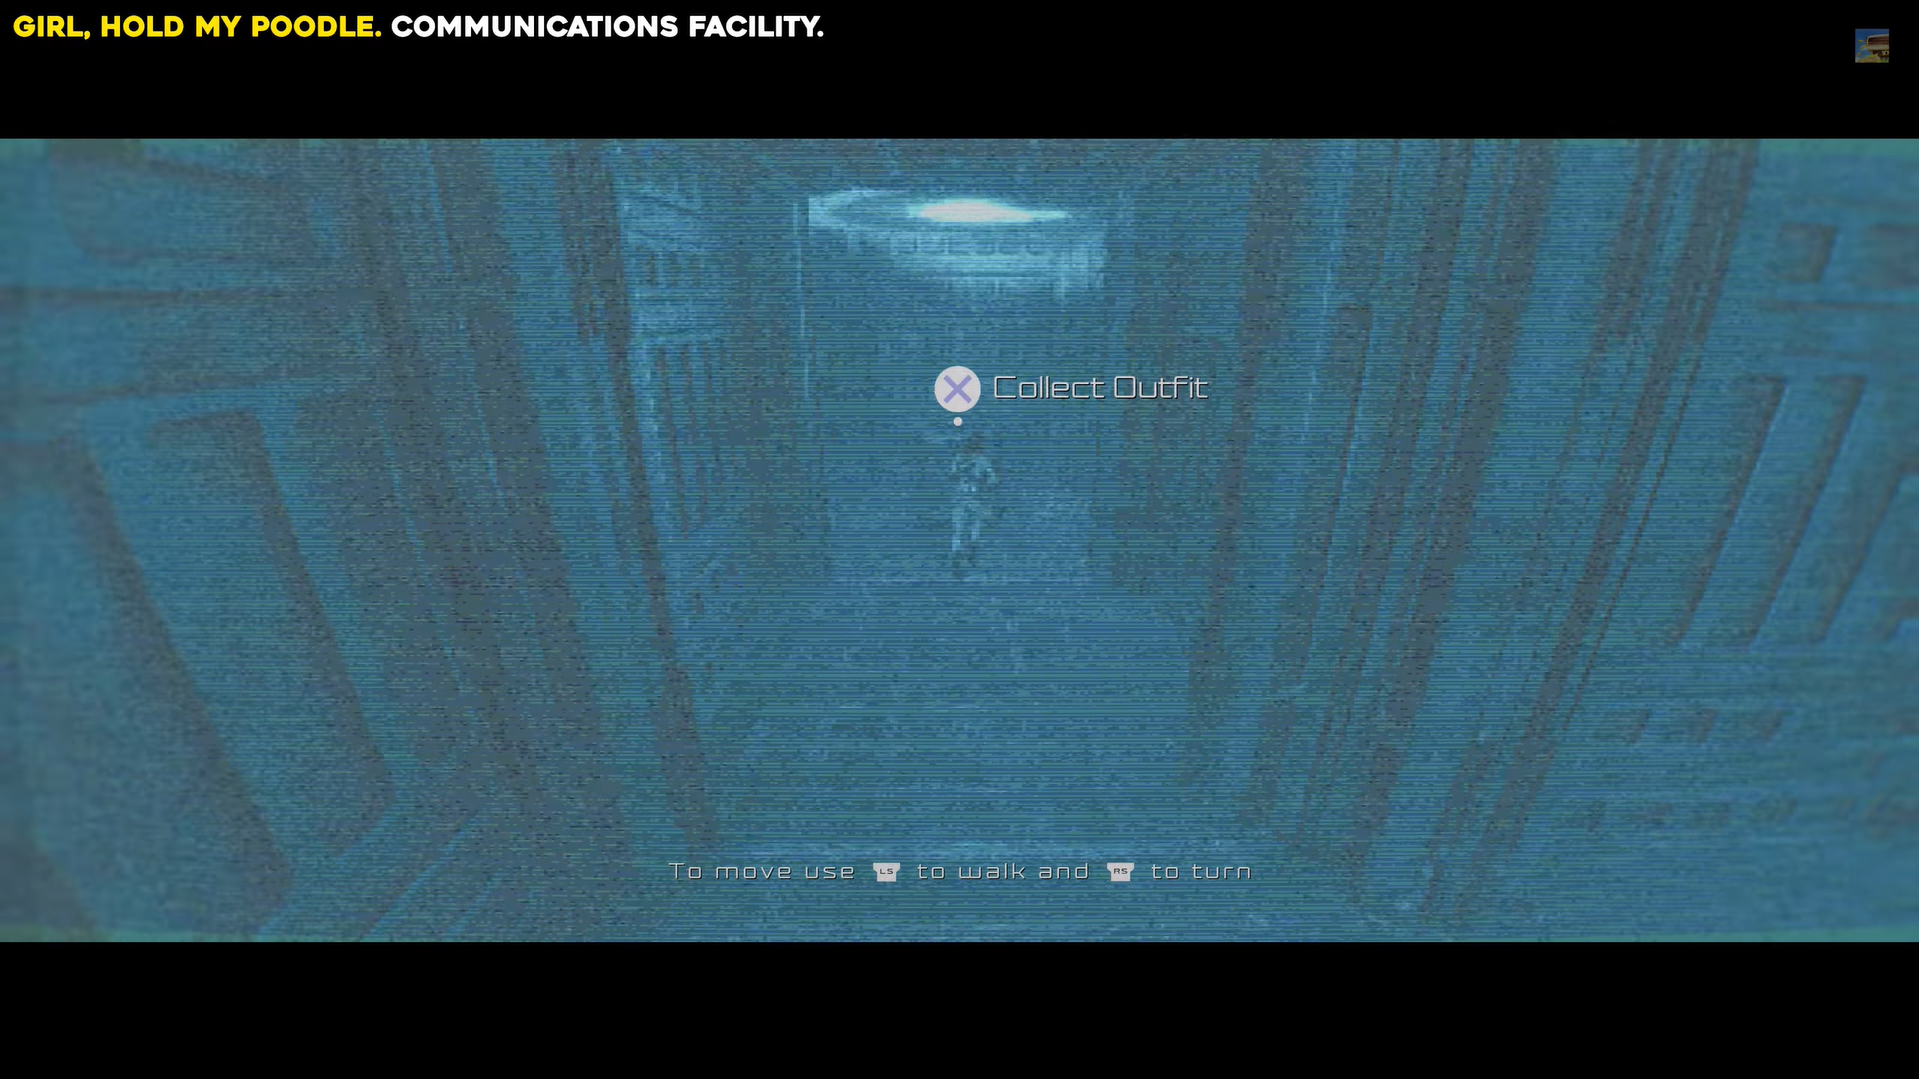
In the storage room, take the right path, the Girl, Hold My Poodle outfit is at the end.
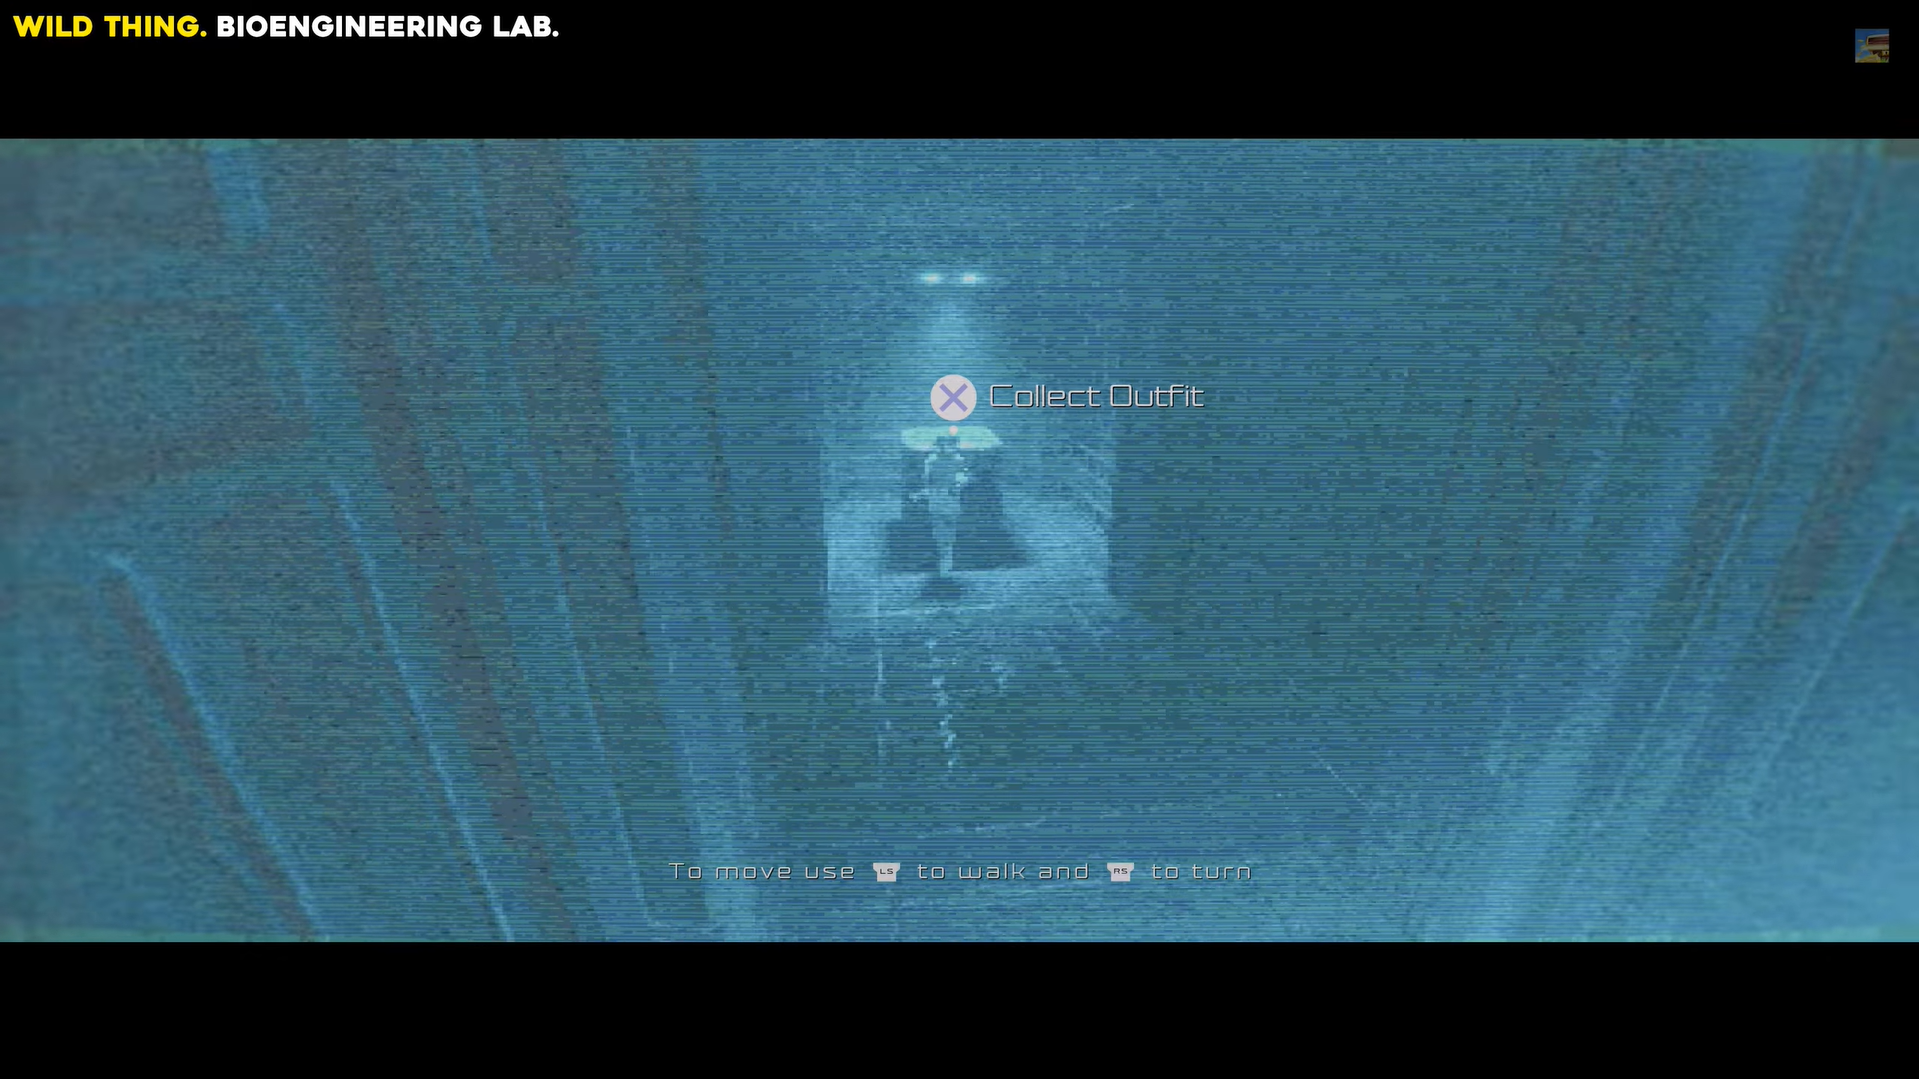
Wild Thing outfit
Head to the Storage area in the Bioengineering Lab and take the Excavation Data Room route, shoot the white bulb above the door, then continue straight, dodging lasers and spotlights.
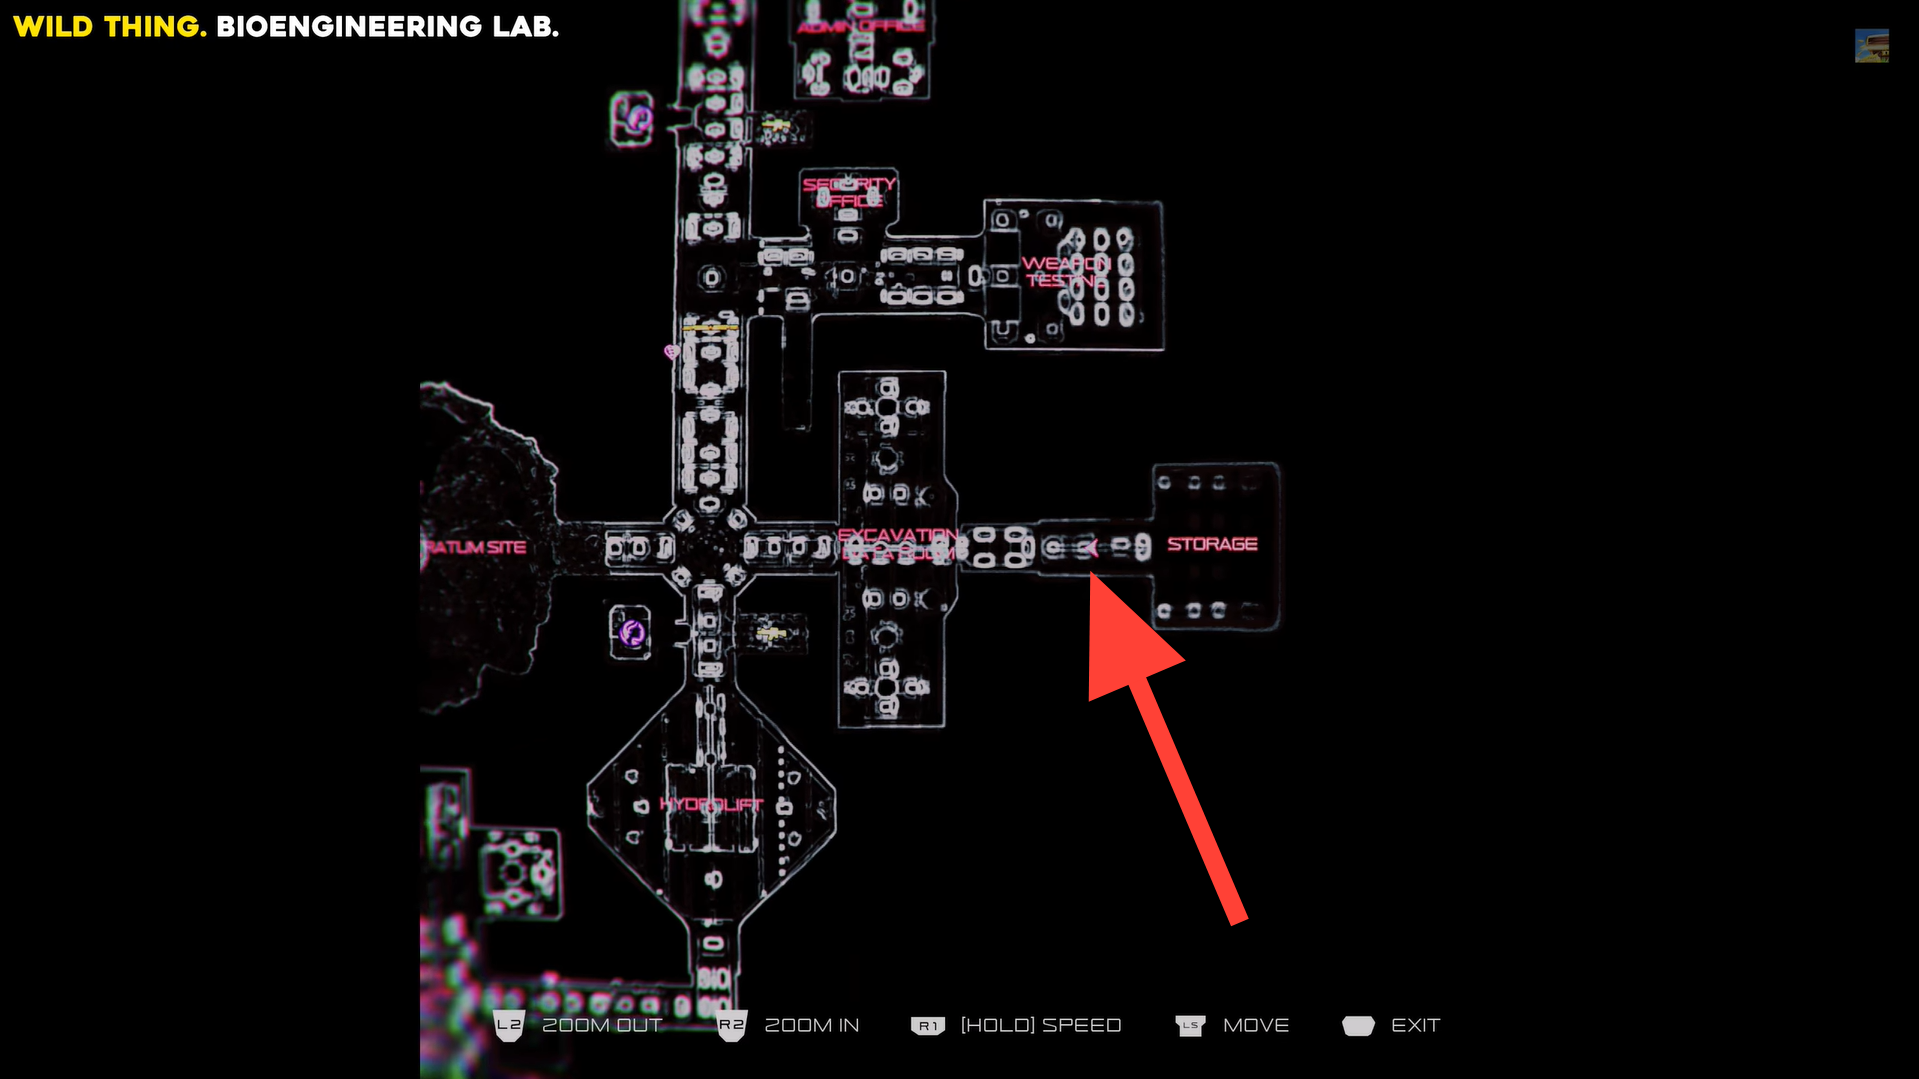
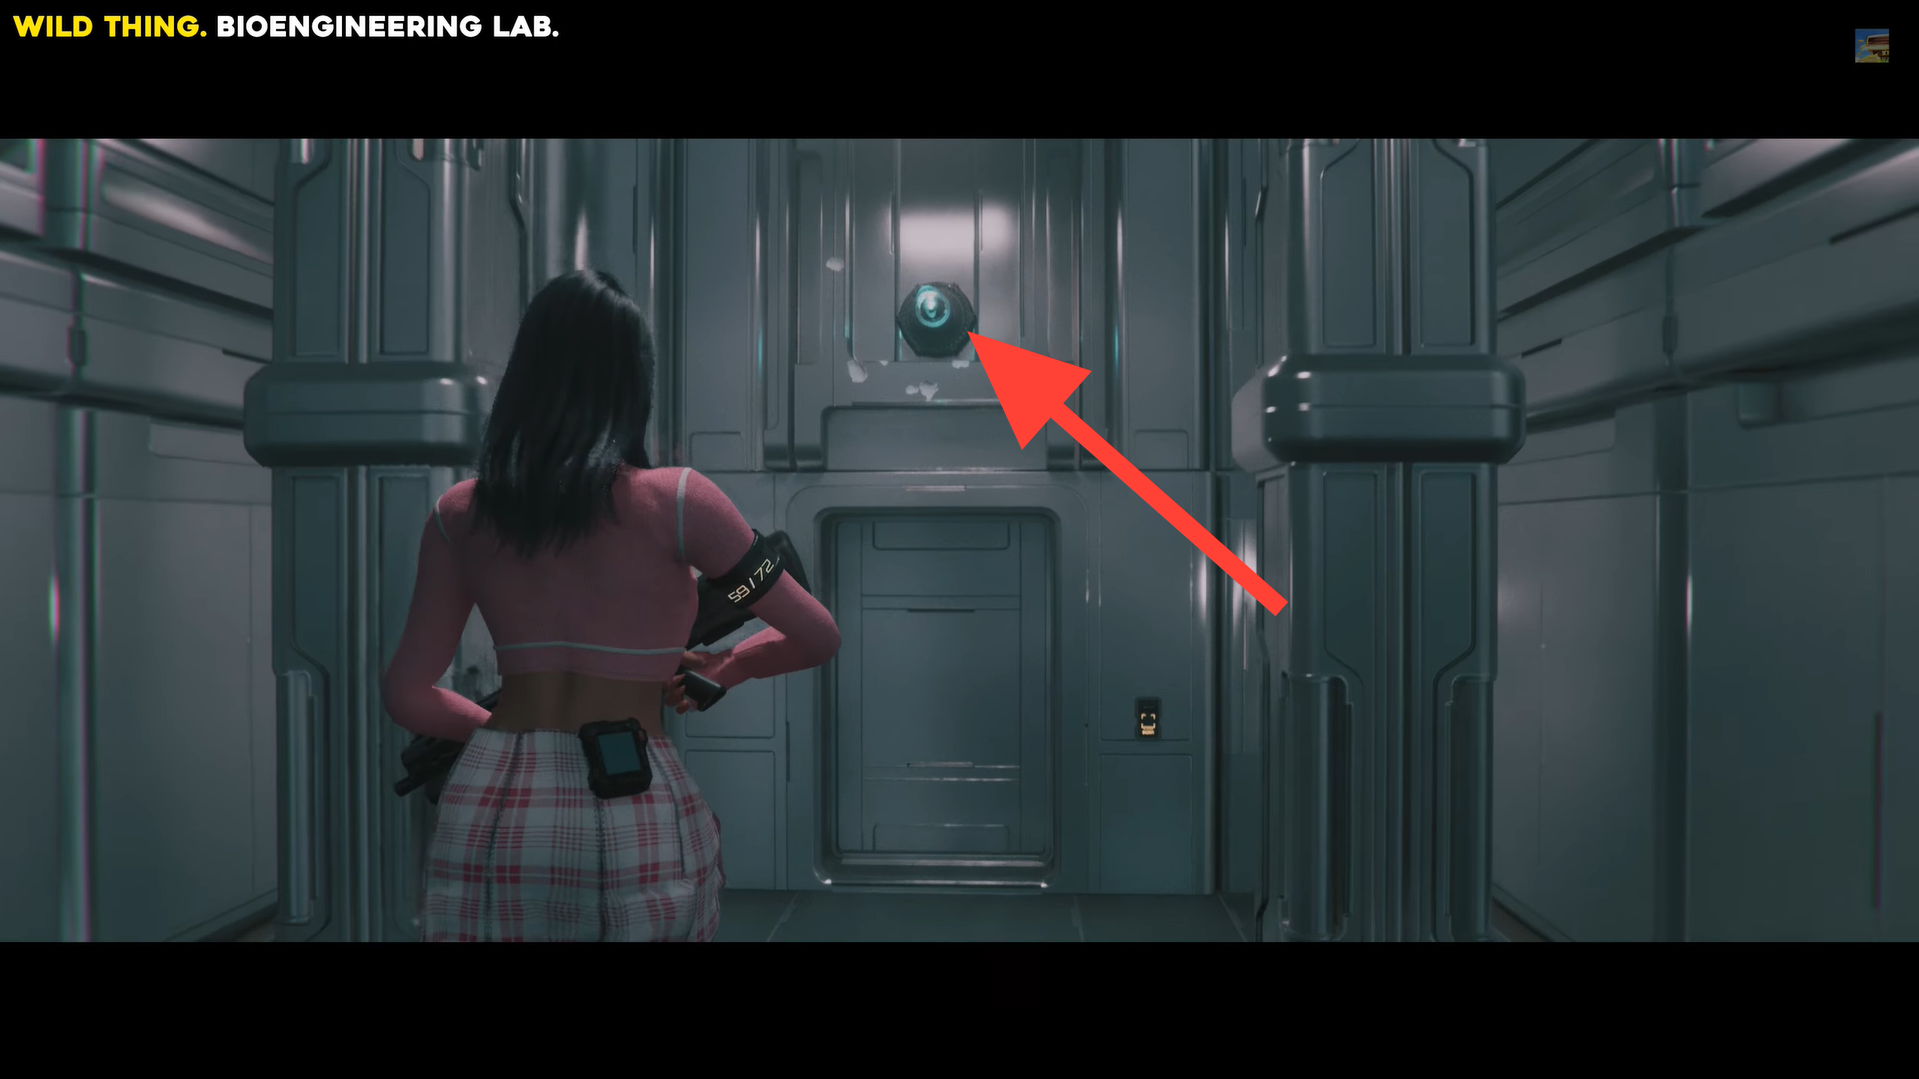
Wild Thing outfit location. Image credits: TeamKill Media / YouTube: 100% Guides
When you reach the Lobby, turn right twice into the outfit path and follow it to the end.
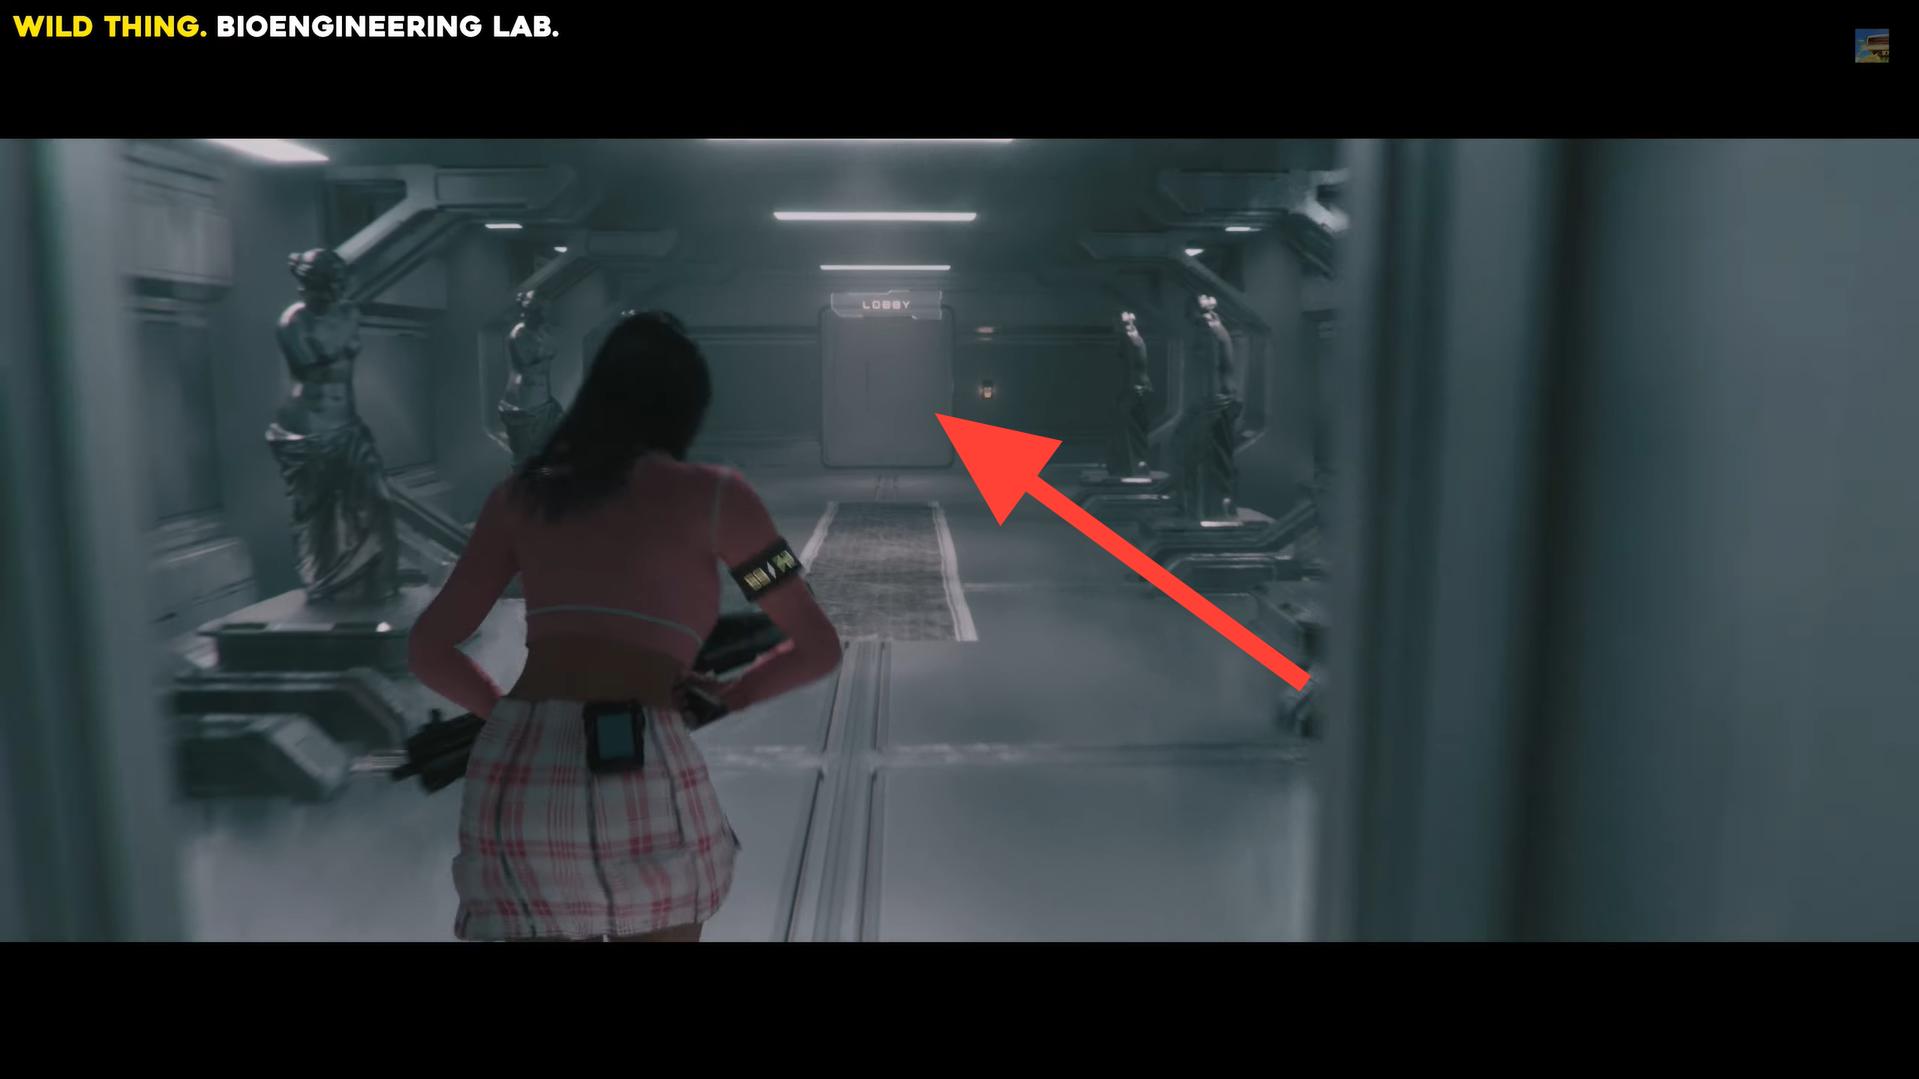
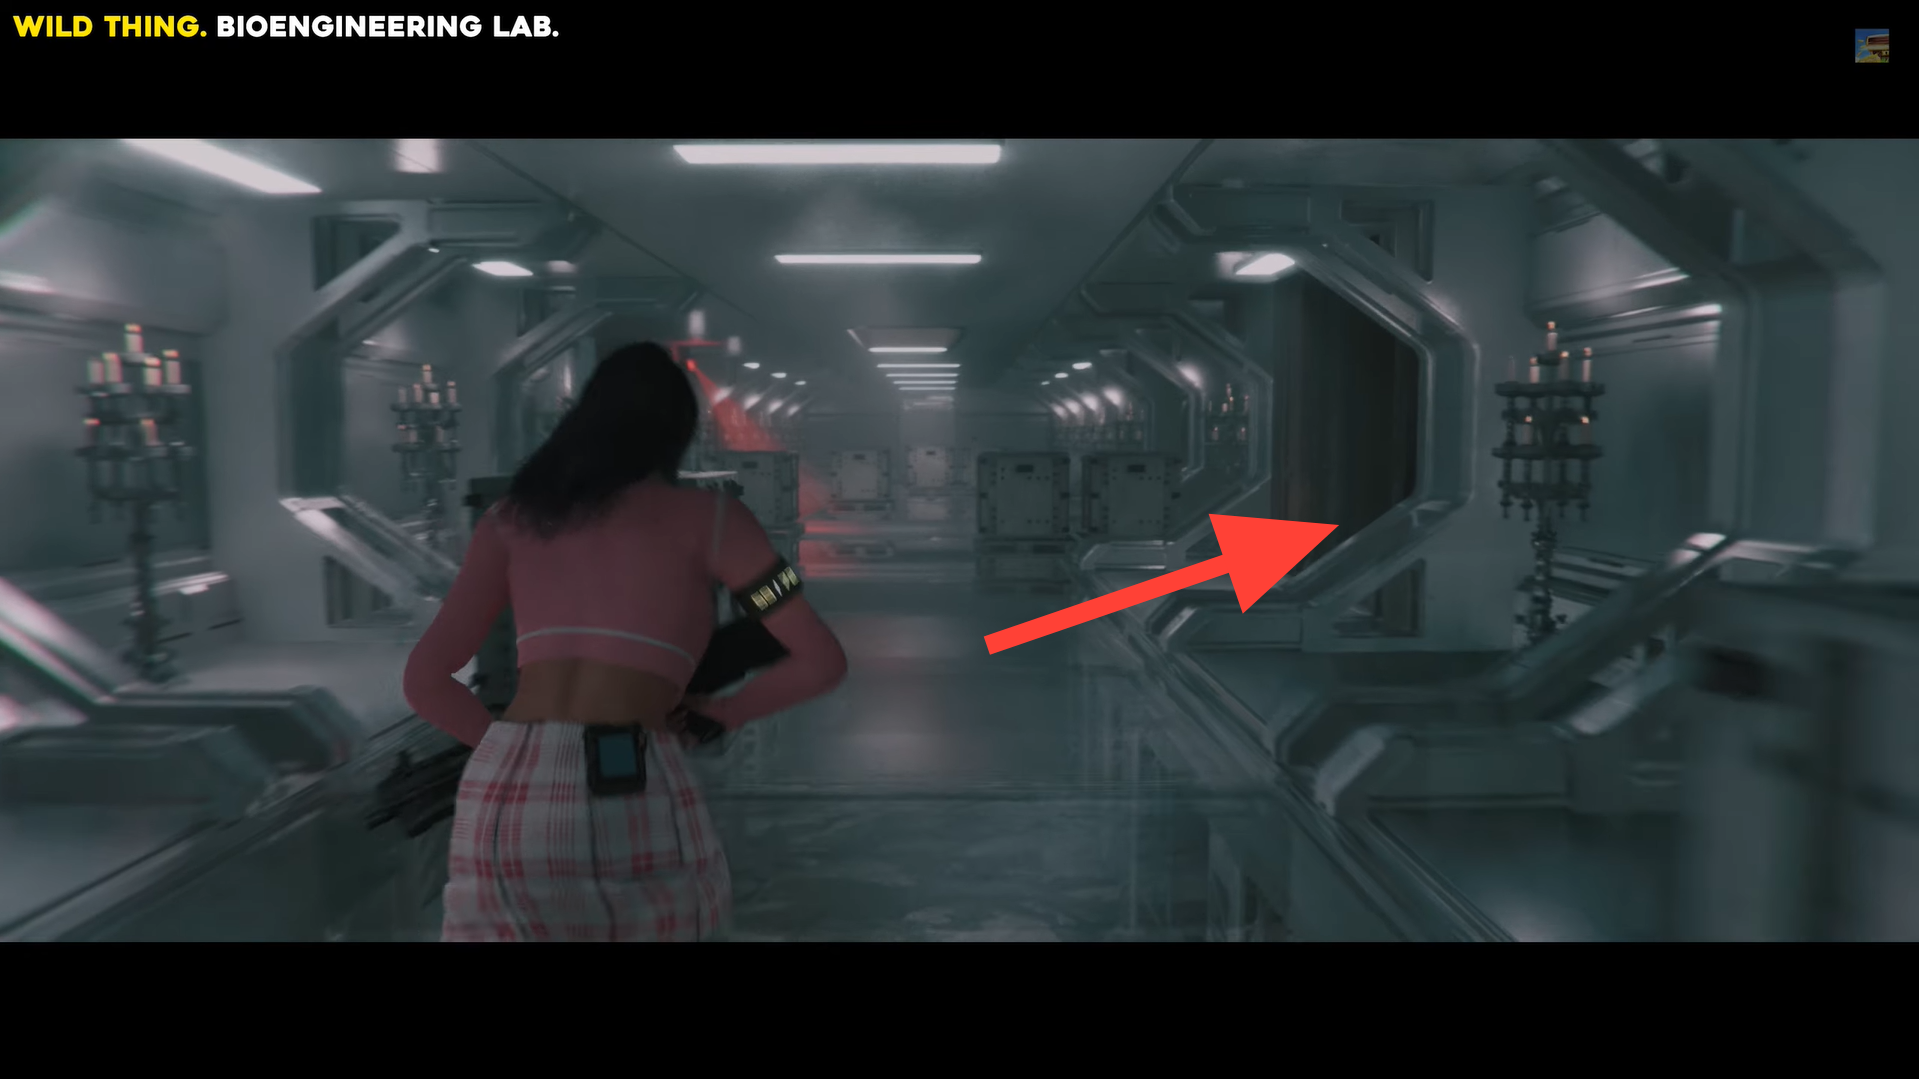
In the Lobby, turn right twice and follow the path. Image credits: TeamKill Media / YouTube: 100% Guides
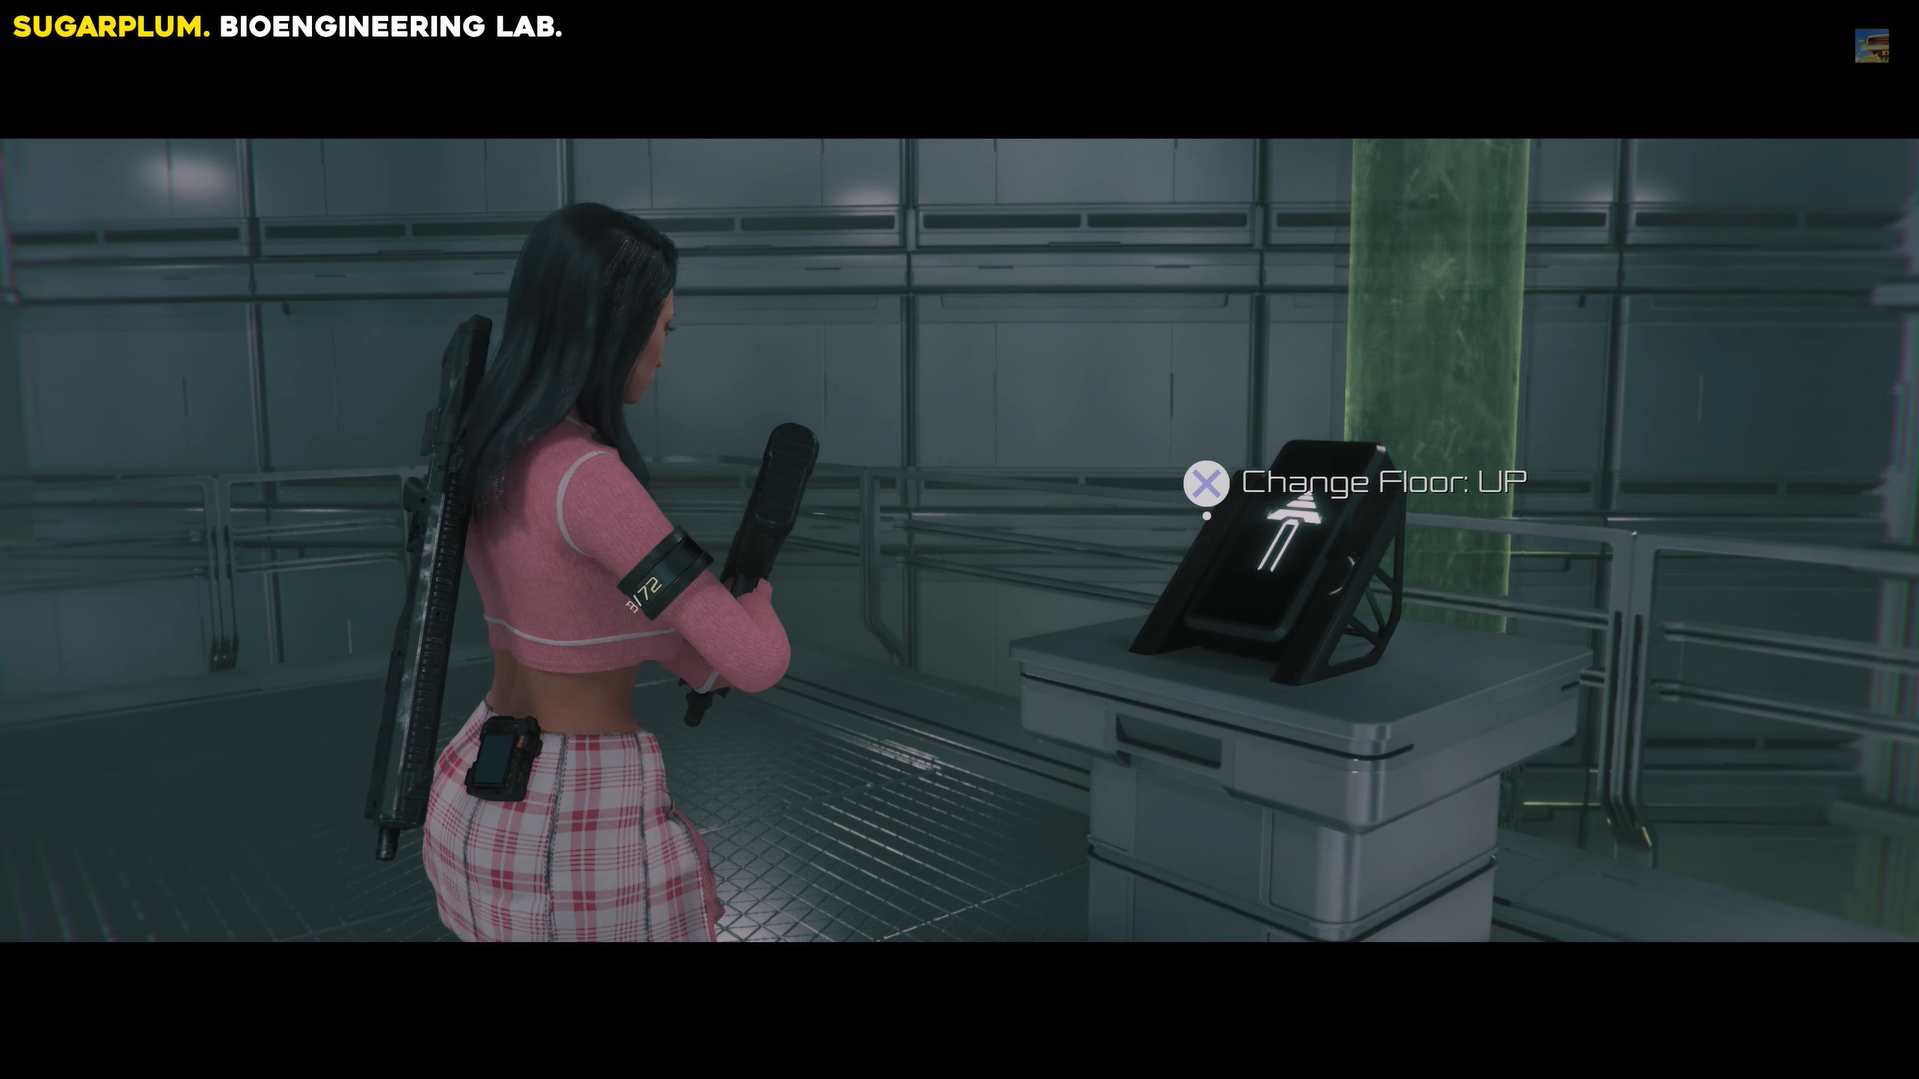
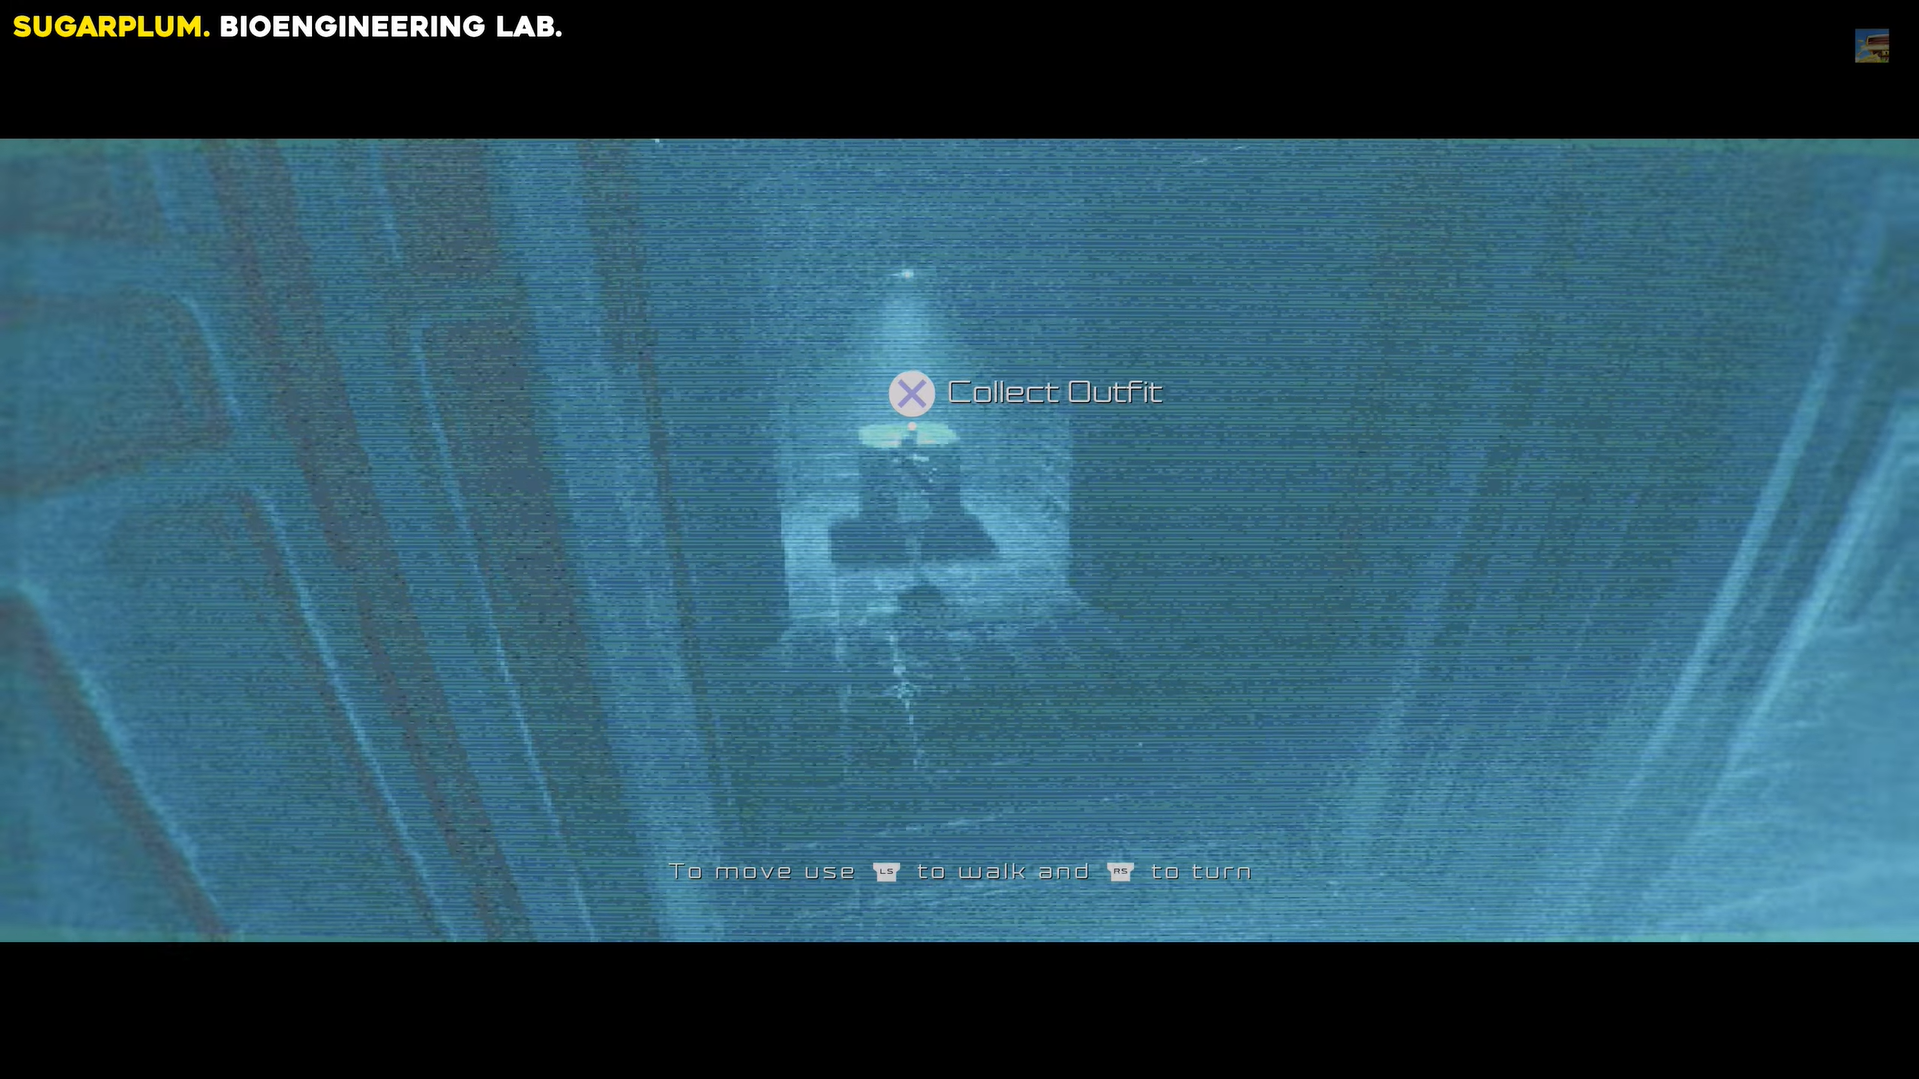
Sugarplum outfit
Head to the middle of the Hydrolift Room in the Bioengineering Lab and lower the lift to the bottom level.
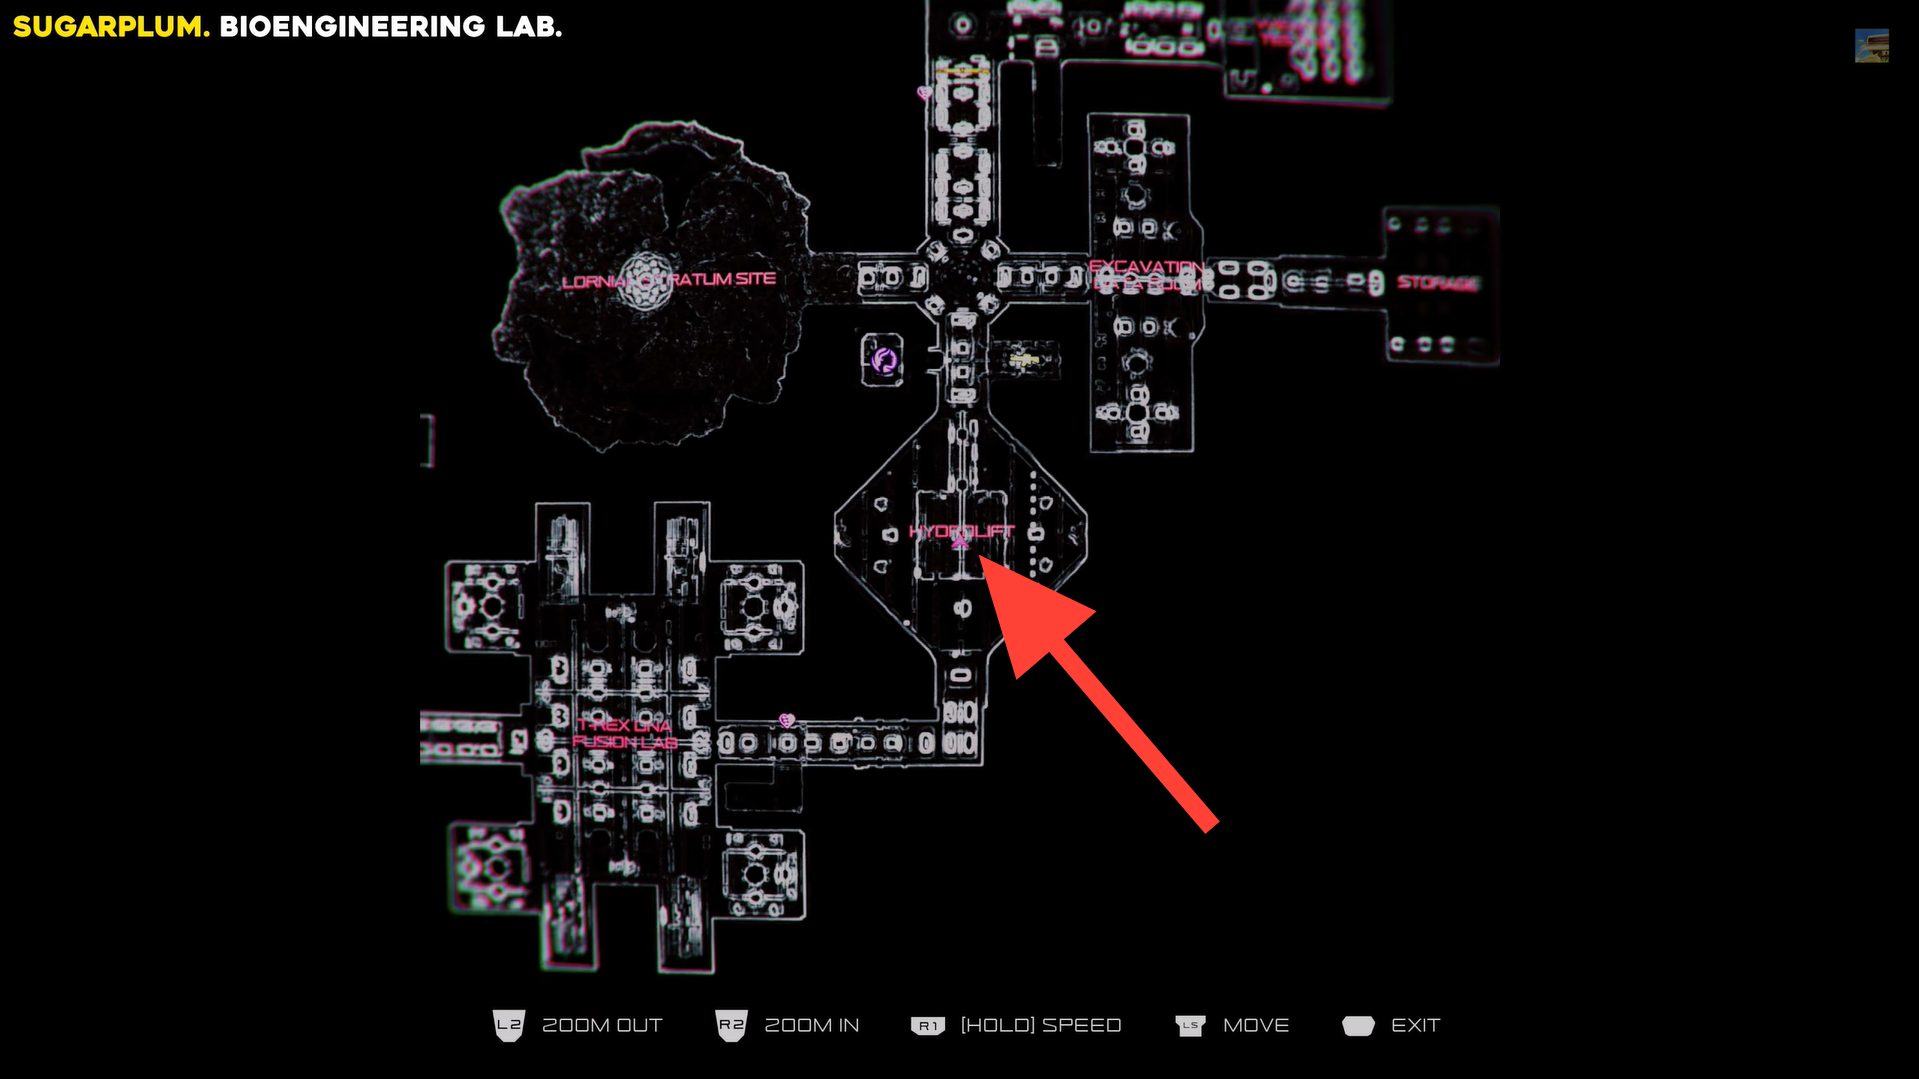
Sugarplum outfit location. Image credits: TeamKill Media / YouTube: 100% Guides
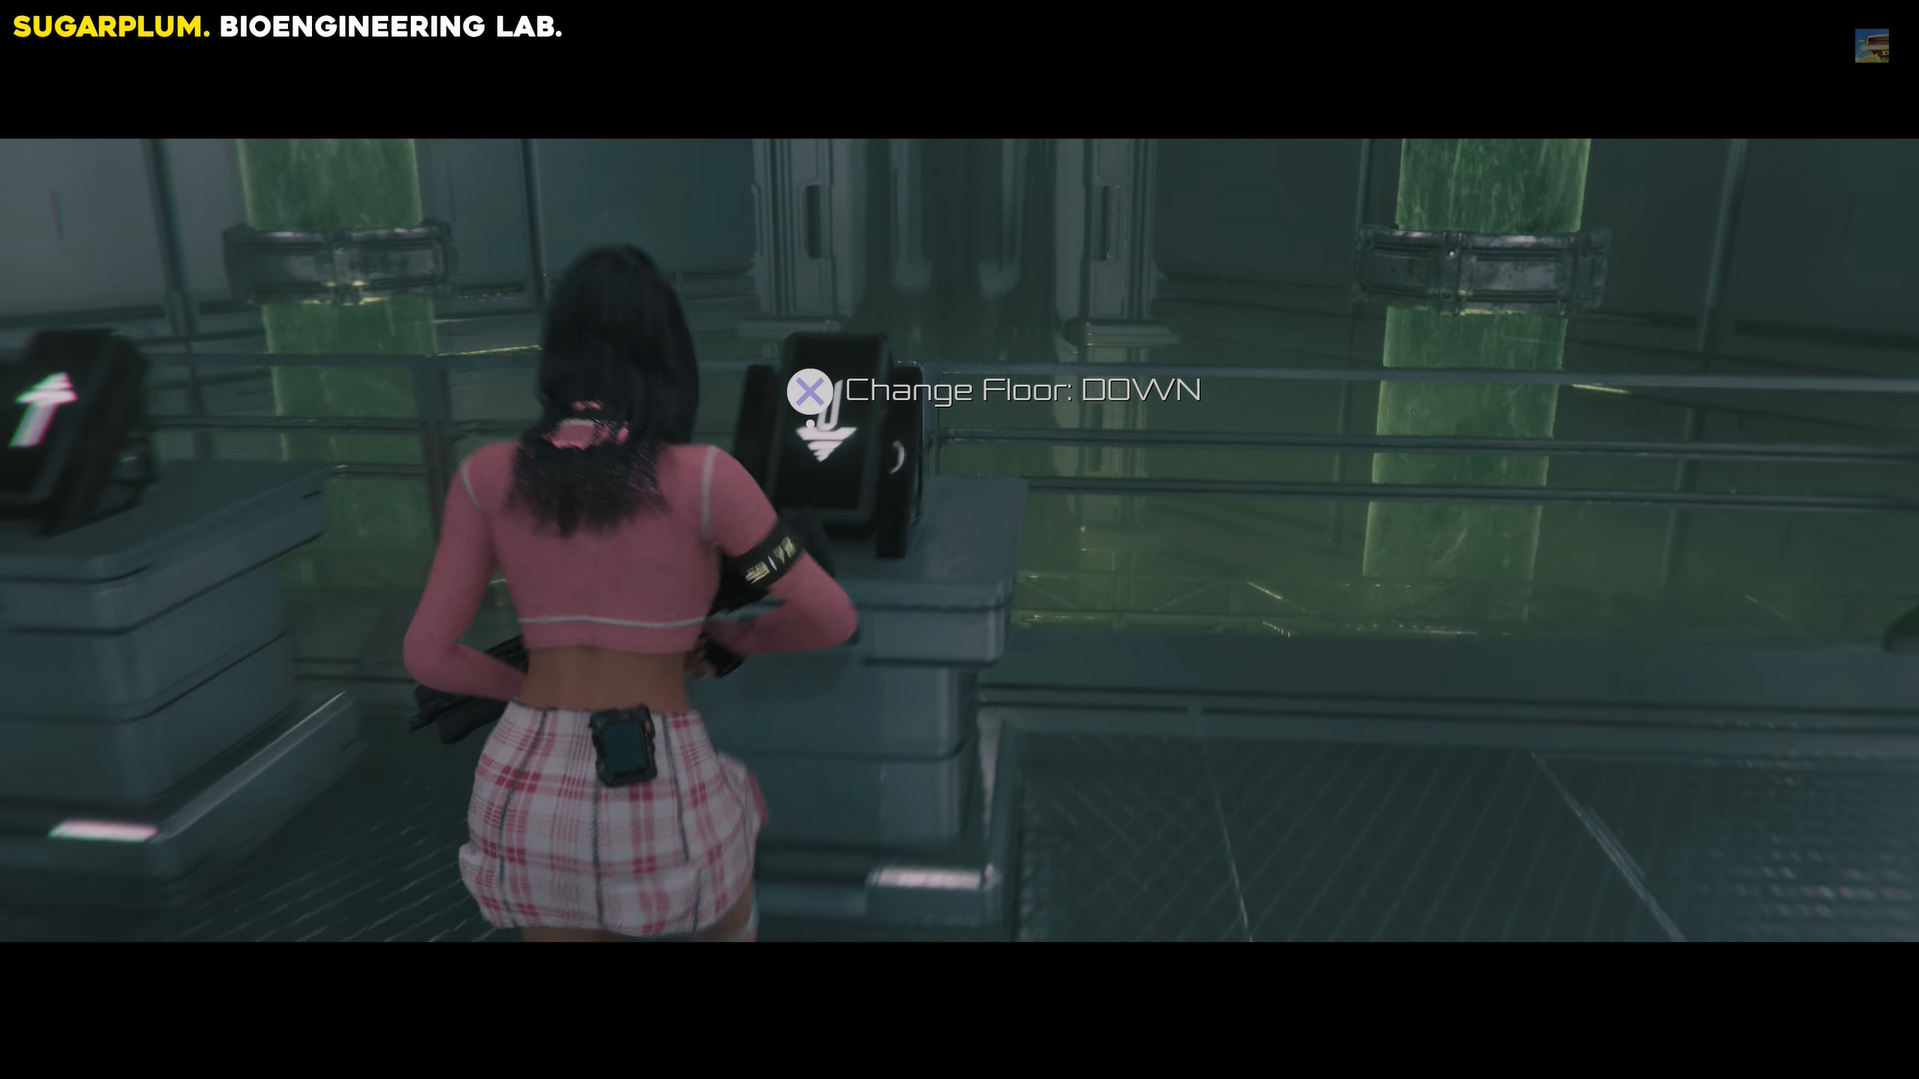
From the bottom level, shoot the white bulb from a distance, then raise the platform and rotate it once.
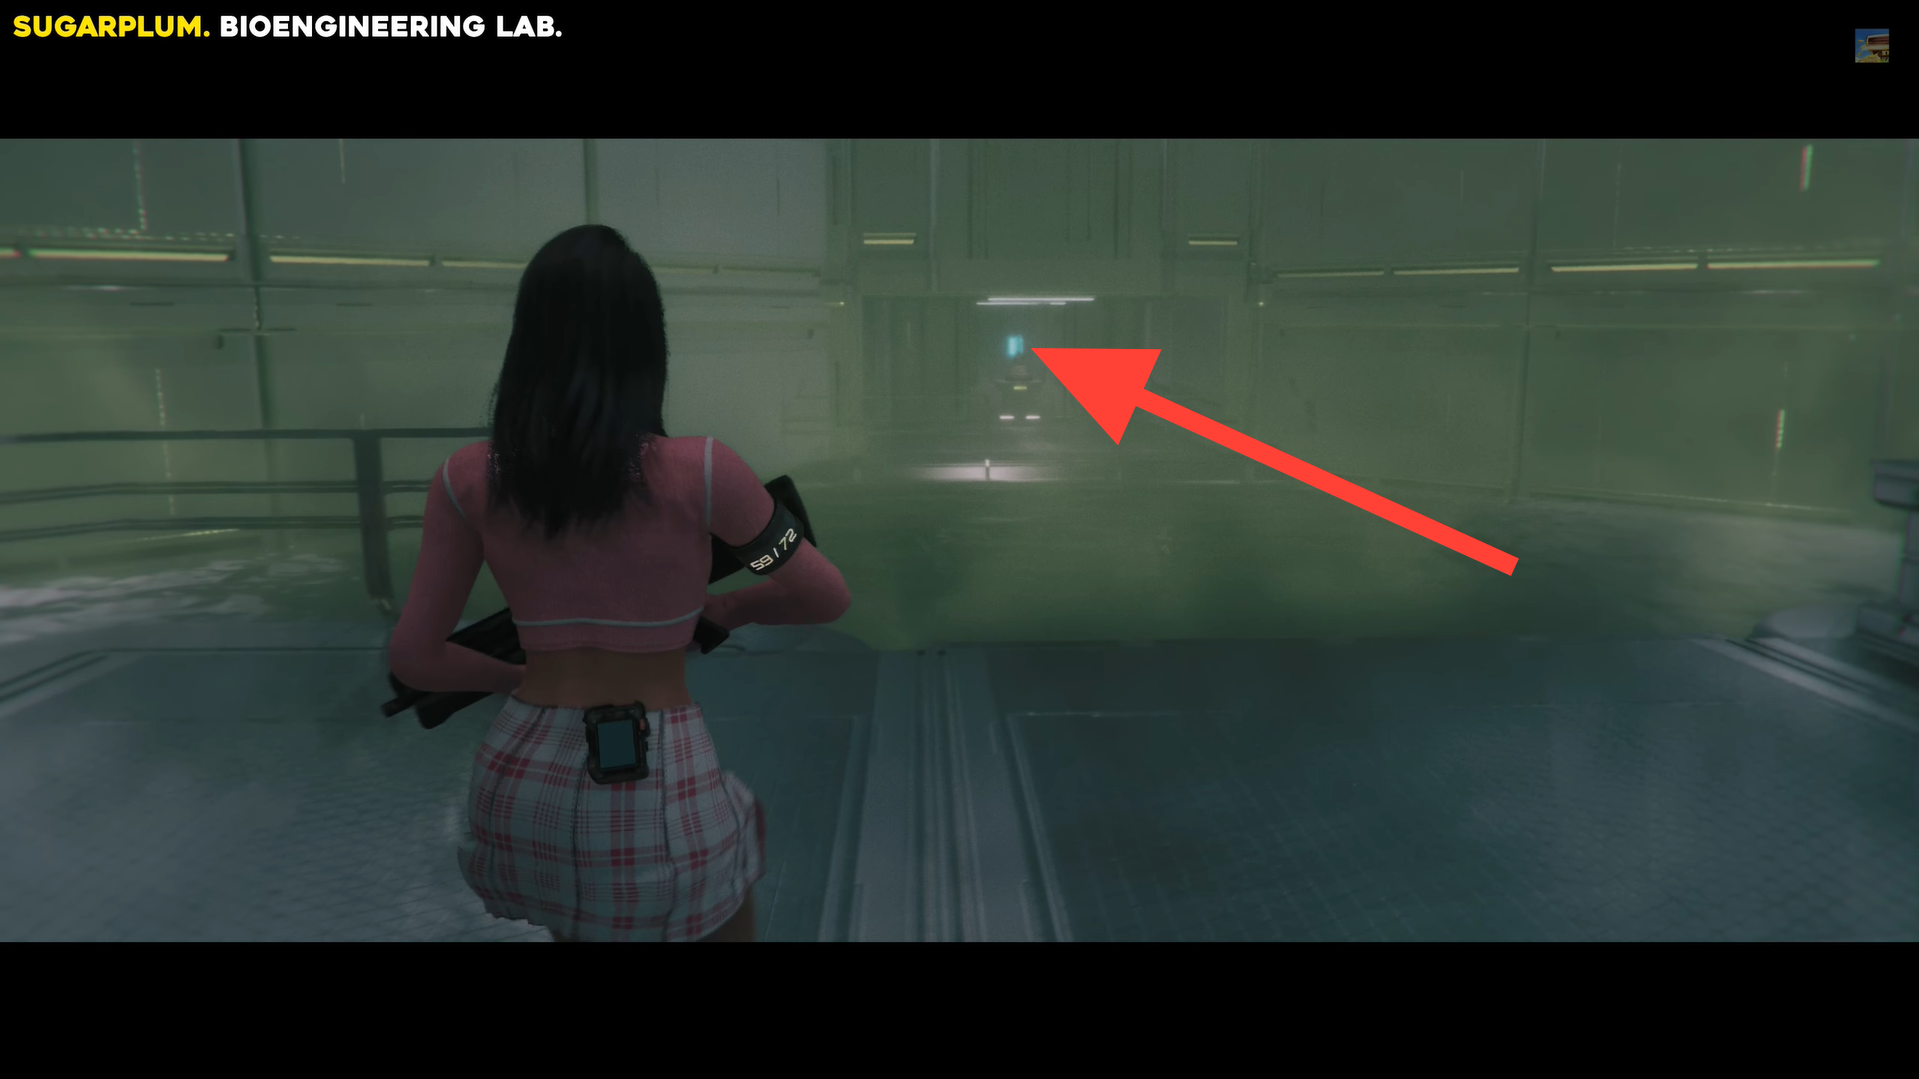
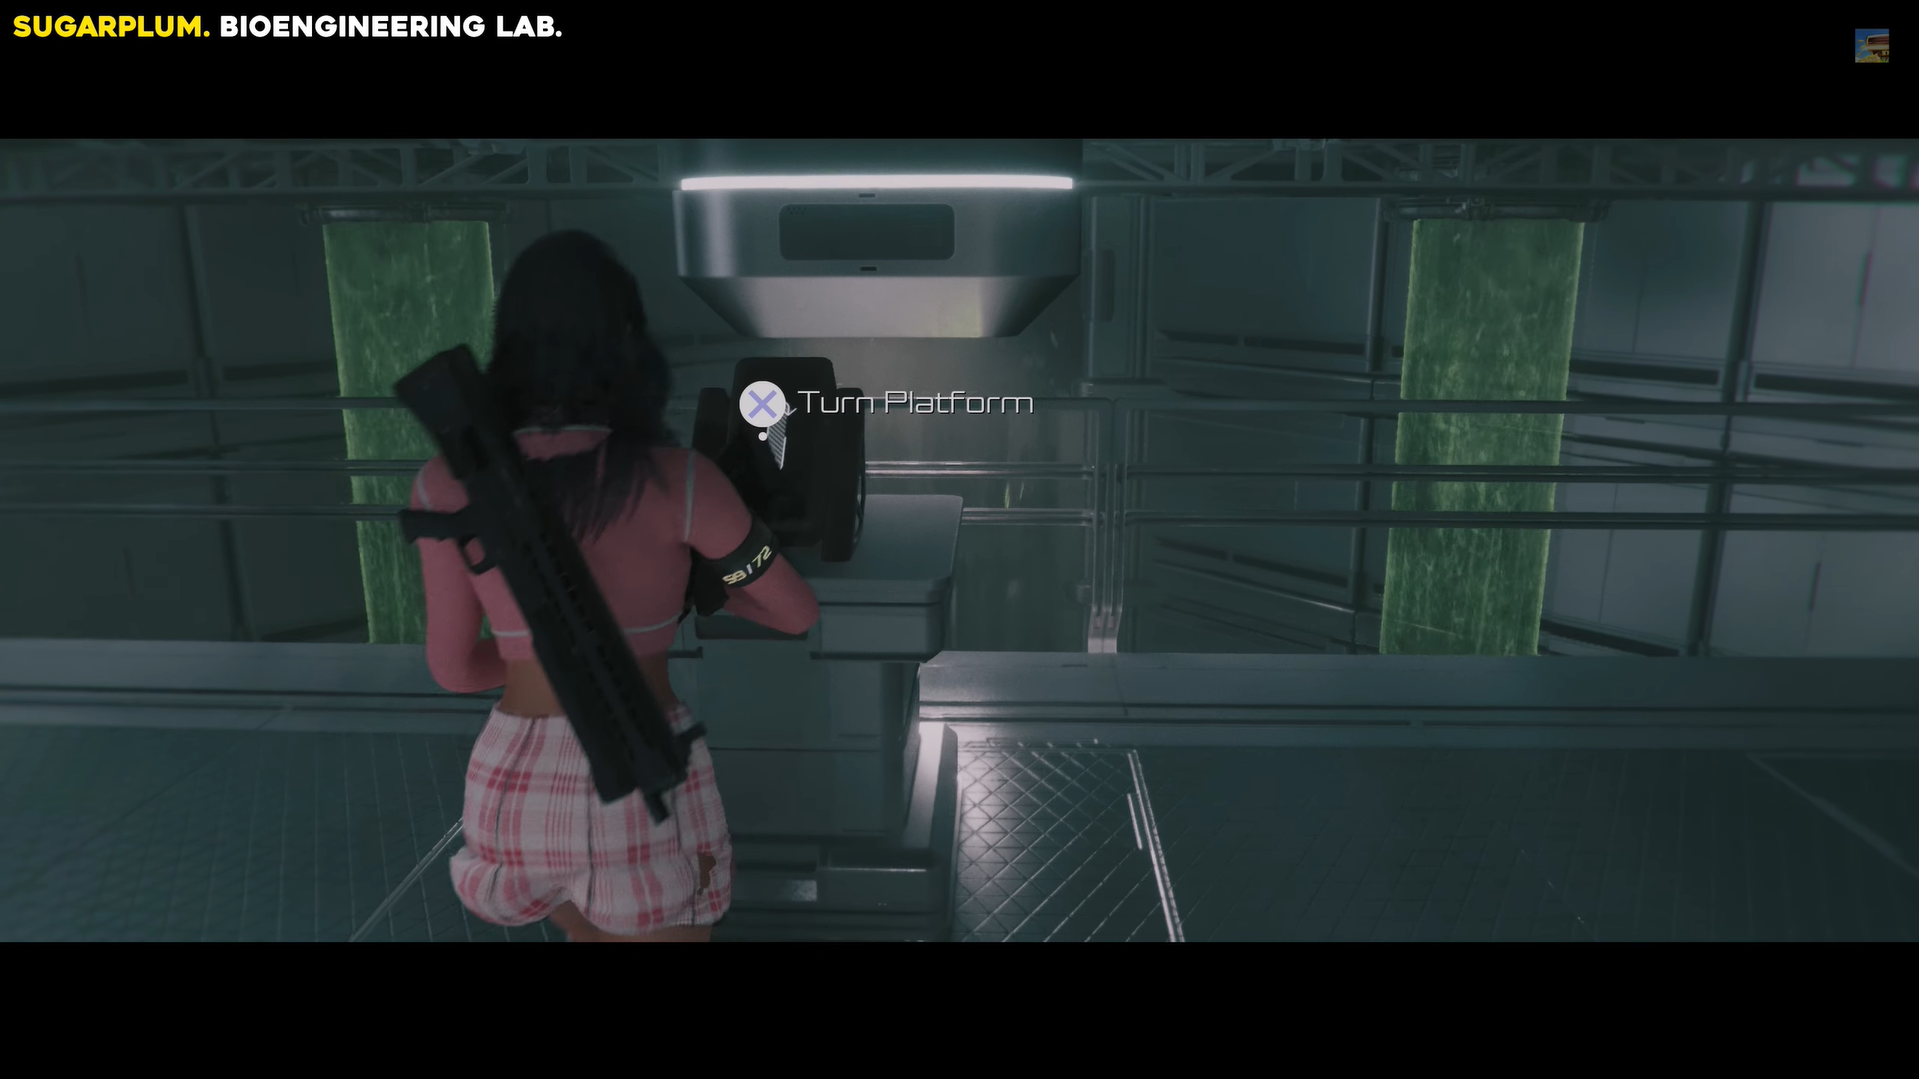
From the bottom, shoot the white bulb, then raise and rotate the platform. Image credits: TeamKill Media / YouTube: 100% Guides
Extend the bridge to the distant door, open it, go straight, descend the stairs on the right, and take the left path into the fixed-camera area.
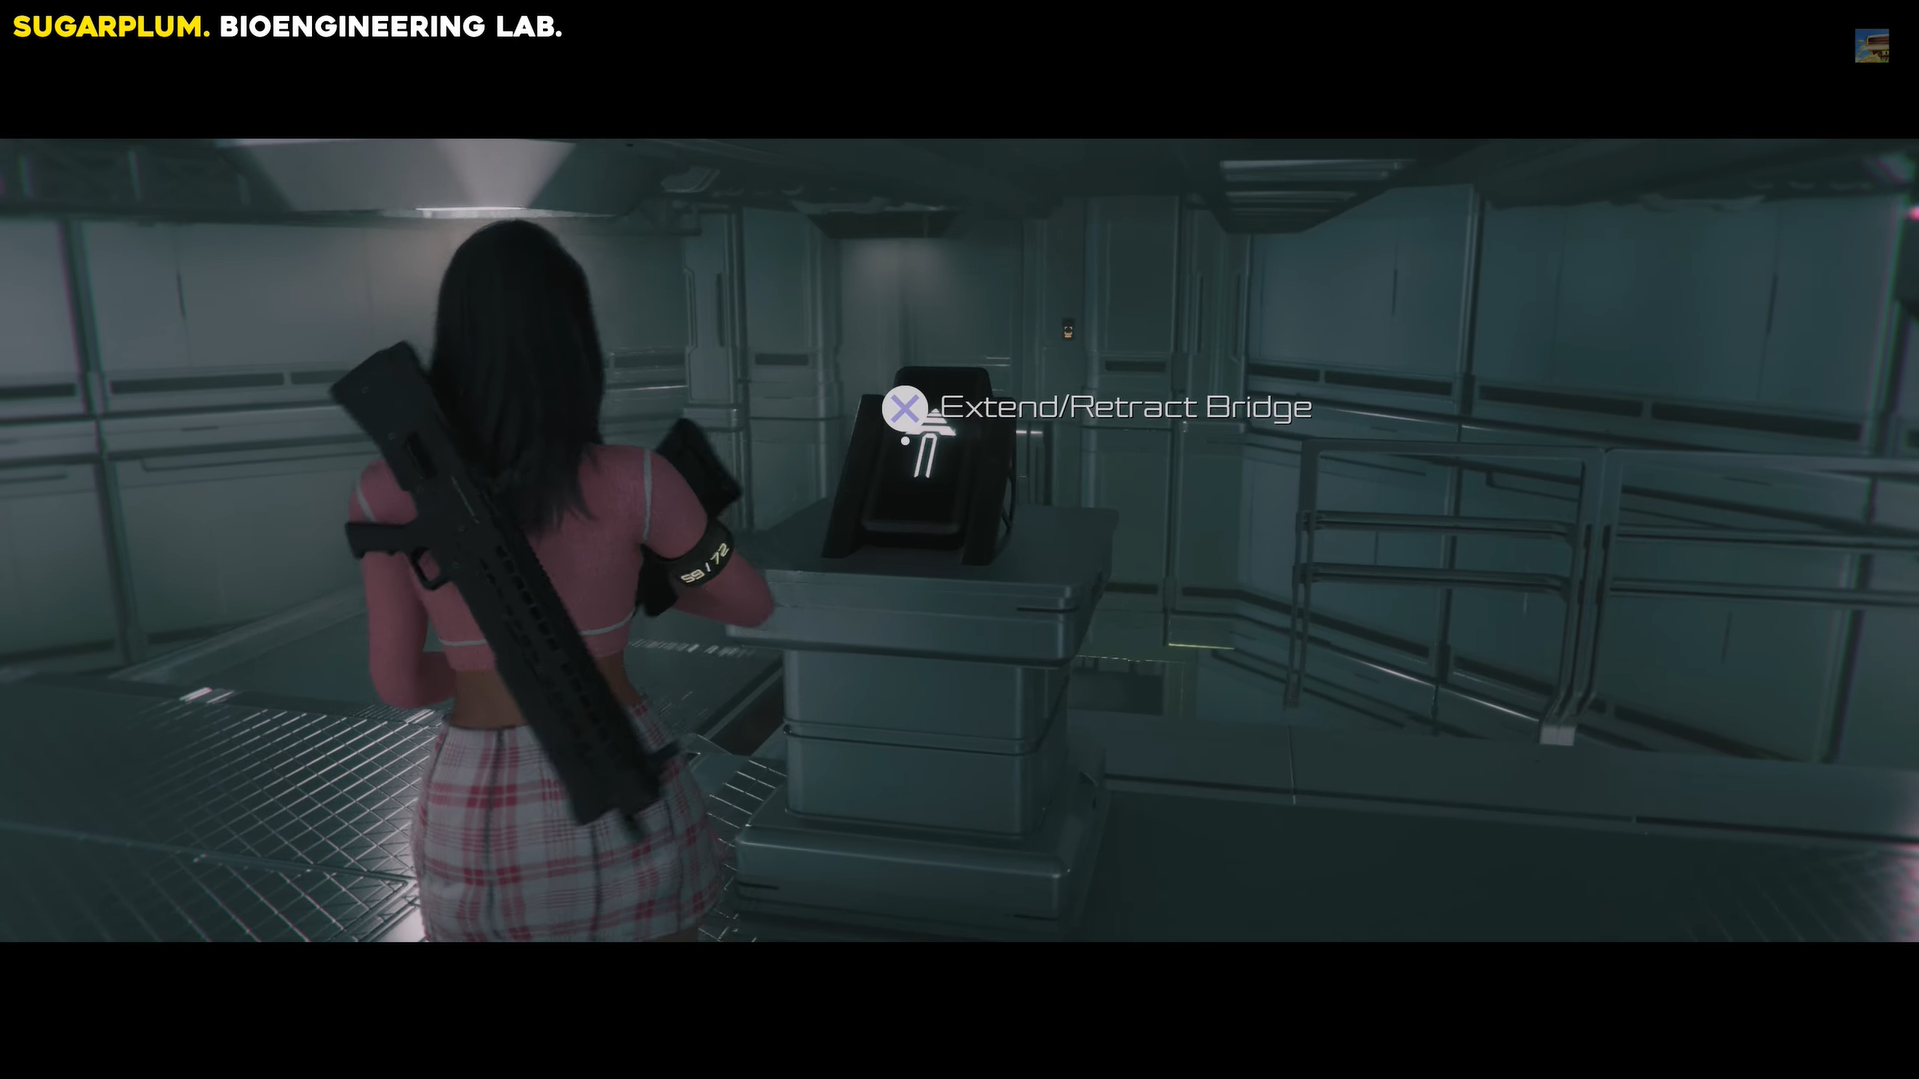
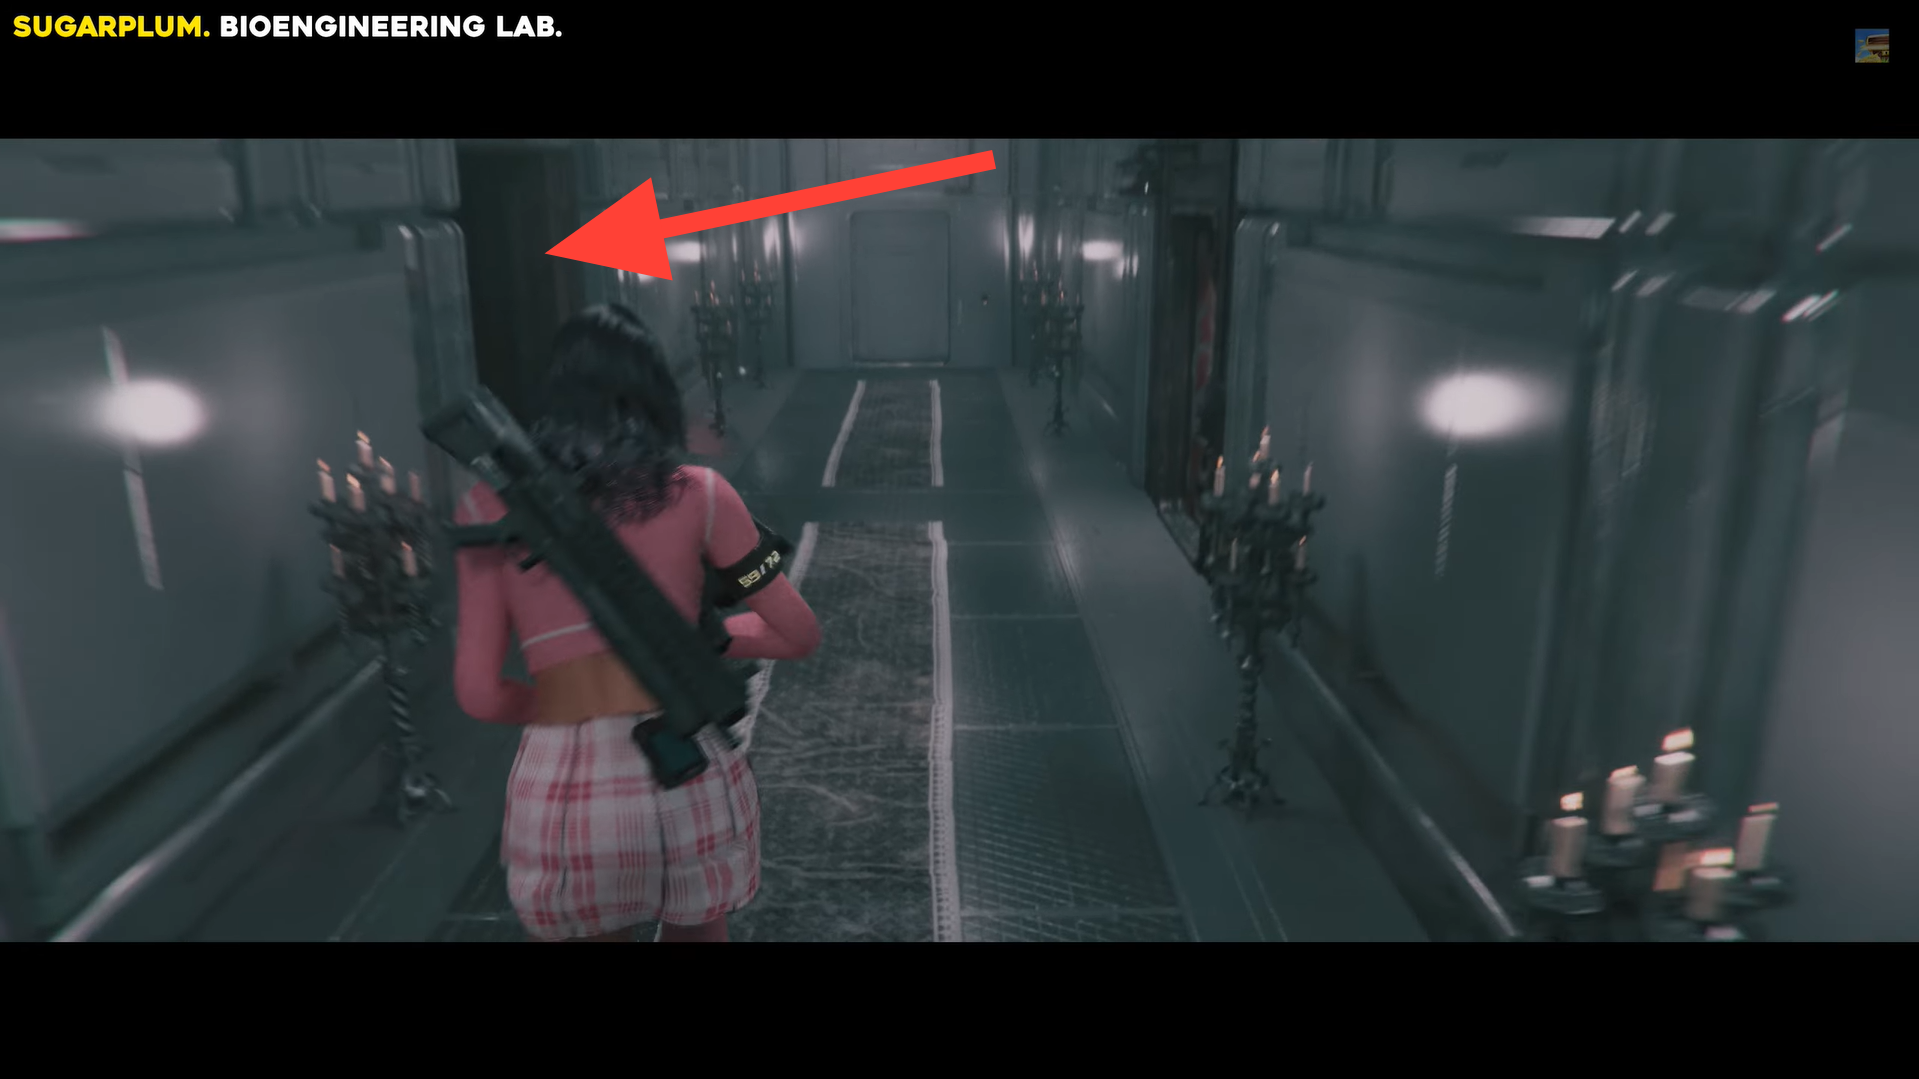
Extend the bridge, open the door, go straight, down the stairs, then left into the fixed-camera area. Image credits: TeamKill Media / YouTube: 100% Guides
Follow the path to collect the Sugarplum outfit.
Argh, Black Tides outfit
Head to the western side of the Clone Monitoring Room in the Bioengineering Lab, shoot the white bulb on the left wall, then take the route east of the room through the hallway of paintings.
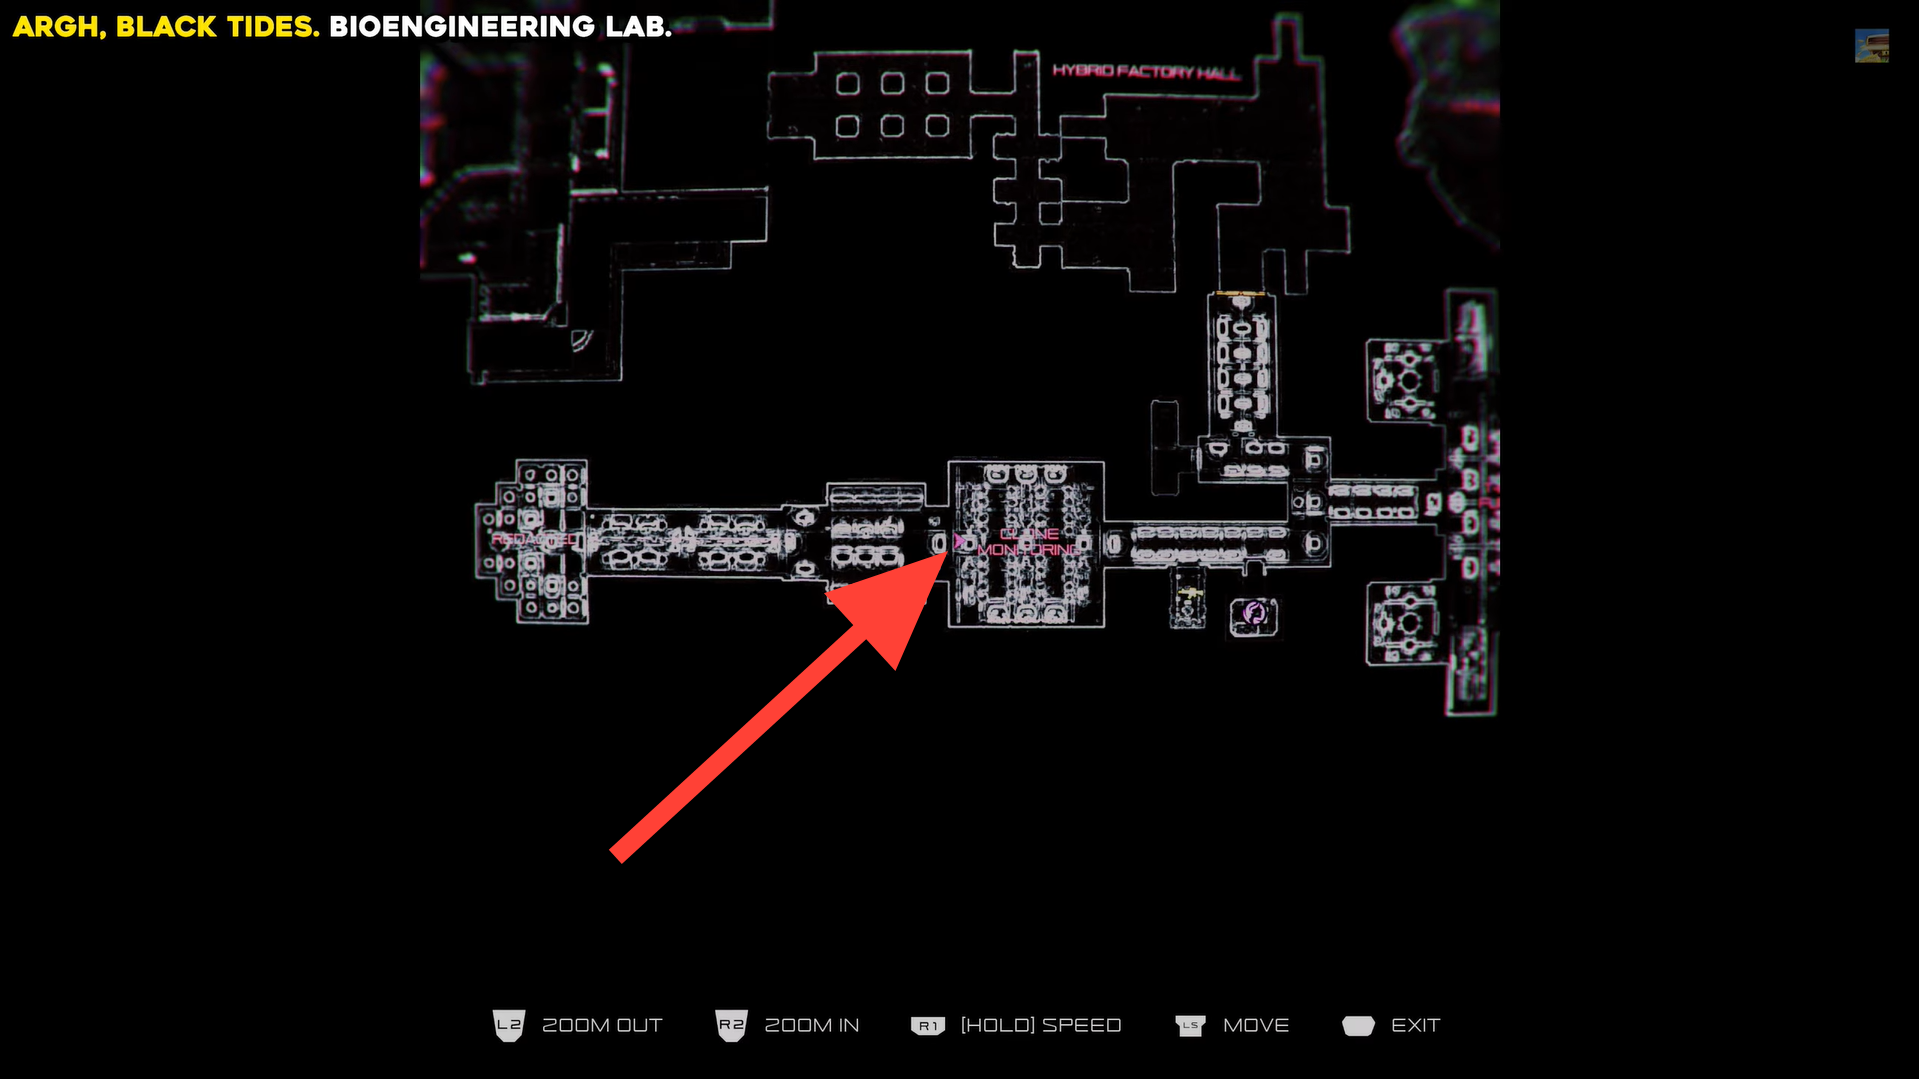
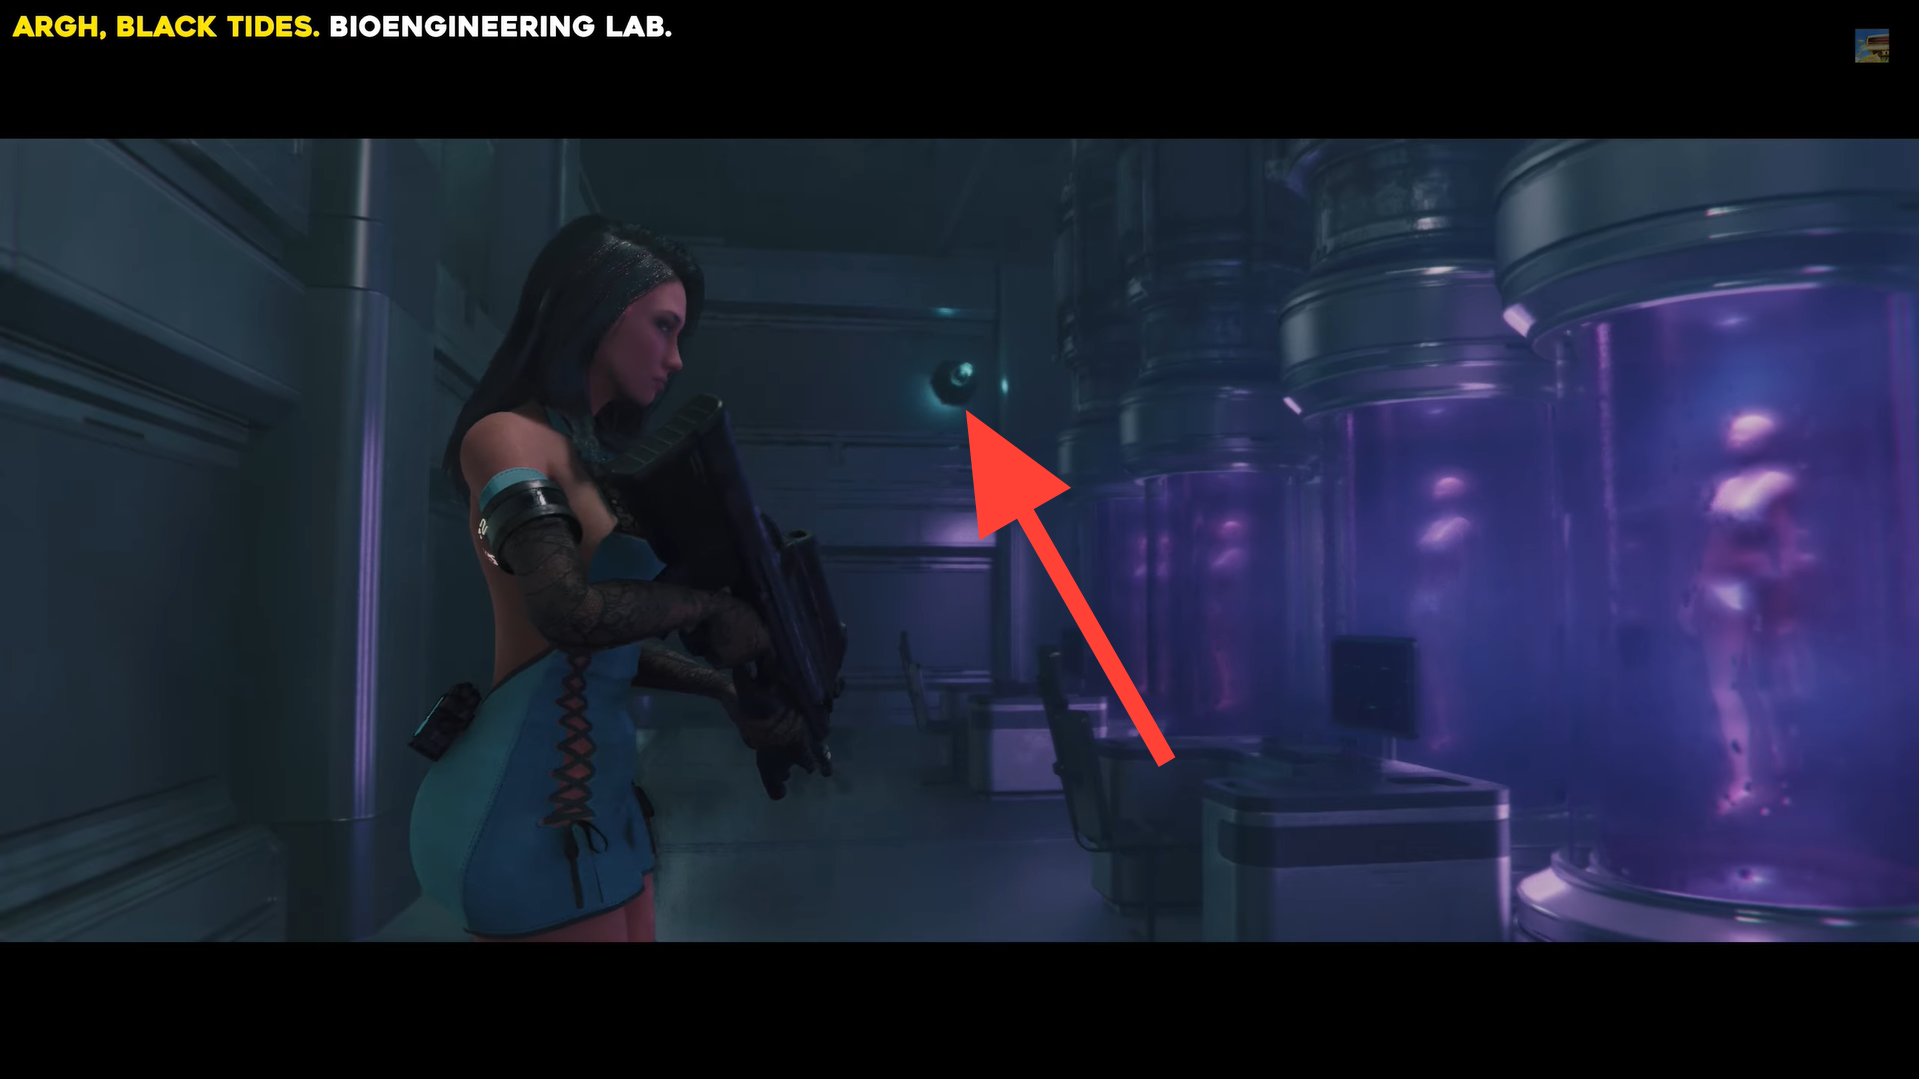
Argh, Black Tides outfit location. Image credits: TeamKill Media / YouTube: 100% Guides
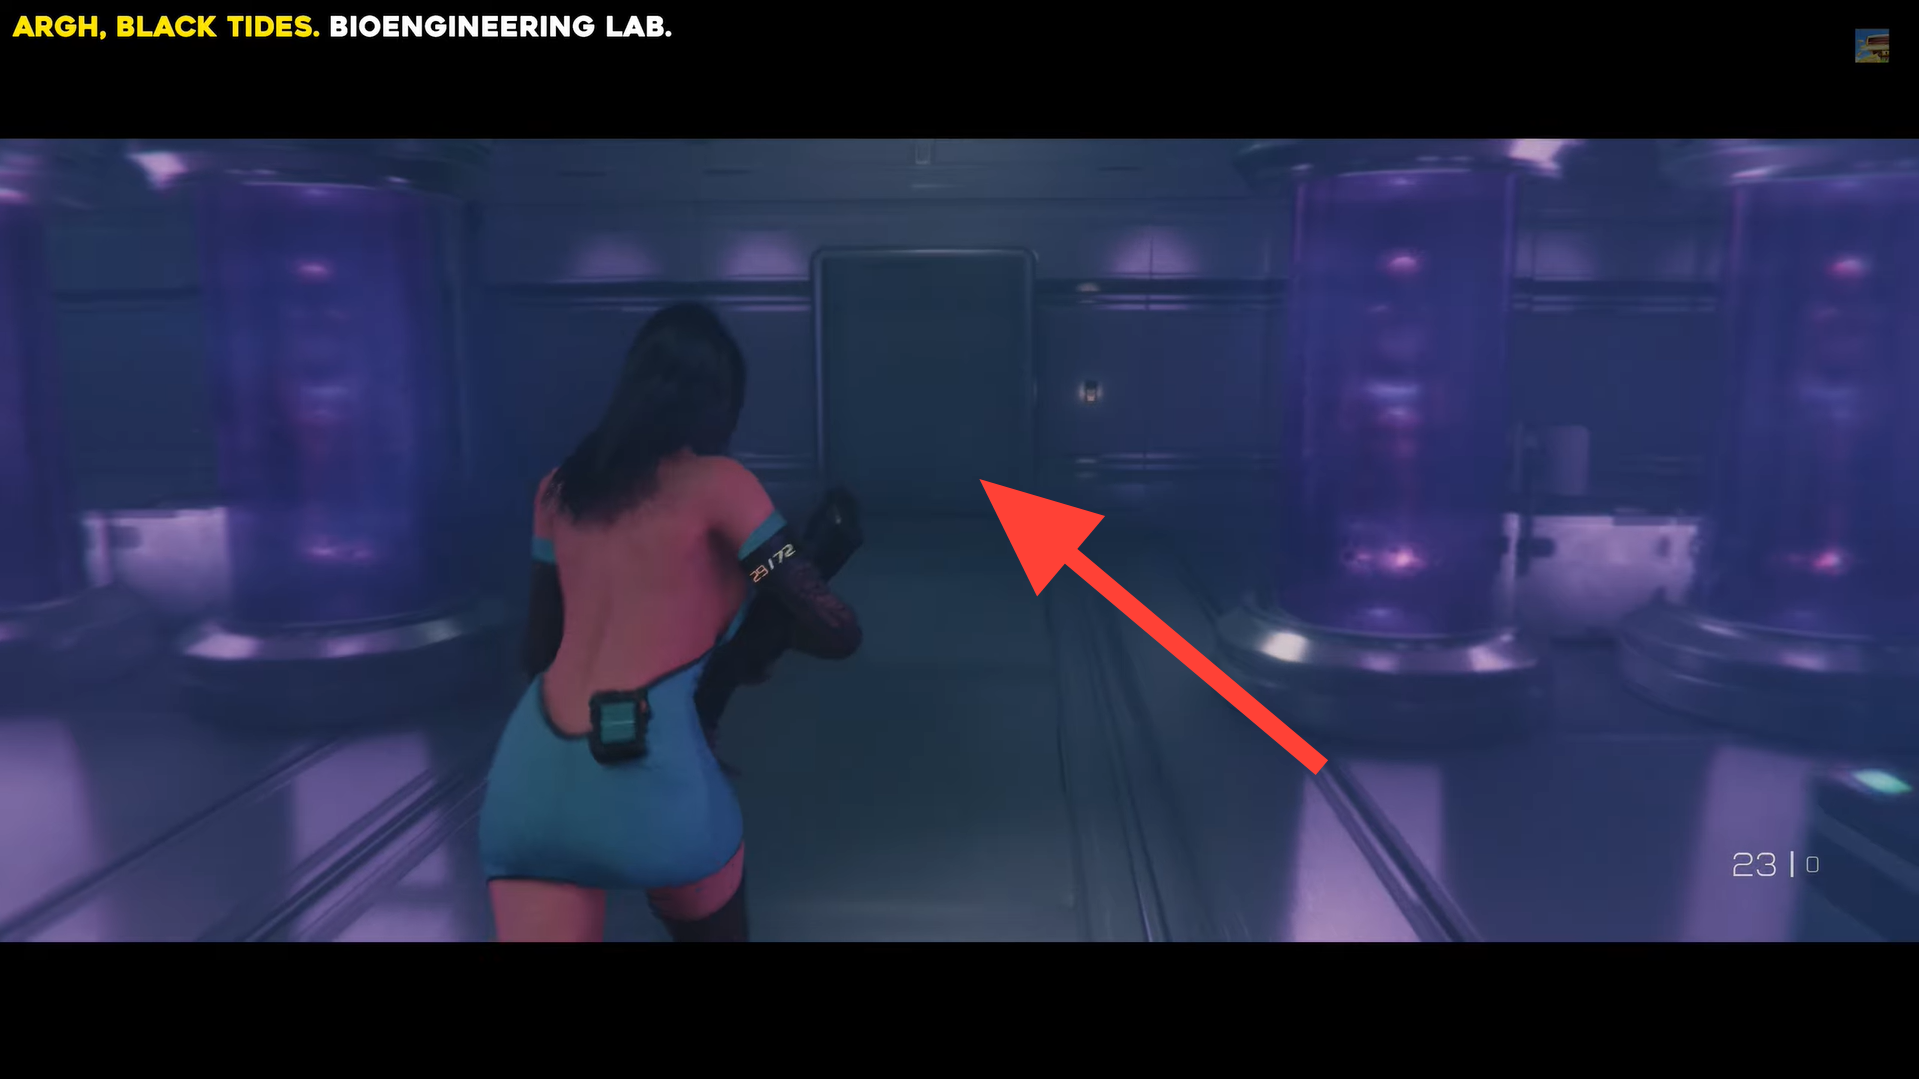
Turn left twice and continue straight into the fixed-camera area—the Argh, Black Tides outfit is at the end.
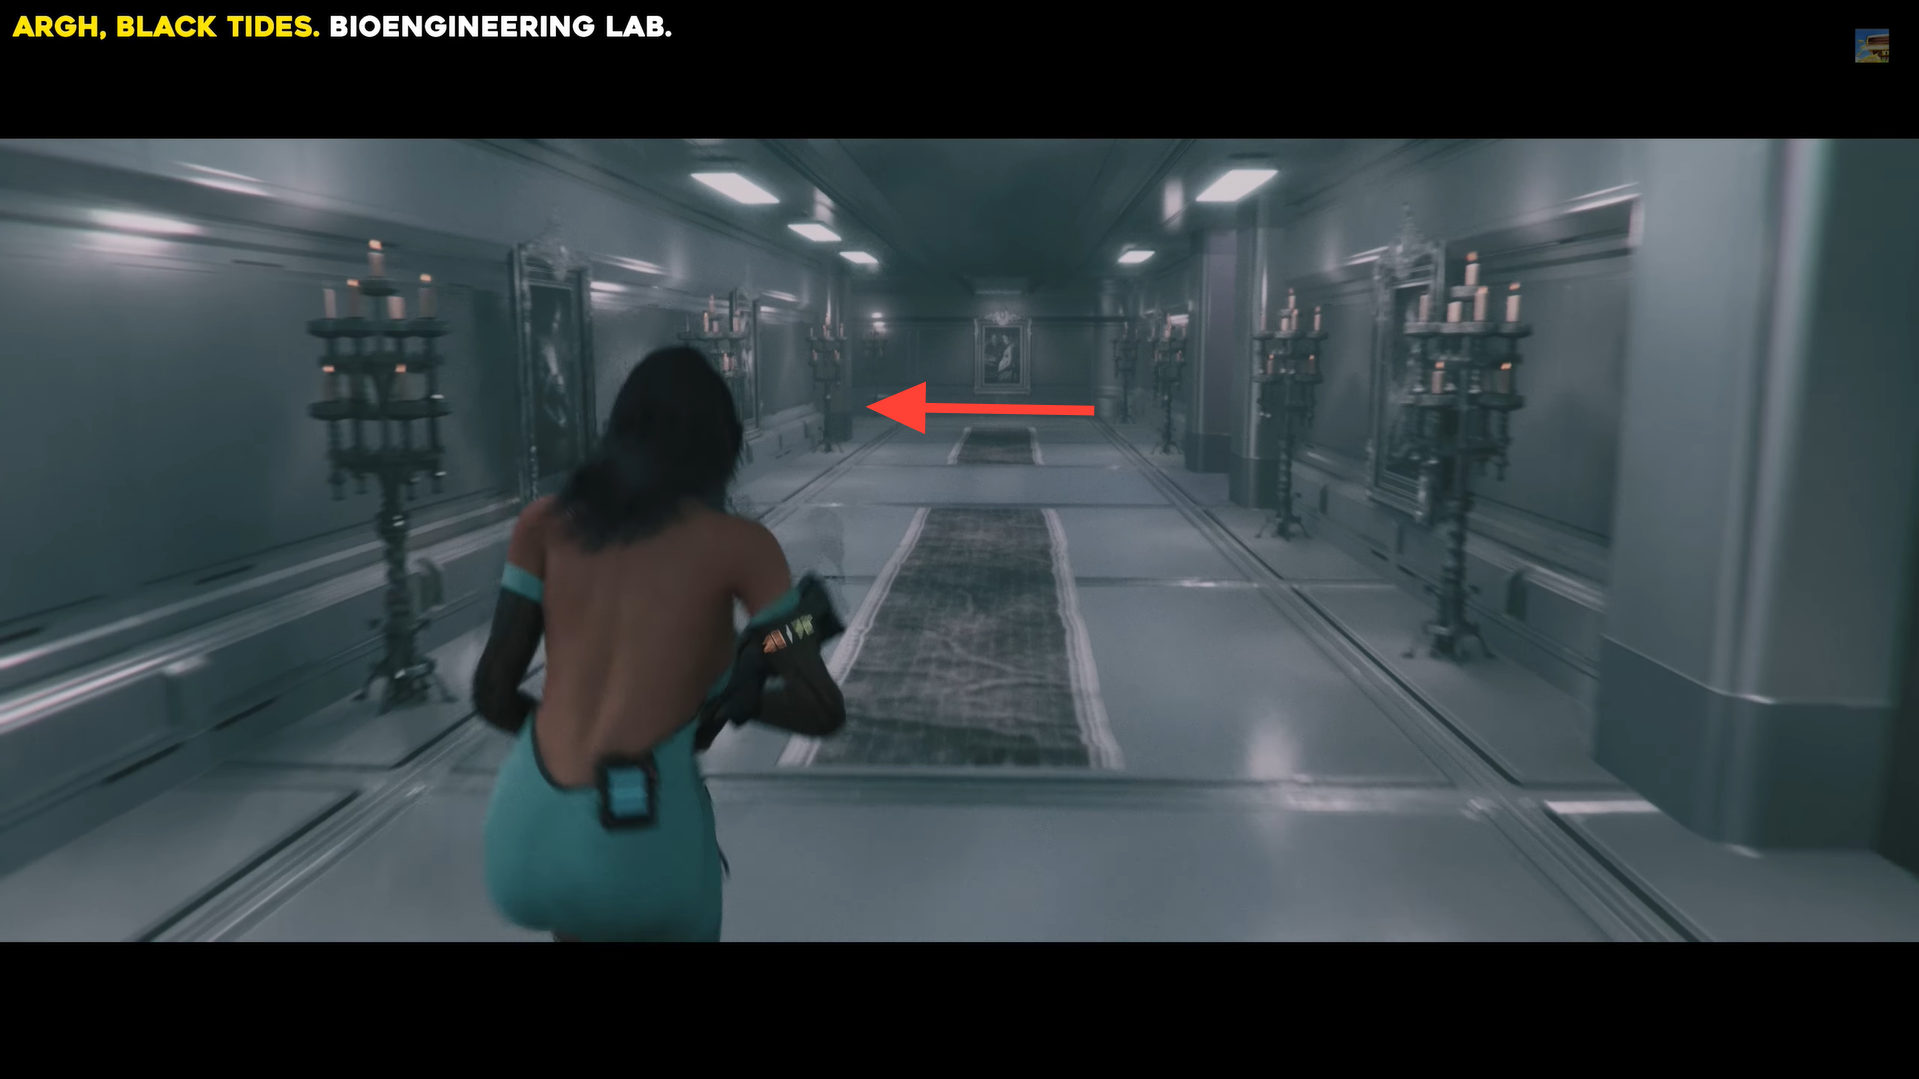
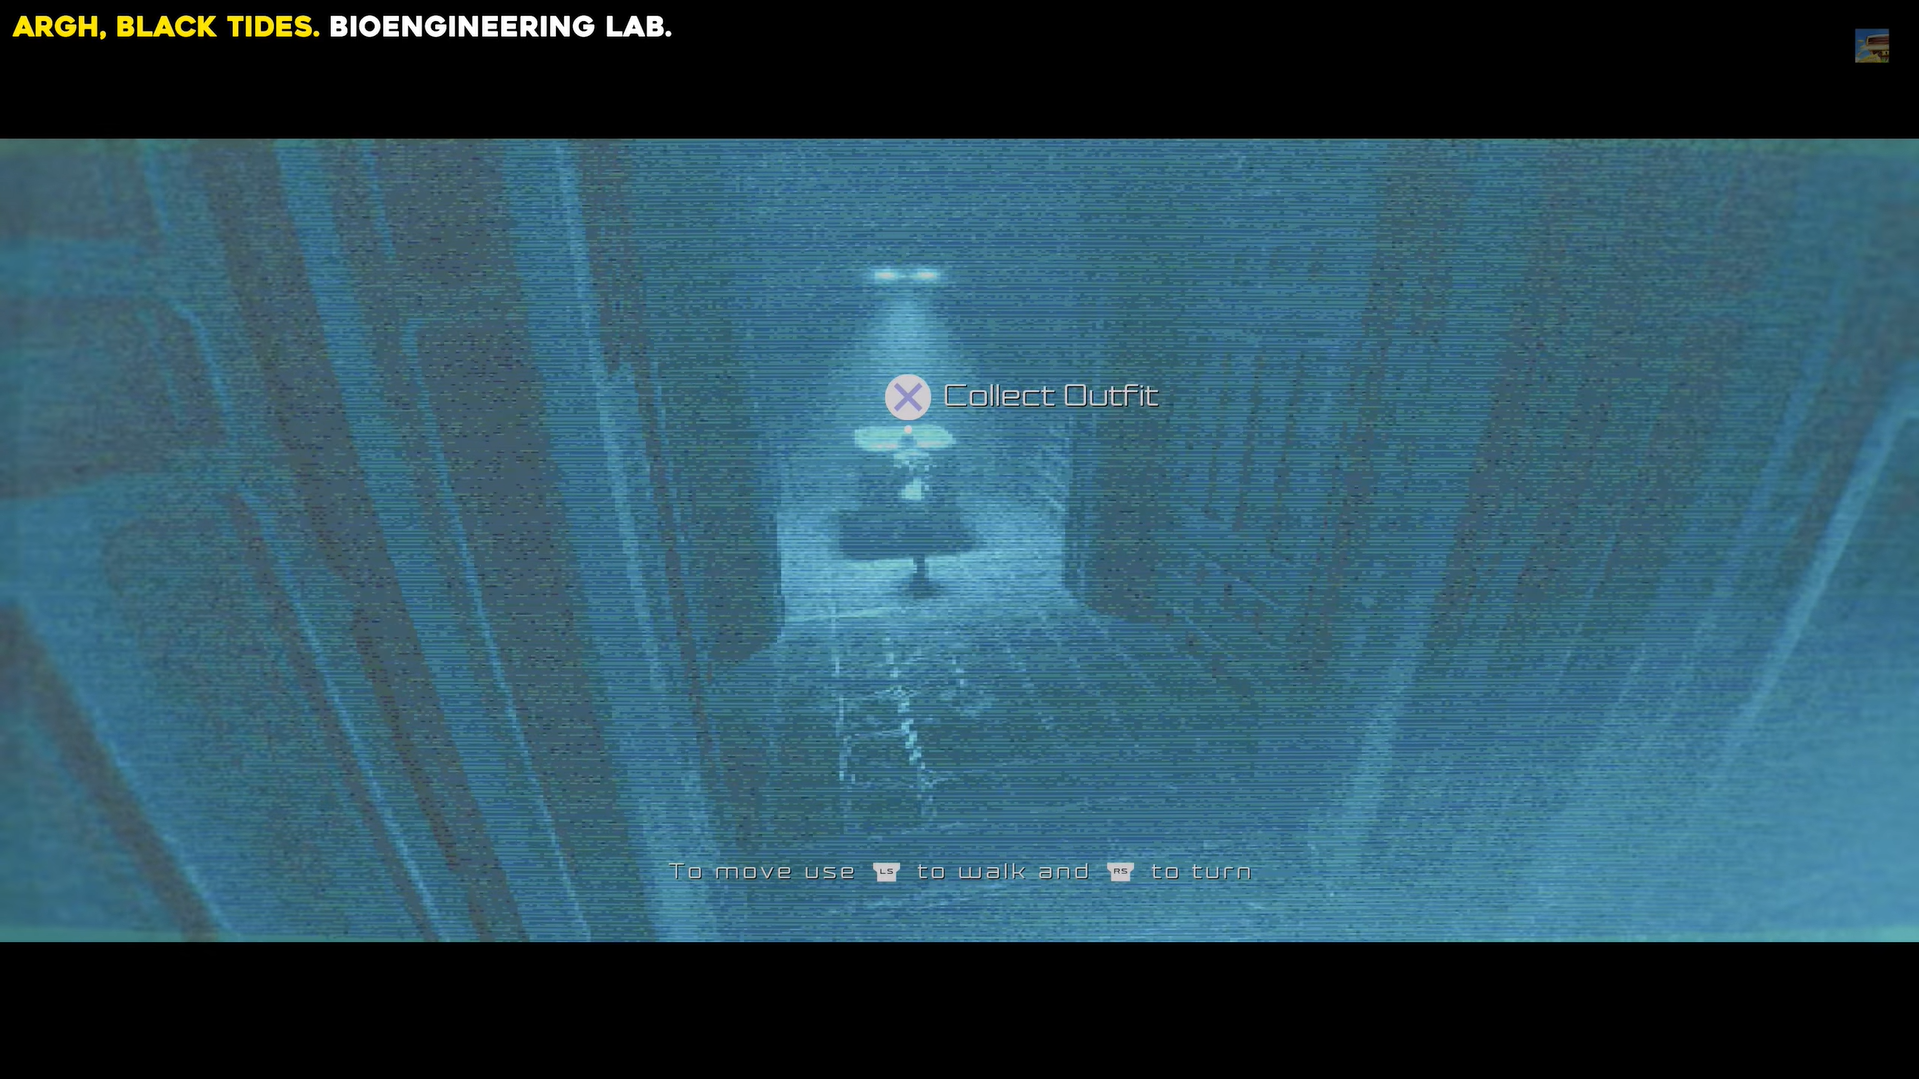
Turn left twice and go straight into the fixed-camera area. Image credits: TeamKill Media / YouTube: 100% Guides
Great Jeans outfit
Head to the Waste Processing section in the Disposal Facility and crouch under the pipes to reach the far end.

Great Jeans outfit location. Image credits: TeamKill Media / YouTube: 100% Guides
Push the cargo blocking the door into a closed space to open it, then interact with the terminal inside.
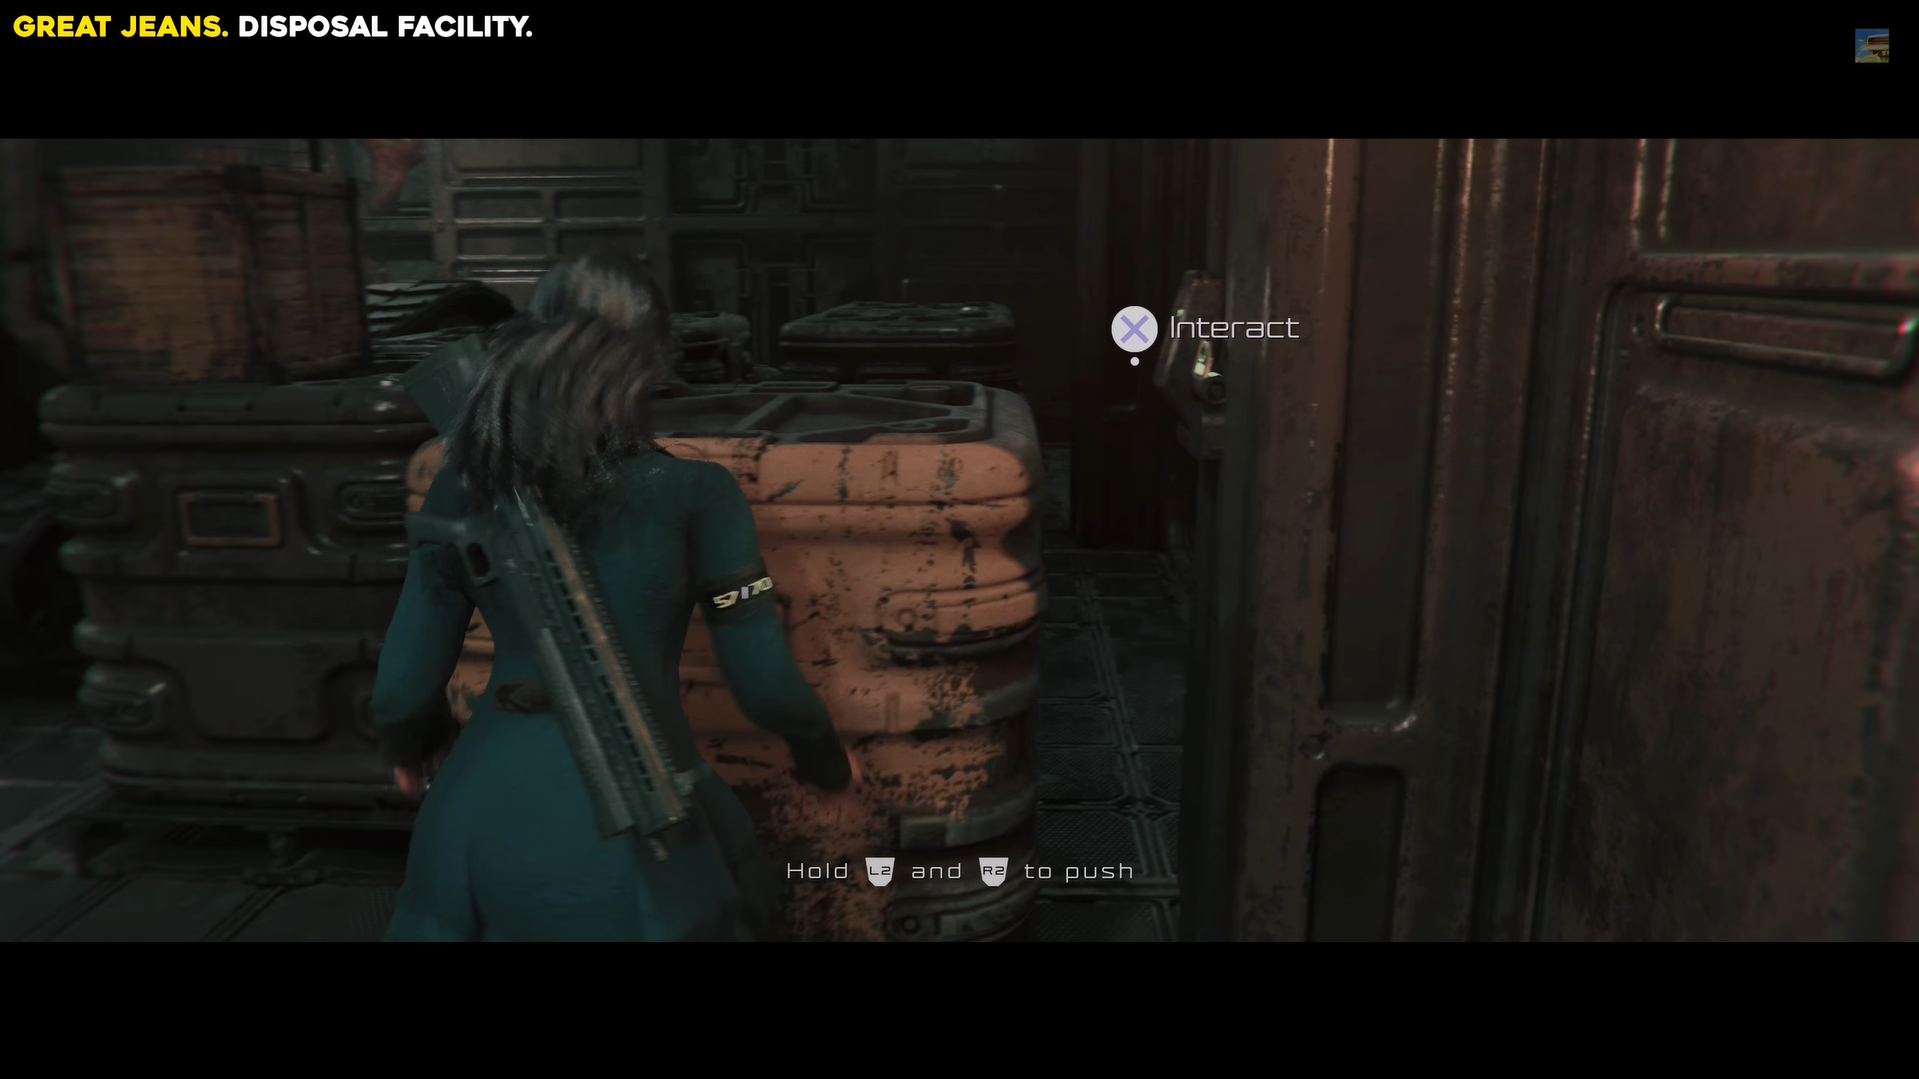
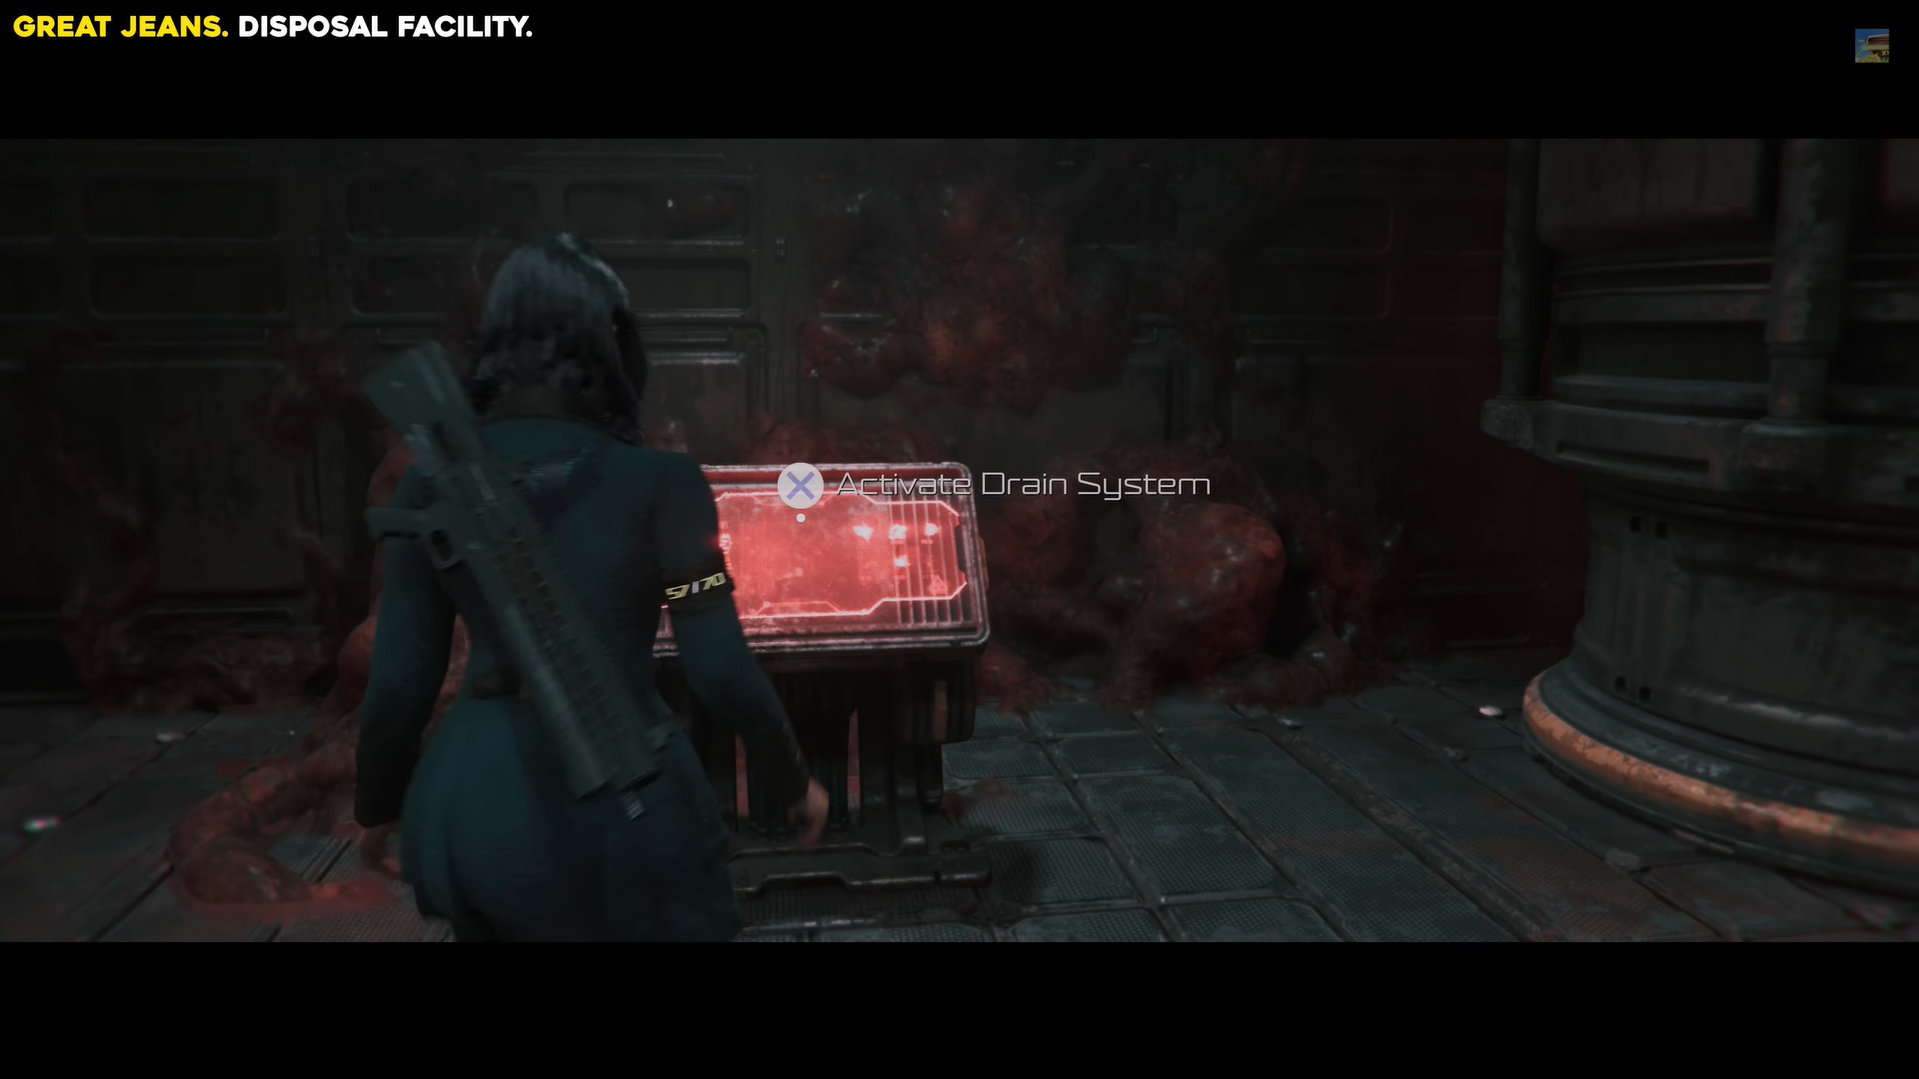
Move the cargo to open the door, then interact with the terminal. Image credits: TeamKill Media / YouTube: 100% Guides
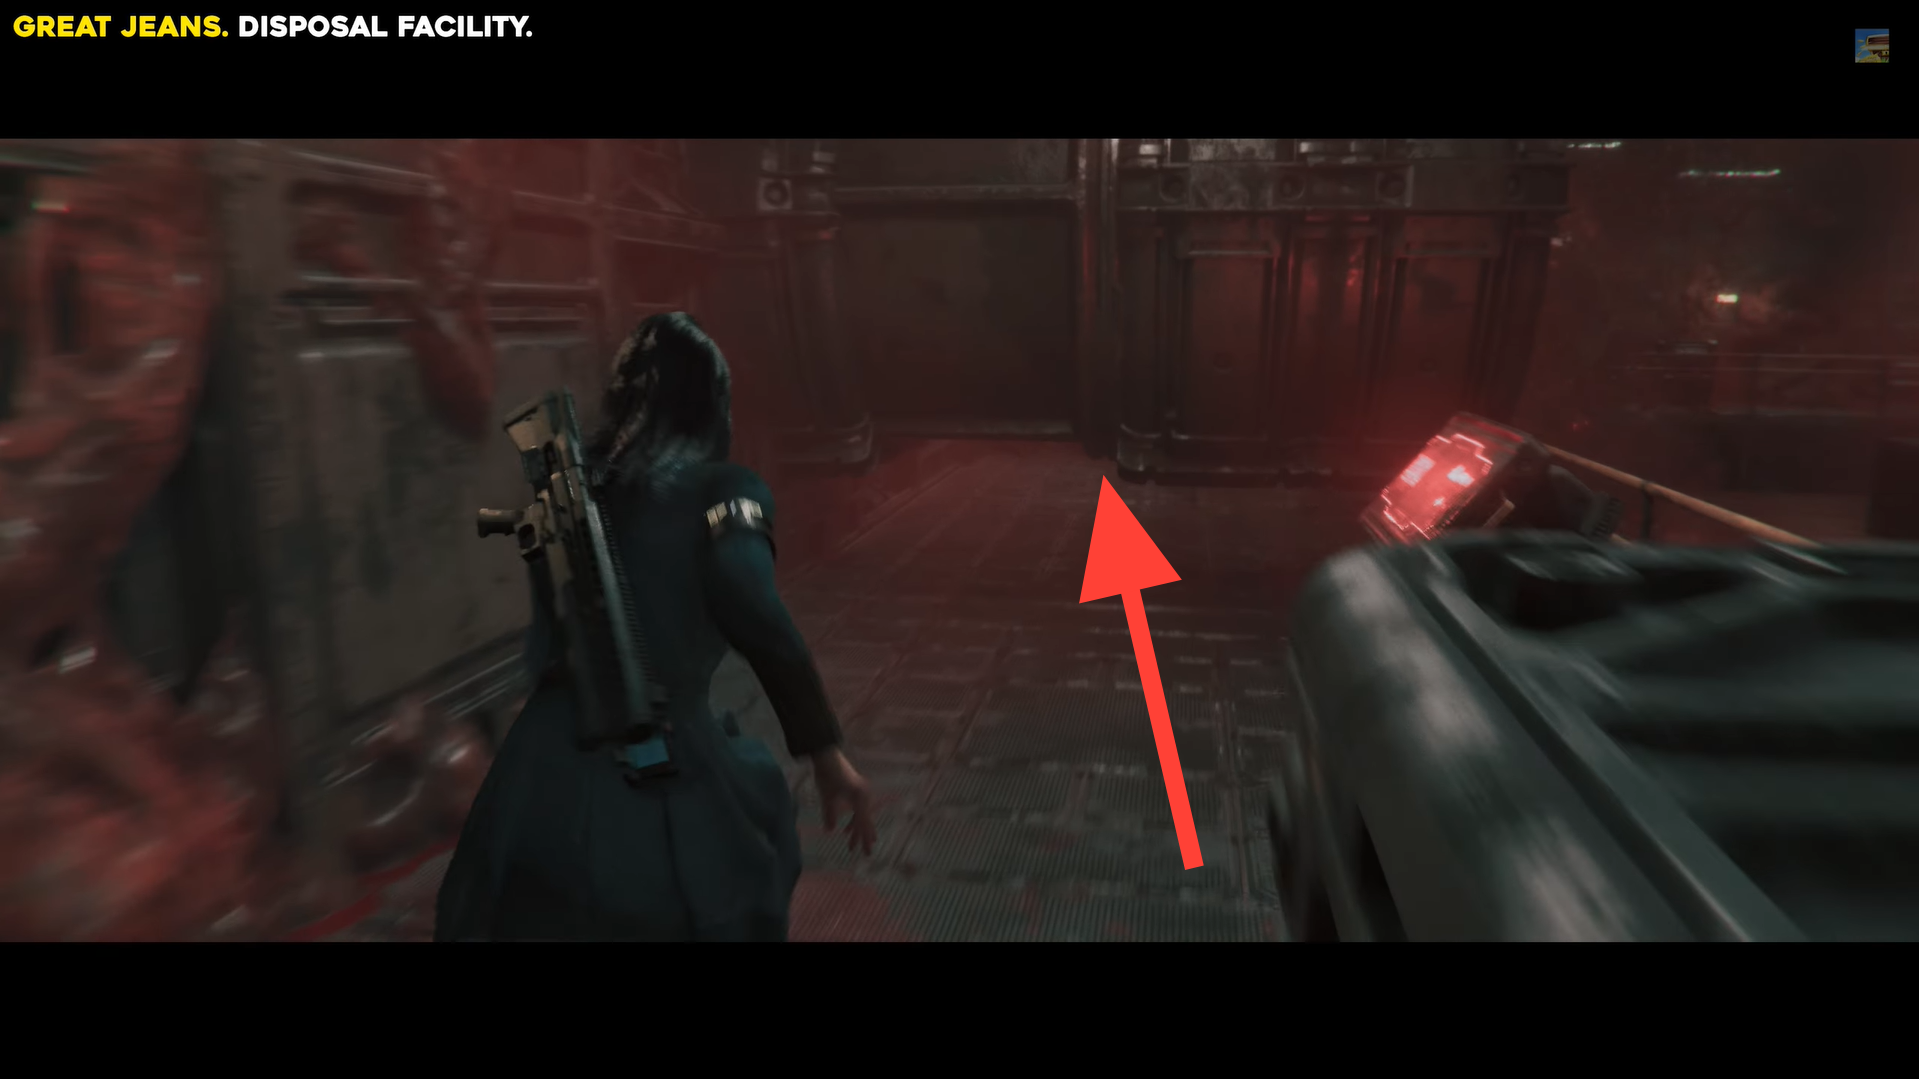
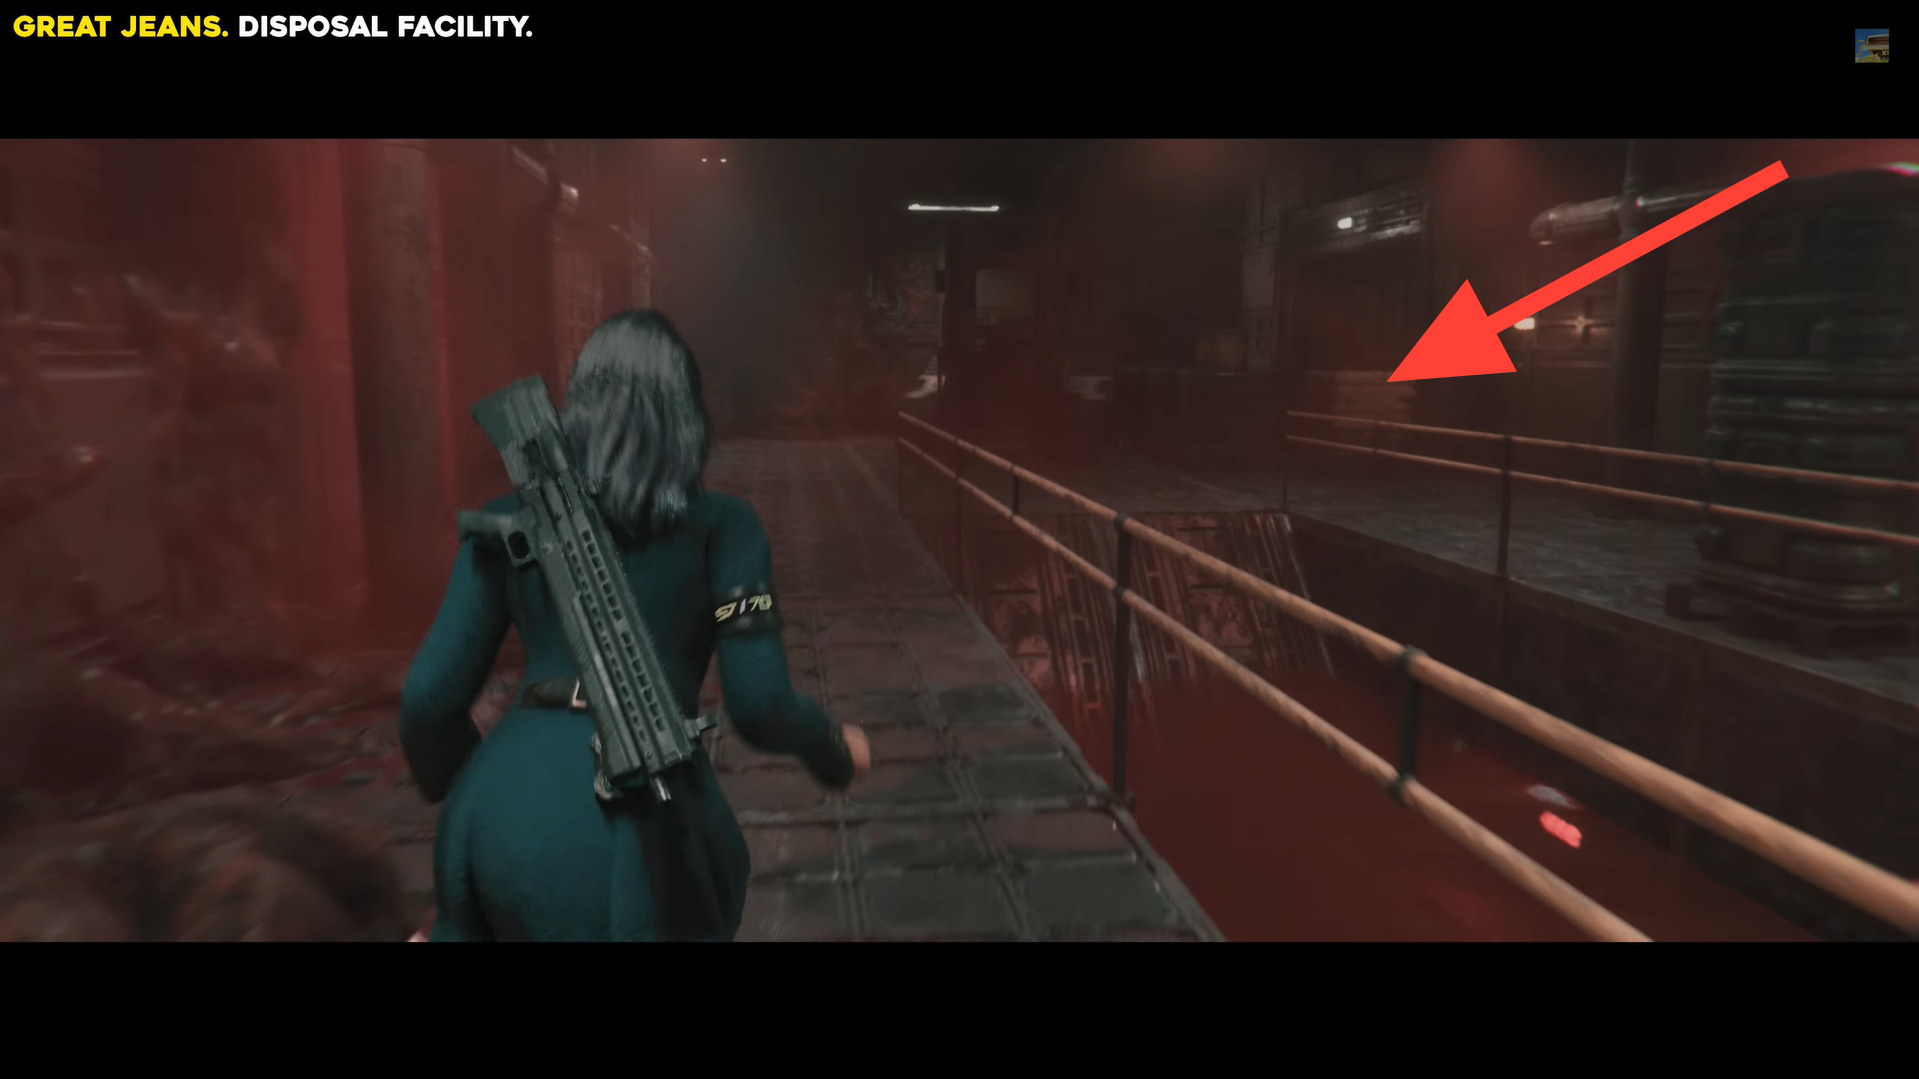
Shoot the white bulb on the right wall, then head to Waste Flow, take a right, then another right into the fixed-camera area.
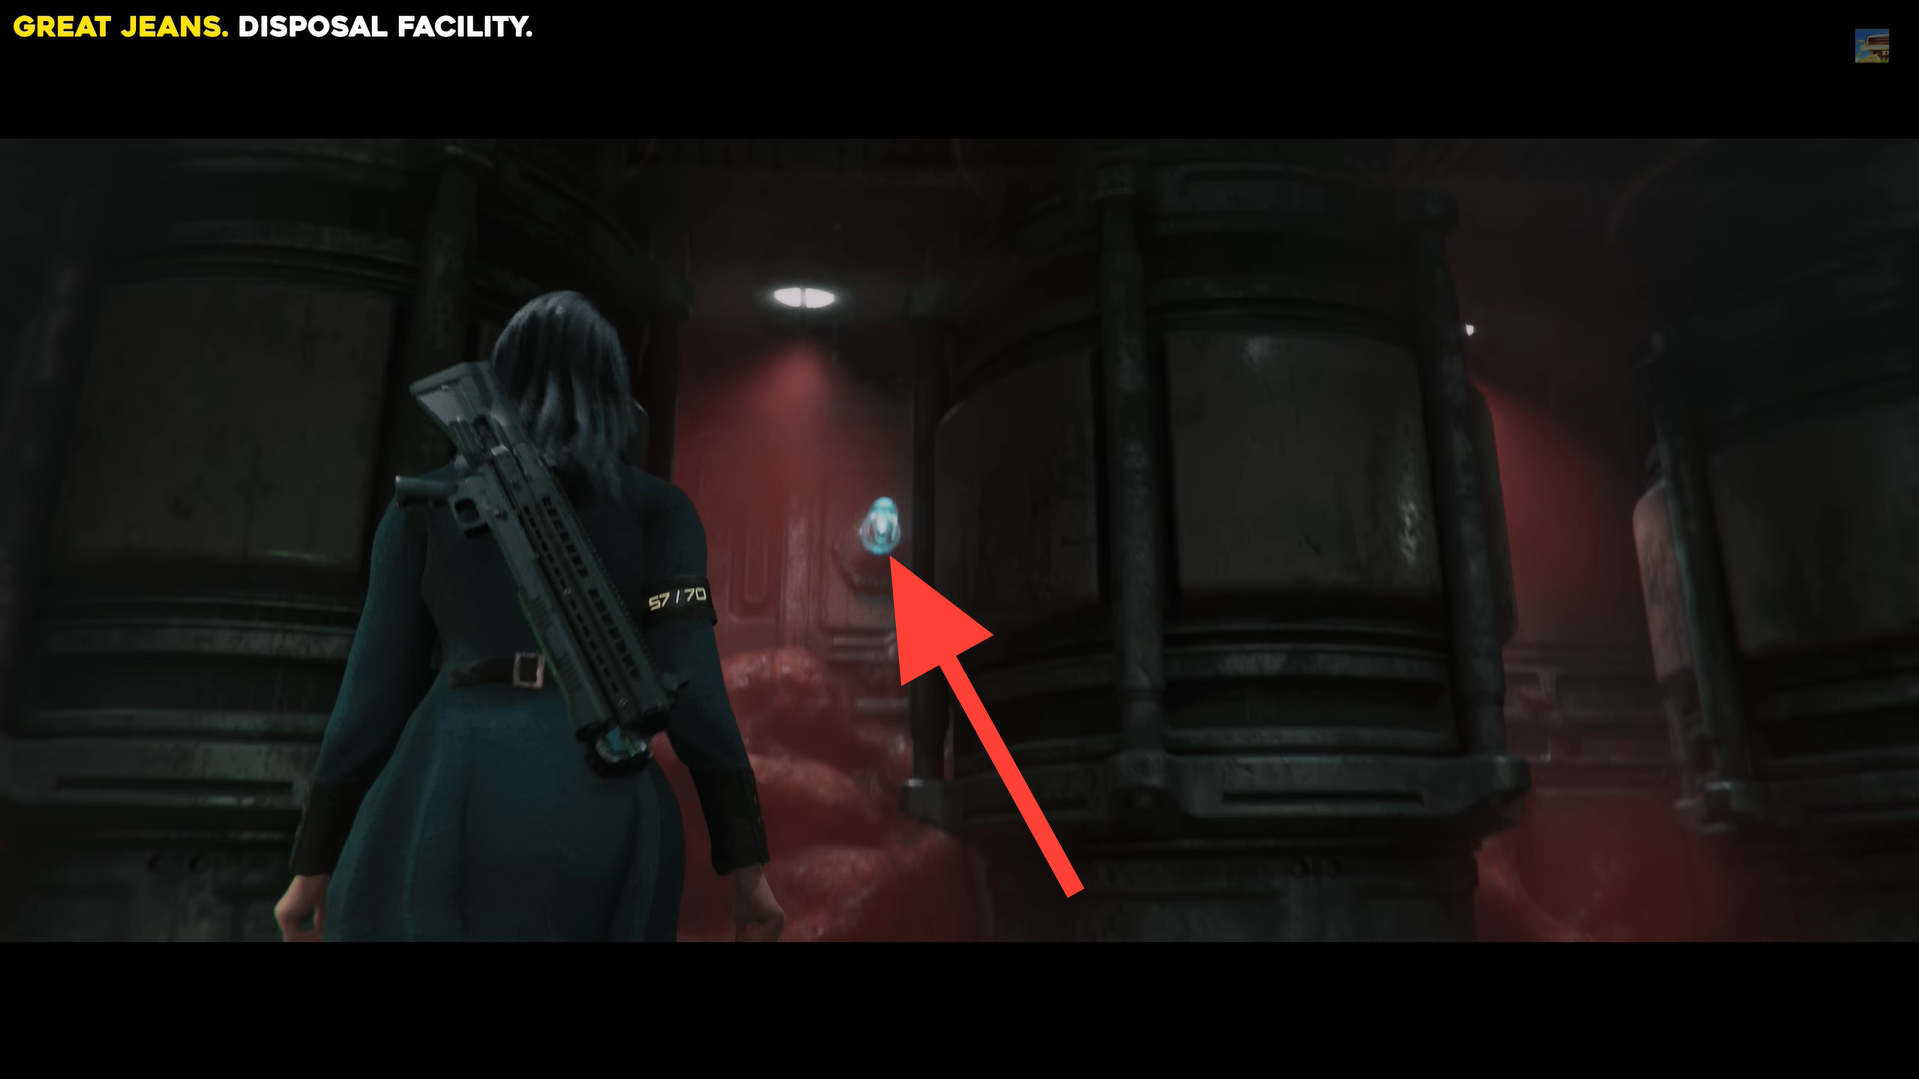
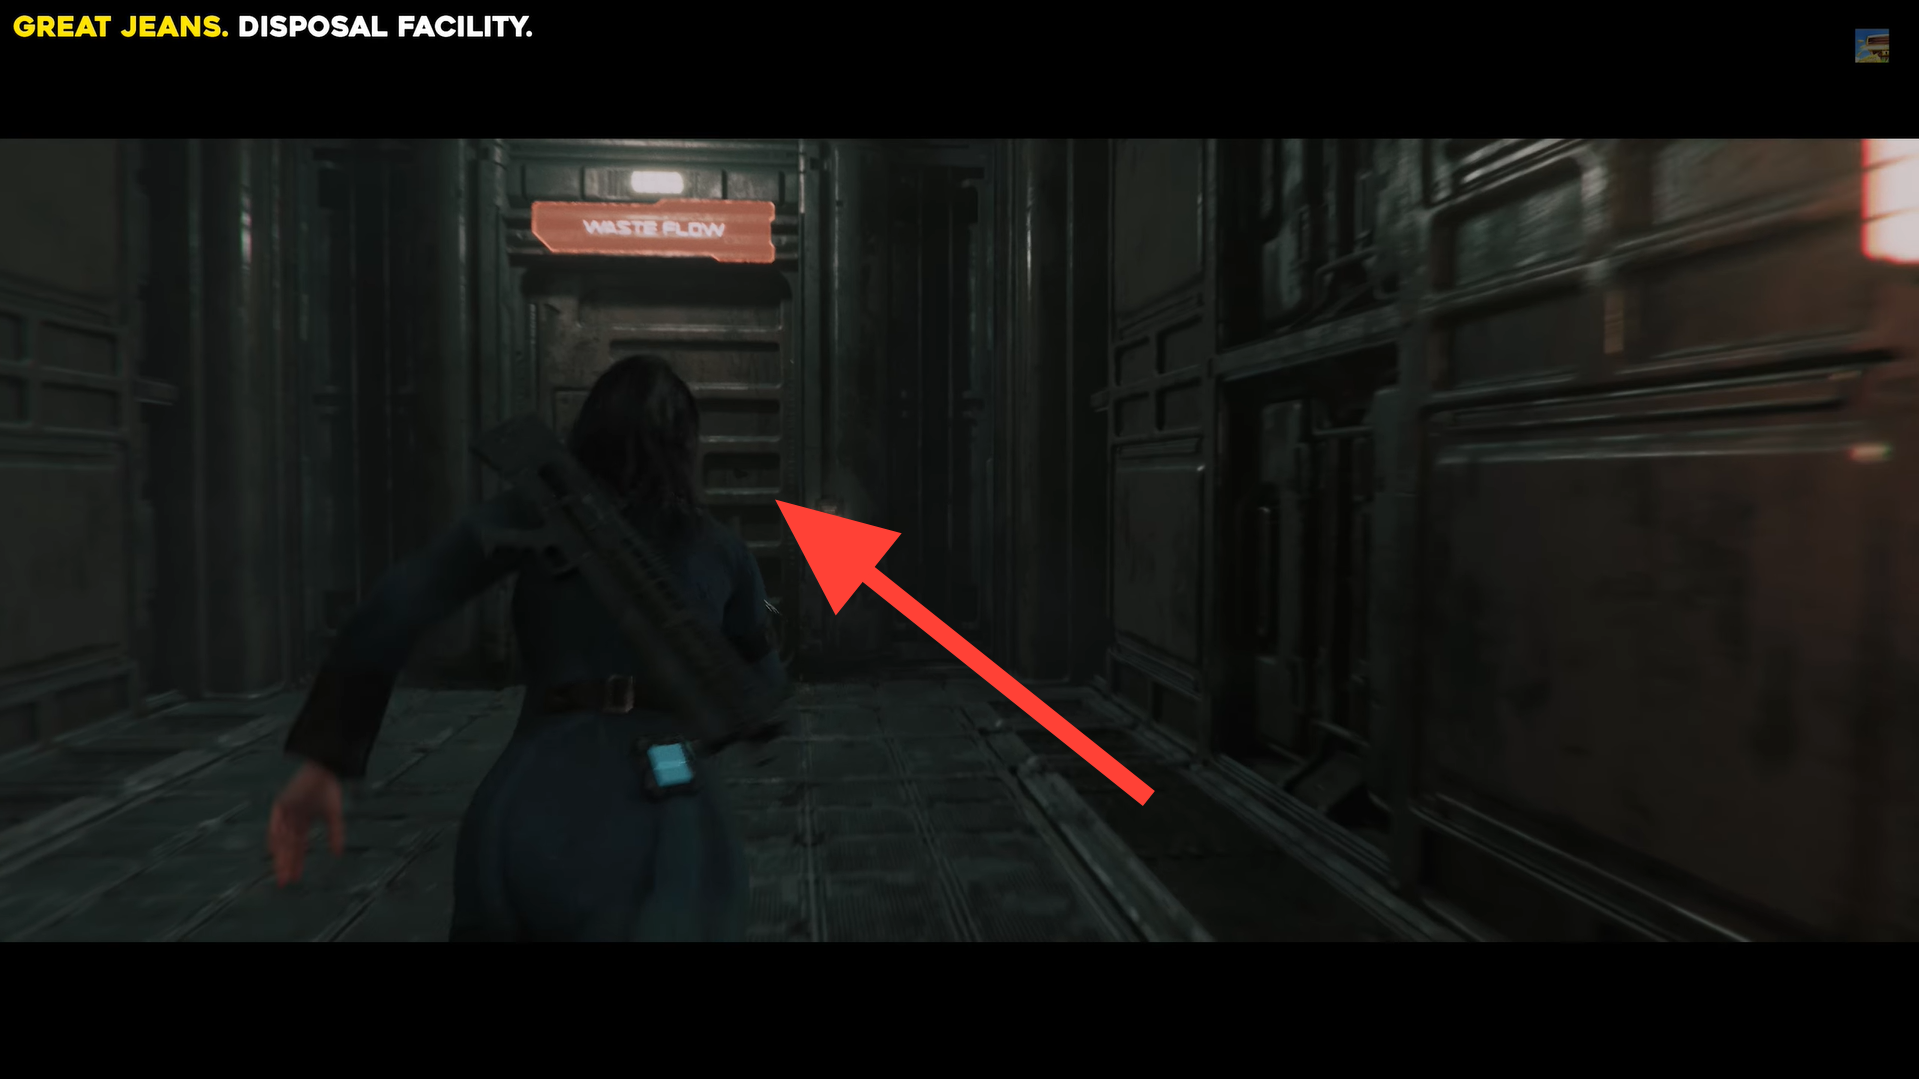
Shoot the white bulb, then take two rights into the fixed-camera area. Image credits: TeamKill Media / YouTube: 100% Guides
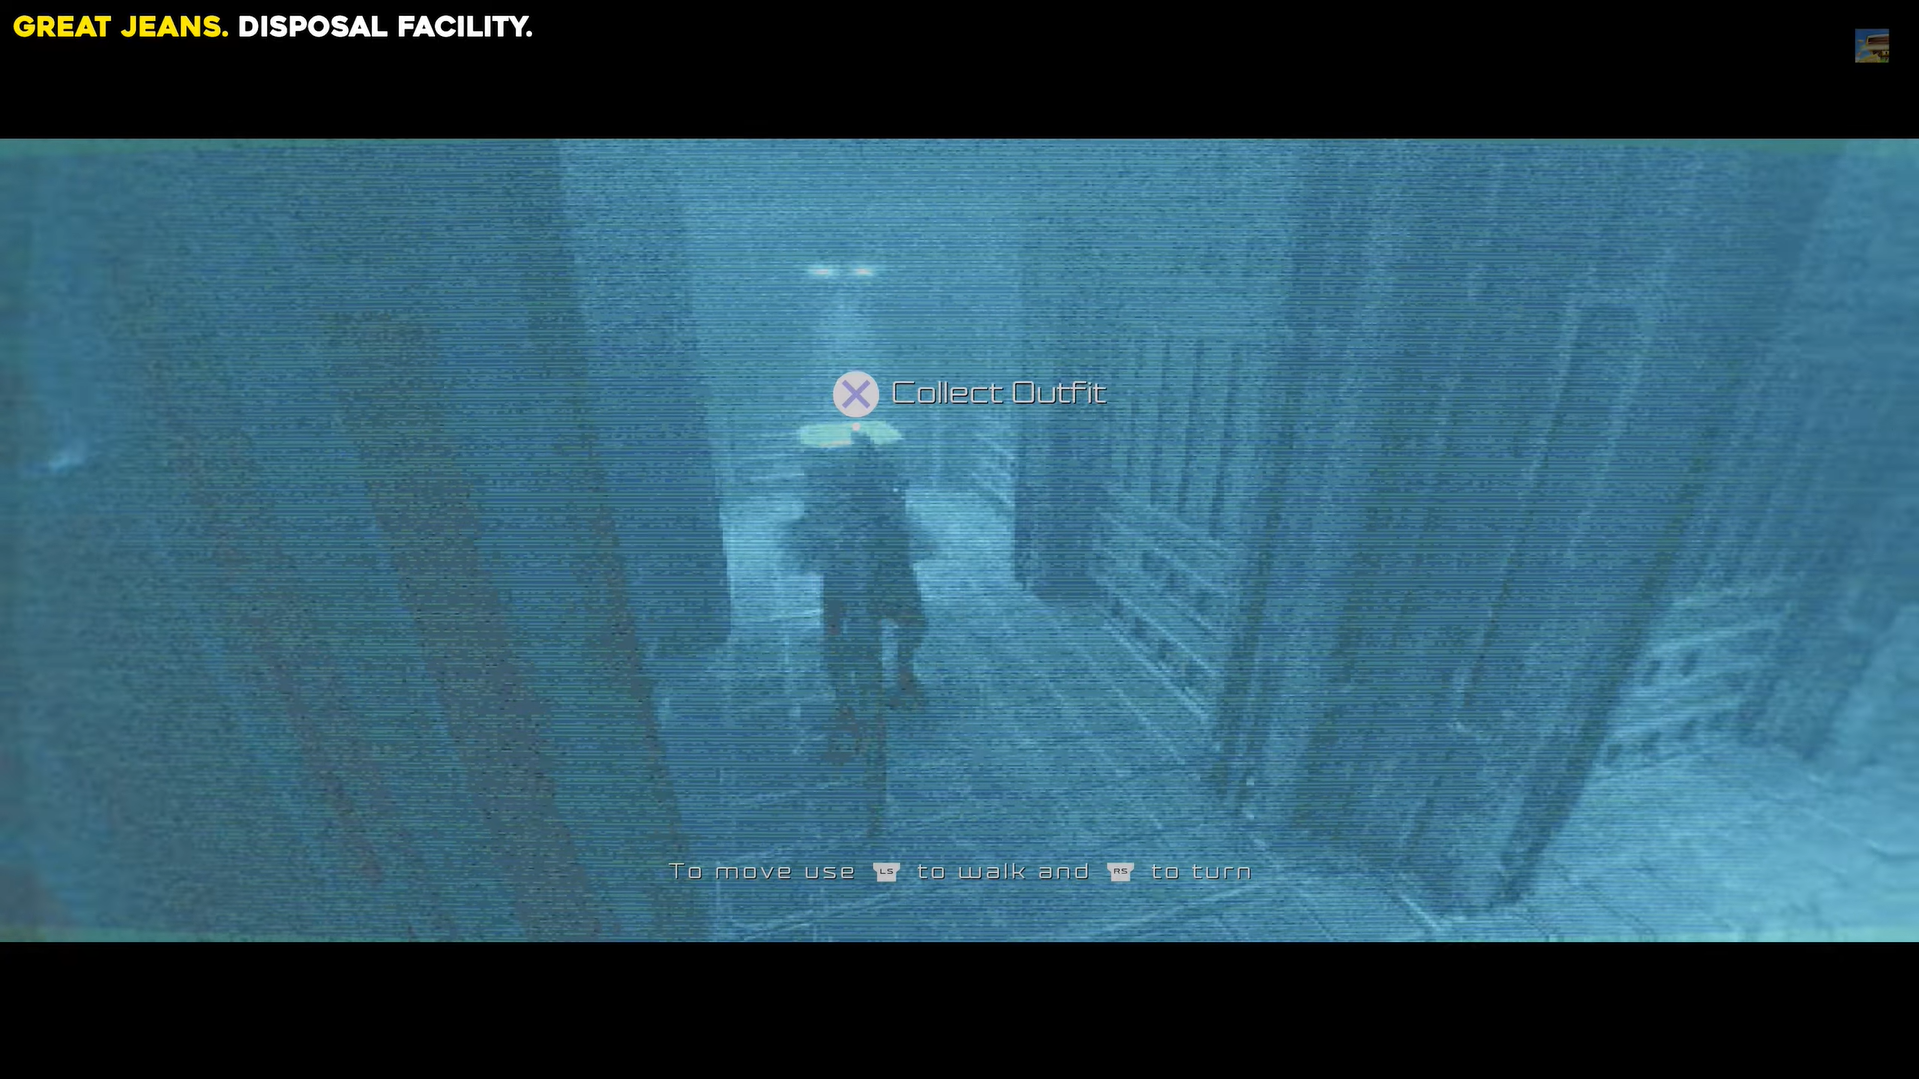
Follow the path to collect the Great Jeans outfit.
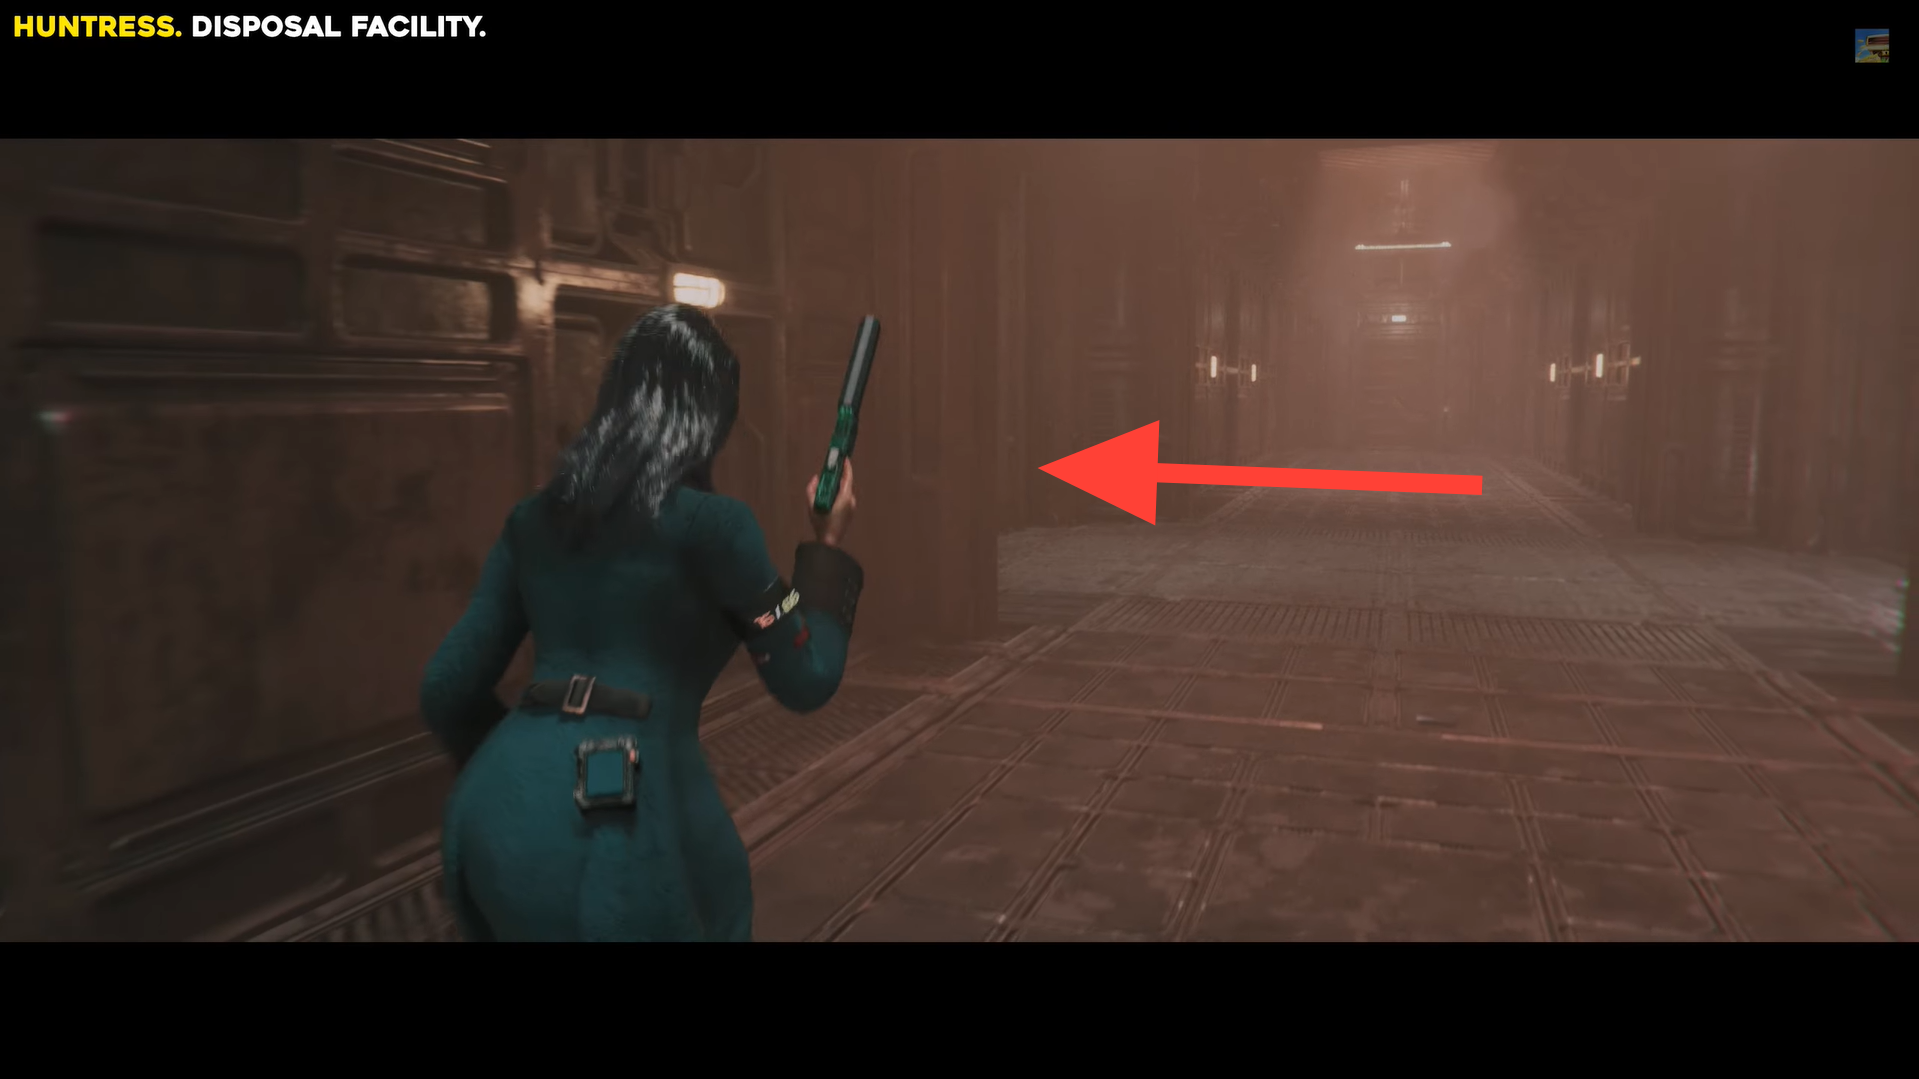
Huntress outfit
Enter the Coolant Rooms in the Disposal Facility from the northeast and head to the far side, shoot the white bulb on the left wall next to the big fan, then exit through the main door.
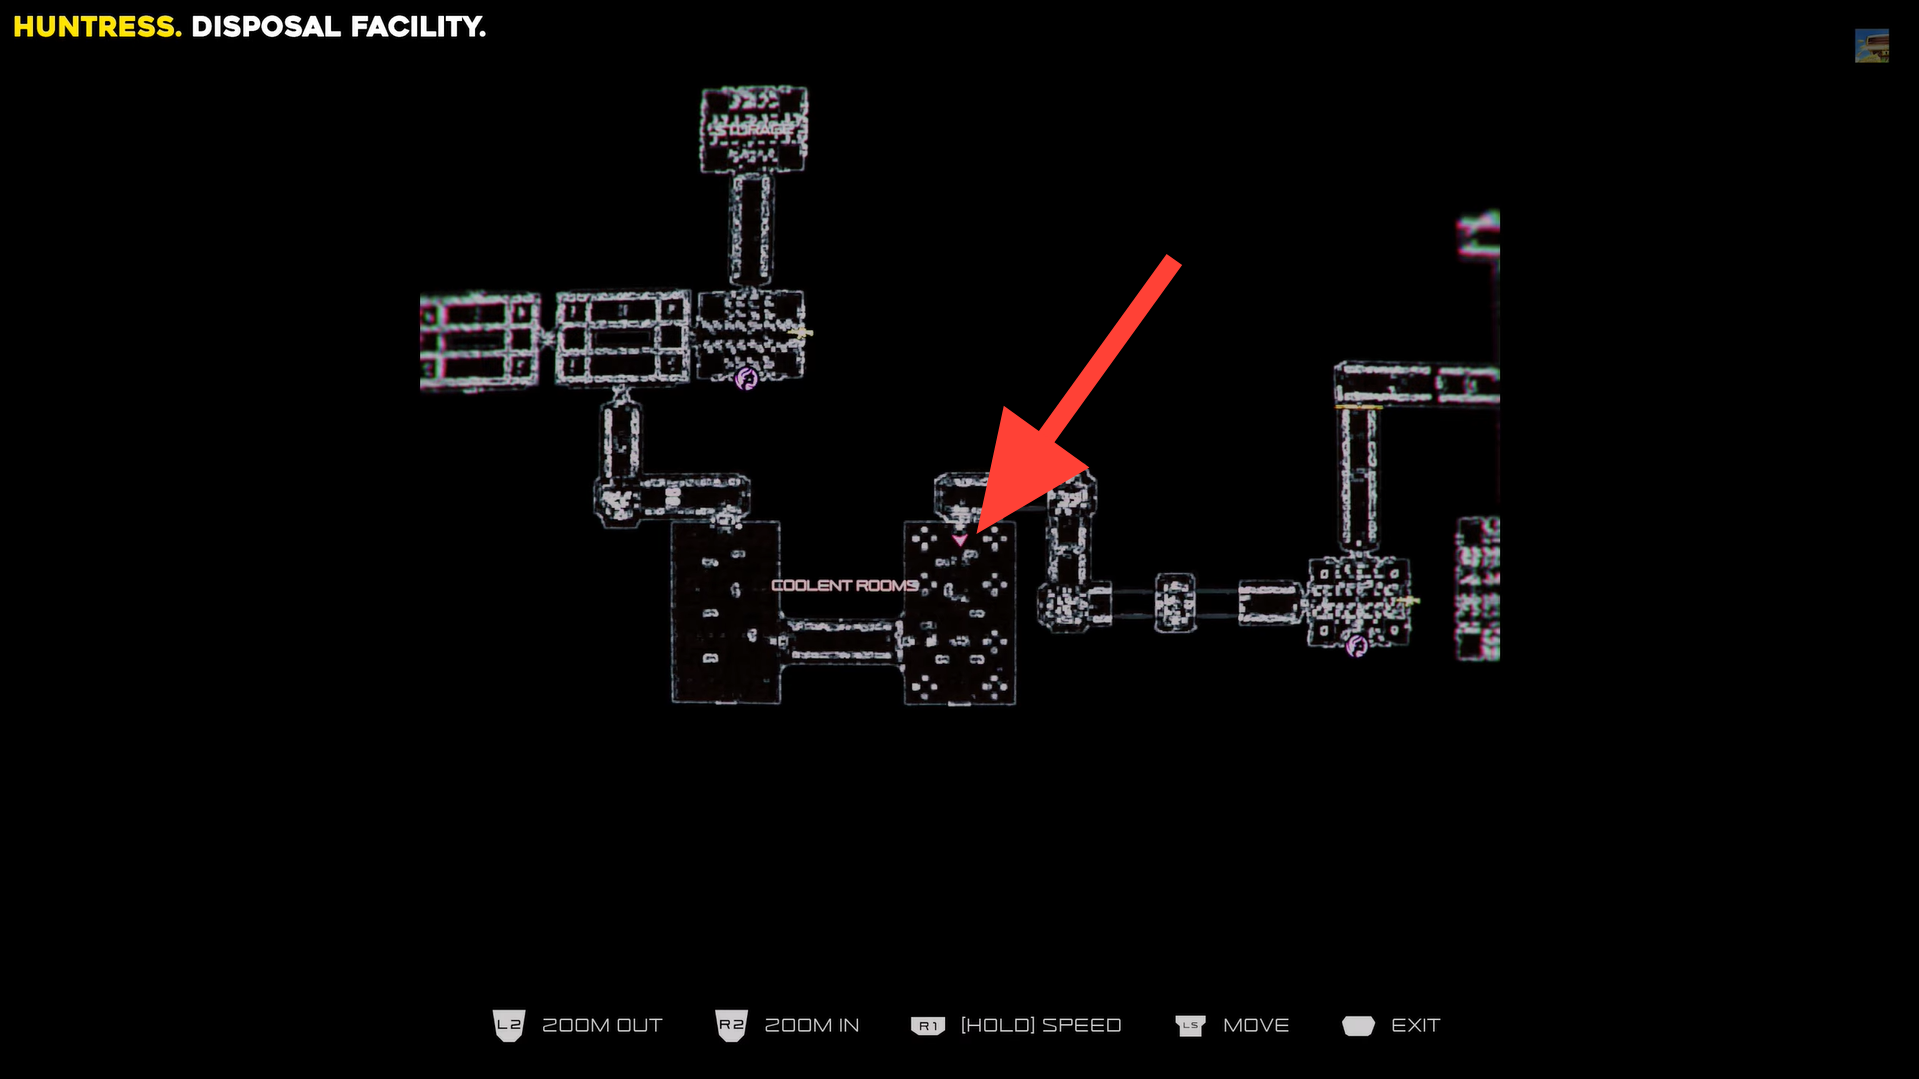
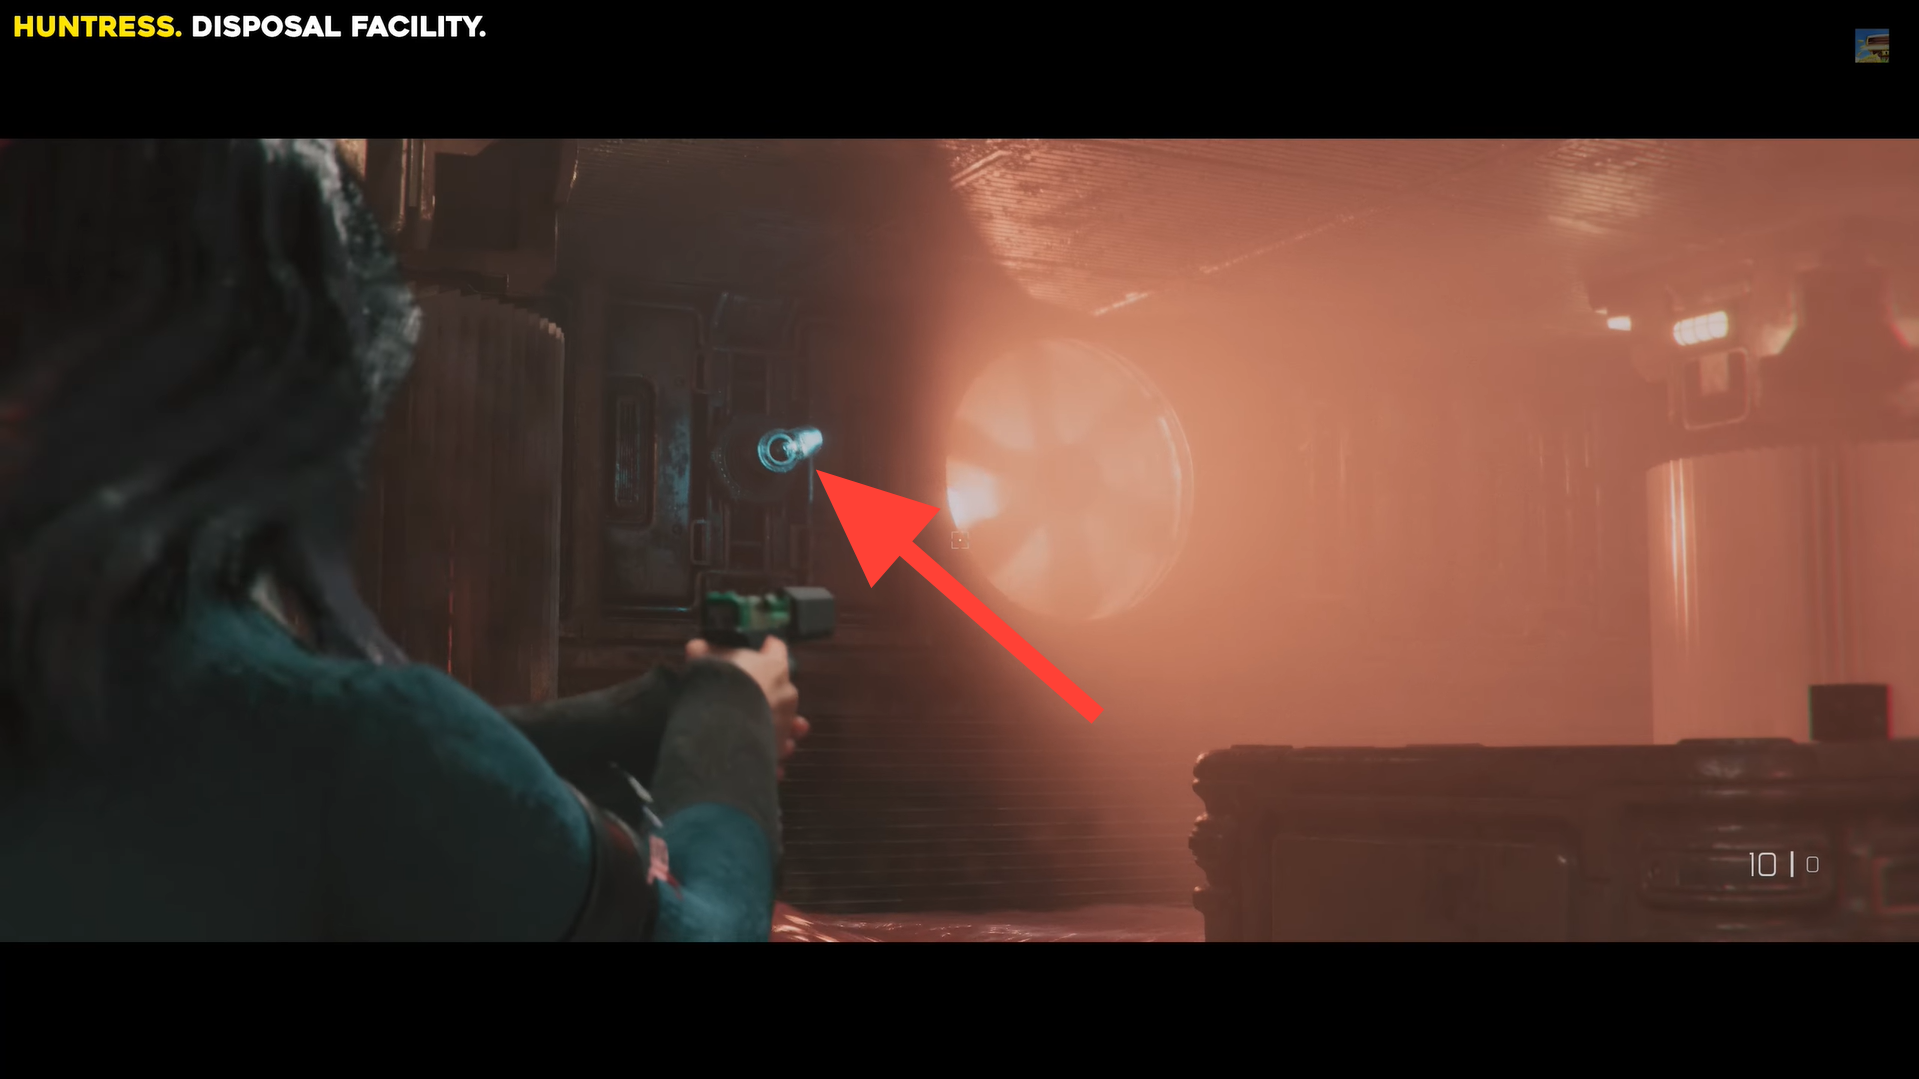
Huntress outfit location. Image credits: TeamKill Media / YouTube: 100% Guides
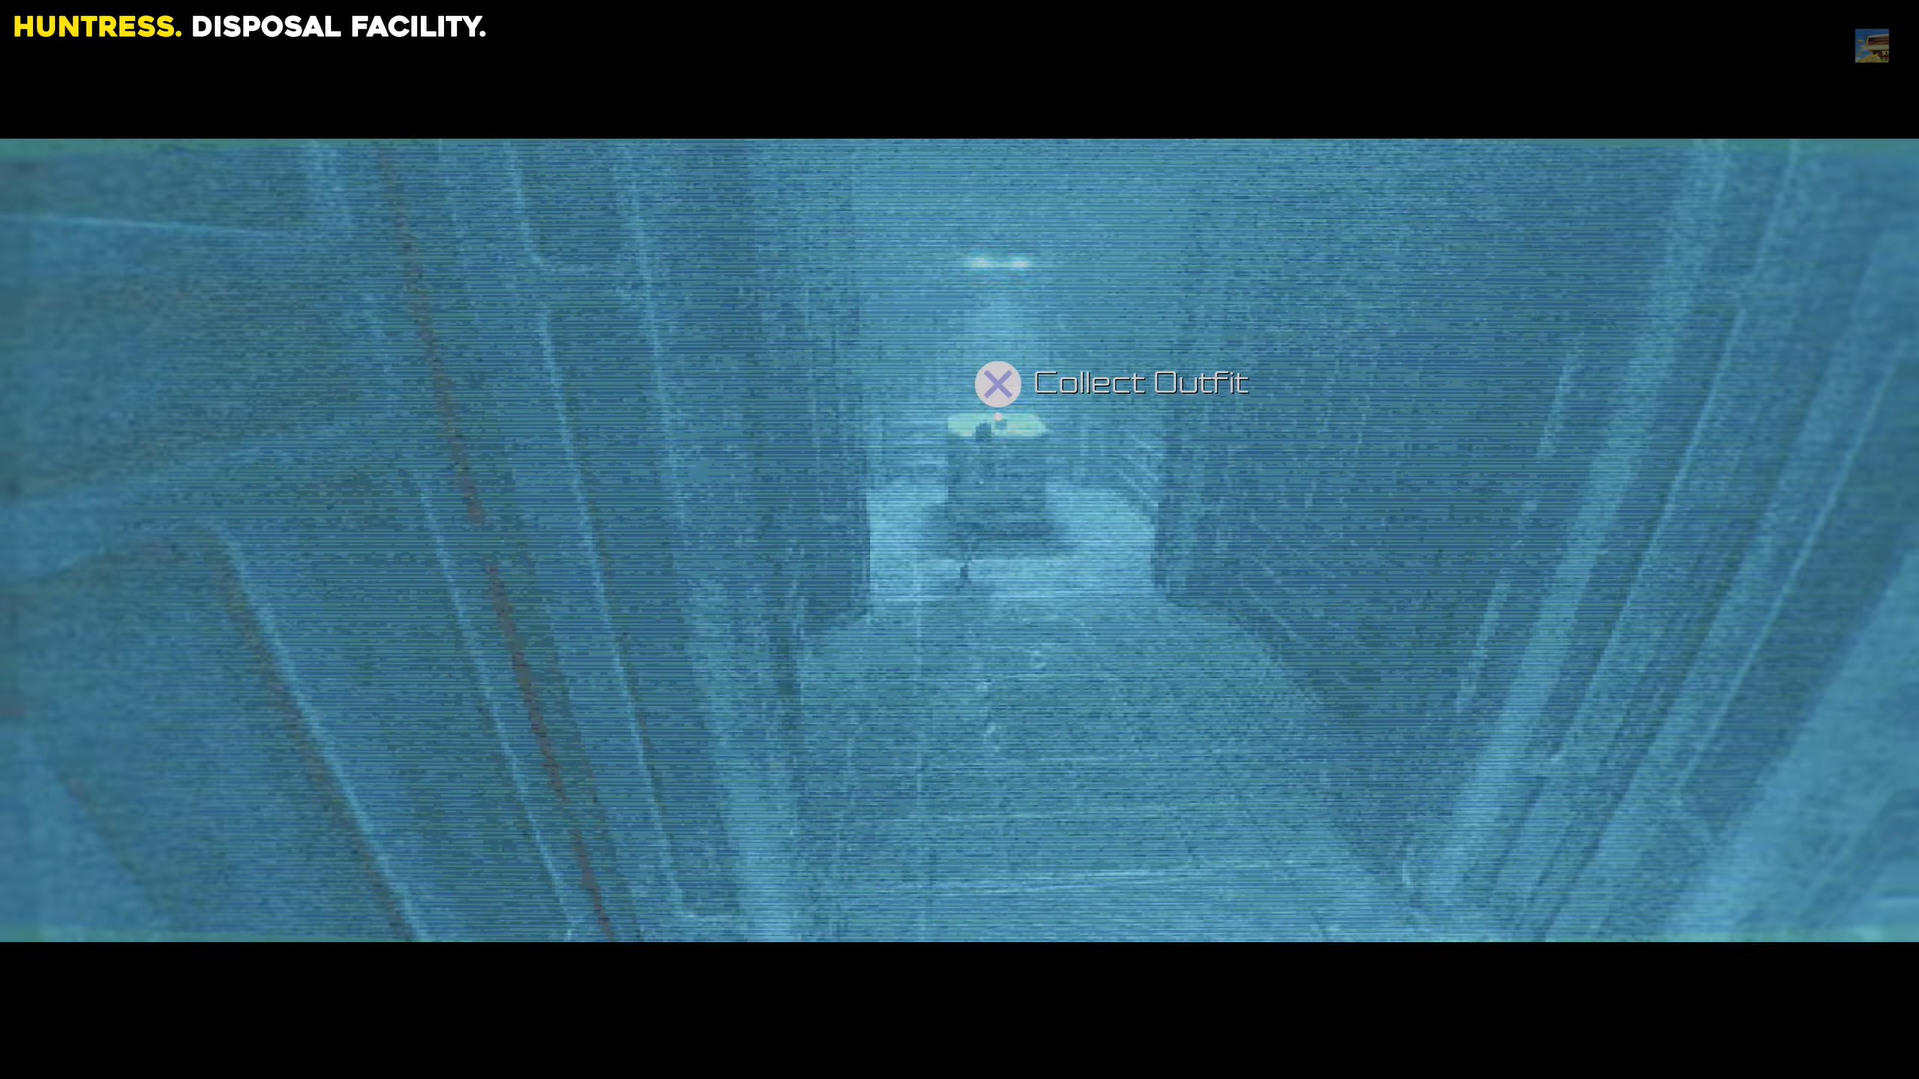
Follow the route, pass the first red light, turn left at the second red light, then take one last left into the special area.
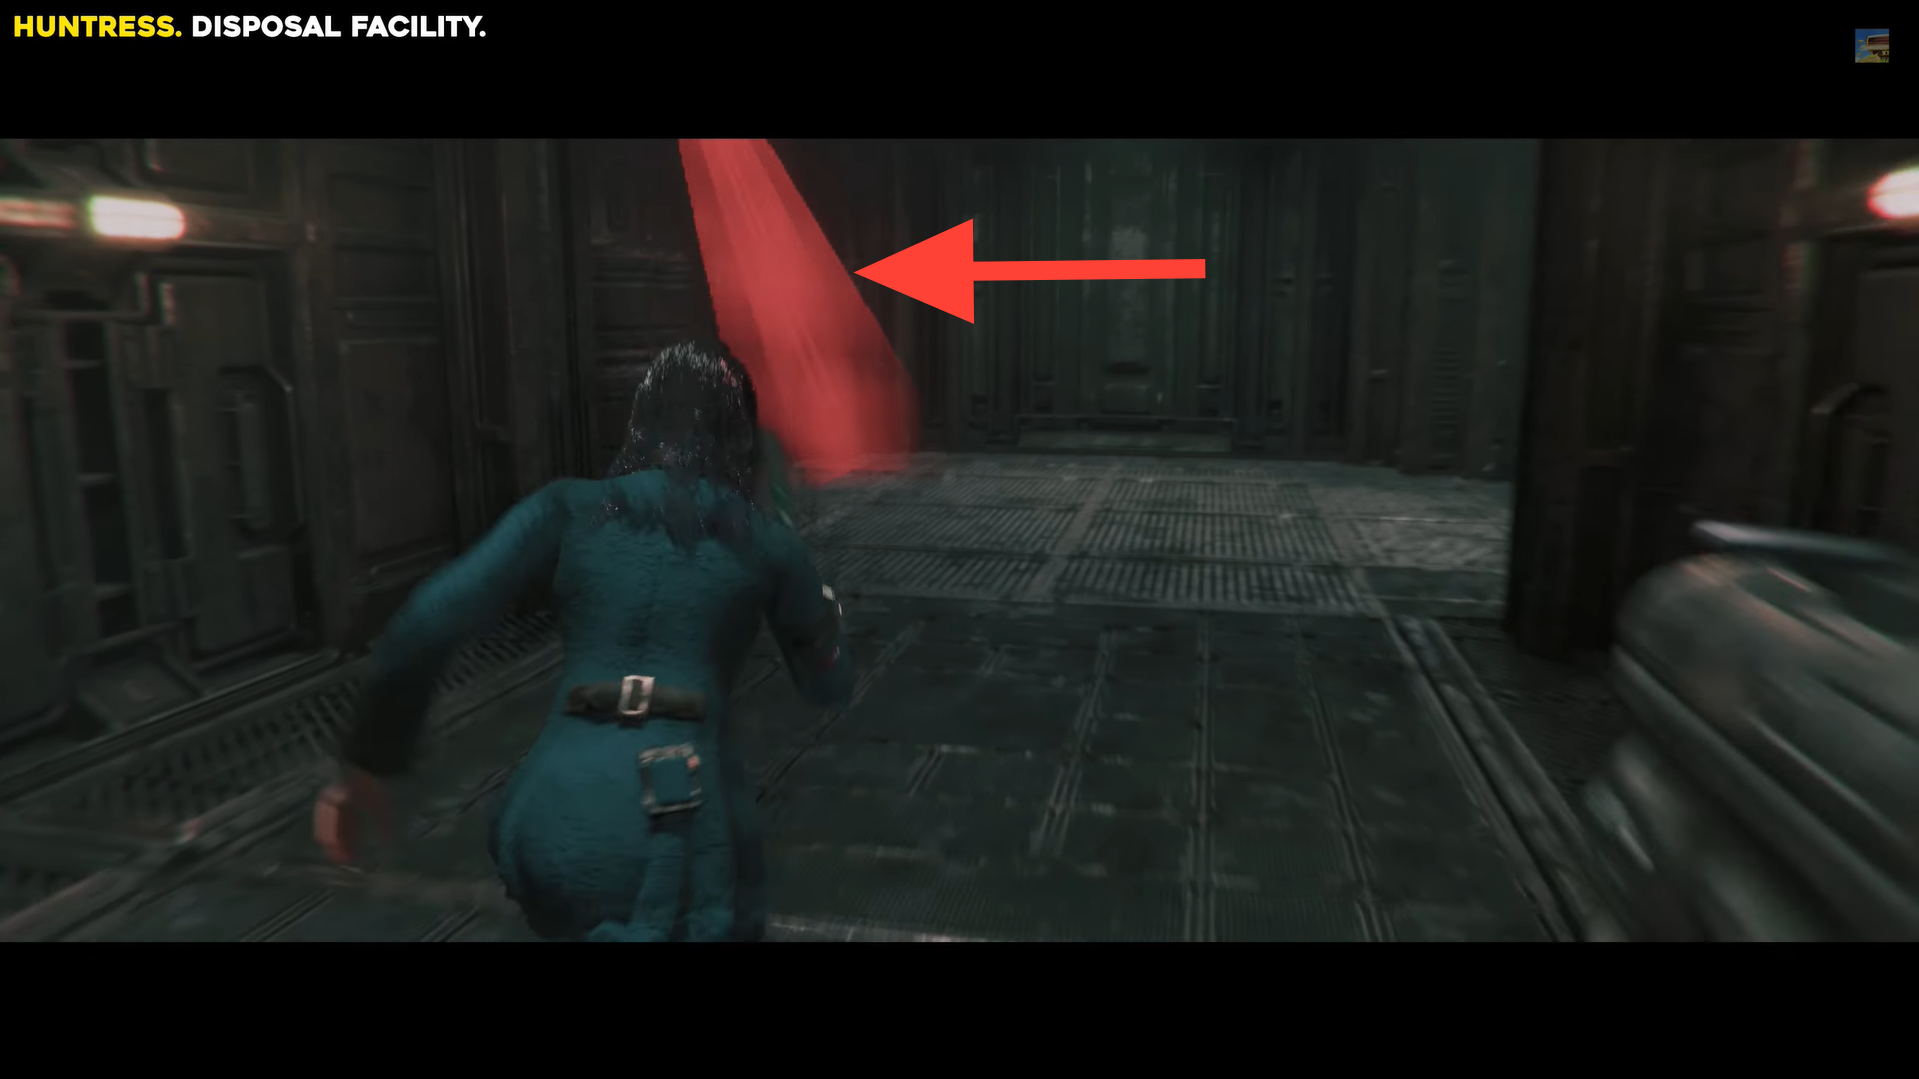
Pass the first red light, left at the second, then left into the special area. Image credits: TeamKill Media / YouTube: 100% Guides
Climb the stairs, turn left, and follow the path to find the Huntress outfit at the end.
Be a Legend outfit
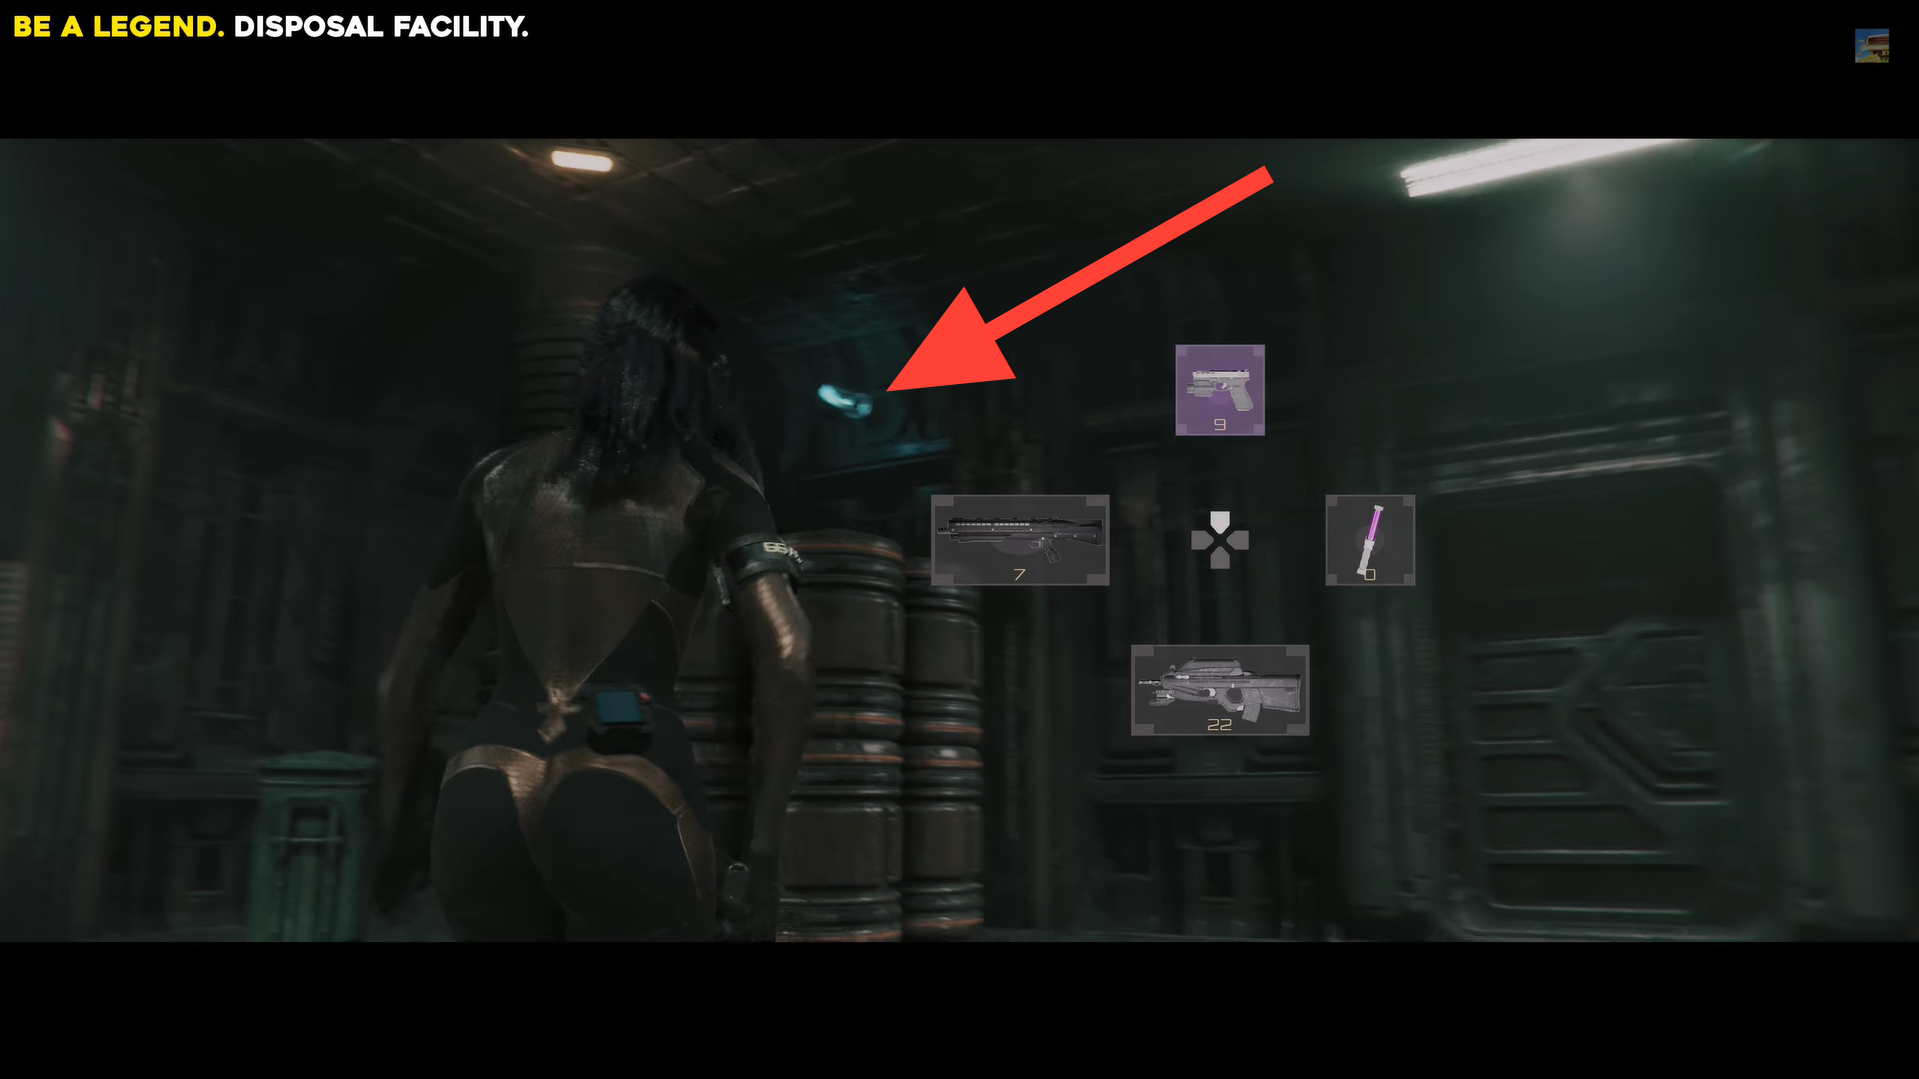
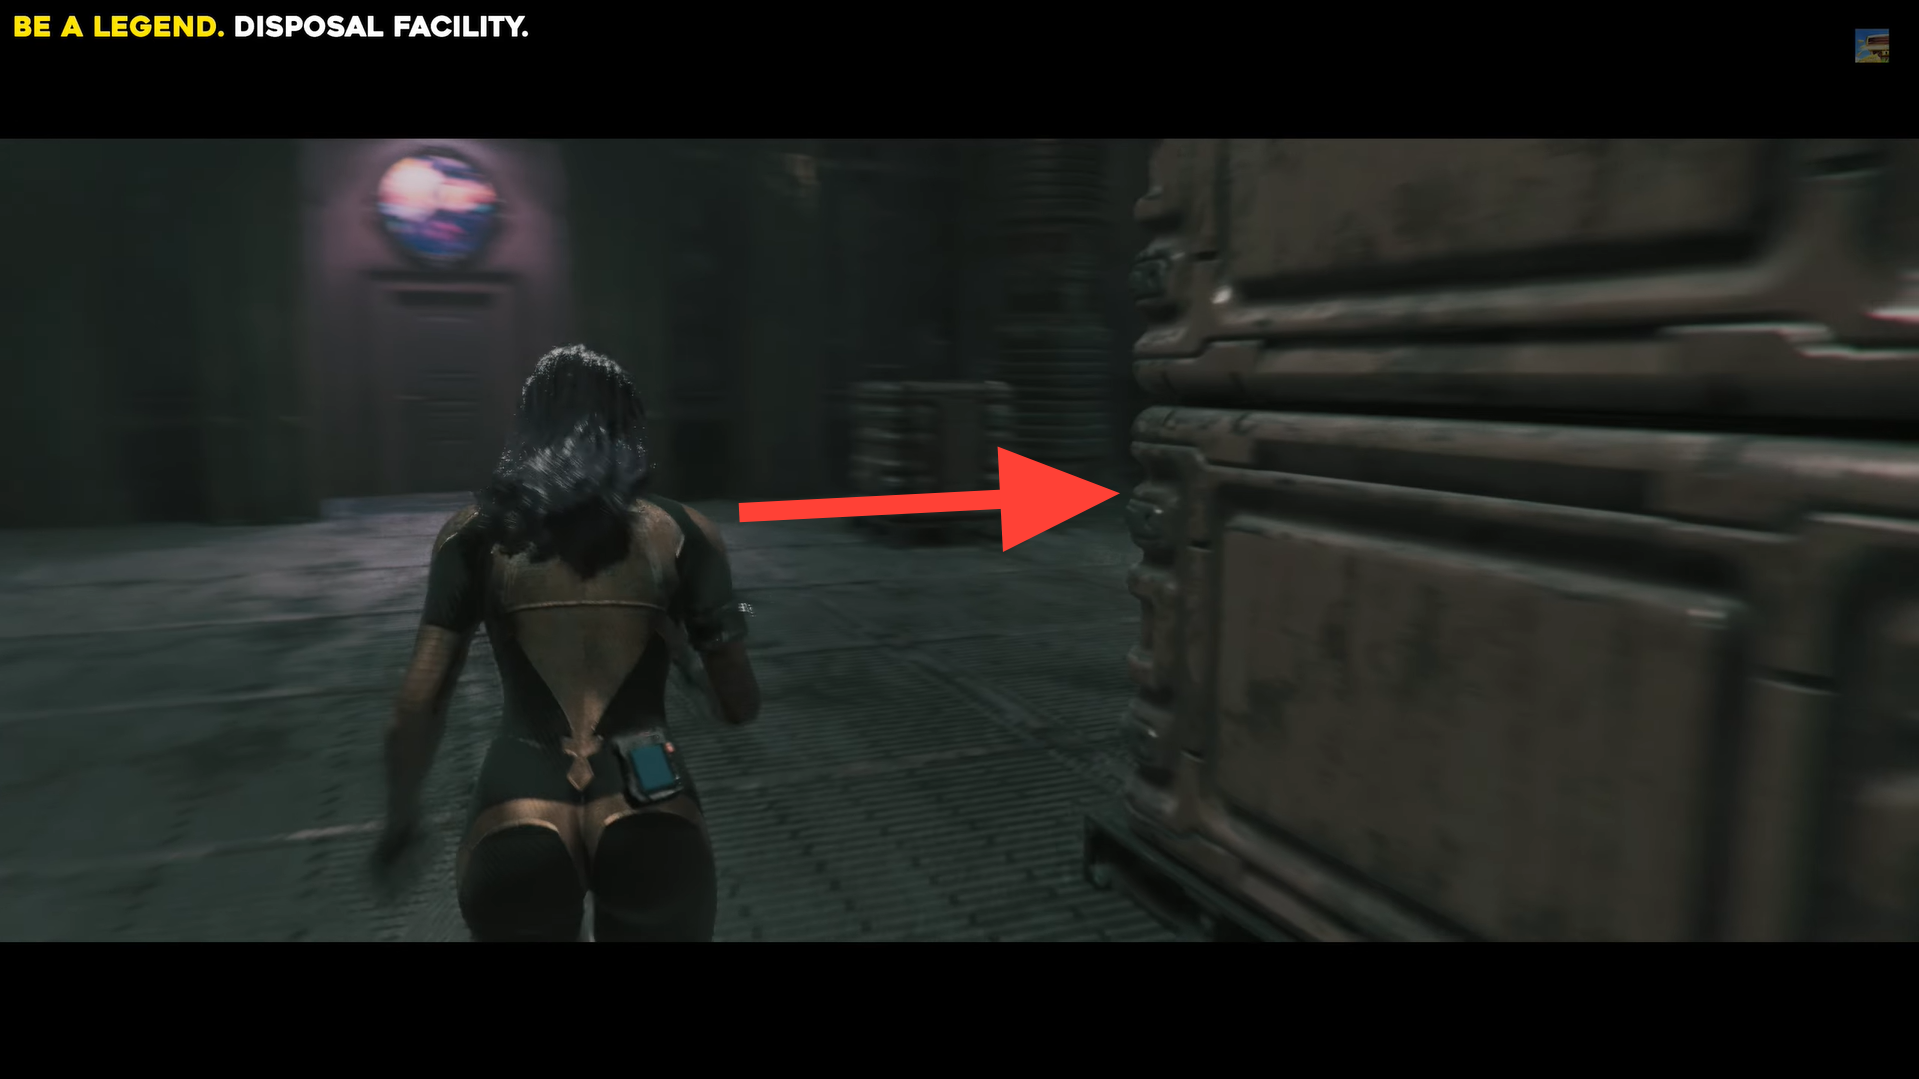
Enter the Storage Room in the Disposal Facility and go to the southeast side, shoot the white energy bulb on the wall, then exit and follow the straight path to the next room.
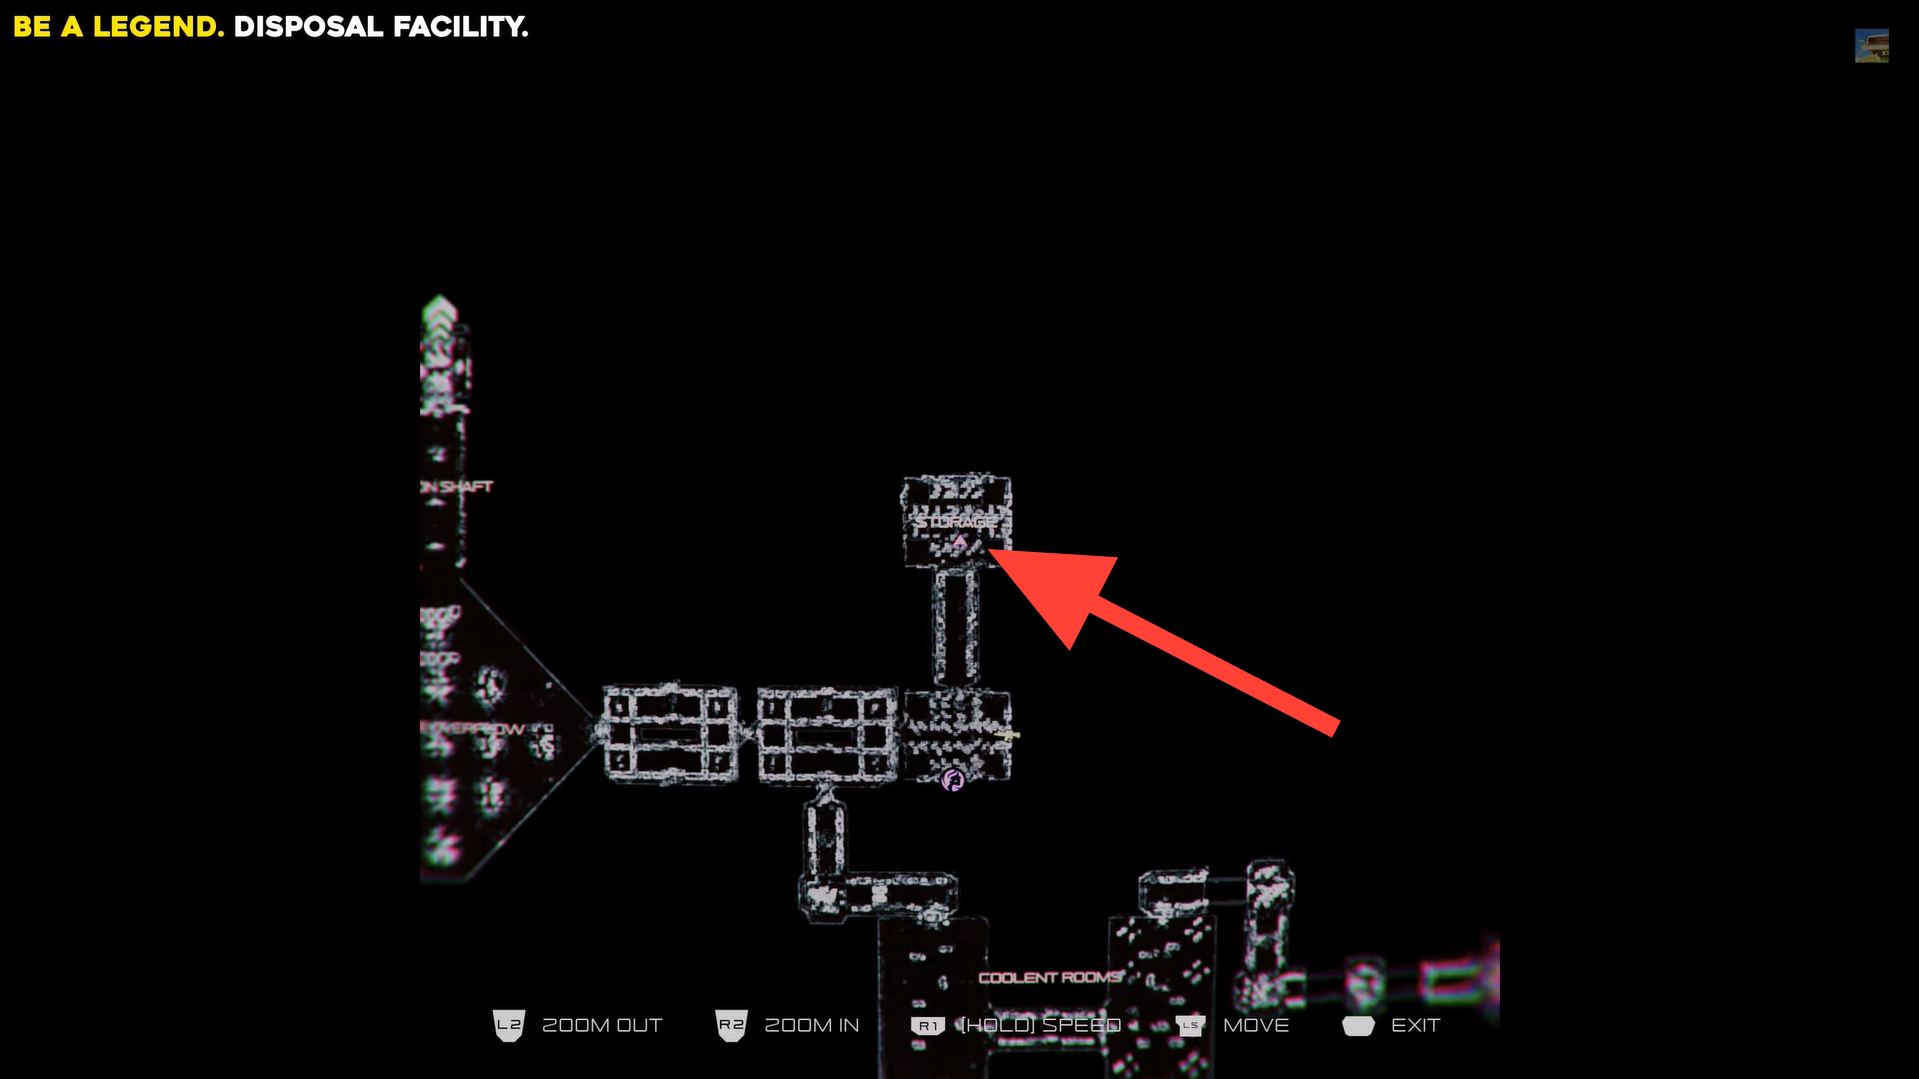
Be a Legend outfit location. Image credits: TeamKill Media / YouTube: 100% Guides
Take the door on the right, then another right into the special area with the fixed camera.
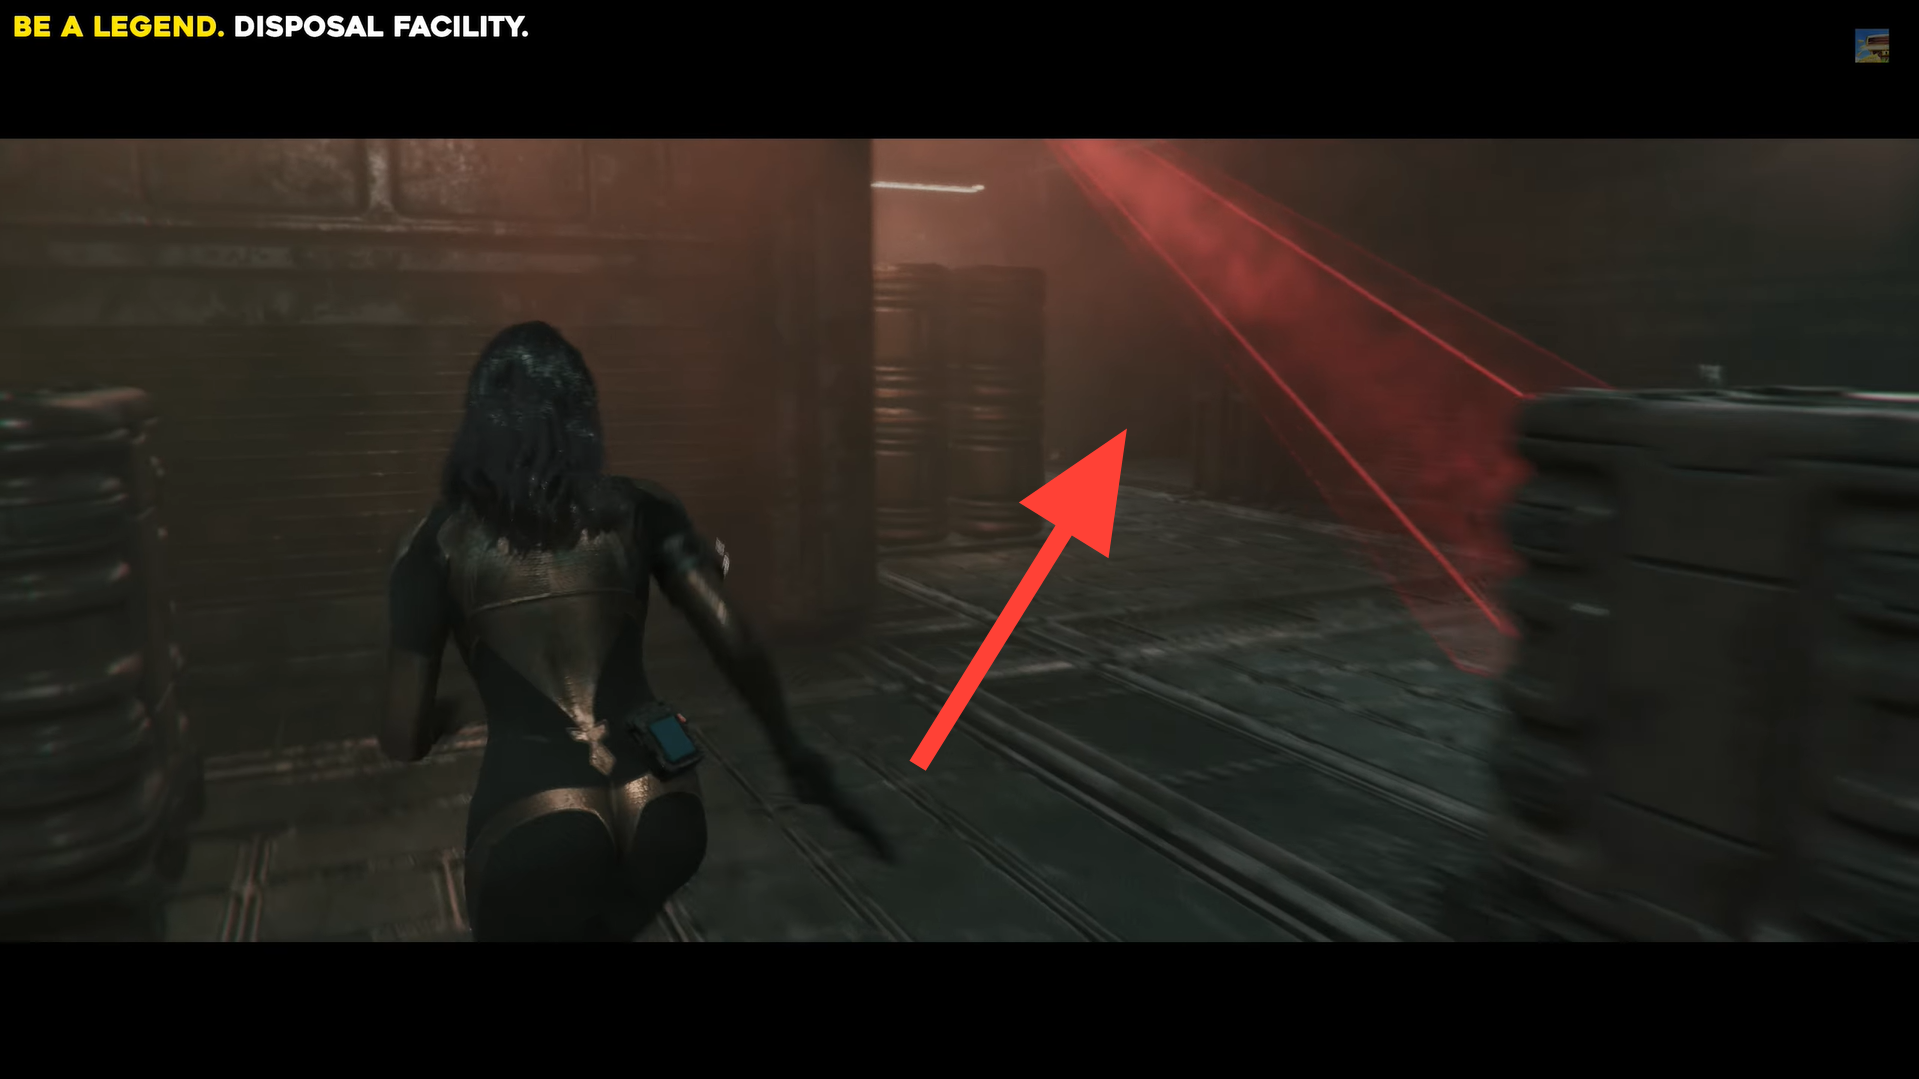
Take two rights into the fixed-camera area. Image credits: TeamKill Media / YouTube: 100% Guides
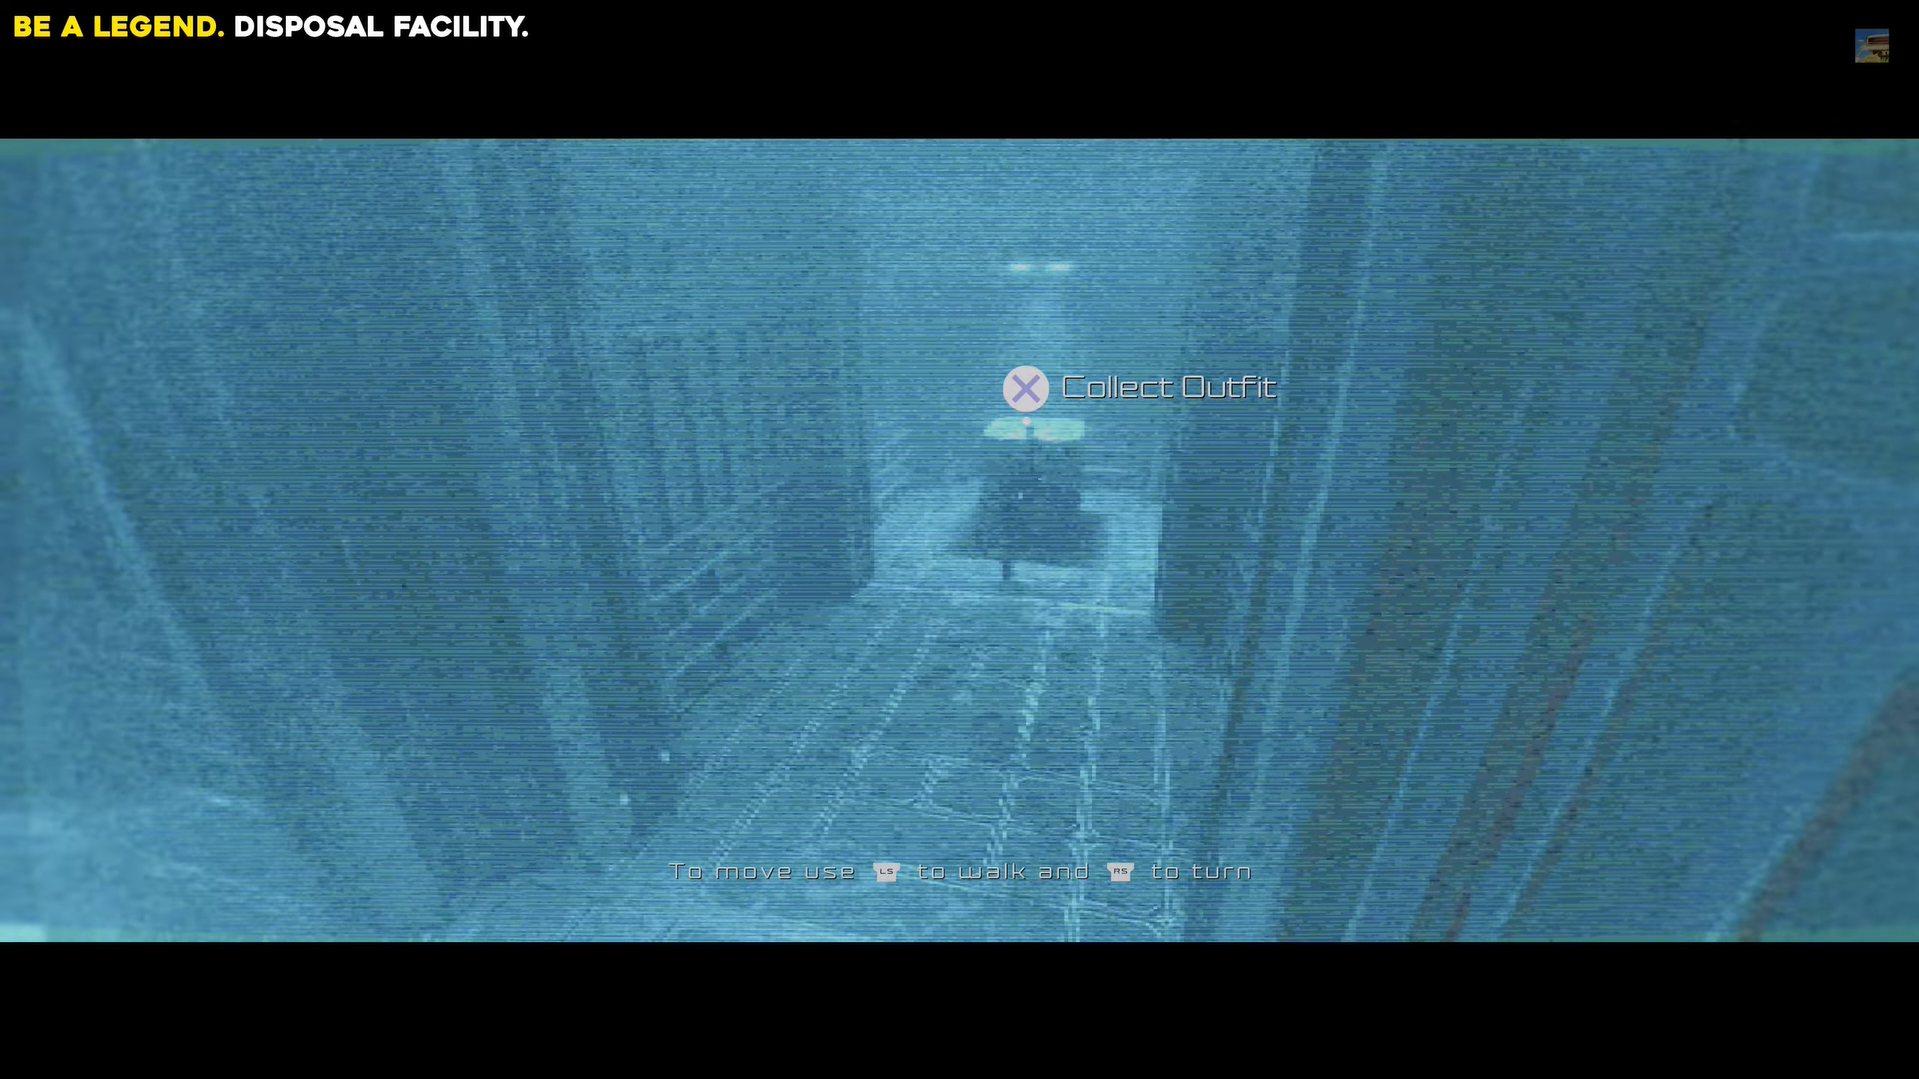
Follow the path to the end to collect the Be a Legend outfit.
Purrfectly Cat’s Meow & Biker Chick outfit
Head to the Starbridge area and climb the large central staircase.
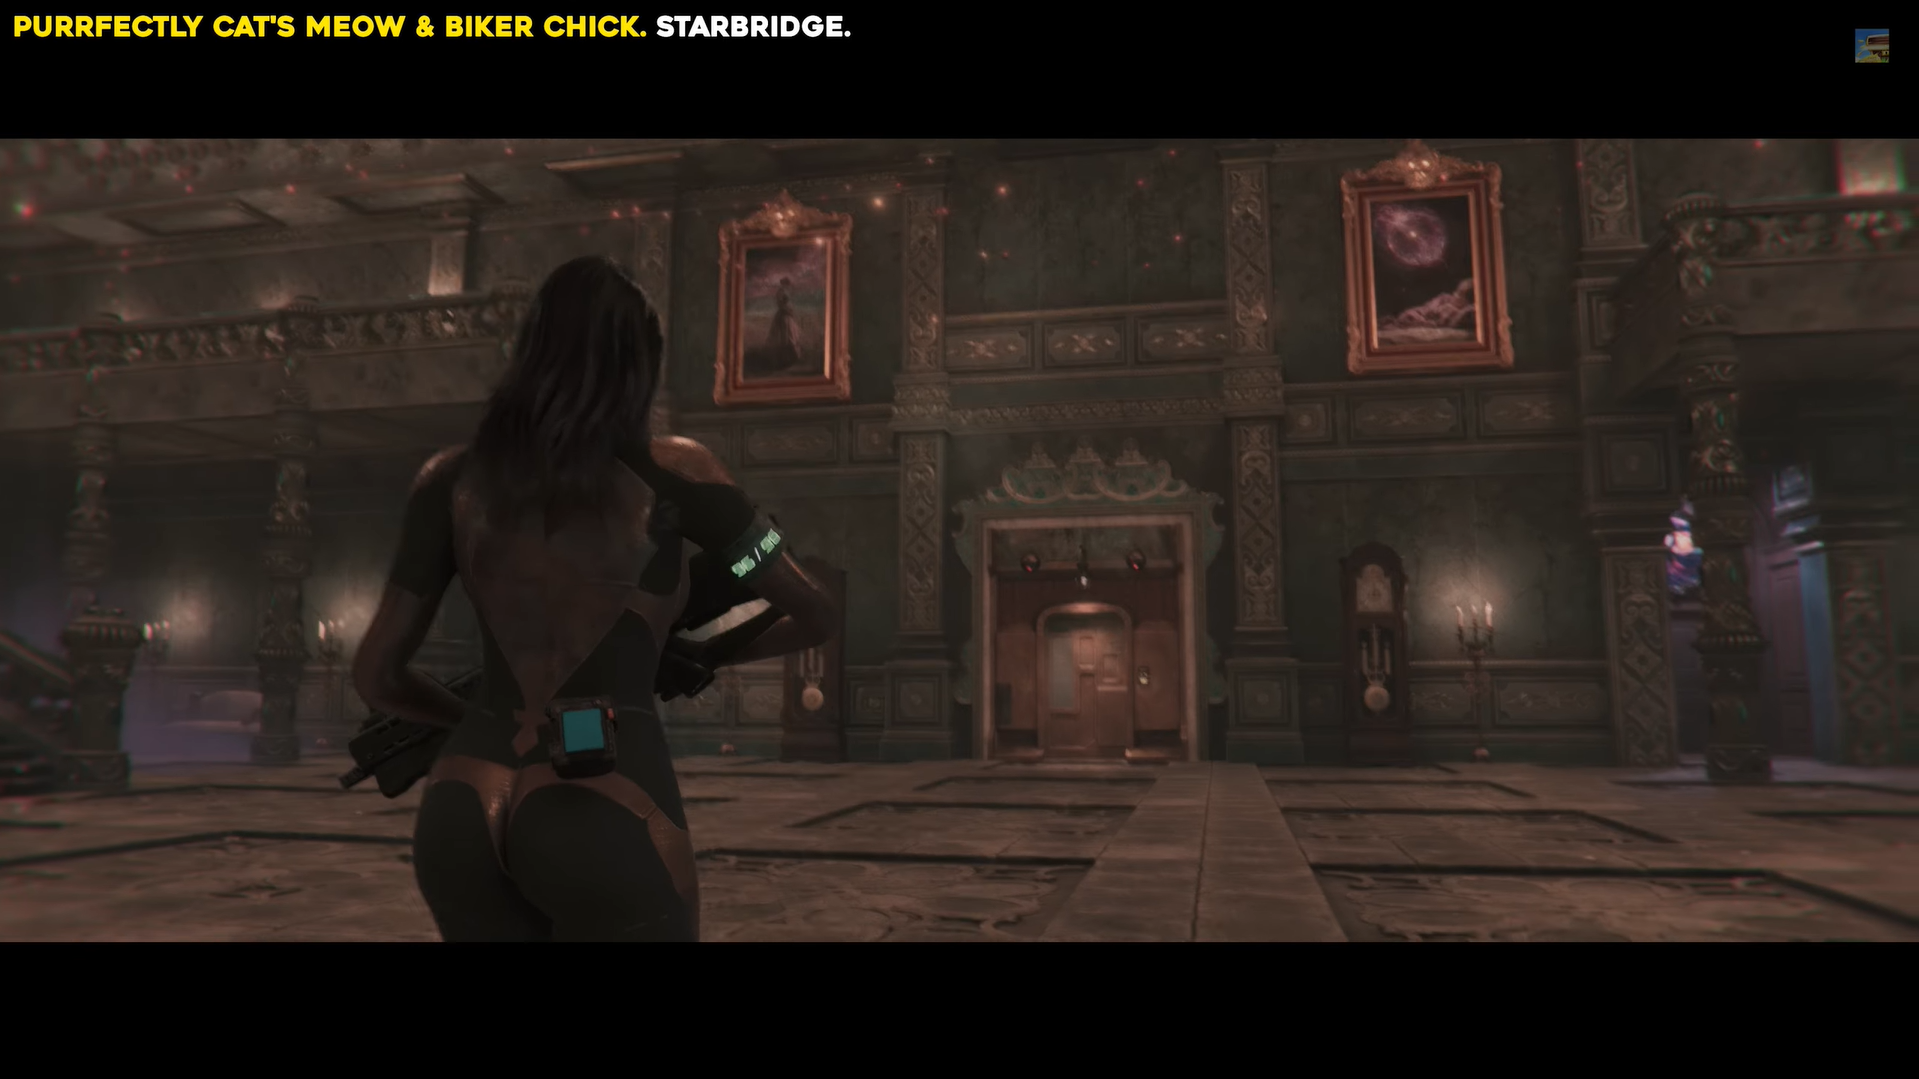
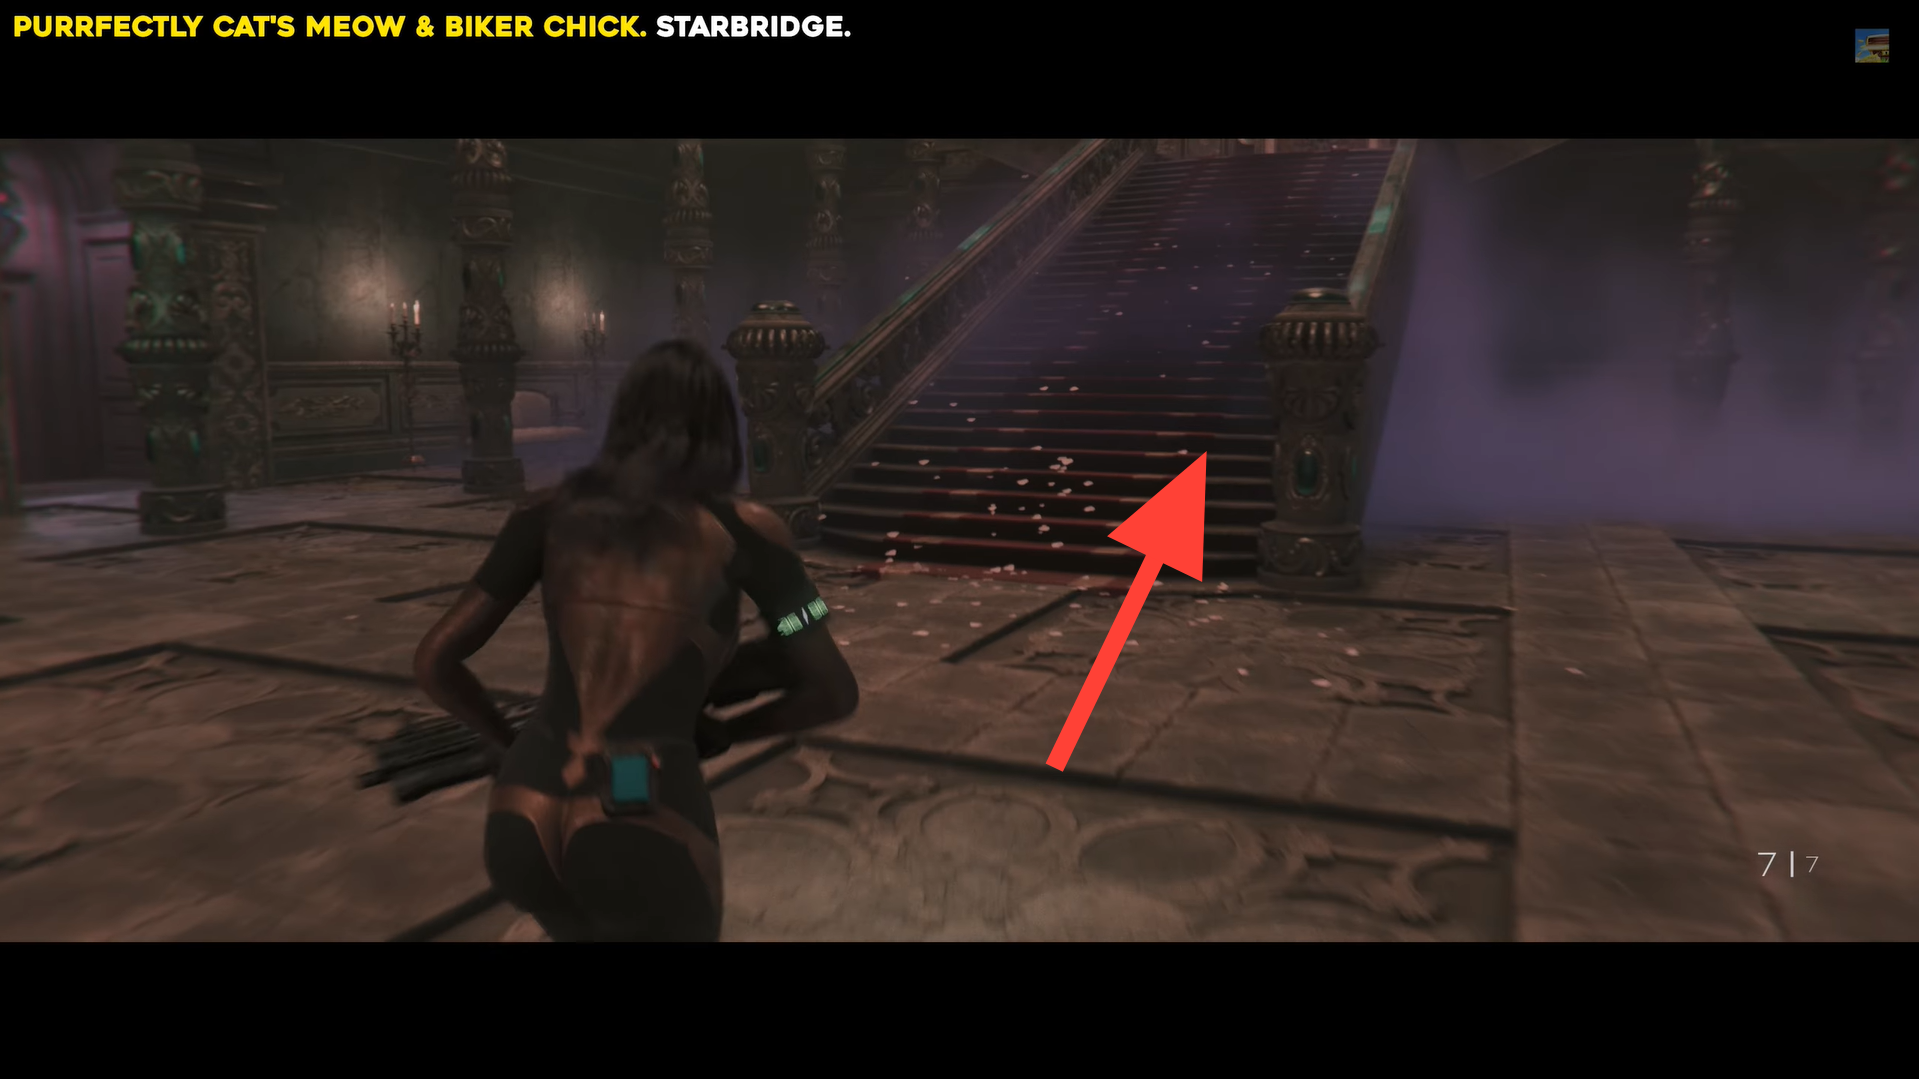
Purrfectly Cat’s Meow & Biker Chick outfit location. Image credits: TeamKill Media / YouTube: 100% Guides
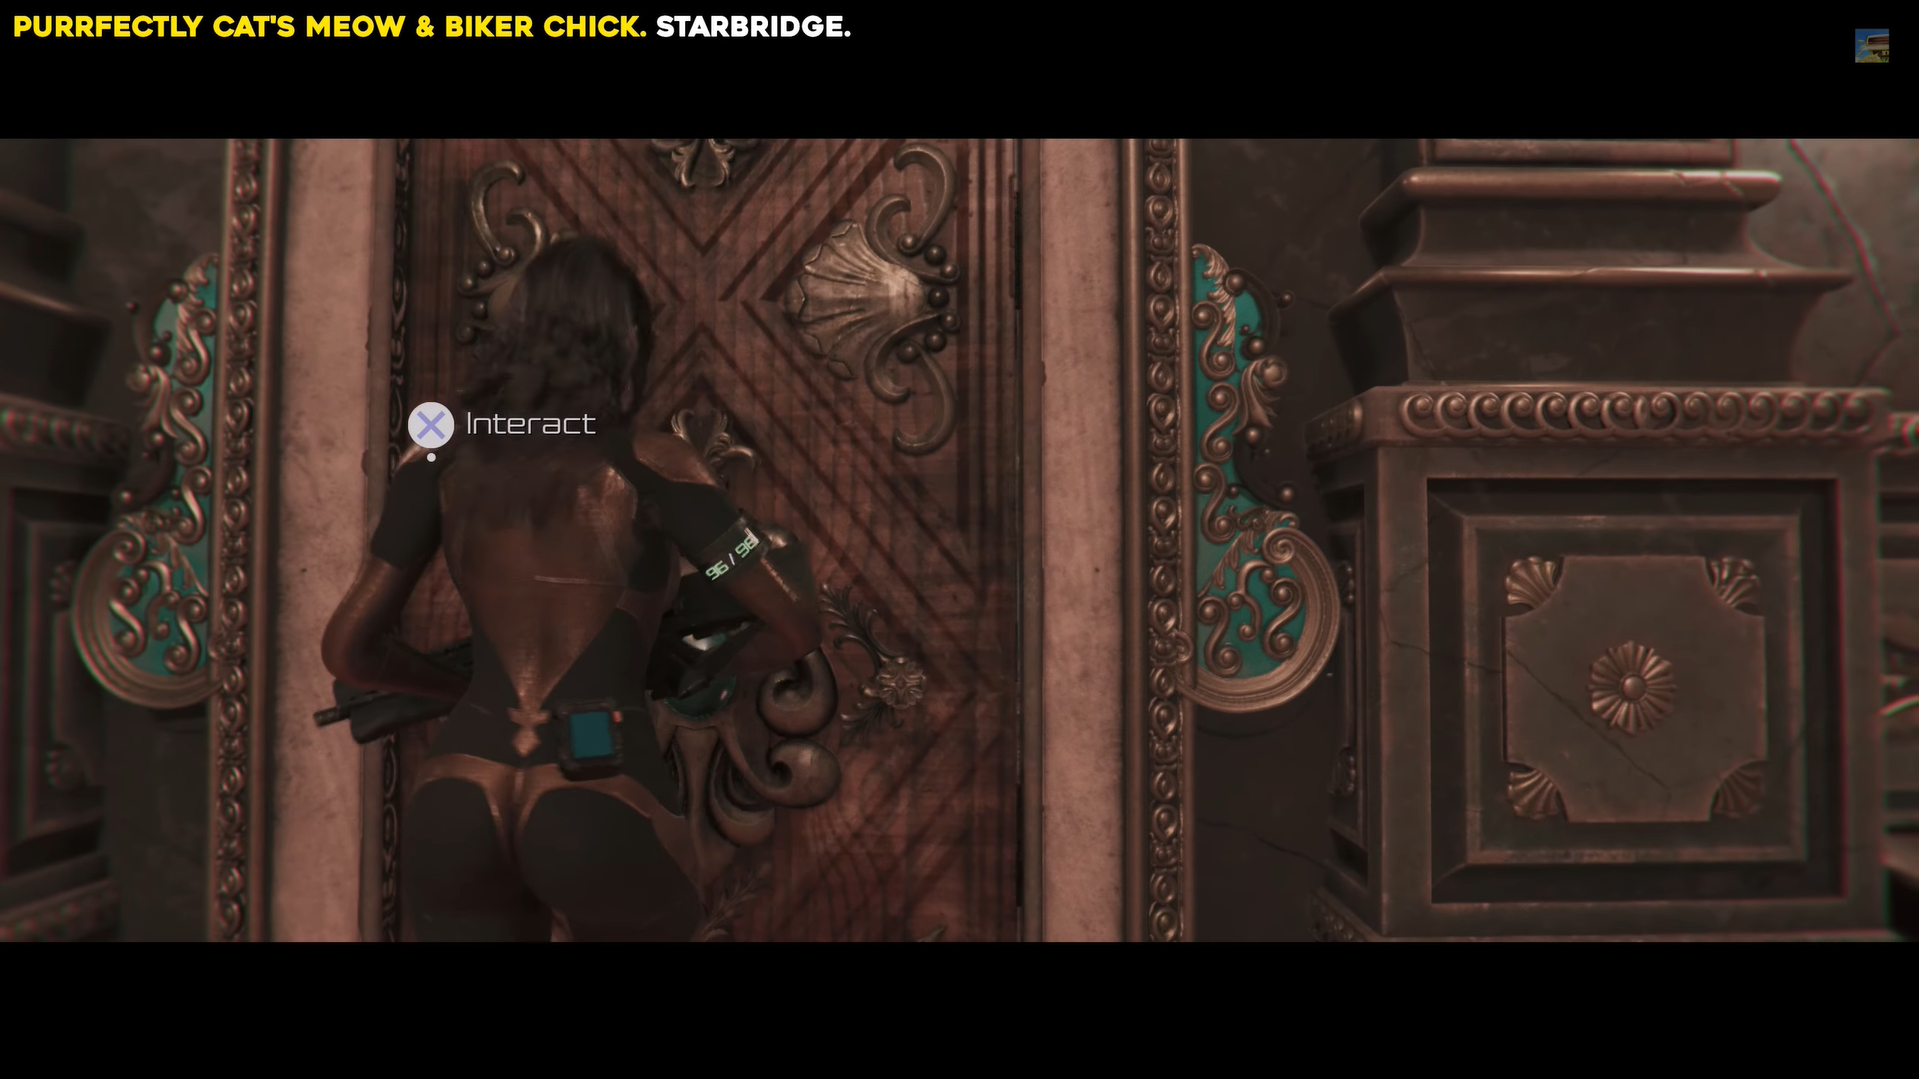
Open the door at the top and enter the room beyond.
Both the Purrfectly Cat’s Meow and Biker Chick outfits lie together on a table, interact to collect them.
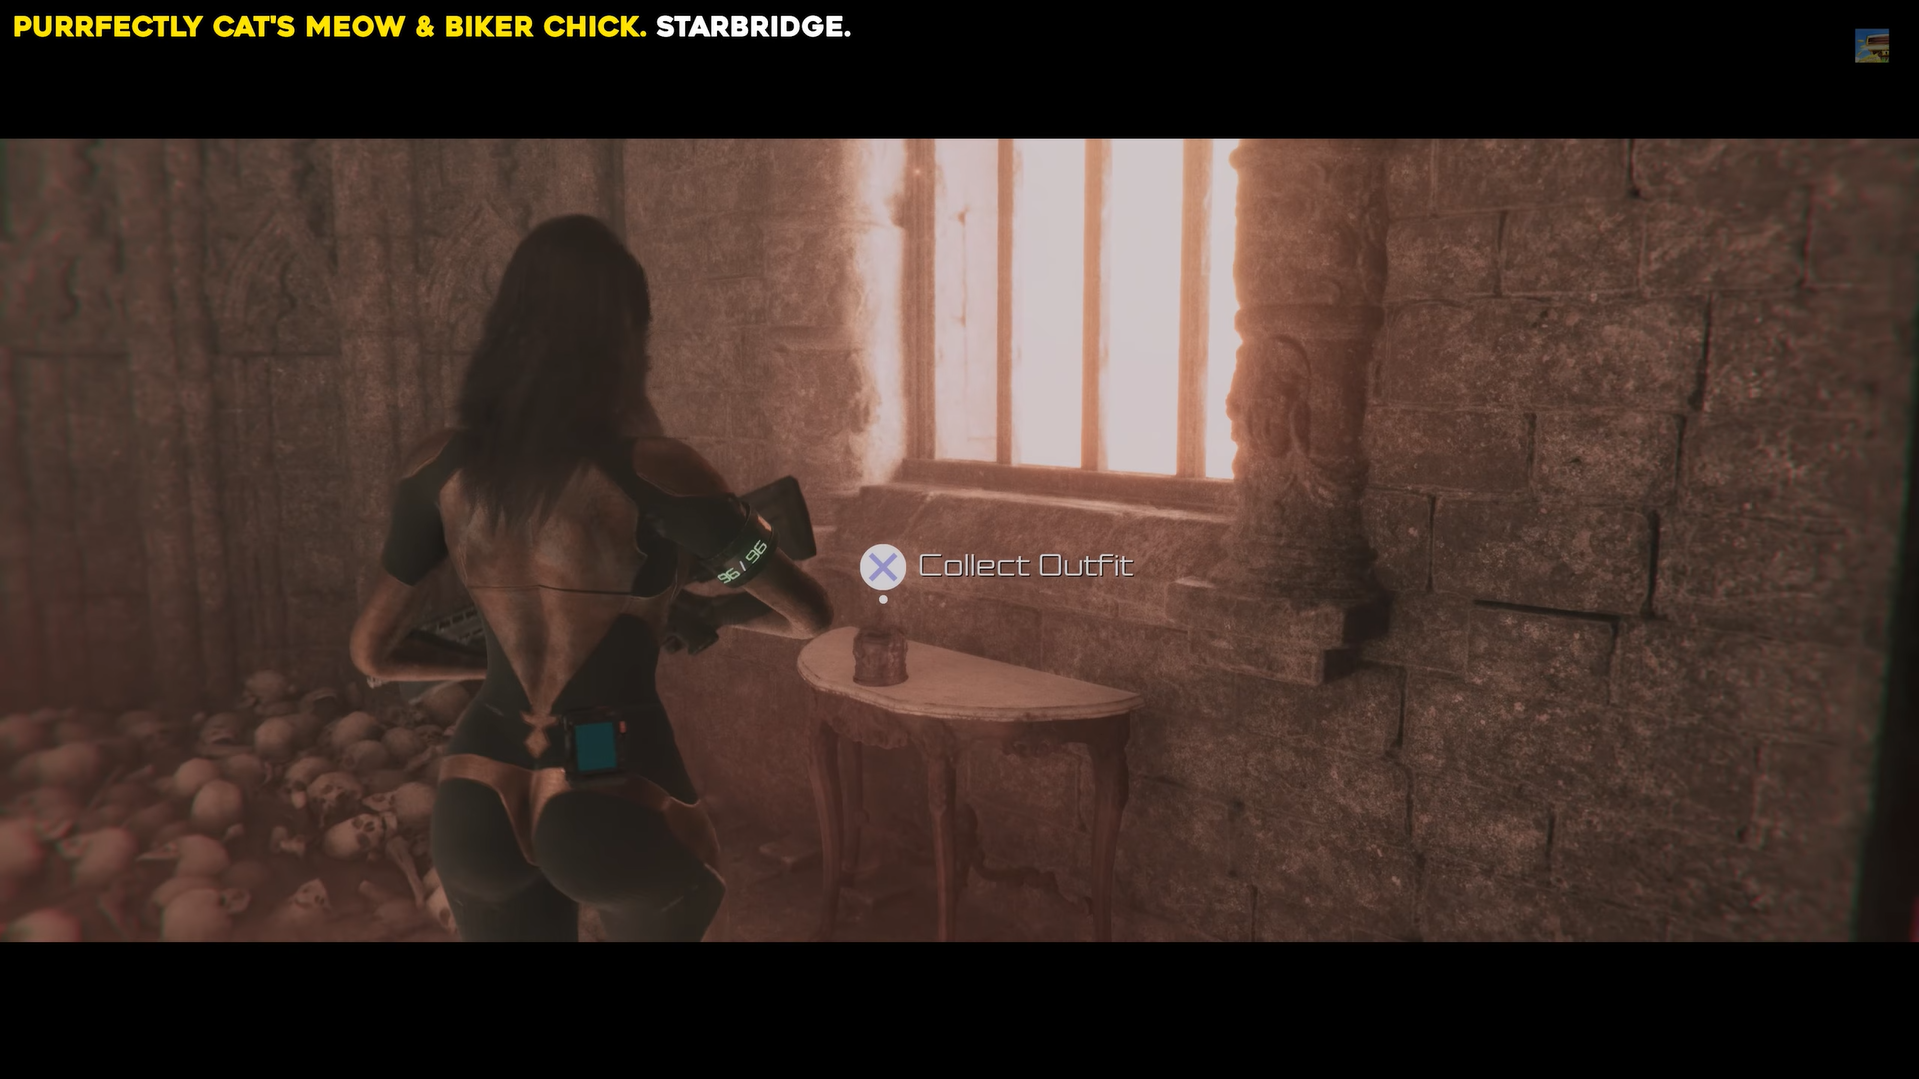
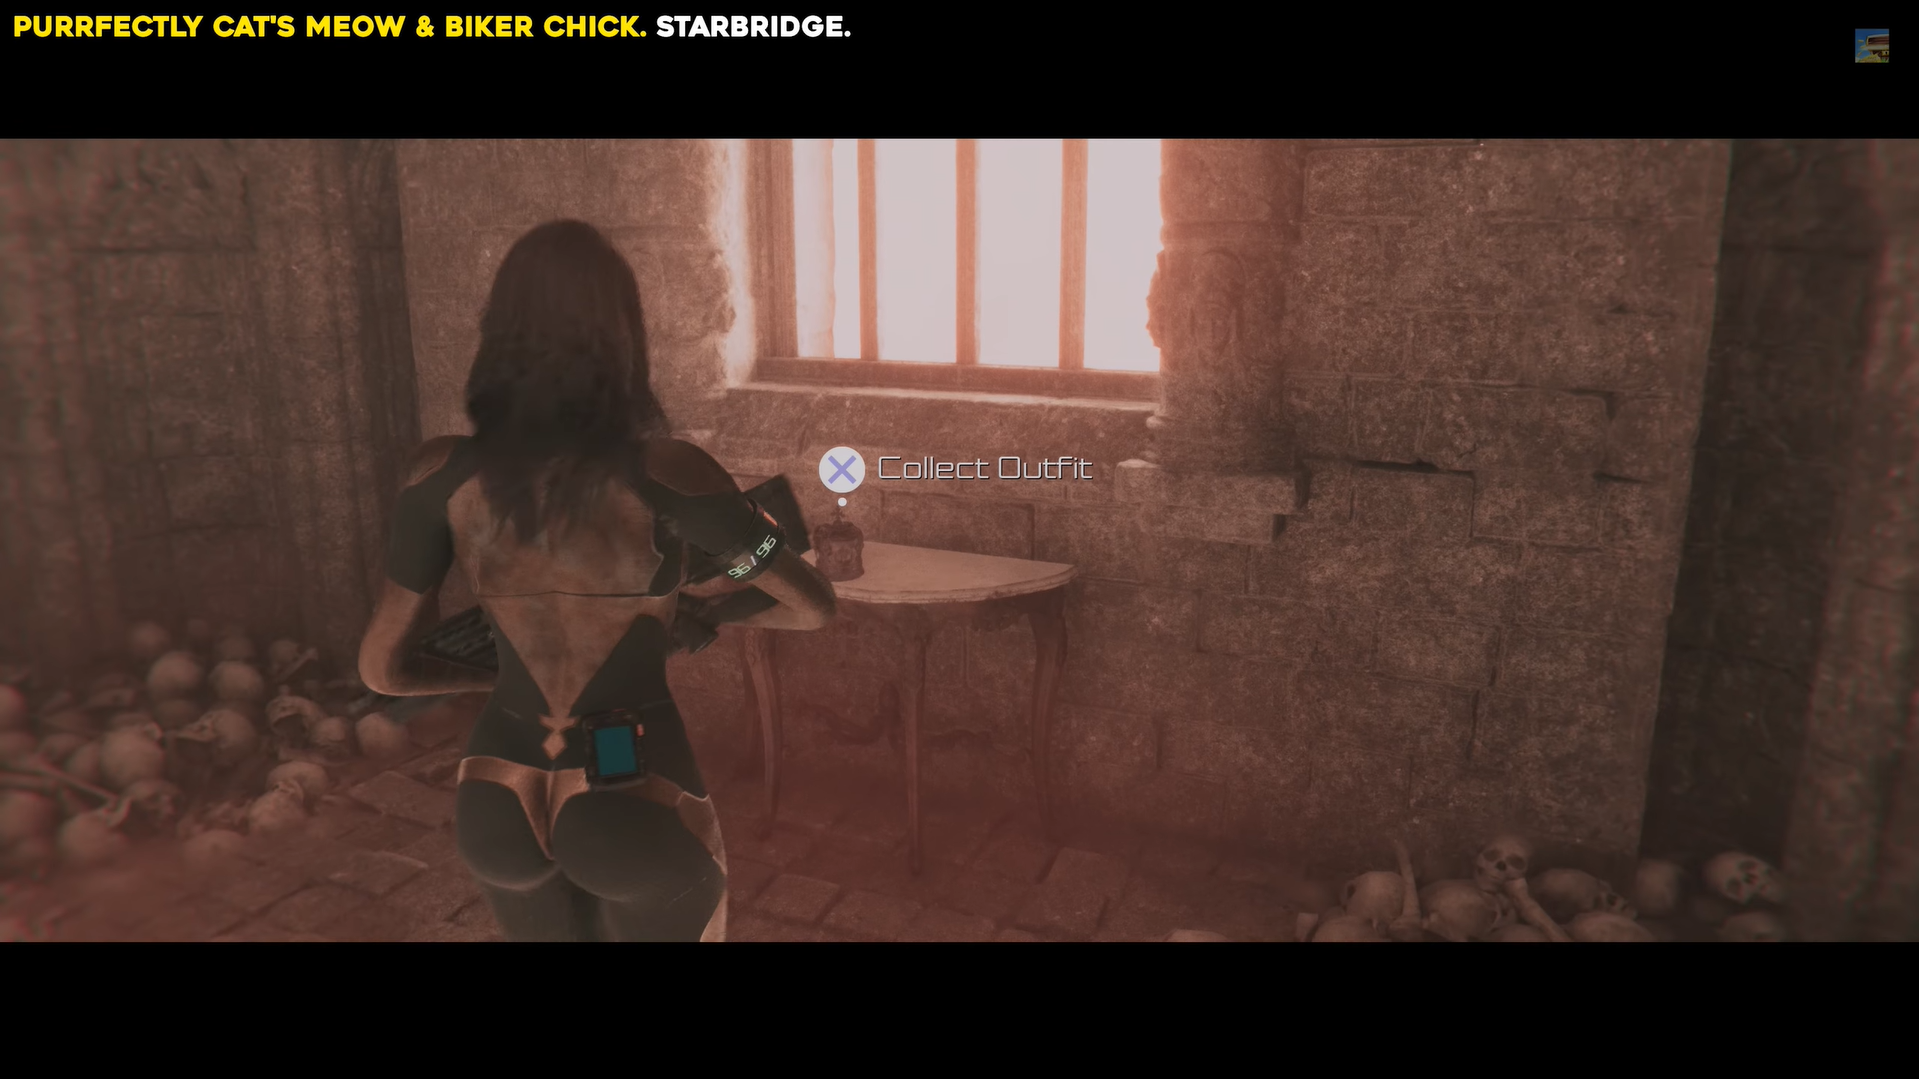
Interact with the table to collect both outfits. Image credits: TeamKill Media / YouTube: 100% Guides
All Outfit Locations in Code Violet
All 18 outfits in Code Violet are tucked away in short, linear side paths that unlock when you shoot specific white energy bulbs scattered throughout the main areas. Keep an eye on corners, walls, and doorways, breaking a bulb reveals a path leading to a fixed-camera section where the outfit awaits. None are missable, so a careful exploration of every room lets you collect all outfits in a single playthrough.
Thanks for reaching the end! Share your experience or doubts in the comments below—we read them closely and try to reply as quickly as possible.


