Complete Wrath of the Ripper Queen mission walkthrough in Borderlands 4. Rescue Quent, extend the Carcadia Bridge, and confront the Ripper Queen’s siege in this detailed step-by-step guide.
What to know
- “Wrath of the Ripper Queen” is the 7th main mission in Borderlands 4, unlocked after completing “A Lot to Process.”
- Recommended Level: 10–15 for balanced difficulty and loot scaling.
- Your goal: Rescue Quent, extend the Carcadia Bridge, and sabotage the Ripper siege engine.
- Rewards include XP, Cash, Eridium, a Rare pistol, and the Gnarly Gnashing Gear Vault Hunter Style.
BL 4 Missions Overview
| Previous Mission | Current Mission | Immediately Unlocked Mission |
|---|---|---|
| A Lot to Process | Wrath of the Ripper Queen | Siege and Destroy |
Wrath of the Ripper Queen mission overview
“Wrath of the Ripper Queen” sets you on a dangerous rescue and sabotage mission. You’ll team up with Quent to fend off the Rippers, extend a critical bridge toward Carcadia, and break their siege. Expect constant skirmishes, heavy resistance, and a dramatic turn as your explosives plan goes awry.
Here’s a complete step-by-step guide to help you complete the mission efficiently and grab all its rewards.
| Objective Type | Details |
|---|---|
| Mission Name | Wrath of the Ripper Queen |
| Recommended Level | 10–15 |
| Location | Carcadia Burn |
| Main Objectives | Rescue Quent, Extend Bridge, Sabotage Siege Engine, Meet Zane |
| Rewards | XP, Cash, Eridium, Rare Pistol, Gnarly Gnashing Gear Vault Hunter Style |

Phases at glance
| Phase | Objective Summary | Key Tasks | Major Encounters |
|---|---|---|---|
| Phase A | Rescue Quent and extend the Carcadia Bridge | – Reach distress signal- Talk to Quent- Escort and defend survivors- Extend the bridge | Ripper Grunts, Ripper Meatheads |
| Phase B | Break the siege and confront the Ripper forces | – Meet Quent at catapults- Plant explosives- Defend against Ripper ambushes- Meet Zane in the bar | Badass Rippers, Explosives Engineers |
Phase A: Rescue Quent and extend the bridge
The mission begins with a distress signal from the outskirts of Carcadia Burn. The Rippers are ambushing Quent’s resistance cell — and it’s up to you to save them.
Step 1: Reach the distress call and clear Rippers
Follow your waypoint to the burned-out industrial area. The first wave of Rippers appears immediately. Use cover, grenades, and any elemental weapons for crowd control. Once the last enemy drops, the area quiets, triggering Quent’s dialogue.

Step 2: Talk to Quent
After clearing the area, locate Quent near a collapsed barricade. He’ll brief you on the siege and ask for help reaching his hideout.

Step 3: Escort Quent and fight reinforcements
Follow him uphill. Along the way, Ripper reinforcements drop in — including Ripper Meatheads. Stay mobile and aim for weak points. Defeating them opens the next area.

Step 4: Optional – speak to survivors
Inside Quent’s hideout, you can interact with nearby survivors. These NPCs provide minor lore and XP bonuses but aren’t required for mission completion.

Step 5: Extend the bridge
Once ready, head outside and look for the half-built bridge. Climb the scaffolding and use your grappling hook to reach the control terminal. Interact with it to extend the bridge. A short animation plays, connecting the two sides of Carcadia Burn.
The path forward is now open — time to take the fight to the siege engines.
Phase B: Break the siege and confront the Ripper forces
With the bridge extended, the focus shifts toward the Ripper Queen’s siege engines blocking Carcadia’s defenses.
Step 6: Meet Quent at the catapults
Head across the new bridge to reach the outer siege line. Quent waits near a group of burning catapults. Once you approach, Rippers will attack again — clear the area before interacting with him.

Step 7: Collect explosives and plant them
Quent hands you a set of explosives. Follow the objectives to place them at three marked points along the siege engine. Watch for ambushes while planting — Rippers tend to swarm when you’re busy.

Step 8: Detonate and take cover
After the last charge, fall back and wait for the detonation. The screen shakes, but… nothing happens. The explosives fail to go off.

Step 9: Follow Quent to the bar
Quent curses the failed plan and decides to regroup. Follow him along the winding path toward a run-down bar nearby. Along the way, waves of Rippers appear — including Badass variants.

Step 10: Defend the bar entrance
Once you reach the bar, several Ripper groups attack. Use environmental hazards to your advantage. When the last wave falls, head inside.

Step 11: Talk to the bartender
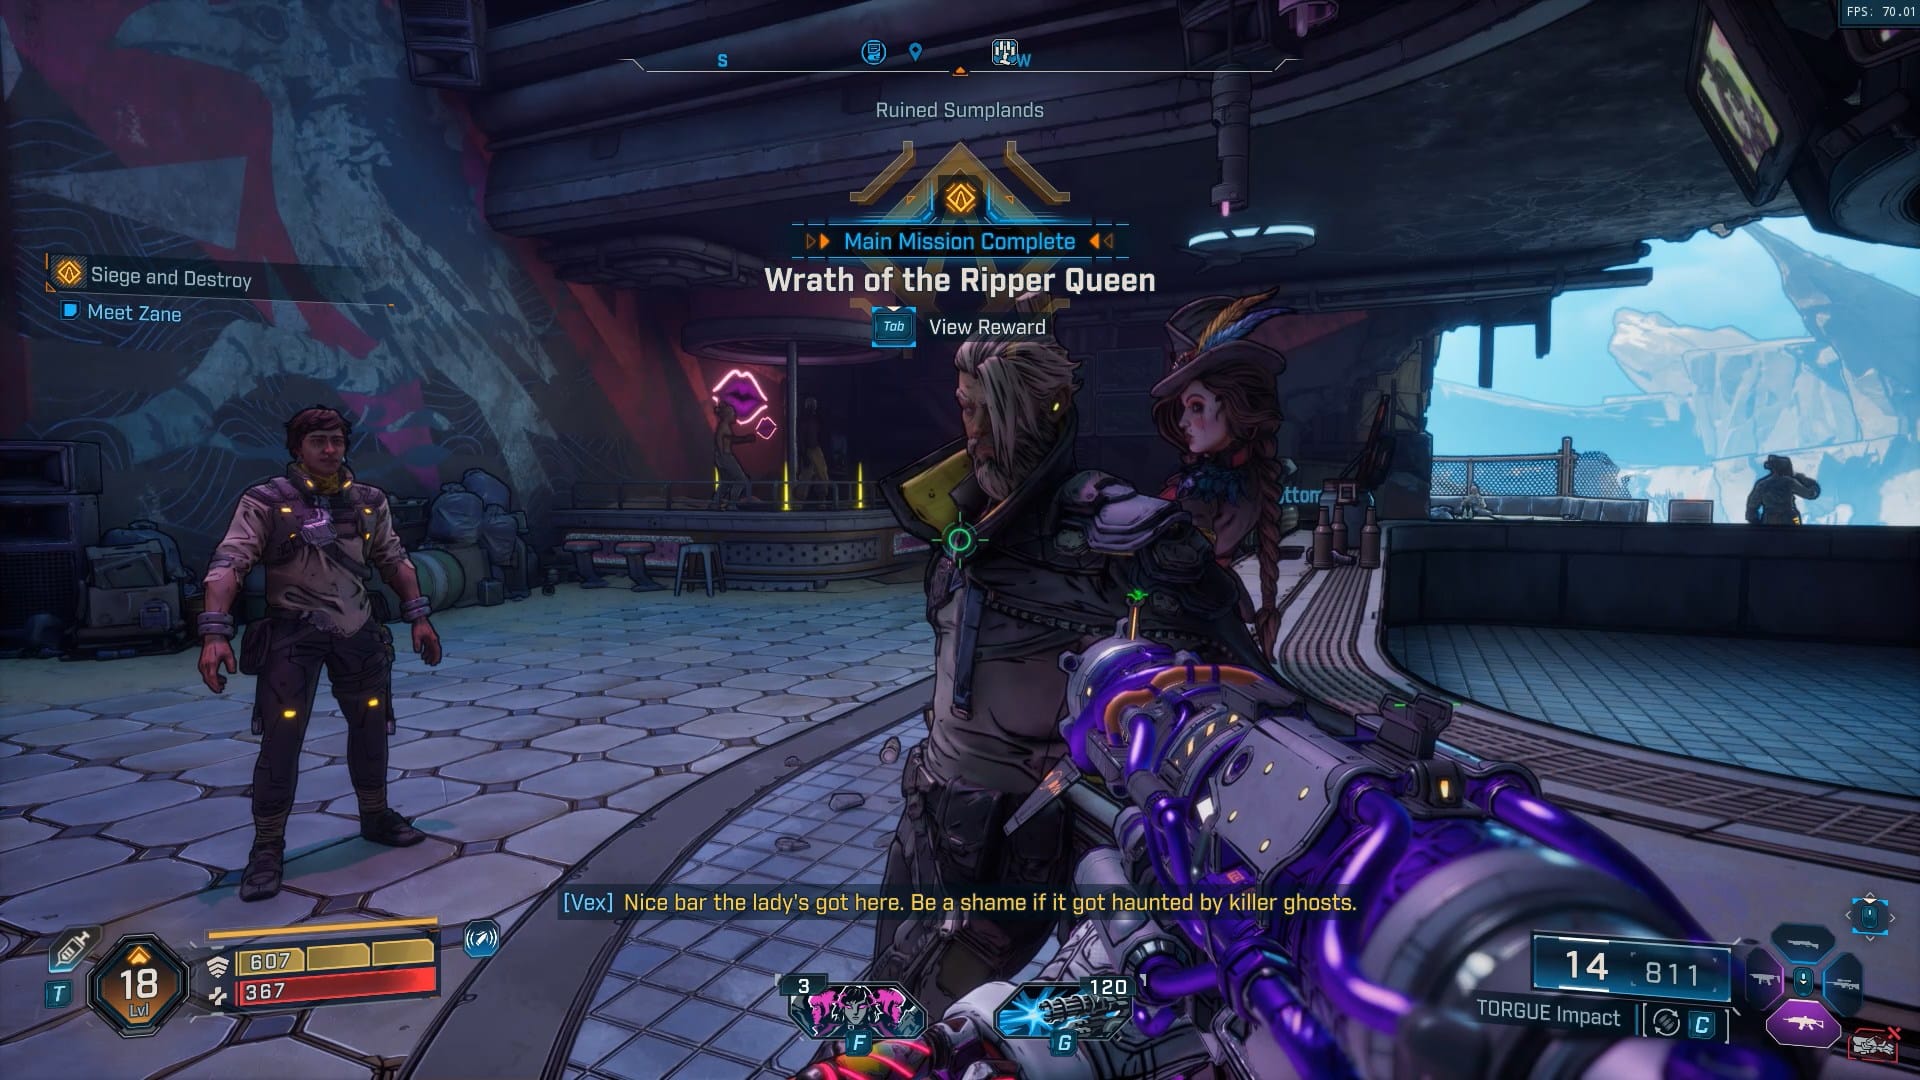
Inside the dimly lit bar, Quent introduces you to the bartender — who happens to be none other than Zane. After a brief cutscene, the mission concludes, unlocking the next story quest: Siege and Destroy.

Wrath of the Ripper Queen mission tips
| Enemy Type | Notes |
|---|---|
| Ripper Grunts | Common melee units; fall quickly to SMG or shotgun fire. |
| Ripper Meatheads | Heavy-hitting enemies with shields; aim for the legs or flanks. |
| Badass Rippers | Appear near the bar; use grenades and cover to control the fight. |
| Explosives Engineers | Found near siege engines; drop ammo and grenades when defeated. |
Combat Tips:
- Keep moving — staying in one place invites melee rushes.
- Use the grappling hook tactically to reposition or reach cover.
- Melee finishers are effective when a Ripper’s shield breaks.
- Save heavy ammo for the siege and bar defense sections.
Wrath of the Ripper Queen mission rewards
| Reward Type | Item or Bonus |
|---|---|
| Experience | High XP for mid-game progression |
| Currency | Cash and Eridium |
| Gear | Rare pistol drop (randomized stats) |
| Cosmetic | Gnarly Gnashing Gear Vault Hunter Style |
Completing the mission
With the bridge extended and the siege plan disrupted, you’ve turned the tide for Carcadia — even if the Ripper Queen’s full might hasn’t yet surfaced. The failed explosion sets up your next mission, Siege and Destroy, where you’ll finally strike back with heavier firepower and new allies.
This mission marks a turning point — the Resistance begins to rise, and your legend starts to spread across the badlands.


