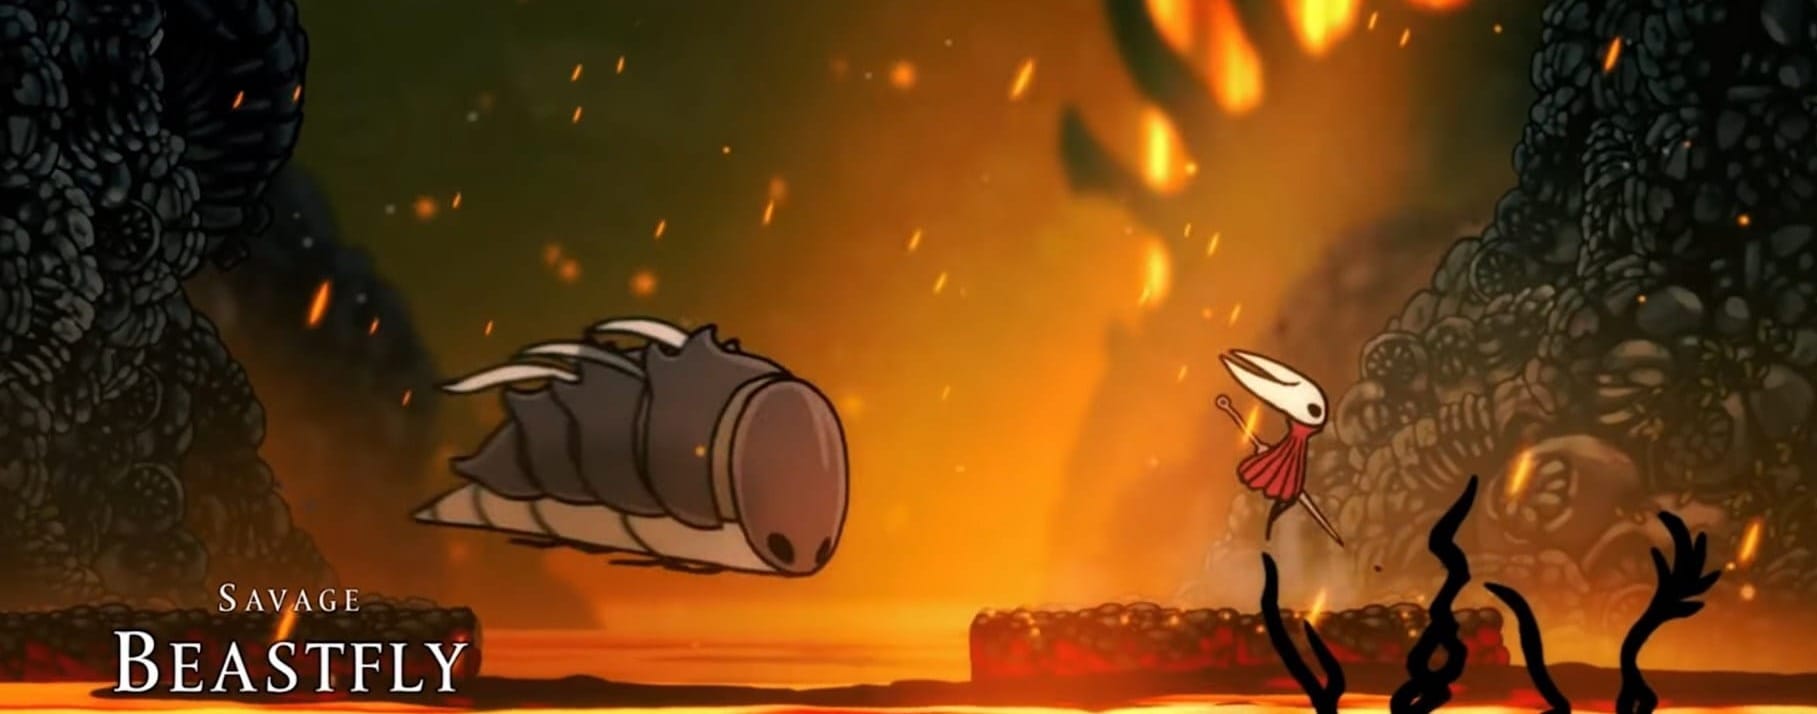
Track down Savage Beastfly 2 in Far Fields for one of Silksong’s toughest battles, brimming with environmental hazards, deadly summons, and relentless attacks
What to know
- Savage Beastfly 2 appears in Far Fields, rematching after the Chapel of the Beast.
- The arena features destructible platforms, adding to the challenge.
- The boss uses aggressive charge and slam attacks, while summoning tough minions.
- Preparation, using Thread Storm for summons, and careful platforming are key to victory.
Hornet faces the ferocious Savage Beastfly twice in Silksong—the rematch in Far Fields, also known as Savage Beastfly 2, is a notorious late-game challenge. With the arena breaking beneath your feet and new minions swarming the screen, patience and mastery of the battle’s rhythms make the difference between victory and defeat.
Savage Beastfly 2 location and prerequisites
Savage Beastfly 2 is found in the Far Fields, specifically by returning to the Fourth Chorus boss arena after accepting the relevant Grand Hunt quest. To access this, first defeat the Beastfly in the Chapel of the Beast, progress past Act Two, and defeat Cogwork Dancers. Then, after accepting the Savage Beastfly Wish at Bellhart, use the Bellways to reach Far Fields and follow the tracking cues to the fight’s location.
| Stage | Location | Prerequisites |
|---|---|---|
| First | Chapel of the Beast | Drifter’s Cloak, Act One |
| Second (2.0) | Far Fields (Grand Hunt) | Defeat first Beastfly → reach Act Two → defeat Cogwork Dancers → Wish from Bellhart |

Arena hazards and environmental dangers
The rematch arena is much tougher because the platforms can break or become lava, shrinking your safe zones over time. Staying mobile, timing leaps, and strategically using the Drifter’s Cloak to float are essential as areas of safety disappear. If space runs out, prioritizing aerial dodging and using floating mechanics helps avoid fatal damage.
Savage Beastfly 2 attack patterns
Horizontal Charge
The boss lines up with Hornet’s Y-axis and dashes repeatedly—bait downward, stay on the ground to encourage low passes, and punish with downward or upward strikes as appropriate.

Vertical Slam
The Beastfly lines up above and slams downward, often three times in a row—step aside, then counterattack as it recovers.

Summon Enemies
At key health intervals, the boss calls in new types of minions, including spear-wielders with ranged attacks and, earlier, spike-firing Kilik and Vicious Caranid.

Savage Beastfly – attack cues & counters
| Attack | Visual cue / behavior | Tip |
|---|---|---|
| Horizontal Dash | Aligns laterally, then charges | Stay grounded; jump over or dash through, punish after a miss |
| Vertical Slam | Hovers above, then drops straight down | Sidestep the landing zone, then strike on recovery |
| Summon Minions | Boss howls; small minions appear | Clear them quickly (AoE like Thread Storm helps) |
Must-have gear and preparation
Drifter’s Cloak
Critical for reaching the arena, and helps avoid attacks with floating jumps.
Thread Storm
Essential skill for clearing summoned minions before being overwhelmed.
Reaper Crest
Downward strike increases damage opportunities during boss’s ground-level attacks.
Magma Bell (if available)
Makes falling in lava less punishing than getting hit by the Beastfly itself.
Swift Step
Better dashing improves survival and repositioning.
How to beat Savage Beastfly 2
Step 1
Defeat Savage Beastfly once in Chapel of the Beast (Hunter’s March), gaining the Drifter’s Cloak after the Far Fields sidequest.

Step 2
Track the Beastfly to the Fourth Chorus arena, watching for cues and hazards on the way.

Step 3
On entering, charge at the Beastfly for a few early hits before it reacts.

Step 4
Read the boss’s patterns—horizontal and vertical charges are predictable. Focus on dodging rather than trading hits. Use low jumps to encourage the boss to charge near the ground.

Step 5
Quickly defeat summoned minions with Thread Storm or explosive silk skills to avoid getting boxed in by multiple threats.

Step 6
Conserve platform space—avoid unnecessary destruction, and reposition as platforms crumble. Use the Drifter’s Cloak to stay airborne or float if there’s no safe platform.

Step 7
If forced, take lava damage (with Magma Bell) rather than a direct Beastfly attack to minimize health loss.

Step 8
After dodging three vertical slams, use the window to heal or regroup before the boss resumes its assault.

Step 9
Expect Beastfly to become more aggressive near the end. Keep composure, manage minions, and land careful finishing blows and finish with grace.

Staying calm and managing stress
Panicking often leads to avoidable mistakes in this frantic fight. Stay composed, focus on consistent dodges, and don’t feel pressured to land every hit—surviving the waves matters more than aggressive offense. Use improved Silksong healing mechanics, as you can now heal while airborne and restore more masks per charge.
Mastering the wild rematch with Savage Beastfly
Beating Savage Beastfly 2 in Silksong is a real test of platforming, patience, and pattern recognition. With the right prep—especially Thread Storm and the Drifter’s Cloak—a methodical approach will let you overcome the boss’s chaos and claim victory.