- What to know
- Why portable mining rigs are a trap
- Electric mining rigs are the backbone of automation
- How automated ore transport works
- Why default crafting blueprints are inefficient
- How to manually set up crafting facilities for maximum speed
- Why proximity matters in crafting
- Applying the same logic to all crafting units
- Benefits of a fully optimized setup
- Common automation mistakes to avoid
- Why automation matters long-term
What to know
- Portable mining rigs are temporary and inefficient
- Electric mining rigs are the foundation of real automation
- Refining units work best with minimal conveyor lanes
- Manual crafting layouts outperform default blueprints
Automation is one of the most important progression systems in Arknights: Endfield, but the game does a poor job of teaching efficient layouts. If you follow the tutorial blueprints and default placements, you’ll quickly run into slow production, clogged belts, and wasted space.
This guide explains how to build fully automated ore mining farms, efficient refining lines, and fast crafting facilities, while avoiding the most common mistakes players make early on.
Why portable mining rigs are a trap
Portable mining rigs are introduced early as a learning tool, but they are not meant to scale.
Their main problems are:
- They require manual collection
- They do not auto-route materials to your base
- They stop working if ignored
- They consume time without long-term payoff
As soon as you unlock power infrastructure, portable rigs should be phased out entirely. Keeping them longer than necessary slows down your progression dramatically.
Electric mining rigs are the backbone of automation
Electric mining rigs completely change how resource farming works.
Once placed on an ore node and supplied with power, they:
- Mine continuously
- Automatically send ores back to your base
- Require no interaction
- Scale infinitely with map expansion
From this point onward, ore farming becomes passive. Your job is no longer to collect resources, but to design systems that process them efficiently.
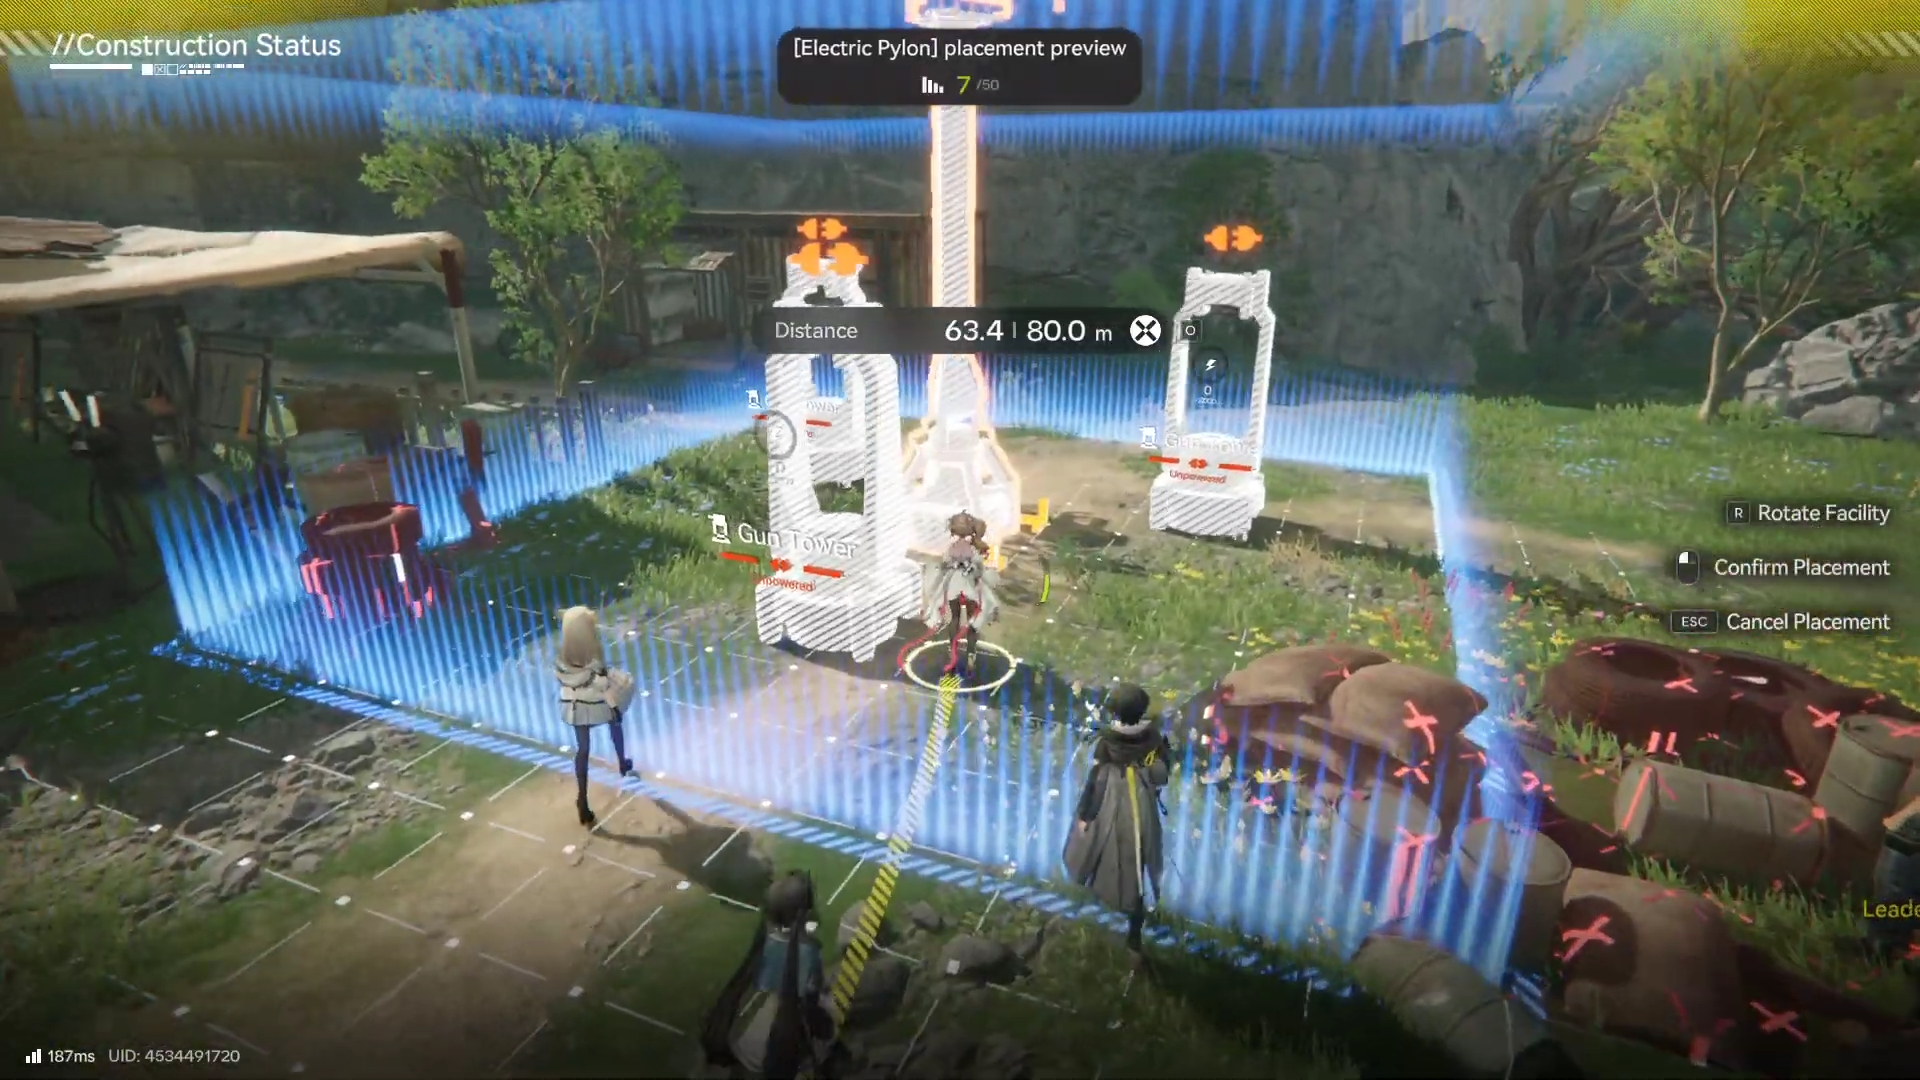
How to power mining rigs correctly
Electric mining rigs only function when connected to your power grid.
Key components
- Electric pylons provide local power coverage
- Relay towers transmit power over long distances back to the base
The most common mistake is placing one pylon per mining rig, which wastes space and materials.
Best placement strategy
- Position pylons so a single pylon covers multiple rigs
- Chain relay towers efficiently rather than spamming them
- Always think in terms of coverage, not proximity
With proper placement, one pylon can power several rigs at once.
Mine every available ore node
As you progress, ore demand increases exponentially due to:
- Advanced crafting
- Electronics production
- Facility upgrades
- Battery and packaging recipes
If a mining node exists and you have the power capacity, it should be active.
Unused nodes represent lost time. Storage can be expanded later, but missing ore production slows everything downstream.
How automated ore transport works
Once powered, electric mining rigs automatically route ore back to your base. You do not need conveyor belts at the mining site.
This means:
- All logistics planning happens at the base
- World exploration stays clean and uncluttered
- Scaling becomes far easier
Your factory is where optimization matters most.
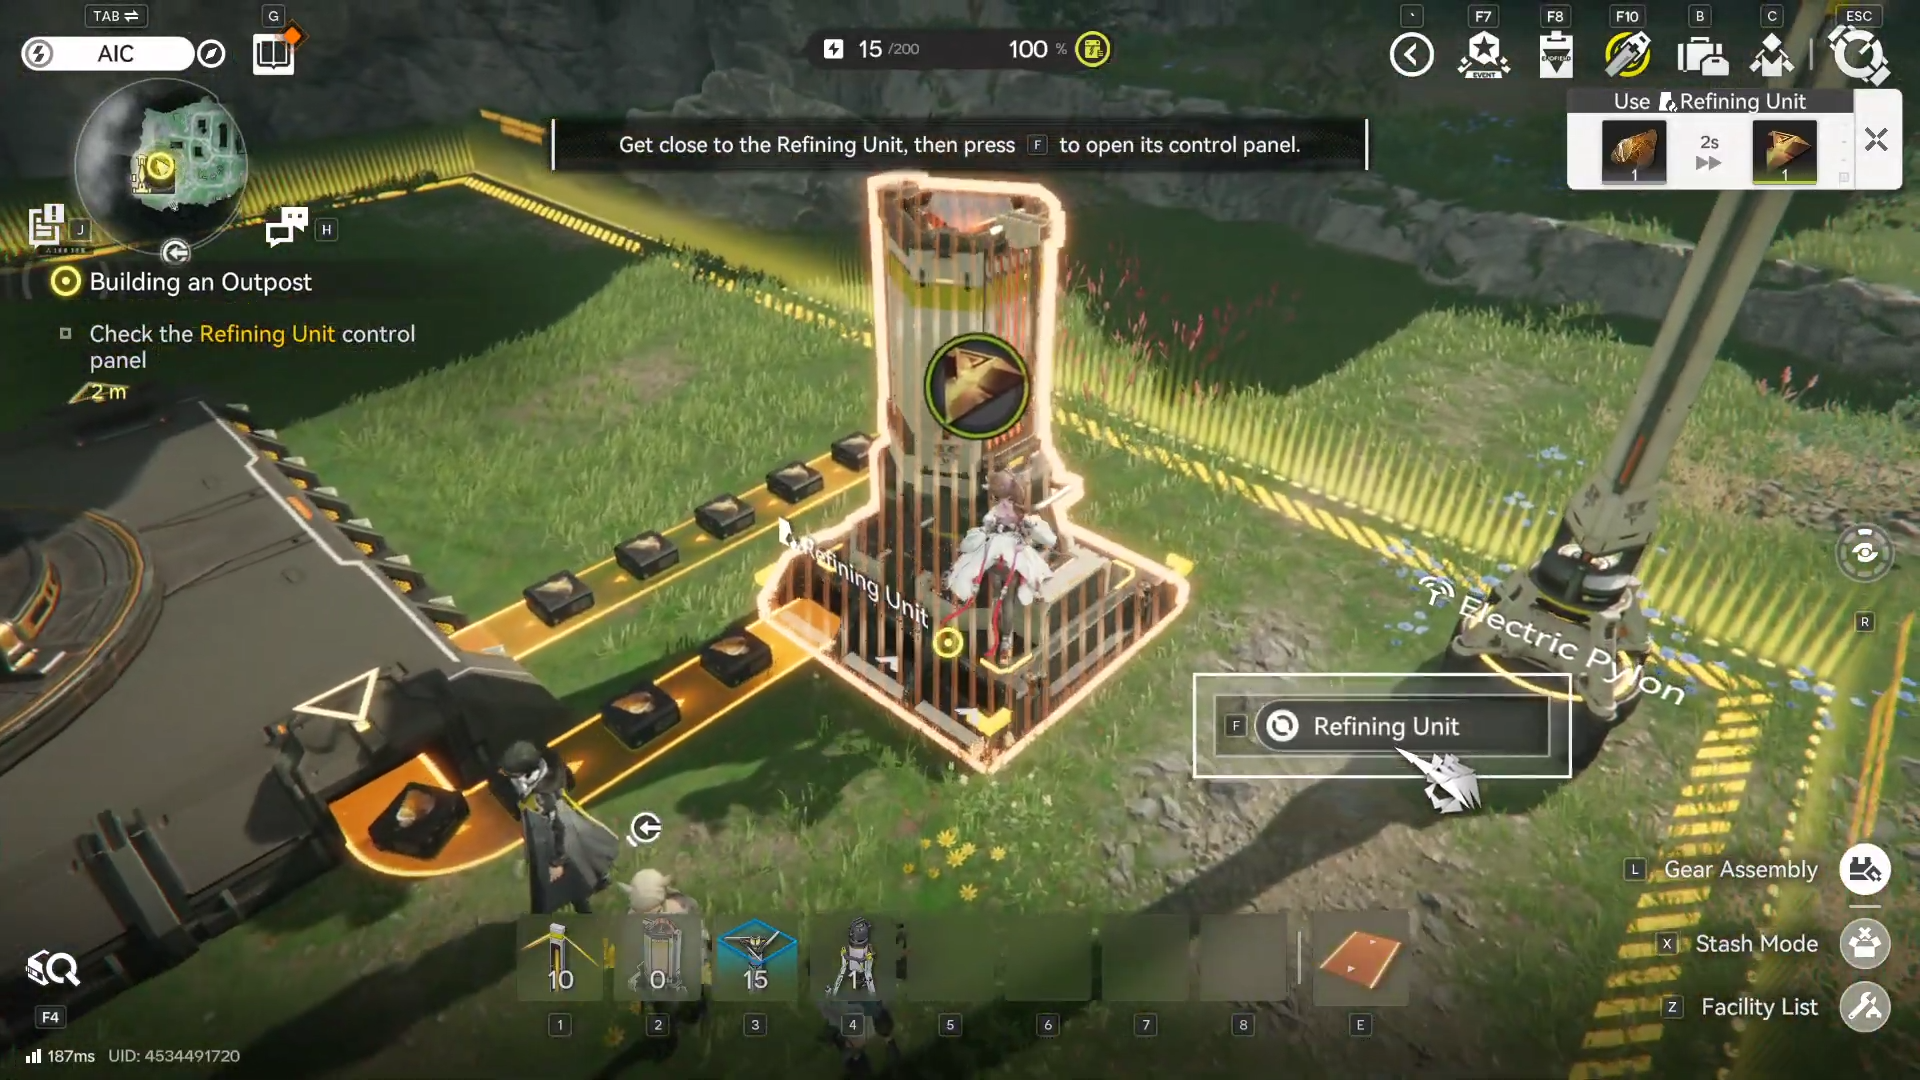
The biggest refining mistake players make
Refining units look like they support multiple conveyor lanes, so many players assume using all lanes increases speed. It doesn’t.
Why using all lanes is bad
- Refining units have fixed processing speed
- Extra inputs create conveyor backups
- Output congestion slows the entire line
- Space usage becomes inefficient
Overfeeding a refining unit reduces throughput instead of improving it.

The correct refining unit setup
The optimal refining setup uses:
- One input lane
- One output lane
This configuration allows the refining unit to:
- Run at full efficiency
- Avoid belt congestion
- Save large amounts of space
Placement tip
Place the refining unit one block away from the output belt. This leaves a small empty gap that is extremely useful for power distribution.
Powering refining units efficiently
That empty four-block gap next to the refining unit is ideal for:
- One electric pylon placed in the center
This single pylon can power:
- The refining unit
- Nearby conveyor belts
- Adjacent crafting facilities
This pattern is repeatable and becomes the backbone of compact factory layouts.
Why default crafting blueprints are inefficient
The game provides blueprints for crafting facilities like the Gearing Unit, but these are intentionally slow and wasteful.
Problems with default blueprints include:
- Long conveyor paths
- Excessive turns and splits
- Poor material pull speed
- Large unused floor space
They function, but they are not designed for efficiency.
How to manually set up crafting facilities for maximum speed
Manual layouts outperform blueprints by a wide margin.
Gearing Unit setup
- Place the Gearing Unit one block away from refined resource storage
- Route conveyors directly from storage into the unit
- Keep belts as short and straight as possible
- Route output directly into the main collection zone
This allows the crafting unit to pull materials instantly and craft continuously without downtime.

Why proximity matters in crafting
Crafting units pull materials faster when:
- Input belts are short
- Storage is nearby
- There are no junction delays
Even small increases in belt length reduce throughput over time. Compact layouts always win.
Scaling crafting without chaos
Once the layout is correct, scaling becomes trivial.
A strong example setup:
- Multiple Gearing Units in parallel
- Shared refined material storage
- Centralized output routing
With only a few units, you can accumulate hundreds of components passively. Players regularly reach massive stockpiles simply by letting the system run while exploring or progressing the story.
Applying the same logic to all crafting units
The same principles apply to:
- Molding Units
- Packaging Units
- Electronics and advanced assemblers
Universal crafting rules
- Minimal conveyor length
- One clean input route
- One clean output route
- Centralized pylon placement
Once learned, these rules make factory expansion almost effortless.
Benefits of a fully optimized setup
With proper automation in place:
- Ores are mined continuously
- Refining never stalls
- Crafting runs at full speed
- Storage fills faster than you can spend
This results in:
- Faster gear upgrades
- Easier story progression
- Less micromanagement
- More time for exploration and combat
Common automation mistakes to avoid
- Keeping portable rigs too long
- Overloading refining units
- Using all conveyor lanes unnecessarily
- Blindly trusting default blueprints
- Spreading facilities too far apart
If something feels slow, the issue is almost always layout, not resource availability.

Why automation matters long-term
Arknights: Endfield is designed around compounding demand. Every new system consumes more:
The best automation setups in Arknights: Endfield are not complex—they’re intentional. By moving to electric mining rigs early, respecting refining limits, and ignoring inefficient blueprints, you can build a factory that works quietly in the background while you focus on everything else.
- Raw ores
- Refined materials
- Crafted components
An optimized factory doesn’t just save time—it future-proofs your progression and removes frustration from later chapters.
Once your base reaches this point, Endfield stops feeling grindy and starts feeling smooth—and that’s when the game truly opens up.