
- What to know
- How Umbraline gathering usually works in Endfield
- How to find Umbraline fast (the repeatable method)
- Step-by-step: quickest way to replicate a short location route
- Step-by-step: building a farming circuit that actually pays off
- Why Umbraline “isn’t there” sometimes (and what to do)
- A practical checklist for faster Umbraline runs
- Making Umbraline easy to farm
What to know
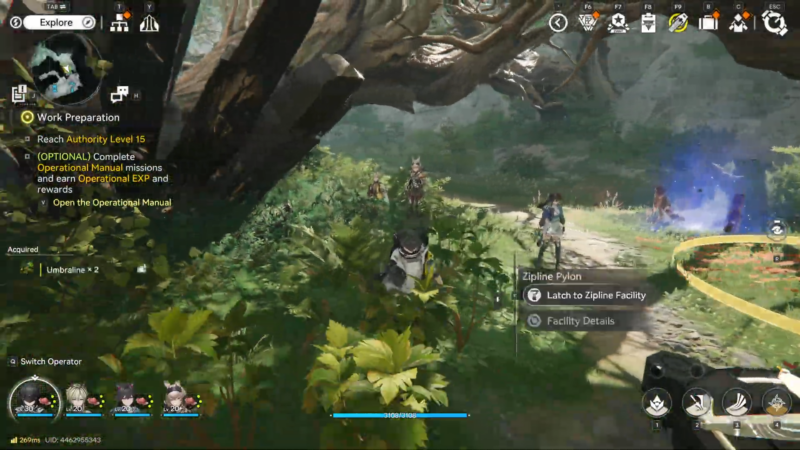
- Umbraline is gathered in the open world (not crafted), so the goal is learning where nodes appear and how to chain them efficiently.
- A single “walk-to-this-spot” route is great for the first pickup, but long-term farming works best with a repeatable circuit.
- Interactive maps are the quickest method to convert “I found one” into “I can farm several per run.”
- If a node isn’t present, it’s usually a timing/respawn issue or a slightly-off search radius, not that the resource is gone forever.
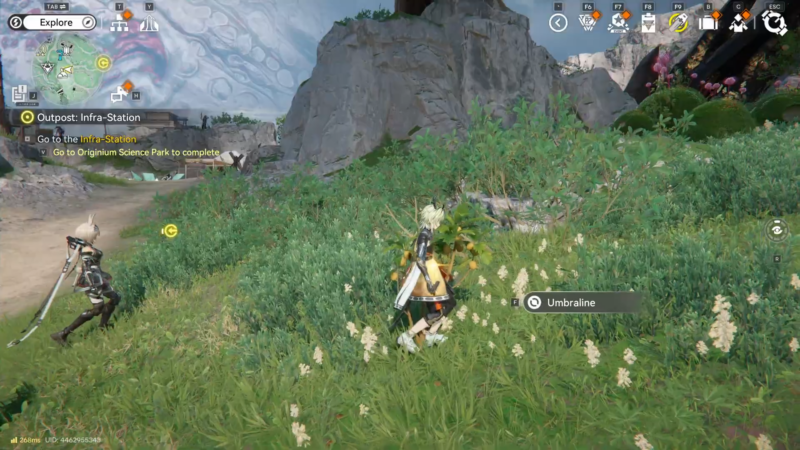
Finding Umbraline is not the easiest because the core problem is navigation: getting to the correct micro-area and recognizing the gatherable plant quickly. Once that first node is confirmed, the job becomes building a route that hits multiple spawns before returning to base.
How Umbraline gathering usually works in Endfield
Umbraline behaves like other overworld plant resources: it appears at fixed node areas, can be picked up when present, and then becomes unavailable until it respawns. The practical takeaway is that “location” matters far more than “technique”—you’re optimizing travel time and node density, not combat efficiency.
In most cases, the same few factors determine success:
- Starting from a nearby fast-travel point so the run begins close to the node.
- Following terrain edges and clearings where plants are easier to spot.
- Using consistent camera angles so the plant silhouette stands out from the ground cover.
How to find Umbraline fast (the repeatable method)
The fastest approach is two-phase: confirm one node, then expand.
Phase 1: Get the first confirmed pickup
Use any short location route you trust to reach a known Umbraline node. The purpose of this first run is not “farming”—it’s calibration: confirming what Umbraline looks like in-world, how big the pickup prompt range feels, and which nearby landmarks make the spot easy to return to.
Once picked up, pause for 10–15 seconds and scan the immediate area. Many resource nodes have nearby “sister” spawns within a short jog—often just out of sight behind a rock, along a ridge, or around a bend in the path.
Phase 2: Turn one node into a farming loop
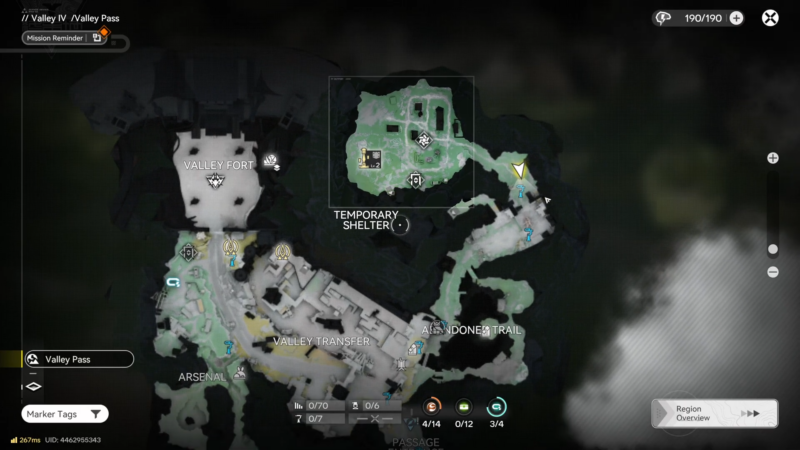
After confirming one location, build a loop that checks multiple nodes in the same region before leaving. The ideal loop:
- Starts at a fast-travel point.
- Visits 3–6 nearby Umbraline nodes (or likely node areas).
- Ends at either the same point (for convenience) or at a second fast-travel point (for speed).
If only one node is known, expand outward in rings:
- Check within a 30–60 second run from the confirmed node.
- Then expand to a 2–3 minute radius.
- Only then switch regions.
This prevents wasting time on long cross-map travel when a dense cluster may be close by.
Using an interactive map without wasting time
Interactive maps are only as useful as the way they’re used. The goal is not to stare at pins—it’s to shorten the “search and verify” cycle.
Practical tips:
- Search by the exact item name (“Umbraline”) first; if nothing appears, try filtering by resource type (plants/forage) and scan the region you’re already in.
- Zoom in enough that individual resource markers are clearly separated; many maps hide details when zoomed out.
- Treat pins as “hot zones,” not pixel-perfect coordinates. In the field, search a small circle around the marker, not just the exact center.
- Mark a personal route: once 2–3 nodes are verified, run them in the same order each time.
Step-by-step: quickest way to replicate a short location route
Step 1
Start at the nearest fast-travel point shown or implied by the route, then align the camera direction to match the first few seconds of the path.
Step 2
Follow the same turns and elevation changes (ramps, cliffs, stairs, slopes) without detours until the first distinctive landmark appears.
Step 3
Slow down in the final approach zone and scan the ground deliberately; many missed pickups happen because the sprint line runs past the interact range.
Step 4
Collect Umbraline, then rotate the camera 360 degrees and look for nearby “resource-looking” micro-spots (edges of rock formations, small clearings, path shoulders).
Step 5
Open the map and route to the next closest Umbraline marker, then connect it back to the first node to form a loop.
Step-by-step: building a farming circuit that actually pays off
Step 1
Pick a region where at least two Umbraline nodes are known or strongly suspected (from a map marker cluster).
Step 2
Choose a start fast-travel point that minimizes backtracking; the best start is usually “uphill,” so the route trends downward (less climbing and fewer camera occlusions).
Step 3
Run Node A → Node B → Node C in a triangle instead of a straight line; triangles reduce dead ends and keep movement efficient.
Step 4
If a node is missing, do a tight 20–30 second sweep around the marker area and then move on; lingering too long kills farming efficiency.
Step 5
End the circuit at a convenient exit point (another fast-travel location, a base facility, or a route that naturally transitions into the next resource you also need).
Step 6
Repeat the same circuit later; consistency makes it easier to notice which nodes are reliable and which are rarely active.
Why Umbraline “isn’t there” sometimes (and what to do)
When an Umbraline node doesn’t appear, common explanations include respawn timing, arriving in the wrong micro-area, or confusing it with a similar-looking plant. The fix is usually procedural, not complicated:
- Return later after doing another activity (missions, crafting, another resource loop).
- Widen the search slightly around the expected point, especially above/below on slopes.
- Verify the plant model by comparing with the confirmed node you already collected once.
If multiple nodes in the same loop are missing, it’s more likely the route is correct but the timing is off. In that case, switch to a different region for a while instead of repeatedly re-checking the same empty spots.
A practical checklist for faster Umbraline runs
- Start from fast-travel, not from a random position.
- Prioritize clusters of nodes over single “far away” nodes.
- Keep the camera slightly angled downward while approaching node zones.
- Use a fixed loop order so timing becomes predictable.
- Combine Umbraline farming with one other nearby resource to avoid downtime.

Making Umbraline easy to farm
Umbraline stops being a “where is it?” problem once the first node is confirmed and turned into a loop that hits several nearby spawn areas. The best results come from treating map markers as search zones, keeping routes short, and rotating to another region when spawns are on cooldown.


