
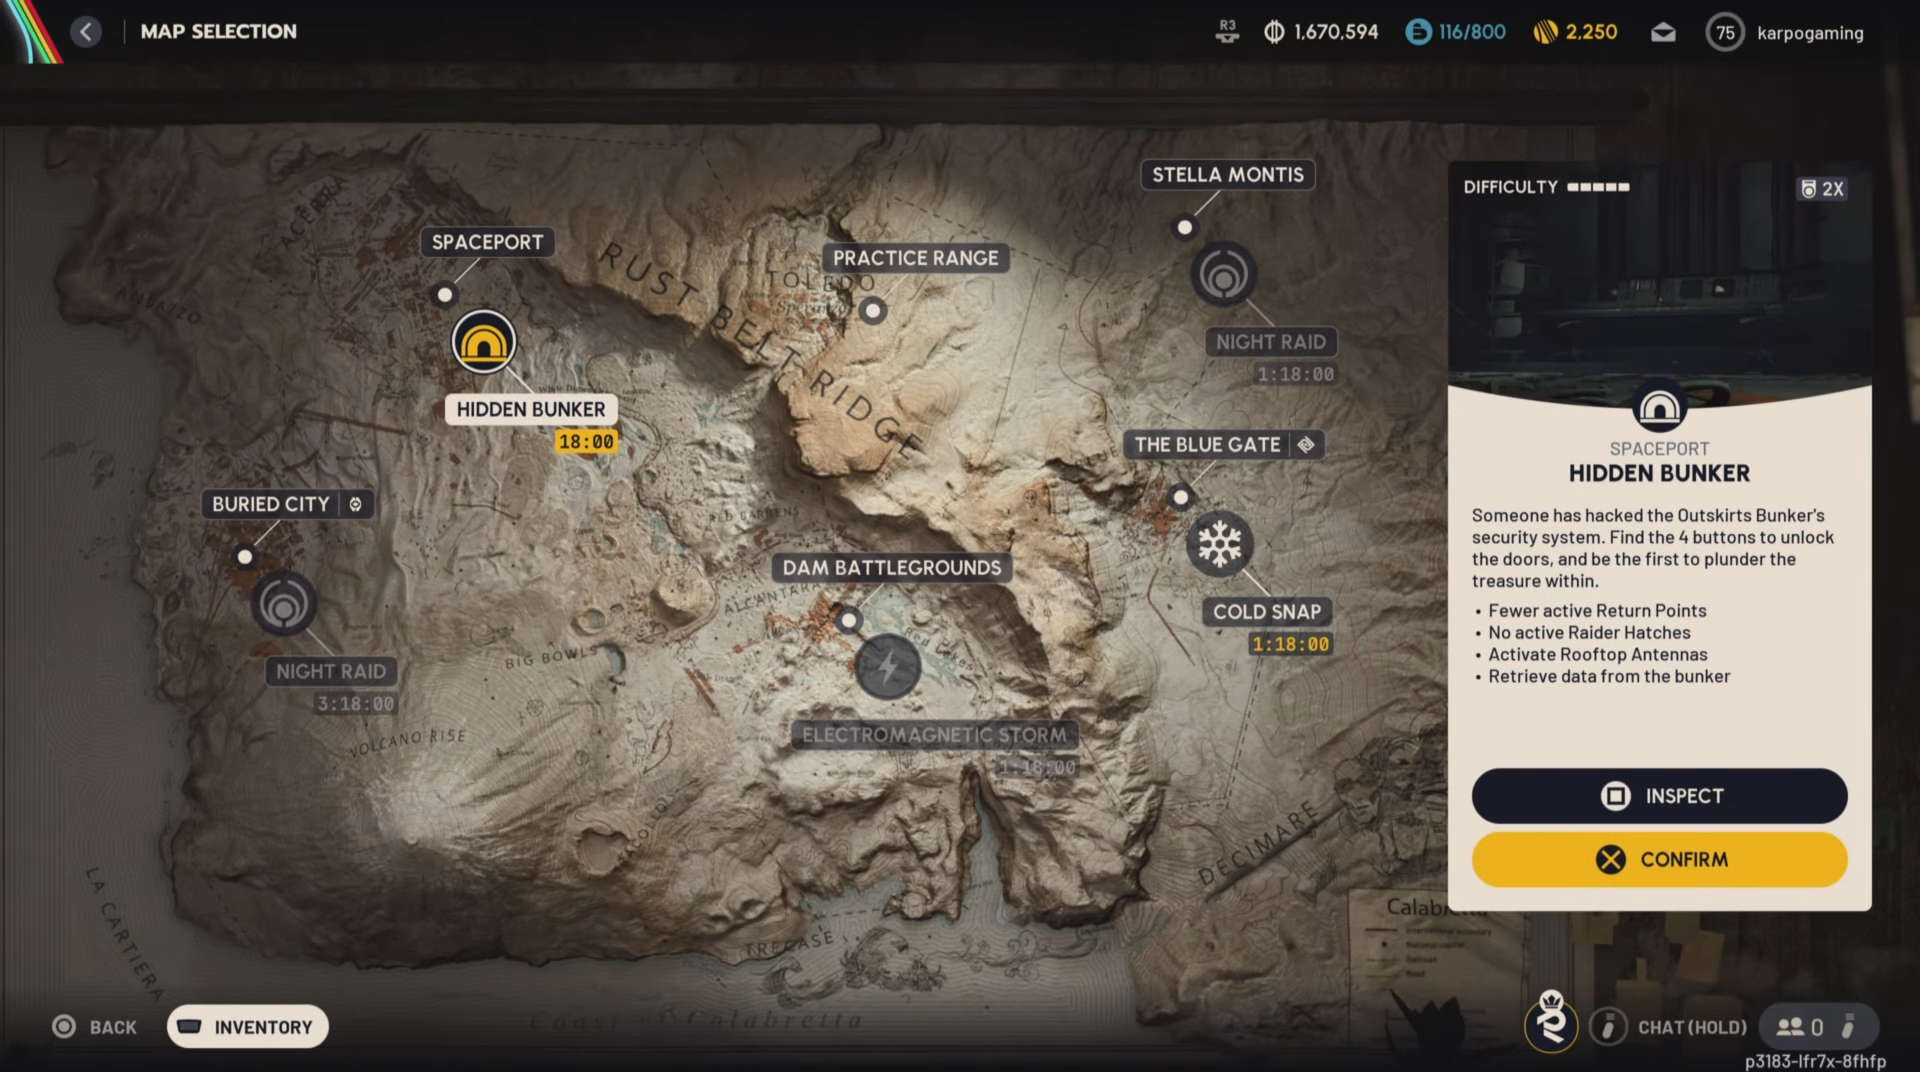
In Ark Raiders, the Spaceport’s Hidden Bunker objective is one of those raid events where your plan matters as much as your aim, because the whole lobby can influence when the bunker opens. If you want the cleanest completion, prioritize antenna speed, get to the bunker quickly after the announcement, then clear rooms efficiently so you can safely finish your downloads and still extract.
| Topic | Quick details |
|---|---|
| Where it happens | Spaceport, during the Hidden Bunker map condition |
| What you must do | Activate four antennae, then enter the bunker and interact with terminals to download data |
| Team requirement | Not required; other teams can activate antennae too |
| Combat expectation | ARC enemies spawn when you activate an antenna and must be defeated before you can finish activation |
| Helpful gear | Ziplines, because some antennae can be difficult or impossible to reach otherwise |
| Why you do it | Loot crates plus repeatable XP from terminal downloads |
Step 1: Confirm you have the Hidden Bunker map condition
Load into Spaceport and check that the match has the Hidden Bunker map condition active, since the bunker objective is specifically framed around that condition.
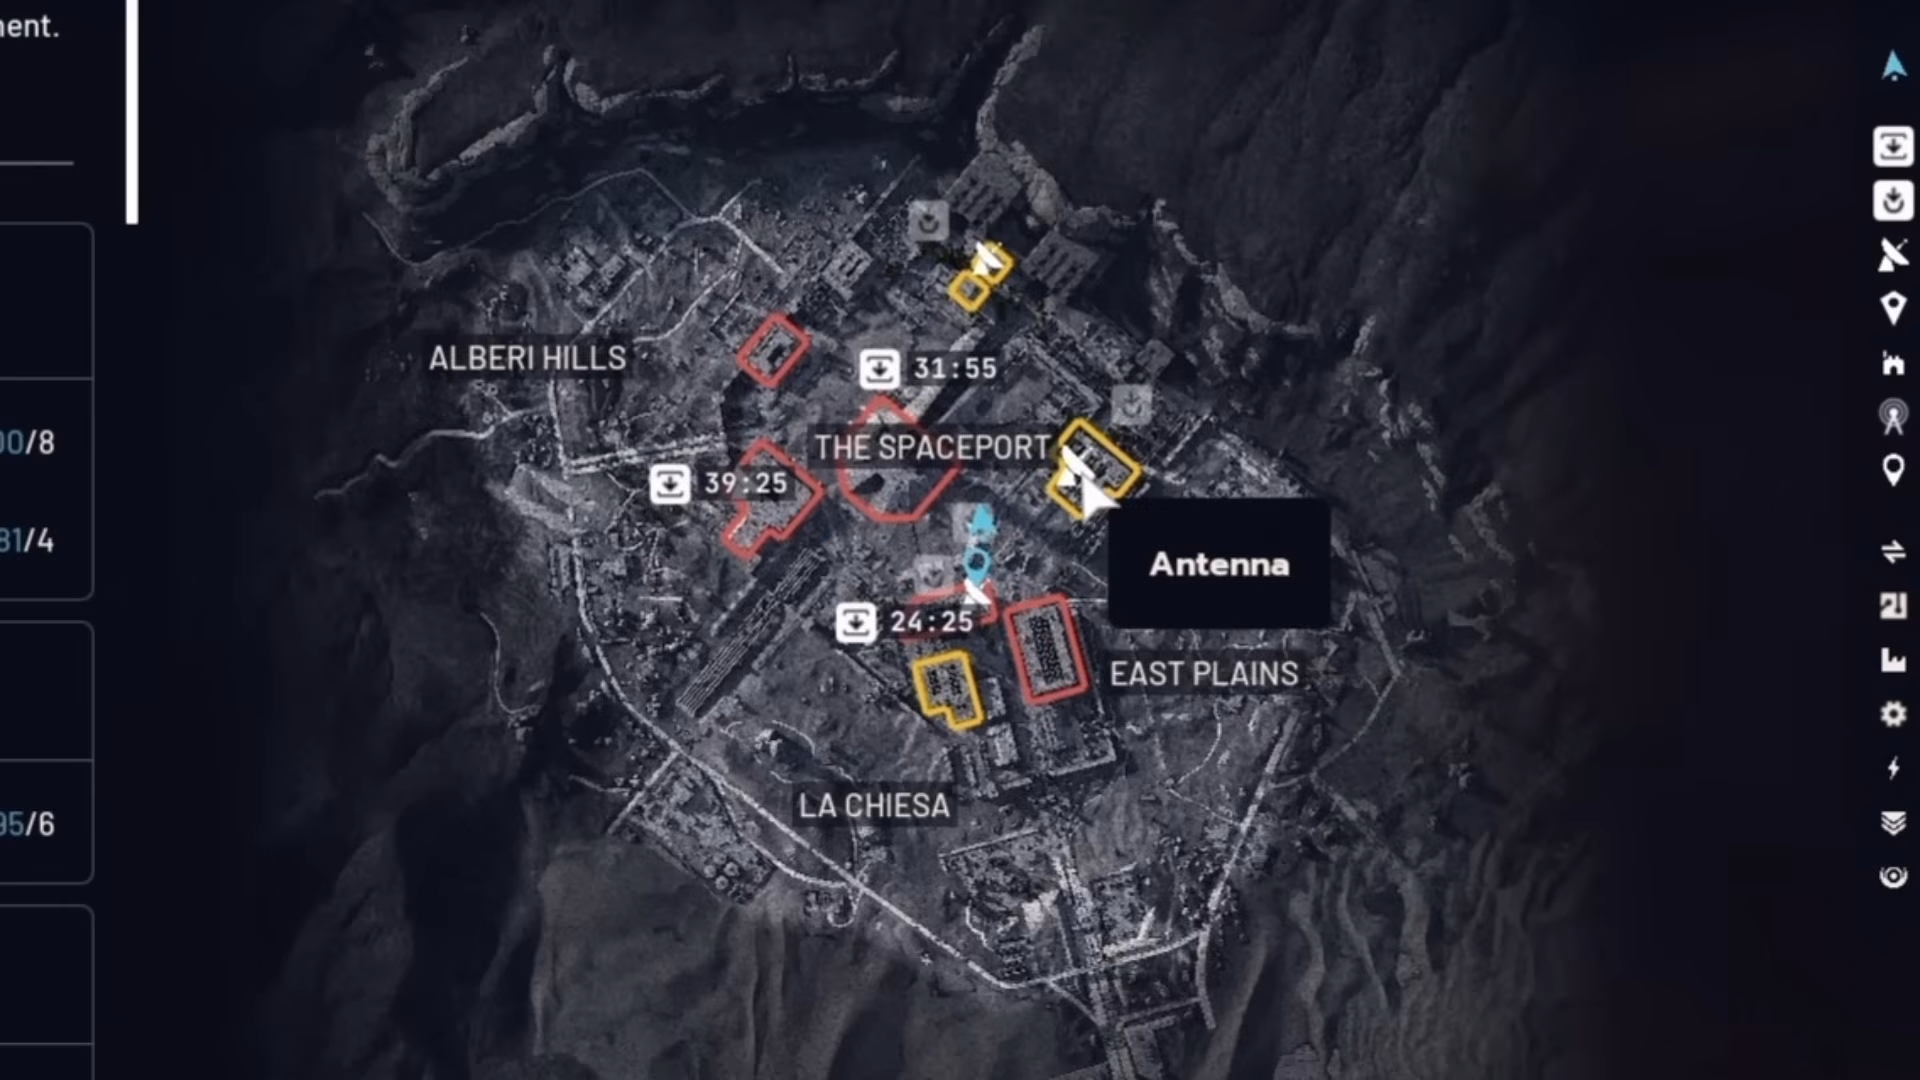
Step 2: Open your map and locate the four antenna icons
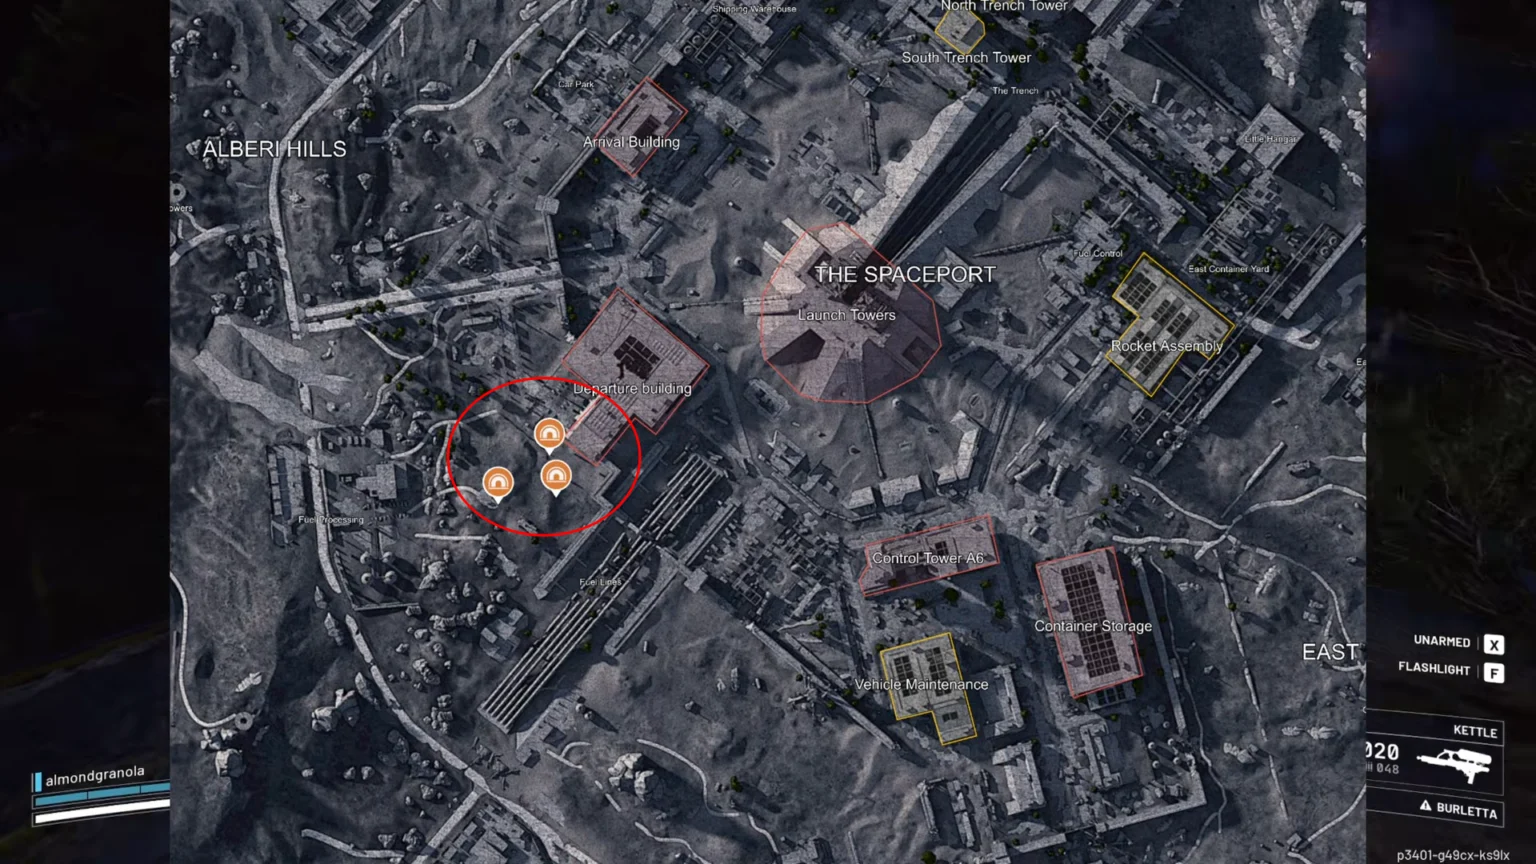
You can identify antenna locations from the map, which shows four antenna icons placed at random spots for that raid.
Step 3: Decide whether you will rush all four or play opportunistically
You do not need to personally activate all four antennae, because different teams can activate different antennae to open the bunker faster. If you want reliability, commit to a route that covers multiple antennae yourself rather than gambling on the lobby doing the work.
Step 4: Bring mobility before you commit
Some antennae can be very difficult to reach without a zipline, so pack a few if you are making the bunker your main objective.
Step 5: Activate an antenna and clear the ARC response
When you start activating an antenna, ARC will spawn nearby and you must defeat them before you can complete that antenna activation.
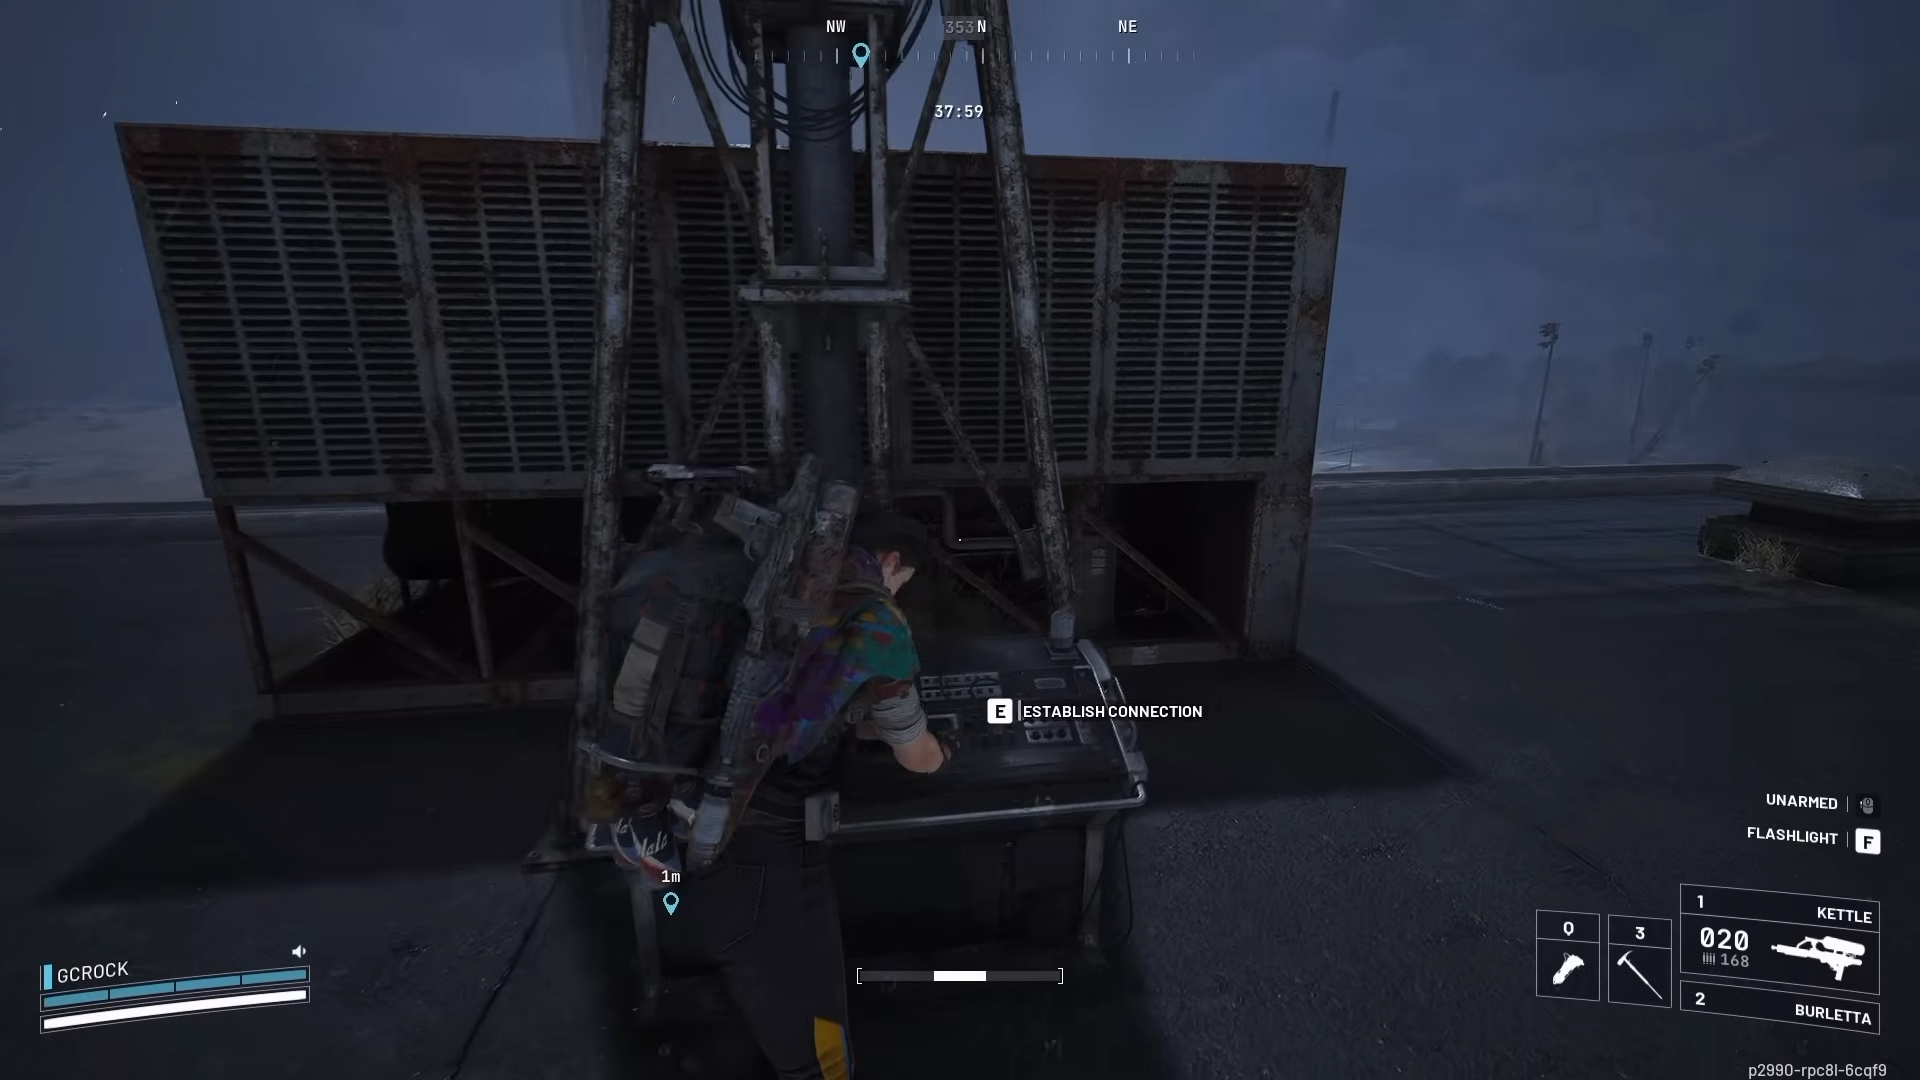
Step 6: Send the unlock signal to finish the activation
After you clear the spawned ARC, go back to the antenna and interact with the prompt that says Send unlock signal to complete the activation.
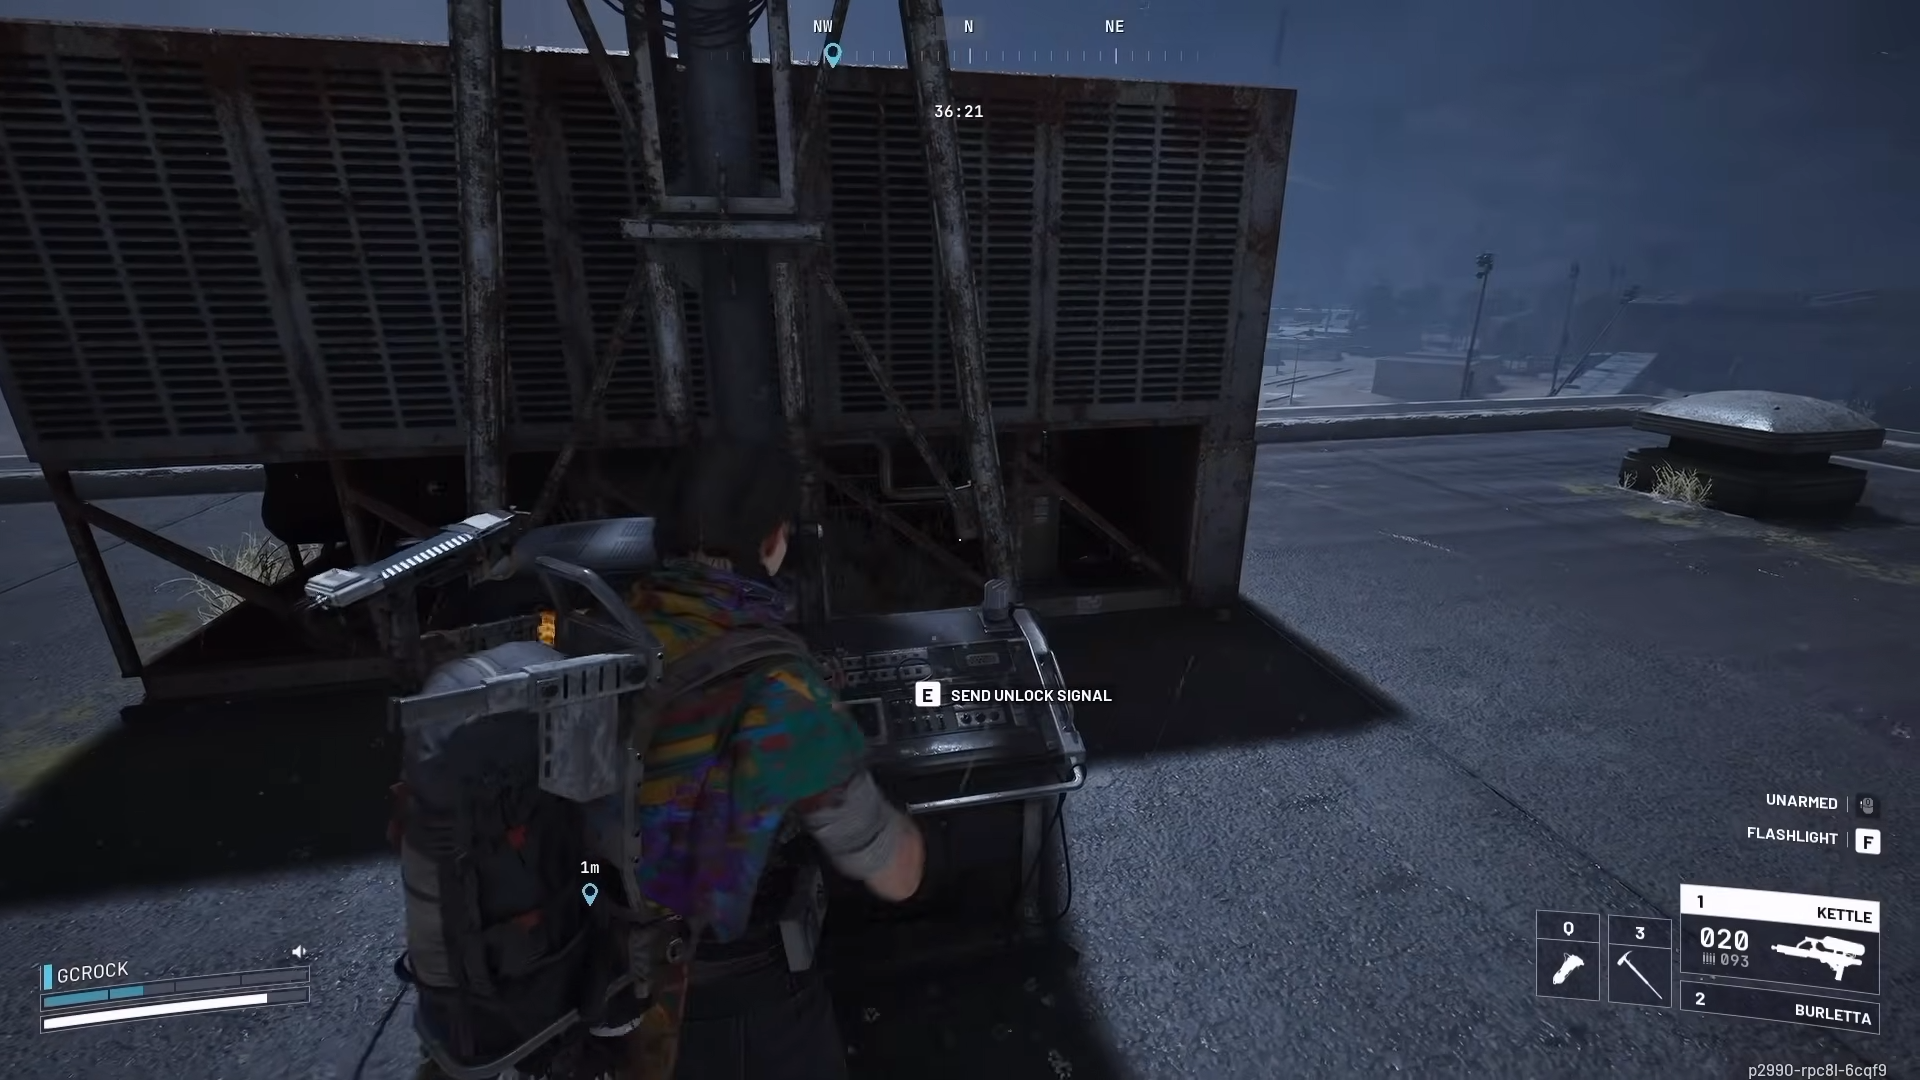
Step 7: Repeat until all four antennae are activated
Once all four are activated, the match sends a raid-wide announcement that the hidden bunker has been opened.
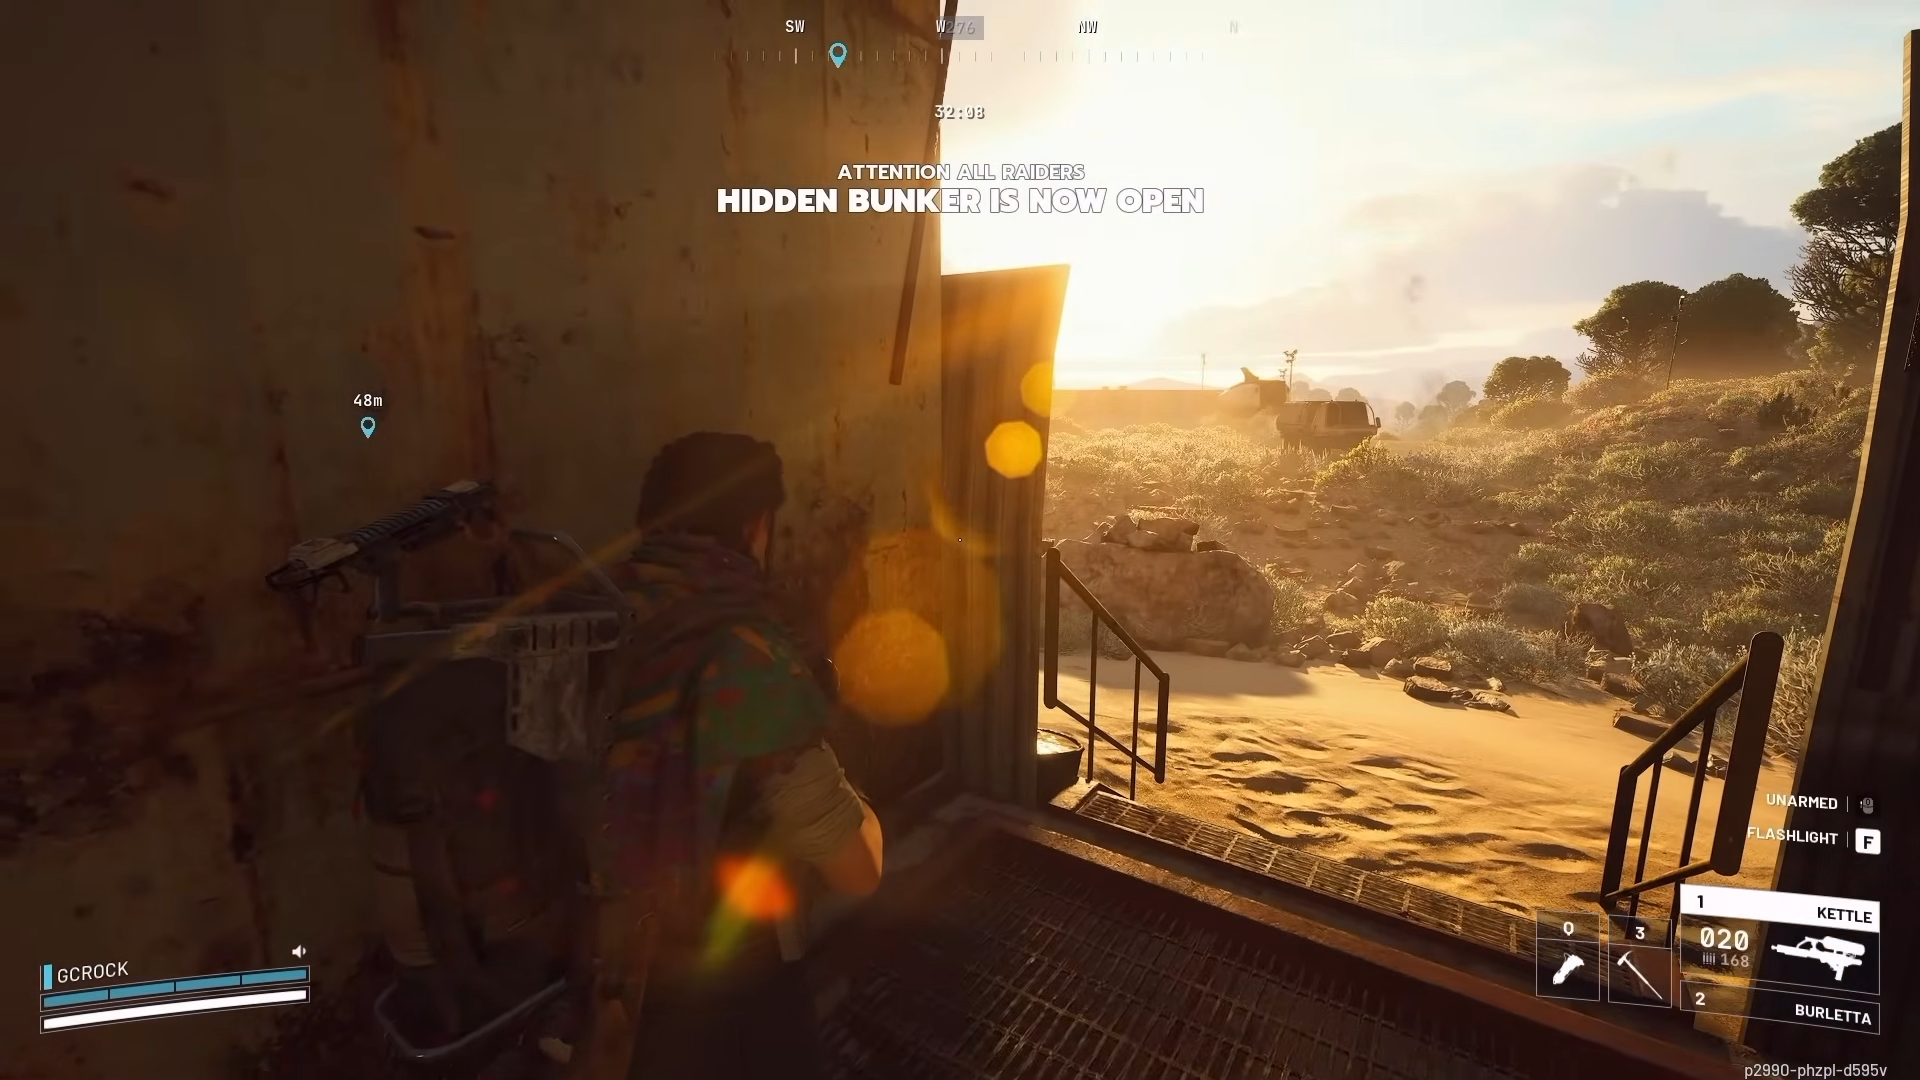
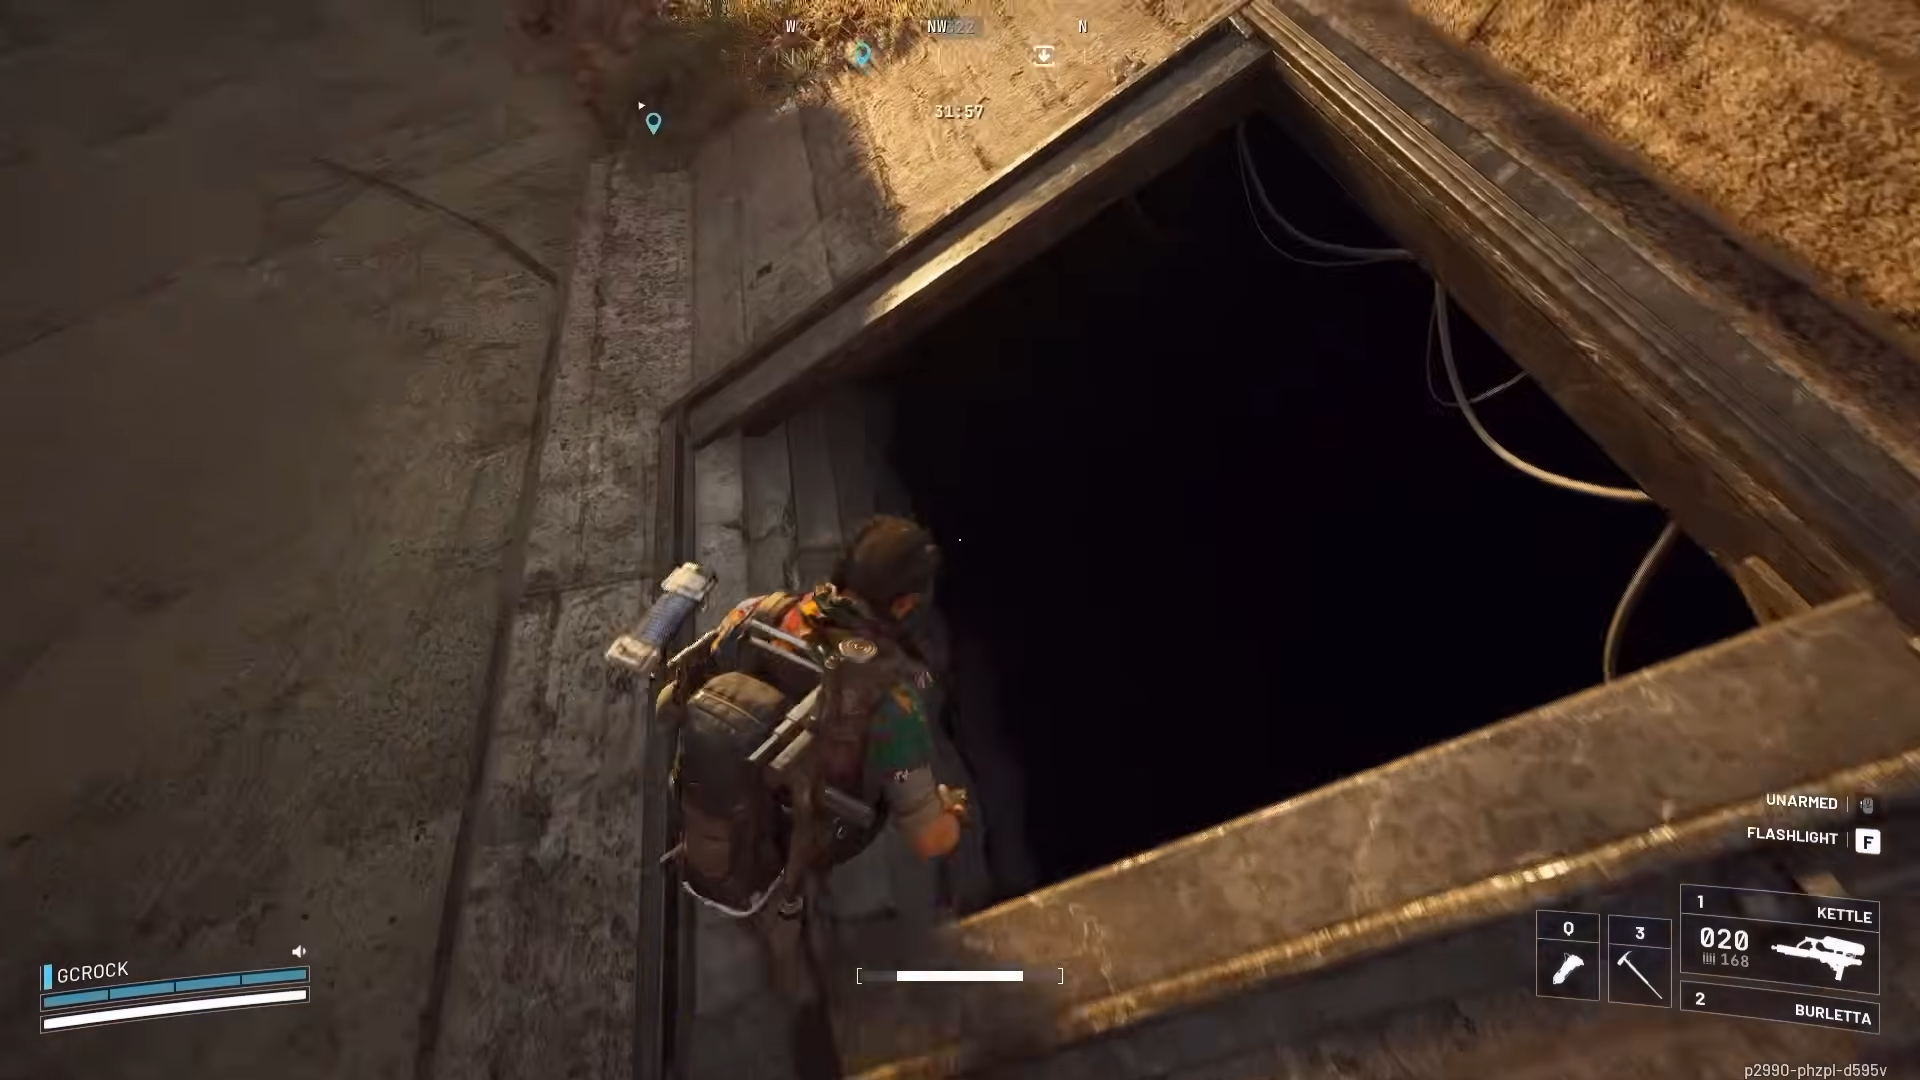
Bunker entrance Location
The hidden bunker entrance is on the western side of Spaceport, in the rocky field just east of the Fuel Processing point of interest. Once you know the area, your real time save is approaching from cover and arriving right after the raid-wide announcement to reduce the chance another squad sets up first.
How to complete Download information inside the bunker
Step 1: Enter and treat the first rooms like a hot zone
Inside the bunker you can expect multiple loot containers, so assume you may run into other raiders who arrived for the same reason.
Step 2: Loot quickly, then commit to the terminals
The bunker contains a variety of weapon and ammo crates, so grab what you need for the rest of the run before you start standing still at objectives.
Step 3: Find a terminal and start the download
Multiple terminals are scattered around the bunker, and you can interact with them to download data.

Step 4: Hold your position until the download completes
You must stand near the terminal for a short time while the data downloads, which is the risky part because you are anchored in place.
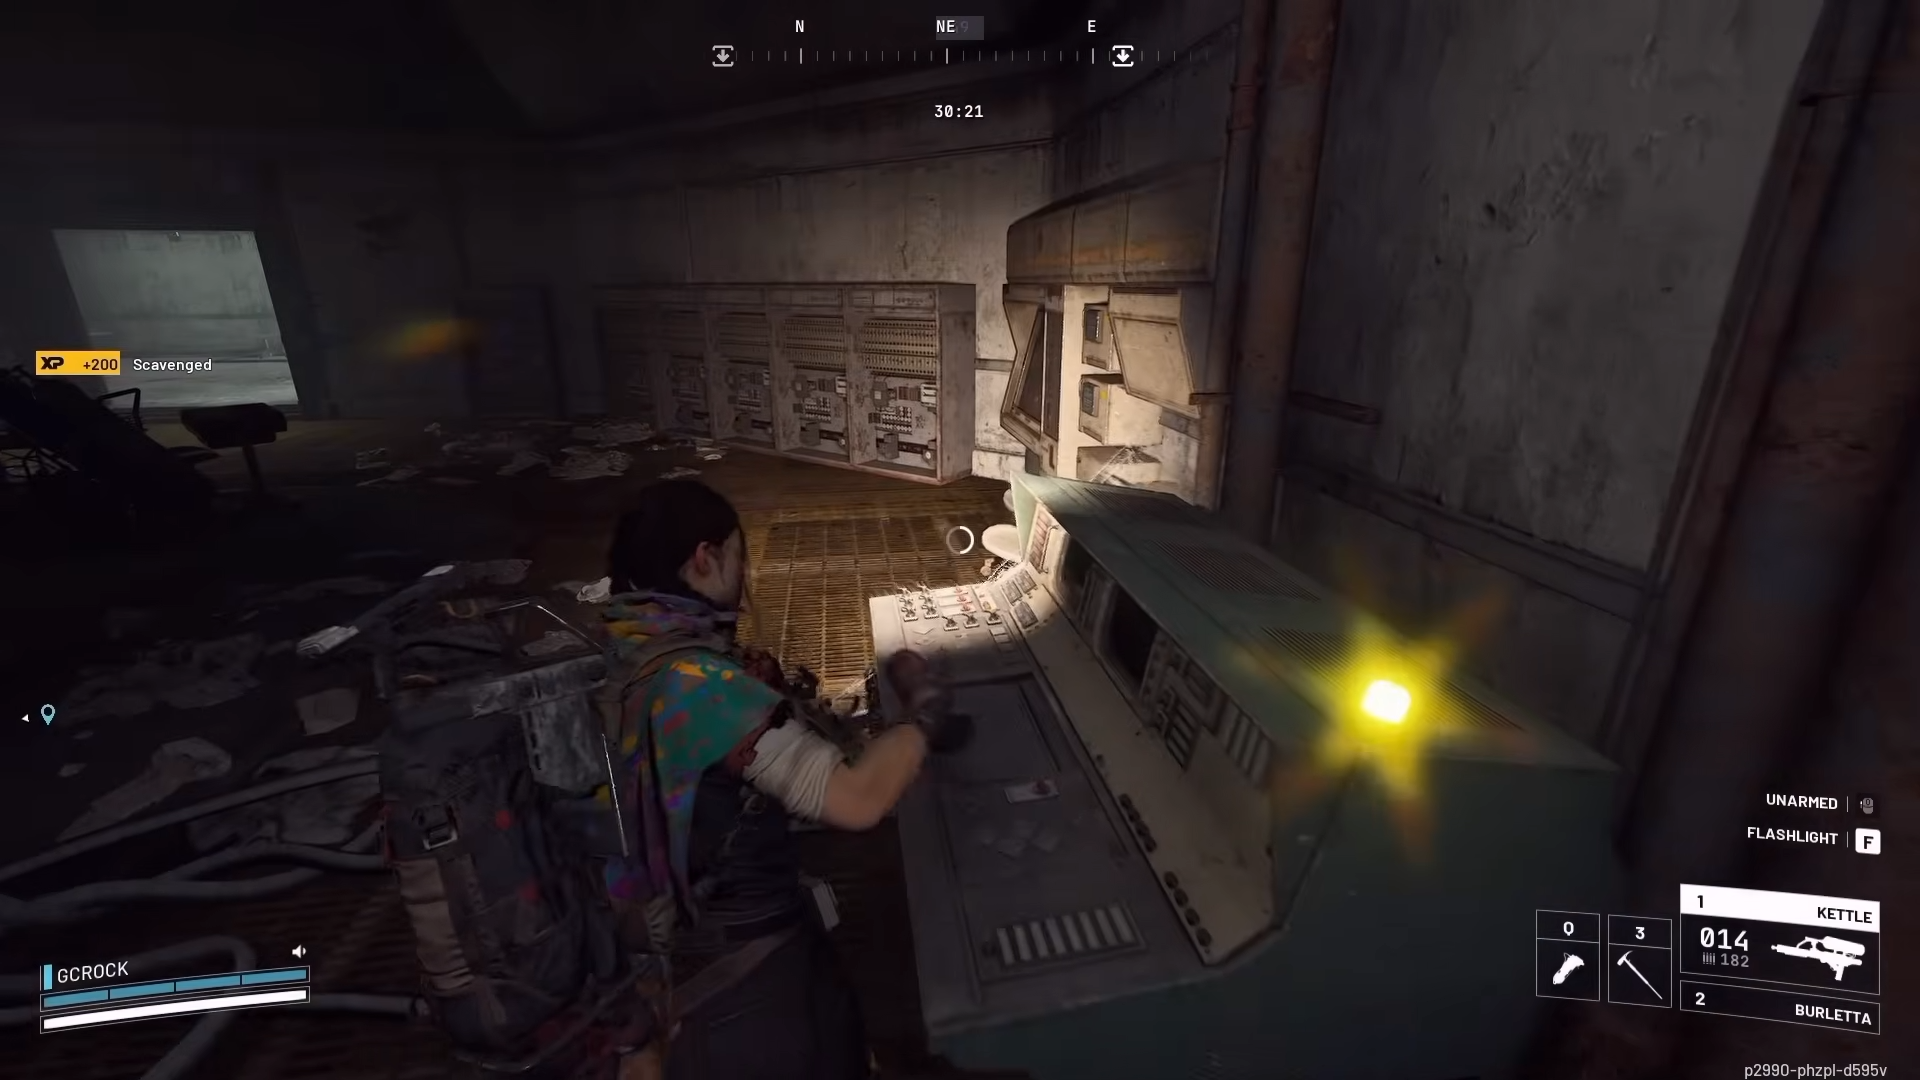
Step 5: Collect your XP and move to the next terminal
Each terminal download grants 500 XP, so the objective naturally rewards you for repeating the interaction across multiple terminals.

Step 6: Reset your route and prepare to leave
After you finish the downloads you came for, rotate out rather than lingering, since the bunker’s loot and stationary objectives make it a common spot for late arrivals.
Rewards
| Reward type | What you get |
|---|---|
| Experience | 500 XP per terminal data download |
| Loot | Weapon and ammo crates inside the bunker, with chances at useful guns or blueprints if you search thoroughly |
Make the bunker run safer without slowing down
Prioritize antennae that are closest together first, and keep ziplines available for awkward approaches so you do not waste time climbing or detouring. When you reach the bunker, clear and loot in short bursts, then start downloads only when you have a defensible angle or an exit route ready.
This objective is straightforward once you treat it like two phases: open the bunker by coordinating antenna activations, then convert that access into XP and gear by working terminal downloads efficiently.


