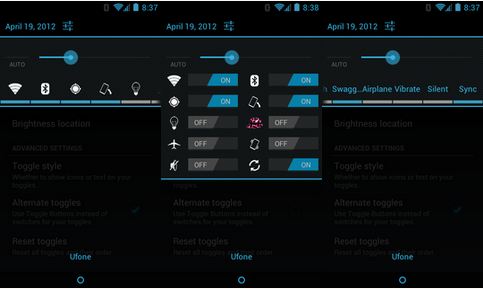
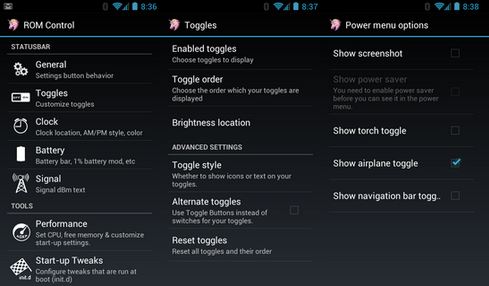
The fad lately among custom ROMs has been of experiencing the stock AOSP Android experience as found on Google’s Nexus phones, and AOKP is probably the most widely developed AOSP ROMs these days. AOKP provides you with good performance, and a gazillion customization options via the inbuilt ROM Control mod. And now, AOKP is finally available on the Xperia Arc and the Arc S, thanks to an unofficial port.
However, the ROM is in the alpha stage, which means that is in its early stages and may not be completely bug free/have some issues in it. Reporting any bugs and issues you encounter in the official development page (linked below in step 3 of the installation guide) will help in improving the ROM faster.
Read on to find out how you can install AOKP ROM on your Xperia Arc/Arc S.
Compatibility
This ROM and the guide below are compatible only and only with the Sony Xperia Arc and Arc S, model number LT15i/LT18i. It’s not compatible with any other device and may render an incompatible device unusable. Check your device model in Settings » About phone.
Warning!
The methods and procedures discussed here are considered risky and you should not attempt anything if you don’t know completely what it is. If any damage occurs to your device, we won’t be held liable.
ROM Info
- Developer → Supervenom
How to Install AOKP ROM on Xperia Arc/Arc S
- This procedure will wipe all your apps, data and settings (but it will NOT touch your SD cards, so don’t worry about those). Backup your Apps and important data — bookmarks, contacts, SMS, APNs (internet settings), etc. This Android backup guide would help you.
Important! Don’t forget to at least make a backup of your APN settings, which you can restore later if your data connection does not work after installing the ROM. Use the backup guide to find out how. - Important! Your Xperia Arc/Arc S must have an unlocked bootloader. You can unlock your bootloader officially → here.
- Install ADB on your computer using the guide → here. This is required to flash the requisite kernel on your phone. (Skip if you already have ADB installed on your PC).
- Download the latest version of the ROM from the official development page.
- Download the Google Apps package, which will install the required Google apps like Market, Gmail, etc, which aren’t included in the ROM itself.
Download Link | Filename: gapps-ics-20120317-signed.zip - Transfer the 2 zip files downloaded in step 4 and 5 to the SD card on your phone.
- Download the kernel required to flash the ROM.
Download Link | Filename: ARC-DooMKernel-ICS-BETA-v04-high-boot.img - Download fastboot, which will be used to flash the kernel downloaded in step 7.
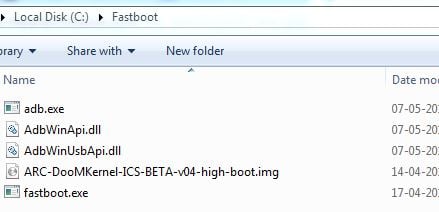
Download Link | Filename: Fastboot.zip - Extract the Fastboot.zip file to the C: drive on your computer to get a folder named Fastboot with four files inside it.
- Copy the ARC-DooMKernel-ICS-BETA-v04-high-boot.img file to the Fastboot folder. You should have 5 files in the Fastboot folder now, as shown in screenshot below:

- Now, connect your phone to the computer in fastboot mode. To do this, first plug the USB cable to PC, then pick up your phone and hold the Menu key (key at the bottom right on your Arc), and then, while holding the Menu key, connect the USB cable to your phone.
- Open Command Prompt on your computer from Start » All Programs » Accessories.
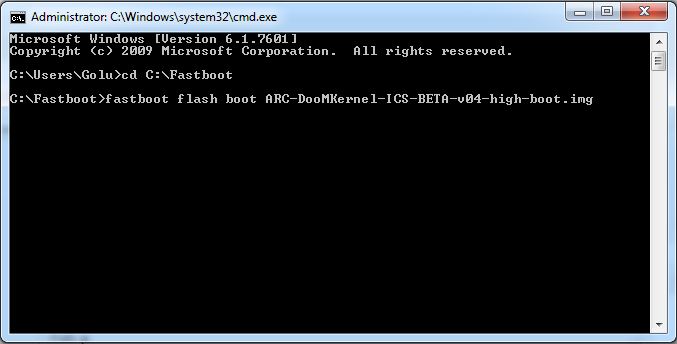
- Now, in Command Prompt, type the following commands to flash the kernel, pressing Enter after each command (Check the screenshot after step 13.2 for reference).
- Once the kernel is flashed, you will get a “finished”/OKAY message in the command prompt window. Disconnect the phone from your computer.
- Turn on the phone. The screen will turn on and show you the kernel logo. As soon as the blue LED lights up, start pressing the Back button on your phone continuously until you boot into recovery. In recovery, use Volume buttons to navigate and Home button to select options.
- Select install zip from sdcard, then select choose zip from sdcard. Scroll to the ROM file on the sdcard and select it.
- Confirm installation by selecting Yes – Install ______.zip on the next screen. The ROM will start installing. After ROM finishes installing, select go back to go back to the main recovery menu.
- Now, repeat step 15, but this time, select the gapps-ics-20120317-signed.zip file. Select Yes on next screen to confirm installation of the Google apps package.
- After the installation is complete, select go back then select reboot system now to reboot the phone and boot up into AOKP ROM.
AOKP ROM based on Ice Cream Sandwich Android 4.0.4 is now installed and running on your Xperia Arc/Arc S. Share your thoughts on the ROM in the comments. Do let us know whether the ROM is worthy of the Note (couldn’t resist), in the comments below.
Screenshots:


fastboot flash boot ARC-DooMKernel-ICS-BETA-v04-high-boot.imgafter pressing enter then show
nothing happen…
use the command fastboot -i 0x0fce flash boot ARC…..img
That should work..
fastboot flash boot ARC-DooMKernel-ICS-BETA-v04-high-boot.imgafter pressing enter then show
nothing happen…
use the command fastboot -i 0x0fce flash boot ARC…..img
That should work..
i can’t switch on my wifi ==”
i can’t switch on my wifi ==”