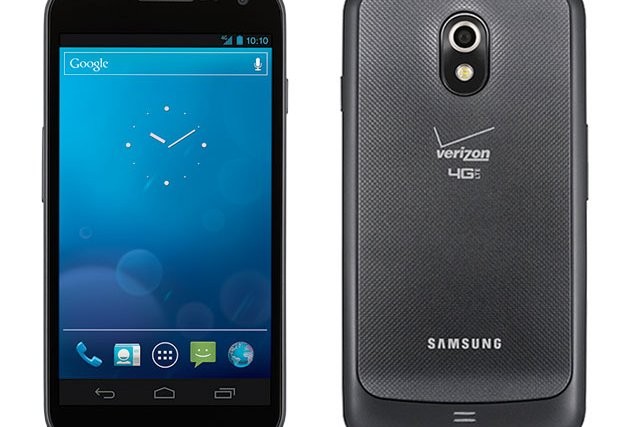
Google has rolled out Android 4.2 to both the Galaxy Nexus and the Nexus 7, both in the US and to the international variants in other markets. However, as is always the case, Verizon (and Sprint) Galaxy Nexus customers will no doubt be waiting a while before the update hits their handsets, but for the adventurous folks that don’t mind going into the world of custom ROMs, that won’t be a problem as they can try out Android 4.2 via a custom ROM right now.
XDA forum member Grouper has released an Android 4.2 ROM – Pure Android 4.2, which is a pure Android 4.2 stock ROM without any modifications except root, and with the necessary Verizon files to make it work properly on the device. It’s the first 4.2 ROM out for the device and a great way to try out the latest version of Android without waiting for Verizon to push out the update.
There are a couple of issues that exist in the ROM for now, though both are pretty minor and are listed below:
- Can’t restore apps/saved WiFi passwords from Google account on initial boot
- Carrier sometimes displays as T-CDMA 64 instead of Verizon Wireless
However, to try out the ROM, you will need an unlocked bootloader on your Galaxy Nexus. While there is a simple procedure for unlocking the bootloader, keep in mind that it will erase all data on your phone, including everything on the SD card, so you will need to backup and restore important things later on.
Now let’s take a look at how you can try out the Pure Android 4.2 ROM on your Verizon Galaxy Nexus.
Compatibility
The procedure described below is only for the Verizon Galaxy Nexus. Do not try it on any other device.
Warning!
The methods and procedures discussed here are considered risky and you should not attempt anything if you don’t know completely what it is. If any damage occurs to your device, we won’t be held liable.
How to Install Pure Android 4.2 ROM on Verizon Galaxy Nexus
- The procedure to flash this ROM involves unlocking the bootloader on the device, which causes all the data on the device to get wiped, including everything on your internal storage. So, backup installed apps and other data such as contacts, messages, bookmarks, etc, by referring to our Android Backup Guide for help. Then, copy everything from the SD card to your computer, which will also include the apps and data you backed up.
- Your phone’s bootloader will need to be unlocked to flash the ROM and you also need ClockworkMod (CWM) recovery installed on it. You can unlock the bootloader and install CWM recovery by using the Galaxy Nexus Toolkit. Make sure you took a backup in step 1 as this will wipe all data from the phone and reset it to factory settings. Skip this if you already have the bootloader unlocked.
- Download the ROM.
Download Link - Download the Google Apps package. This will install apps like Play Store, Gmail, etc. which are not present in the ROM by default.
Download Gapps | Filename: Slim-GApps-4.2.0-JOP40C-MRH3LLMAN.zip - Copy both the ROM and the Gapps file to the phone. Remember, do not extract the files, copy them to the device without extracting.
- Boot into ClockworkMod (CWM) recovery. To do this, turn off the phone. Then, press and hold the following keys together: Power + Volume Up + Volume Down to enter Fastboot mode where you will see “Start” written in big green letters. Then, using the volume buttons, navigate to the Recovery mode option, then select it using the Power button to reboot into recovery mode.
- Perform a Nandroid Backup of your existing ROM, so that you can always restore it from recovery if something does not work out with this ROM (this will backup the entire firmware on the phone). To perform a backup, select Backup and Restore –> On the next screen, select Backup again. Go back to main recovery menu after backup is complete.
- Select wipe data/factory reset, then select Yes on next screen to confirm. Wait a while till the data wipe is complete (this will only wipe installed apps and settings, but will not files on the SD card).
- Select install zip from sdcard, then select choose zip from sdcard. Scroll to the ROM file and select it. Confirm installation on the next screen.
- After ROM installation completes, select choose zip from sdcard again, then select the Slim-GApps-4.2.0-JOP40C-MRH3LLMAN.zip file to install the Google apps package.
- After the installation is complete, go back to the main recovery menu and select reboot system now to reboot the phone and boot up into the Android 4.2 ROM.
NOTE: If you want to go back to your previous ROM, boot into recovery (see step 6), select backup and restore then restore your previous ROM by selecting it from the list.
The Android 4.2 ROM is now installed on your Verizon Galaxy Nexus. Do try it out and let us know how it works, and don’t forget to visit the source page for updates on the ROM and more details.


Watch it when you flash to 4.2, it puts all your saved stuff into a /0 folder and you can not restore a backup. Just a heads up, not trying to troll or anything. If there is a fix I haven’t found it and would love to know about it. So if you do find one get back at me, but like I said just a warning.
Thnx for the heads up, bro! A very useful tip, indeed.