Learn how to join and invite players to a guild in Grow a Garden 2, including where to find Gilbert, accept Mailbox invites, and manage guild members.
Guilds in Grow a Garden 2 are invite-only, so getting in means someone has to send you an invite that lands in your Mailbox. Everything else runs through one spot: Gilbert at the Guild Stall in the middle of the map, where you create, view, edit, and invite. Here’s how both sides of it work — joining and inviting — plus what guilds actually do right now.
To join a guild in Grow a Garden 2 you must be invited by a guild owner and accept the invite from the Mailbox outside your garden; to invite players, talk to Gilbert at the Guild Stall in the center of the map, open View Guild, and use the Invite button to add players in your server.
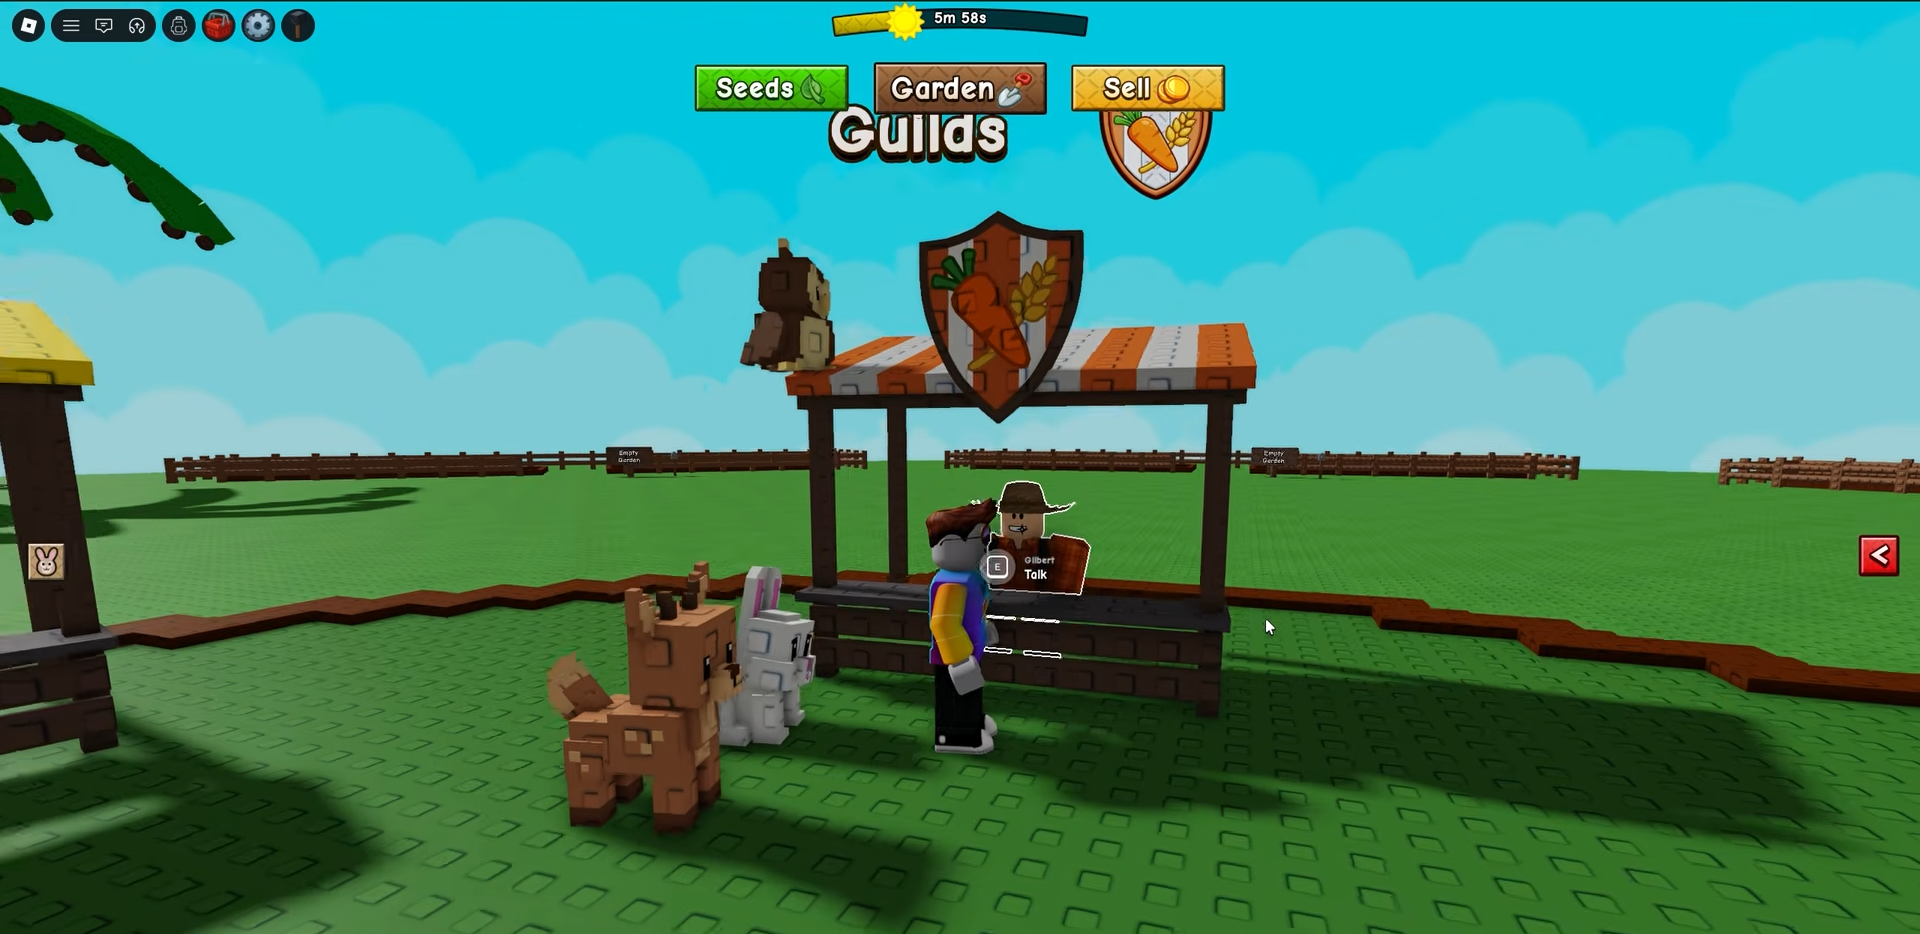
Where to find Gilbert and the Guild Stall
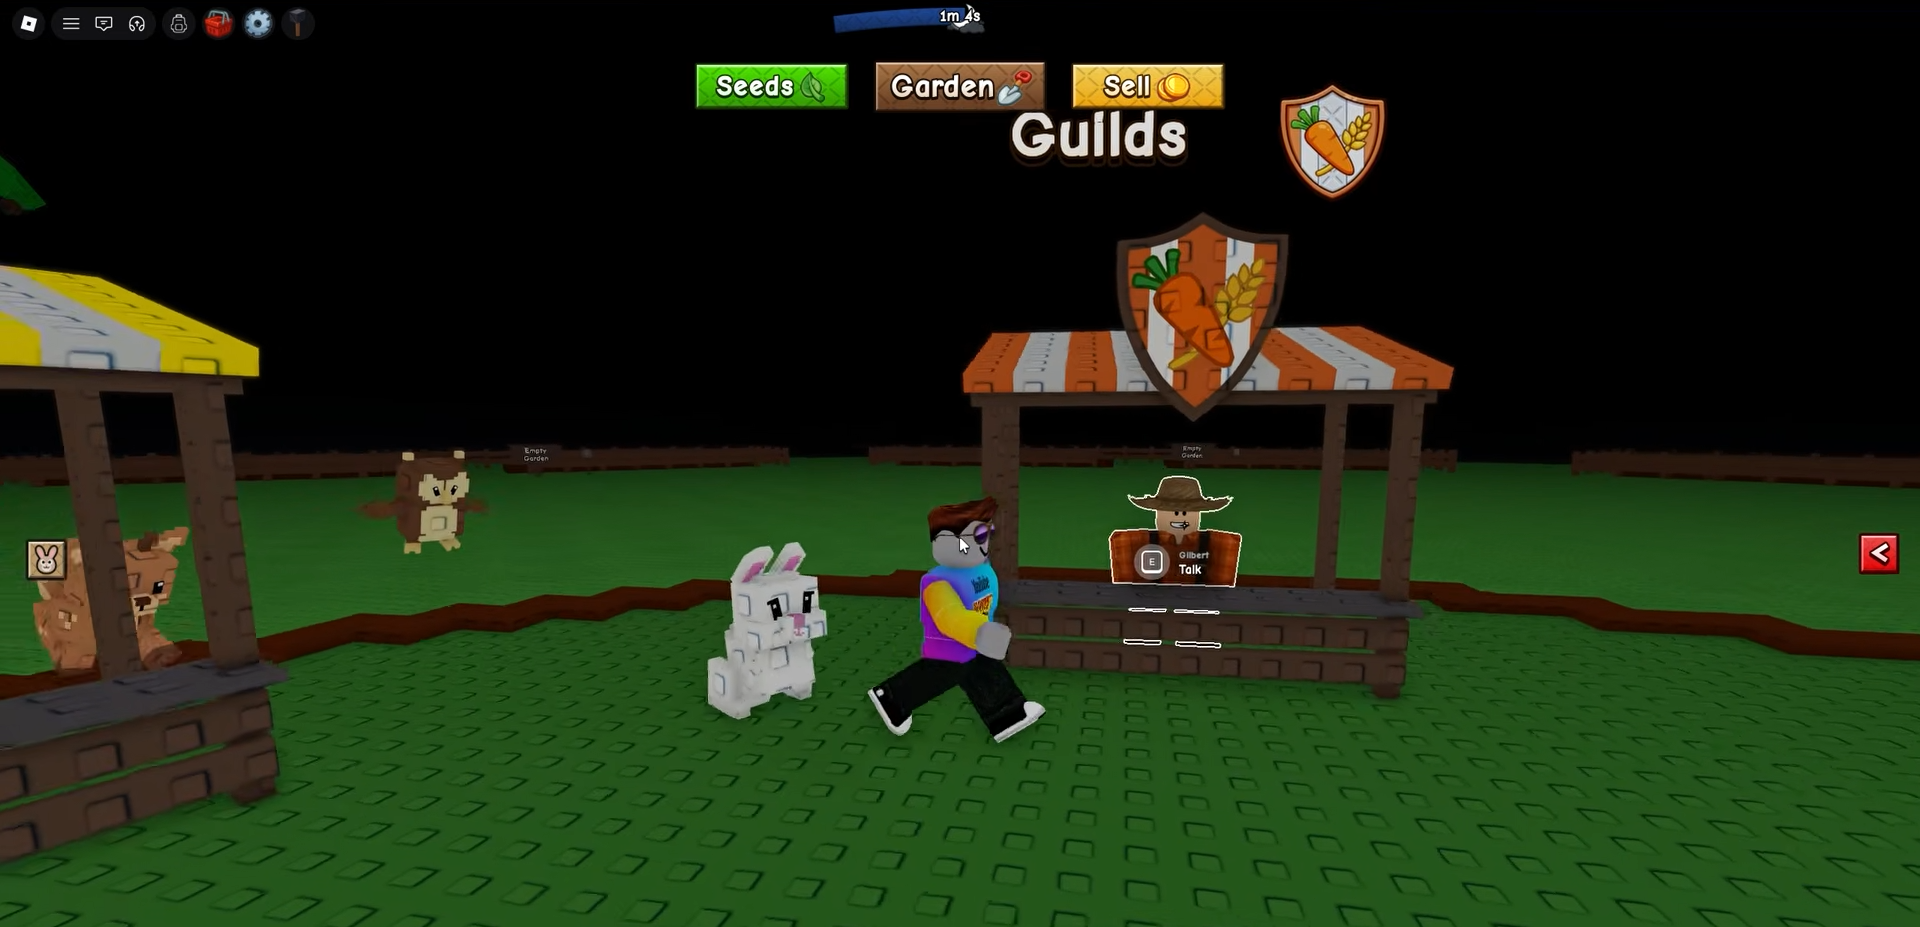
Head to the central hub in the middle of the map, the circle where the other shops sit. The guild spot is an orange-and-white striped stall marked with a shield icon showing a carrot and wheat, and the NPC standing there is Gilbert. He’s the one place every guild action lives — creating a guild, viewing yours, editing it, checking rewards, and sending out invites all start by talking to him.
If you’ve used the other vendors in the center, you already know roughly where to look; the guild counter sits among them rather than off in its own area.
How to invite players and accept a guild invite in Grow a Garden 2
STEP 1/7
Return to the Guild Stall
After creating your guild, go back to Gilbert at the guild counter in the center of the map.

STEP 2/7
Open your guild menu
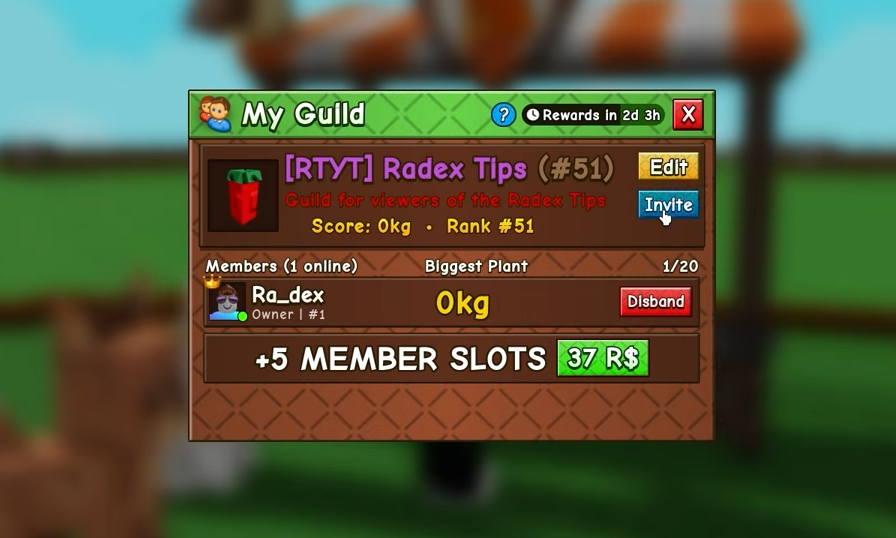
Talk to Gilbert and open the guild menu — choose View Guild to reach your guild’s page.
STEP 3/7
Select the Invite option
Click the blue Invite button next to your guild name to pull up the player list.
STEP 4/7
Choose players to add
Pick a player who is currently in your server and confirm; the invite is sent straight to their Mailbox.
STEP 5/7
Open your garden Mailbox
If someone invited you, go to your own garden and interact with the Mailbox just outside it — a red exclamation mark flags a waiting invite.
STEP 6/7
Open the Mail tab
Open the mail section to see your pending guild invitations.
STEP 7/7
Accept the guild invite
Hit the green Join button on the invite to officially become a member.

Get into the same server as a guild owner before asking for an invite — invites only reach players in your current lobby, so join a friend’s server first, then watch your Mailbox for the red exclamation mark.
One thing to keep straight: the invite flow above only works if you already own a guild (or hold a rank that’s allowed to invite). If you don’t have one yet, your route in is either accepting someone else’s invite or creating your own.
Creating your own guild from scratch
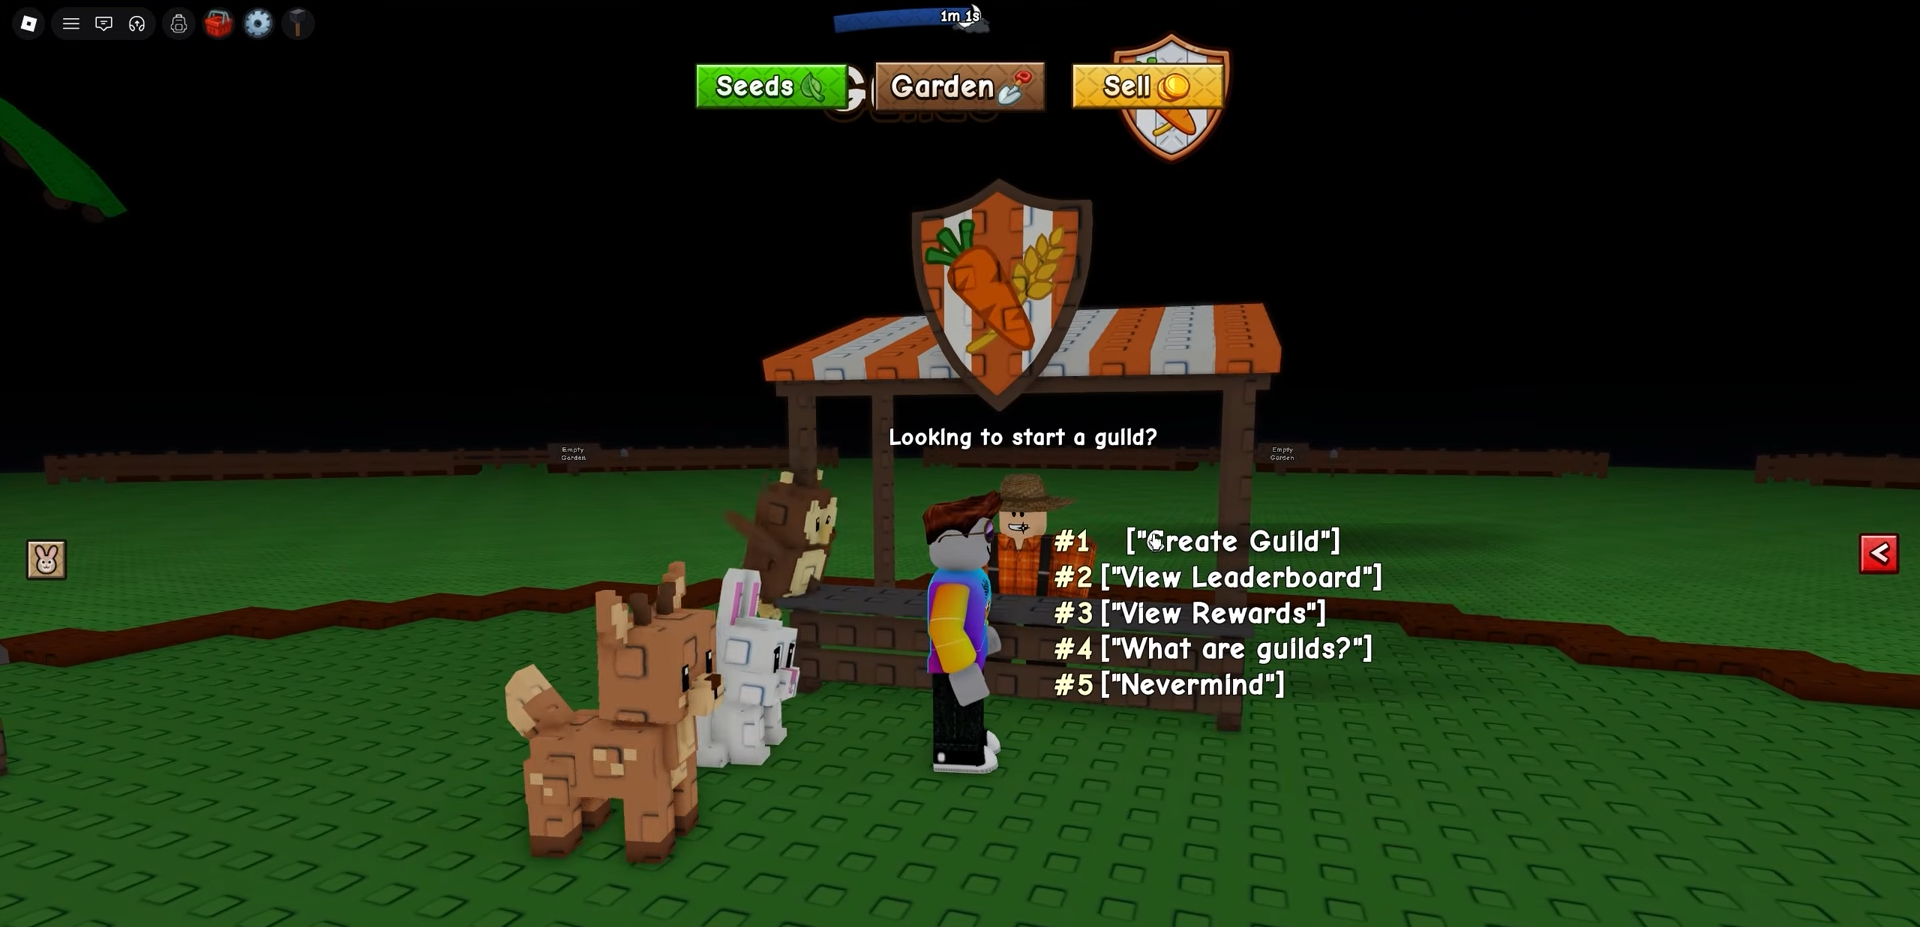
If nobody’s inviting you, the other way to “join” is to make a guild yourself — doing so automatically sets you as both its owner and first member. At Gilbert’s stall you choose Create Guild.
The catch is the price: a guild costs 99 Robux, with no Sheckles option at all. In-game currency simply can’t buy one.

The creation menu asks you to fill in a few fields. You set a Guild Name (up to 24 characters), a Guild Tag (up to 5 characters, and it has to be unique), and a Description (up to 200 characters). You can also pick custom colors, and optionally an image, so your guild stands out from the rest. Once everything’s set you complete the purchase, and the guild is live with you at the top.

Guild costs, member caps, and roles
| Detail | Value |
|---|---|
| Creation cost | 99 Robux |
| Joining cost | Free |
| Base member cap | 20 |
| Max member cap | 50 (via Robux Slot Packs) |
| Guild Name limit | 24 characters |
| Guild Tag limit | 5 characters (unique) |
| Description limit | 200 characters |
| Roles | Owner / Elder / Member |
A fresh guild holds 20 members by default, and you can push that ceiling up to 50 by buying extra slots with Robux. There’s no Sheckles route to more space, same as creation. As for ranks, a guild runs on three: Owner, Elder, and Member. The owner can always invite.
Mistakes players make when joining guilds
The most common one is assuming Sheckles can create a guild — they can’t, it’s Robux only. Right behind it is hunting for a public guild list to browse; there isn’t one, so the only way in is an invite. A lot of players also miss invites entirely because they expect a pop-up — guild invites are mail, sitting in your Mailbox until you open it, not an on-screen alert.
On the inviting side, trying to add someone who isn’t in your current server won’t work; the player list only shows people in your lobby. And if you see someone demanding a huge sum like 500,000 Sheckles to let you in, that’s a rule one owner made up for their own guild — it’s not something the game charges anyone.
What guilds do now and what’s coming
Right now the full guild rewards system hasn’t been completely revealed. Guild points and rewards are expected to matter a lot more in future updates, but the finer details aren’t confirmed yet, so for the moment guilds are mostly about organizing a group and getting set up before the bigger payoff arrives. There is one live activity, though: a weekly Biggest Plant challenge that scores each member’s heaviest unharvested crop at 1 point per gram, with ranked rewards reportedly running from a top-tier prize for the #1 guild down to common rewards lower on the board.
On management, owners get the full toolkit from the guild menu under Edit: change the name, tag, description, and colors later, promote members to higher ranks, remove or ban players, or disband the guild entirely. Members can leave whenever they want, but an owner can’t simply walk away — to leave, the owner has to disband the guild. So if you’re going to create one, do it because you actually plan to run it and recruit active players, not just to grab a tag.
Frequently Asked Questions
Is joining a guild free, or does it cost Robux?
Joining is free. The only thing that costs money is creating a guild, which is a one-time 99 Robux. Accepting an invite to an existing guild costs nothing.
Can you create or join a guild with Sheckles instead of Robux?
No. Creating a guild is Robux only — there’s no Sheckles option in the menu. Joining is free, so Sheckles never come into it either way. If a player asks you for Sheckles to join their guild, that’s their personal rule, not an in-game requirement.
Where does a guild invite show up after someone sends it?
In your Mailbox, just outside your garden. When an invite is waiting, a red exclamation mark appears above the Mailbox; interact with it, open the Mail tab, and your invitations are listed there with a green Join button to accept.
Can you invite players who aren’t in your current server?
Invites only reach players in your current server.
How many members can a guild hold, and how do you expand it?
A guild starts with room for 20 members and can be expanded up to 50 using Robux Slot Packs.
More questions⤵
Who can invite players — only the owner, or other ranks too?
The owner can always invite.