If you want to customize your gameplay experience in Paralives, mods are one of the easiest ways to add new features, improve gameplay systems, or change visuals. The game offers built-in Steam Workshop support, which means you can browse, install, disable, and remove mods without manually moving files around.
| Feature | How it Works |
|---|---|
| Install Mods | Subscribe through Steam Workshop |
| Enable Mods | Enabled automatically after download |
| Disable Mods | Use the blue toggle switch |
| Remove Mods | Click the trash bin icon |
| Browse Mods | Accessible through the in-game Mods menu |
| Platform Support | Steam Workshop integration |
| Save File Warning | Removing mods can sometimes break saves |
- How to access the mods menu in Paralives
- How to install mods in Paralives
- How to install a mod through Steam Workshop in Paralives
- Faster way to install mods in Paralives
- How installed mods work in Paralives
- How to disable mods without deleting them
- How to remove mods permanently in Paralives
- Why removing mods can affect save files
- Tips for managing mods safely
To begin managing your mods, launch Paralives and head to the main menu screen. From there, open the Mods section. This area acts as your central hub for everything related to community-created content.
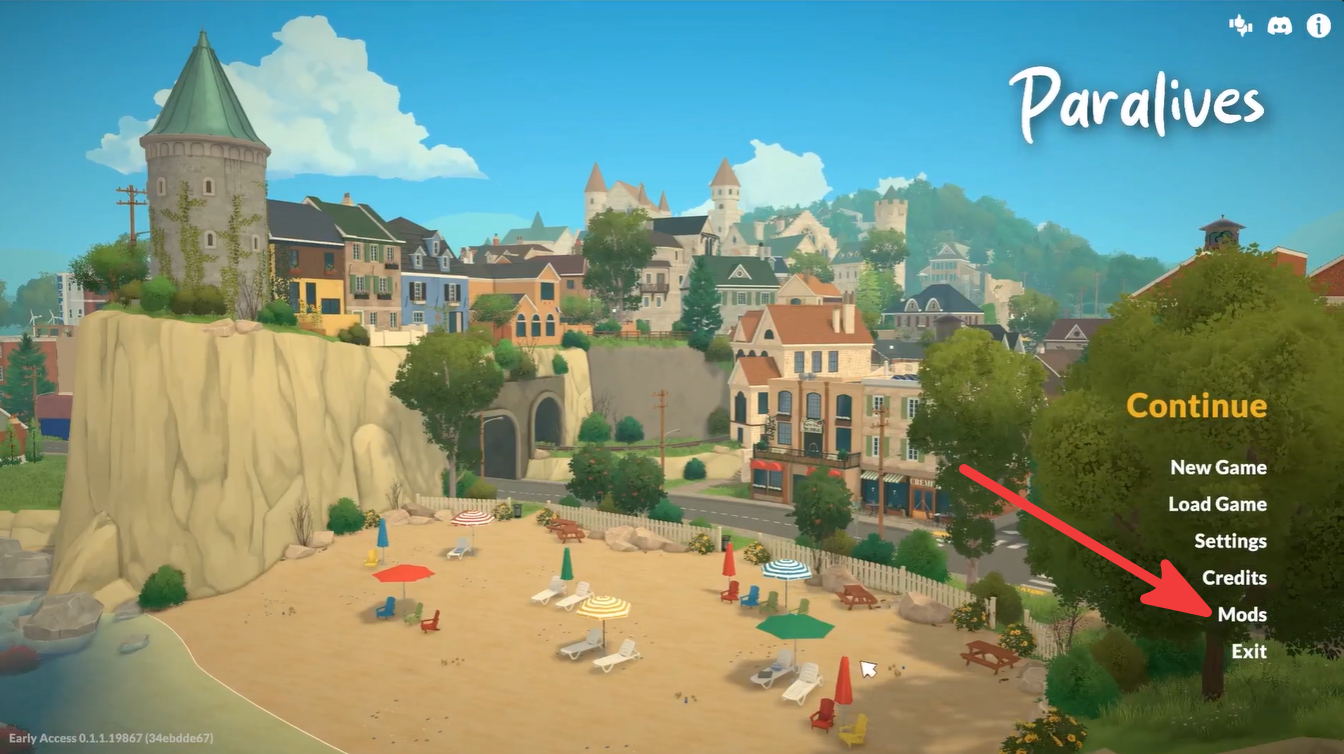
Inside the menu, you can view installed mods, check which ones are active, disable specific mods, or browse new creations through the Steam Workshop.
How to install mods in Paralives
Installing mods in Paralives is designed to be extremely straightforward because the game integrates directly with Steam Workshop.
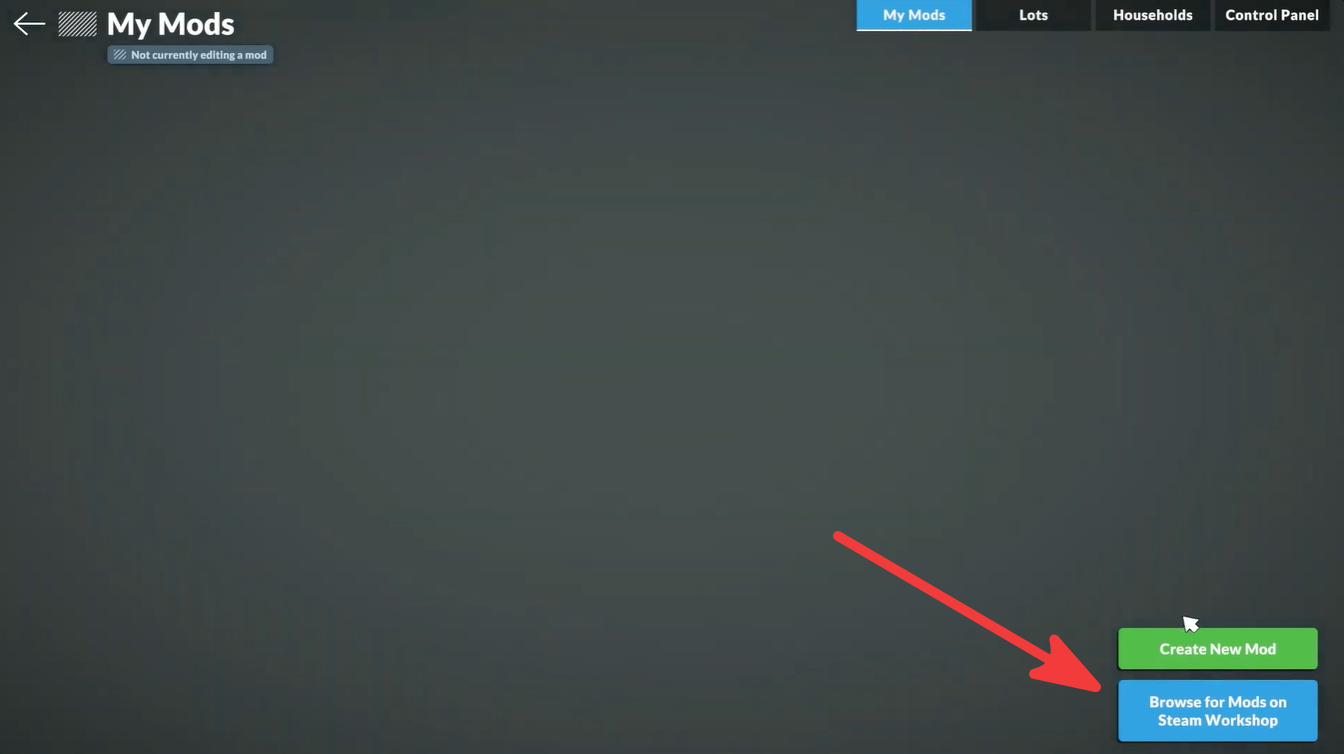
When you subscribe to a mod on Steam Workshop, Steam automatically downloads the required files and connects them to your game. You do not need to manually extract ZIP folders or place files into directories.
This system keeps mod installation simple and beginner-friendly.
Browse available mods by category, popularity, or recent uploads until you find something you want to use.
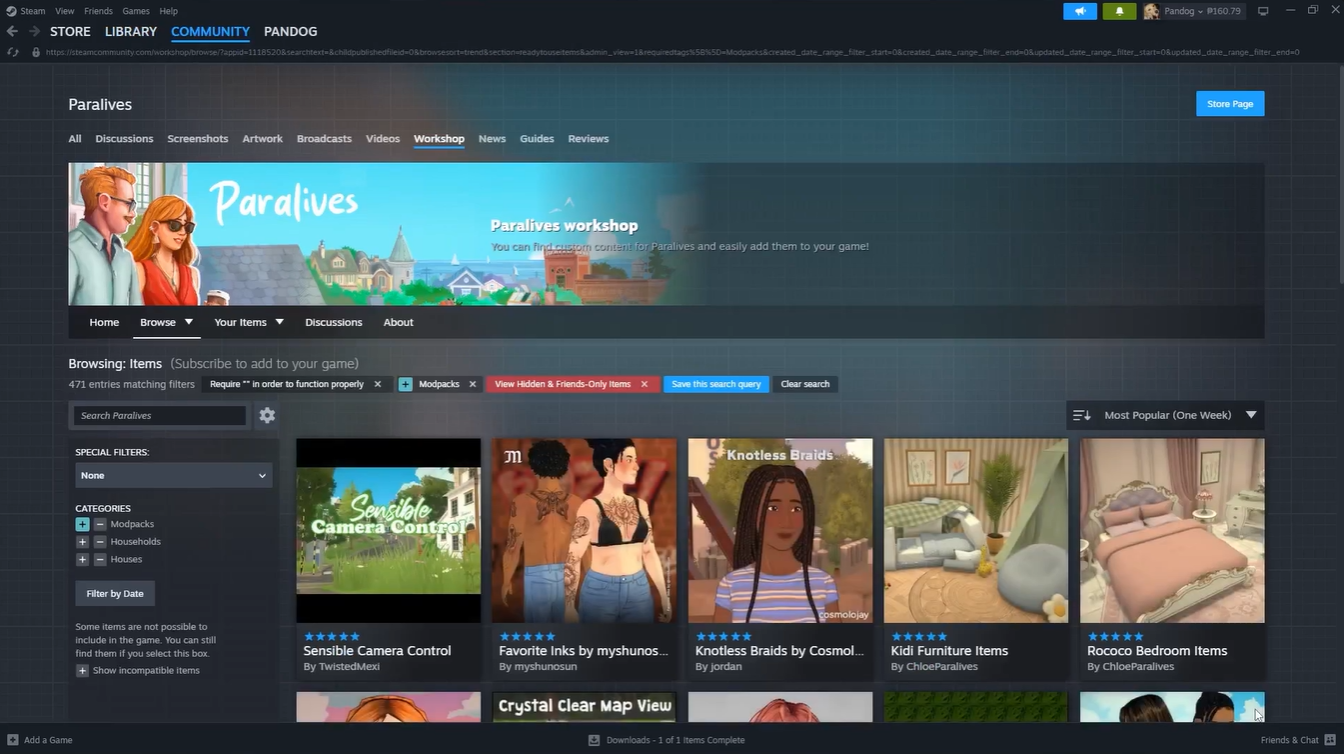
Many creators include screenshots, descriptions, compatibility notes, and update logs to help you decide whether the mod fits your game.
How to install a mod through Steam Workshop in Paralives
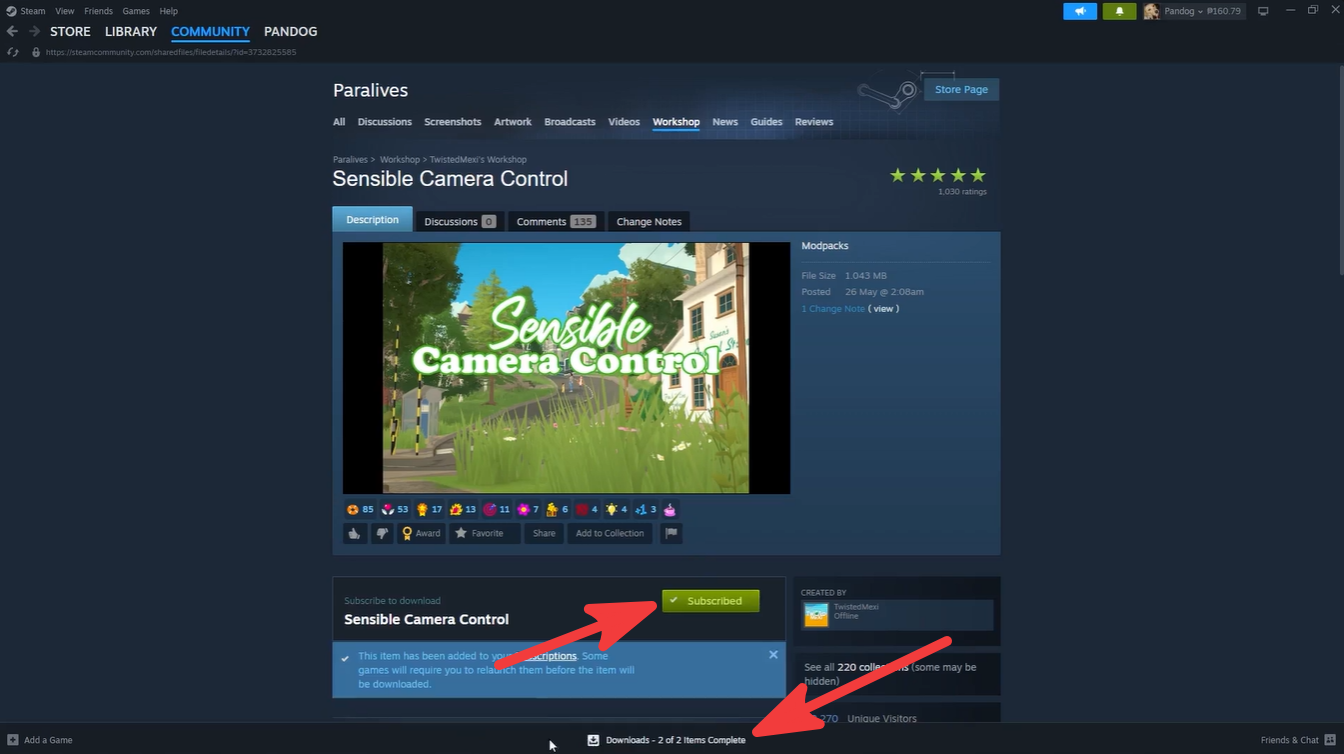
Click on the mod you want to install to open its full Workshop page.
Press the Subscribe button.
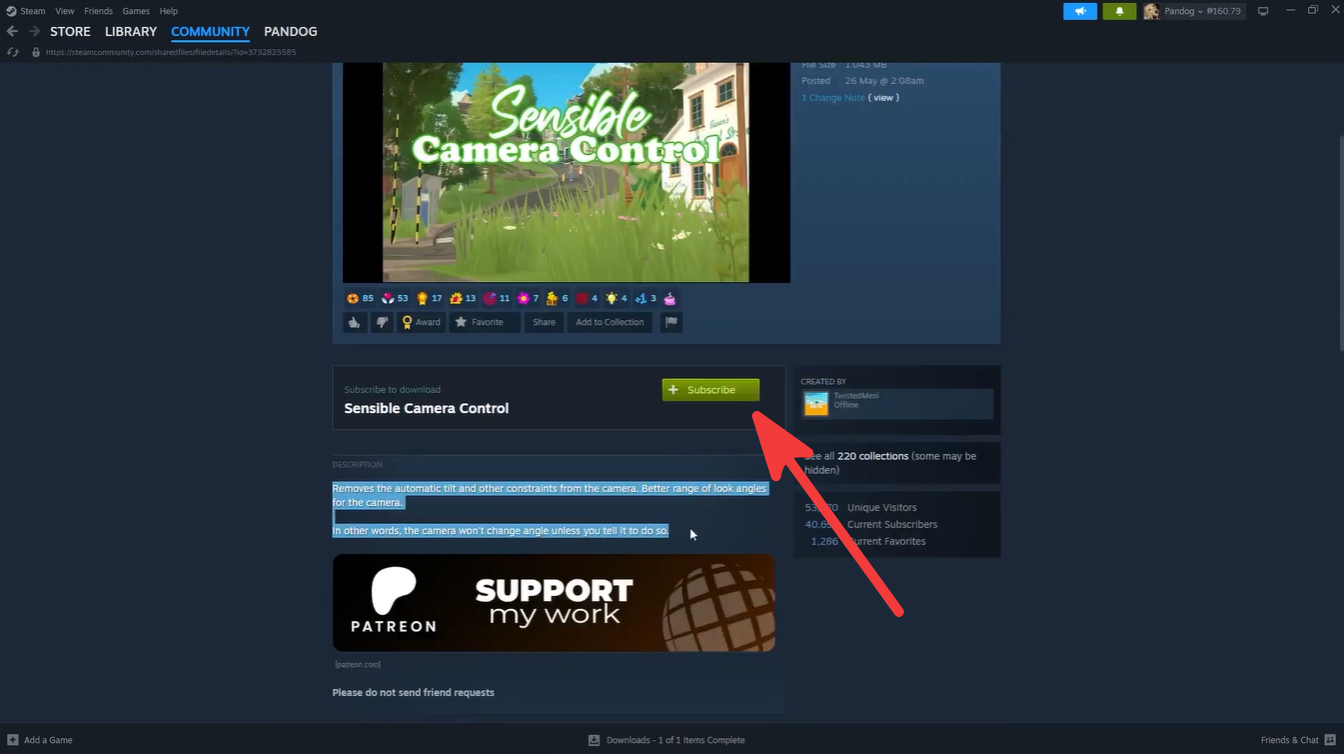
Once subscribed, Steam immediately starts downloading the mod files automatically.
Wait for the download to finish. The mod will then appear inside your Paralives mods list the next time the game refreshes the menu.
Faster way to install mods in Paralives
Paralives also includes a quicker installation method directly from the Workshop browsing page.
Find the mod thumbnail you want. Click the small green plus icon located in the bottom-right corner of the thumbnail.
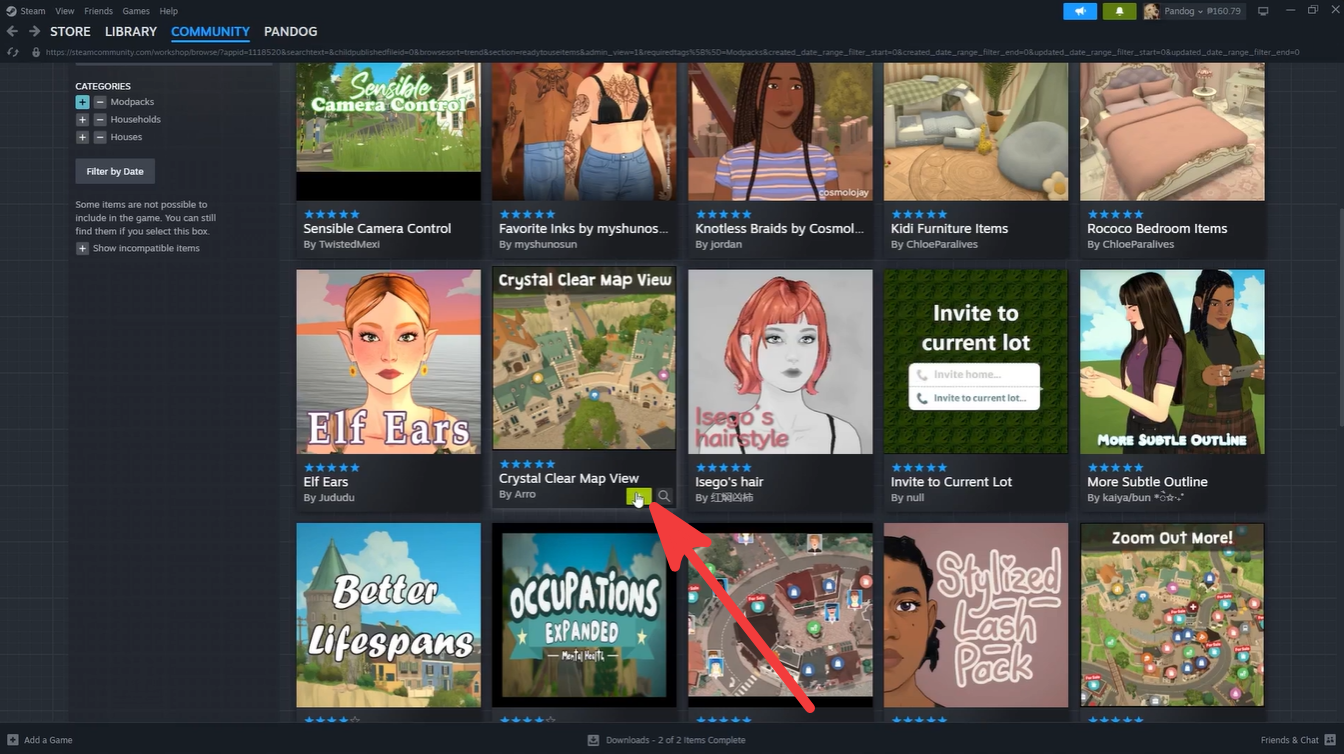
Steam automatically subscribes and downloads the mod without needing to open the full page.
This is useful when installing multiple mods quickly.
How installed mods work in Paralives
After returning to the game, all downloaded mods appear in your installed mods list automatically.
By default:
| Mod Behavior | Status |
|---|---|
| Newly downloaded mods | Automatically enabled |
| Disabled mods | Remain installed but inactive |
| Removed mods | Deleted and unsubscribed |
As long as the toggle remains active, the mod will load during future gameplay sessions.
How to disable mods without deleting them
Sometimes you may want to temporarily turn off a mod without fully uninstalling it. Paralives allows you to do this directly from the mods menu.
Open the installed mods list. Locate the mod you want to disable.
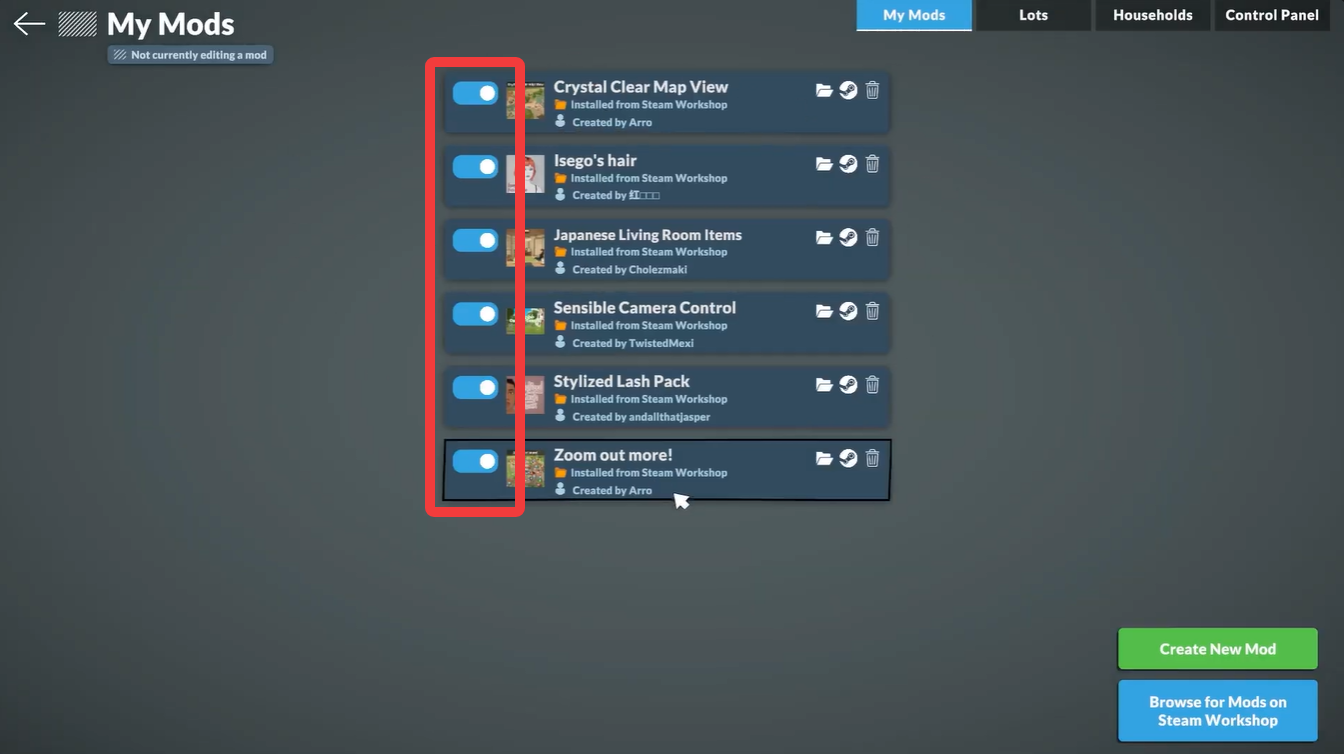
Click the blue toggle switch beside the mod.
Once the game finishes loading or refreshing the mod list, the mod becomes inactive.
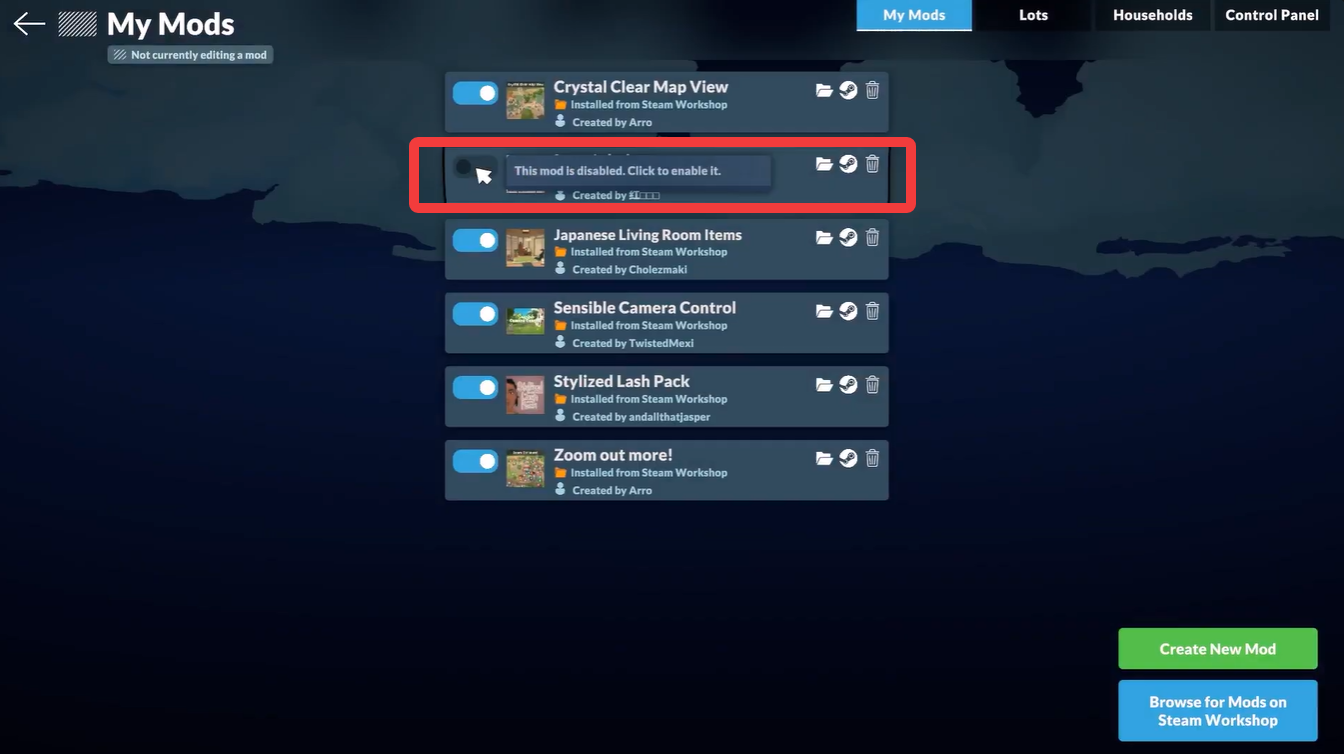
The files remain installed, meaning you can enable the mod again later without redownloading it.
How to remove mods permanently in Paralives
If you no longer want a mod installed, you can completely remove it from your game and unsubscribe from the Workshop entry.
Open the mods list inside Paralives. Find the mod you want to delete.
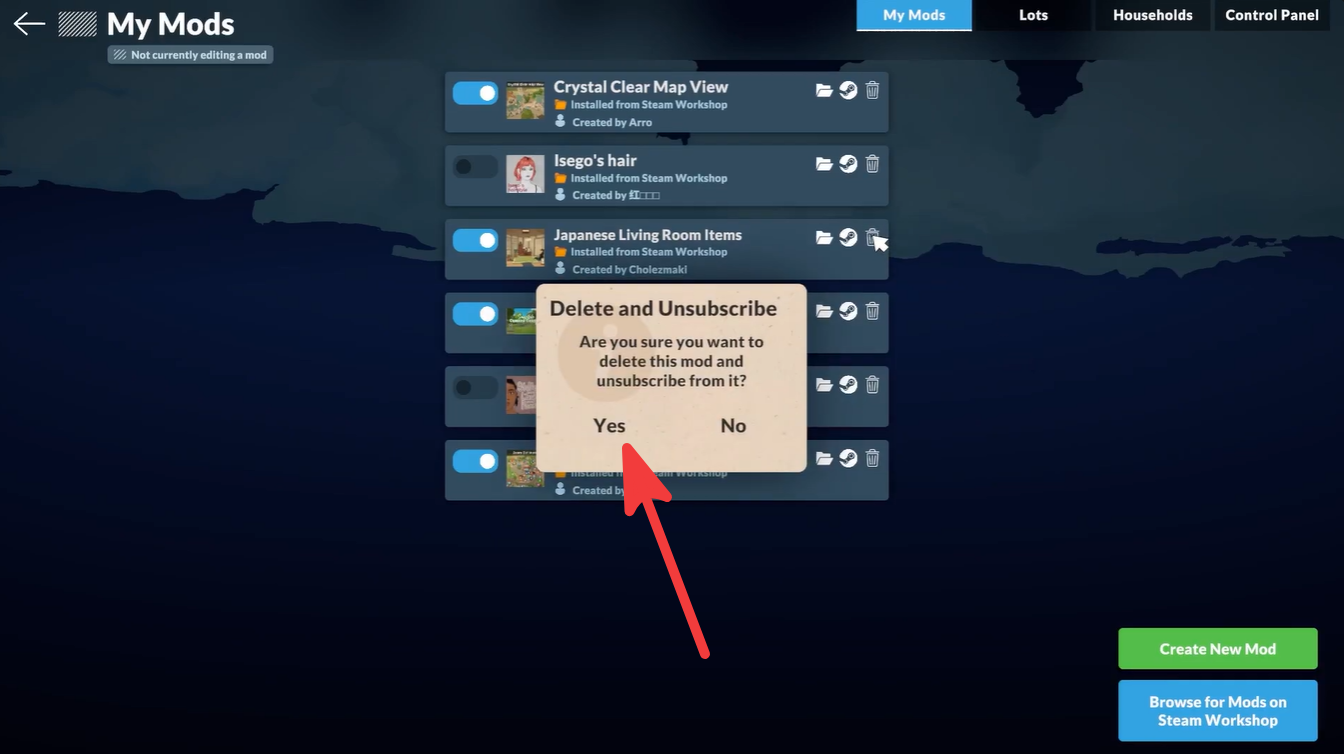
Click the trash bin icon next to the mod.
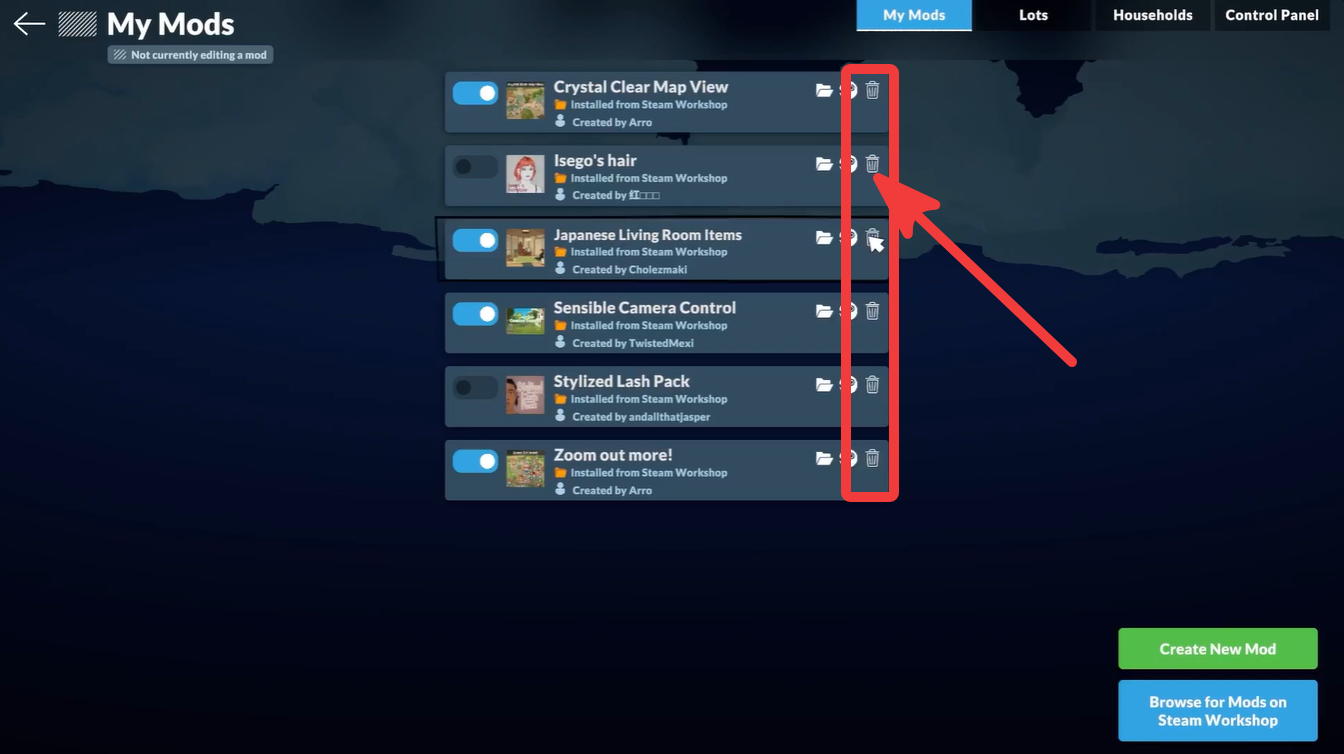
This permanently removes the mod from your installed list and unsubscribes you from it on Steam Workshop.
This method is recommended for cleaning up outdated mods or removing content you no longer use.
Why removing mods can affect save files
Like many moddable simulation games, Paralives saves can sometimes depend on modded objects, systems, or gameplay changes.
If you remove a mod that your save file actively uses, you may experience:
| Possible Issue | Description |
|---|---|
| Missing objects | Furniture or items may disappear |
| Broken systems | Certain gameplay mechanics may stop working |
| Save instability | Some saves may fail to load correctly |
| Character issues | Traits or interactions tied to mods may break |
Because of this, it is usually safer to back up important save files before removing large gameplay mods.
Tips for managing mods safely
Keeping your mod setup organized can help prevent crashes or compatibility problems.
Here are a few useful practices:
| Best Practice | Why it Helps |
|---|---|
| Remove outdated mods | Prevents compatibility issues |
| Disable mods before testing | Easier troubleshooting |
| Back up saves regularly | Protects long-term progress |
| Read Workshop descriptions | Helps avoid conflicts |
| Install mods gradually | Easier to identify broken mods |
As your collection grows, it becomes important to regularly manage inactive or unnecessary mods. Paralives makes this easier than many other simulation games thanks to its simple Workshop integration and built-in management tools.
The ability to instantly enable, disable, or completely remove mods from one menu helps keep your game stable while still allowing heavy customization. Whether you are installing small cosmetic tweaks or larger gameplay overhauls, understanding how the mods system works can help you avoid save issues and maintain smoother gameplay.