What to know
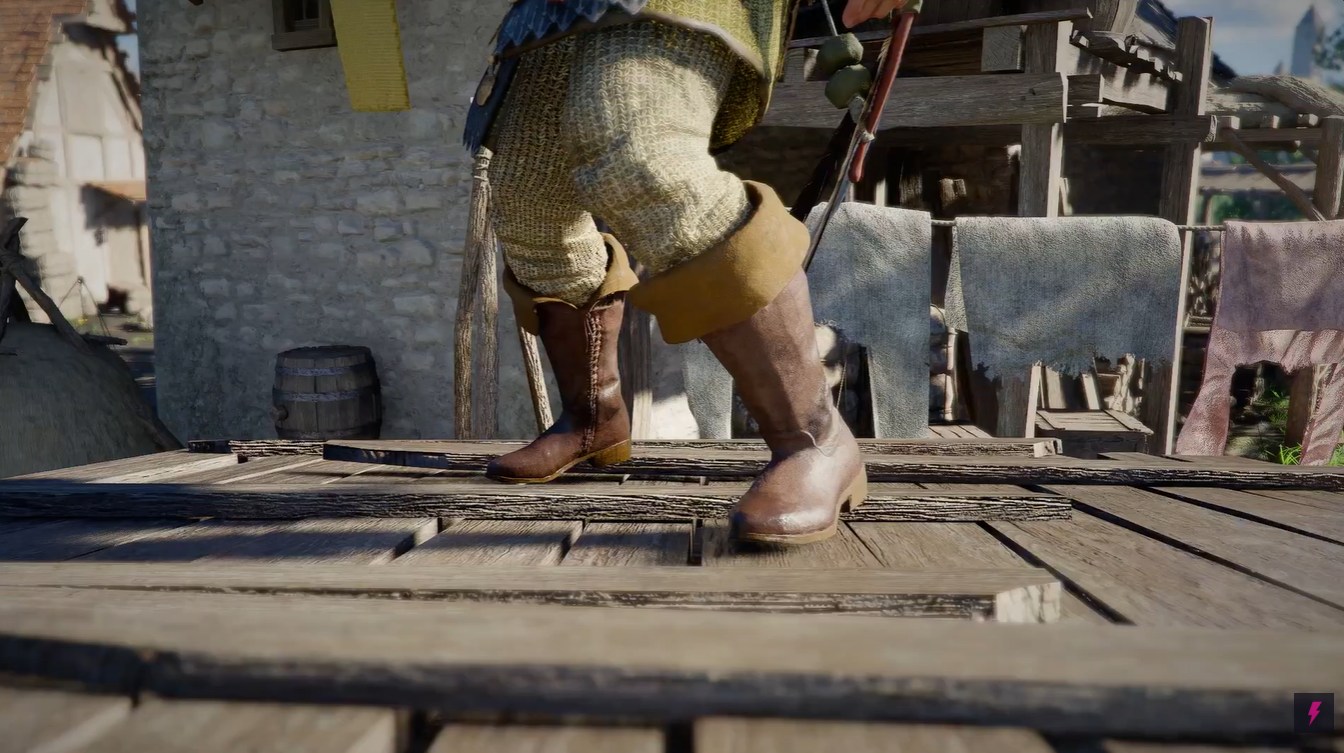
- Nagmore Leather Boots are hidden inside a tower chest near Demeniss.
- The boots provide attack, defense, critical rate, and lightning resistance bonuses.
- You also gain a useful 2% swim speed socket perk.
- The surrounding area can become hostile depending on your story progression.
If you are exploring gear upgrades in Crimson Desert, the Nagmore Leather Boots are one of the more valuable hidden armor pieces you can grab early without needing a major boss fight. These boots offer a balanced combination of offense, defense, elemental resistance, and utility, making them especially useful for players who frequently explore rivers, coastlines, or flooded regions.
Crimson Desert Nagmore Leather Boots details
| Feature | Details |
|---|---|
| Item Type | Footwear |
| Rarity | Uncommon |
| Region | Kliff |
| Item Name | Nagmore Leather Boots |
| Main Benefit | Swim Speed Bonus |
| Chest Location | Tower Balcony Chest |
| Nearby Landmark | Stronghoof Saddlery |
| Special Resistance | Lightning Resistance Lv 1 |
| Socket Count | 2 Sockets |
Crimson Desert Nagmore Leather Boots location
The boots are located in the Demeniss region. You will need to travel toward the area positioned above the letters “N” and “I” on the Demeniss map. From there, head left toward the Golden Plains label.
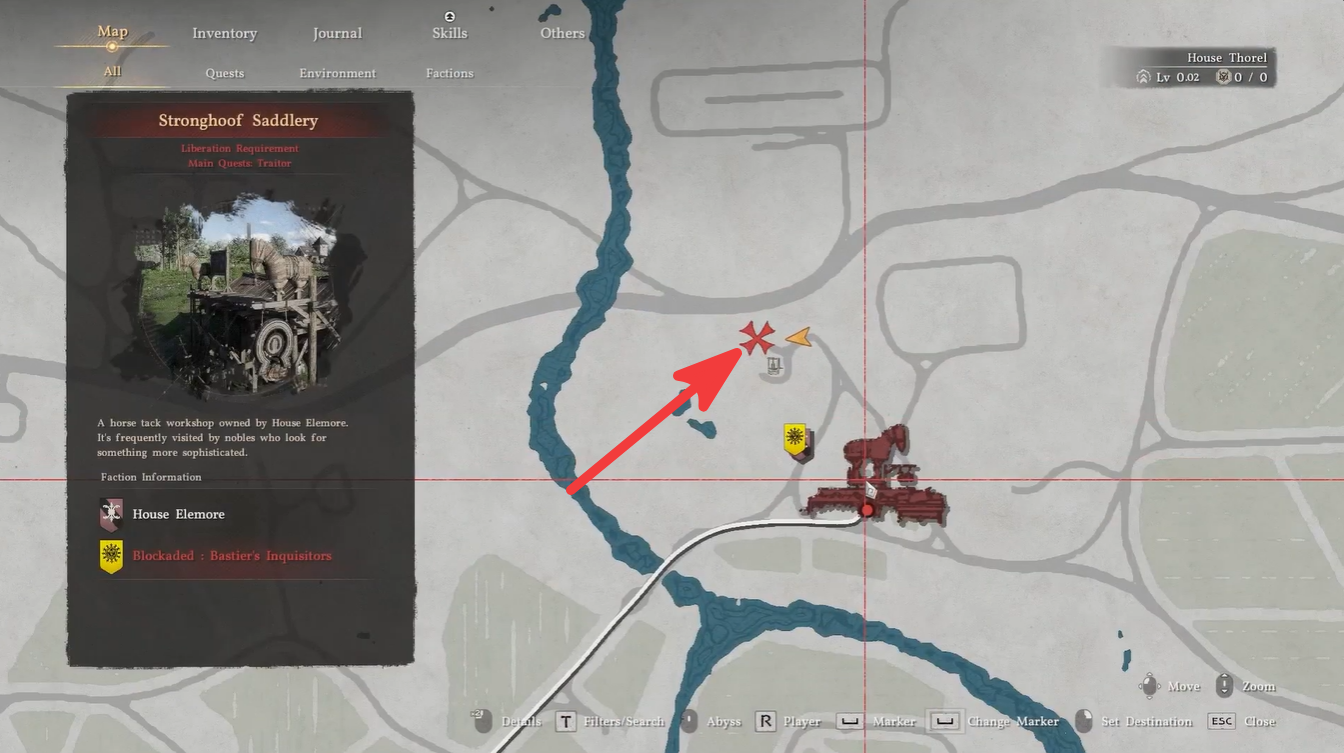
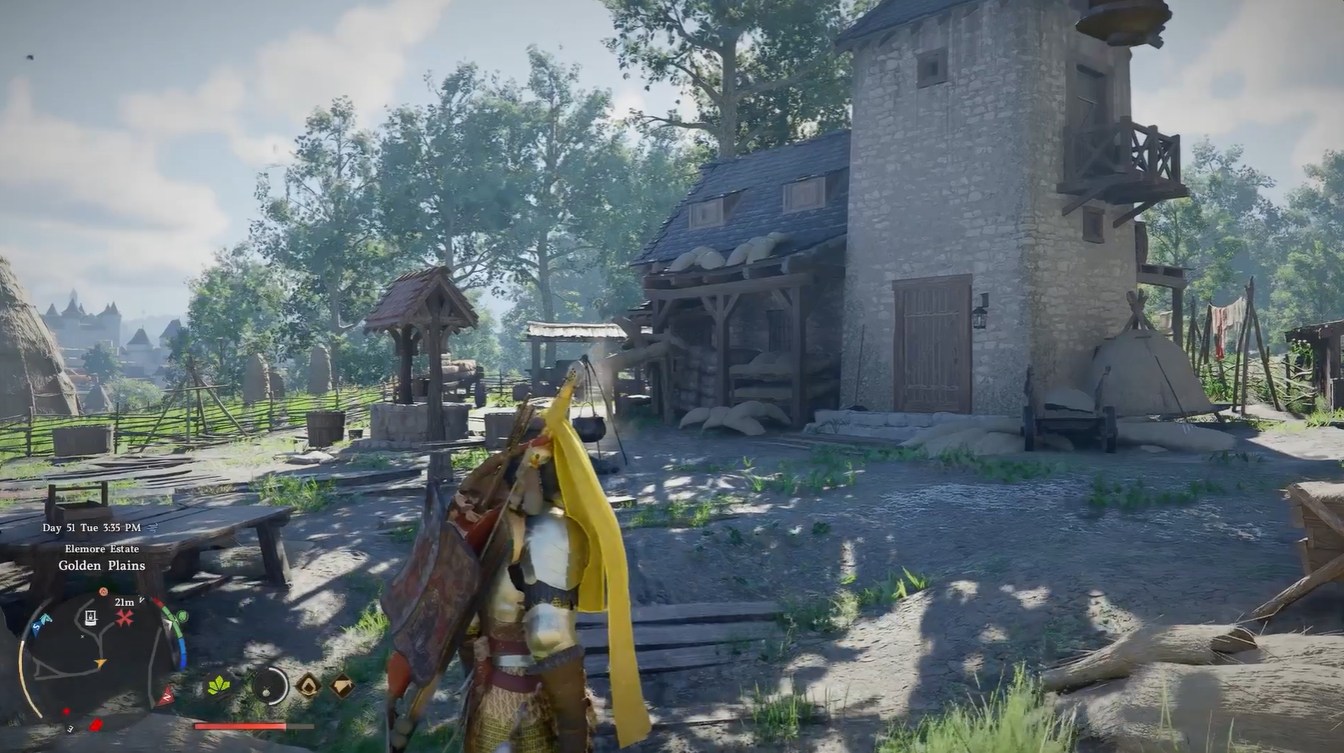
The exact location sits near Stronghoof Saddlery, close to a well and barn structure. The final chest is hidden inside a tower balcony area. Depending on your story progression and faction status, enemies in the area may become hostile, so approaching carefully is recommended.
How to get Nagmore Leather Boots in Crimson Desert
Step 1
Open your world map and travel toward the Demeniss region. Focus on the area above the letters “N” and “I” visible on the map overlay.
Step 2
Move westward toward the area near the Golden Plains label. Continue following the road until you approach the outskirts above Stronghoof Saddlery.
Step 3
Locate the nearby well and barn structures. This confirms you are close to the correct hidden loot location.
Step 4
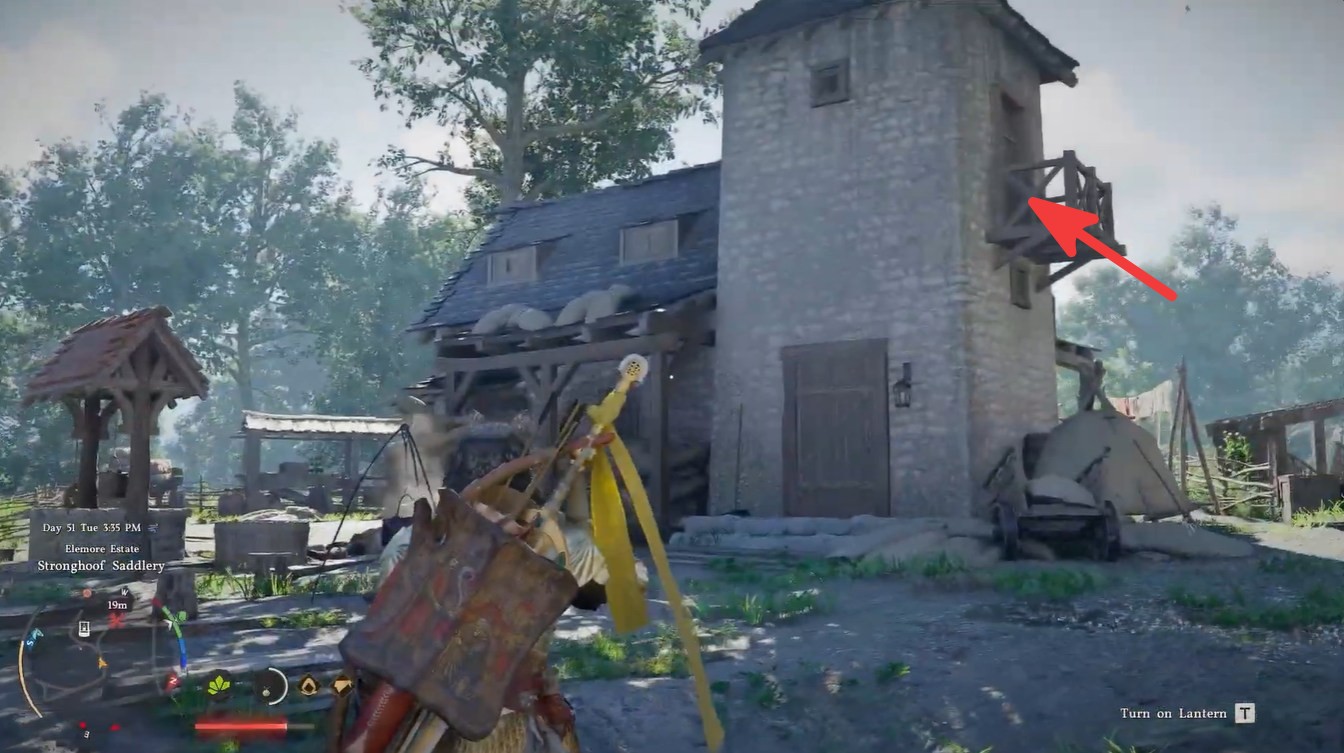
Search for the tall tower nearby. The treasure chest is not located on the ground floor, so you will need to climb upward.
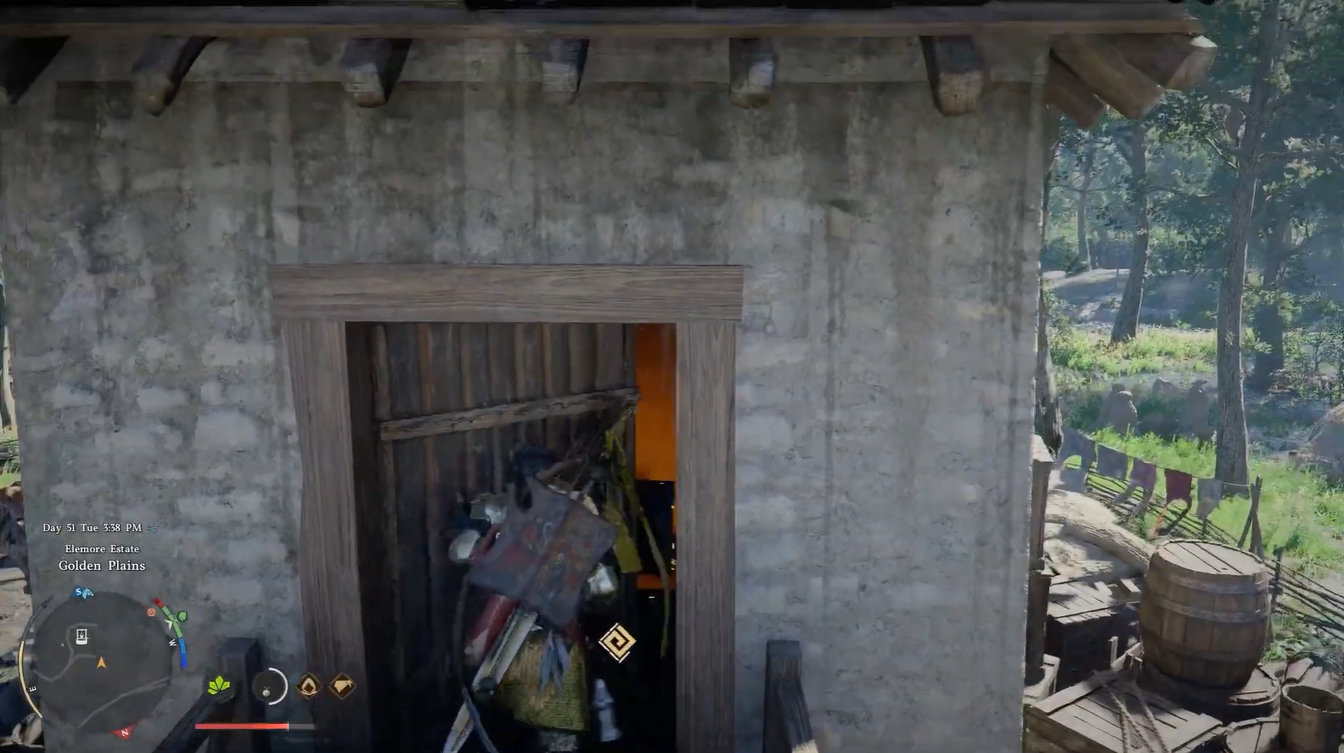
Step 5
Climb onto the tower balcony on the upper floor. Be cautious because hostile enemies may patrol nearby depending on your current progression.
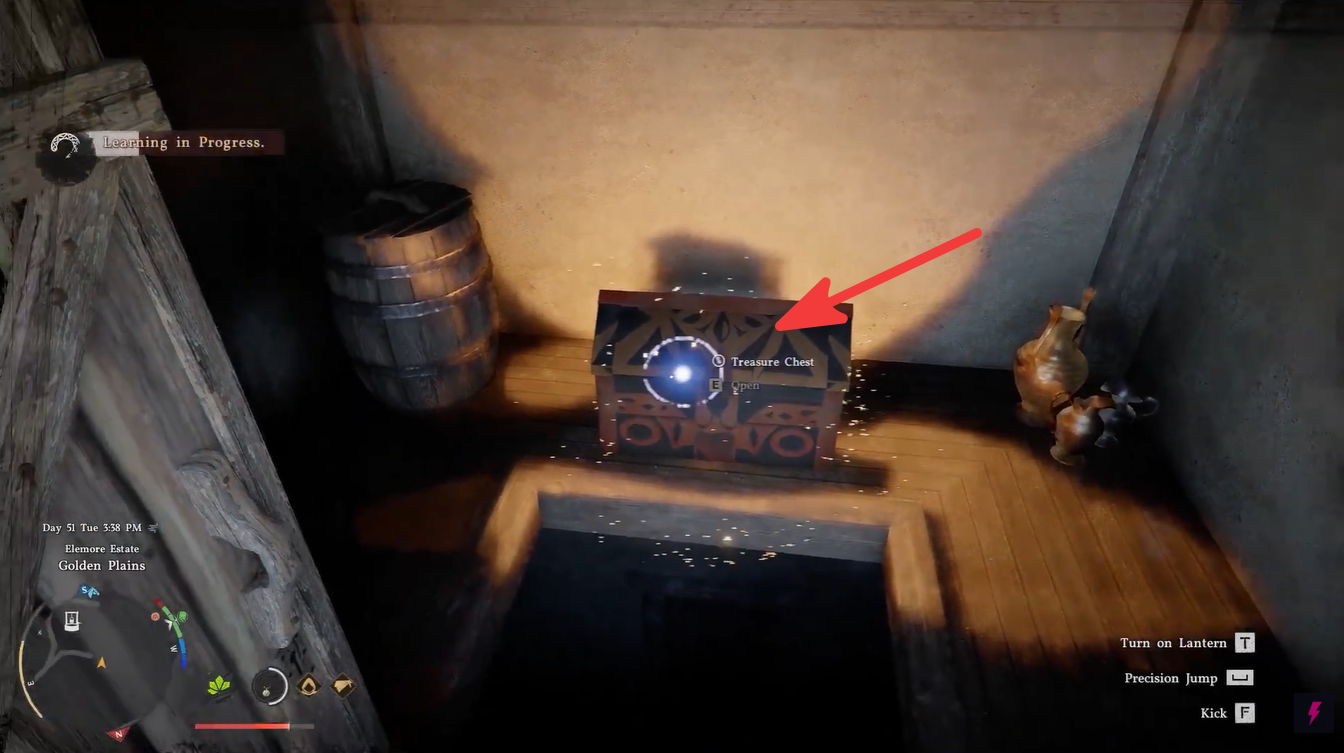
Step 6
Open the chest located on the balcony to obtain the Nagmore Leather Boots.
Nagmore Leather Boots stats explained
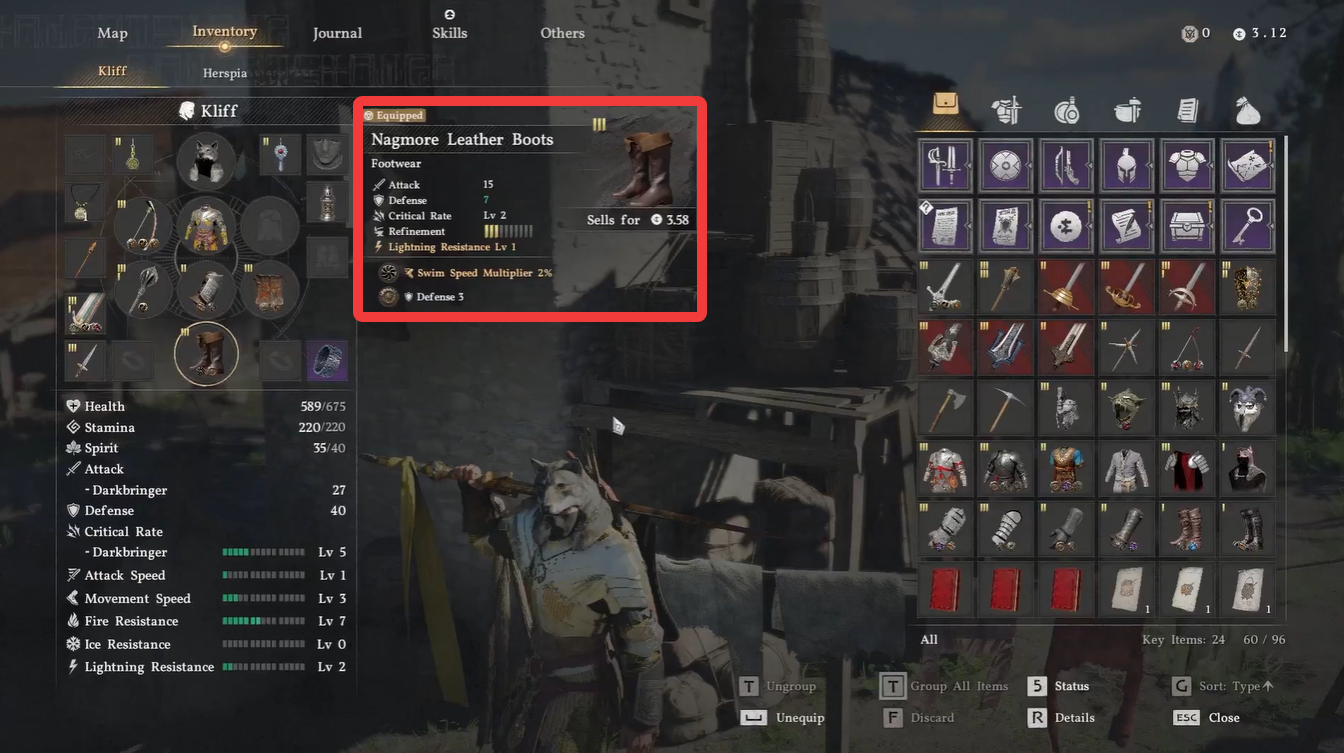
The boots come with surprisingly strong attributes for an exploration-based hidden chest reward. They provide both offensive and defensive improvements while also increasing mobility in water-heavy areas.
| Stat | Value |
|---|---|
| Attack | 9 → 29 |
| Defense | 1 → 18 |
| Critical Rate | Lv.2 → Lv.3 |
| Lightning Resistance | Lv 1 |
| Socket Slots | 2/2 |
| Socket Bonus #1 | Swim Speed 2% |
| Socket Bonus #2 | Defense +3 |
The swim speed multiplier is the standout perk here, especially if you spend time traversing lakes, rivers, or coastal routes. The added critical rate upgrade also makes the boots surprisingly effective for agile combat builds.
Why these boots are worth getting early
| Playstyle | Why It Works |
|---|---|
| Exploration Builds | Faster swimming and mobility |
| Agile Combat Builds | Critical rate increase |
| Survival Builds | Added defense and resistance |
| Hybrid Adventurer Builds | Balanced utility and combat bonuses |
Many hidden armor pieces in Crimson Desert focus entirely on defense, but the Nagmore Leather Boots combine combat and traversal bonuses together. The added critical rate boost helps maintain offensive momentum during fights, while the swim speed perk becomes extremely useful during exploration-heavy quests.
The lightning resistance is also helpful in regions with electrical hazards or enemies that use shock attacks. Since the boots include two socket slots, they remain flexible for different build types as you progress further into the game.
The Nagmore Leather Boots are one of the better hidden equipment rewards available through simple exploration in Crimson Desert. Their combination of combat stats, resistance bonuses, and movement utility makes them valuable long after you first acquire them. If you are already exploring the Demeniss area, this chest is absolutely worth grabbing before moving deeper into later regions.