-
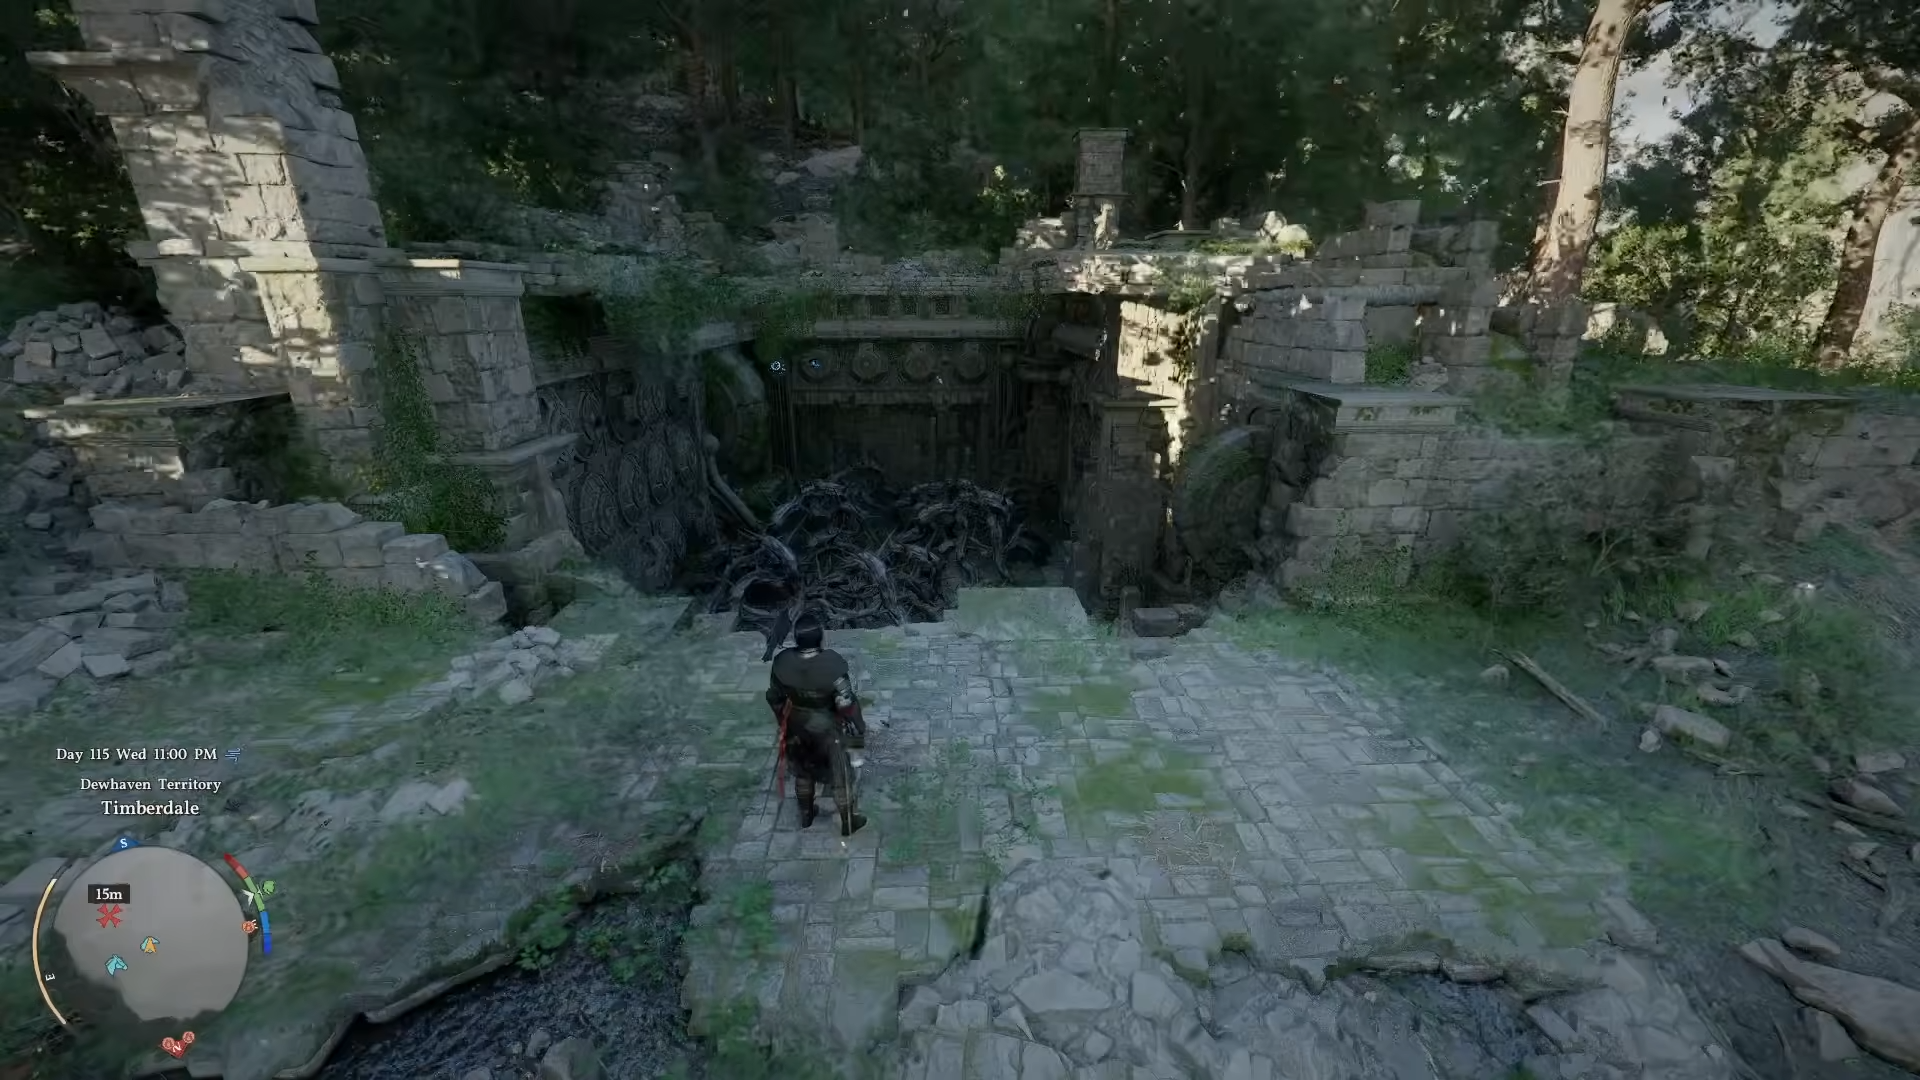
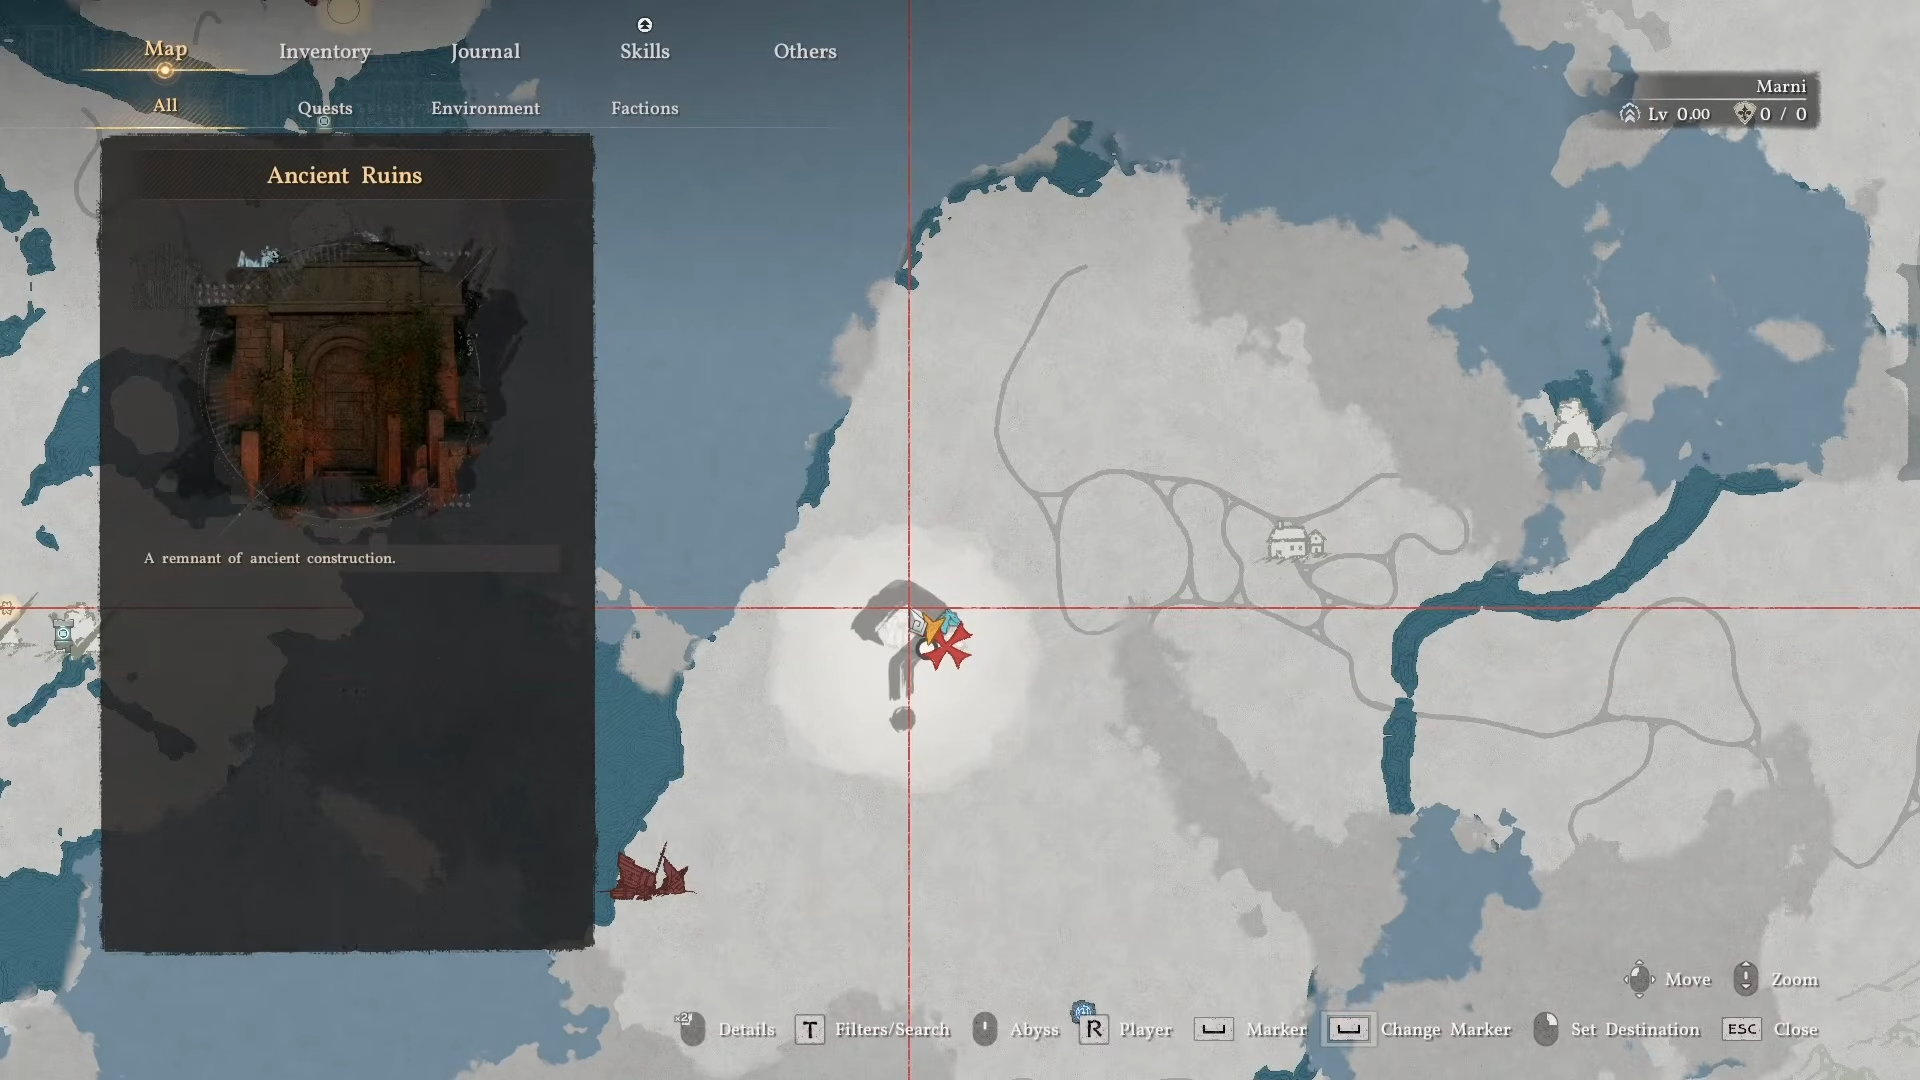
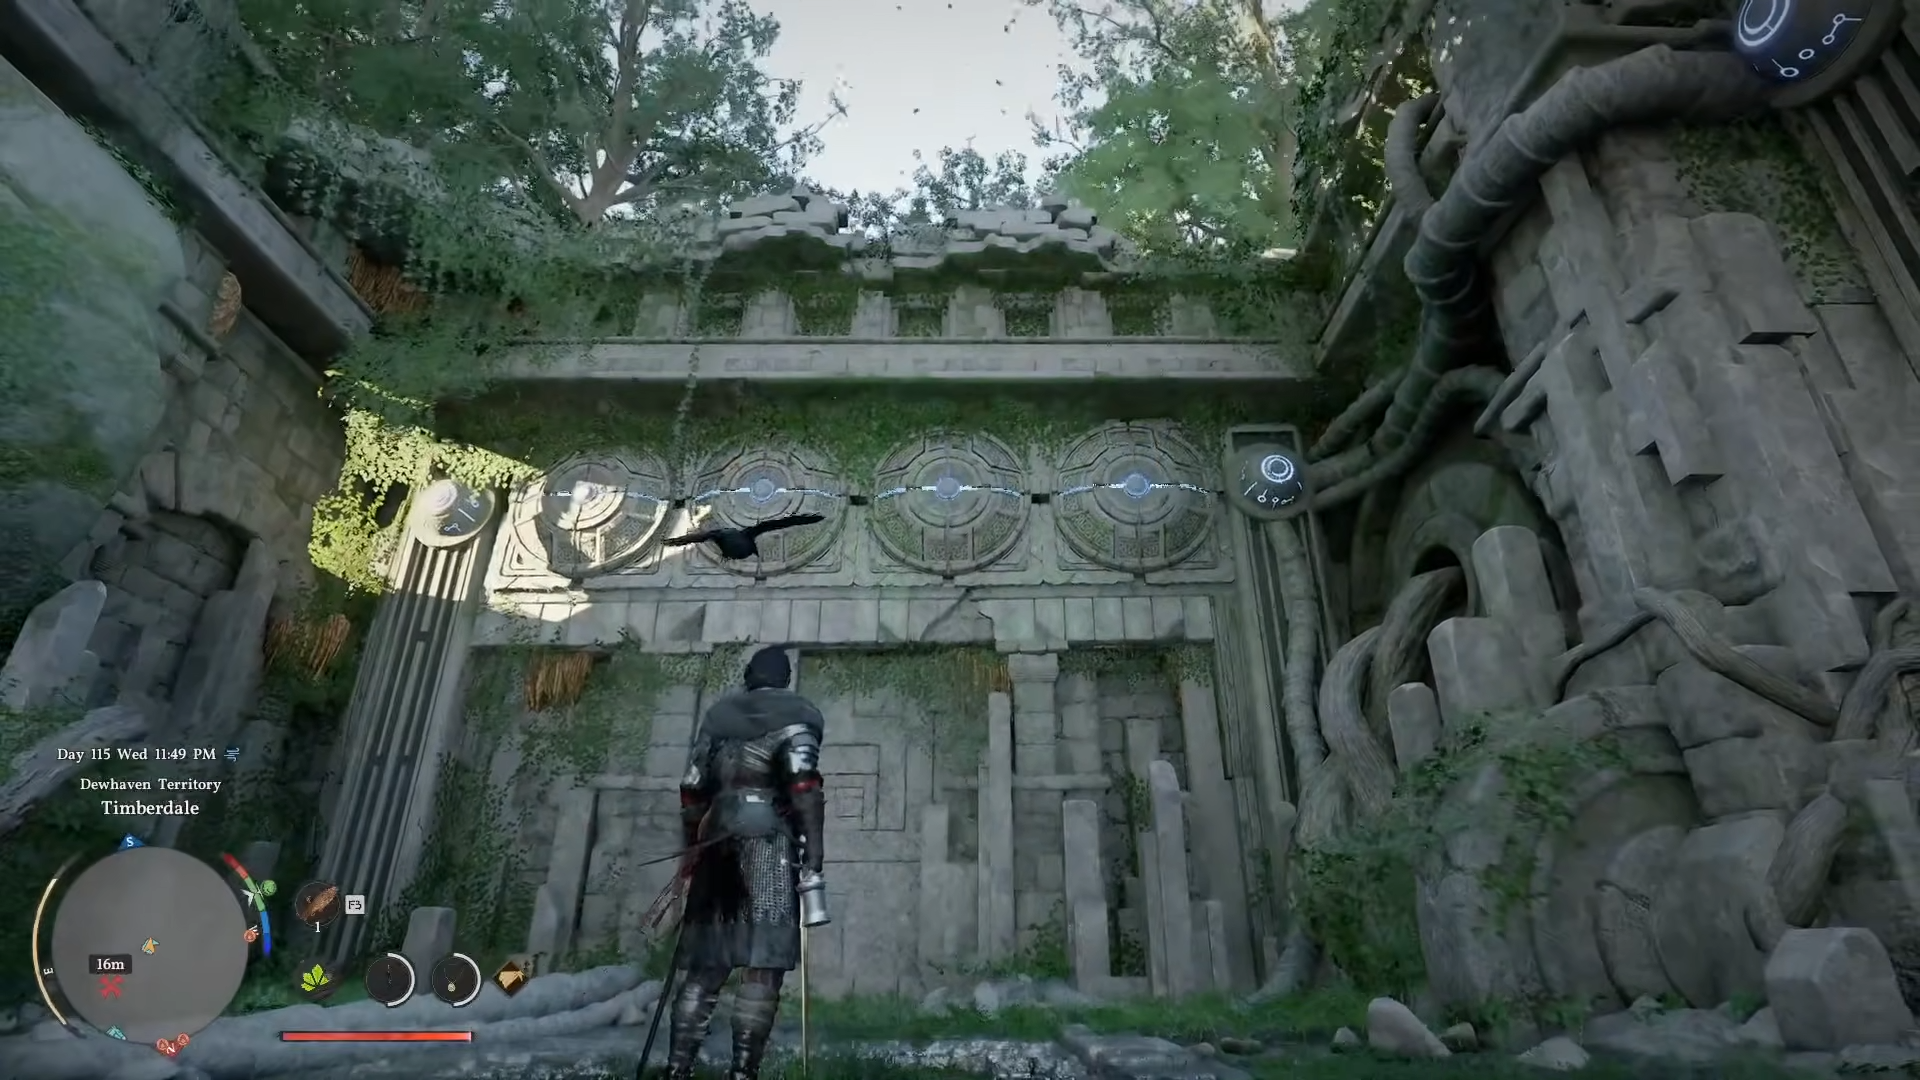
Located in Delesyia region’s Dewhaven Territory, southwest of Dewhaven Logging Camp amid dense forest.
-
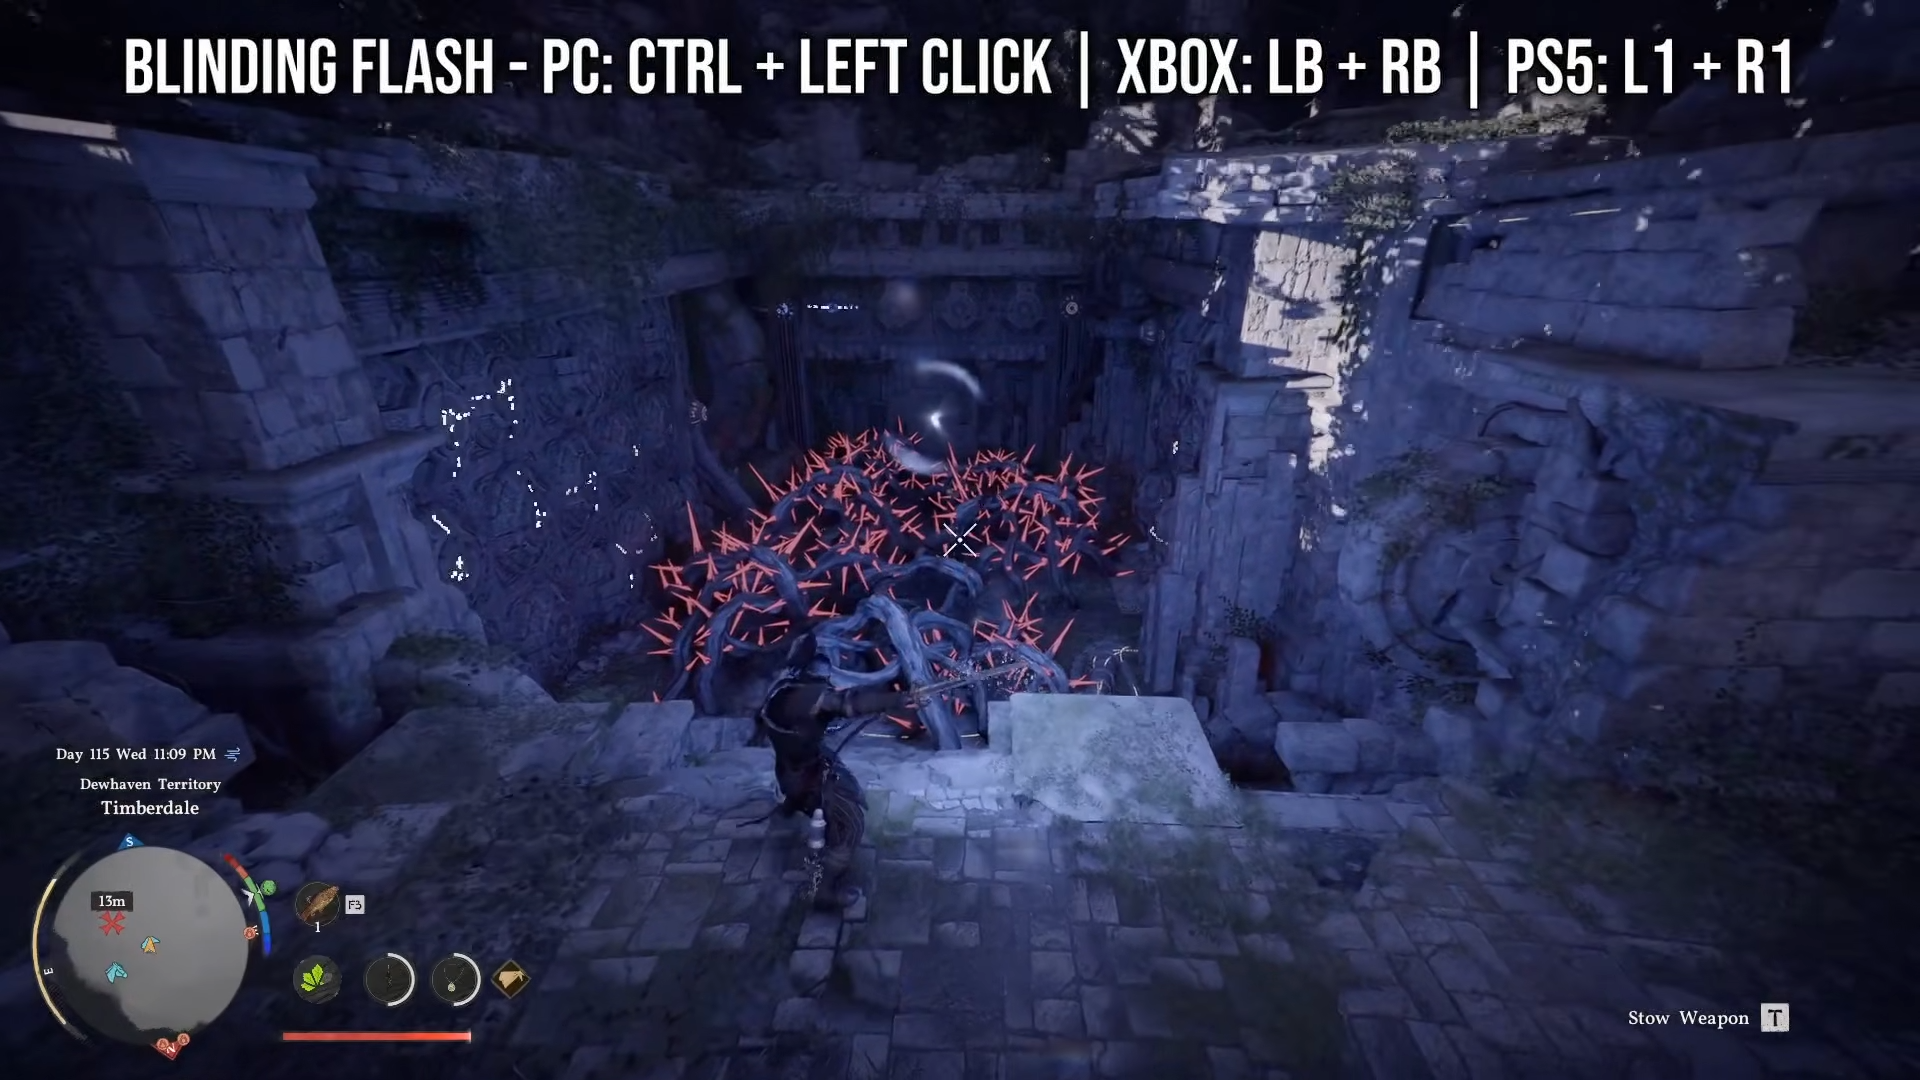
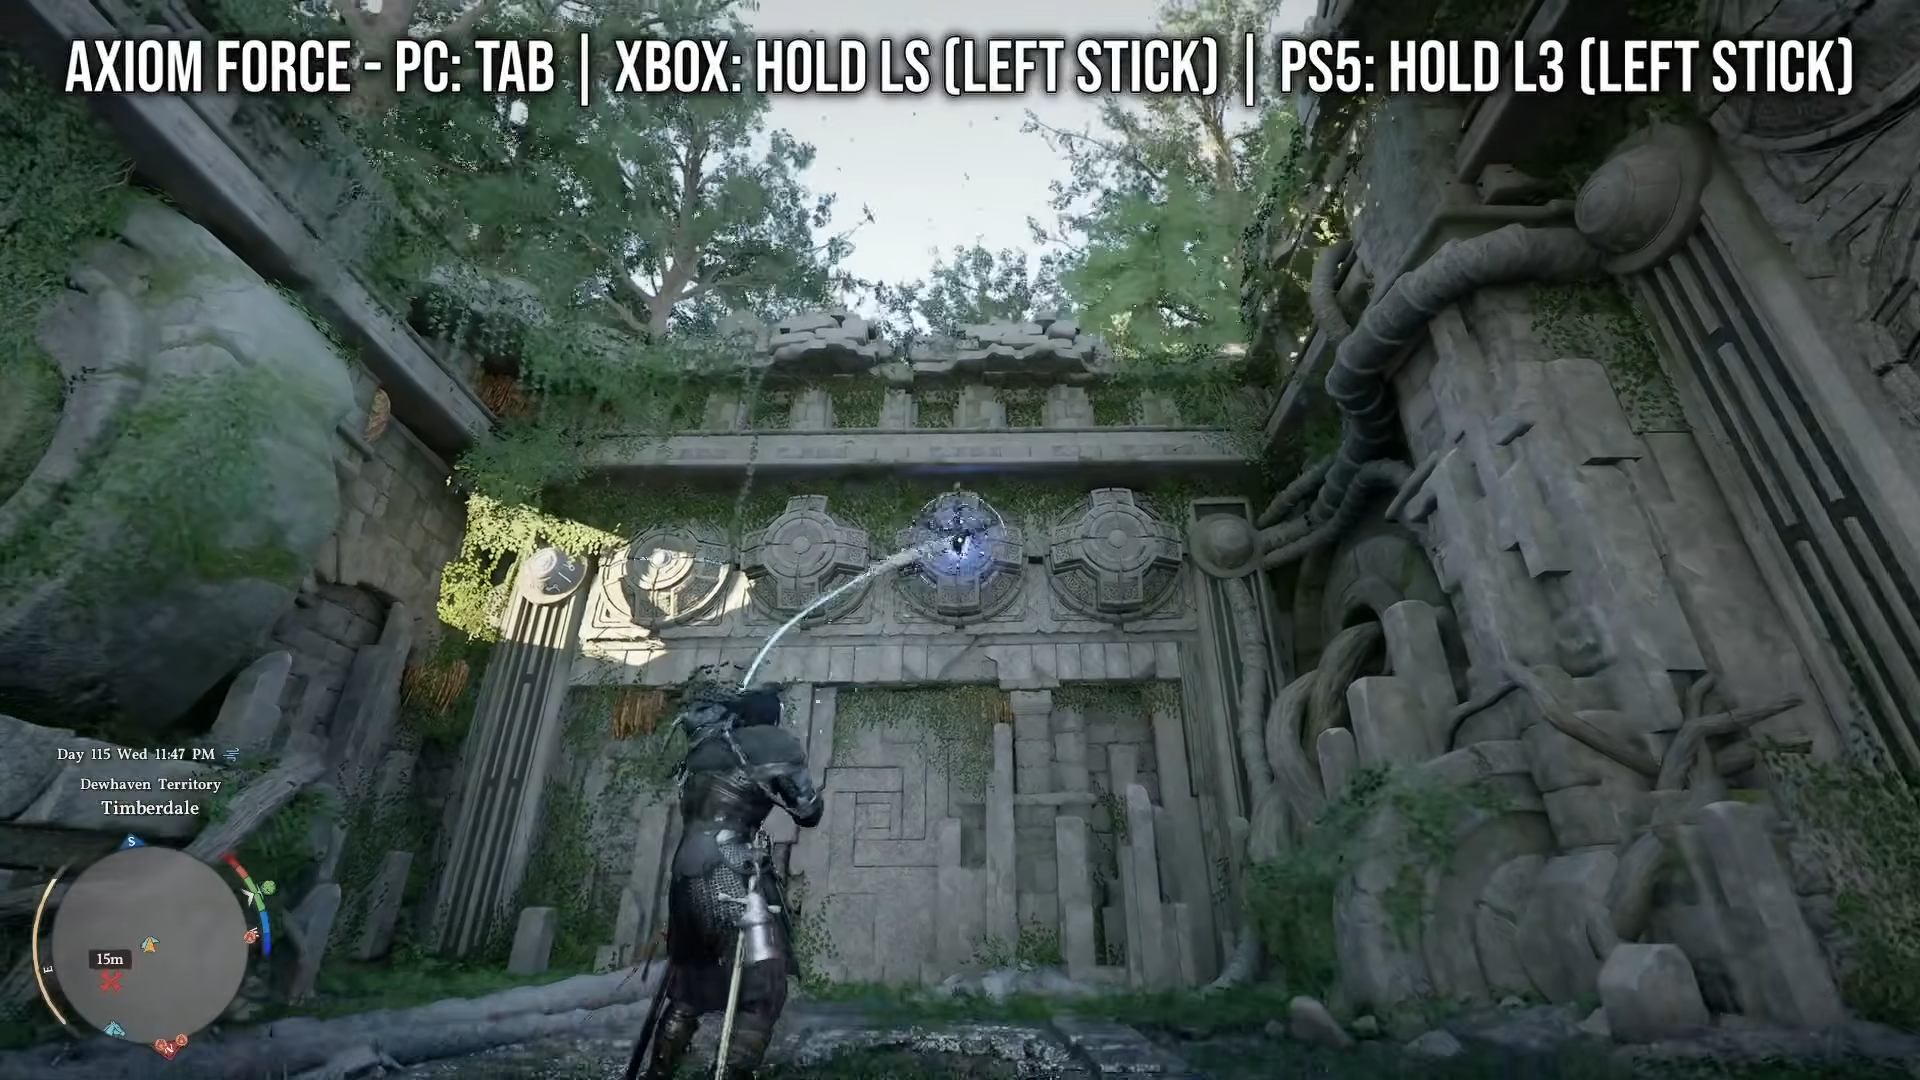
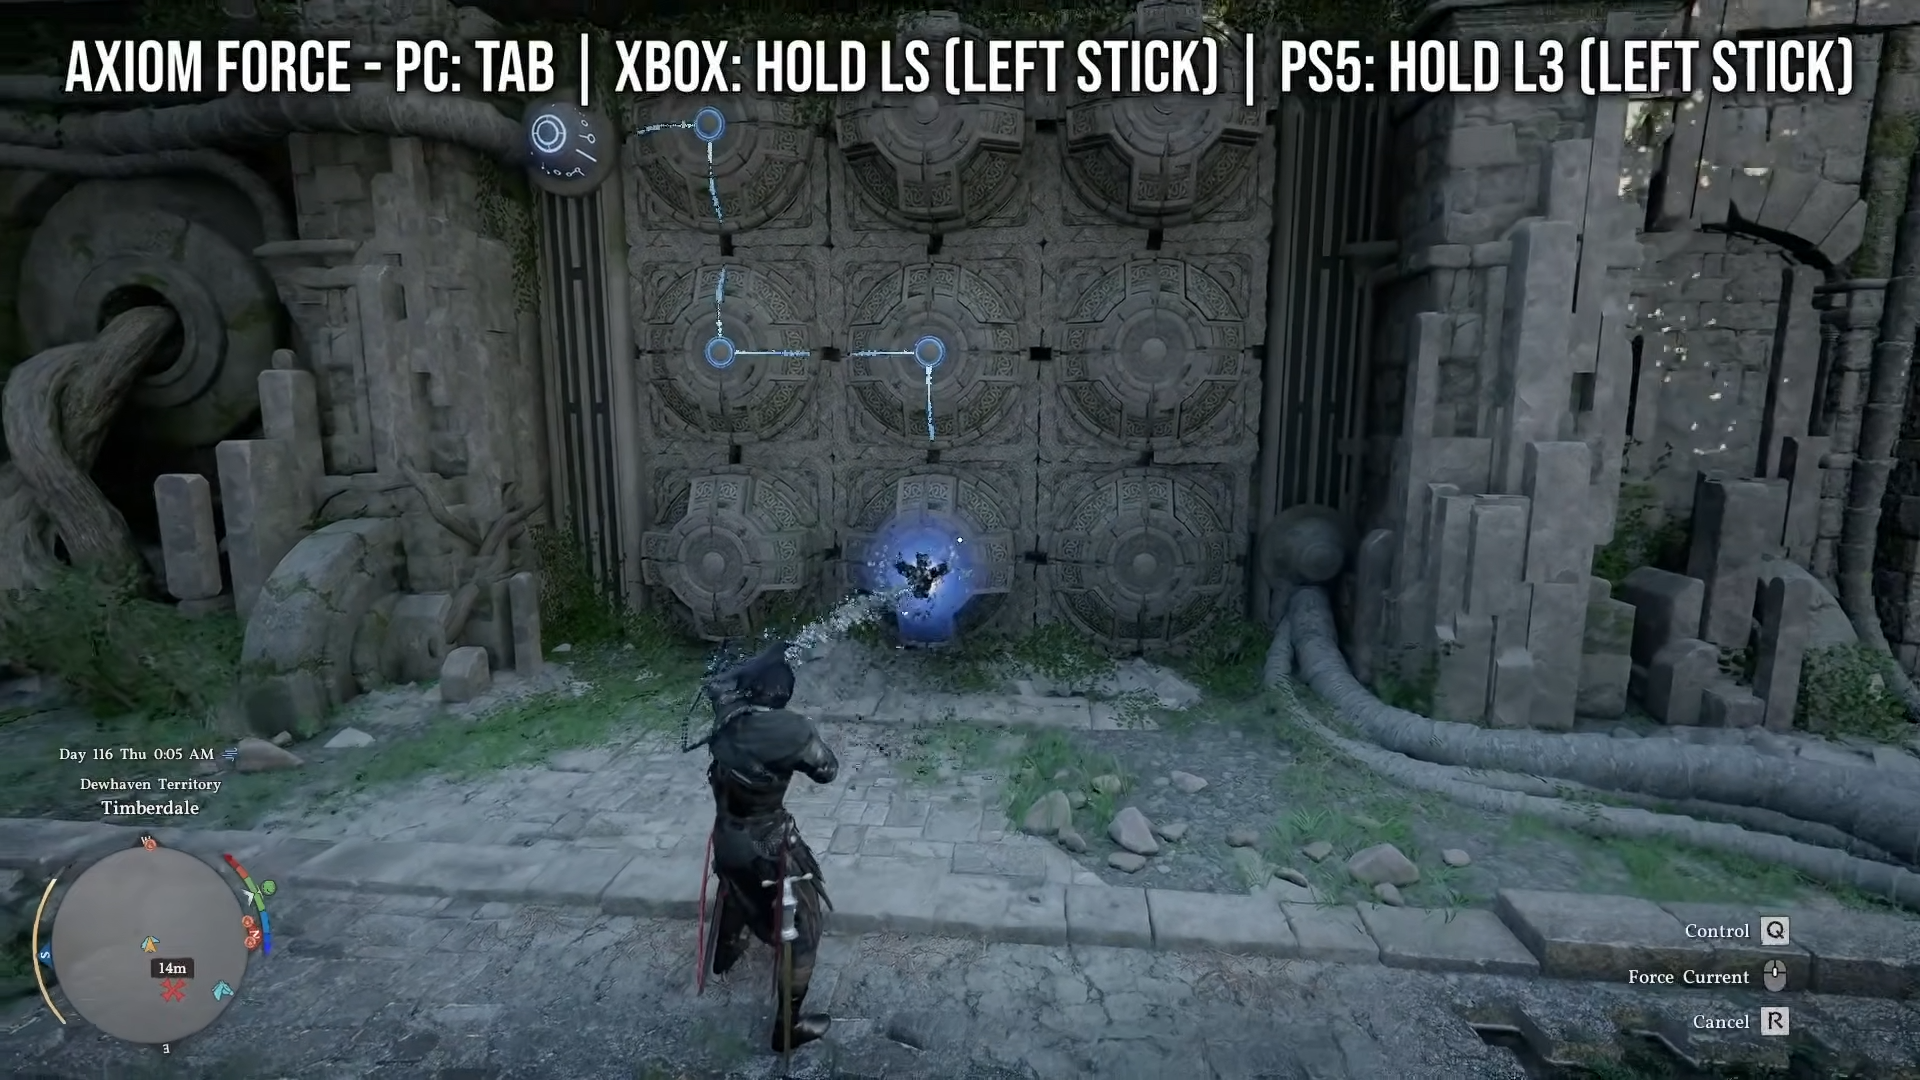
Involves burning thorns with Blinding Flash, then solving three sequential wall disc puzzles using Force Palm.
-
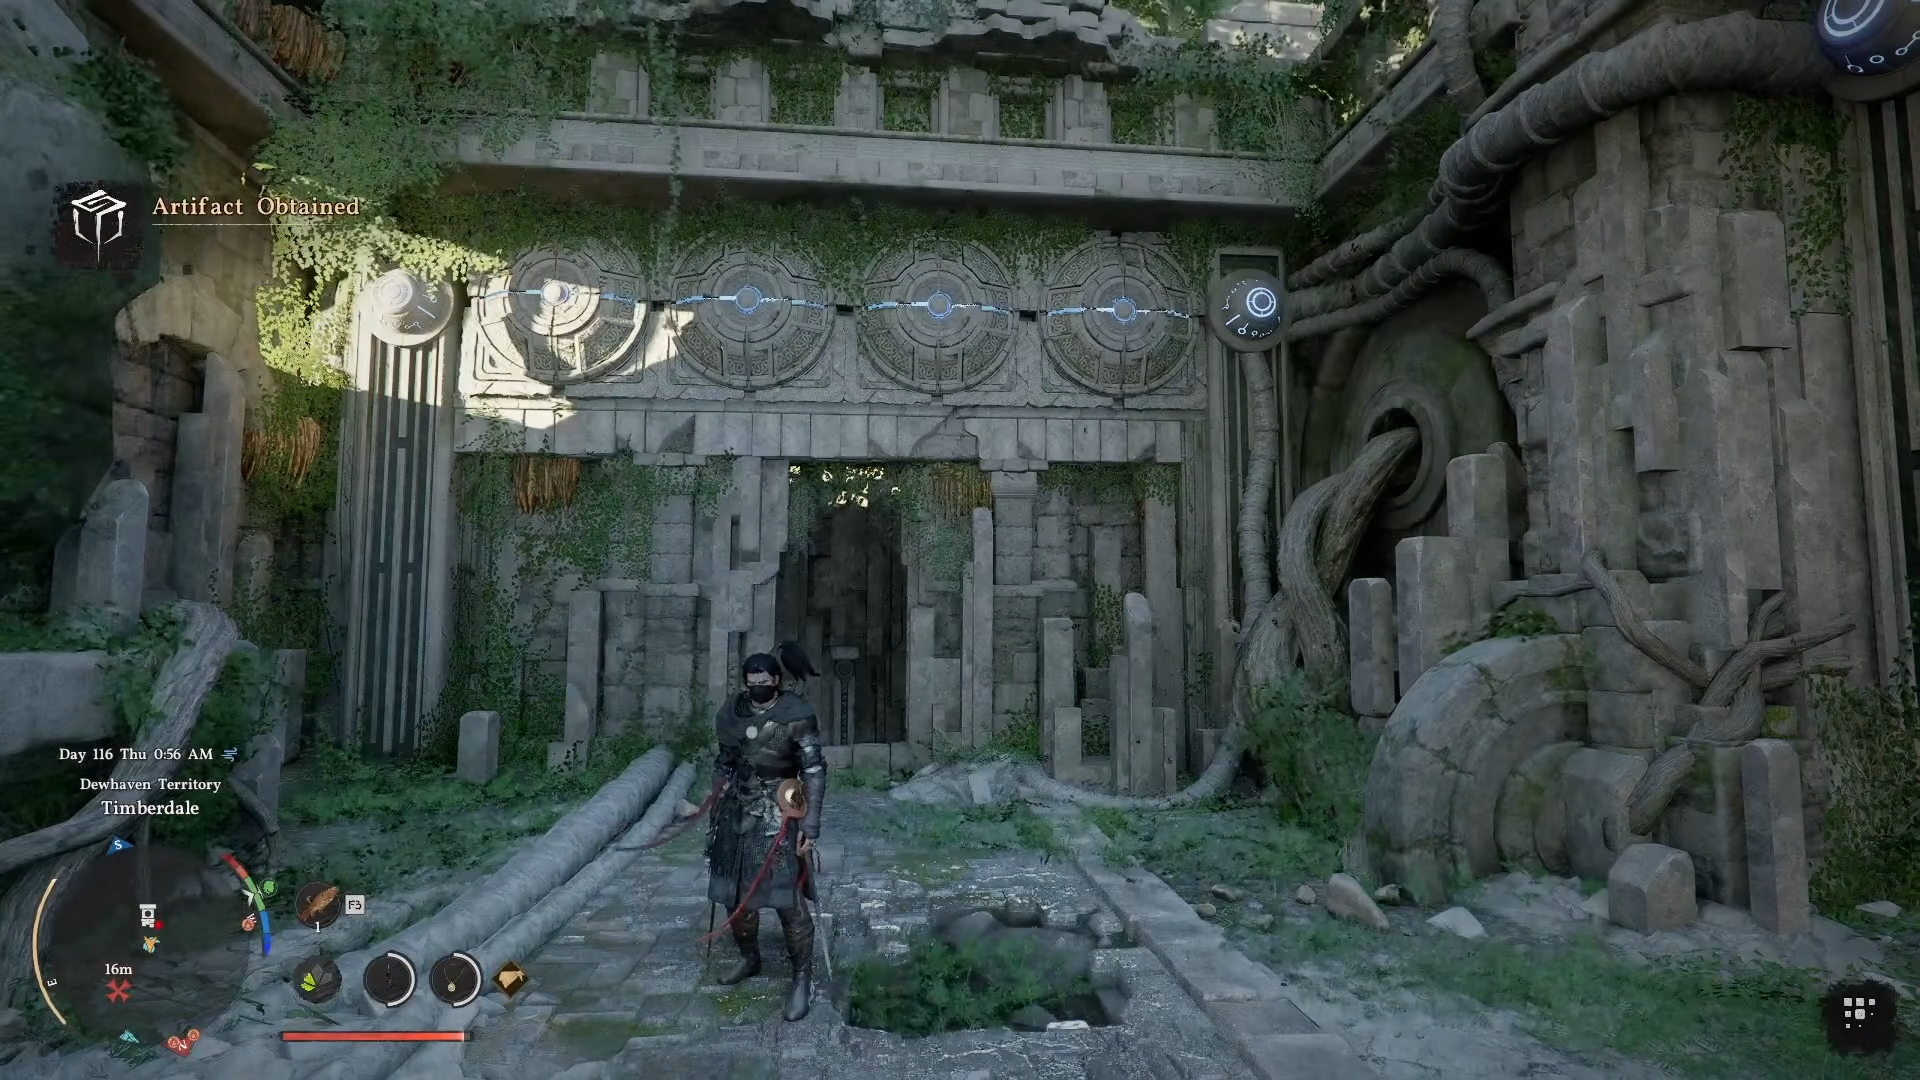
Rewards include an Abyss Artifact for skill upgrades and a permanent fast travel point at the Abyss Cresset.
-
Part of Ancient Ruins challenges testing combat skills like precise aiming and positioning.
Nestled in the lush forests of Timberdale, the Cliff Ruins puzzle challenges players to uncover ancient mechanisms hidden behind thorny barriers. This site demands mastery of light-based and force abilities to reveal and activate energy pathways on stone walls. Completing it unlocks valuable progression items essential for exploring Crimson Desert‘s vast open world.
Timberdale Cliff Ruins Puzzle details
Timberdale location
The Timberdale Cliff Ruins sit prominently in Dewhaven Territory’s forested cliffs, just southwest of the Dewhaven Logging Camp and northwest of central Dewhaven hubs, near related sites like Timberdale Gorge Ruins to the east.
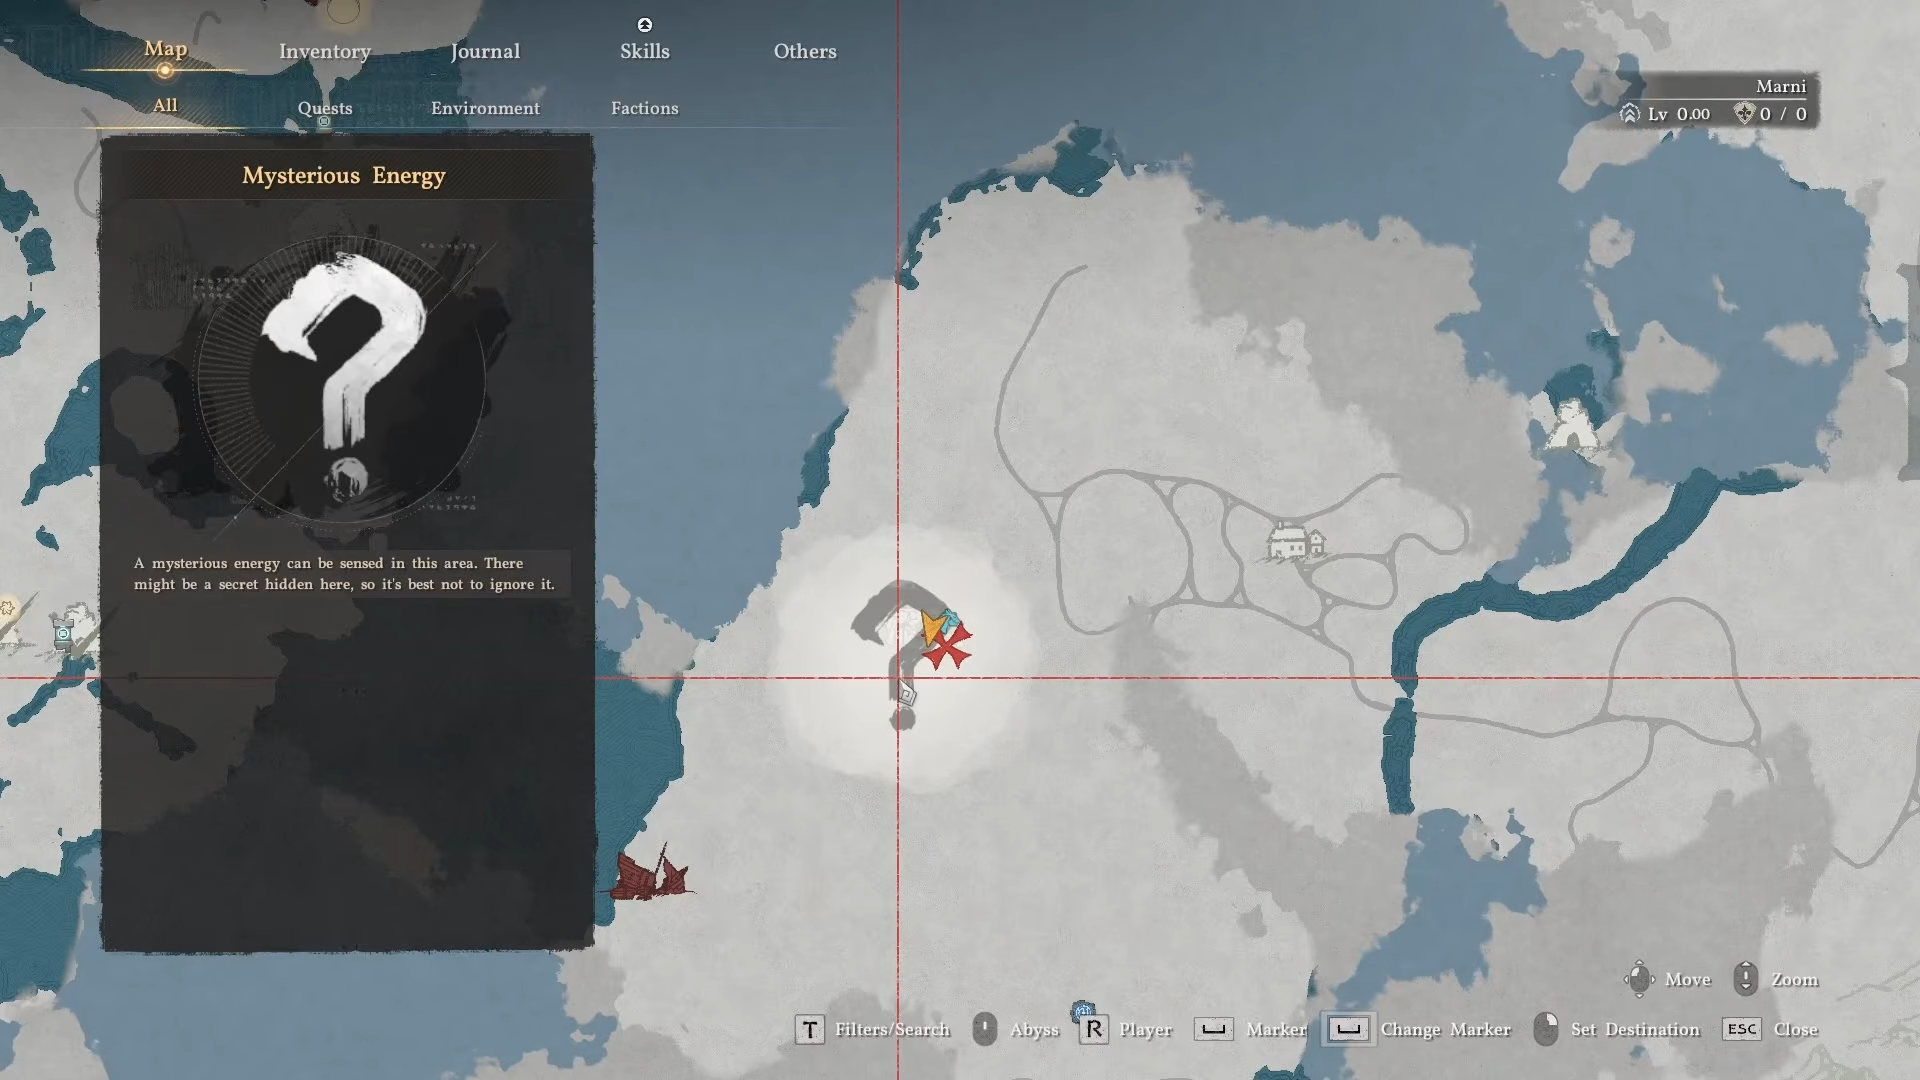
Players often discover it via Mysterious Energy map markers while traversing the dense woodland paths and cliff edges characteristic of this sub-region.
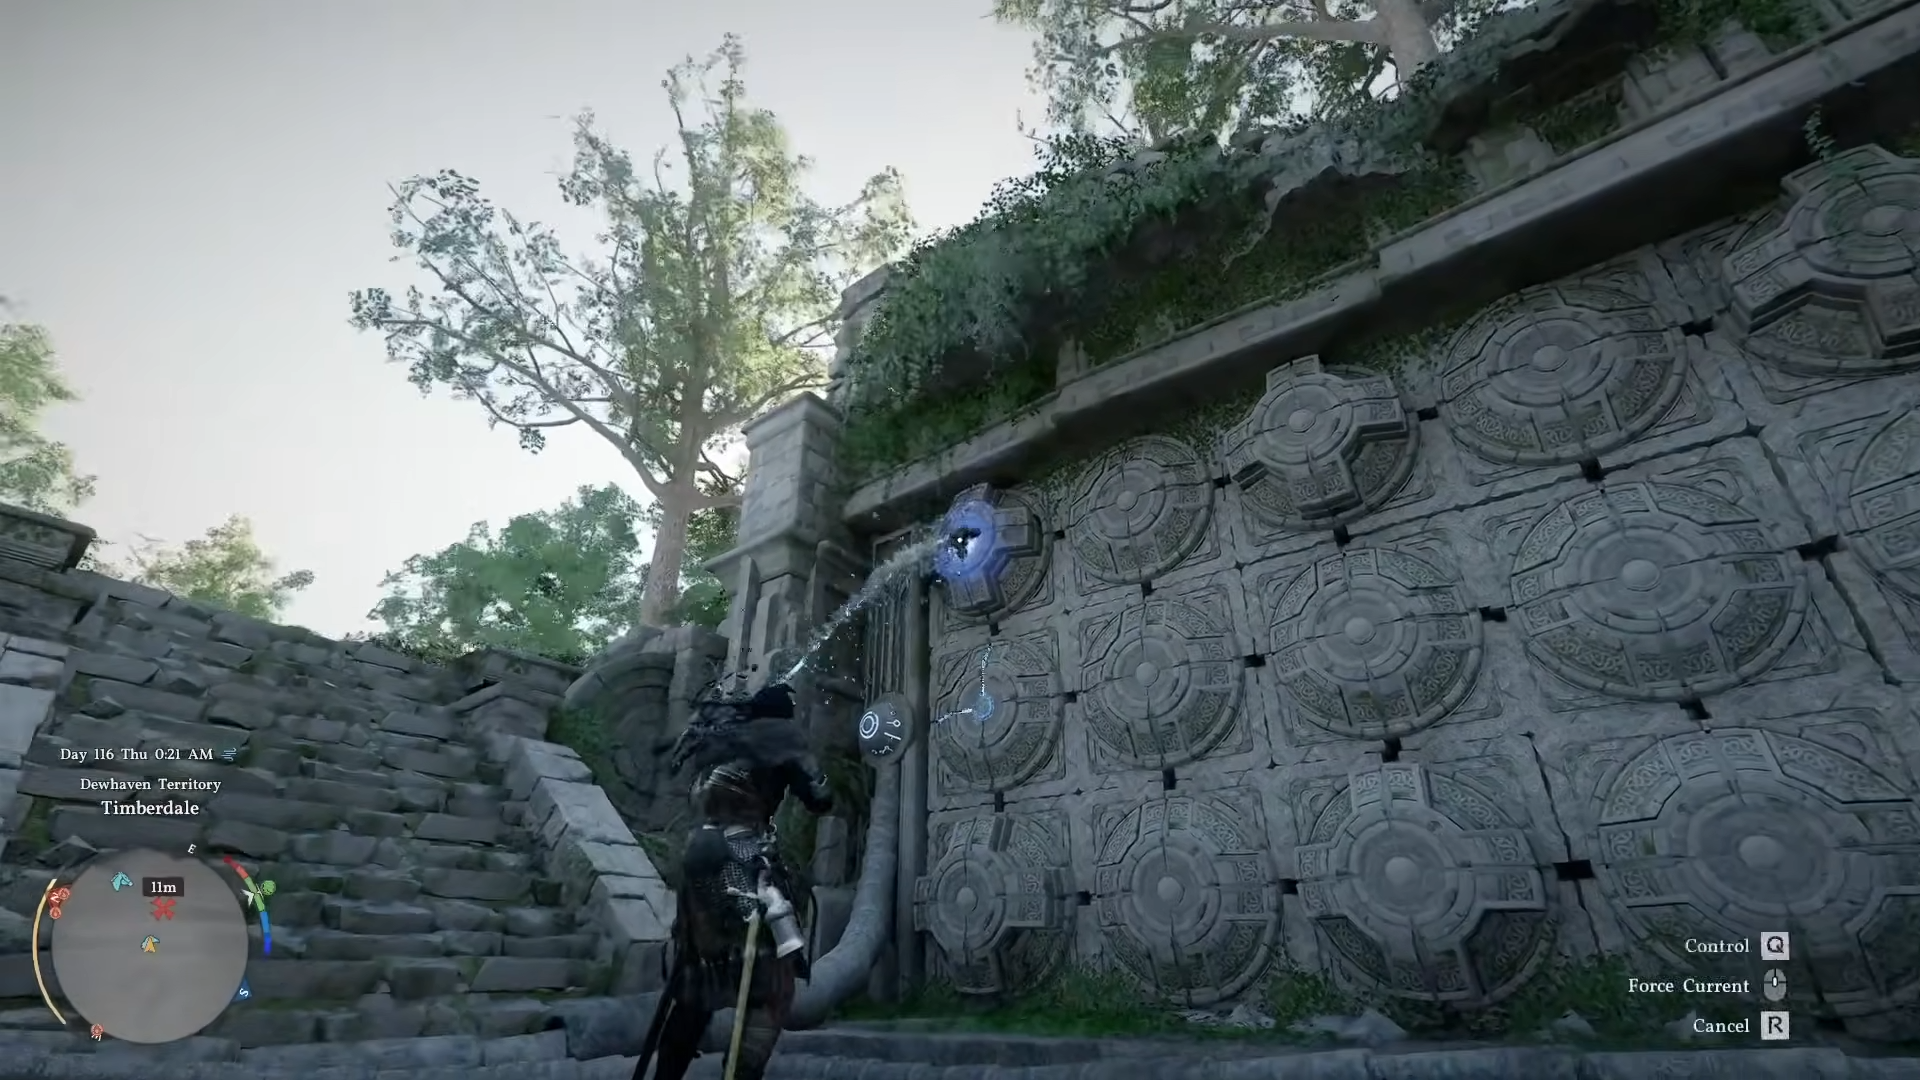
These ruins feature weathered stone walls etched with circular discs that channel glowing energy lines when activated correctly.
How to clear the thorns pit
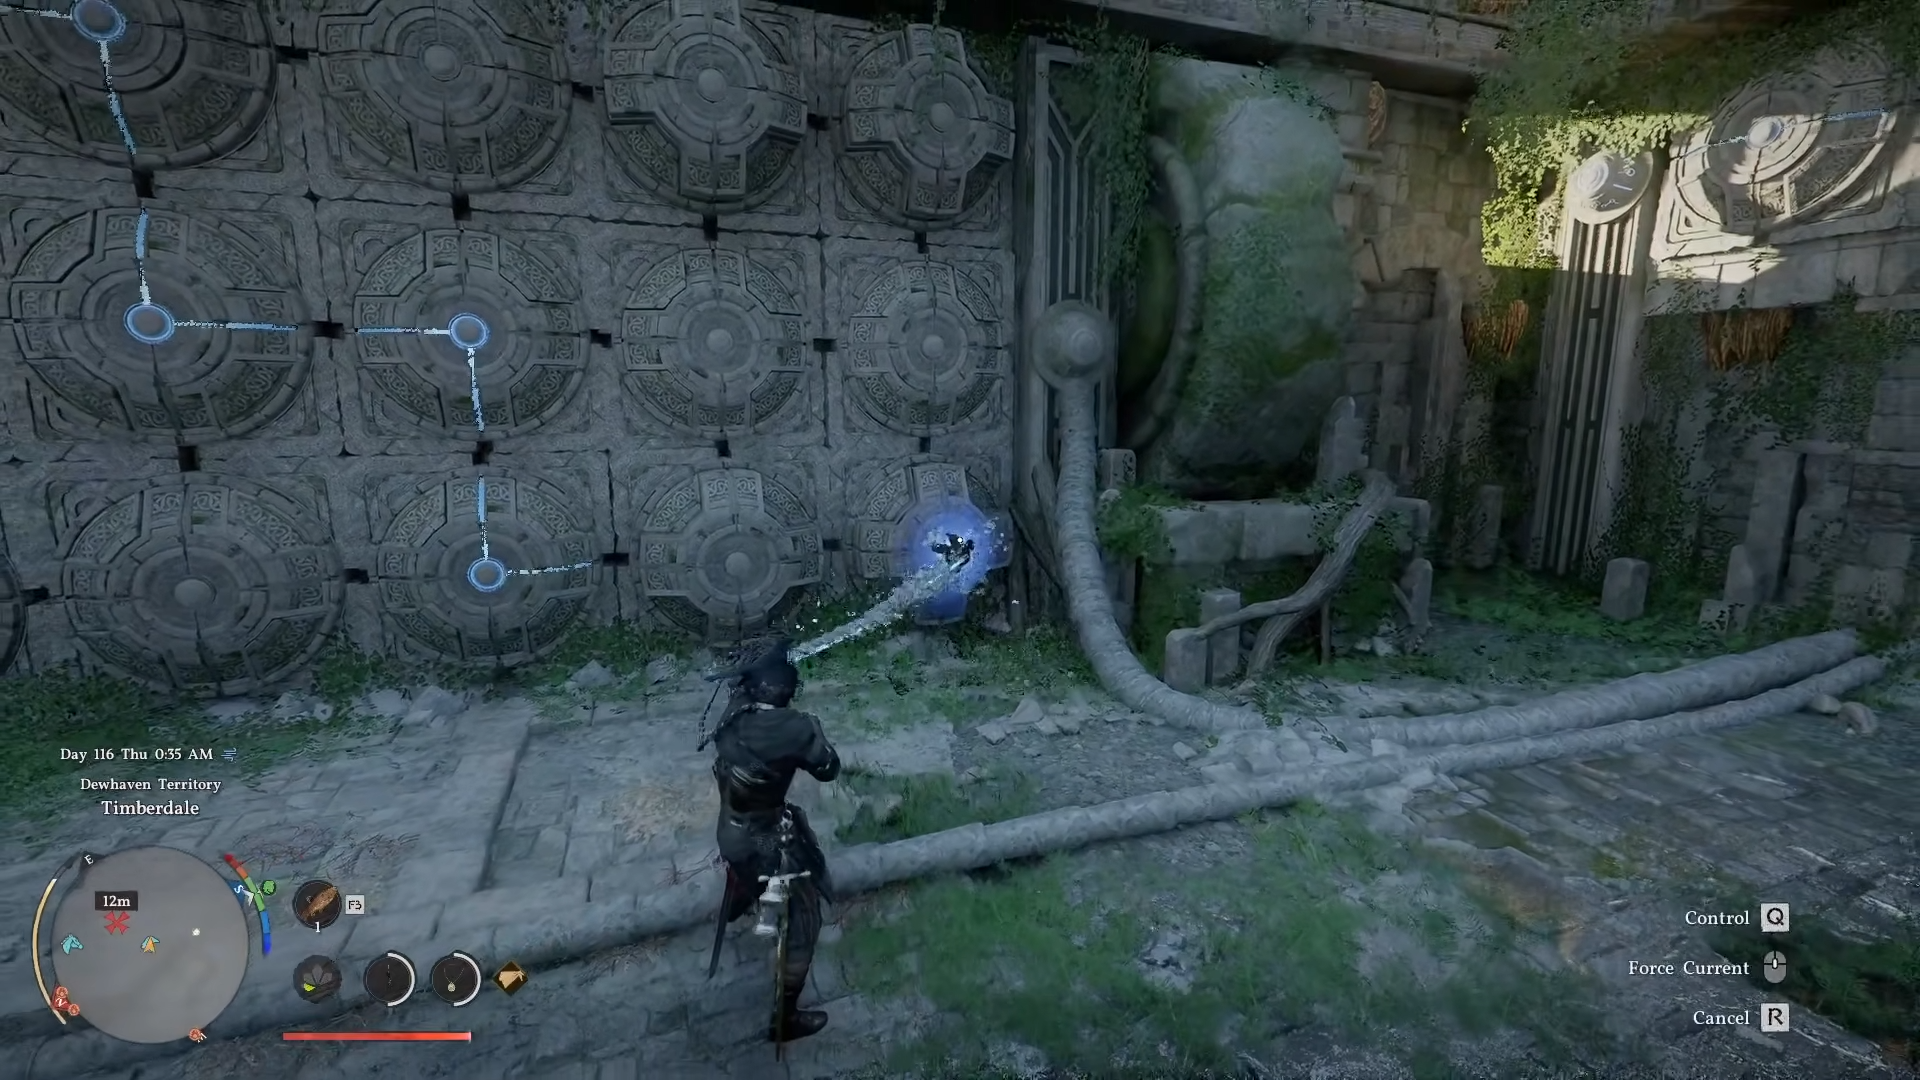
Start by approaching the central area overgrown with thorny vines blocking access to the puzzles. Equip and activate Blinding Flash to burn away the dense brambles, revealing the three puzzle walls arranged in a triangular layout: one north, one east, and one south.
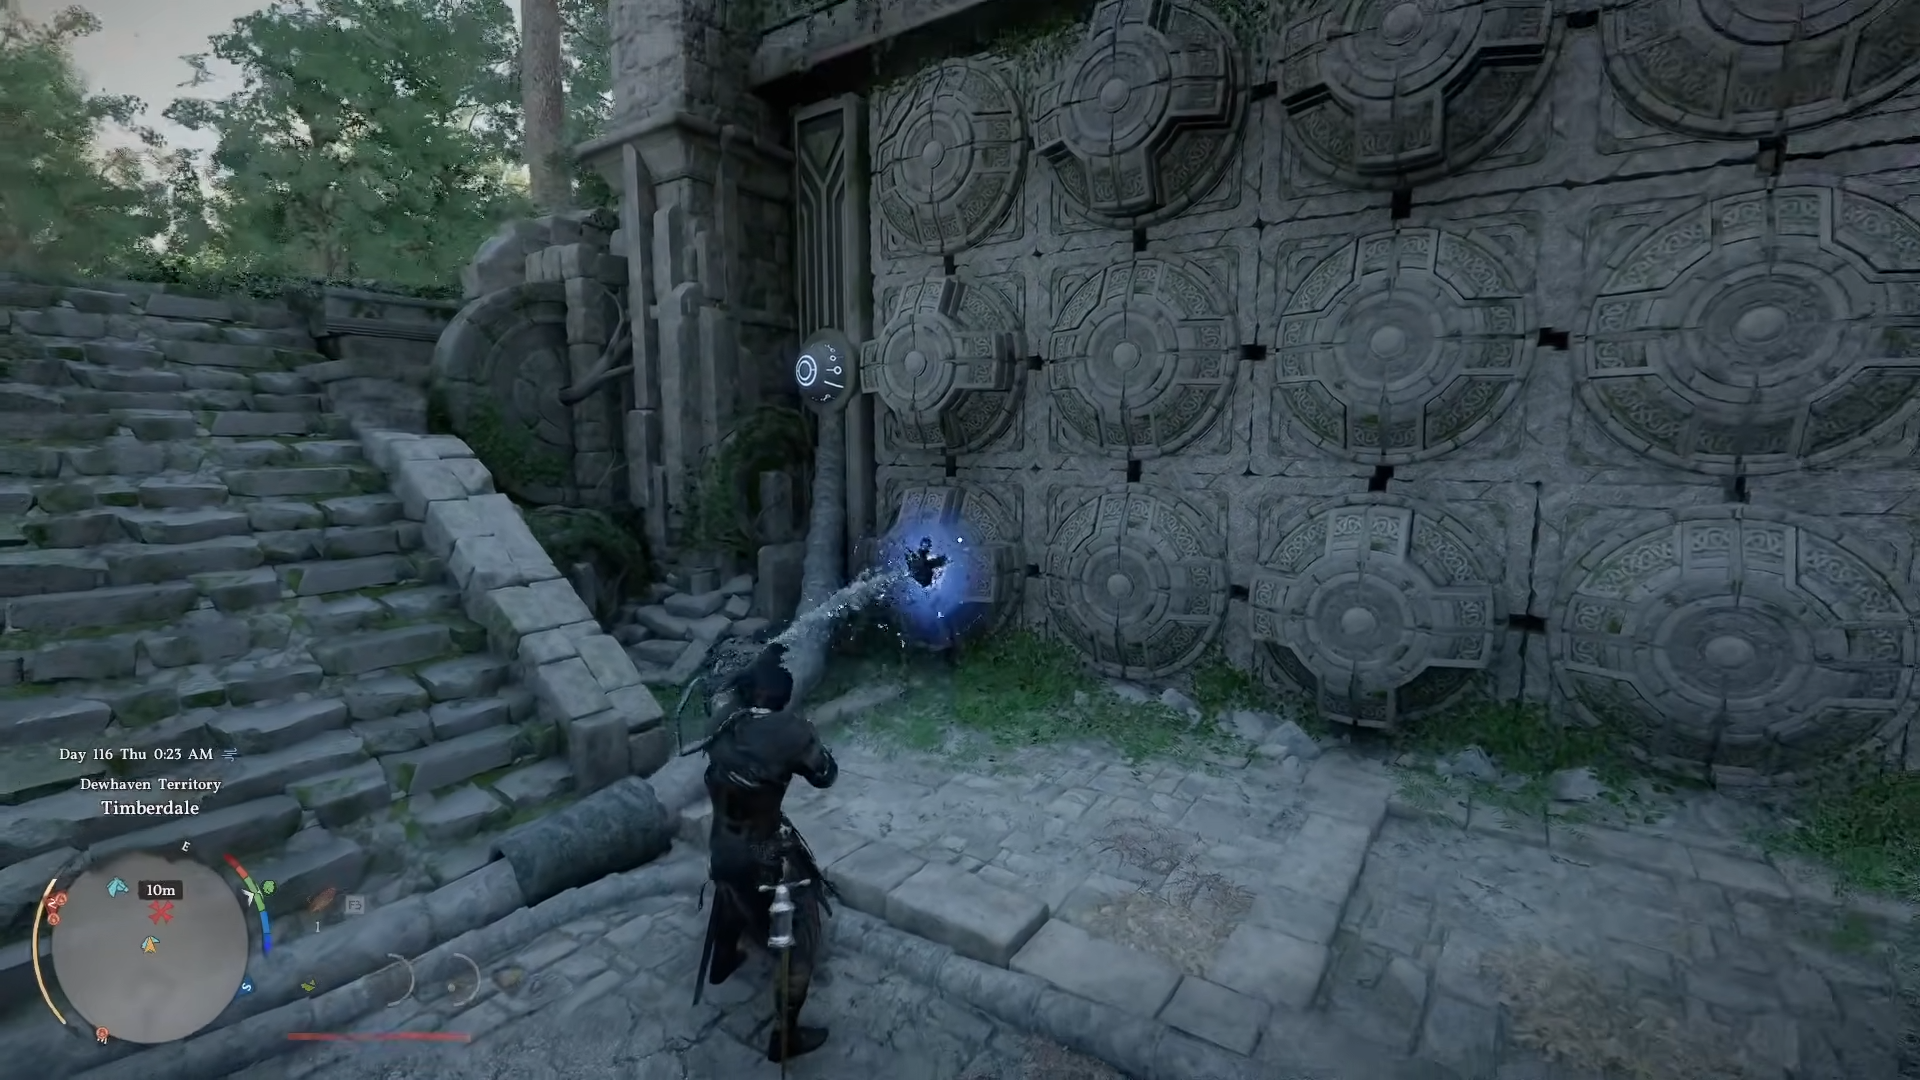
How to solve the north wall puzzle
Position yourself squarely facing the northern wall’s row of discs.
Step 1
Target the third disc from the right and strike it with Force Palm (R3 on controller or mouse wheel on PC).
Step 2
Watch as energy lines connect from one side to the other; a single activation suffices here due to the simple layout.
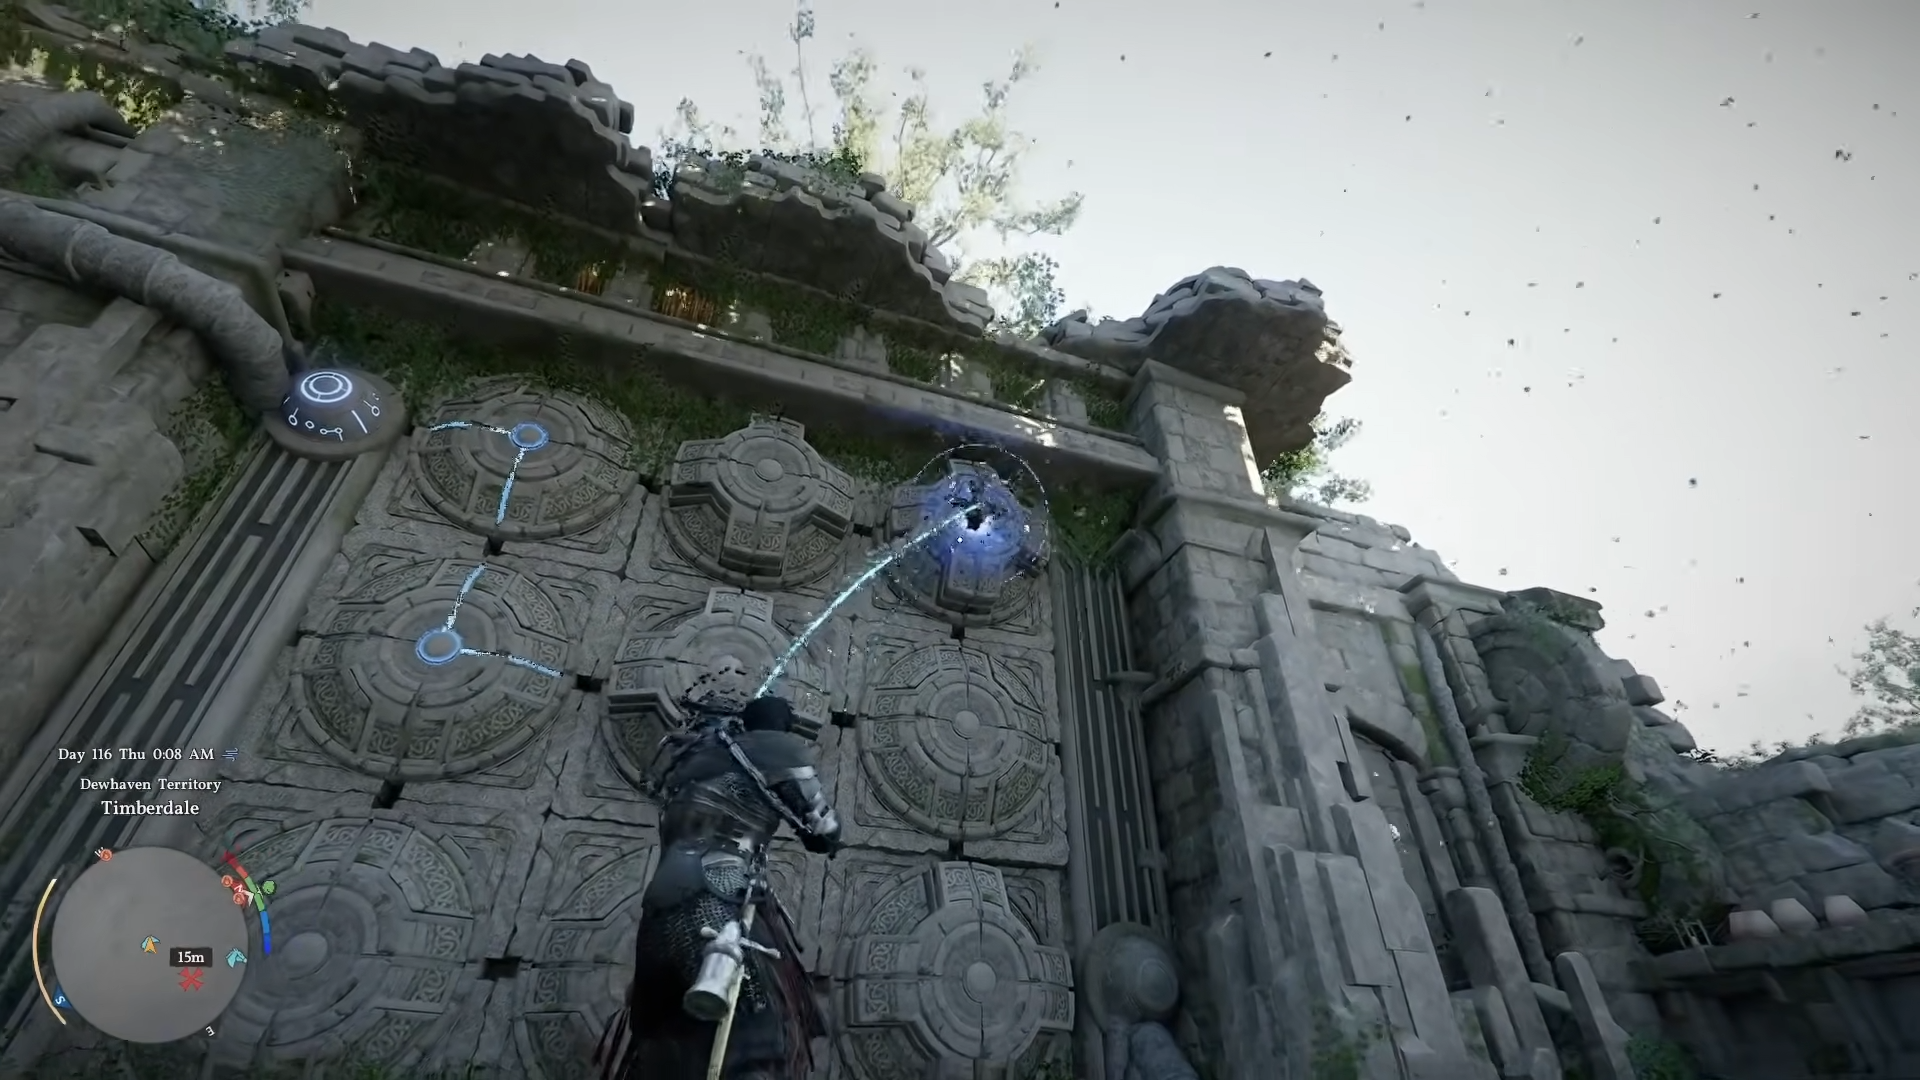
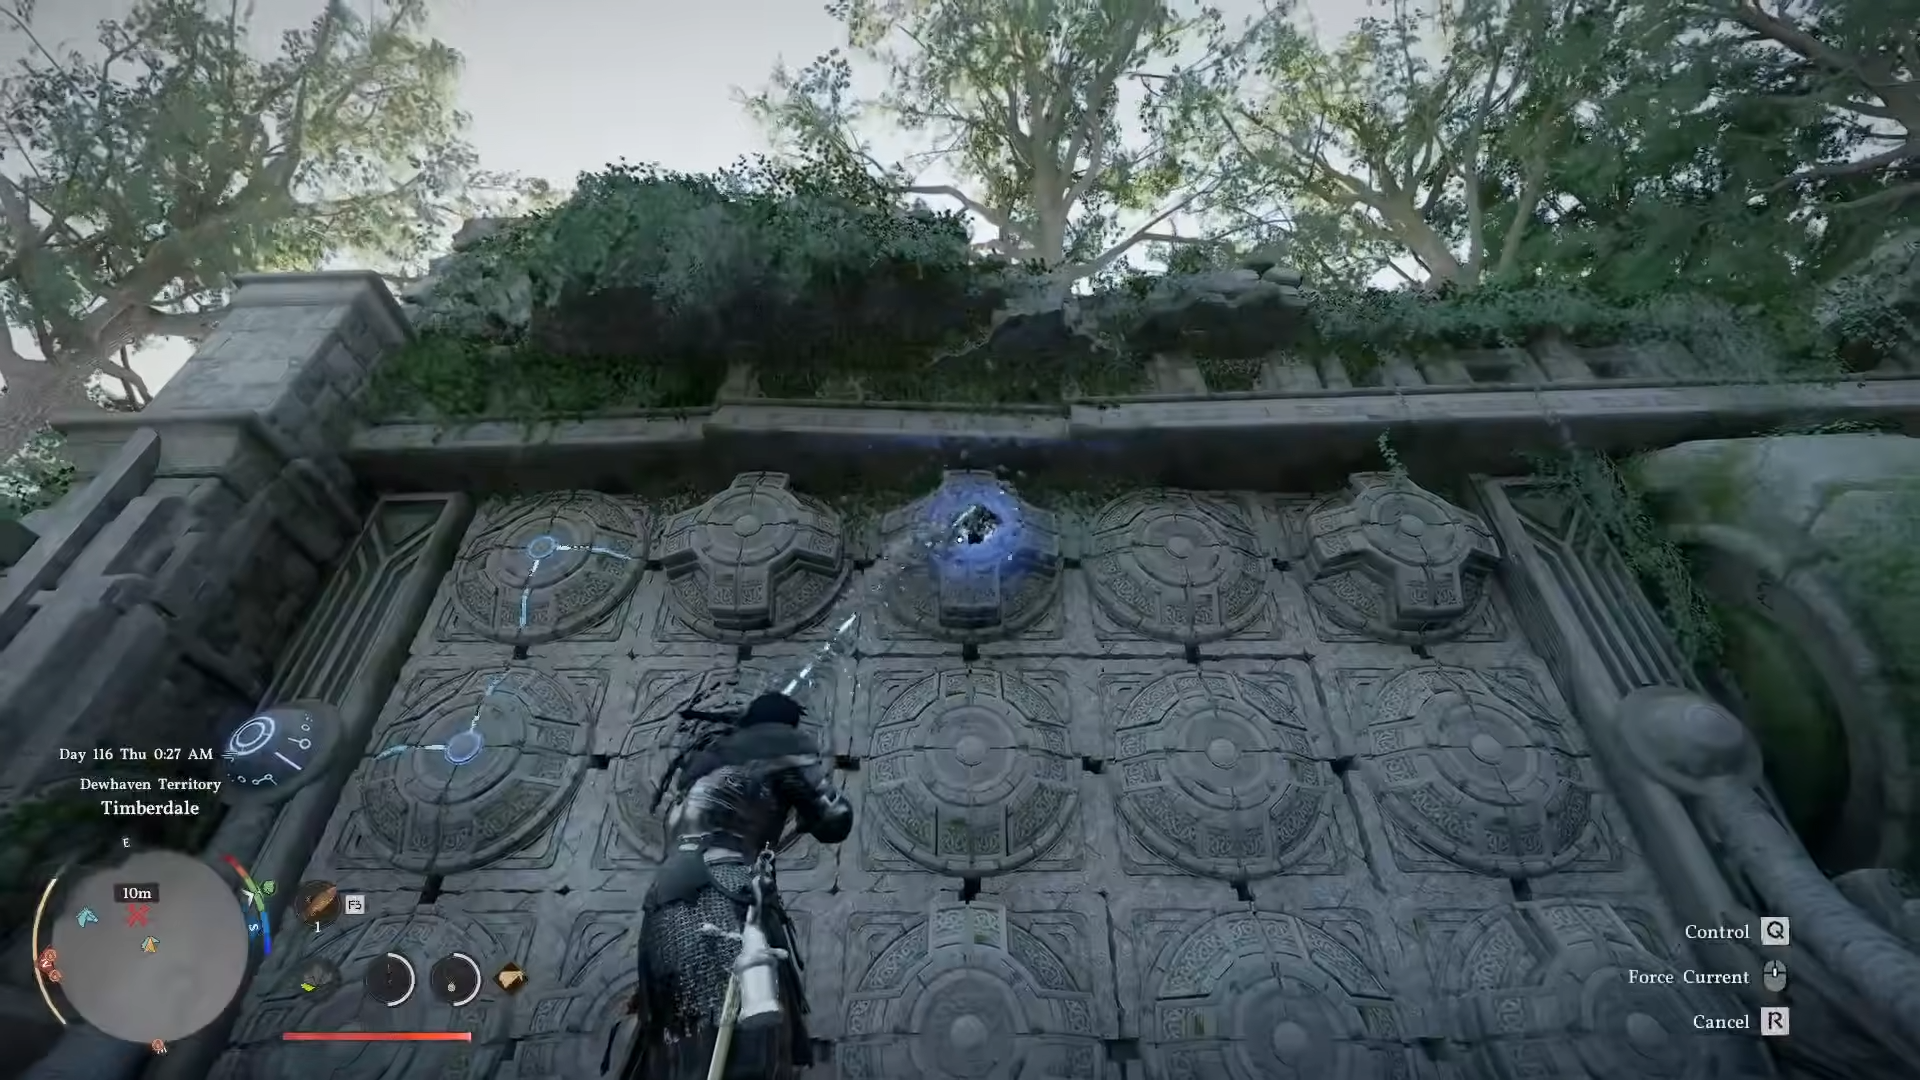
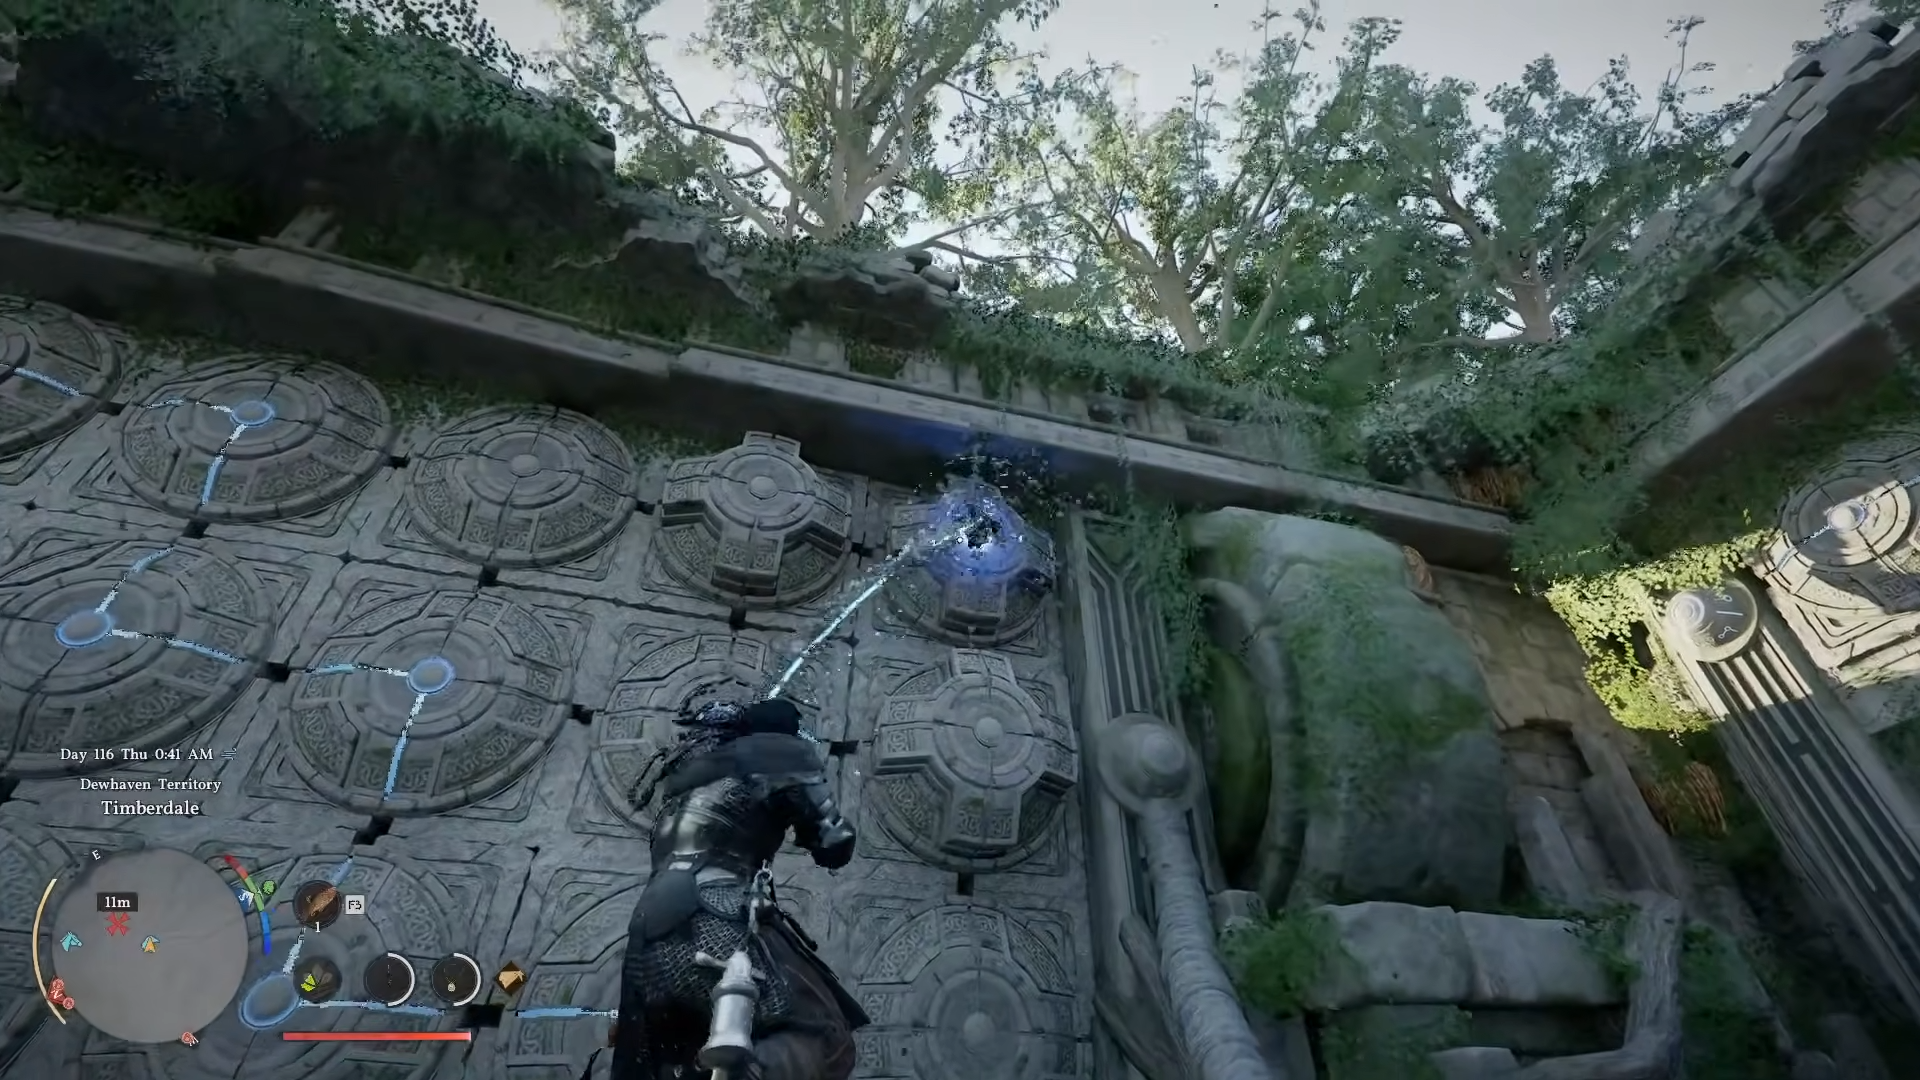
How to solve the east wall puzzle
Move east to the second wall, which has a more complex grid of discs.
Step 1
Punch the bottom center disc first to initiate the energy flow.
Step 2
Strike the top right disc next.
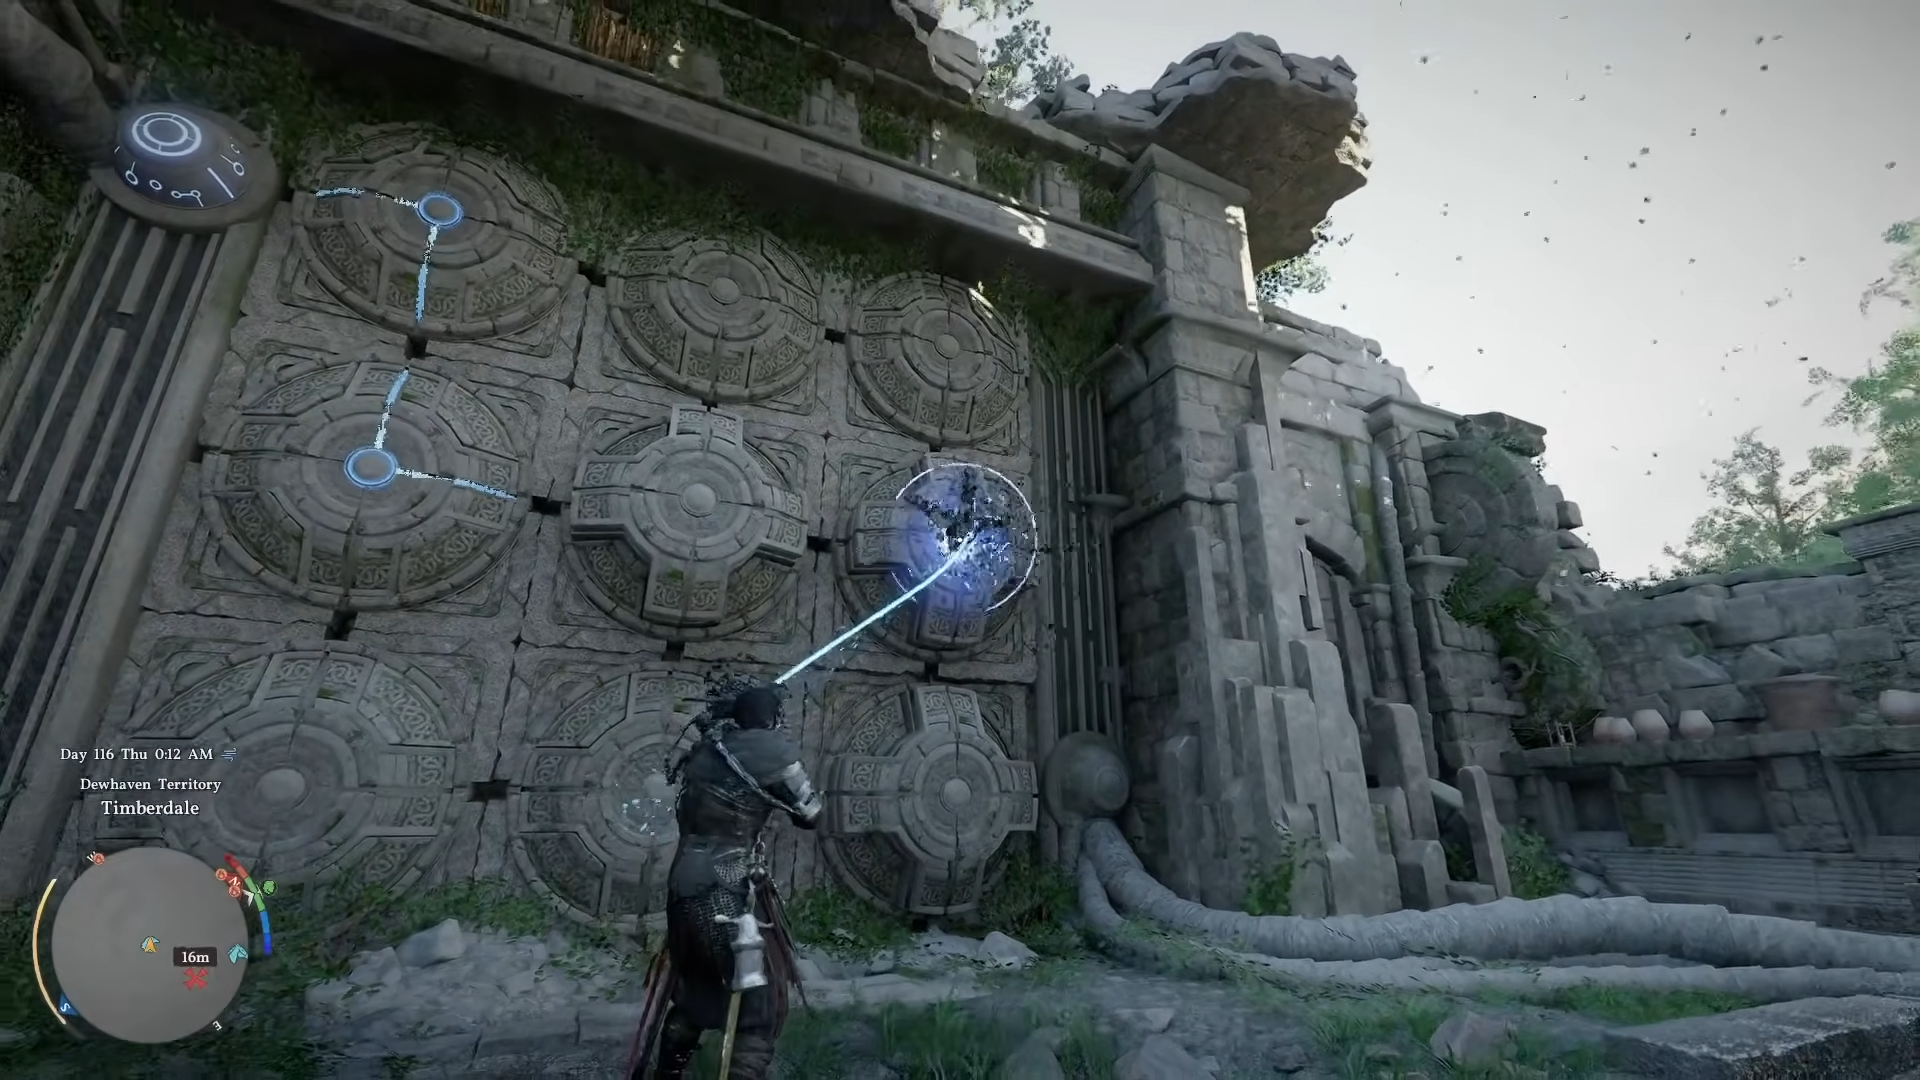
Step 3
Hit the center right disc.
How to solve the south wall puzzle
Head south to the final wall.
Step 1
Begin with the top left disc.
Step 2
Punch the bottom left corner disc.
Step 3
Strike the center top disc.
Step 4
Hit the center bottom disc.
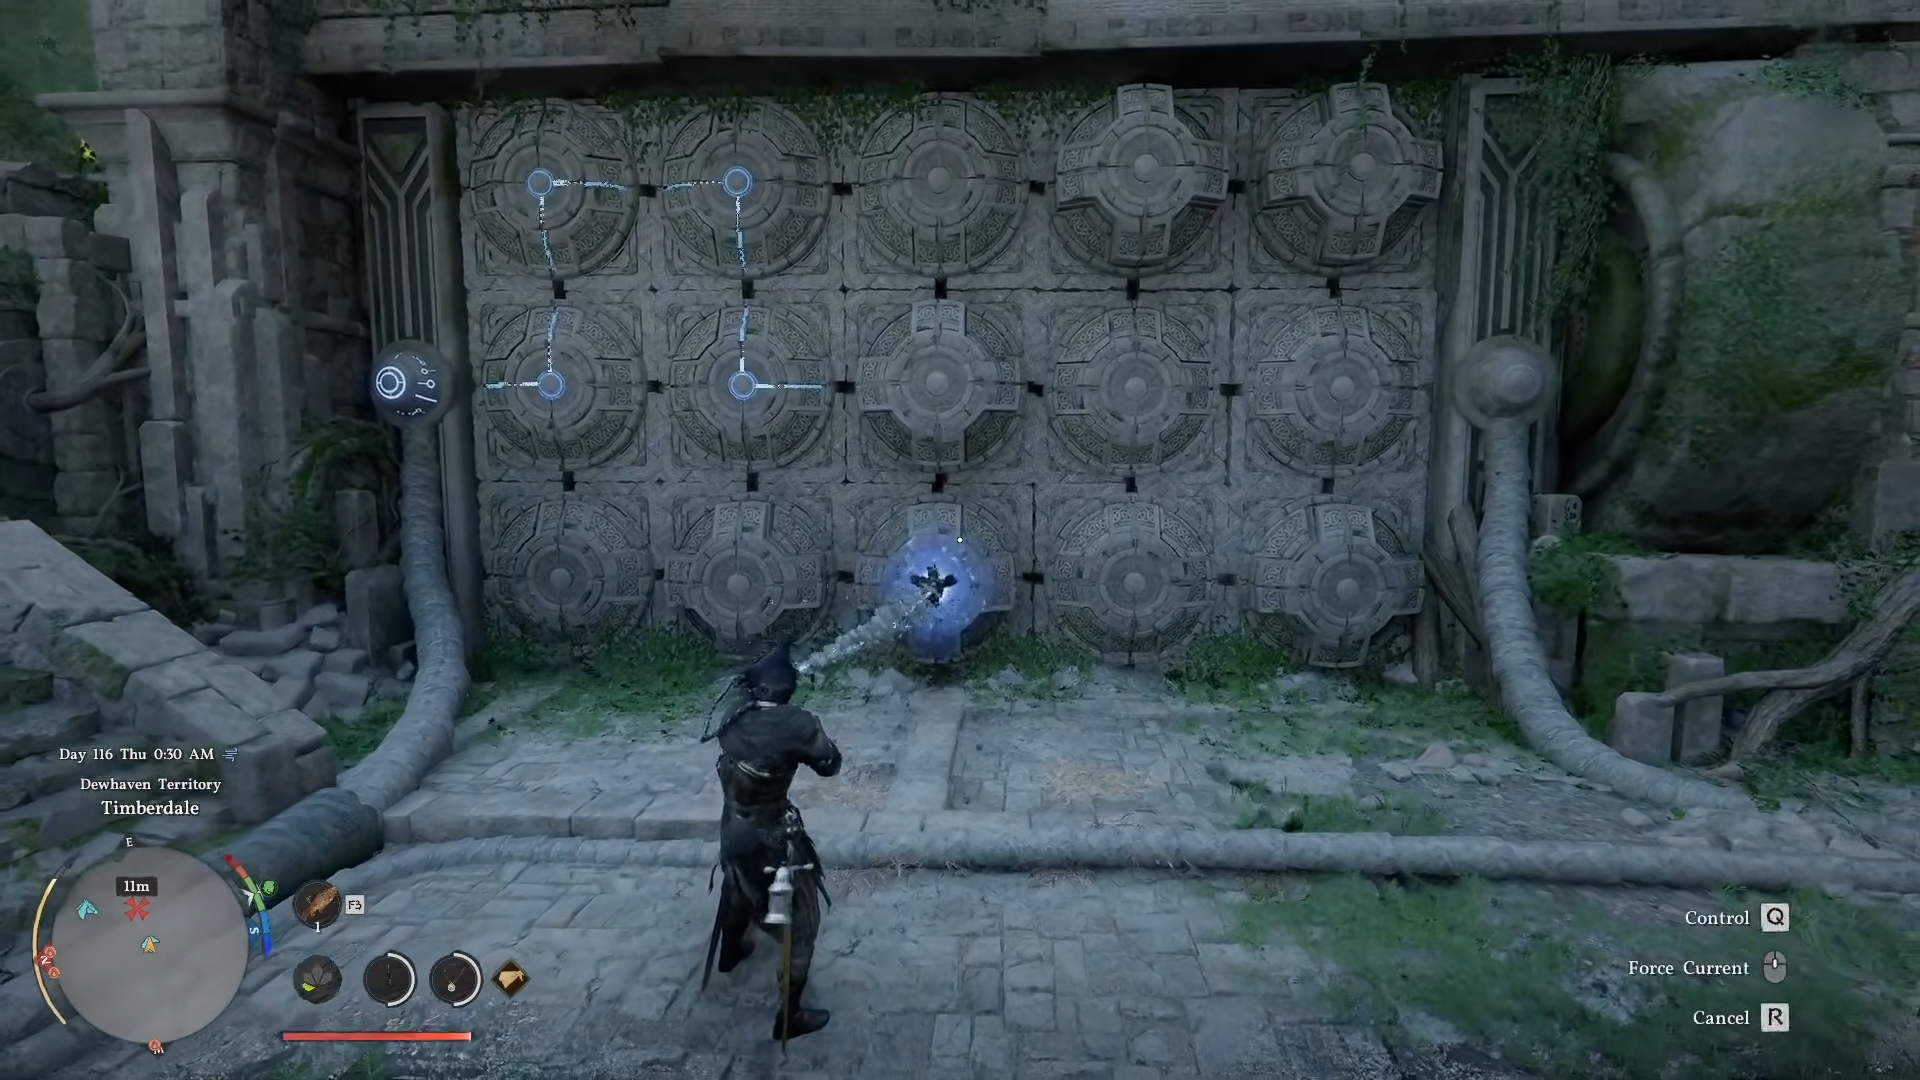
Step 5
Then the bottom right disc.
Step 6
Finally, hit the top right disc.
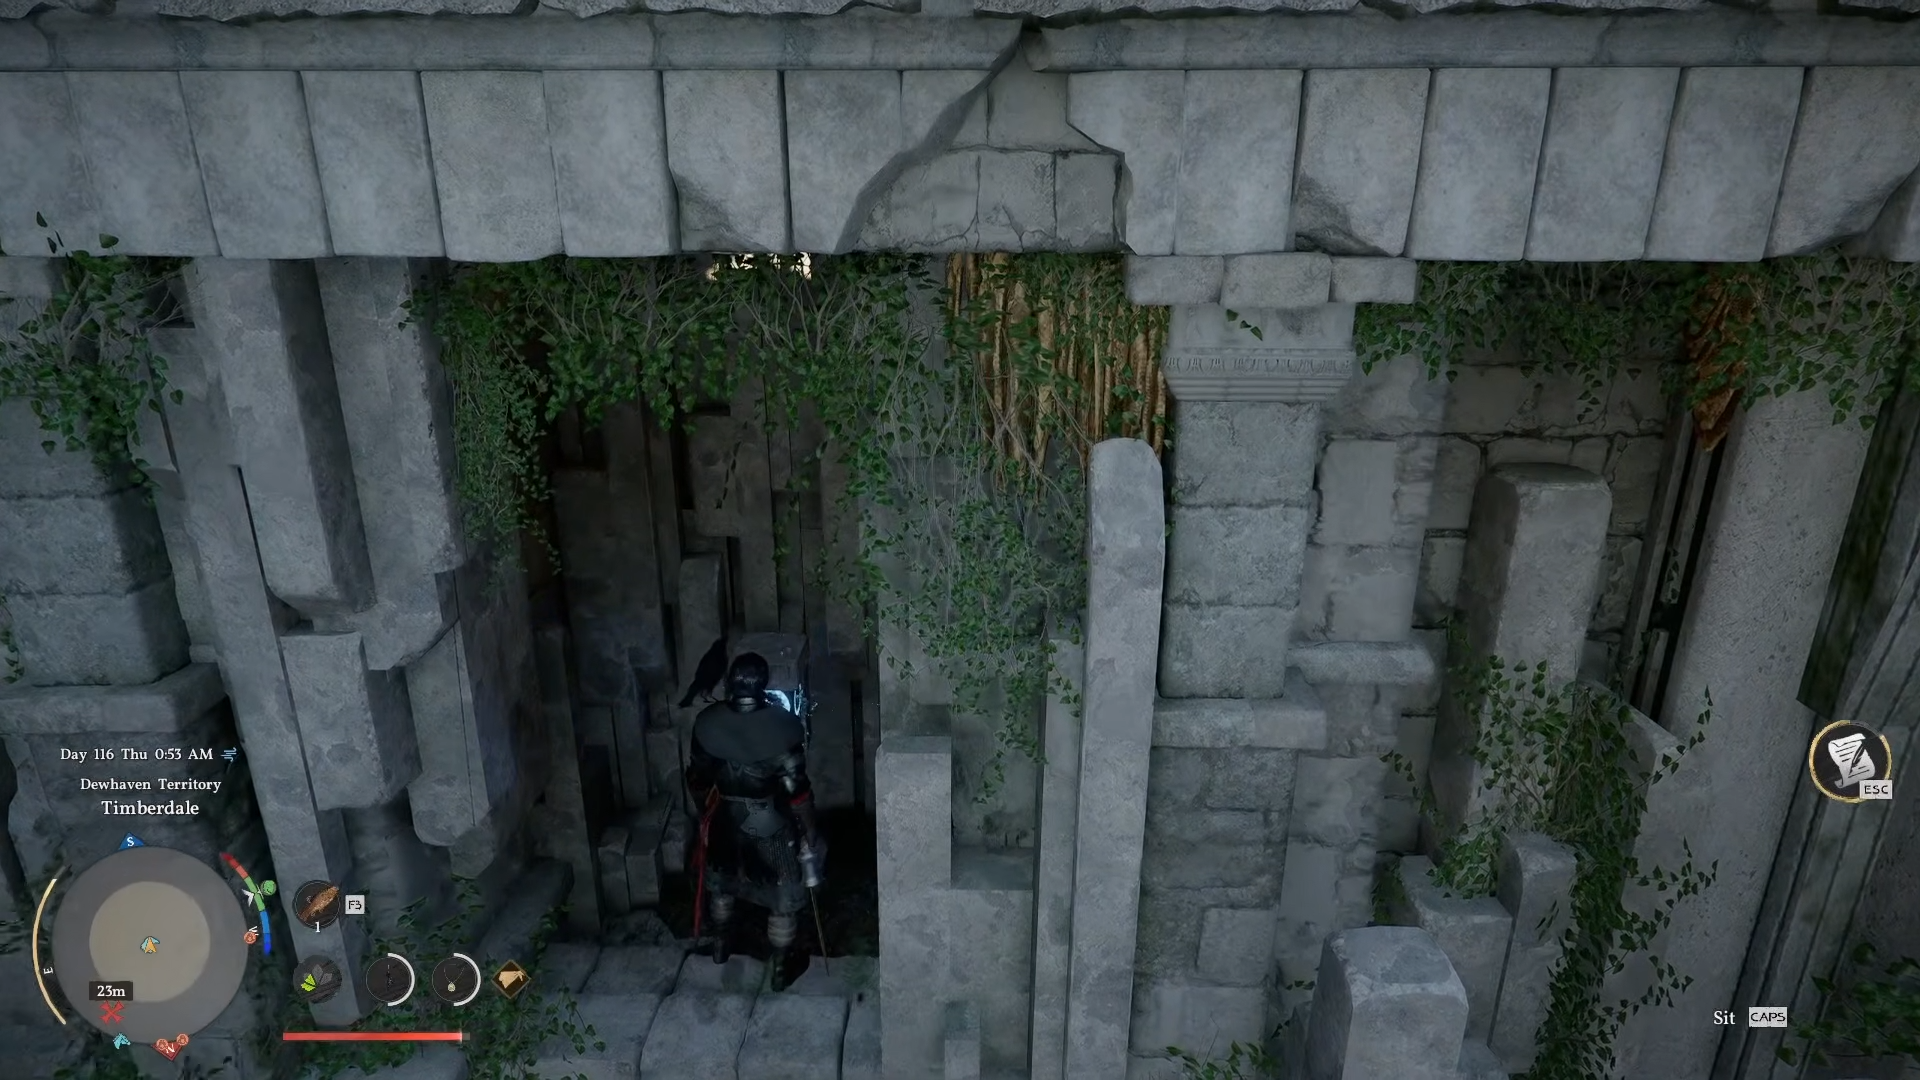
Successful alignment powers the central mechanism.

Rewards from Timberdale Cliff Ruins
Interact with the glowing blue podium after all walls activate to claim these.
Tips for smooth completion
Line up perpendicular to each target disc to avoid mis-hits that reset neighbors. Use Force Current (Axiom Force L3 + R3) for elevated discs if Force Palm falls short. If energy paths fail to link, step back—the puzzle resets on area exit via Nexus fast travel.
Tackle this puzzle early in Dewhaven exploration to secure the fast travel and artifact boost; it sharpens skills for tougher Ancient Ruins ahead.