What to know
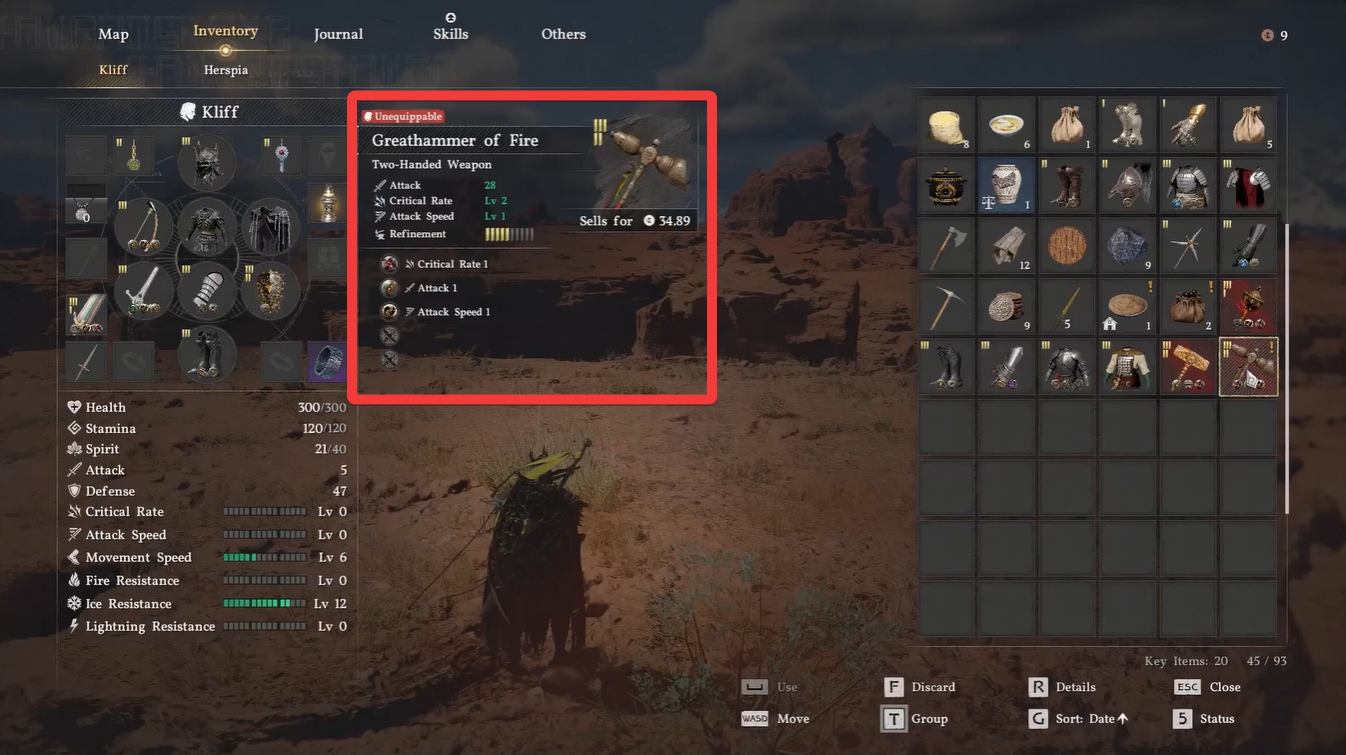
- Greathammer of Fire is a two-handed weapon with high base attack (28).
- It comes with pre-equipped Abyss Gear bonuses boosting combat stats.
- Located in the northern desert region near Trader’s Expanse.
- Requires climbing and gliding to reach the hidden chest.
You will come across many weapons in Crimson Desert, but the Greathammer of Fire stands out due to its strong base stats and built-in enhancements. If you are playing as Oongka or favor heavy weapons, this hammer can significantly improve your damage output early on. Finding it is not straightforward, though—you will need to rely on terrain navigation and visual clues rather than a marked quest.
Crimson Desert Greathammer of Fire details
| Attribute | Details |
|---|---|
| Weapon Type | Two-Handed Hammer |
| Attack | 28 |
| Critical Rate | Level 2 |
| Attack Speed | Level 1 |
| Abyss Gear Slots | 5 total |
| Pre-equipped Effects | Critical Rate +1, Attack +1, Attack Speed +1 |
| Sell Value | 34.89 |
| Region | Northern Crimson Desert |
Crimson Desert Greathammer of Fire location
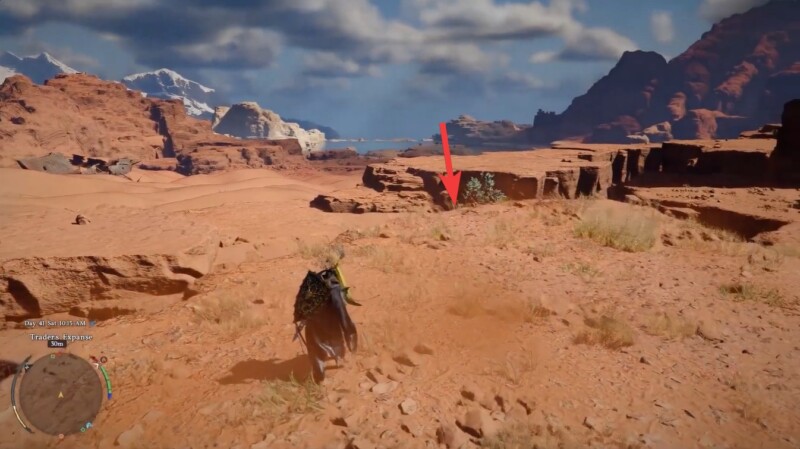
The weapon is located in the northern section of the Crimson Desert, specifically just south of the “Trader’s Expanse” map label. You will need to align your map carefully rather than relying on markers.
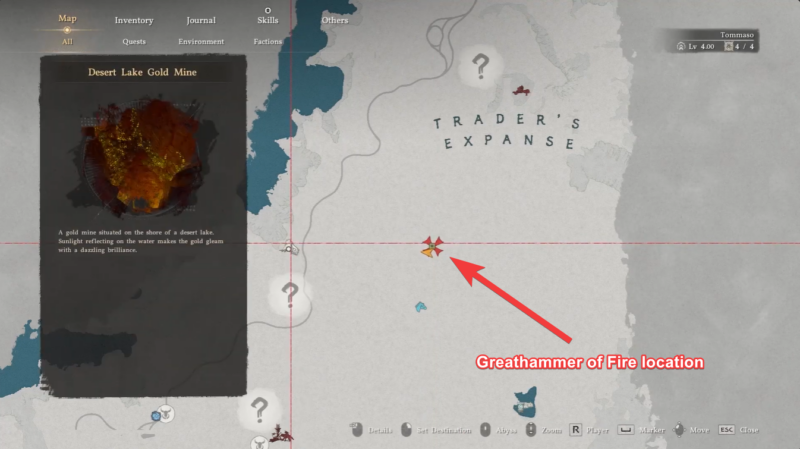
The ideal positioning method is to align horizontally with the Desert Lake Gold Mine and vertically with the letter “T” in Trader Expanse. This creates a precise reference point that leads you directly to the correct rock formation.
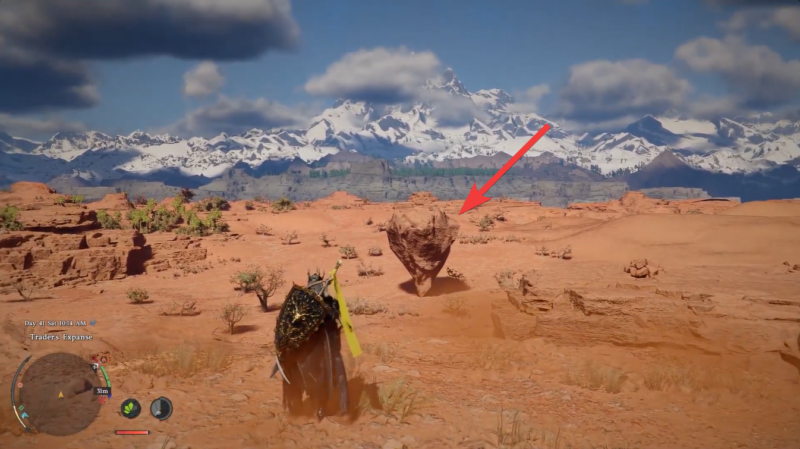
Once you reach the area, you should start climbing upward across rocky terrain. The location is elevated, so expect some traversal effort. The most important visual clue is a cone-shaped rock formation, which acts as your final landmark. Right beside it, you will notice a plateau—this is where your positioning matters most.
How to get the Greathammer of Fire in Crimson Desert
Step 1
Head toward the northern desert region and align your map using the Trader’s Expanse label and Desert Lake Gold Mine. This ensures you are in the correct zone. Begin climbing the surrounding rock formations, moving upward steadily until the terrain becomes more narrow and elevated.
Step 2
Look carefully for a cone-shaped rock formation. This is the key visual marker that confirms you are in the correct spot.
Step 3
Move toward the right side of the plateau next to the cone-shaped rock. Position yourself near the edge carefully.
Step 4
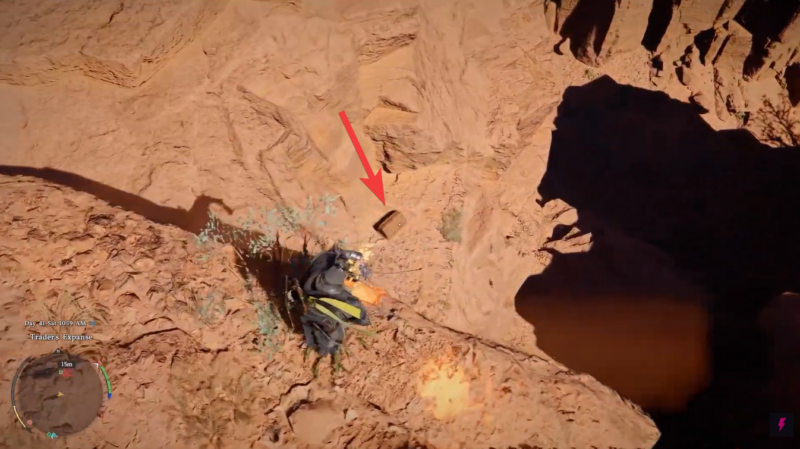
From this edge, look downward to spot a hidden chest below. It is not immediately visible unless you angle your camera properly.
Step 5
Glide down safely toward the chest. Make sure your descent is controlled to avoid missing the landing area.

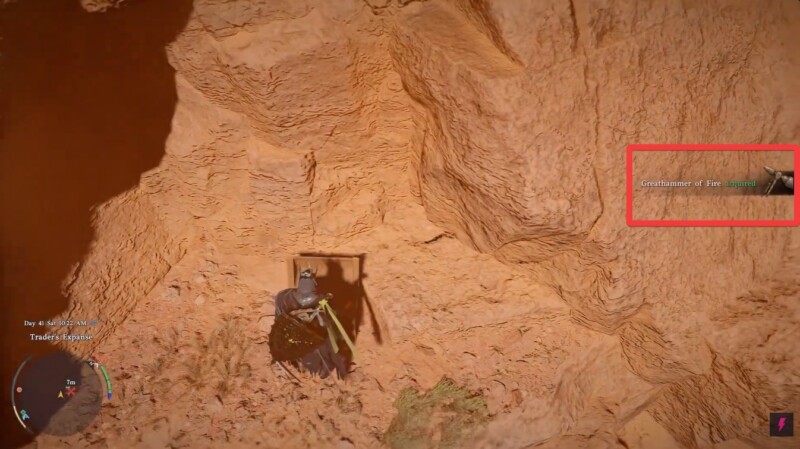
Step 6
Open the chest to obtain the Greathammer of Fire, instantly adding it to your inventory.
Why this weapon is worth getting early
The Greathammer of Fire is more than just a high-damage weapon—it is a stat-efficient pickup. With five Abyss Gear slots and three already filled, you effectively skip part of the upgrade grind. This makes it particularly valuable if you are still building your loadout.
You will notice that its Level 2 critical rate provides a noticeable increase in burst damage, while the added attack speed bonus offsets the naturally slow nature of heavy weapons. This balance makes it surprisingly versatile for a two-handed hammer.
Additionally, the weapon scales well into mid-game, meaning you will not need to replace it immediately after acquiring it. If you invest further into Abyss Gear enhancements, it can remain viable for longer than most early pickups.
Practical combat usage and playstyle tips
When using the Greathammer of Fire, you should focus on timing your strikes rather than spamming attacks. The weapon rewards patience and positioning. Because of its moderate attack speed boost, you can chain attacks slightly faster than typical heavy weapons, allowing for more aggressive play if needed.
You will also benefit from targeting groups of enemies, as wide hammer swings can hit multiple opponents at once. Combined with its critical rate bonus, this makes it effective for clearing clustered enemies quickly.
However, you should remain cautious in fast-paced fights. Dodging and spacing are still essential, as the weapon cannot match the agility of lighter alternatives.