- What to know
- Crimson Desert Crossroads of Uncertainty Abyss location
- How to complete the Crossroads of Uncertainty Abyss puzzle in Crimson Desert
- Rewards you earn after completing the puzzle
- Why this puzzle is harder than it looks
- Tips to make the traversal smoother
- Final thoughts on mastering this Abyss challenge
What to know
- This puzzle is located northeast of the Path of Providence in the Abyss region.
- You must chain together launches, hoops, and platforms using momentum mechanics.
- Abilities like Force Push/Pull and glide control are essential.
- Final activation restores the Abyss and rewards you with an artifact.
The Crossroads of Uncertainty puzzle in Crimson Desert is one of the most skill-based traversal challenges you’ll encounter in the Abyss. Unlike traditional puzzles, this one focuses heavily on movement, timing, and maintaining aerial momentum. If you lose flow even once, you may have to restart key sections, so understanding each phase is crucial.
Below is a clear breakdown to help you complete it smoothly.
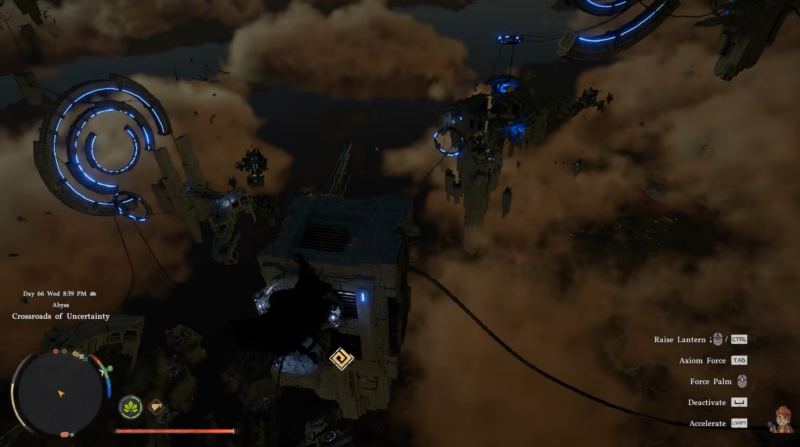
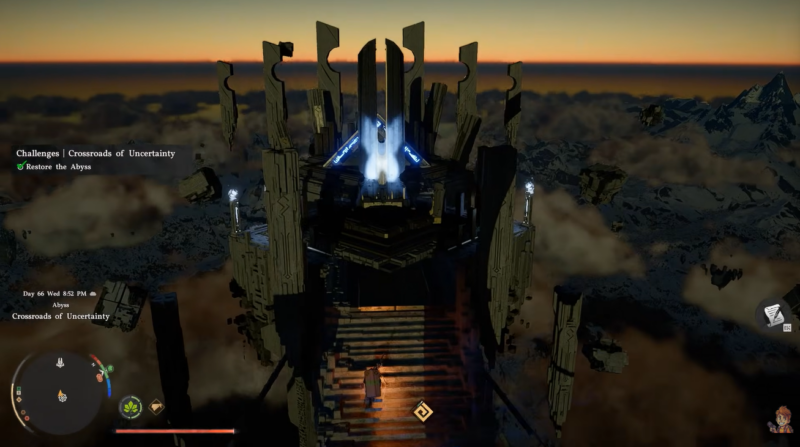
Crimson Desert Crossroads of Uncertainty Abyss location
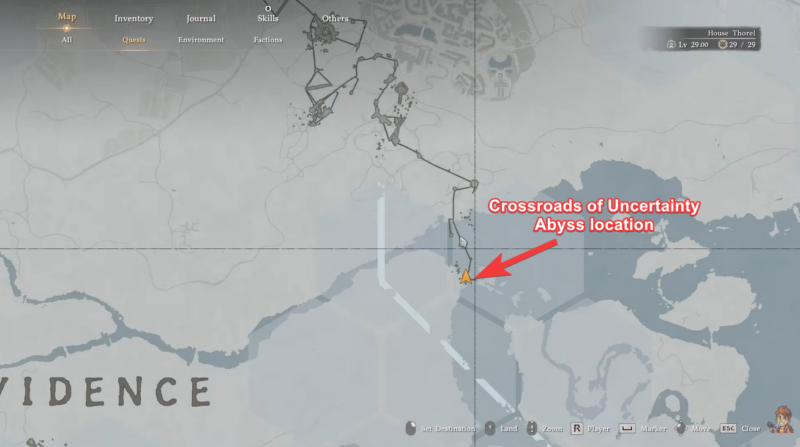
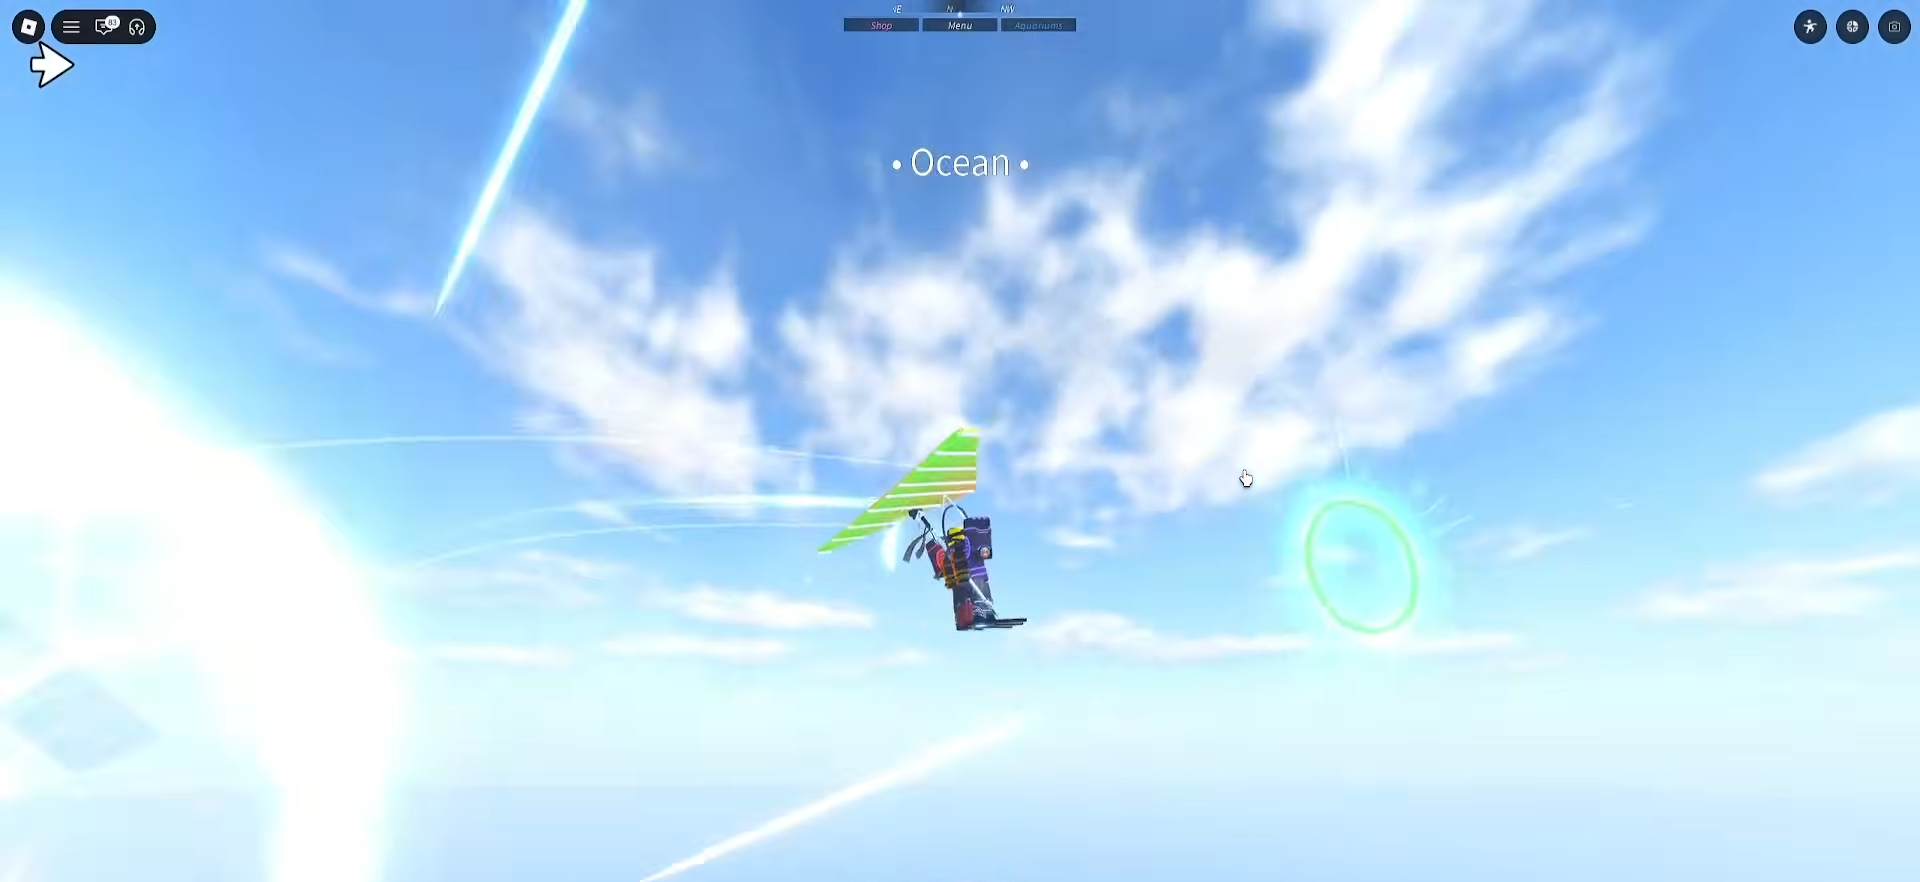
This challenge is set in the Abyss, northeast of the Path of Providence, a region known for its floating platforms and surreal vertical design. You’ll notice wind currents, hovering structures, and glowing rings that indicate your intended path. The area is designed to test your ability to read environmental cues while reacting quickly.
| Element | Purpose |
|---|---|
| Hoops | Act as checkpoints to guide your flight path |
| Launch Pedestals | Provide forward momentum and height |
| Circular Cores | Anchor points for stabilization using pull ability |
| Platforms | Reset points to regain control |
| Ring Clusters | Advanced traversal sequences |
| Nexus Core | Final activation point |
You’ll essentially be chaining movement mechanics together while staying airborne for extended periods.
How to complete the Crossroads of Uncertainty Abyss puzzle in Crimson Desert
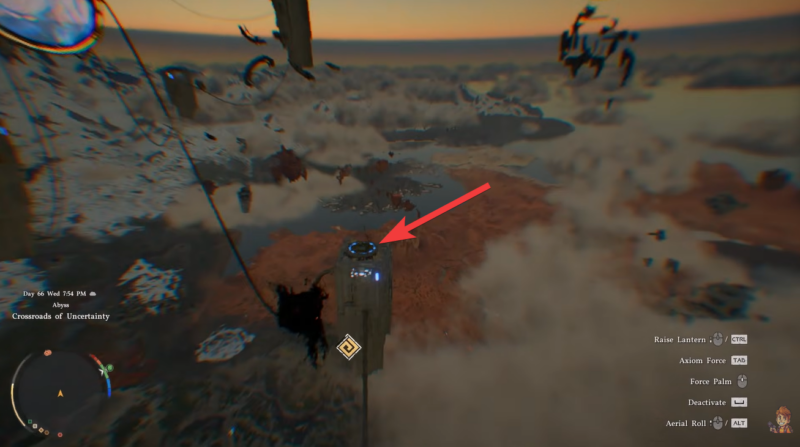
Step 1
Use your force ability to activate the initial hoops, which sets the entire sequence in motion.

Step 2
Move to the launch pedestal and jump into the air, transitioning immediately into a glide.
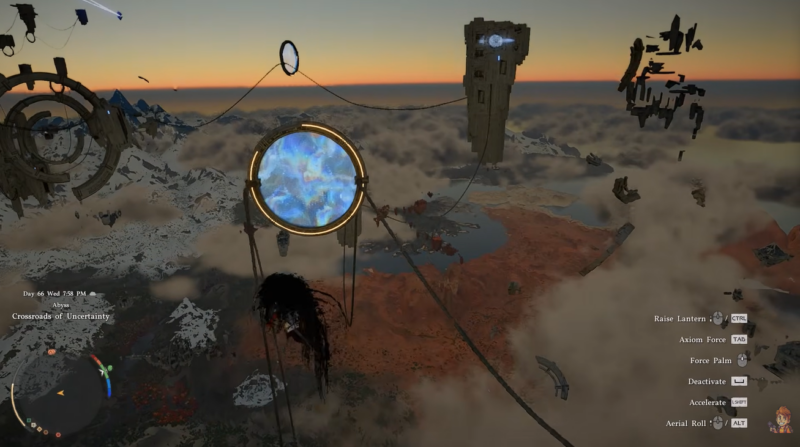
Step 3
Pass cleanly through the first set of activated hoops, maintaining a straight trajectory.
Step 4
Chain into the next launch pedestal to keep your momentum going, as losing speed here will break your flow.
Step 5
After exiting the second hoop, aim for the 1st platform and land carefully.
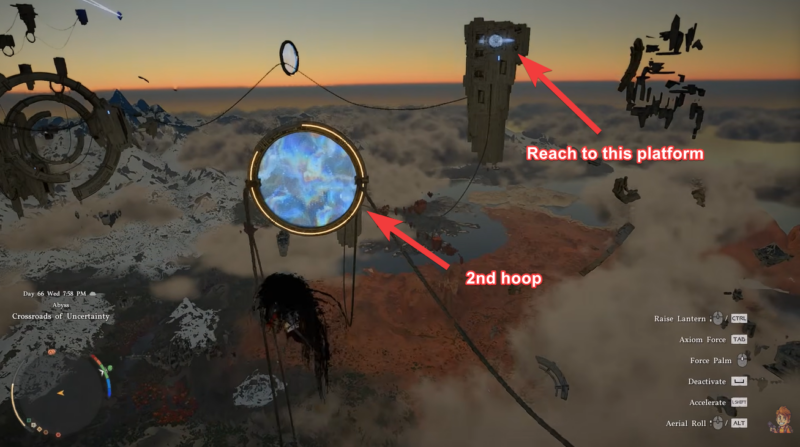
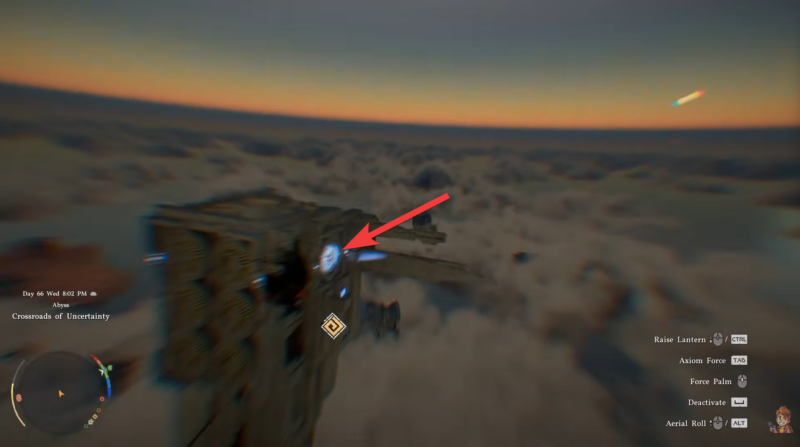
Step 6
Locate the circular core and use your pull ability to anchor yourself, stabilizing your position.
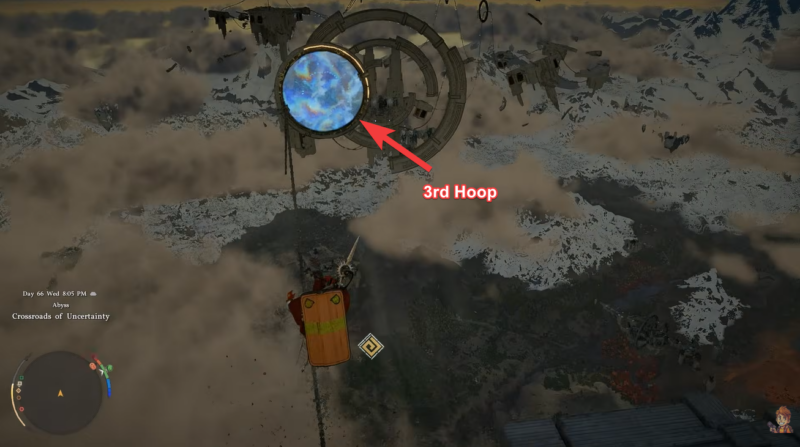
Step 7
Launch again and pass through the 3rd hoop with controlled speed.
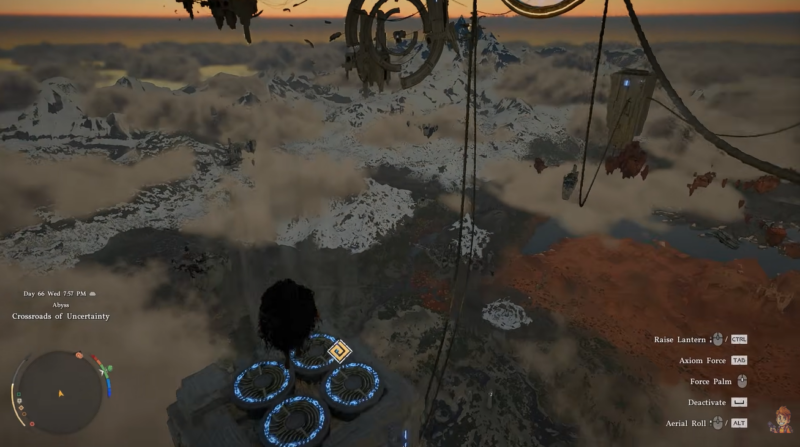
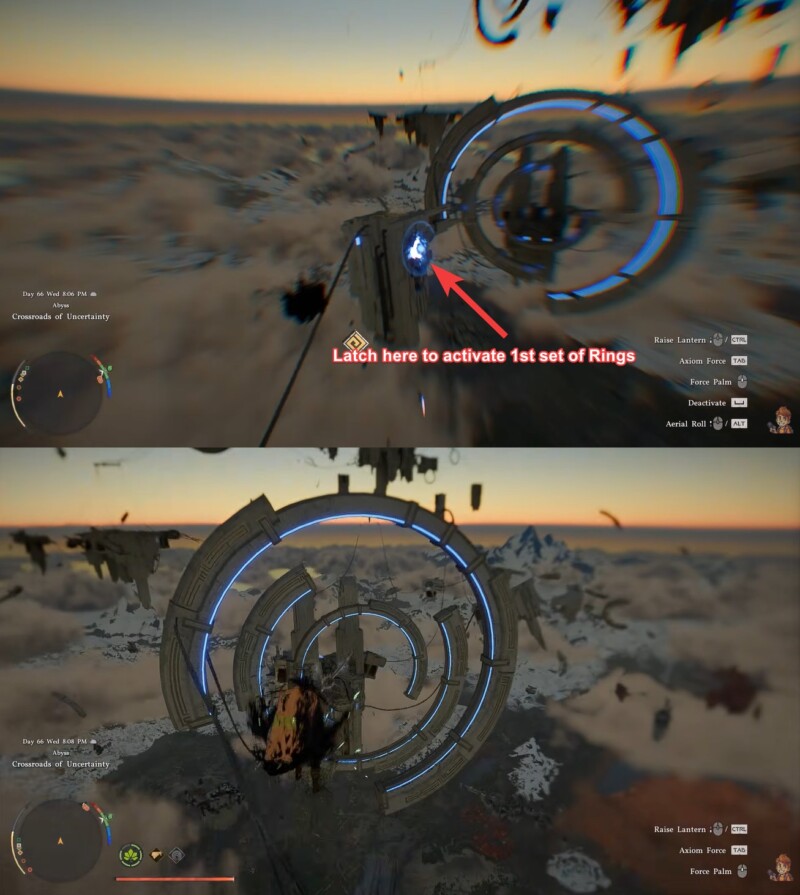
Step 8
Reach the 2nd platform and activate the cluster of rings, then immediately glide through them.
Step 9
Land on the 3rd platform and activate another core, preparing for a longer aerial stretch.
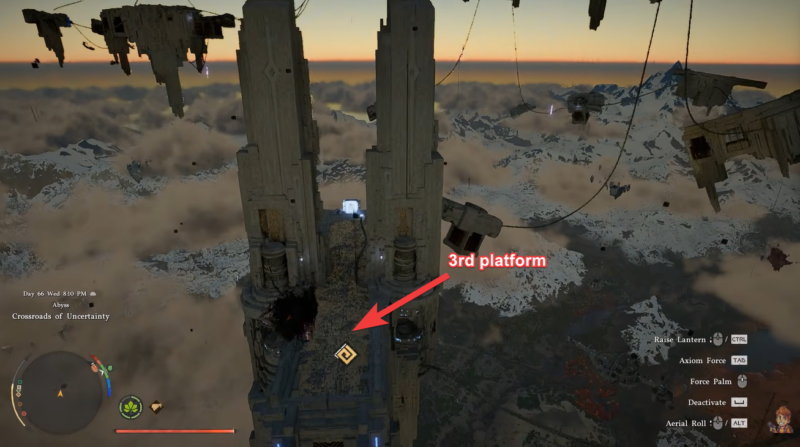
Step 10
Take off from the right side and aim toward the 4th hoop, adjusting your angle mid-air.
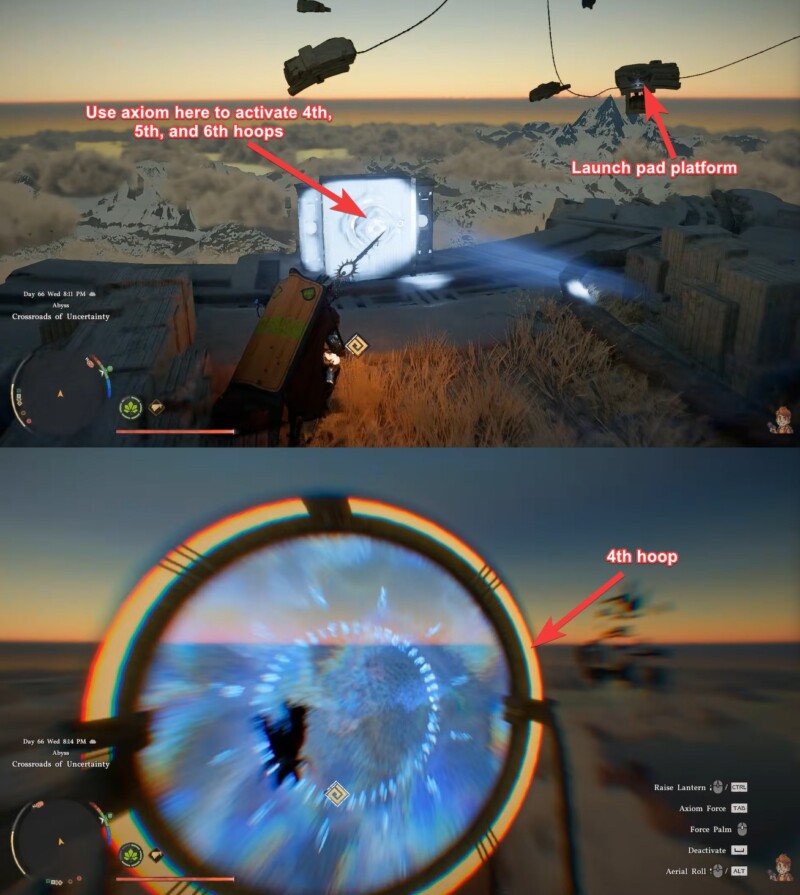
Step 11
Use the next launch platform to propel yourself toward the fifth and sixth hoops, keeping your glide steady.
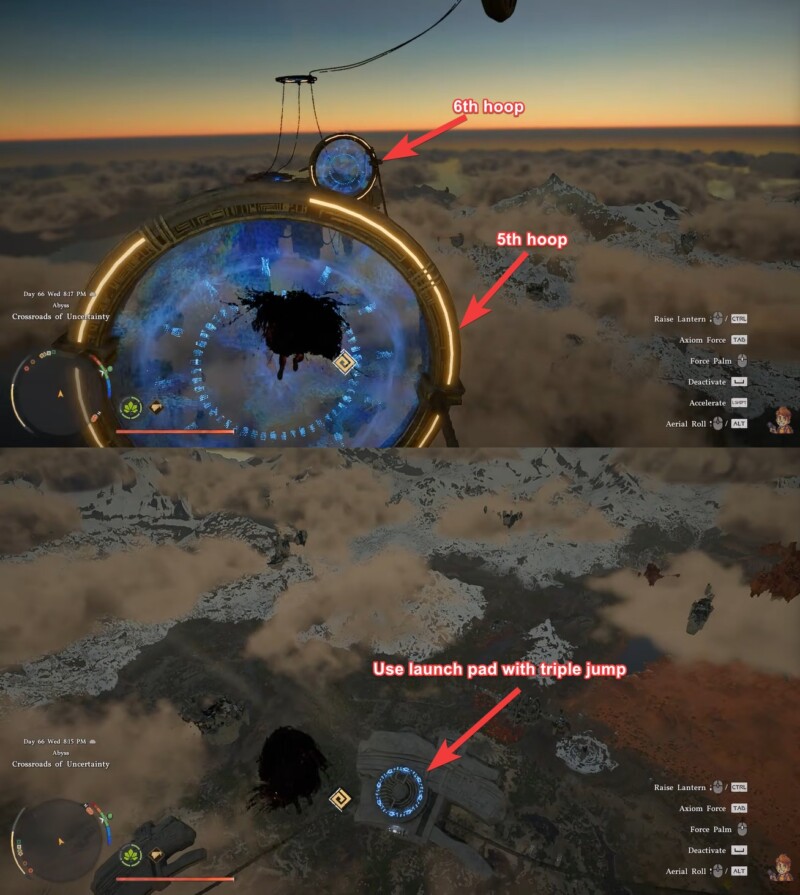
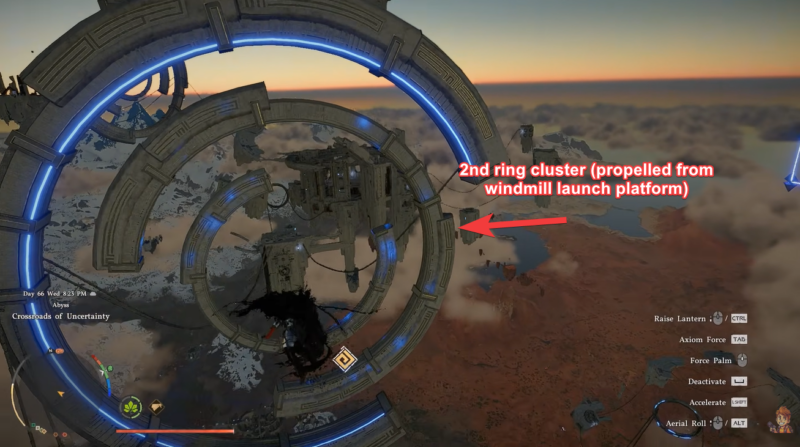
Step 12
Navigate onto the windmill-like platform and use it as a launch point.
Step 13
Pass through the 2nd cluster of rings, which requires tighter control and precision.
Step 14
Dodge incoming laser hazards while moving through the seventh hoop, staying centered.
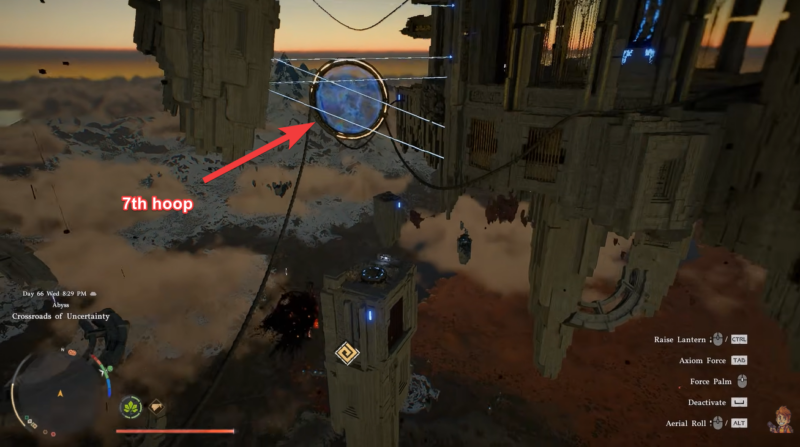
Step 15
Land on the next platform and prepare for the eighth and ninth hoops.
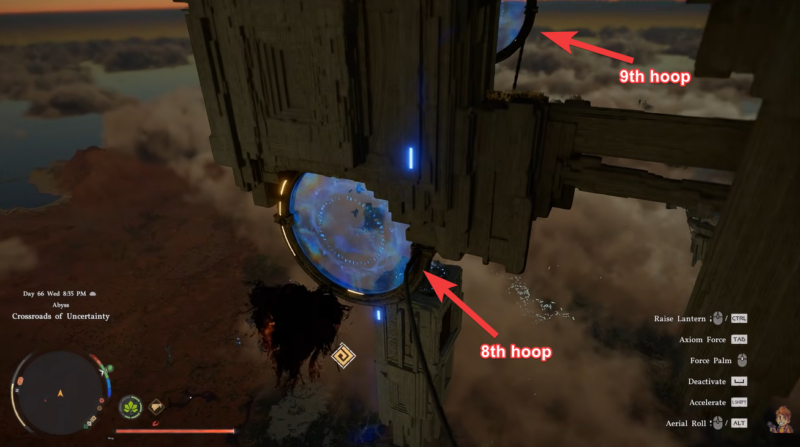
Step 16
Find the circular core and latch onto it, ensuring you don’t drift off.
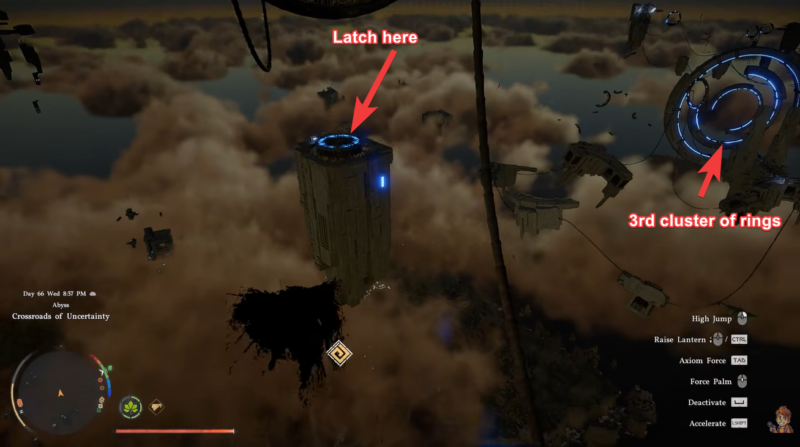
Step 17
Launch forward and pass through the 3rd cluster of rings in one smooth motion.
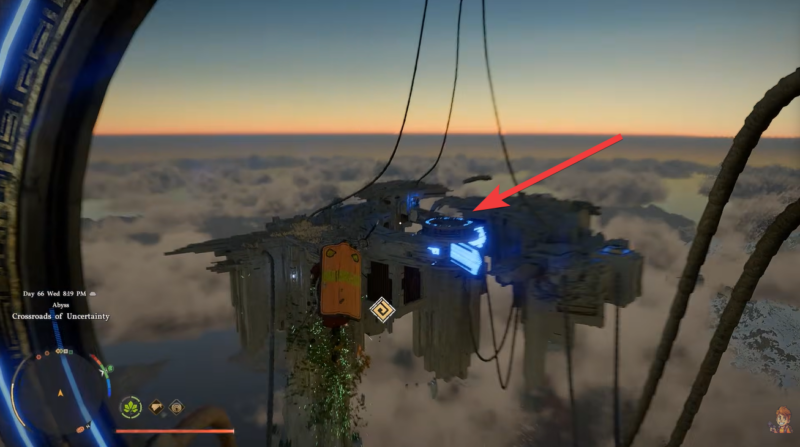
Step 18
Make your way toward the final platform, maintaining enough momentum to reach it cleanly.
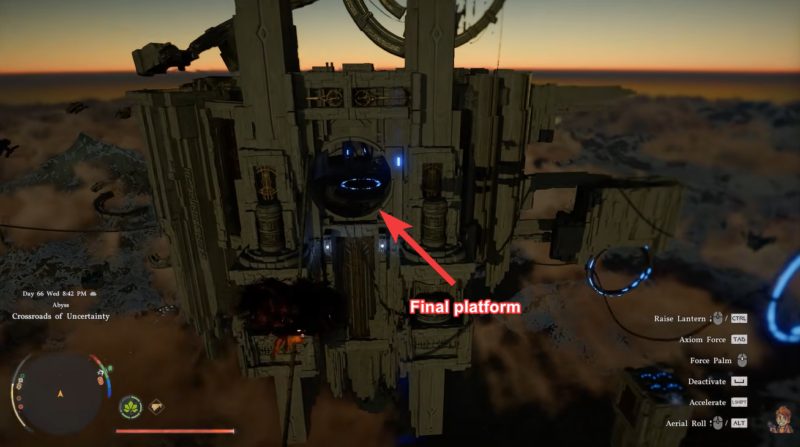
Step 19
Pass through the final cluster of rings to see the Abyss platform.
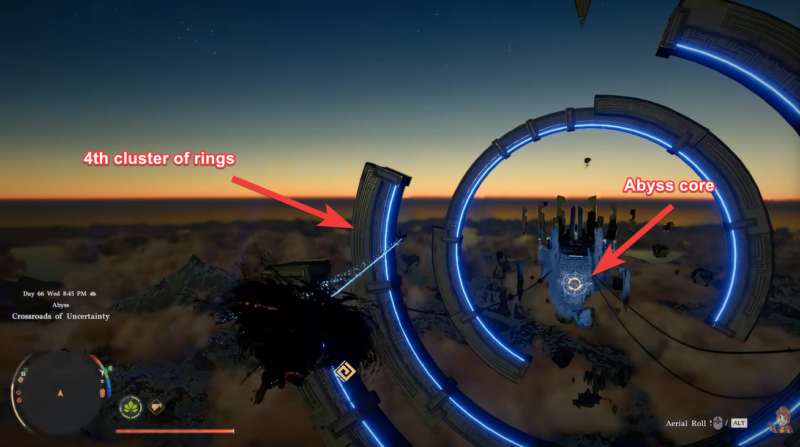
Step 20
Latch onto the Abyss core and use your force palm ability to activate the nexus.
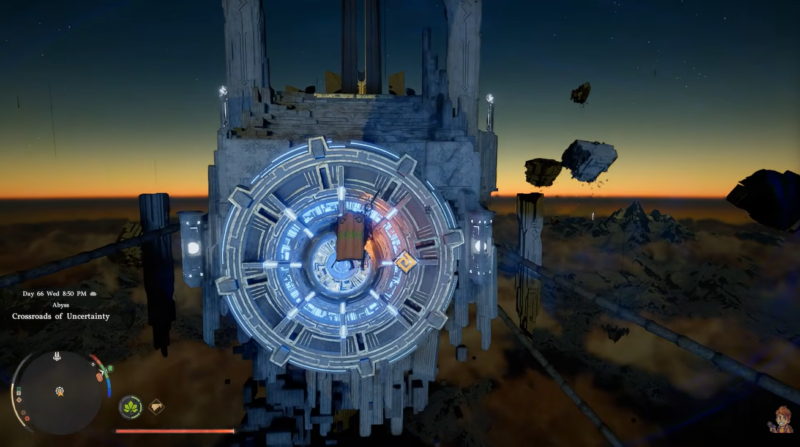
Step 21
The Abyss restoration completes, unlocking your reward.
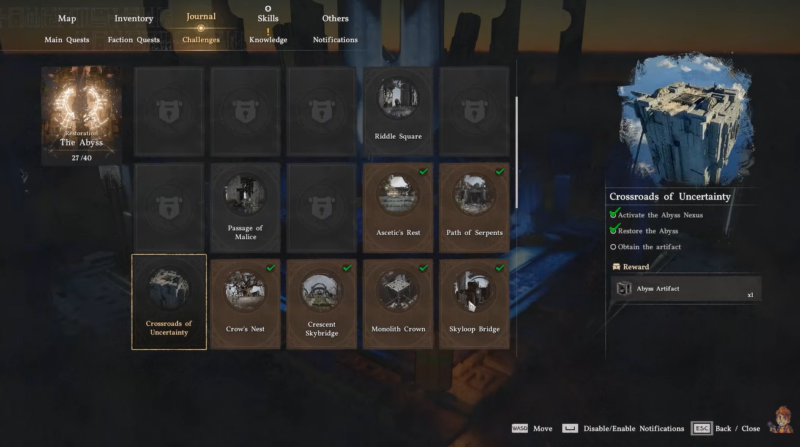
Rewards you earn after completing the puzzle
| Reward Type | Details |
|---|---|
| Artifact | Unique Abyss artifact (varies by progression) |
| Abyss Restoration | Unlocks environmental progression |
| Experience | Boost toward character progression |
| Exploration Completion | Counts toward region completion |
Completing this puzzle not only grants rewards but also contributes to overall Abyss restoration, which is tied to late-game progression systems.
Why this puzzle is harder than it looks
The real challenge comes from maintaining uninterrupted momentum across multiple mechanics. You’re not just solving a puzzle—you’re executing a sequence. Timing your launches, aligning your glide, and reacting mid-air all need to happen seamlessly.
Laser hazards and tight ring clusters further increase the difficulty, especially if your positioning is slightly off. You’ll need to stay calm and adjust quickly.
Tips to make the traversal smoother
Always align your camera before launching, as your direction is heavily influenced by your initial angle. Use short glide corrections instead of oversteering, which can throw you off course. Whenever you reach a platform, take a second to reset your orientation before continuing.
Mastering this puzzle improves your overall mobility skills in Crimson Desert, which becomes increasingly important in later Abyss challenges.
Final thoughts on mastering this Abyss challenge
The Crossroads of Uncertainty puzzle is a perfect test of your movement mastery in Crimson Desert. Once you understand the flow and practice the transitions, it becomes a satisfying sequence rather than a frustrating one.
Treat each section as part of a rhythm rather than isolated steps, and you’ll find yourself completing it much more consistently.