- What to know
- Basement locations
- How to collect the first Joint Plug
- How to collect the second Joint Plug
- How to get the Square Socket Wrench
- How to reach the Collection Pool and Processing Room
- How to find the Forklift Key
- How to power up and move the first forklift
- Inspection area conveyor puzzle
- How to drain the blood pool and grab the third Joint Plug
- How to escape Collection Pool lower level
- How to retrieve all Joint Plugs
- Rescue Emily and escape the basement
- Tips
What to know
- Start in Holding Cells by removing the first Joint Plug from the main machine.
- Use plugs to power doors leading to Boiler Room, Furnace, Workshop, and Collection Pool areas.
- Pick up Square Socket Wrench and Forklift Key to access the third plug.
- Insert all three plugs back to rescue Emily and escape via elevator.
In Resident Evil Requiem, Grace explores the dark basement of the Care Center as she searches for Emily, facing shadows and monsters while solving the Joint Plugs puzzle to restore power and open cells.
| Aspect | Details |
|---|---|
| Objective | Collect 3 Joint Plugs to power the Holding Cells machine and free Emily. |
| Key Items | Joint Plug x3, Square Socket Wrench, Forklift Key. |
| Main Areas | Holding Cells, Furnace Room, Boiler Room, Workshop, Collection Pool, Processing Room, Inspection Area. |
| Threats | The Girl (hide or stun), zombies, electrified water, meat grinder. |
| Rewards | Emily rescue, basement escape, story progression, items like hip pouches, map, locks. |
Basement locations
The puzzle spans the Holding Cells where Emily waits, the adjacent Furnace room with powered doors, the Boiler Room hiding the wrench behind a movable box, the Workshop connected by vents, the Collection Pool with its distributor panel, and the Processing and Inspection areas linked by conveyor belts of bodies.
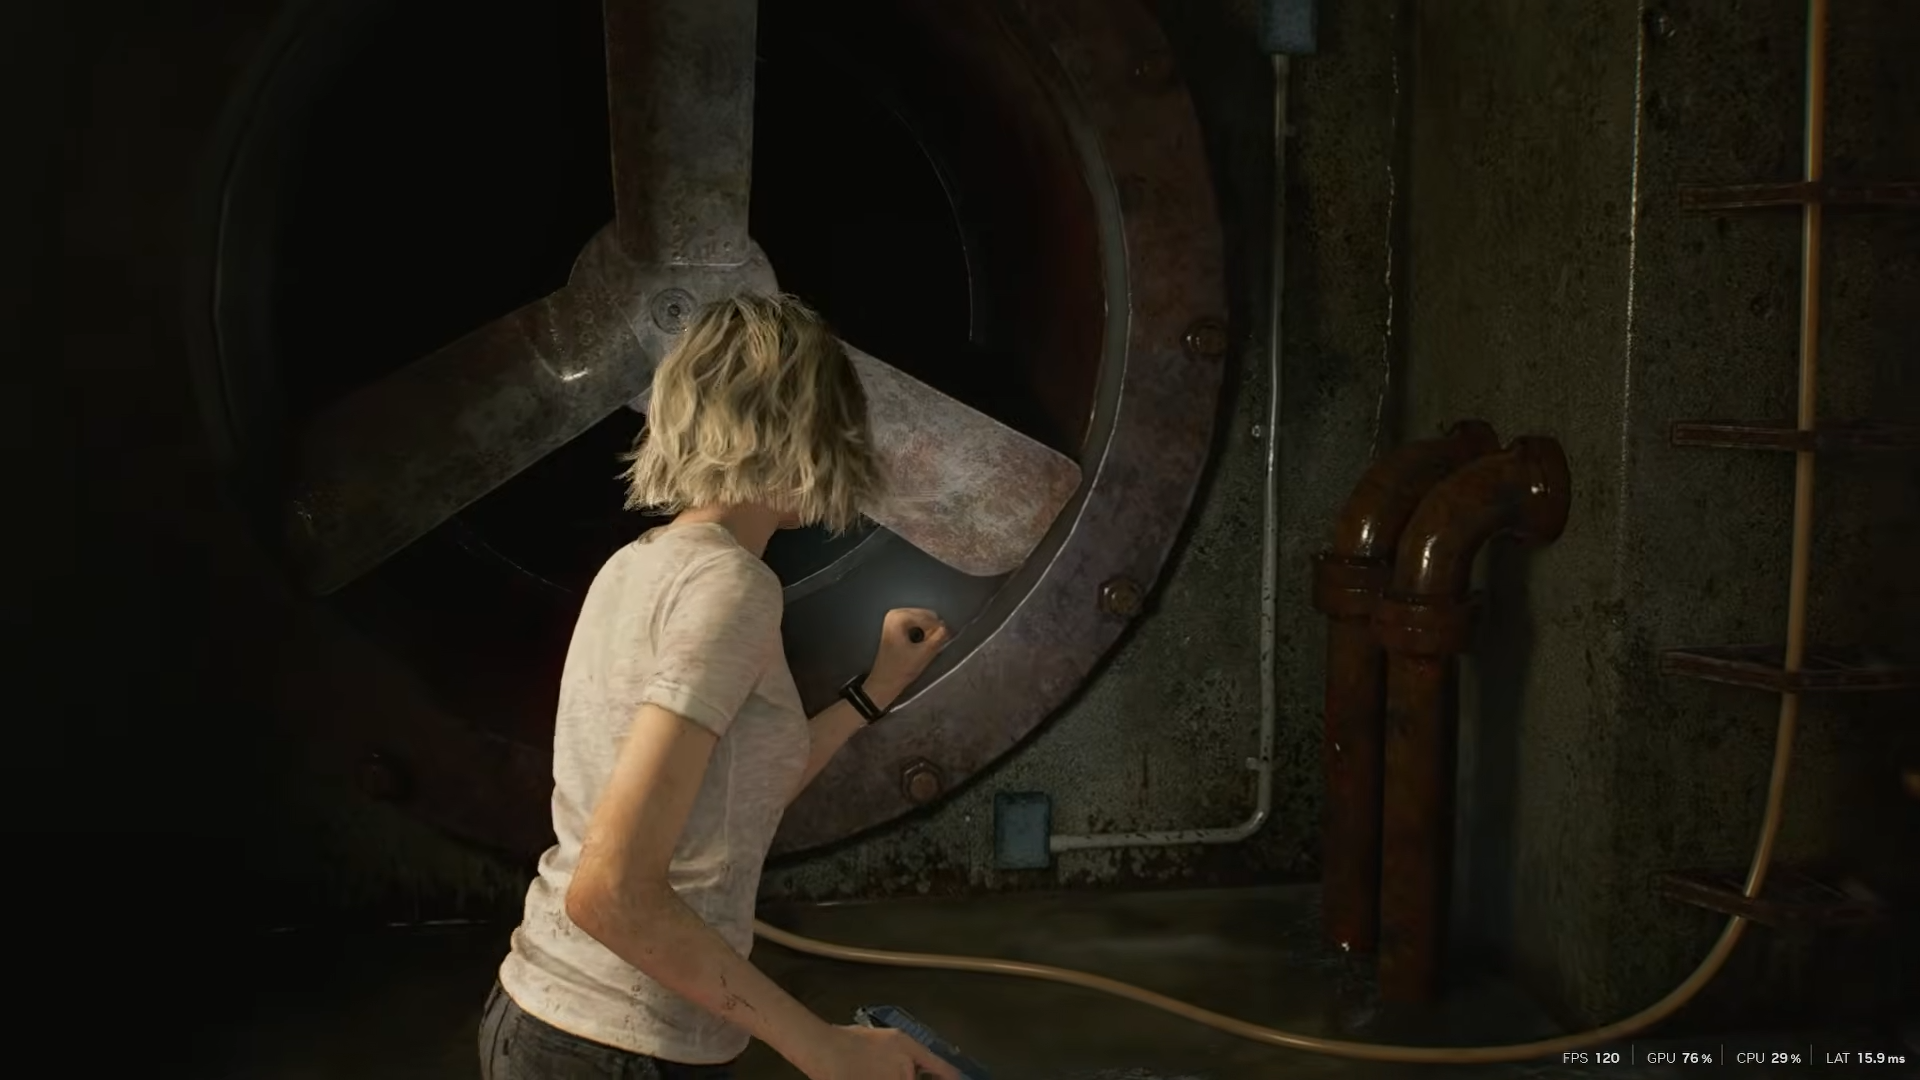
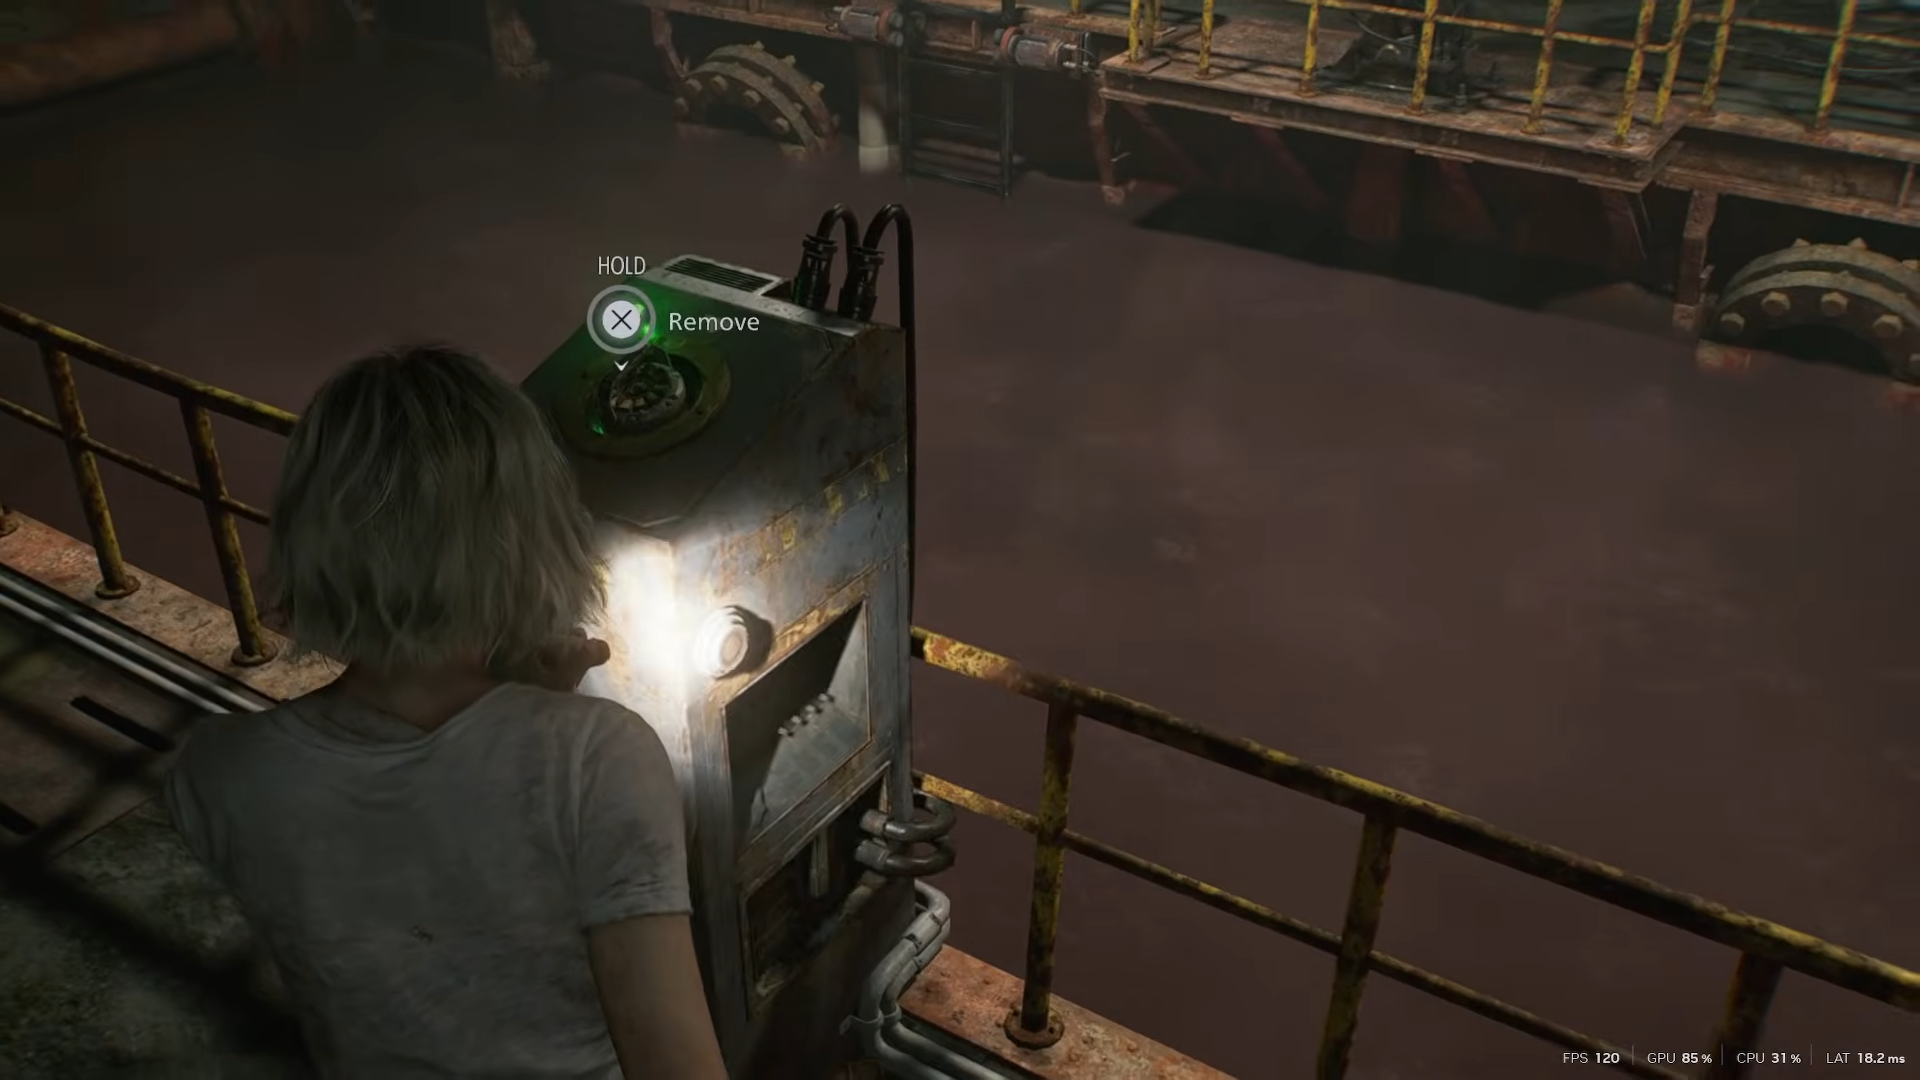
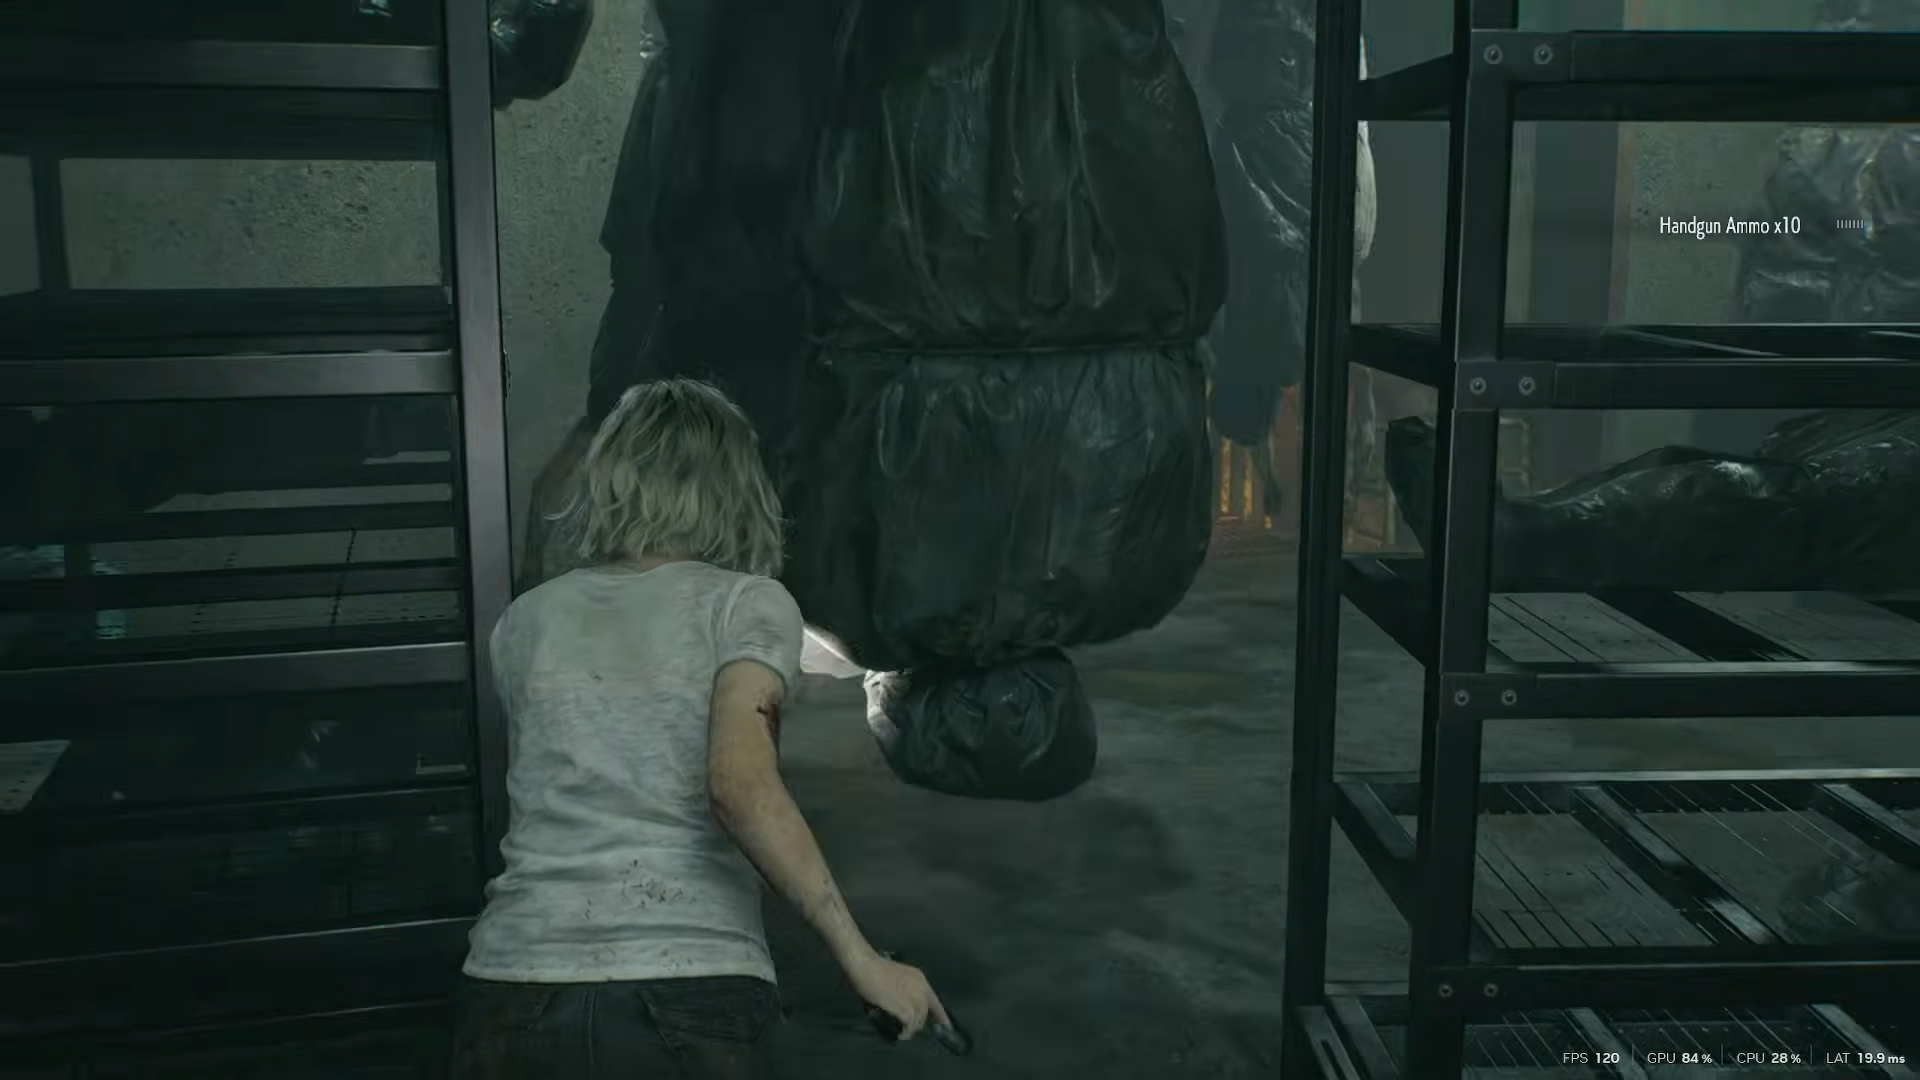
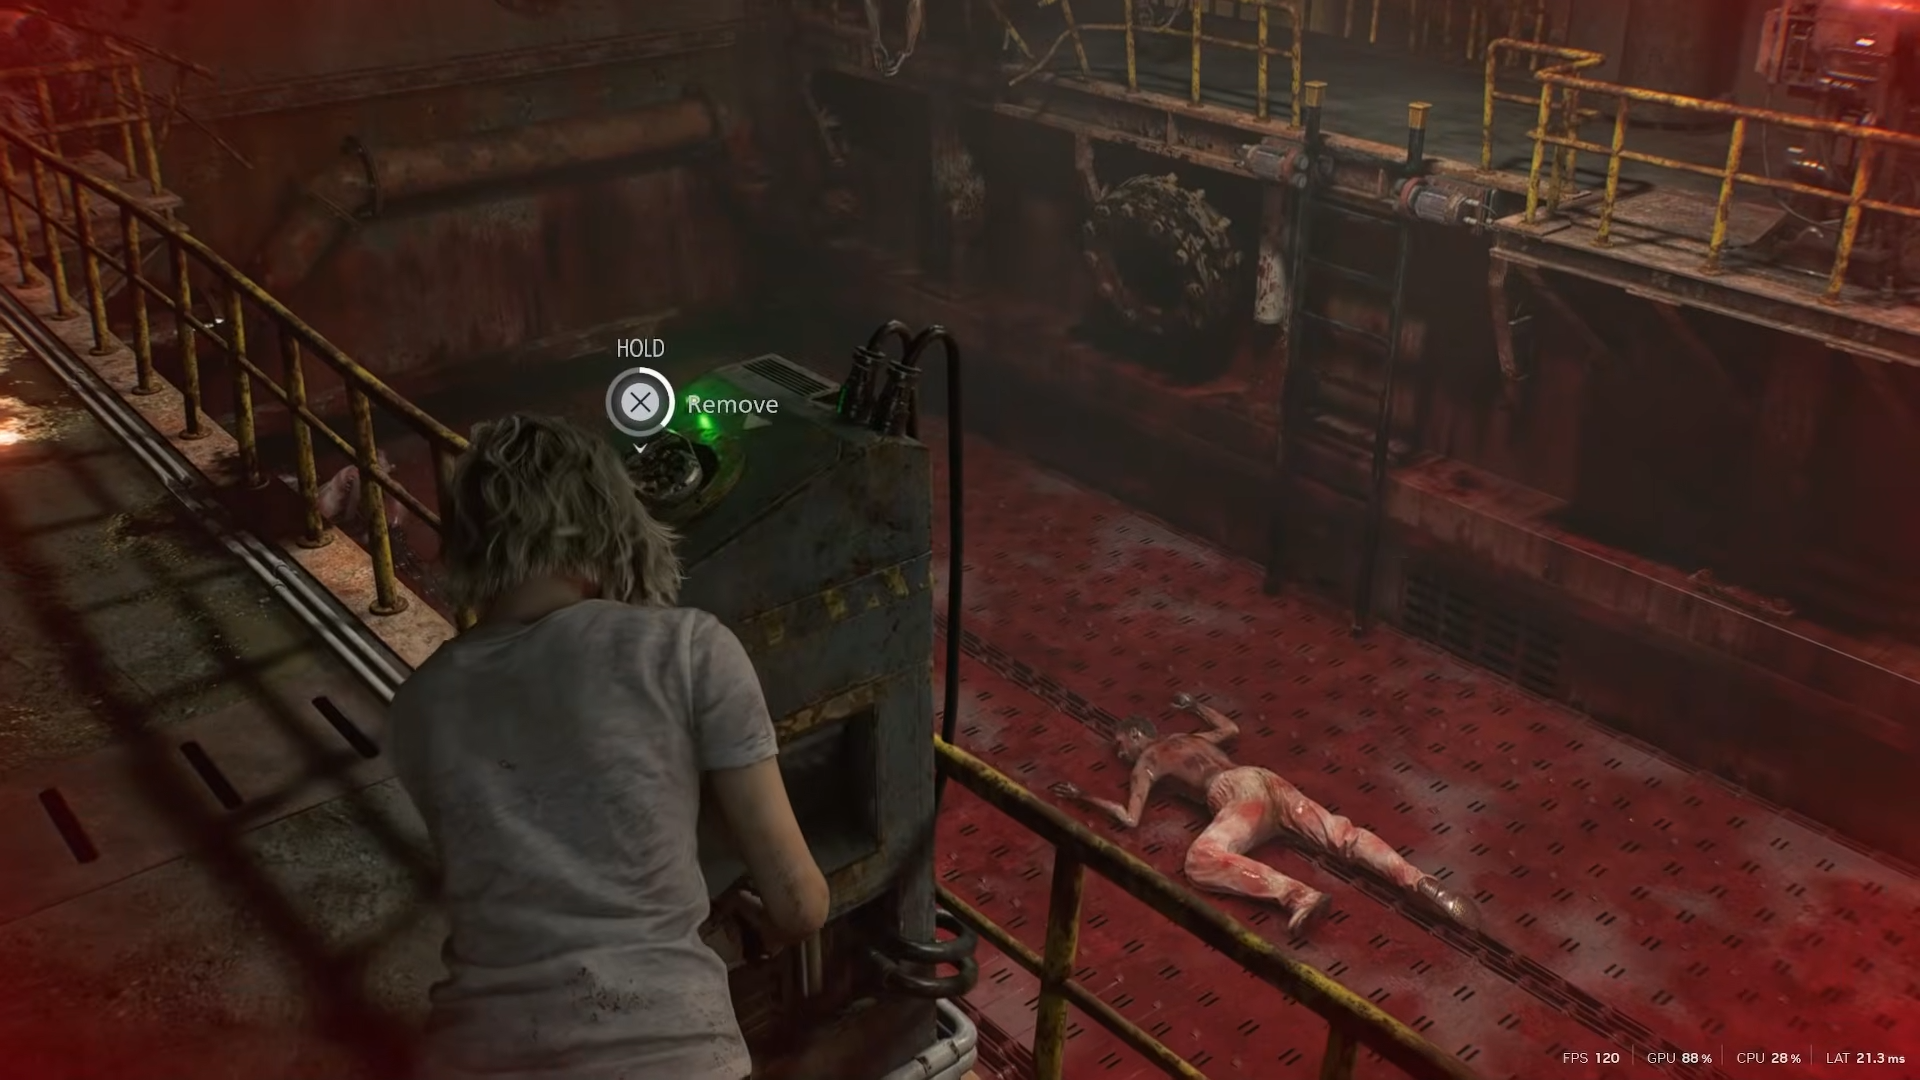
How to collect the first Joint Plug
Begin in the Holding Cells and approach the large machine near Emily’s cell.
Hold the interact button to pull out the first Joint Plug from its socket. Lights turn off immediately, summoning The Girl—hide in a nearby open cell until she passes.

How to collect the second Joint Plug
Take the first Joint Plug to the Furnace room west wall socket up the stairs and insert it to open the door. Enter the caverns to reach the Workshop interior, spot the immovable forklift, and grab the second Joint Plug in front of it.

Crouch into the opposite vent to escape to the Workshop, then climb northeast boxes back to Holding Cells.
How to get the Square Socket Wrench
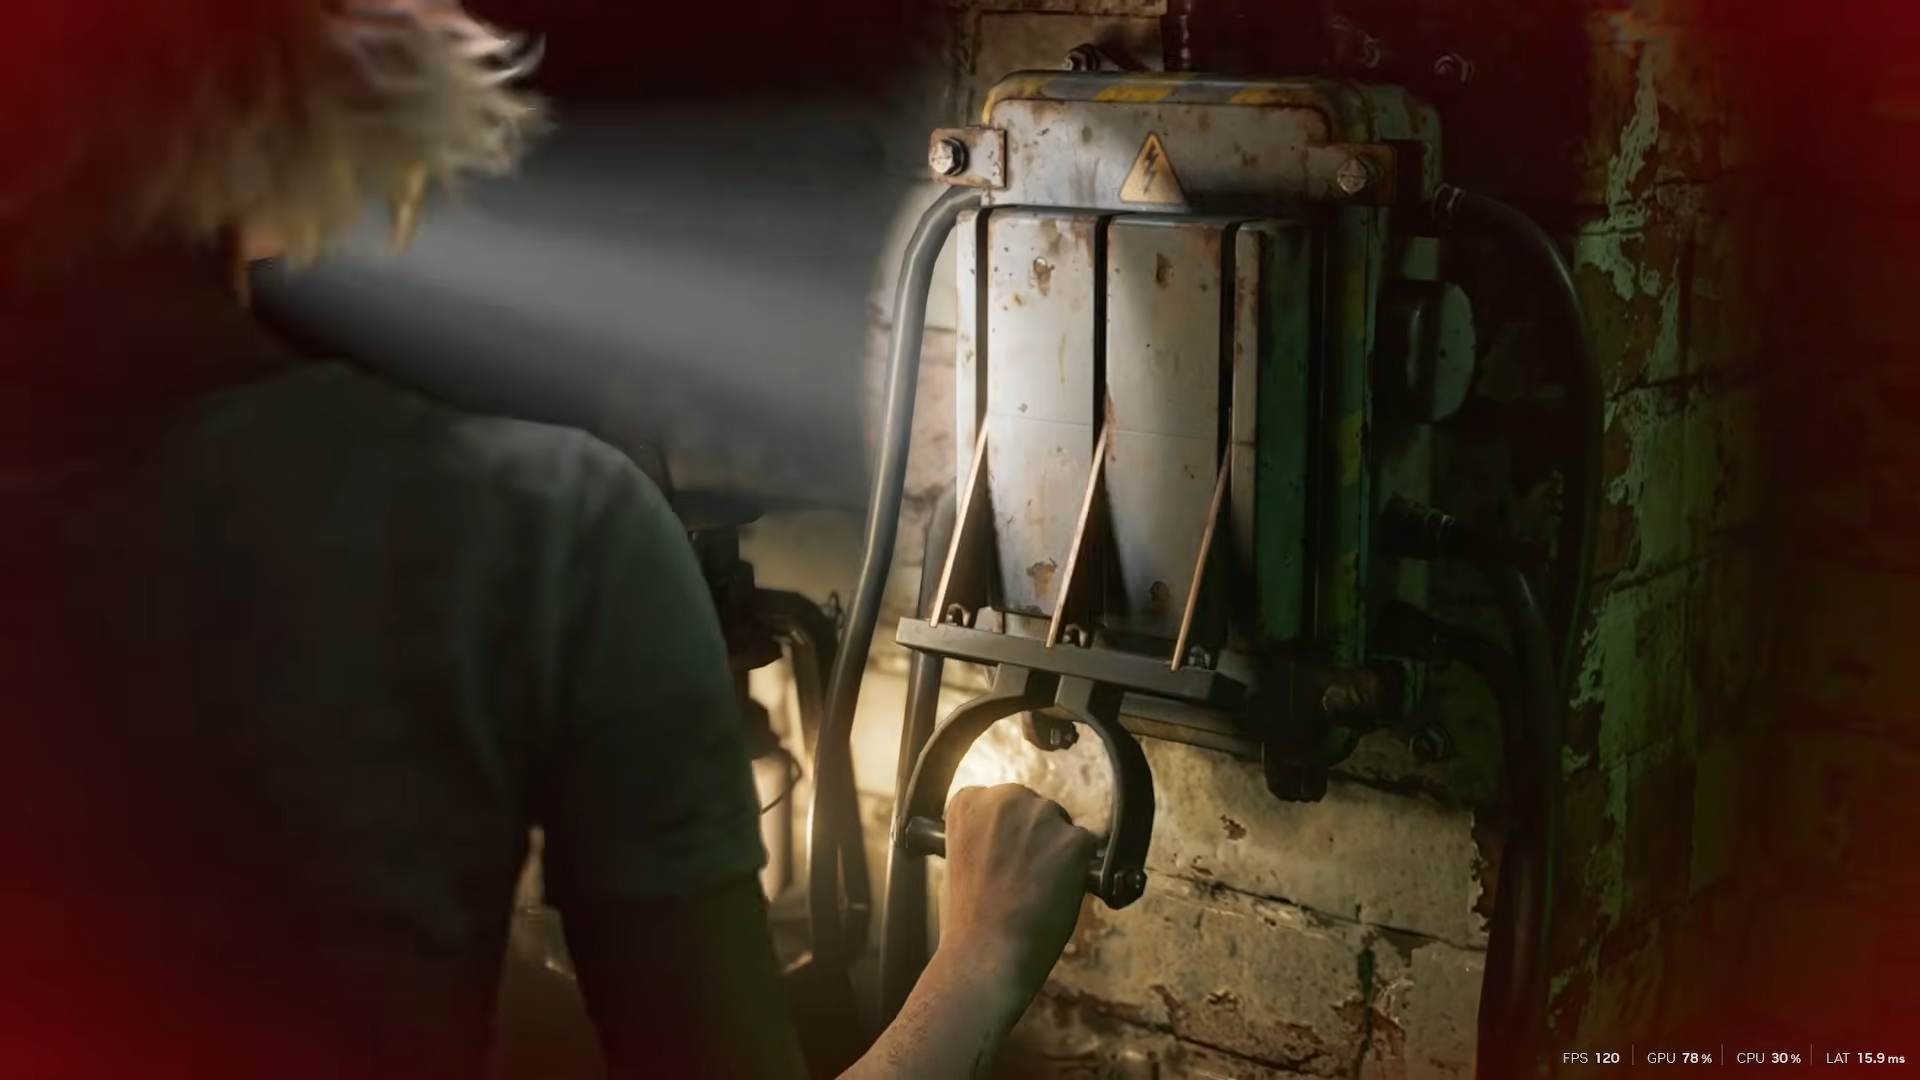
Return to the Furnace entrance, retrieve the first Joint Plug. Head east from Furnace, north up the hallway to the Boiler Room back entrance socket—insert a plug to power it.
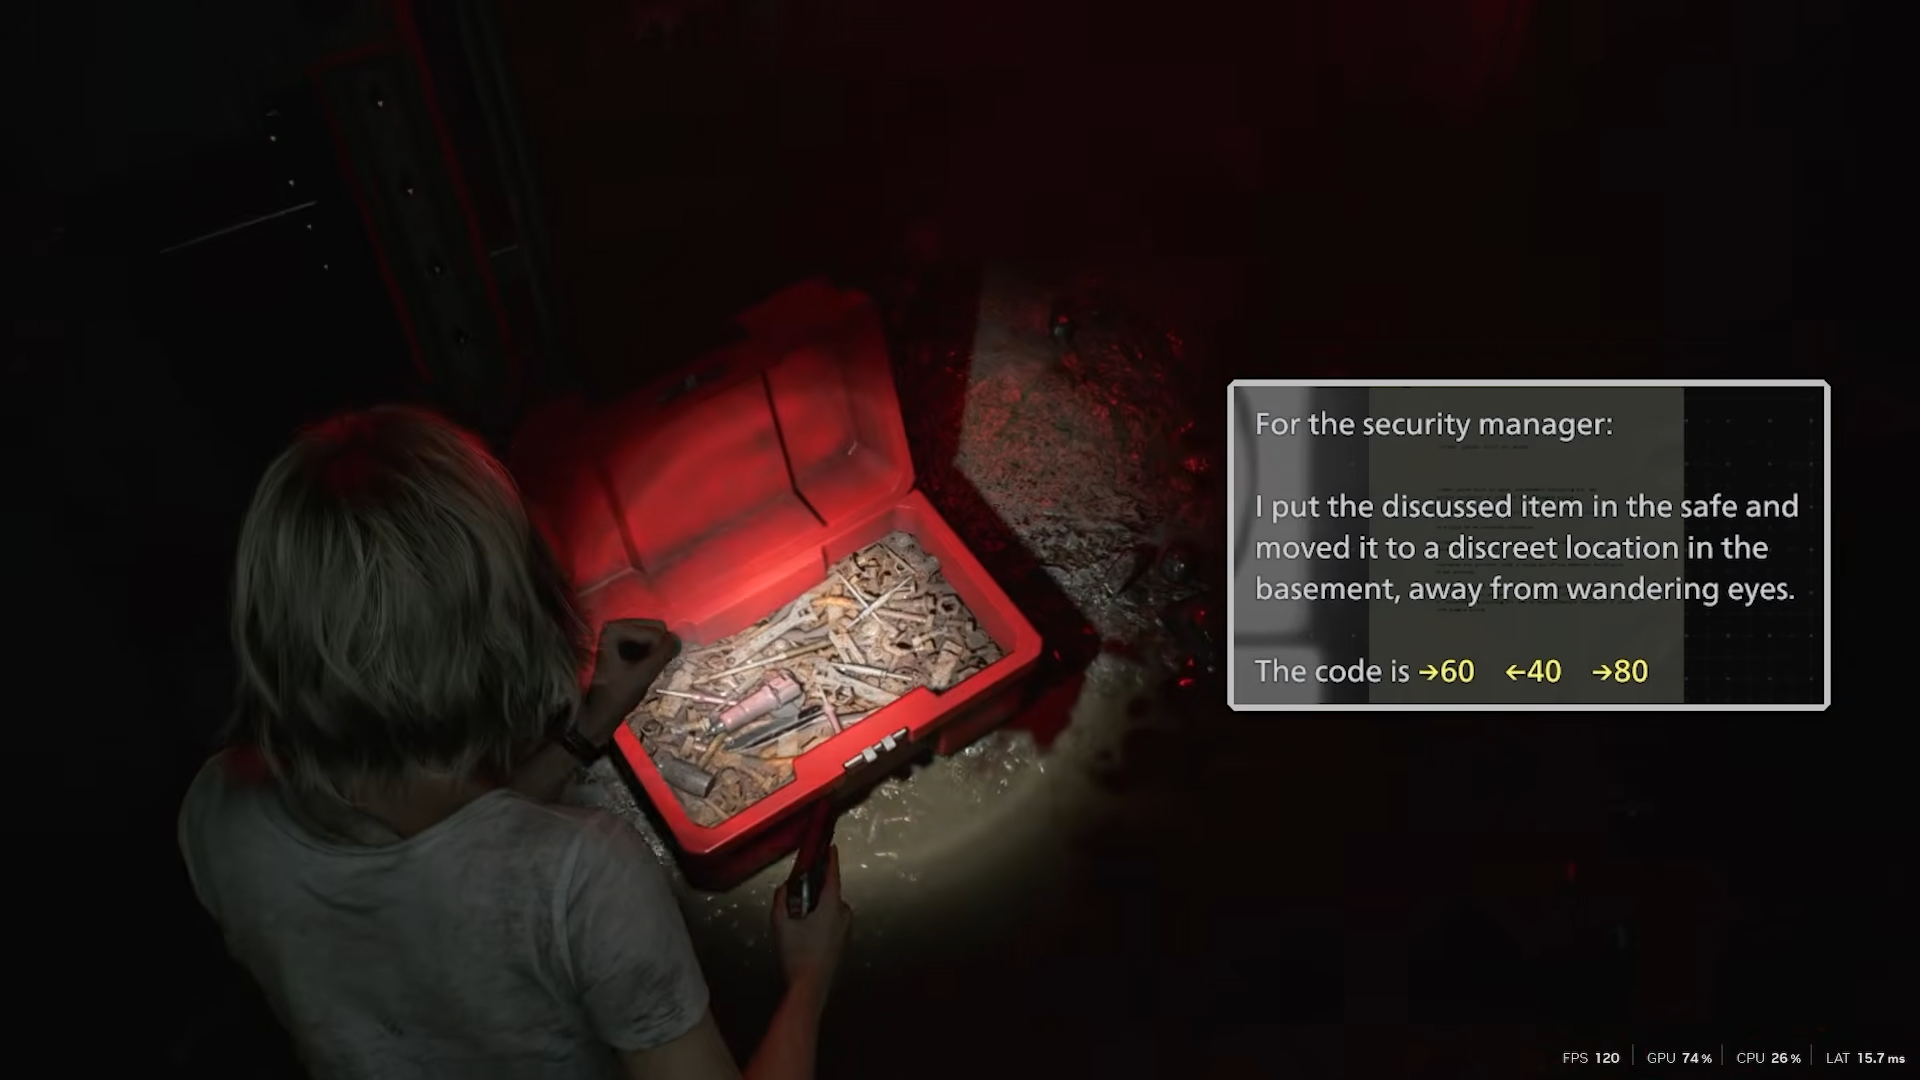
Move the box aside to enter safely without electrifying the water. Inside the western room, open the red toolbox for the Square Socket Wrench. Exit through the gap, retrieve the plug, and watch for The Girl.
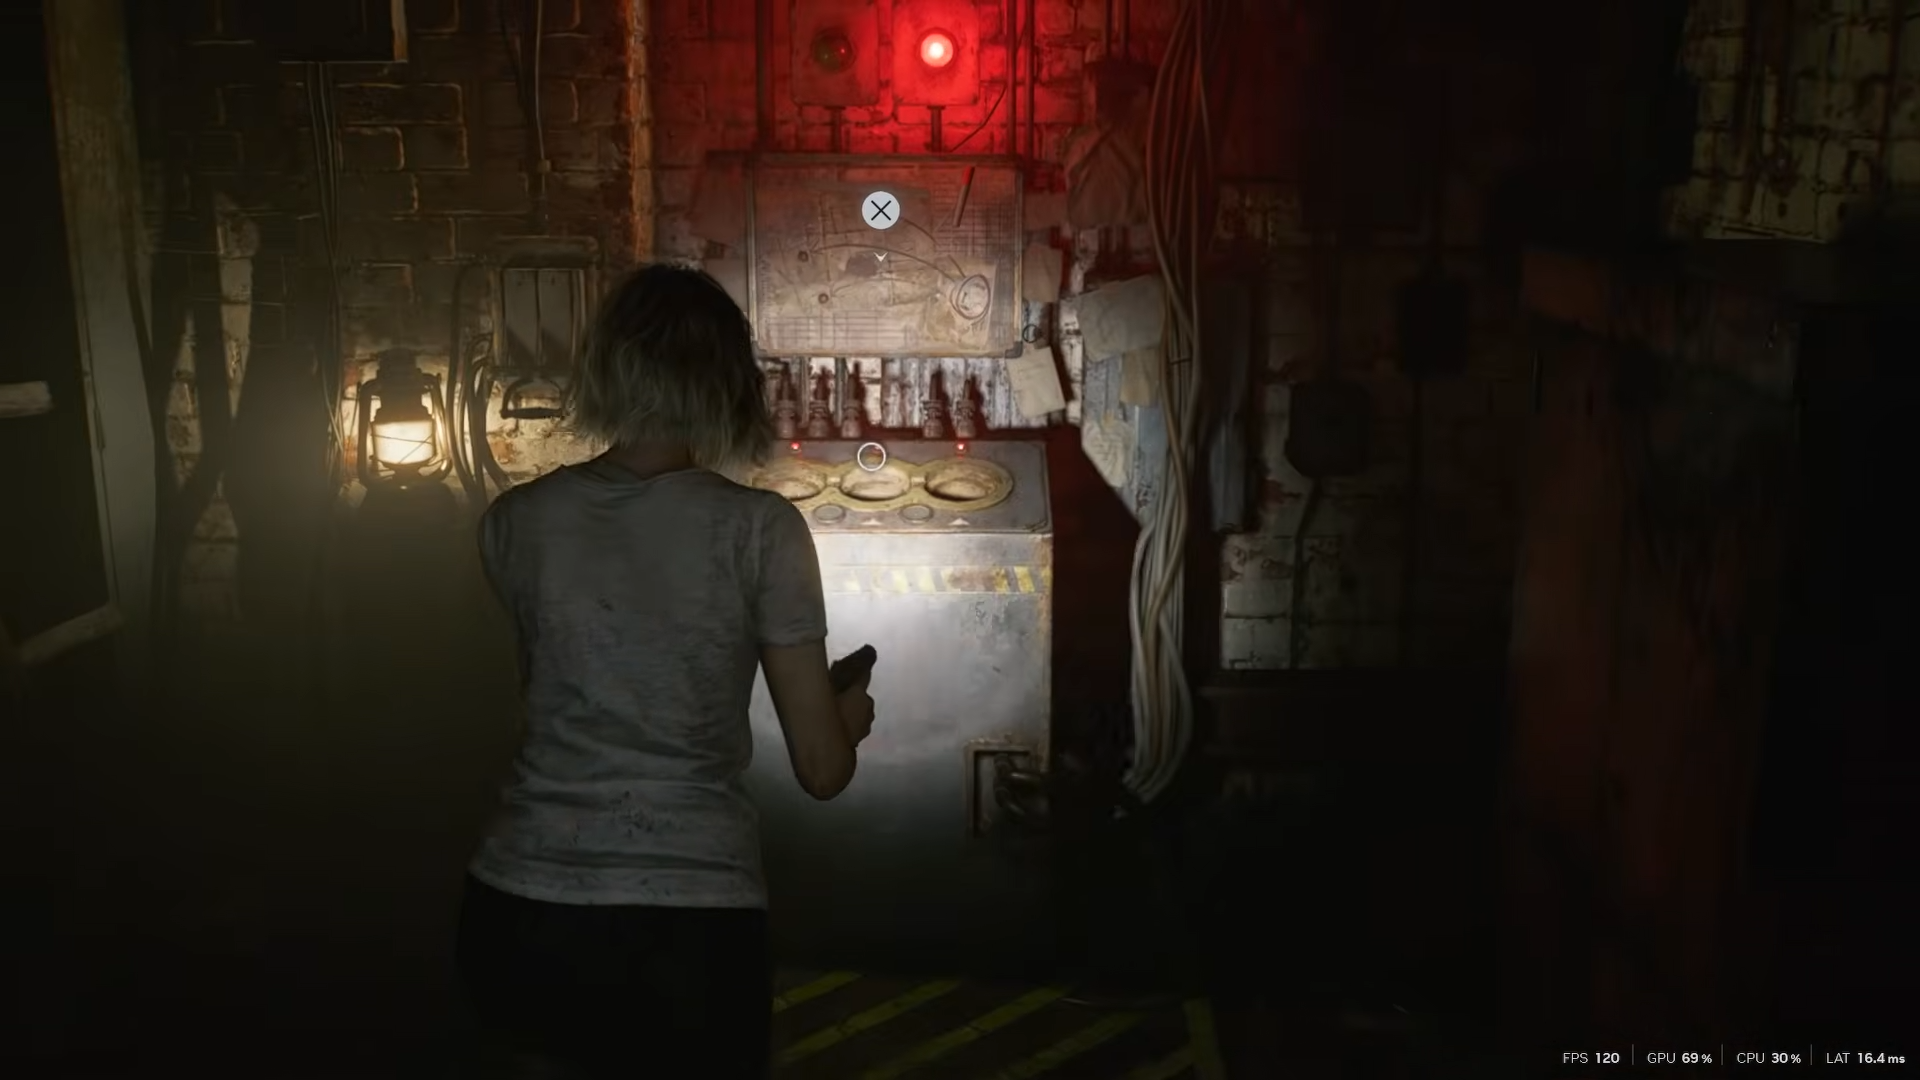
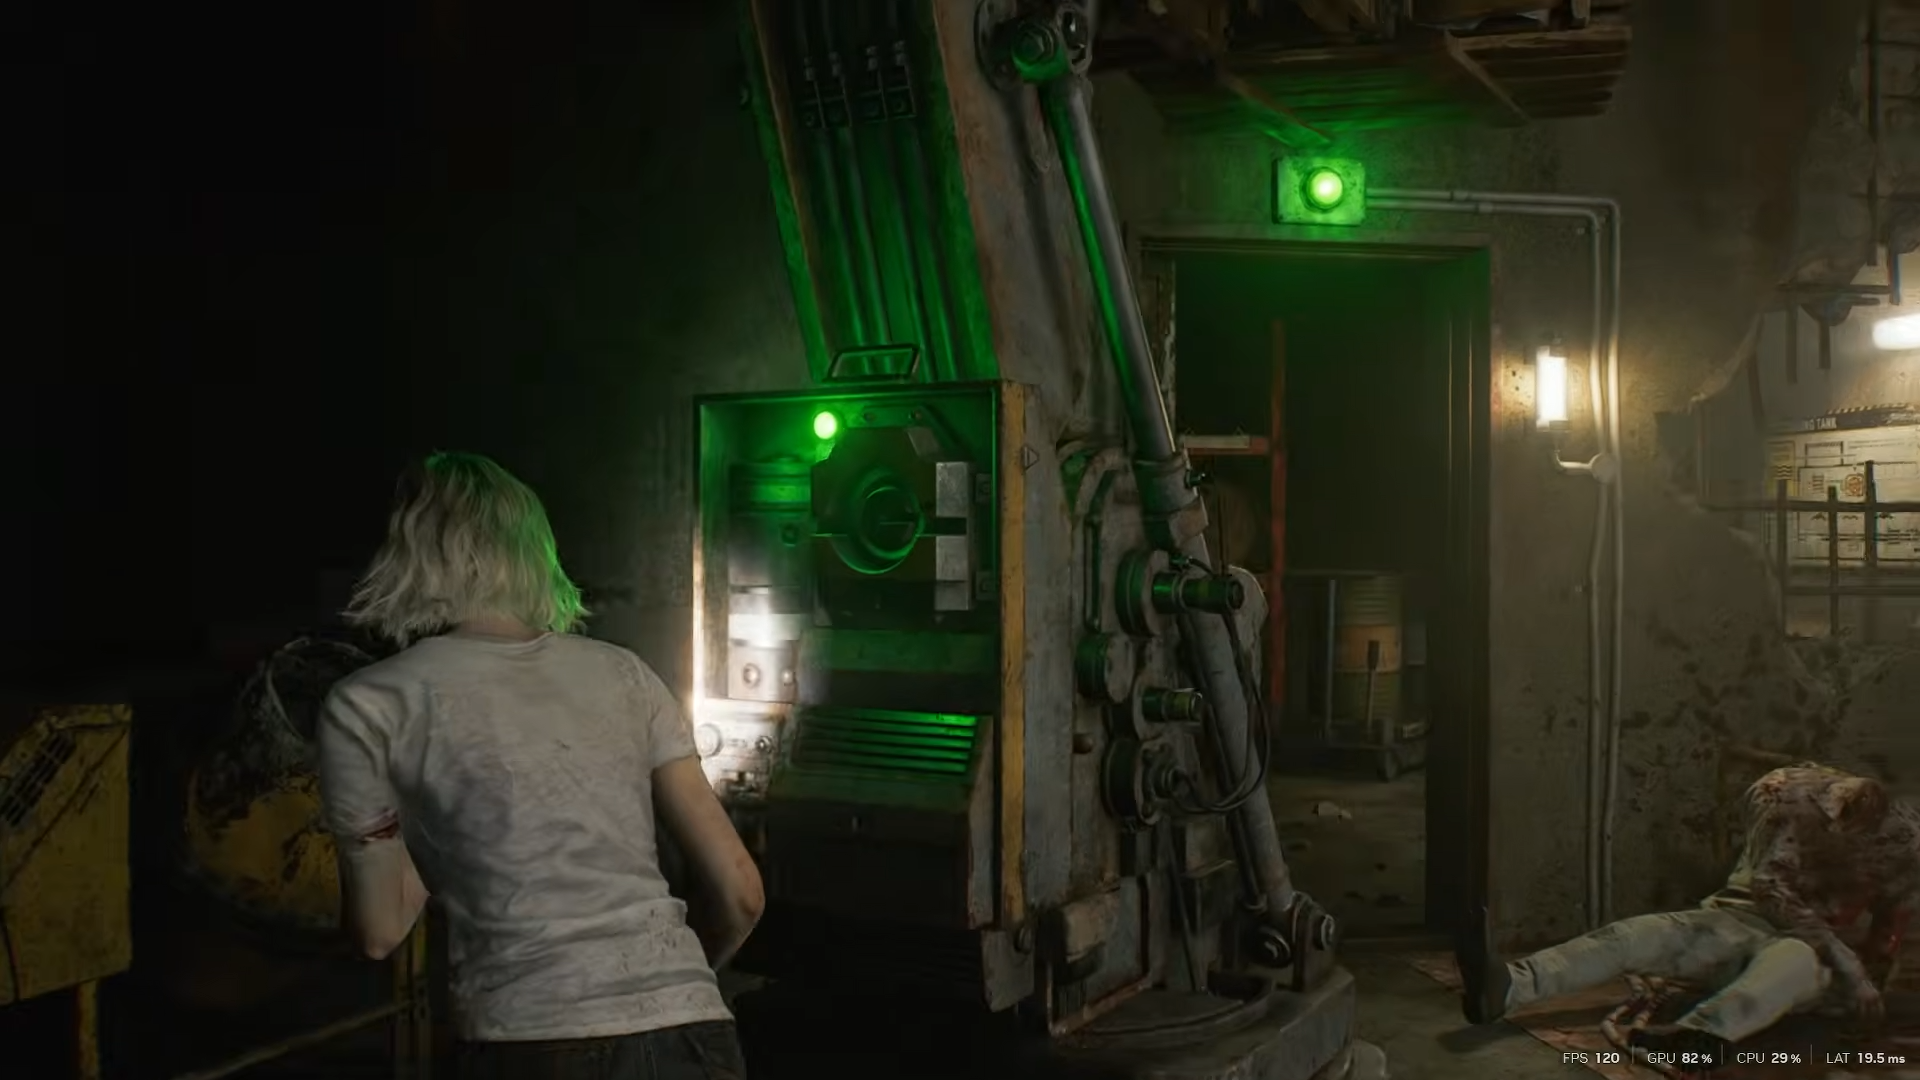
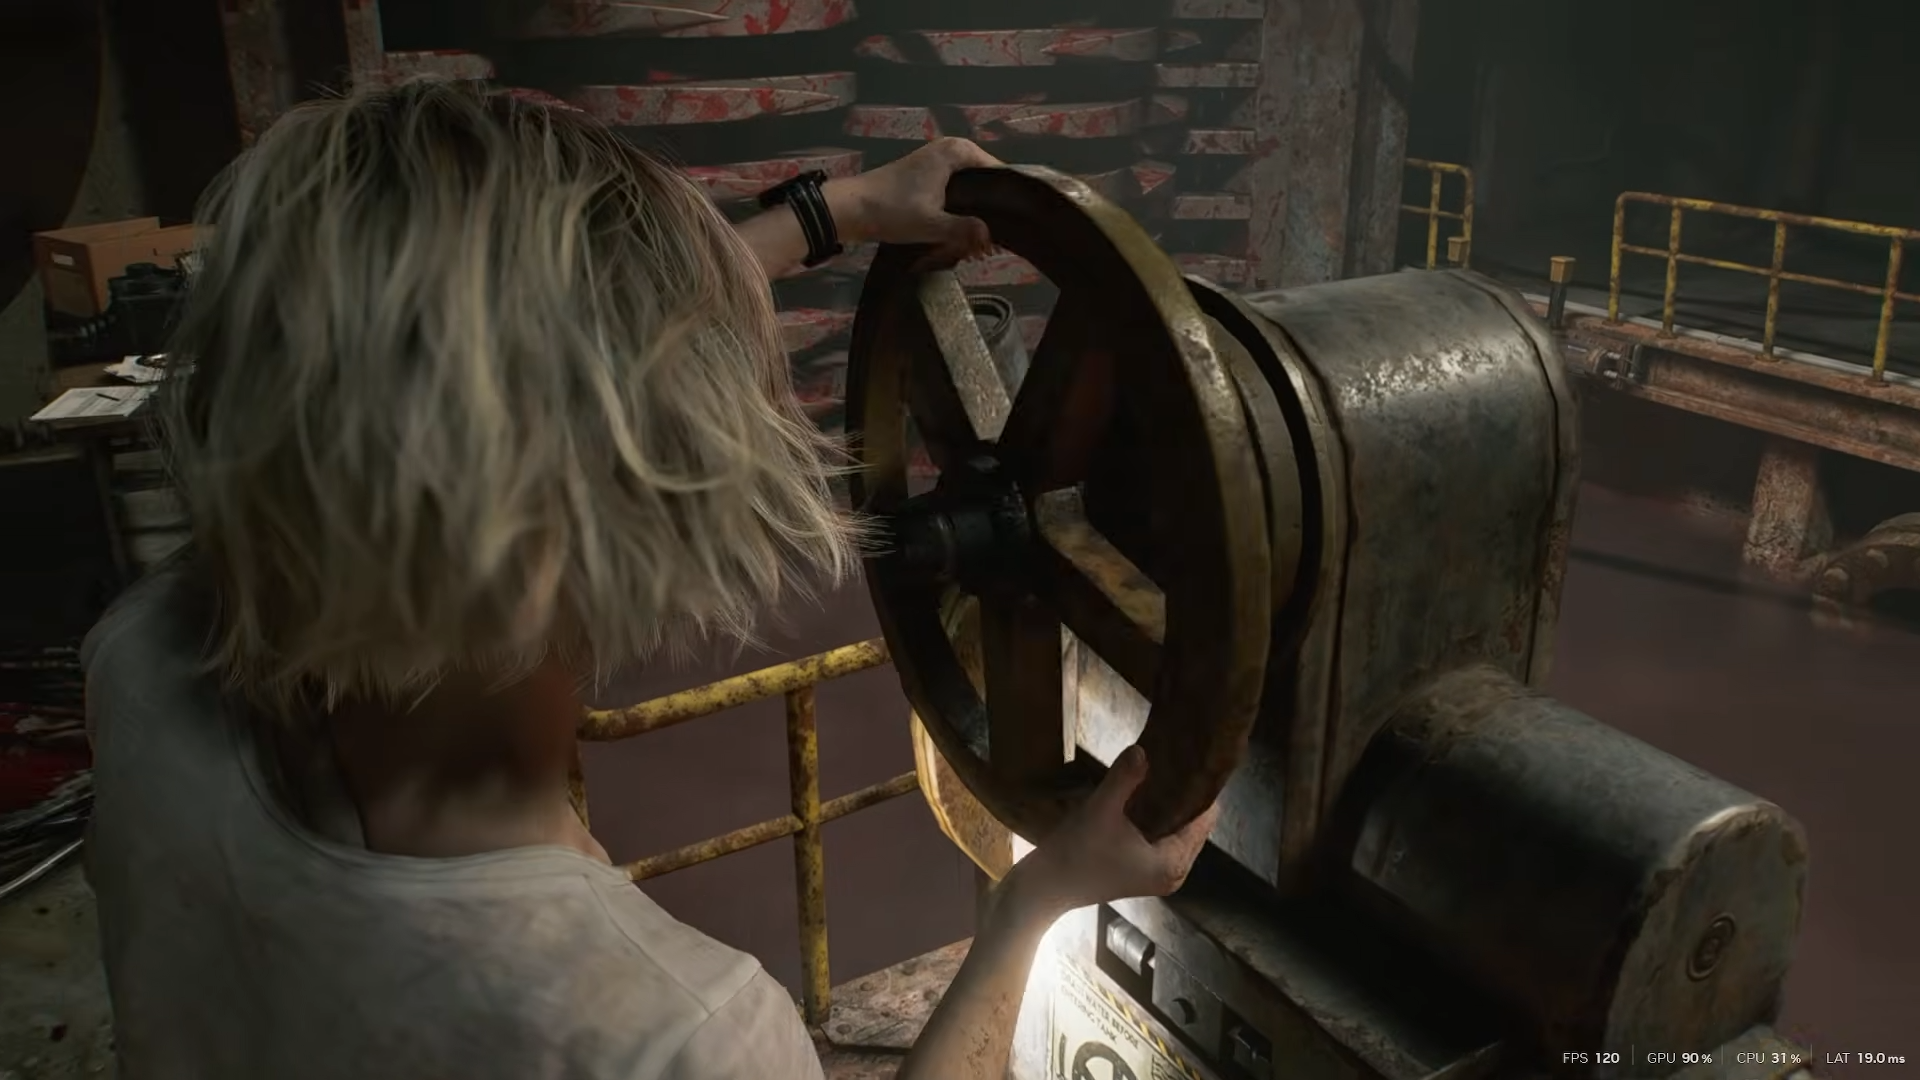
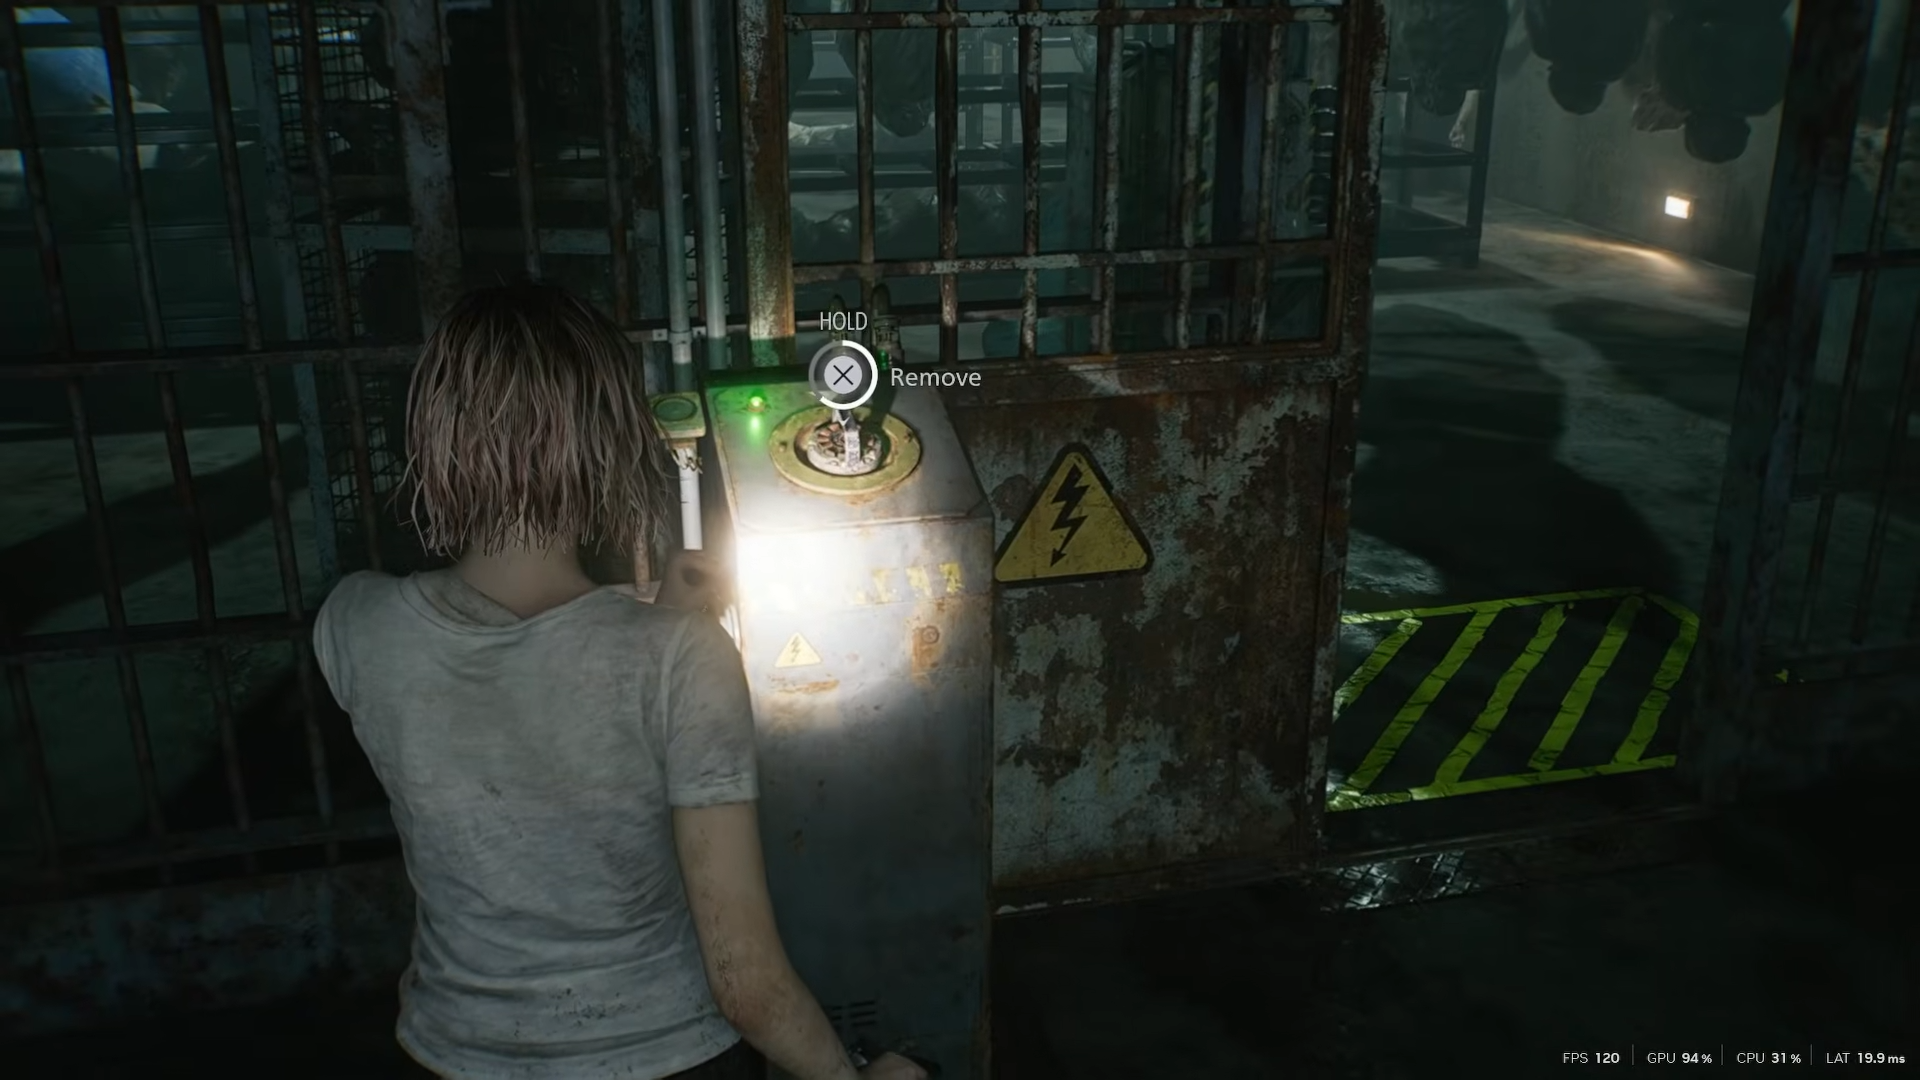
How to reach the Collection Pool and Processing Room
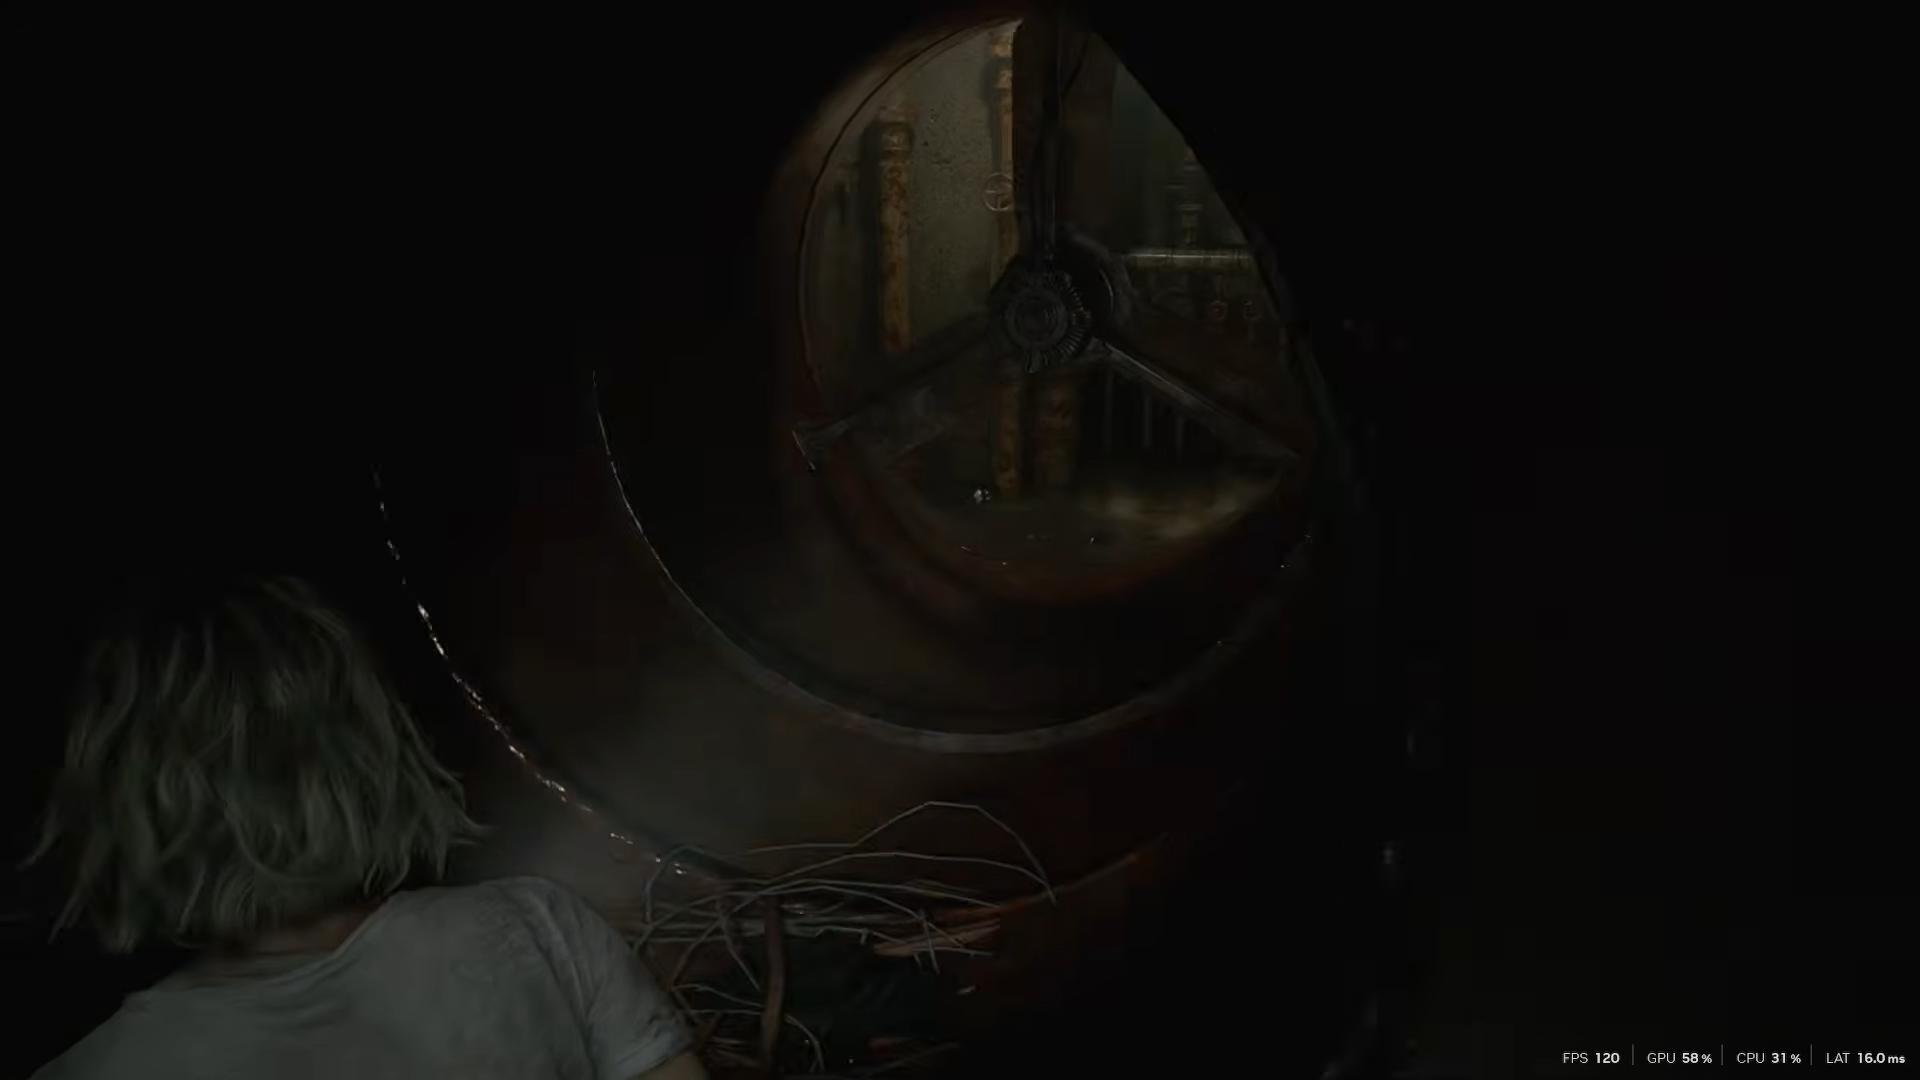
With two plugs and the wrench, enter the south Furnace room to the Collection Pool. Use the Square Socket Wrench on the Power Distributor panel to reveal slots—insert both plugs to activate power.

Proceed west linearly, crouch through the now-deactivated fan into the Processing room with its blood pool.
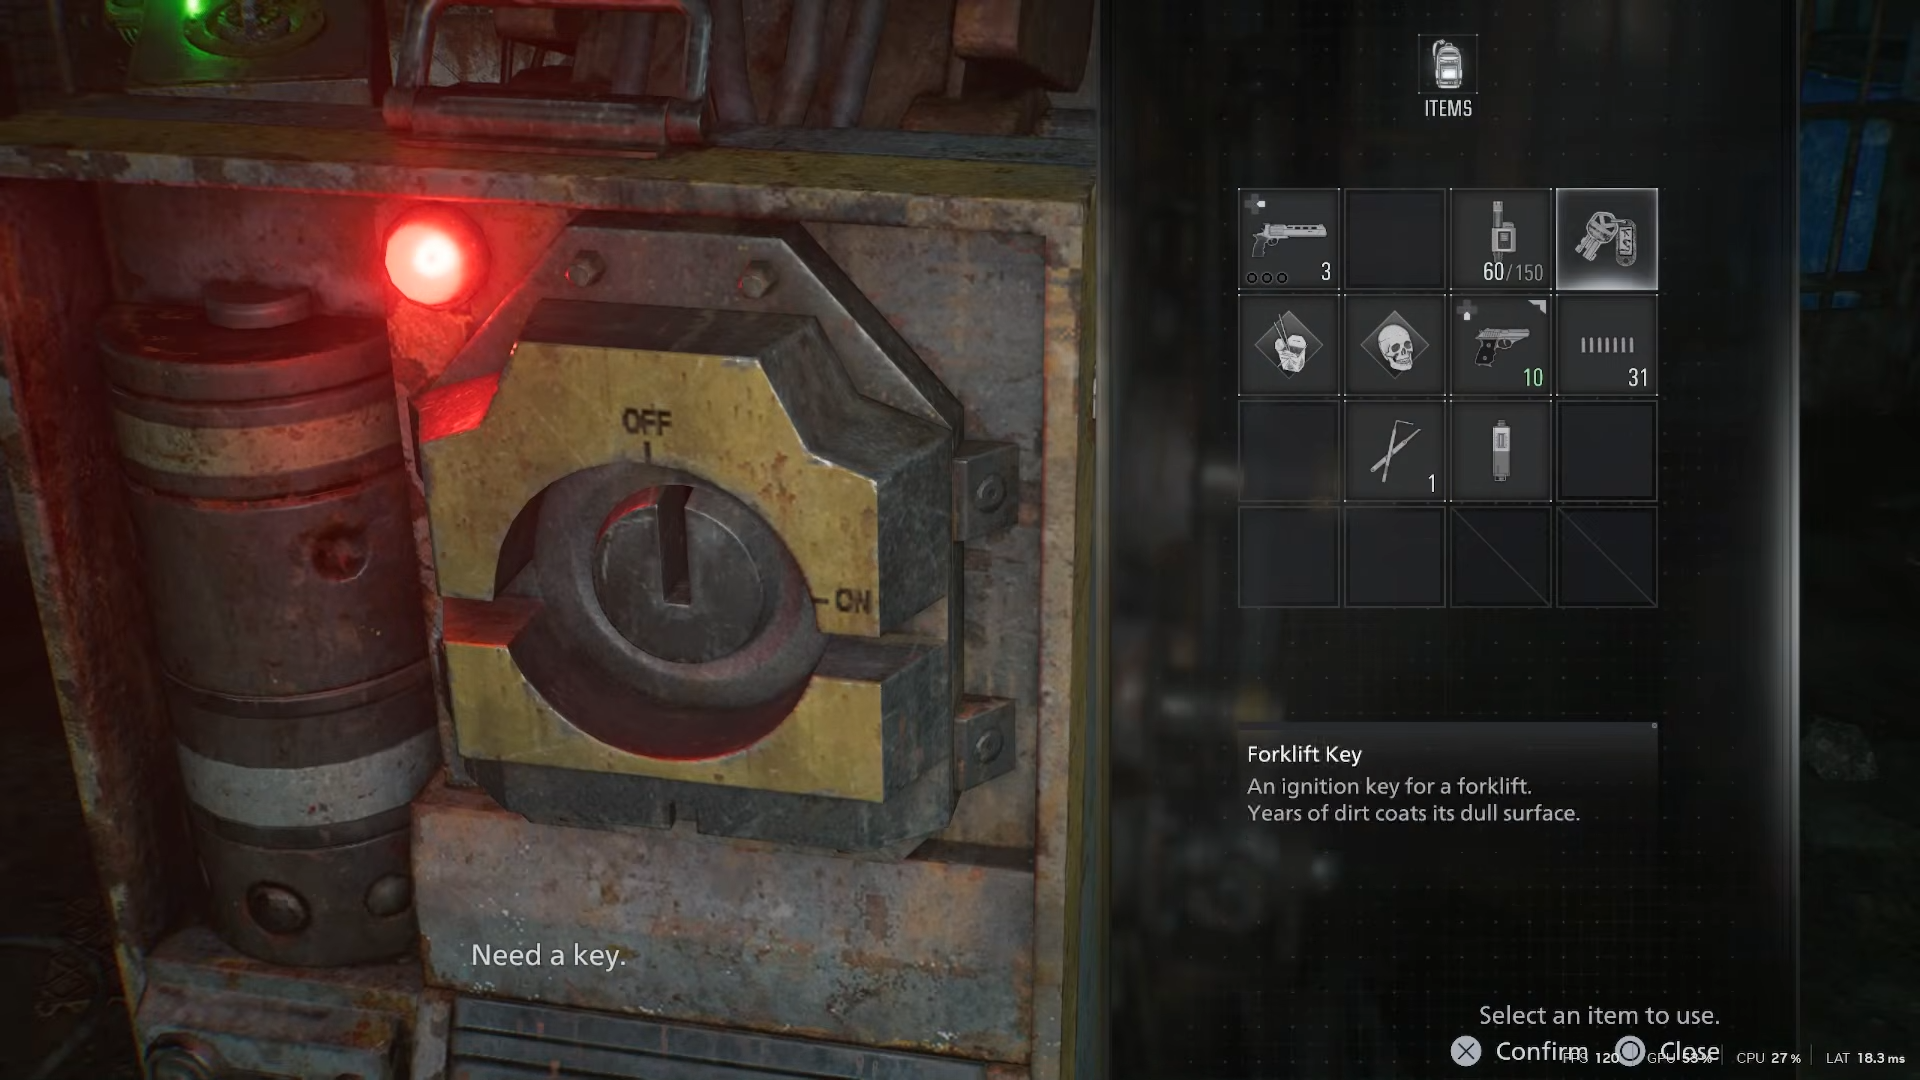
How to find the Forklift Key
In Processing, ignore the visible third Joint Plug for now.
Check right of the forklift to pick up the Forklift Key on the floor. Retrieve both plugs from Collection Pool on your way back. Insert one plug into the Workshop west of Holding Cells to enter.
How to power up and move the first forklift
From Workshop, crawl through the vent to the forklift room (second plug area). Wait for The Girl to patrol away, then insert the second plug into the wall socket to turn on lights and drive her off. Insert the Forklift Key into the forklift and activate it to clear the path to the Inspection area.
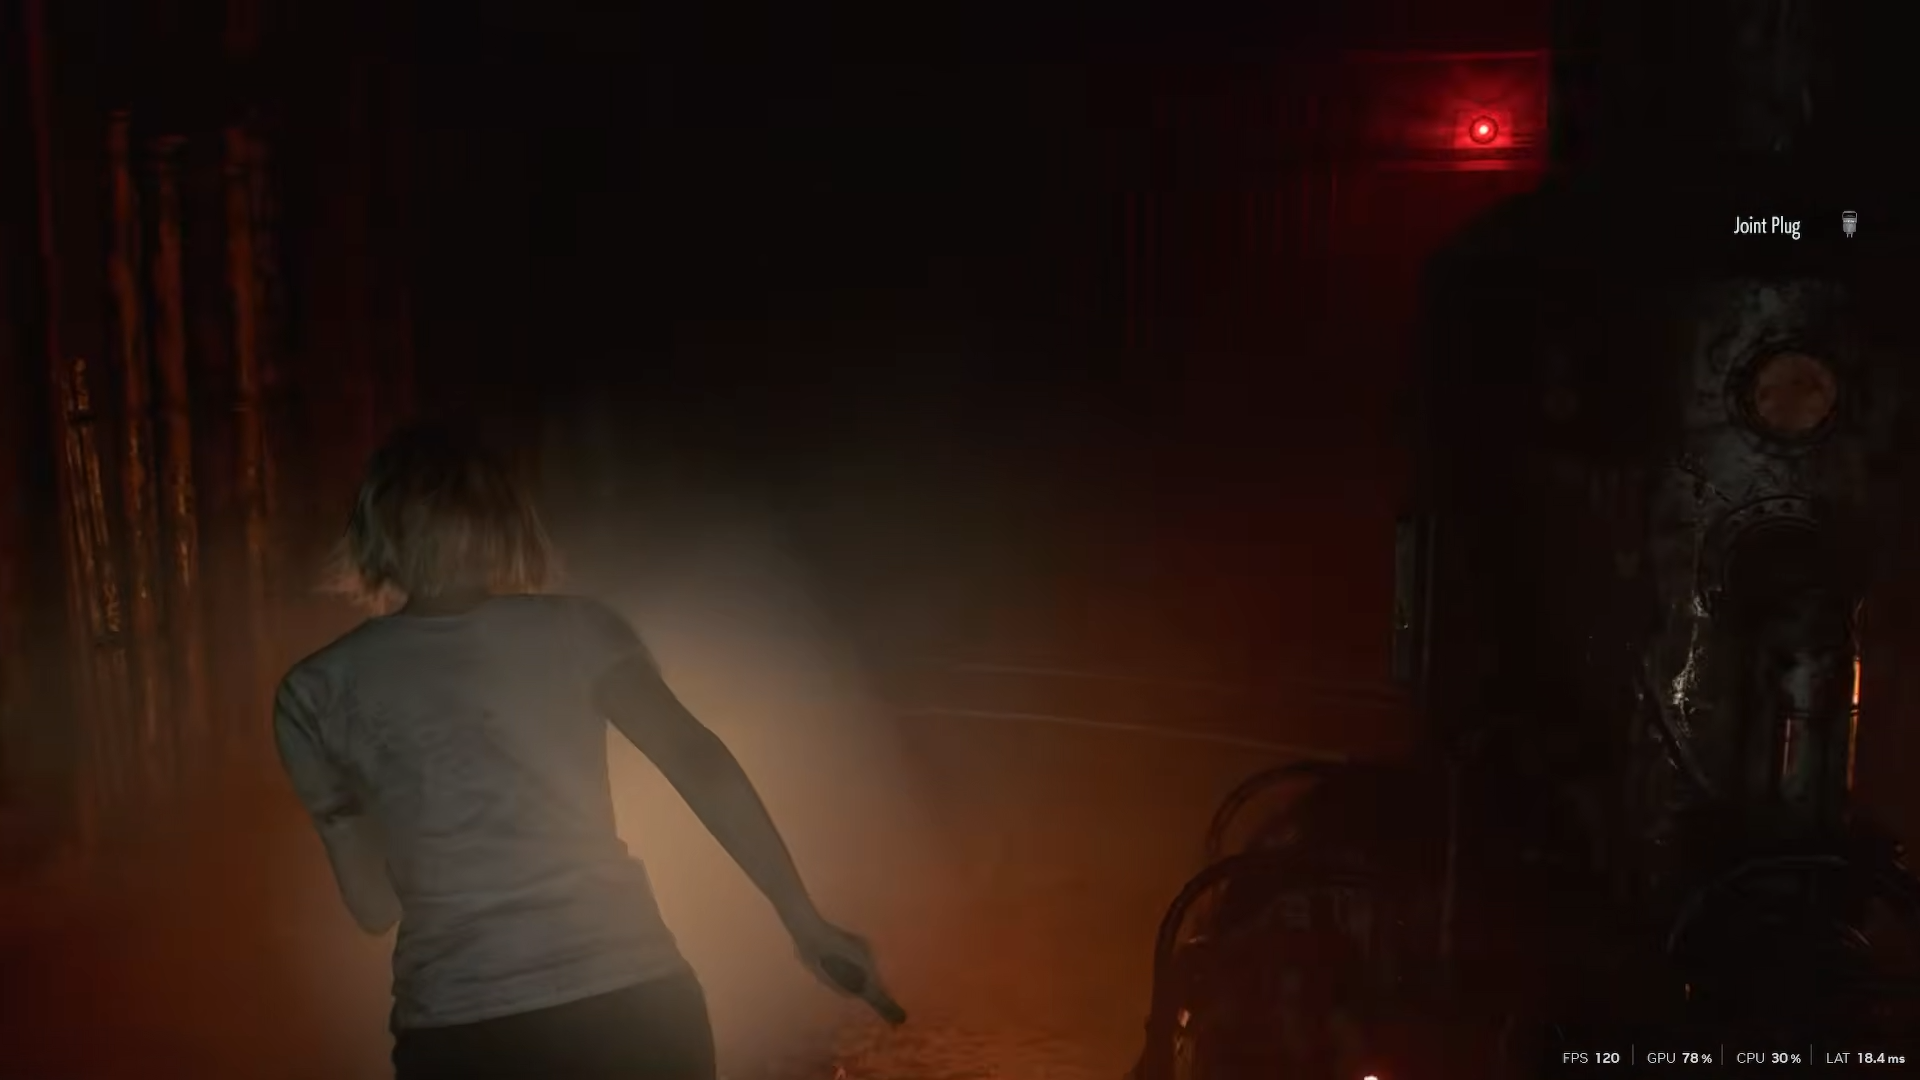
Inspection area conveyor puzzle
In Inspection, locate the lever but do not pull it yet. Find gaps in the moving line of bodies and time your movement with them to reach the halfway trolly—push it aside.
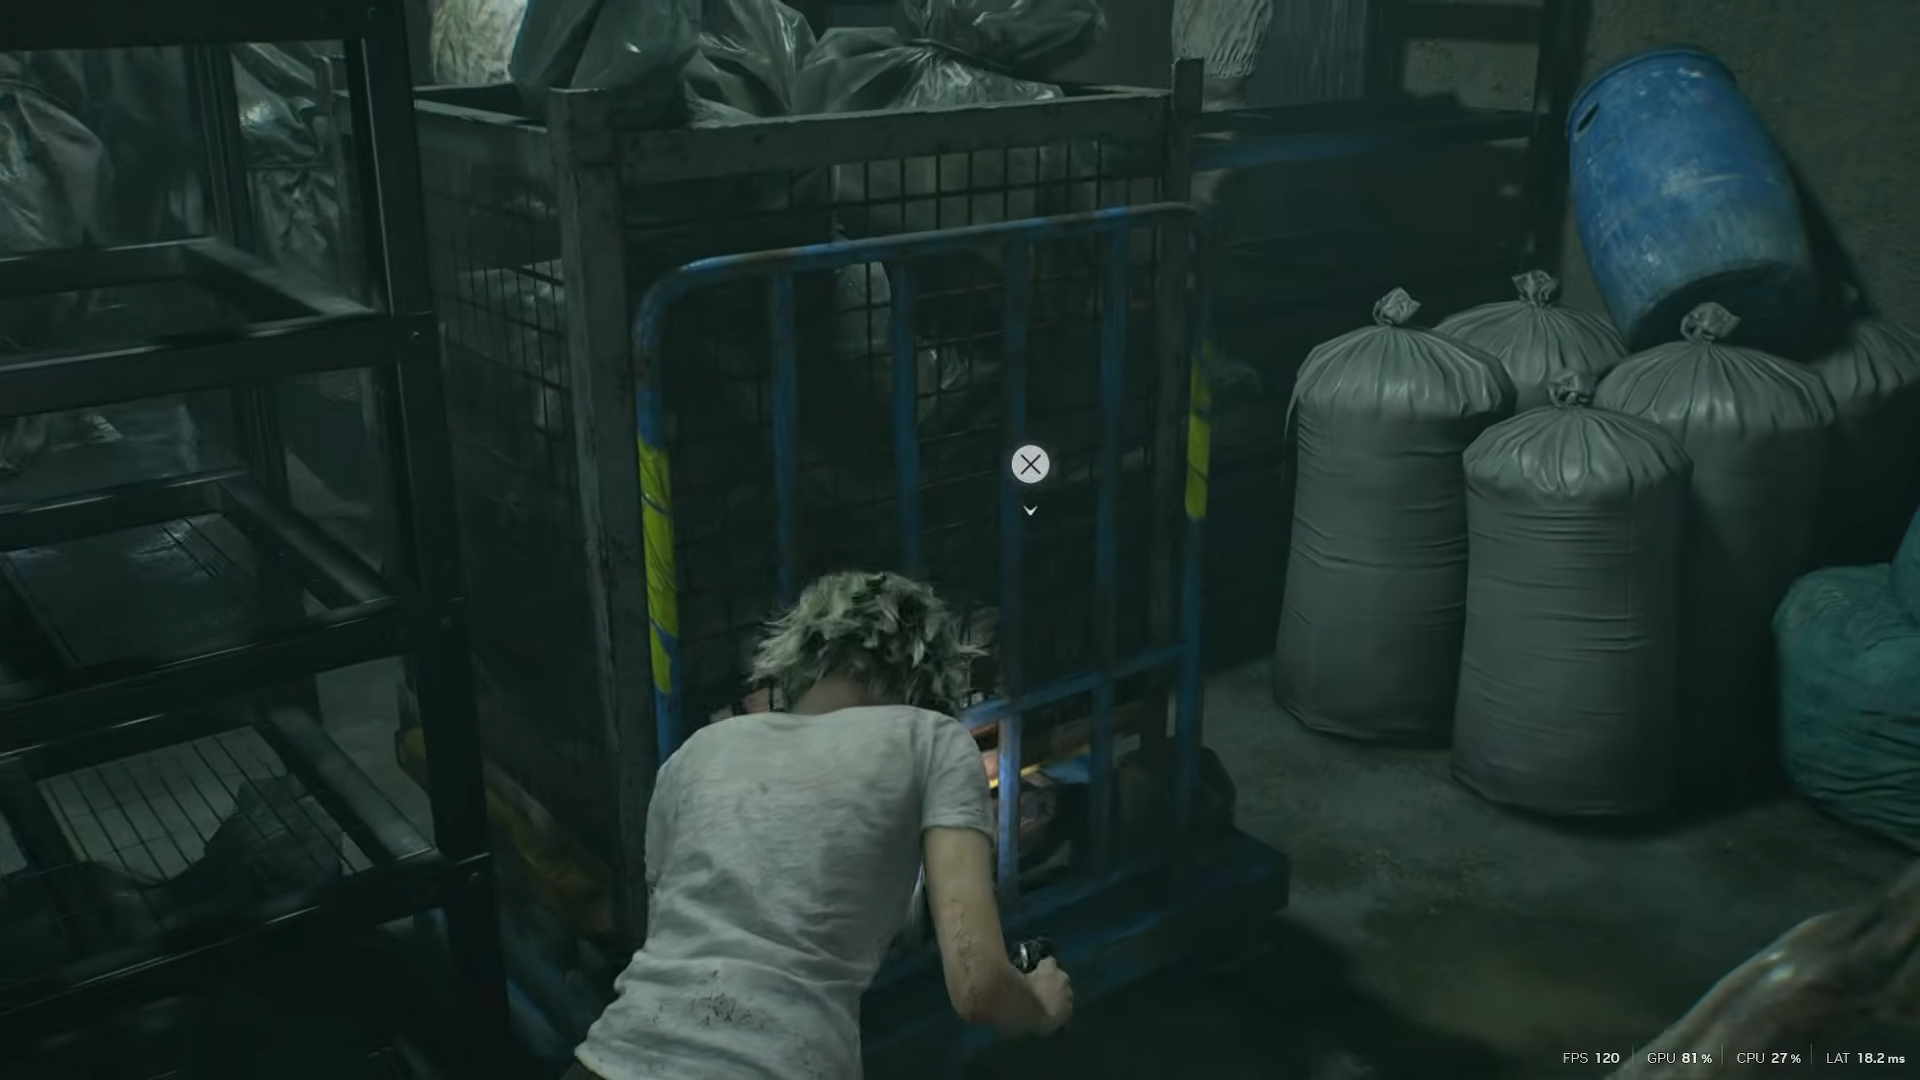
Return, pull the lever to reverse body flow (turn left). Follow gaps again to the opposite Processing side.
How to drain the blood pool and grab the third Joint Plug
In Processing, turn the wheel at the typewriter to drain the blood river below.
Climb down the ladder.
Run along the track dodging the meat grinder and waking zombies until it stops.
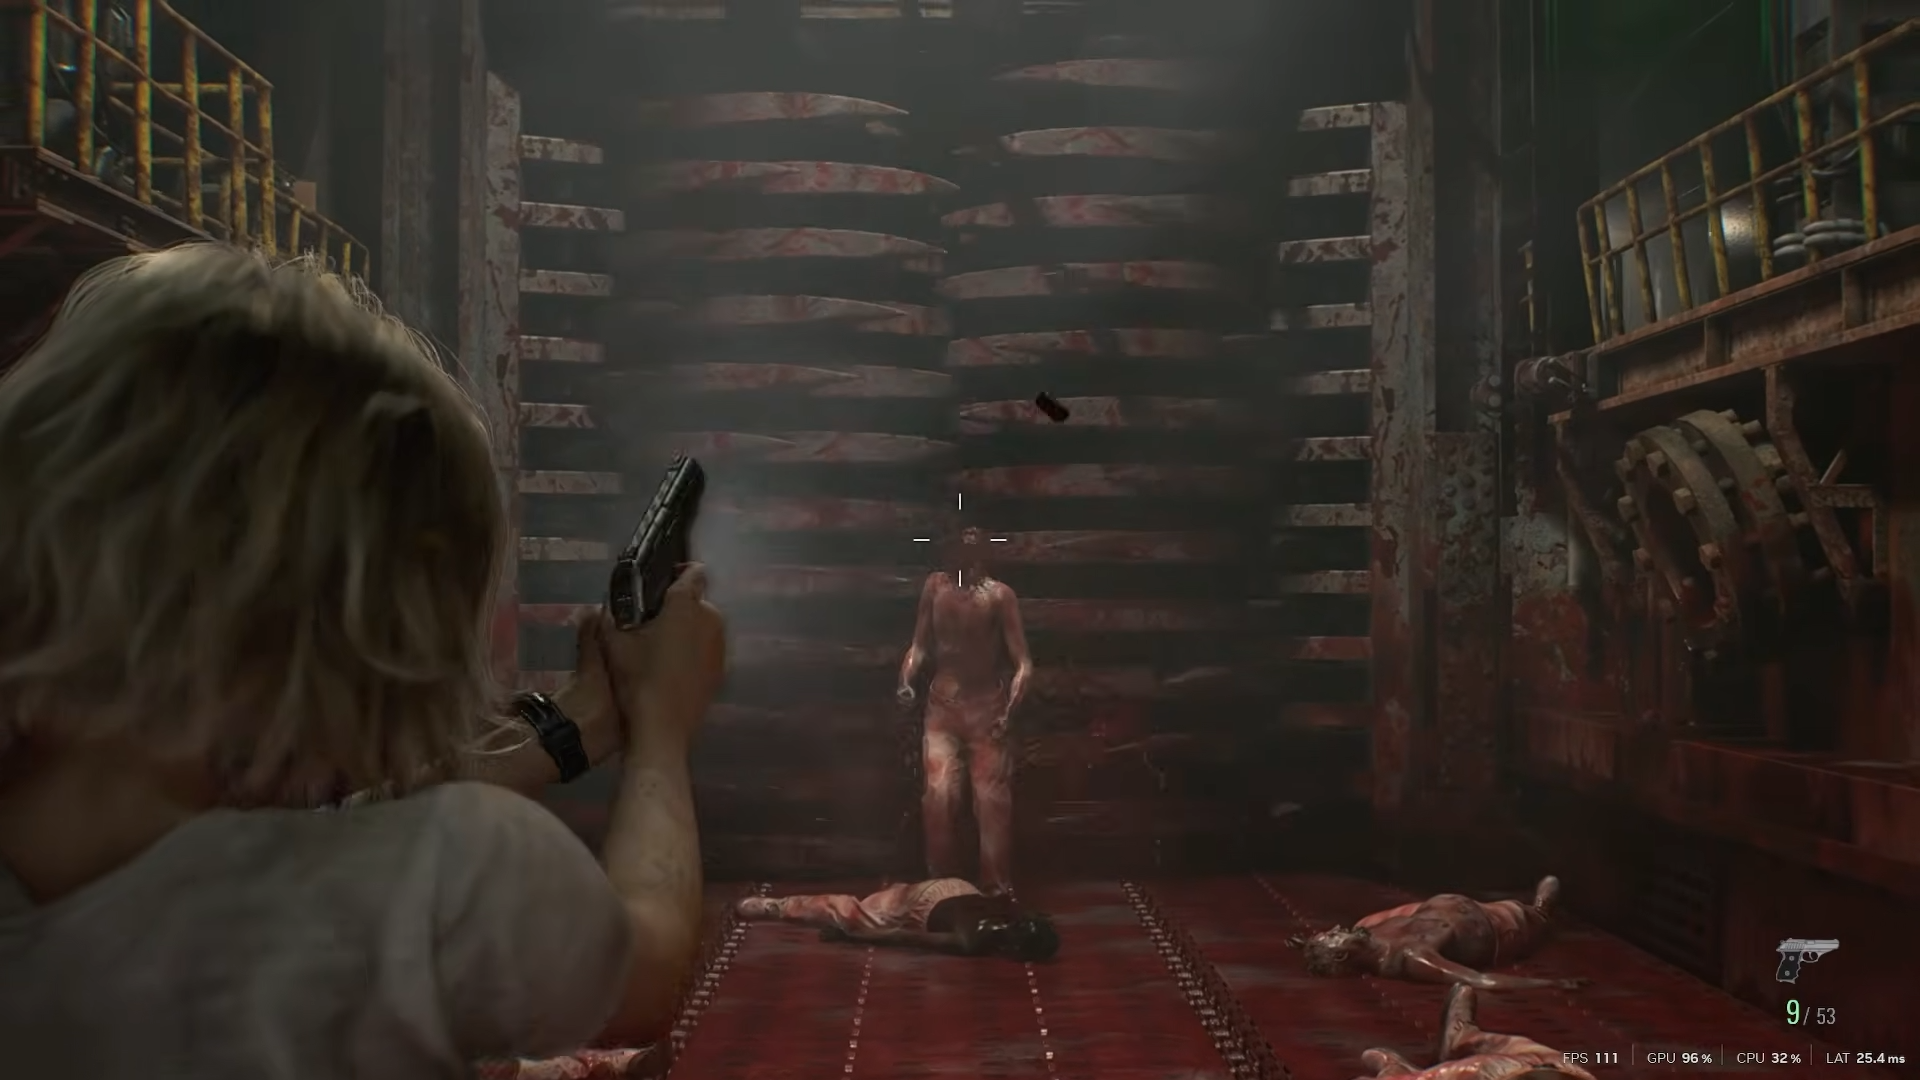
Climb up and pick up the third Joint Plug.
Power shuts down, deactivating the entry fan.
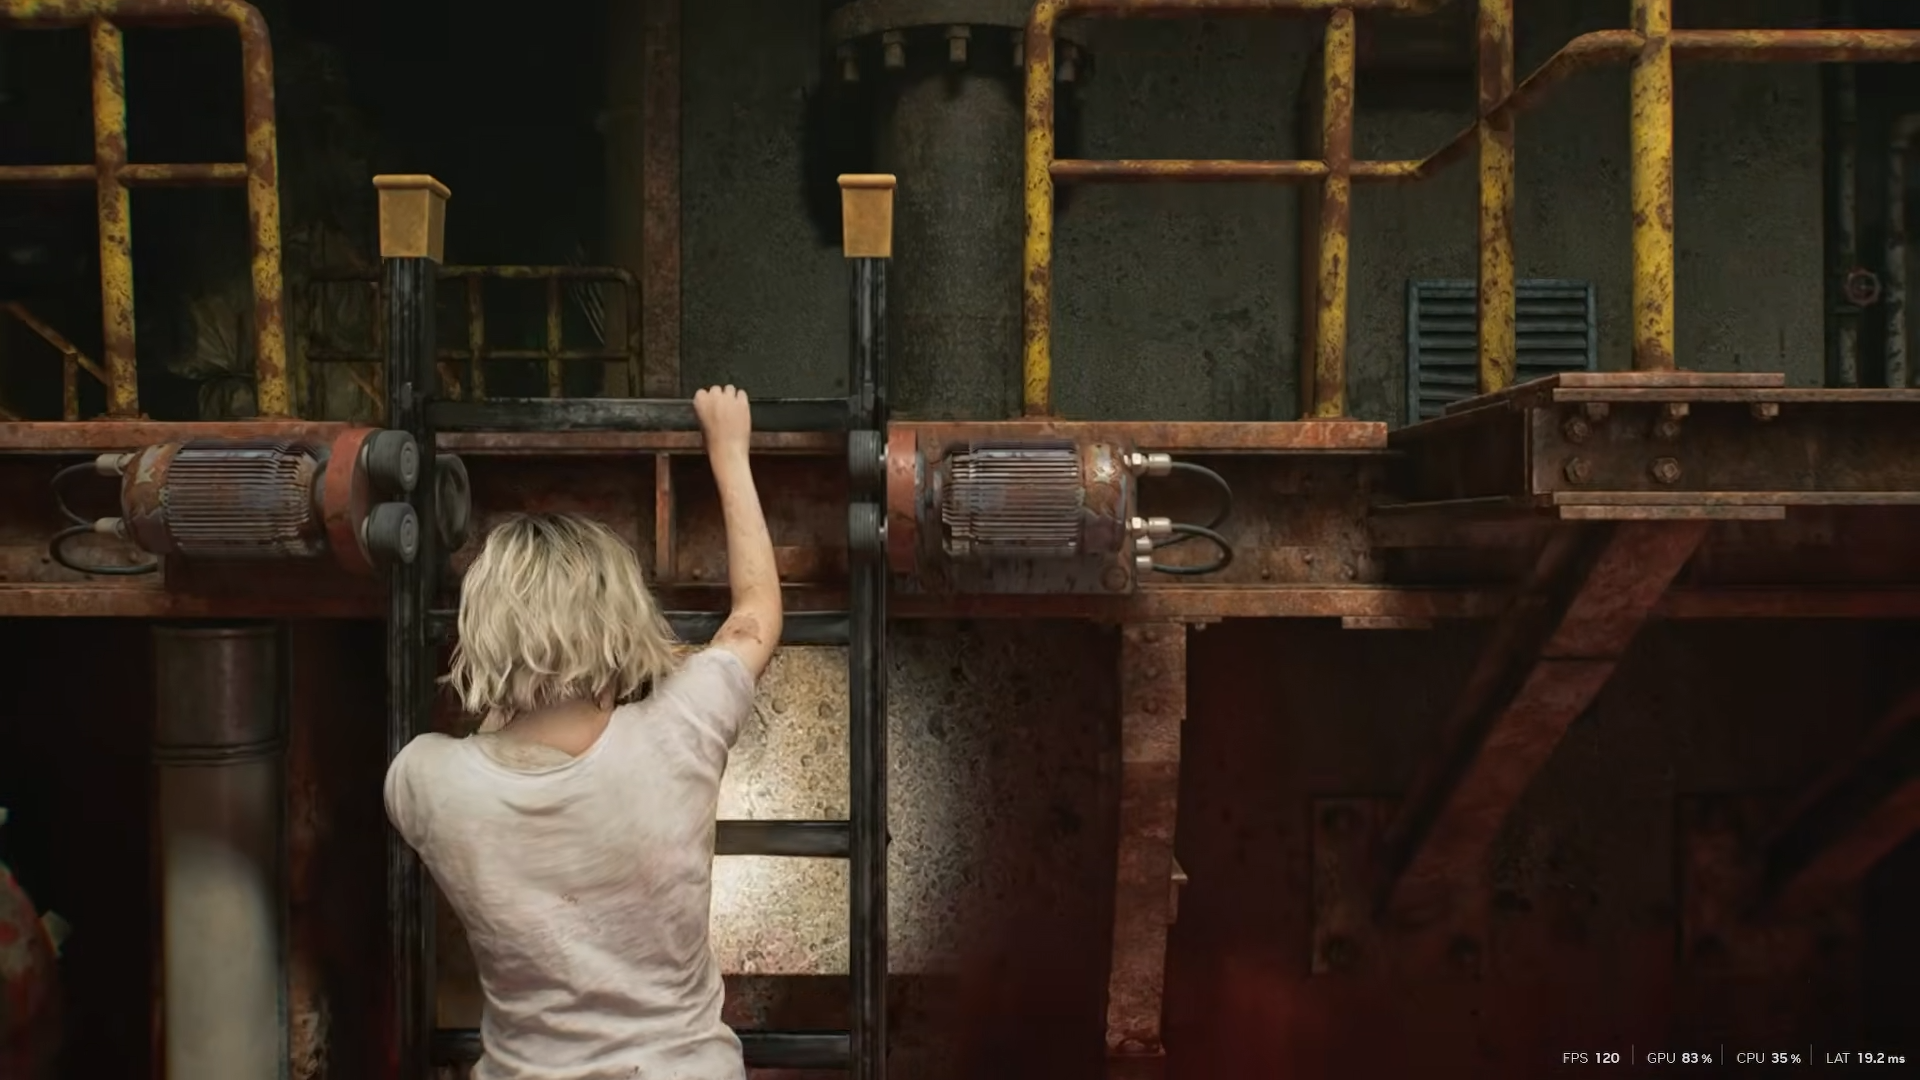
How to escape Collection Pool lower level
Crawl through the now-open fan shaft from Processing typewriter area—you slide to the Collection Pool bottom level. Head northwest to the elevator and ride it up.
How to retrieve all Joint Plugs
Zombie activity ramps up. Return to Inspection via Workshop and Furnace paths: grab the plug by the moved forklift first, then the one at Furnace/Workshop as you flee The Girl.
| Plug | Location Retrieved | Prerequisites |
|---|---|---|
| 1 | Holding Cells machine | None |
| 2 | Workshop forklift front | Plug 1 in Furnace socket |
| 3 | Processing blood pool upper | All prior steps, conveyor puzzle, drain wheel |
Rescue Emily and escape the basement
With all three Joint Plugs, return to Holding Cells. Insert them into the machine sockets and pull the left lever.
A cutscene triggers—carry Emily left toward the elevator. Spam interact to clear obstacles at the elevator door while shooting The Girl, then ascend to escape.
Tips
Grab extras like Raccoon items, easy locks in Bunkroom, hip pouches, and map near forklifts before final insertion—no return after. Save at typewriters in Processing.