What to know
- Each Bird’s Nest grants 180 points, so efficiency matters more than combat.
- You need around 4,000 points for 3 Stars, which equals roughly 23 nests.
- The bottom section of the map has the highest nest density.
- Smart routing through Piaza Roma, Town Hall, Red Tower, Church Ruins, and Piaza Arbusto is key.
The Loot Bird’s Nests Trial in ARC Raiders is less about gunfights and more about precision looting. If you approach it like a normal scavenging run, you’ll waste time. To secure 3 Stars, you need a structured route, tight movement, and a clear understanding of how the scoring system works. Once you know where to search and how many nests you actually need, the challenge becomes far more predictable.
| Requirement | Details |
|---|---|
| Trial Type | Loot-focused objective |
| Points per Bird’s Nest | 180 points |
| Target for 3 Stars | ~4,000 points |
| Estimated Nests Needed | 23 nests (approx.) |
| Best Map Area | Bottom section of the map |
| Key Locations | Piaza Roma, Town Hall, Red Tower, Church Ruins, Piaza Aburto |
| Notable Rewards | Epic Duck, Modules, Bobcat, Compensator Blueprint |
The math is simple but important. 180 points per nest means you need 23 chimneys searched to cross the 4,000-point threshold. Once you internalize this number, you stop guessing and start tracking your progress properly.
Why the bottom of the Buried City gives you the best results
The lower portion of the map consistently offers the highest building density. More buildings mean more rooftops, more chimneys, and ultimately more chances for Bird’s Nests to spawn.
What makes this area ideal is not just quantity but structure. Buildings are positioned close together, reducing travel time between searches. That short distance is critical. The Trial is essentially a race against time and competition. Every second spent rotating across the map reduces your total searchable chimneys.
If you spawn elsewhere, rotate downward immediately. It is better to reposition early than to commit to low-density areas.
How the scoring system determines your 3-star result
To hit 3 Stars, you need to think in checkpoints rather than vague progress. Since each nest gives 180 points, your scoring progress should look something like this:
| Nests Looted | Points Earned |
|---|---|
| 5 | 900 |
| 10 | 1,800 |
| 15 | 2,700 |
| 20 | 3,600 |
| 23 | 4,140 (3-Star Range) |
Reaching 20 nests puts you close, but it is not enough. You must push beyond that to safely clear the 4,000-point mark. If you fall short at 21 or 22 nests, you risk missing the 3-Star threshold.
Because of this, efficient routing is everything.
Exact route for Bird’s Nest farming in ARC Raiders
Start at Piaza Roma and nearby buildings
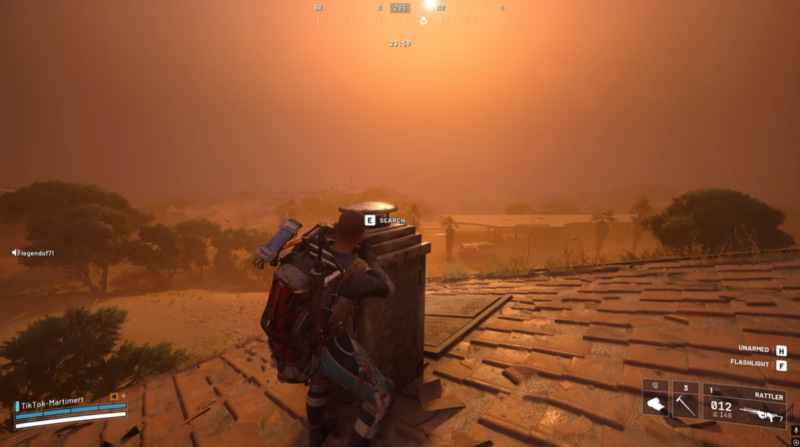
Begin your run in Piaza Roma. This area has tightly packed structures with accessible rooftops and chimneys. You should move systematically from one building to the next rather than jumping randomly across rooftops.
Focus on full clears. Do not leave a building half-checked. If you skip chimneys, you reduce your point potential and may need to travel farther later.
From Piaza Roma, clear surrounding adjacent structures before moving forward. This ensures you maximize the early-game nest density while competition is still spreading across the map.
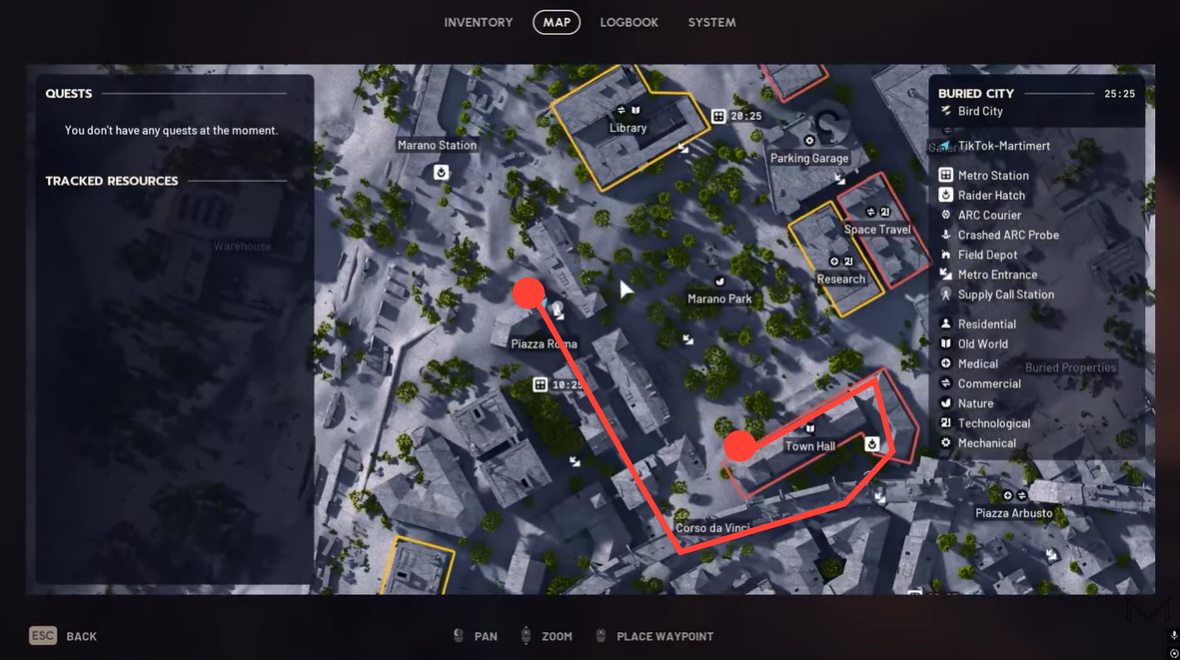
Transition to Town Hall for mid-run momentum
After Piaza Roma, rotate toward Town Hall. This area maintains solid rooftop coverage and often has slightly less early traffic compared to central landmarks.
By this stage, you should aim to have at least 8 to 12 nests collected. If you are below that pace, increase your movement speed between buildings and reduce unnecessary looting.
Remember, combat slows you down. The Trial rewards searching, not fighting. Avoid engagements unless absolutely necessary.
Sweep Red Tower and Church Ruins for low-traffic gains
Red Tower and Church Ruins are strong mid-to-late route picks because they tend to attract fewer players compared to high-profile zones.
This is where you make up ground if you are slightly behind pace. Because traffic is lighter, you can often search rooftops uninterrupted.
By the time you finish these areas, you should be pushing toward the 18–20 nest mark. At this point, your 3-Star run becomes realistic.
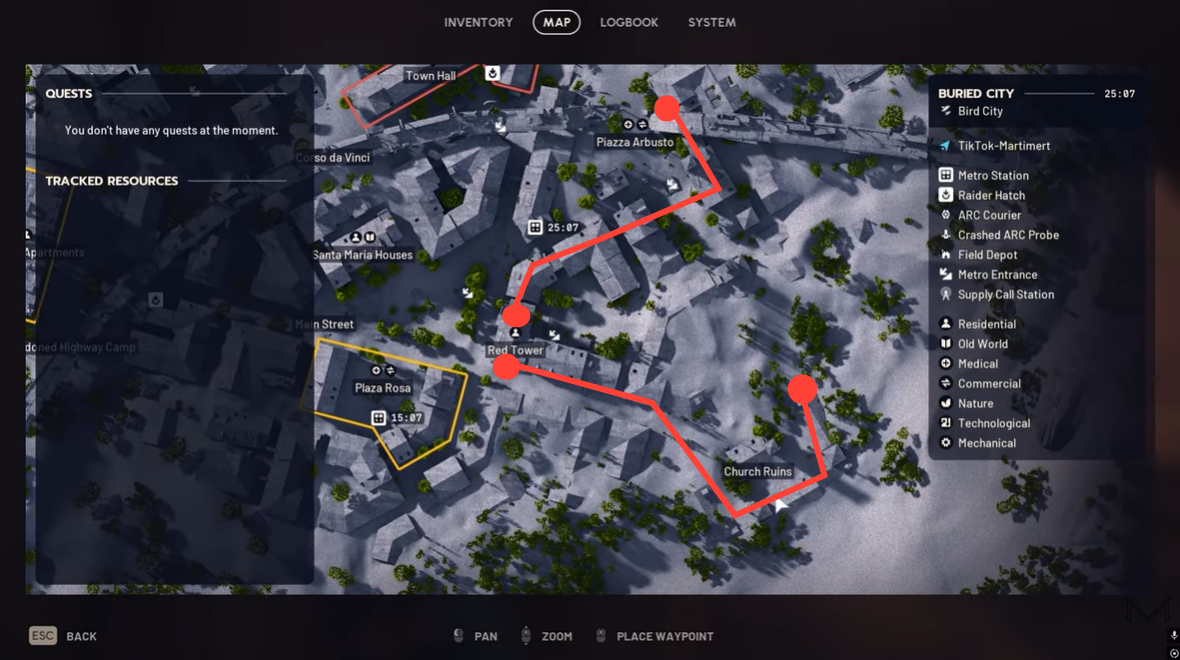
Finish at Piaza Aburto for final point push
Piaza Aburto is your closing zone. The key here is thoroughness. Check every building. Do not assume a chimney has already been looted unless it is clearly empty.
This final sweep should give you the remaining nests needed to cross 4,000 points. If you entered this phase with 18–20 nests already secured, you only need a handful more to guarantee 3 Stars.
Managing time and risk during the Trial
The biggest mistake players make is overcommitting to fights. While eliminations can be tempting, they do not contribute to the nest score. Every extended gunfight is effectively lost search time.
If you encounter other Raiders, reposition instead of forcing the engagement. The Trial rewards route discipline over aggression.
Movement efficiency also matters. Use vertical traversal intelligently. Climbing, vaulting, and rooftop movement should be fluid. Hesitation adds up across 20+ buildings.
Full reward breakdown for the Loot Bird’s Nests Trial
While the primary goal is 3 Stars, the rewards are what make the grind worthwhile.
| Reward Type | Item |
|---|---|
| Cosmetic | Epic Duck |
| Equipment | Modules |
| Early Reward | Bobcat |
| Blueprint | Compensator Blueprint |
The Epic Duck cosmetic stands out as a highlight reward, while the Bobcat and Compensator Blueprint offer practical value early on. Securing 3 Stars maximizes your reward consistency and progression speed.

Common mistakes you should avoid
One of the most common errors is splitting your route across the entire map. The trial is density-based, and spreading out reduces your efficiency.
Another issue is poor chimney tracking. If you lose count of your nests, you might extract prematurely. Always estimate your progress based on the 23-nest benchmark.
Finally, many players underestimate the final push. Even if you are at 3,600 points, that last 400 can be difficult without a concentrated closing sweep.
Securing 3 Stars consistently
The Loot Bird’s Nests Trial in ARC Raiders is less about luck and more about execution. If you focus on the bottom map density, follow a structured route, and commit to the 23-nest target, 3 Stars becomes repeatable rather than random.
Once you internalize the scoring math and optimize your rotation from Piaza Roma to Piaza Aburto, you’ll find that hitting 4,000+ points feels controlled instead of chaotic. Stay disciplined, avoid unnecessary fights, and treat every rooftop as part of a calculated path.