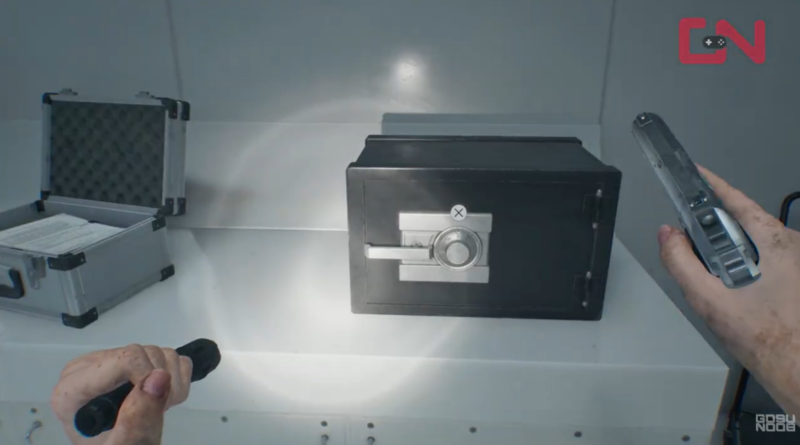
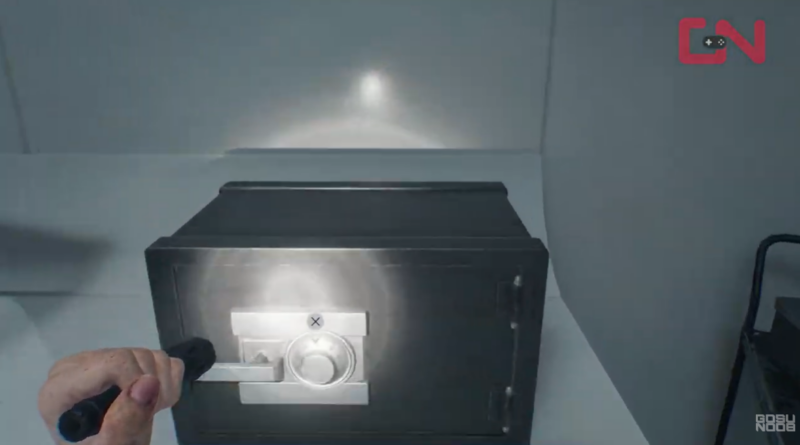
- The safe is located in the Monitor Control Room, near the Lab Entrance.
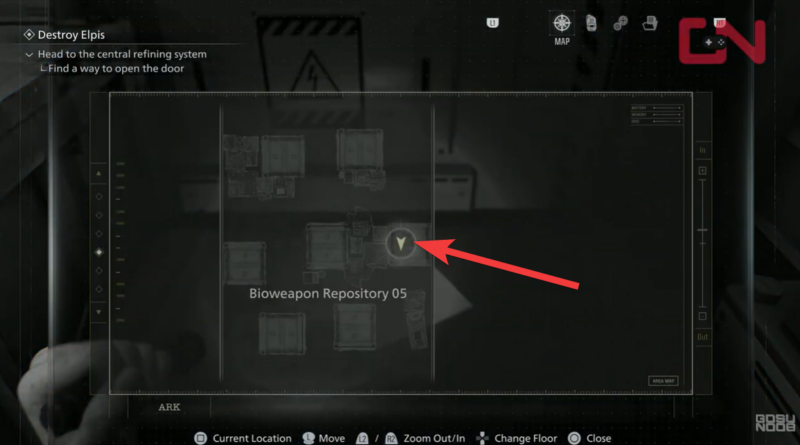
- The code is found on a leaflet inside a crate in Bioweapon Repository 05 (Lower Level).
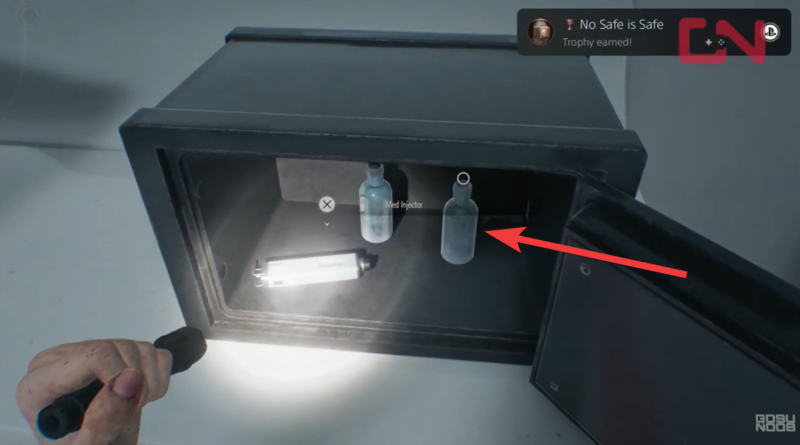
- Rewards include a Med Injector, Bottle of Acid, and Empty Bottle.
- Opening all safes in the game unlocks the “No Safe Is Safe” trophy.
If you are progressing through the “Destroy Elpis” objective in Resident Evil Requiem, you’ll eventually pass through the Lab Entrance area. Before pushing further into the central refining system, it’s worth detouring to unlock the safe in the Monitor Control Room. The rewards are practical early-to-mid game supplies, and you’ll also be ticking progress toward a trophy.
Monitor Control Room safe details
| Category | Details |
|---|---|
| Safe Location | Monitor Control Room |
| Starting Point | Lab Entrance |
| Code Location | Bioweapon Repository 05 (Lower Level) |
| Where to Find Code | Inside a crate (Leaflet item) |
| Safe Rewards | Med Injector, Bottle of Acid, Empty Bottle |
| Related Trophy | “No Safe Is Safe” (Open all safes) |
Location of Monitor Control Room safe in RE9
Starting at the Lab Entrance, you’ll need to move through the connected interior corridors toward the Monitor Control Room. The room is clearly marked on the map and sits adjacent to the main lobby-facing section of the lab complex.

Step 1
Enter the Lab Entrance area and open your map. Identify the Monitor Control Room, which is directly connected to this section.
Step 2
Clear any enemies along the corridor leading to the Monitor Control Room. This space can be tight, so make sure you’re prepared before interacting with the safe.
Step 3
Locate the safe inside the Monitor Control Room. It is positioned along the wall and becomes interactable once you approach it.
At this point, you won’t have the code yet—so your next task is heading to the Lower Level.
Location of safe code
The code isn’t randomly generated. It’s written on a leaflet stored in a crate at the Bioweapon Repository.
Step 1
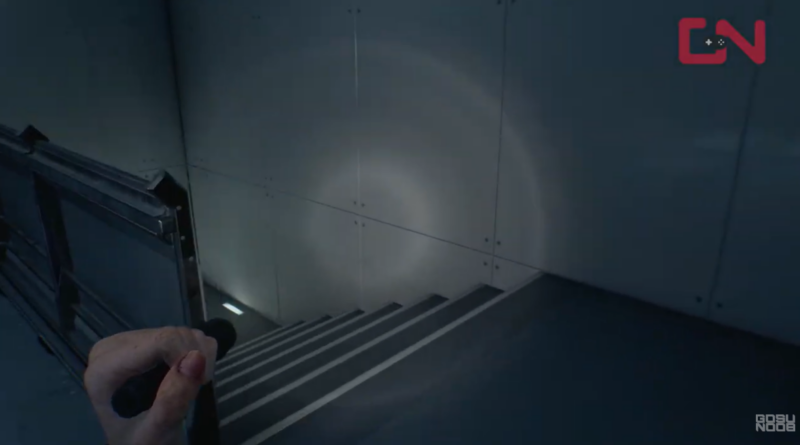
From the main level, access the Lower Level of the facility using the nearest stairwell or elevator.
Step 2
Navigate to Bioweapon Repository 05. This room is labeled on your map and contains multiple storage crates.
Step 3
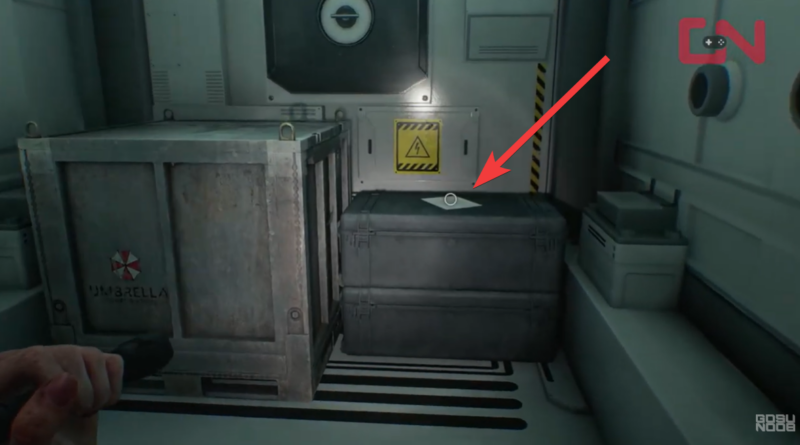
Search the crates inside the room carefully. One crate contains a Leaflet item.
Step 4
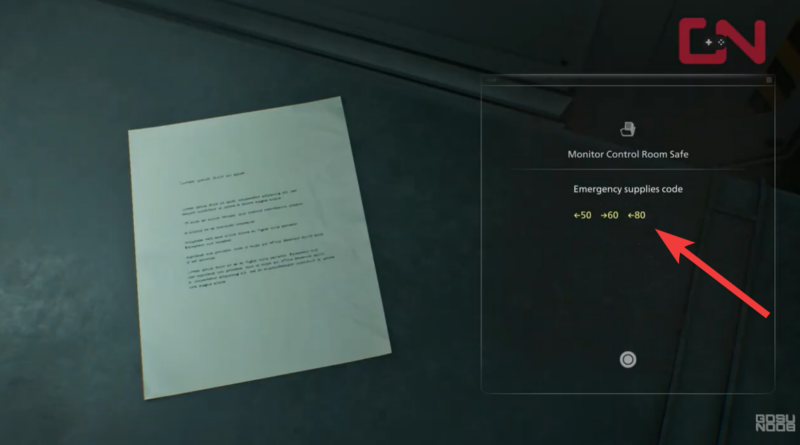
Inspect the leaflet in your inventory. The safe code is written directly on it.
Once you’ve noted the code, return to the Monitor Control Room.
How to open the safe and claim your rewards
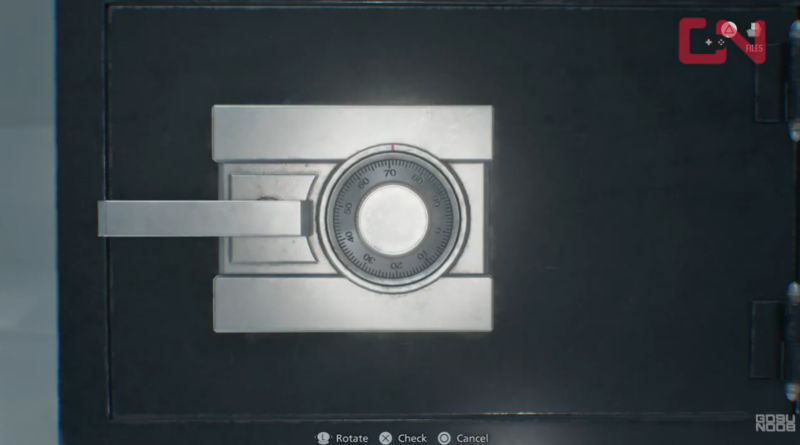
With the code in hand, go back to the Monitor Control Room safe. The Key is -50-60-80.
Step 1
Interact with the safe and input the code exactly as written on the leaflet.
Step 2
Confirm the combination to unlock the safe.
Step 3
Collect your rewards immediately after opening it.
Safe rewards breakdown
| Item | Type | Use |
|---|---|---|
| Med Injector | Healing Item | Restores health during combat |
| Bottle of Acid | Crafting Material | Used in advanced crafting recipes |
| Empty Bottle | Crafting Material | Base component for throwable or chemical items |
These items are especially useful if you’re preparing for tougher encounters deeper inside the refining system.
Trophy progression toward “No Safe Is Safe”
Opening this safe contributes to the “No Safe Is Safe” trophy. To unlock it, you must open every safe in Resident Evil Requiem across all areas and characters.
Each safe requires a specific code found elsewhere in the environment. None are random, so thorough exploration is key. If you’re aiming for 100% completion, make sure you track which safes you’ve already opened.
Why this detour is placed in the mid-game
If you’re near the Lab Entrance, take the time to grab the leaflet from Bioweapon Repository 05 on the Lower Level and unlock the Monitor Control Room safe. You’ll secure useful supplies and make progress toward the “No Safe Is Safe” trophy—all without significantly delaying your main objective.
The Med Injector can help stabilize your resources before a boss encounter, while the Bottle of Acid and Empty Bottle expand your crafting flexibility. Even if you’re stocked on healing items, the crafting materials give you more strategic options later.
It’s a short detour, but one that pays off.