What to know
- Yield fertilizer dramatically increases how many crops you harvest, especially from strawberries and other small‑bed plants.
- Lower‑rank fertilizers are not worth using; save your materials for the 4th and 5th tier options.
- You need silver and gold poop from ranching skills to craft the higher‑level fertilizers.
- Keep your garden beds small and focus fertilizer on crops you plan to process or sell.
On Starsand Island, using yield fertilizer shifts your farming from a slow grind to a fast, efficient loop. Instead of tending dozens of plants for a modest haul, you can plant a tiny bed and still pull out six or even sixty times the normal yield. This makes it easier to stockpile ingredients for recipes, crafting, and selling without dedicating half your island space to crops.
| Aspect | Detail |
|---|---|
| Main benefit | Multiplies crop output per harvest (up to much higher than base) |
| Best‑rank fertilizers | 4th and 5th tiers; 3rd is niche, 1st and 2nd are not recommended |
| Key resource from ranching | Silver poop and gold poop from ranching skills |
| Ideal garden size | Small, focused beds instead of sprawling fields |
| Recommended use | Only on high‑priority crops you process or sell |
How to unlock and use ranching skills
Before you can make strong yield fertilizers, you need the right poop from your animals. You unlock this through the ranching skill tree. Open the skill menu, then navigate to the ranching section. Inside ranching, look for the nodes that increase your chances to obtain silver poop and gold poop when you interact with your animals.
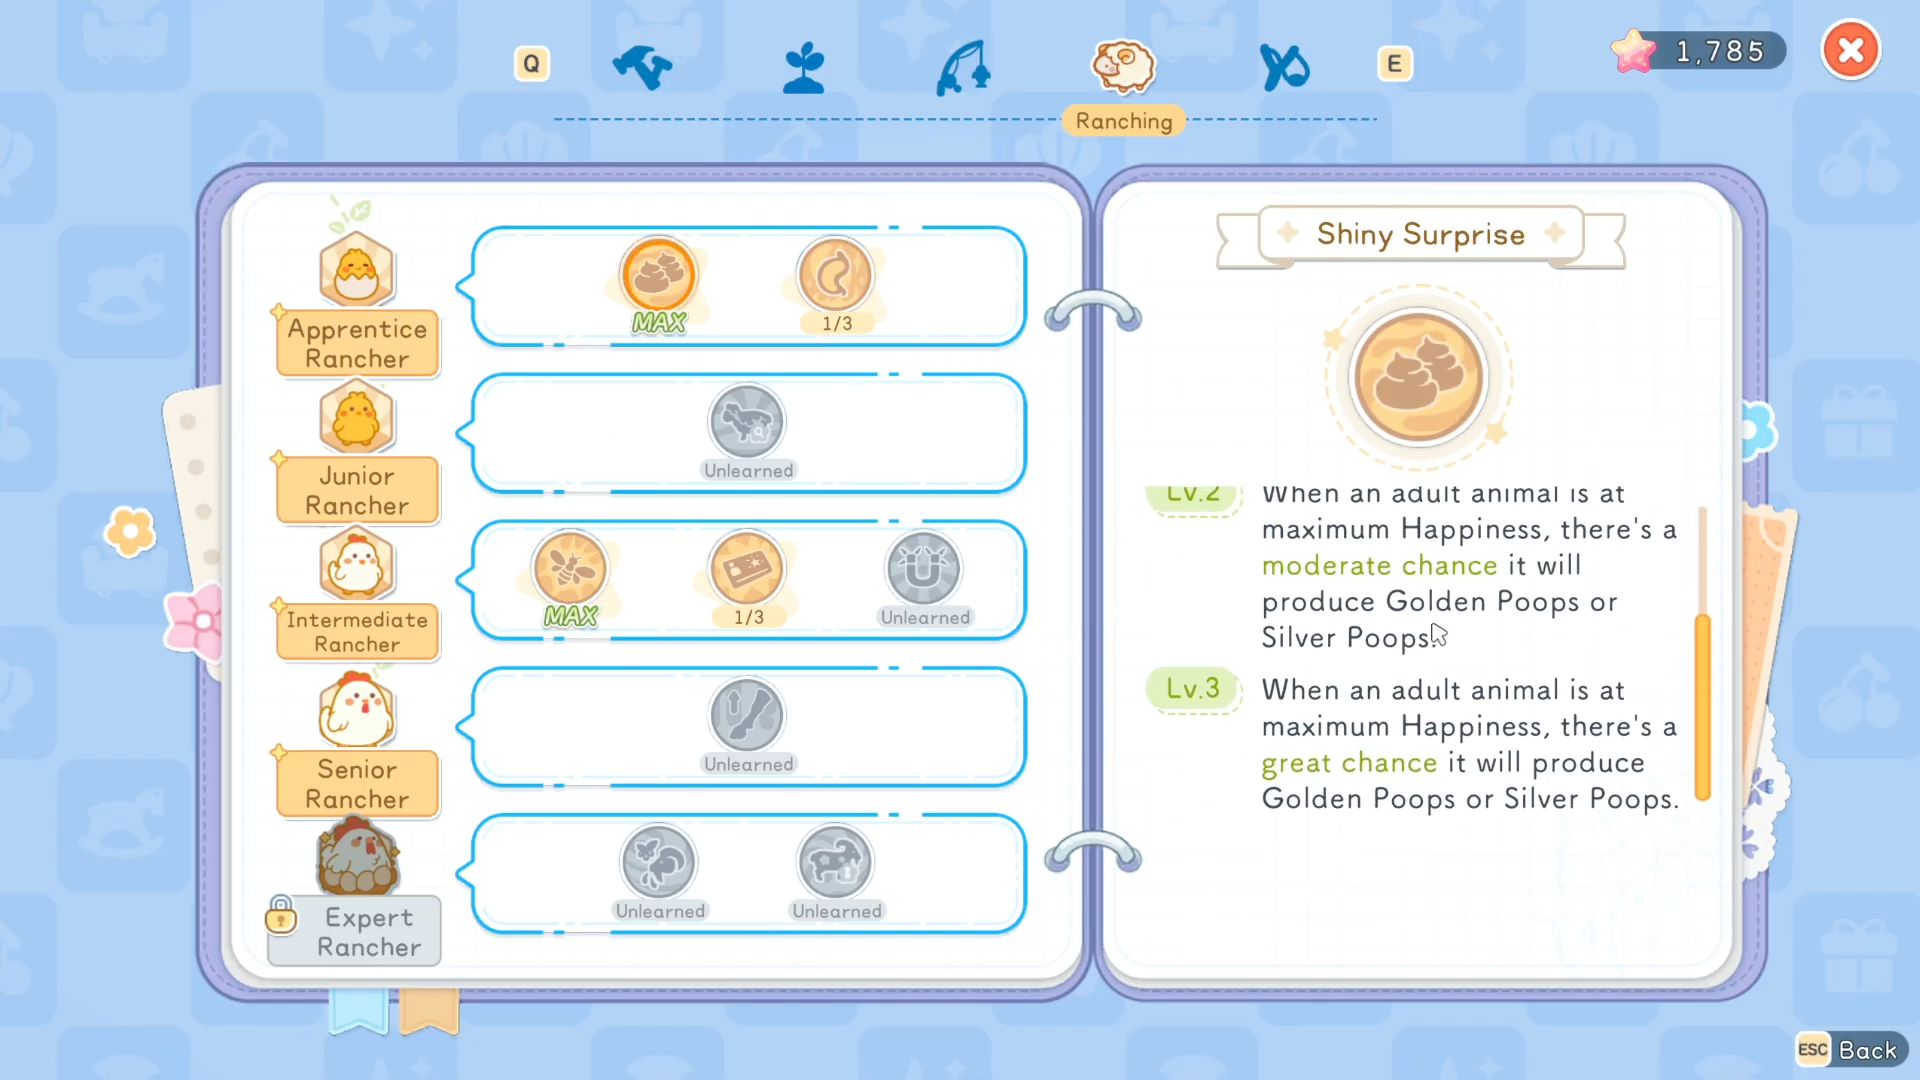
Spend your skill points to fully max out these chances as soon as you can. Once unlocked, your animals will regularly drop silver and gold manure, which becomes the backbone of your higher‑tier yield fertilizer recipes.
How to craft yield fertilizer step by step
Step 1: Gather starting materials
Collect the basic crafting ingredients you need for lower‑rank fertilizers. These usually include common farm and foraging materials such as fiber, mushrooms, and basic compost‑like items that are easy to farm or find early on the island. Keep a steady supply of mushrooms since they appear in several fertilizer recipes.
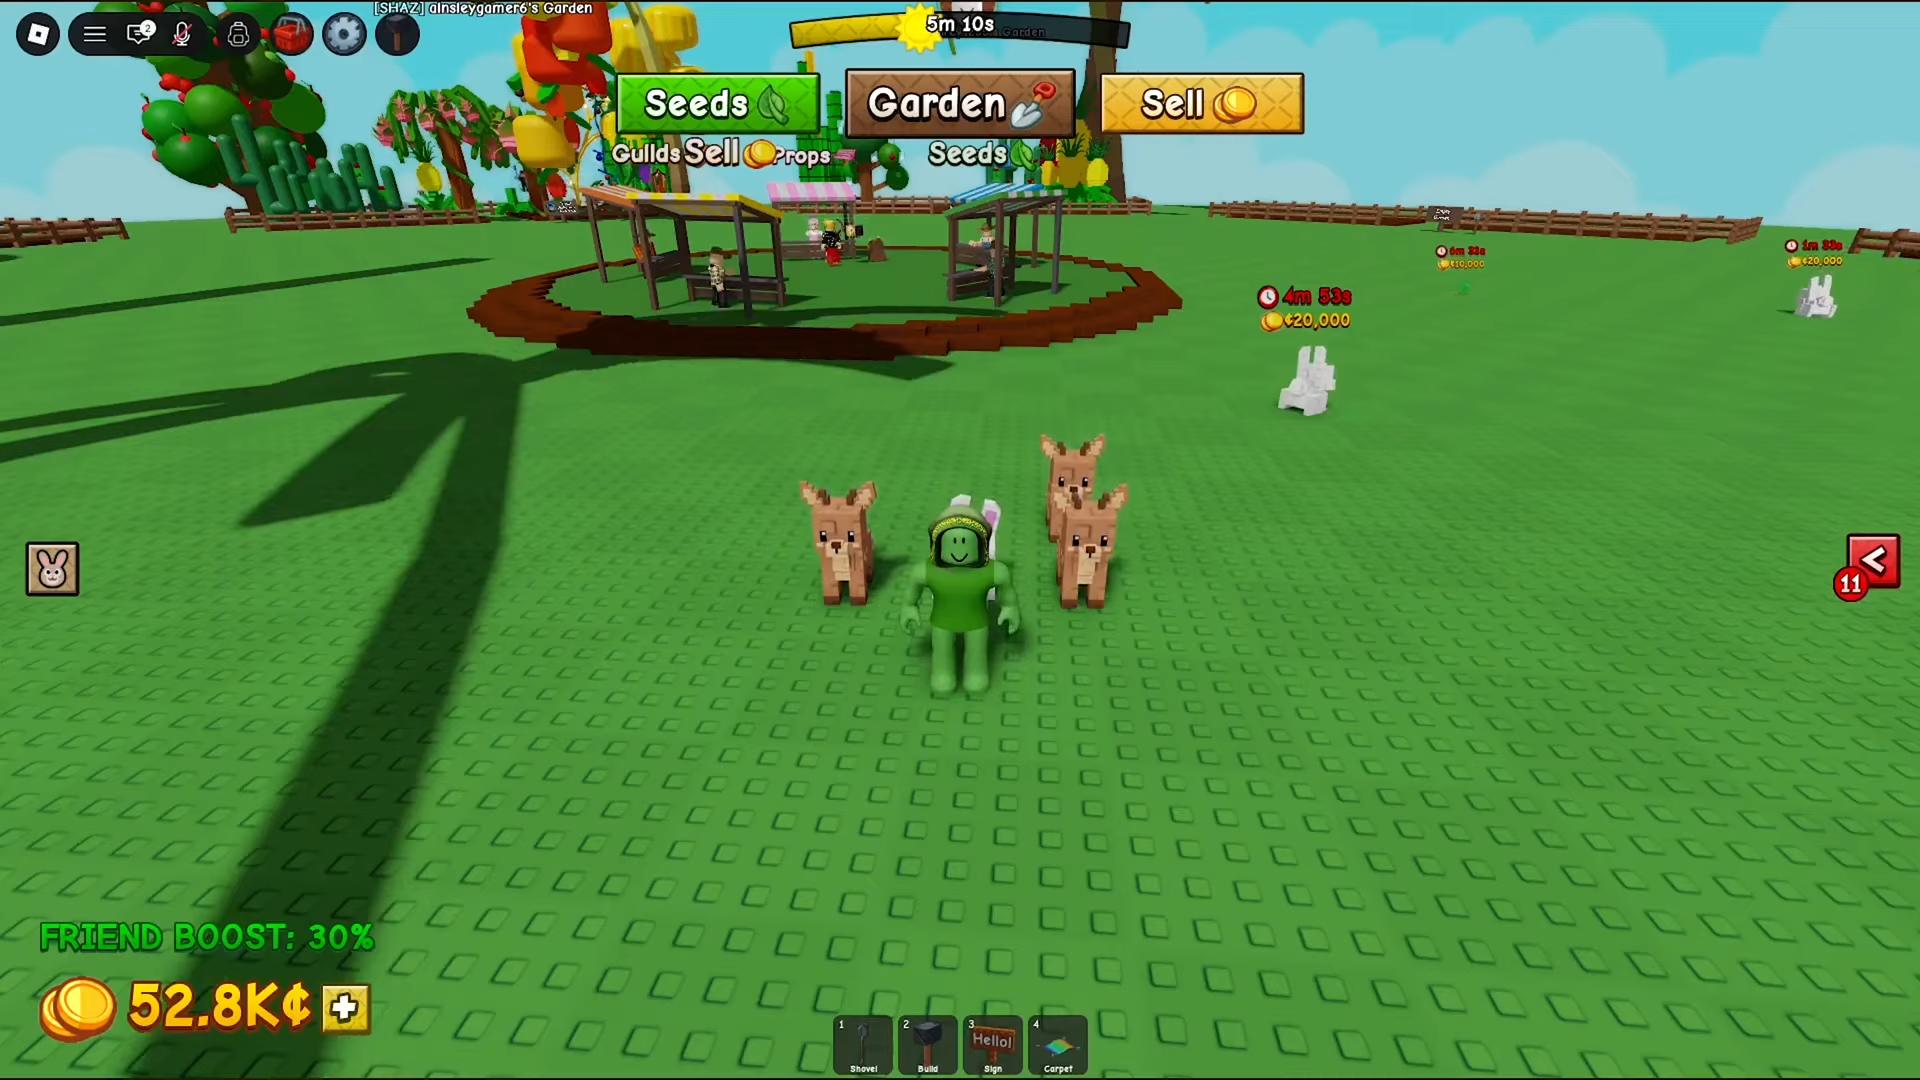
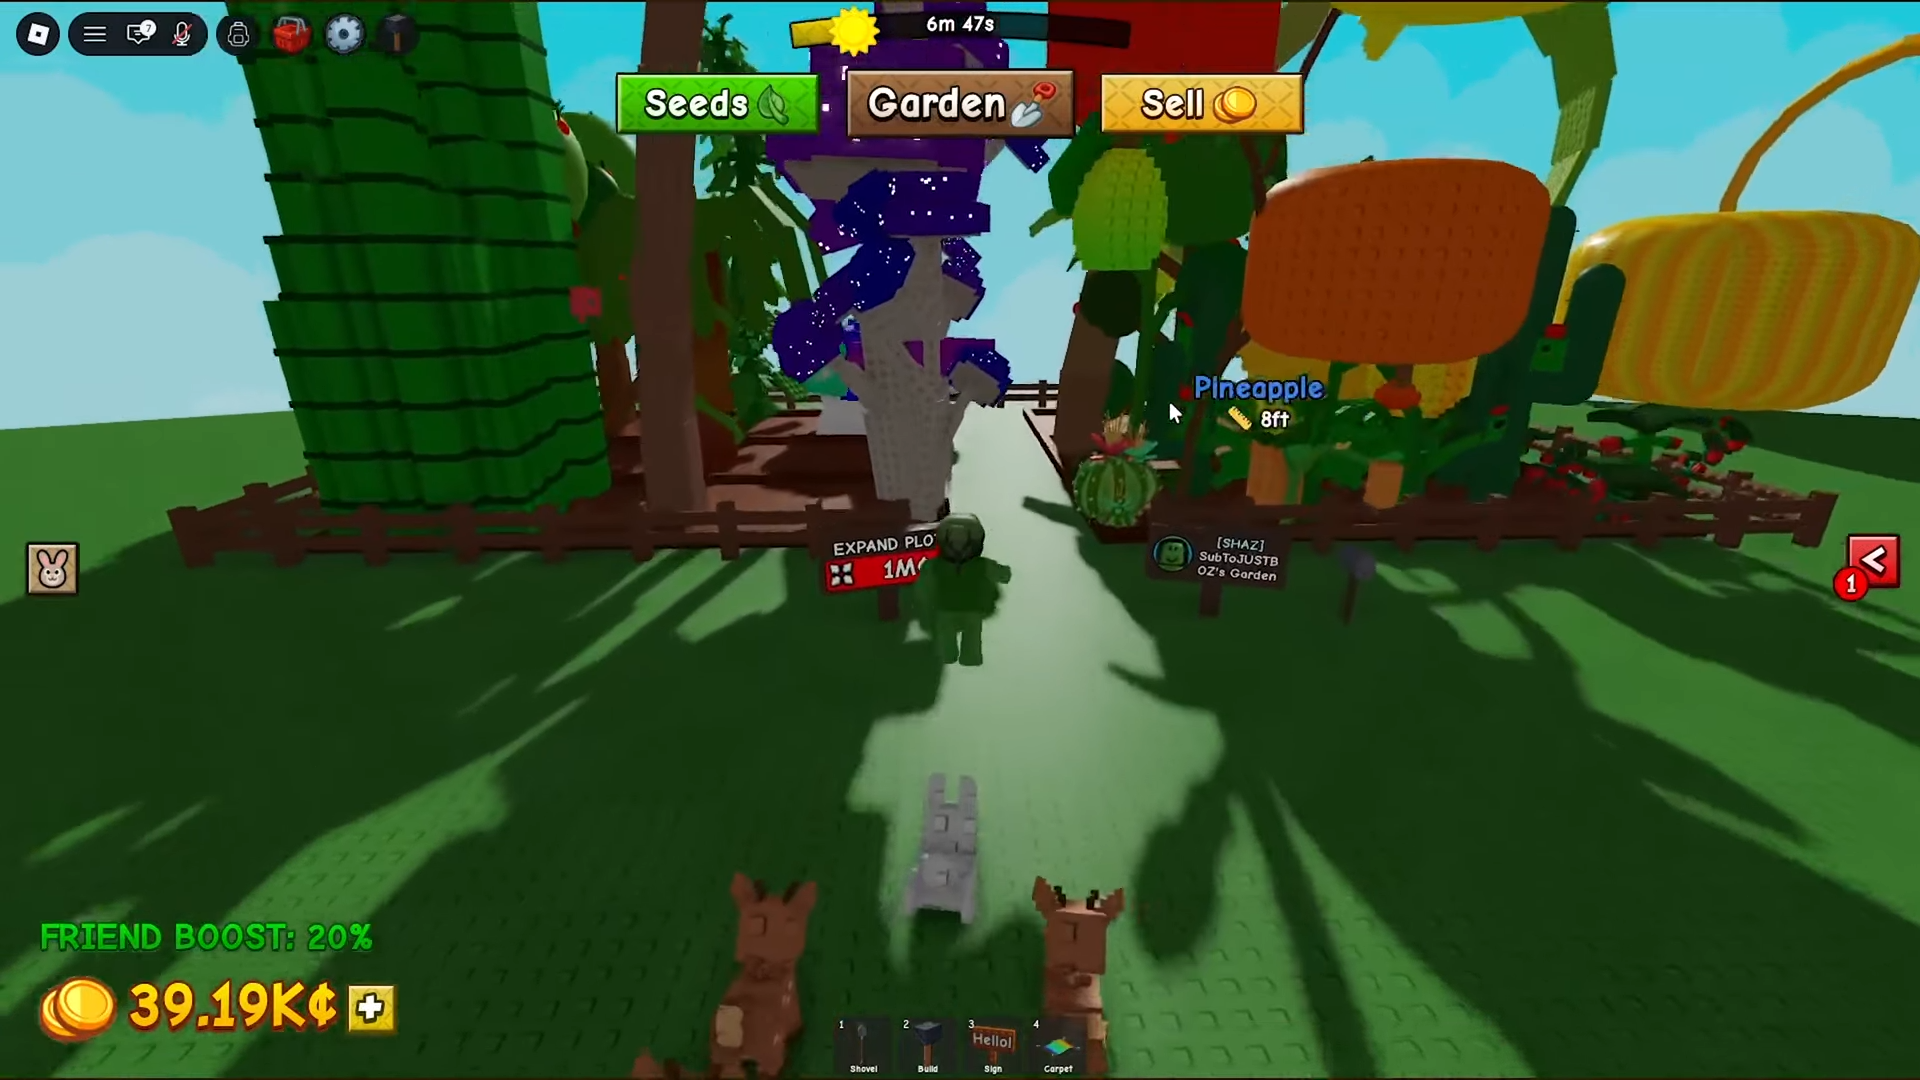
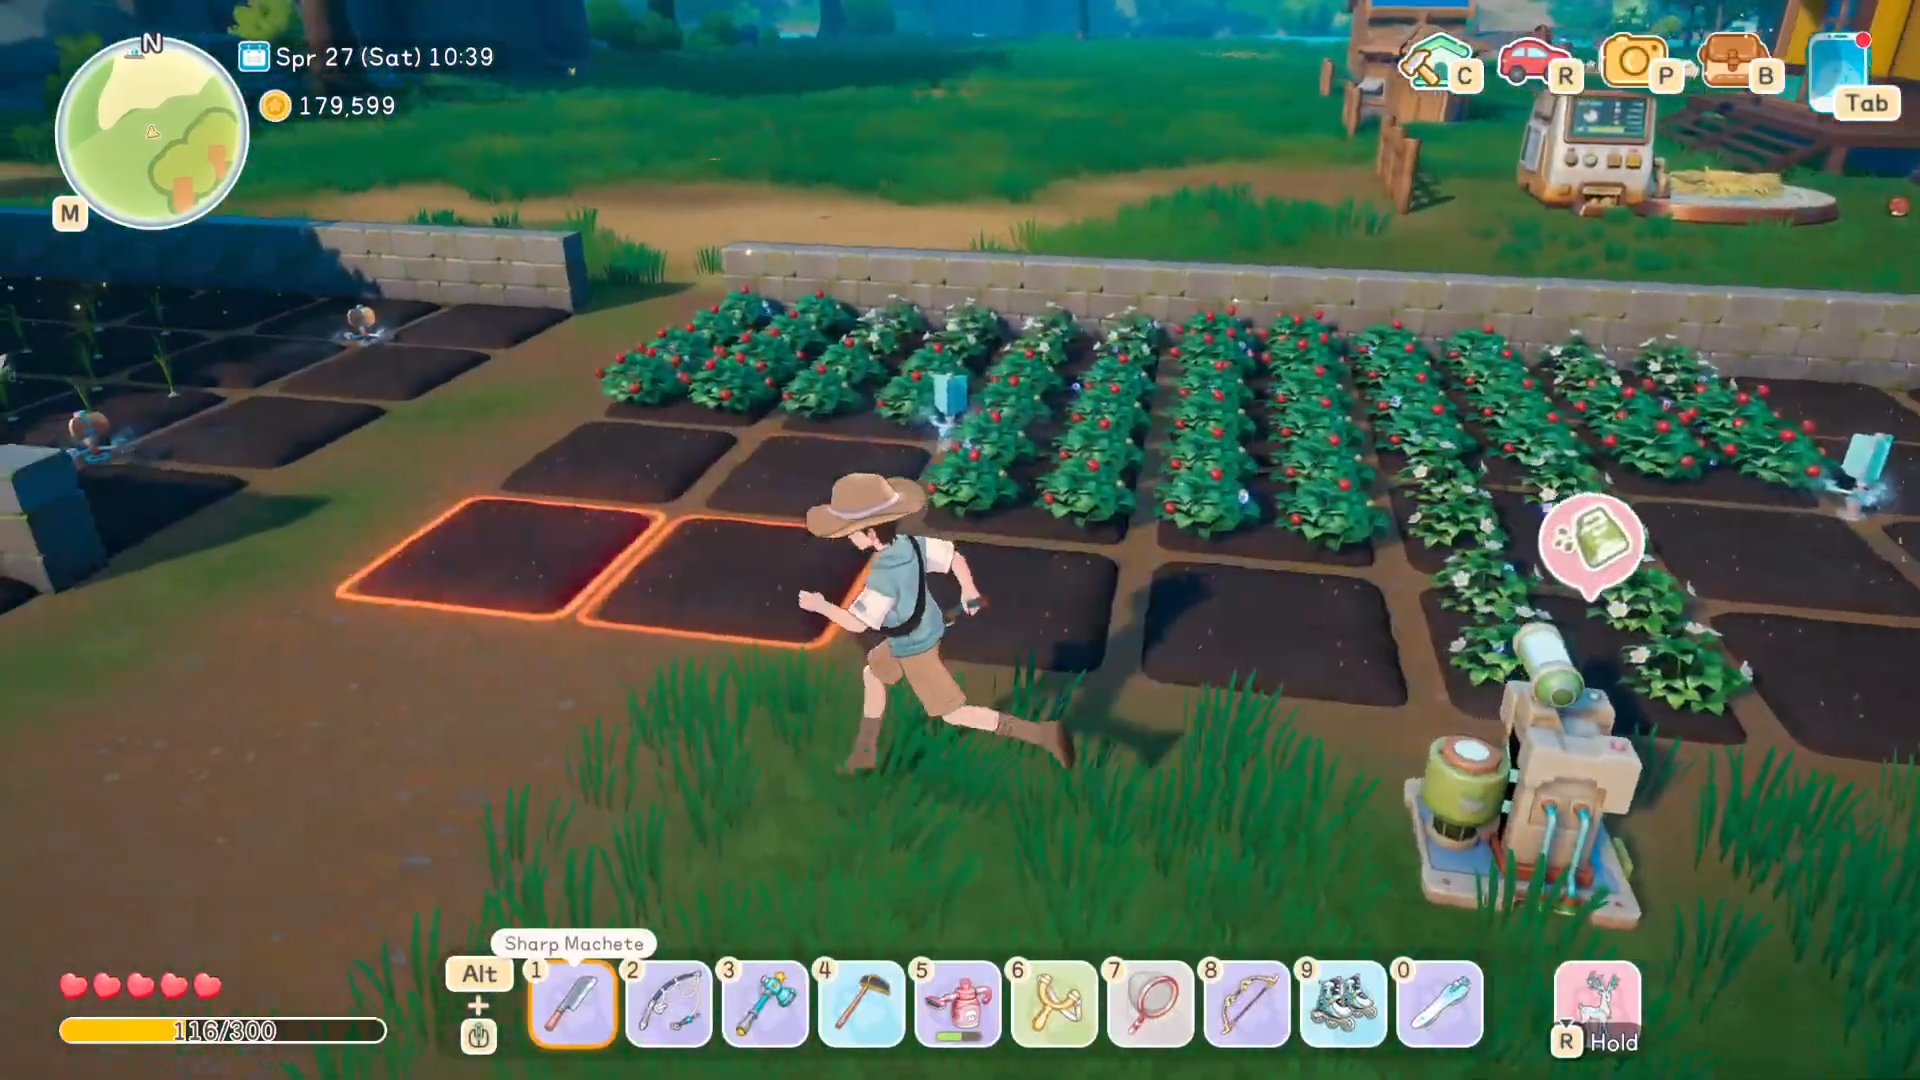
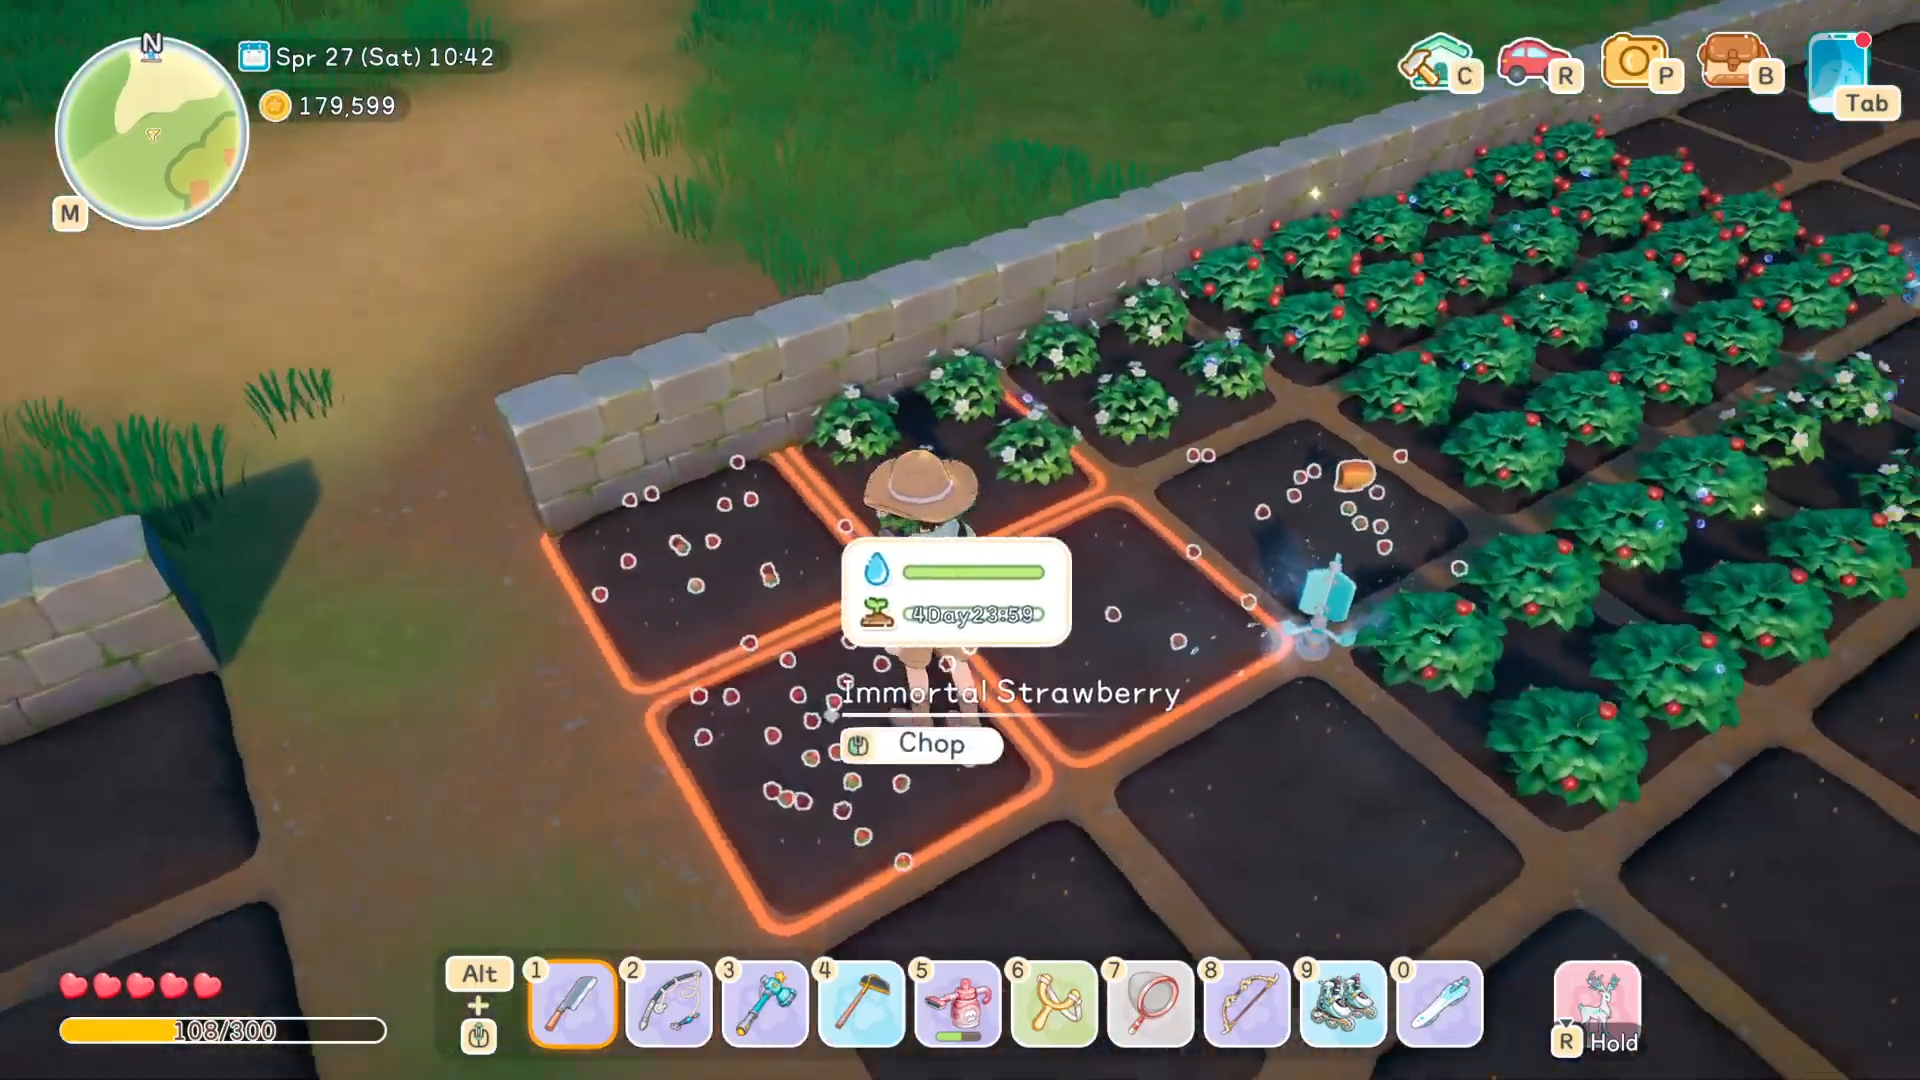
Step 2: Prepare beds and decide which crops to target
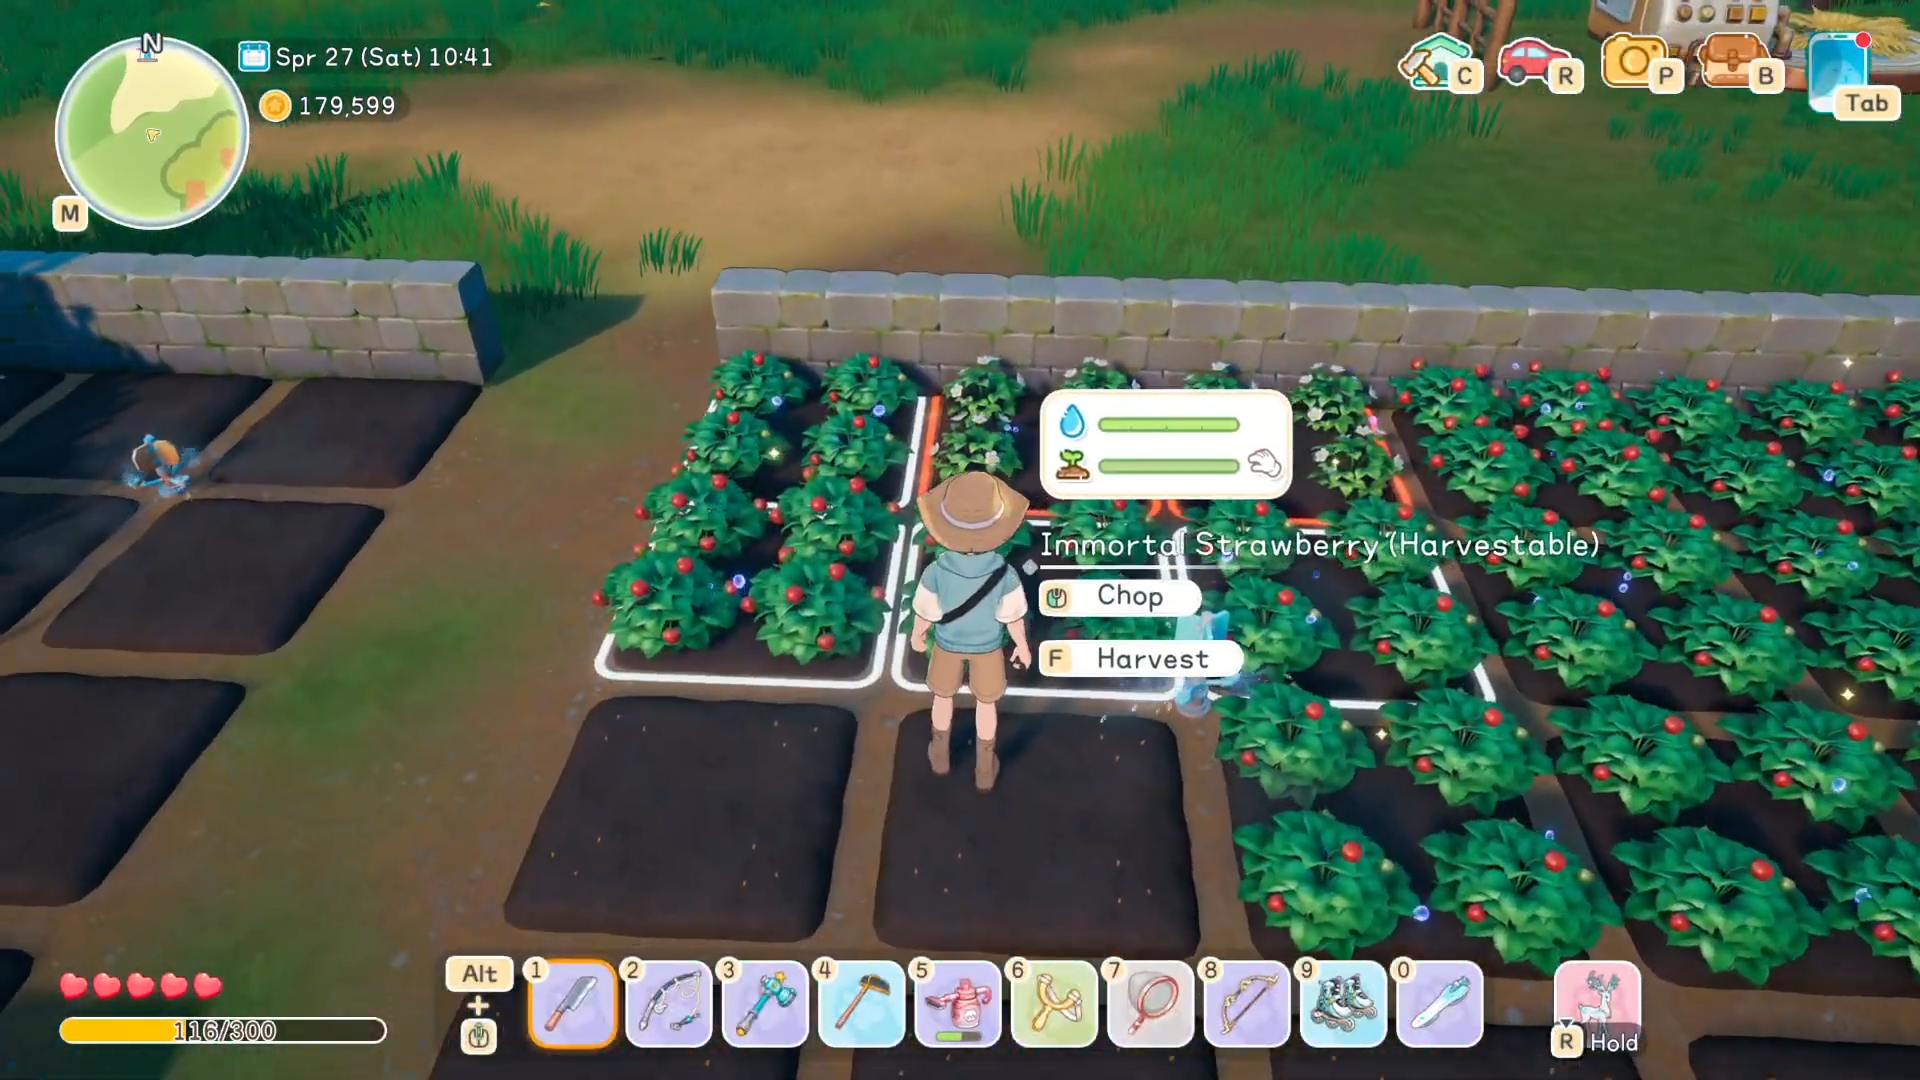
Pick a small section of your garden, ideally only a few tiles, and plant crops that you know you will harvest in large quantities, such as strawberries or other frequently used ingredients. For maximum efficiency, avoid spreading fertilizer over every plant and instead focus on crops you plan to turn into goods or sell.
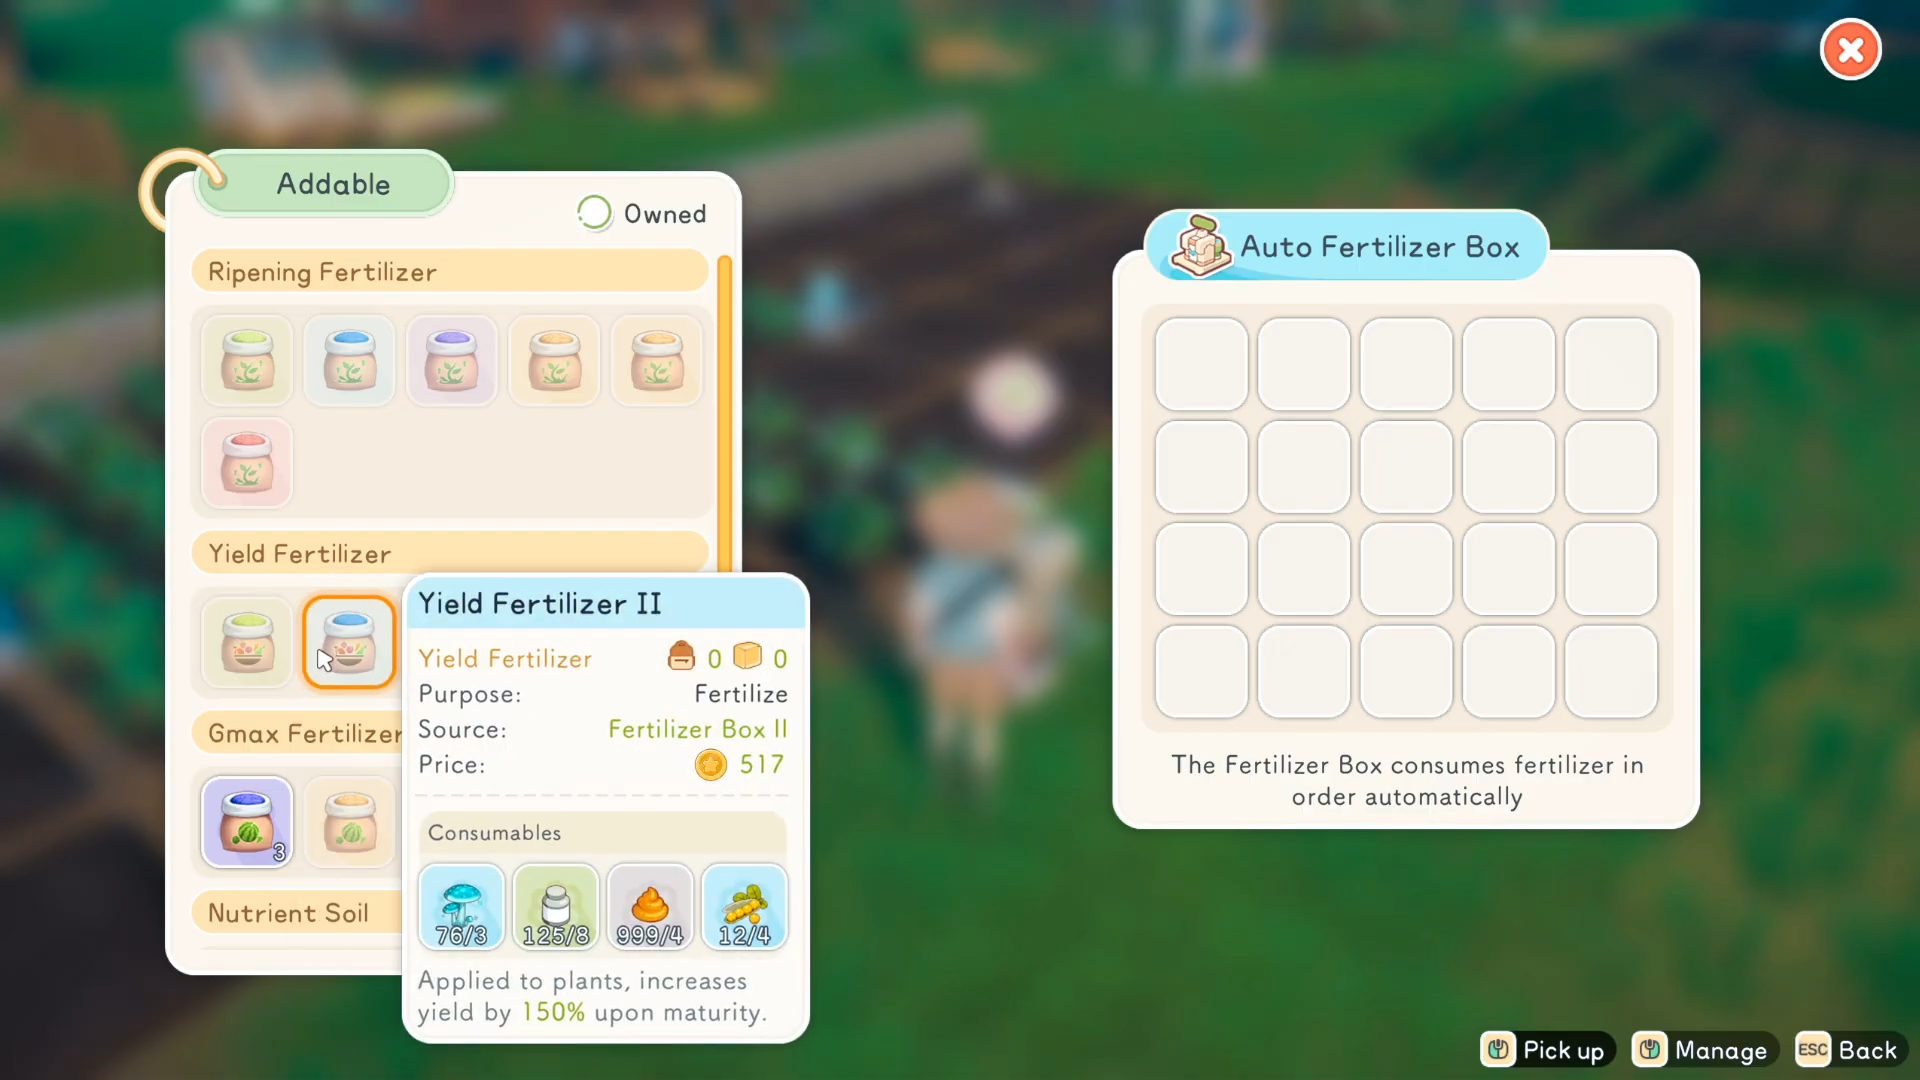
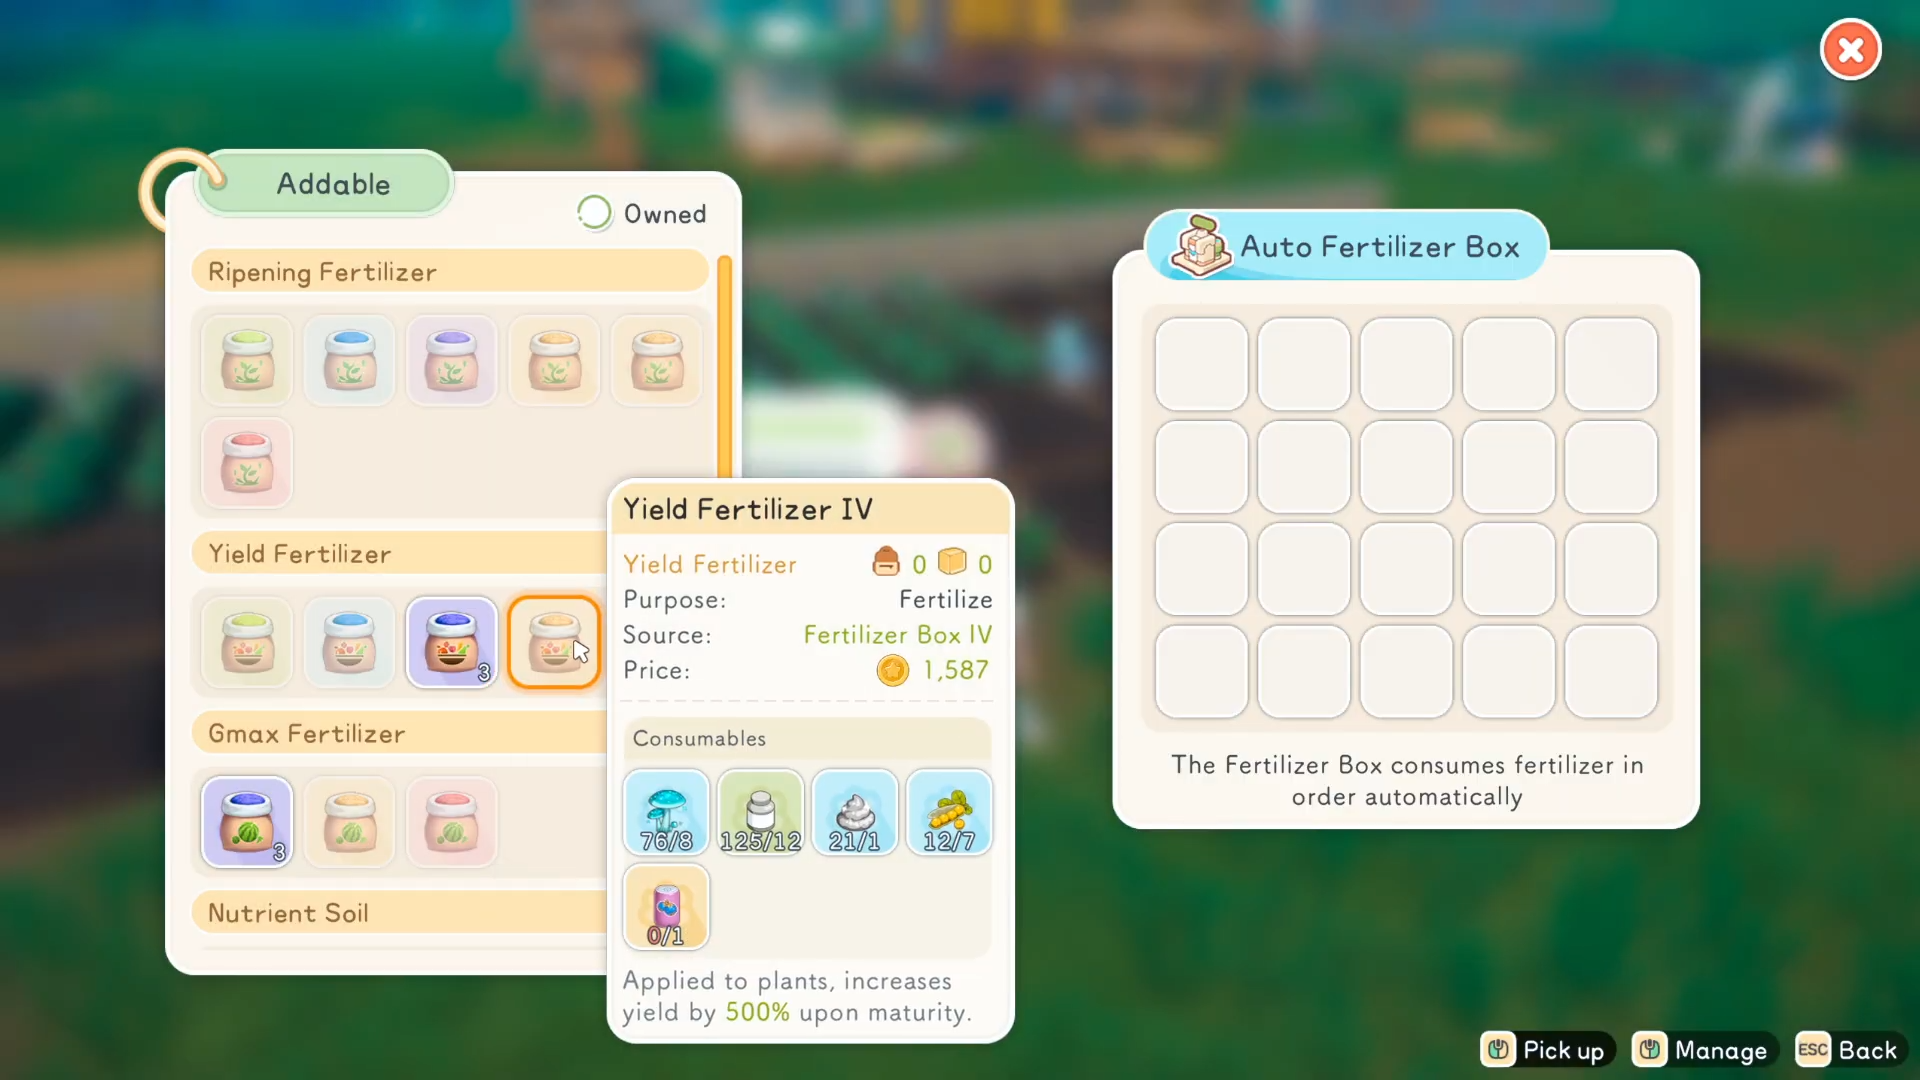
Step 3: Start using lower‑tier yield fertilizer (rank 1–3)
Open the fertilizer crafting menu and create the first three ranks of yield fertilizer. Apply rank 1 and 2 only if you are experimenting or lack better materials, since they are not efficient long term.
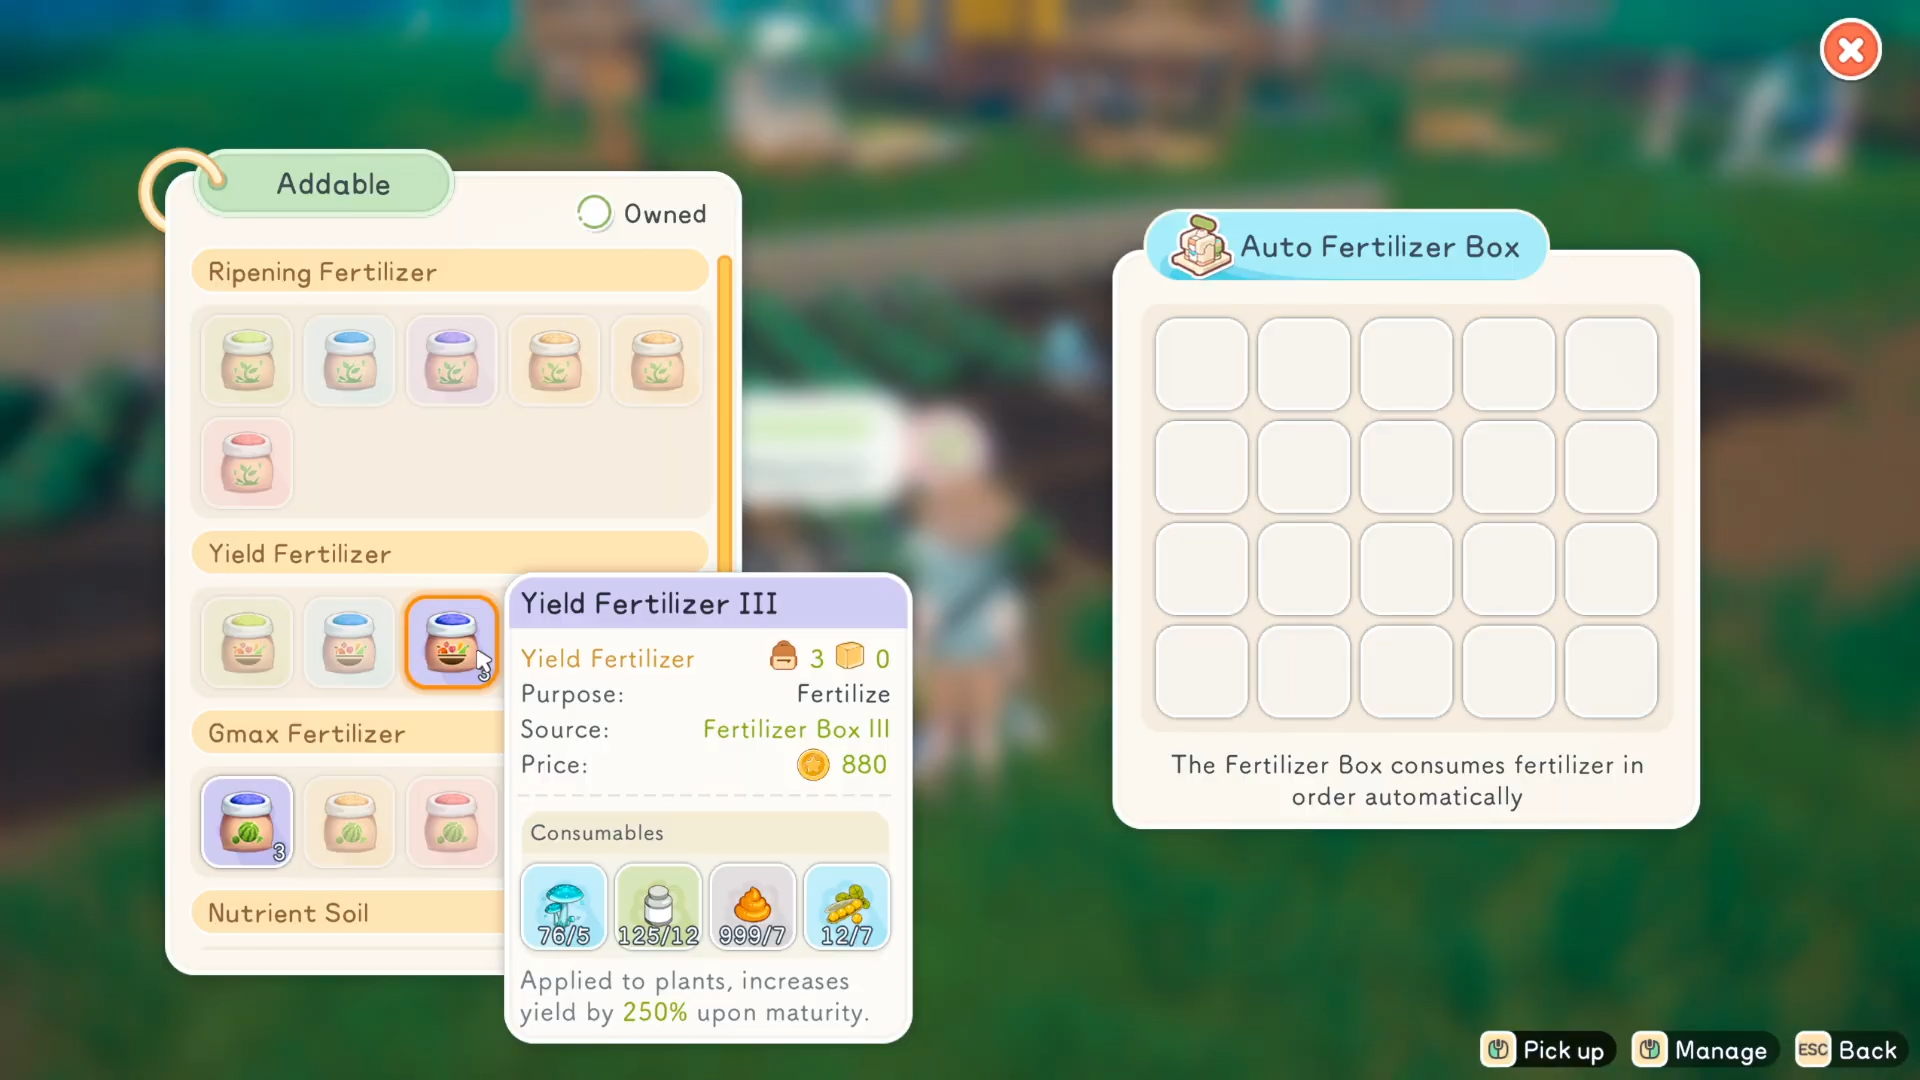
Rank 3 can give a 250% boost under certain conditions, making it a short‑term option if you do not yet have silver or gold poop.
Step 4: Unlock silver and gold poop farming
Return to the ranching skill tree and invest points until you fully unlock the percentage boosts for silver poop and gold poop. After that, regularly interact with your animals to trigger the higher‑chance drops. Silver poop will appear more often, and once your skill is maxed out, gold poop will start showing up as well.
Step 5: Craft 4th and 5th tier yield fertilizer
Once you have a steady supply of silver and gold poop, switch to the higher‑tier yield fertilizer recipes. These require the shiny manure types plus additional farm ingredients such as soybeans and mushrooms. Increase your soybean plot if these become a bottleneck, since they are crucial for the best fertilizers.
Step 6: Apply fertilizer to your best crops
Select the 4th and 5th tier yield fertilizer from your inventory and apply it to the crops you prioritized earlier.
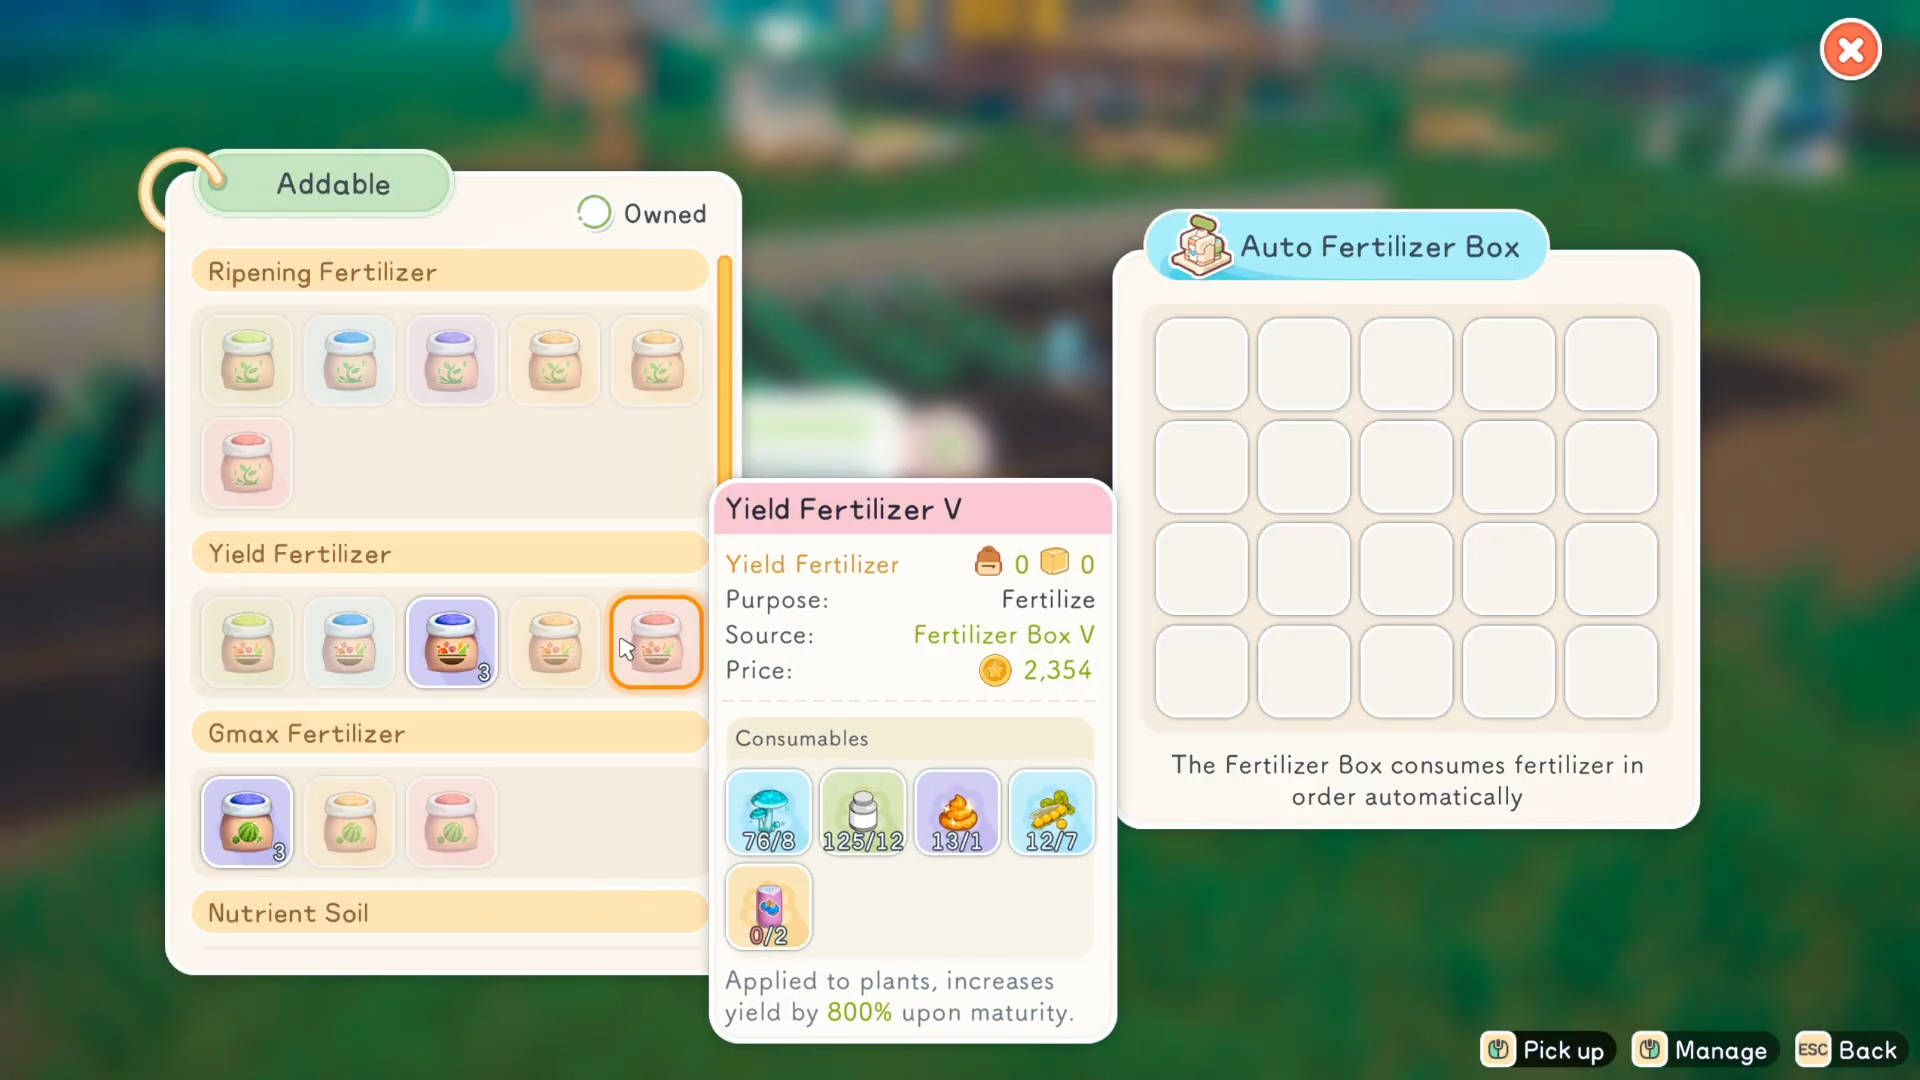
You should see the boost values rise dramatically, with the top fertilizer tiers offering very high percentage increases over base yield.
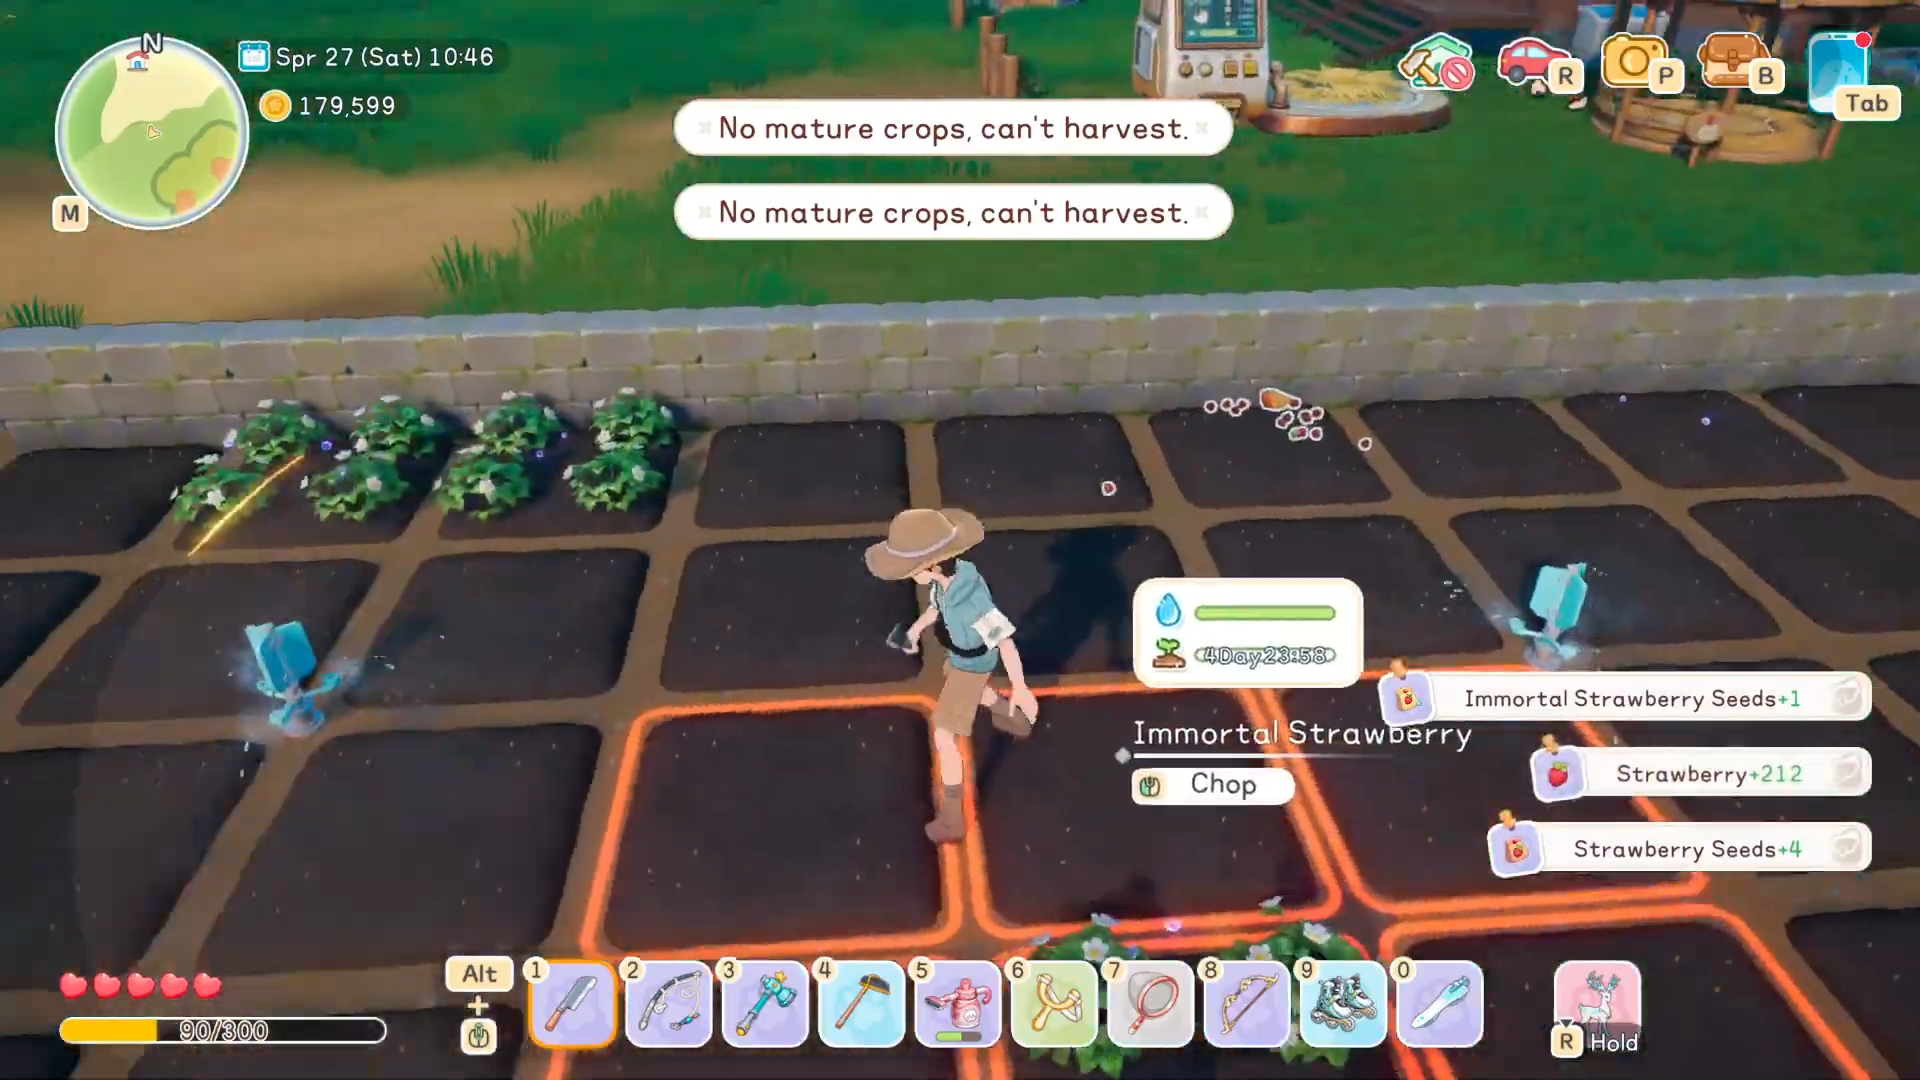
Step 7: Harvest and evaluate your output
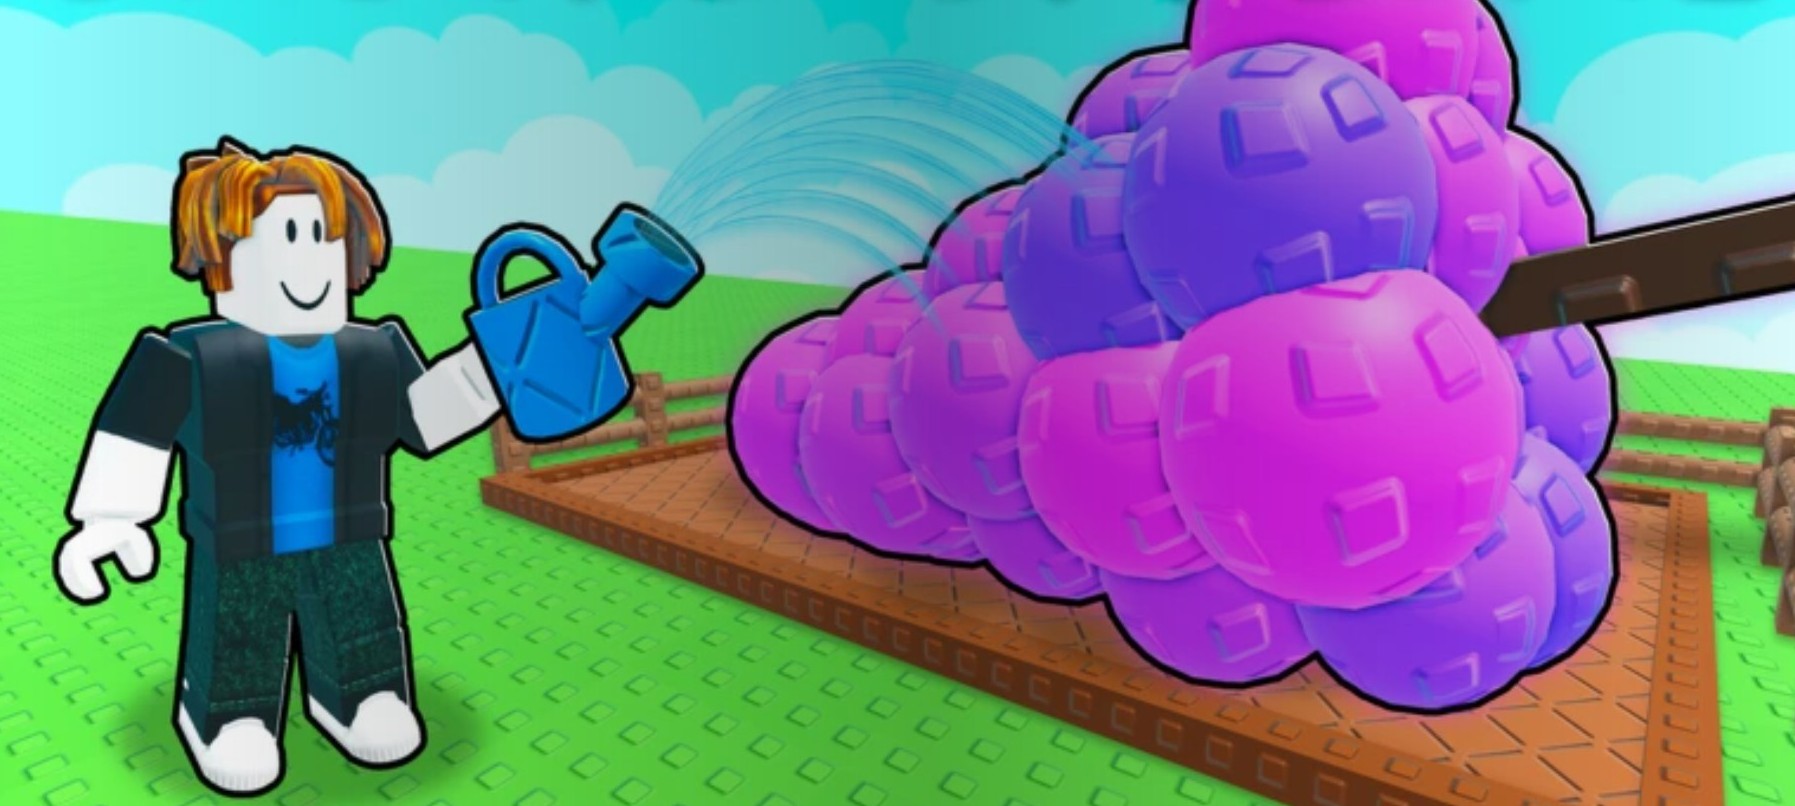
After the plants are fully grown, harvest them and compare the stacks you end up with to what you would have gotten without fertilizer. In one example, a small bed of only a few strawberry plants produced 60 strawberries, and a slightly larger patch of 10–12 plants yielded around 250 fruit. This kind of jump makes it viable to keep beds compact and still flood your inventory.
How to manage beds and fertilizer use
Keep your garden beds intentionally small so you can concentrate your best fertilizer on fewer plants. Instead of one massive field, create several small plots dedicated to different high‑value crops. This also makes it easier to rotate fertilizer types and avoid wasting the higher tiers on low‑priority plants.
Use yield fertilizer selectively on crops that feed into recipes with high demand, such as bakery ingredients, processed foods, or crafting materials. Avoid using your silver or gold poop‑based options on anything you do not plan to turn into goods or sell, since the resources are too valuable to waste.
Rewards and benefits of using yield fertilizer
| Aspect | Benefit |
|---|---|
| Overall yield | Turns a couple of plants into dozens or even hundreds of harvests per cycle |
| Space efficiency | Lets you keep tiny, tidy gardens instead of sprawling fields |
| Resource savings | Fewer seeds and less land needed to maintain the same item output |
| Farm income | More raw crops means more materials for recipes, crafting, and selling |
| Long‑term progression | Supports faster progression through recipes and skill unlocks that require large ingredient counts |
Why you should switch to yield fertilizer
Using yield fertilizer on Starsand Island is one of the most impactful mid‑game upgrades you can make to your farm. By focusing on the 4th and 5th tier options and pairing them with silver and gold poop from maxed ranching skills, you turn a slow, spread‑out garden into a compact, high‑output production line. Start small, pick the right crops, and let yield fertilizer do the heavy lifting so you can spend more time on other parts of the island.