- What to know
- What confusion damage actually is in Nioh 3
- Status effects that feed into confusion
- Confusion levels and how they scale your damage
- How confusion changes enemy Ki behavior
- How to trigger confusion damage reliably
- How to maintain high confusion uptime in boss fights
- Elemental debuffs and confusion synergy
- Practical mistakes to avoid with confusion builds
- Building around confusion damage in your setup
What to know
-
Confusion (the Confused status) activates when an enemy suffers several status ailments at once, usually from different elements, and scales up across multiple levels.
-
At level 1, Confusion already gives a large damage boost; higher levels extend the debuff and add slowdown effects, letting you melt bosses during safe DPS windows.
-
Confusion is strongest against yokai, as it can practically freeze their Ki recovery while the debuff is active, leaving them unable to recover stamina and fight back effectively.
-
Building around Confusion means planning reliable ways to apply two to four different ailments quickly using weapons, Ninja skills, Onmyo magic, and Soul Cores, then timing it for burst phases.
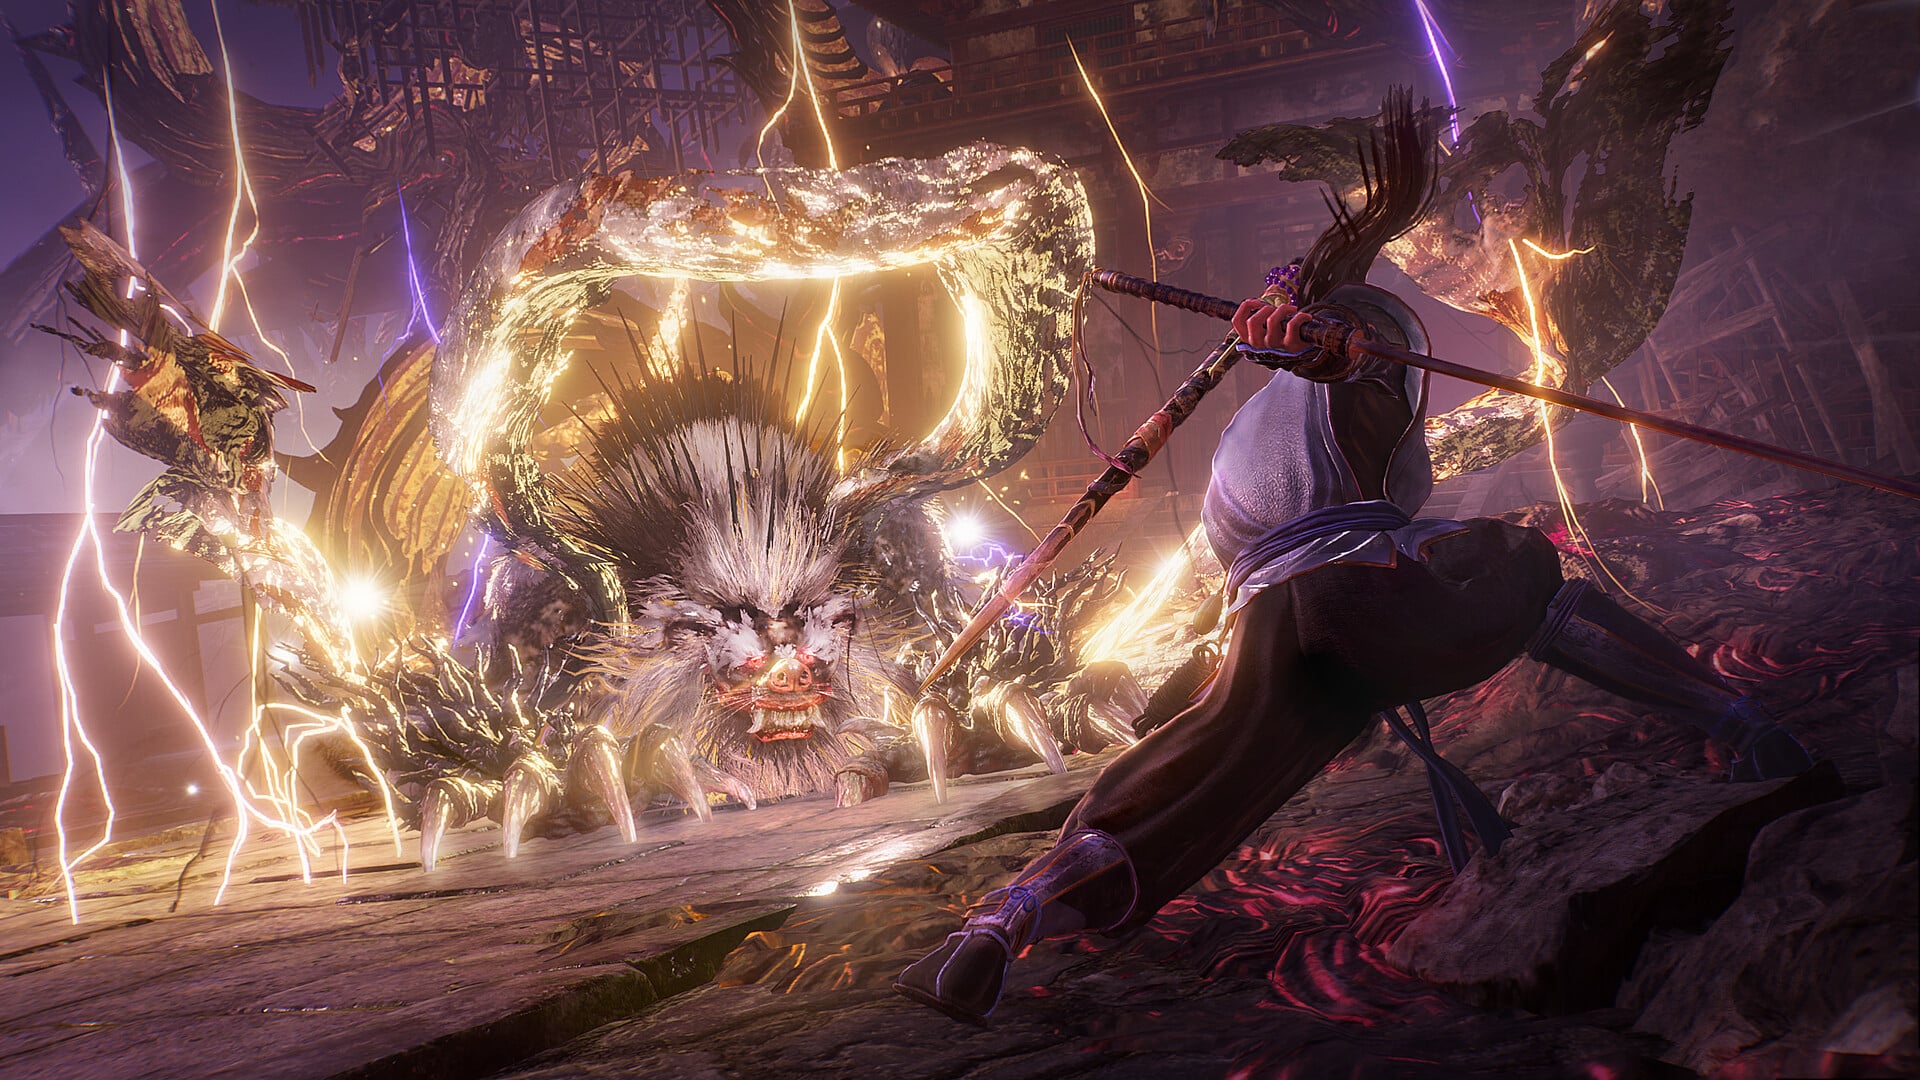
Confusion damage is one of the core ways to push your DPS in Nioh 3. If you think of ordinary elemental debuffs as “good damage,” Confusion is what turns them into “boss delete” tools. Understanding how it works, what feeds into it, and when to trigger it is key if you want your build to keep up in late-game missions and Crucible content.
| Topic | Quick answer |
|---|---|
| What is Confused? | A debuff that increases damage taken and slows or stops Ki recovery. |
| How you trigger it | Stack multiple negative status ailments on the same target at once. |
| How many levels it has | Three practical levels, scaling with 2, 3, or 4 simultaneous ailments. |
| Main benefit | Huge damage multiplier window plus Ki lock, especially vs yokai. |
| Best way to apply it | Combine an elemental weapon with Ninja/Onmyo/Soul Cores for extra elements. |
| Typical duration window | Around 8 seconds per Confusion application, often refreshed by extra ailments. |
| Works on | Both humans and yokai, but Ki suppression is most noticeable on yokai. |
| When to use it | After breaking Ki or during safe stagger windows to convert into burst DPS. |
What confusion damage actually is in Nioh 3
Confusion in Nioh 3 appears as the “Confused” negative status effect: a special debuff that kicks in when an enemy is afflicted by multiple status ailments at once. While earlier games in the series used the same idea, Nioh 3 makes the scaling much clearer: the more ailments you stack, the stronger Confusion becomes.

Mechanically, Confusion does not deal its own damage over time. Instead, it is a powerful defense-down type debuff: it increases all damage the enemy takes from your hits, skills, and projectiles. In practice that means every source of damage you have becomes significantly stronger for as long as Confusion is active.
On top of the raw damage increase, Confusion interferes with Ki. By default, Confused enemies recover Ki more slowly, and most yokai have their Ki recovery halted entirely while the effect is active. That is what makes Confusion so scary in boss fights: if you combine it with a Ki break, the boss can be locked in a helpless state, unable to regenerate Ki and stuck in a prolonged punish window.
Status effects that feed into confusion
Nioh 3 is packed with status effects, but not all of them are equally useful for building Confusion. The most important ones for Confusion setups are the elemental-style debuffs and a few complementary ailments.
Here are the major negative effects you will usually mix to trigger Confusion:
| Status | Source type | What it does by itself | Why it’s good for Confusion |
|---|---|---|---|
| Scorched | Fire | Gradually reduces Life (burn). Ends early if the target rolls. | Easy to apply with fire talismans, bombs, or Ninja tools; contributes one ailment. |
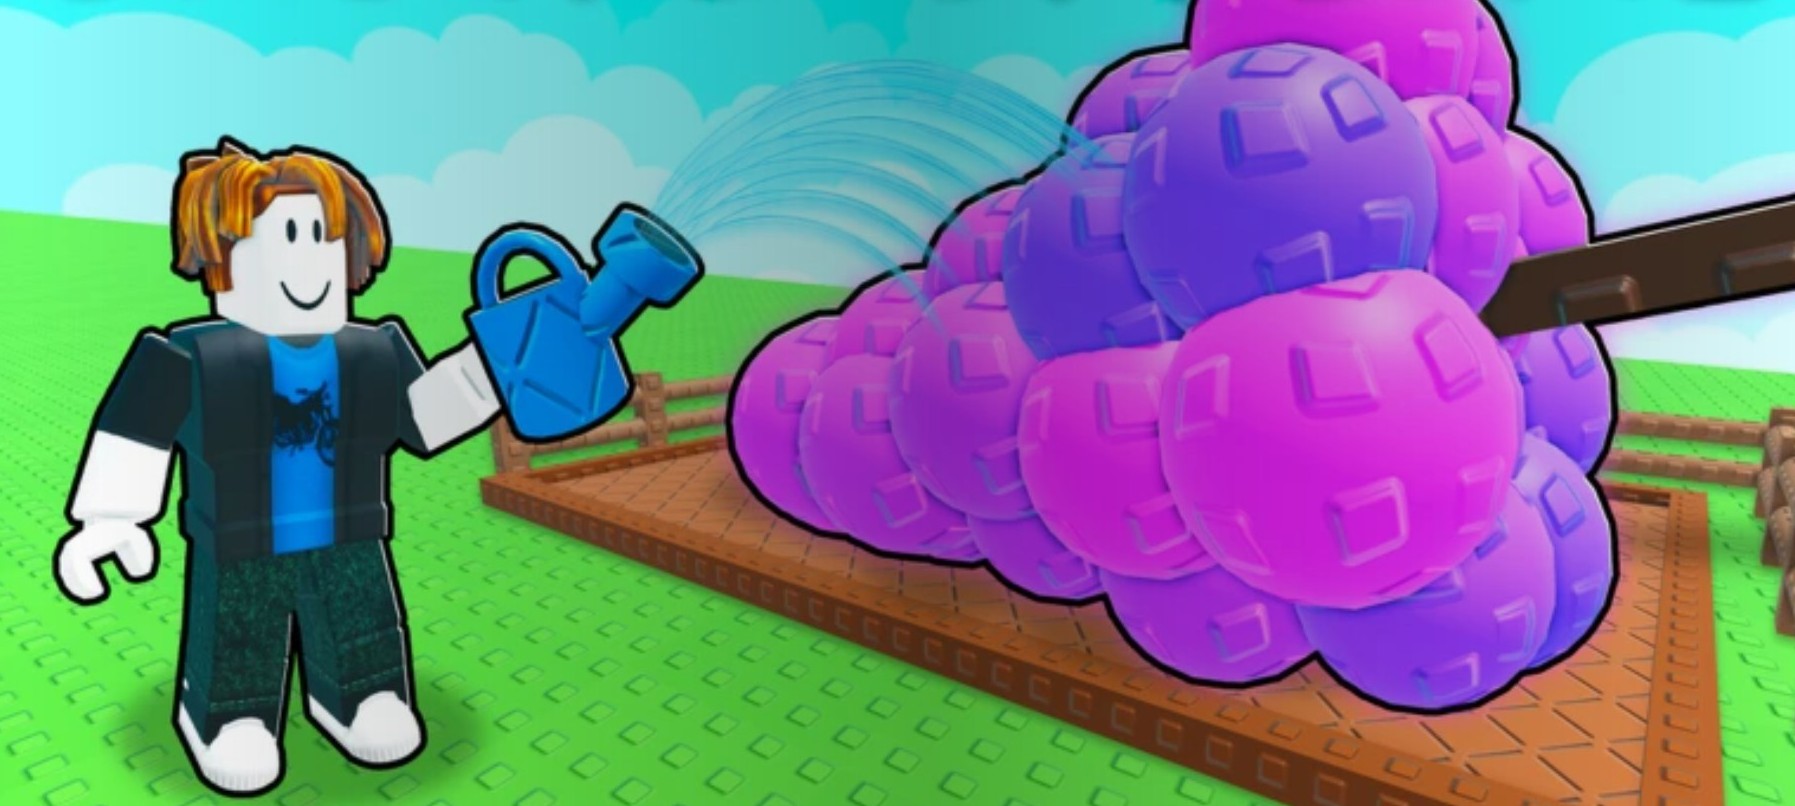
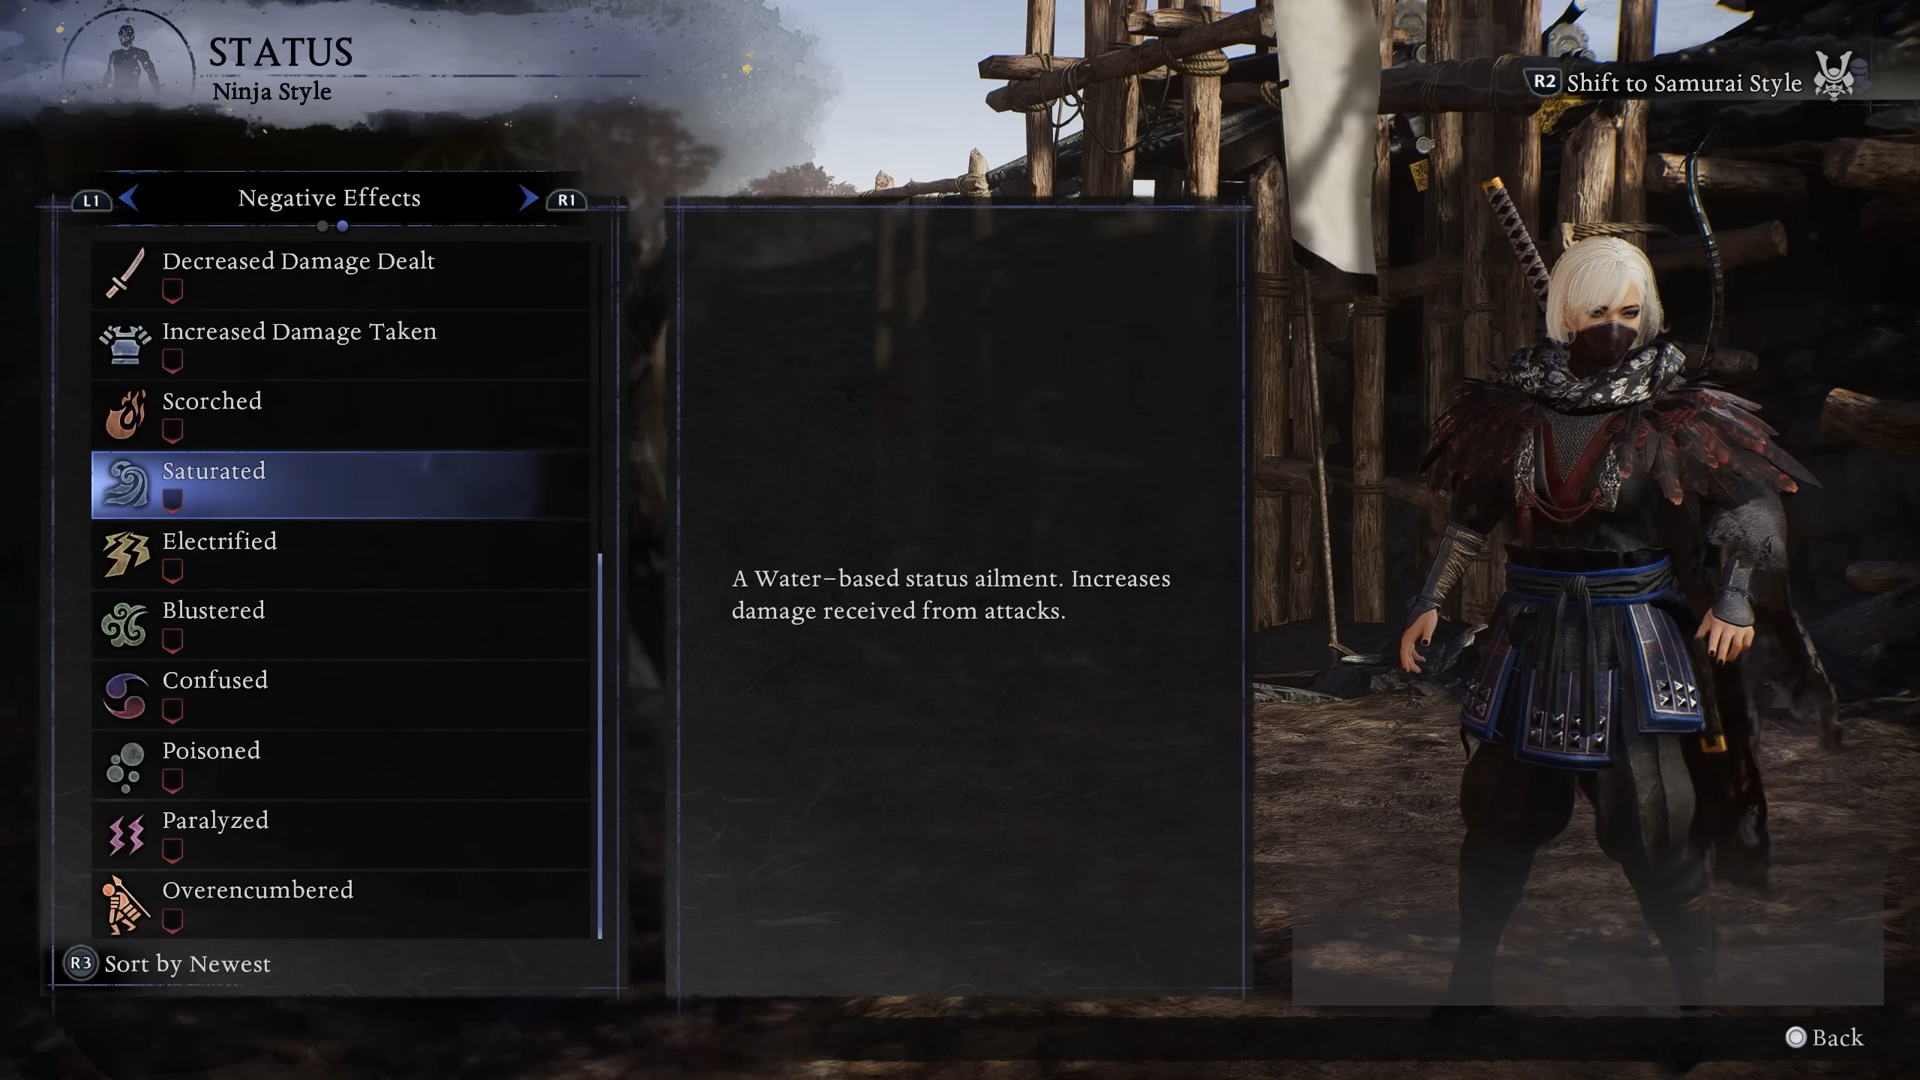
| Saturated | Water | Increases all damage the target receives from attacks. | On its own is already a damage boost; multiplying it with Confusion is extremely strong. |
| Electrified | Lightning | Slows attack and movement speed (shock). | Makes bosses slower and easier to punish while also counting toward Confusion. |
| Blustered | Wind | Increases Ki consumption and Ki damage received. | Synergizes with Ki break strategies and adds another ailment for higher Confusion levels. |
| Poisoned | Poison | Long-duration damage over time, slower than fire but lasts longer. | Flexible extra ailment in some builds; helps reach higher Confusion levels if your tools allow. |
| Paralyzed | Paralysis | Temporarily prevents movement. | Less common in Confusion-focused builds but still counts as an additional ailment when active. |
Confused triggers when afflicted with multiple status ailments, with the effect increasing in proportion to the number of ailments. In practice, most players achieve this by stacking the elemental-style debuffs (Fire, Water, Lightning, Wind) plus occasional extra ailments like Poison or Paralysis when a build naturally includes them.
You do not need a specific combination: any time the enemy is simultaneously suffering from several of these negative statuses, Confusion can activate and then scale up as more are layered on.
Confusion levels and how they scale your damage
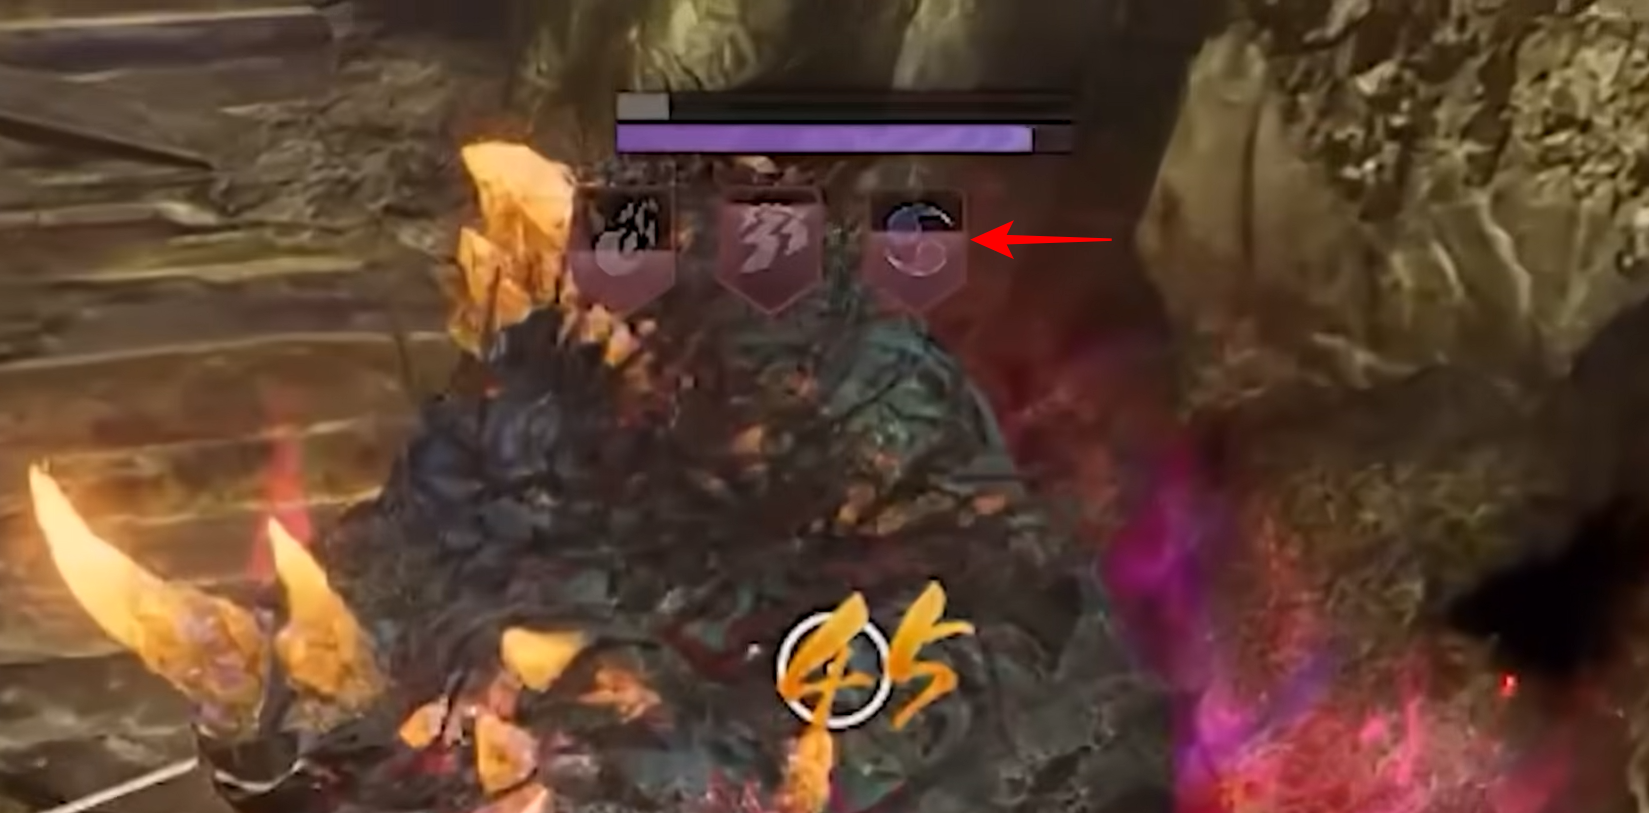
Confusion in Nioh 3 has distinct “levels” tied to how many ailments are stacked on the target at the same time. These are not labeled in-game, but you can read them from the icons beneath the enemy’s health bar and from the damage you deal once the debuff appears.
Confusion behaves roughly as follows:
| Confusion level | Ailments active at once | Approx. damage taken multiplier | Extra effects |
|---|---|---|---|
| No Confusion | 0–1 | 1.0× (baseline) | Only the individual ailment effects apply. |
| Level 1 | 2 simultaneous ailments | ~1.4× damage taken | Noticeable damage spike; Ki recovery slowed or halted for yokai. |
| Level 2 | 3 simultaneous ailments | ~1.7× damage taken | Damage spike is huge; Confusion duration is refreshed and often extended. |
| Level 3 | 4 or more simultaneous ailments | Same ~1.7× damage taken | Adds a stronger slow effect on enemy actions plus long uptime, but no extra damage beyond level 2. |
A few important nuances:
-
The exact percentages above (around 40% and 70% increased damage taken at levels 1 and 2) are based on community measurements and may shift slightly with patches.
-
All Confusion levels last for roughly 8 seconds by default, but applying additional ailments while Confusion is active can refresh and extend its timer, especially when jumping from level 1 to level 2, or level 2 to level 3.
-
Level 3 Confusion is more about utility (slow plus long uptime) than raw damage; it keeps the 1.7× damage taken bonus of level 2, but adds stronger movement/attack slowdown rather than more multipliers.
Even at level 1, Confusion is extremely strong. Level 2 is where it becomes build-defining, letting you combine huge damage with long stretches where a boss cannot safely fight back.
How confusion changes enemy Ki behavior
The Ki interaction is what turns Confusion from “nice debuff” into a boss-killing mechanic:
-
All Confusion levels slow enemy Ki recovery; the more ailments and the higher the level, the more noticeable the slowdown.
-
Most yokai effectively stop regaining Ki while Confused, which means that once their Ki bar is emptied, they can be kept in a helpless state for most or all of the Confusion window.
-
Human enemies do not shut down as hard, but Confusion still significantly slows their Ki regeneration, making it easier to keep them Ki-broken and chain grapples or high-stance finishers.
Because of this, the ideal timing for Confusion is usually after you have already heavily pressured or broken the enemy’s Ki, not at the very start of an encounter. You want to convert that Ki break into a massive burst window where they can neither recover Ki nor defend themselves effectively.

How to trigger confusion damage reliably
Below is a practical way to start using Confusion early in Nioh 3 without a highly specialized build:
Step 1: Put a reliable element on your main weapon
Choose an elemental buff that you can apply consistently on hit—Fire, Water, or Lightning are the usual candidates early on. This can come from:
-
A weapon with innate elemental damage.
-
A Samurai/Ninja skill that adds an element to attacks.
-
A basic elemental talisman you can reapply as needed.
Stick to one “primary” element on your melee weapon so you always know which ailment you’ll inflict through normal attacks.
Step 2: Add a second element through skills or tools
To get Confusion, you need at least one more status ailment. Early on, good secondary sources include:
-
Ninja skills such as elemental shuriken or bombs (for Fire or Lightning).
-
Onmyo elemental shots or familiars (for Water or Lightning).
-
Early Soul Cores that apply an element when used (for example, yokai cores that apply fire or lightning on hit).
The idea is simple: your weapon provides ailment A; a skill or tool provides ailment B.
Step 3: Apply the first ailment while pressuring Ki
Engage the enemy and build up your main element first. You’ll see its status icon appear under their health bar—Scorched, Saturated, Electrified, or similar. While you are doing this, keep an eye on their Ki bar so you do not over-commit and get punished.
Step 4: Quickly apply the second ailment to trigger confusion
As soon as the first ailment is active and you have an opening, land your secondary elemental hit (for example, toss a Fire Shuriken or use a Lightning shot). If both status meters are active together, you will see the Confusion icon appear and a visual effect (often a distinctive cloud around the enemy) indicating the new debuff.
At this point you have at least level 1 Confusion and a large damage window.
Step 5: Exploit the confusion window with your hardest-hitting tools
Once Confusion is active:
-
Focus on your highest-damage skills, finishers, and grapples.
-
Try to keep the enemy’s Ki low or broken; Confusion will make it much harder for them to recover.
-
If you have a third element available (for example, a Lightning tool on top of Fire + Water), apply it mid-window to jump to level 2 Confusion and refresh the duration.
The goal is to compress as much burst damage as possible into those 8-ish seconds, ideally while the enemy is Ki-broken.
How to maintain high confusion uptime in boss fights
Once you understand the basics, you can start building for more consistent Confusion in harder content.
Step 1: Choose two “main” ailments to build around
Pick a core duo designed for your weapon and playstyle, such as:
-
Fire + Water (Scorched + Saturated) for strong raw damage multipliers.
-
Lightning + Wind (Electrified + Blustered) for control and extra Ki pressure.
-
Water + Poison (Saturated + Poisoned) for long-duration debuffs that are easy to keep up between Confusion windows.
Design your weapon, Ninja and Onmyo loadout so that these two ailments are easy to apply without burning through rare consumables every fight.
Step 2: Add a flexible third ailment for level 2 confusion
To reliably reach level 2 Confusion against bosses, you want a third status you can layer in on demand:
-
A different elemental bomb or shot you keep in reserve.
-
A Soul Core active that applies an extra element.
-
A niche ailment like Poison or Paralysis that fits naturally into your kit.
The third ailment is primarily there to refresh Confusion and boost it from level 1 to level 2 in the middle of your burst window.
Step 3: Time Confusion for Ki breaks, not at the start of the fight
Instead of opening with full Confusion, build up Ki pressure first:
-
Chip away at the boss’s Ki with stance-efficient strings and Ki-damaging skills.
-
Use your primary element to start softening their defenses (e.g., Saturated for bonus damage taken, Blustered for more Ki damage).
-
Once they are close to or at zero Ki, add your second element to trigger level 1 Confusion.
This way, you enter Confusion at the exact moment the enemy is least able to respond, maximizing the benefit.
Step 4: Upgrade to higher confusion levels mid-burst
While the boss is Confused and Ki-broken:
-
Layer in your third ailment to push Confusion to level 2 and refresh the duration.
-
If your build supports it, a fourth ailment can add the level 3 slow and extend the punish window further, though it will not increase damage beyond level 2.
-
Keep pressure high; Confusion does not pause during your repositioning or hesitation.
Think of it as a “combo finisher” for your debuffs: once you are committed to bursting, you stack to level 2 or 3 for the longest and most damaging window.
Step 5: Respect resistances and adjust elements per boss
Bosses in Nioh 3 have individual weaknesses and resistances to status effects. For example:
-
Some bosses are weak to Confused but resist specific elements like Scorched or Blustered.
-
Others may resist Confusion itself while being vulnerable to Poison or other ailments.
Check their behavior and status icons during attempts. If a particular element builds very slowly or falls off almost immediately, pivot to elements they are less resistant to so that Confusion can actually stack.
Elemental debuffs and confusion synergy
To plan Confusion-oriented setups, it helps to know what each major status offers by itself and how it pairs with Confusion.
Key ailment synergies
| Primary status | Core effect in Nioh 3 | Synergy with Confusion |
|---|---|---|
| Saturated | Target takes more damage from all attacks. | Multiplicative feeling damage boost when combined with Confusion; ideal base ailment. |
| Scorched | Solid, fast-applying damage over time. | Adds passive chip during Confusion windows; often applied via Ninja tools. |
| Electrified | Slows enemy attacks and movement. | Keeps bosses sluggish while you exploit Confusion, making punishes safer. |
| Blustered | Increases Ki consumption and Ki damage taken. | Helps you reach Ki breaks faster, then Confusion locks them there. |
| Poisoned | Very long-duration DoT. | Great for keeping some debuff pressure up between Confusion windows. |
In practice, you rarely need to chase every possible ailment. Two well-supported elements plus a flexible third are enough to reach level 2 Confusion and shred bosses when you time it correctly.
Practical mistakes to avoid with confusion builds
A Confusion-focused style is powerful, but there are some common pitfalls:
-
Triggering Confusion too early. If you proc Confusion while the boss still has high Ki and full mobility, you waste the best part of the effect. Try to line it up with Ki breaks or big stagger windows.
-
Over-investing in rare consumables. Relying heavily on single-use items for your second and third ailments can feel great in one fight, but is unreliable for long sessions. Prefer repeatable Ninja skills, Onmyo, and core actives over limited items.
-
Ignoring enemy resistances. Some bosses resist your favorite element, meaning that status buildup is painfully slow or barely sticks. Swap in elements that hit their weaknesses so Confusion triggers in a reasonable number of hits.
-
Chasing level 3 every time. Level 3 Confusion mostly adds slow and duration, not extra damage beyond level 2. Do not risk your life forcing a fourth ailment if the boss is already almost dead or about to phase.
-
Neglecting your own defense. Confusion is a damage amplifier, not a substitute for dodging and Ki management. You still need to respect boss patterns; the best Confusion window is worthless if you get one-shot mid-combo.
Building around confusion damage in your setup
When you are ready to fully lean into Confusion, your build choices should reflect that focus.
Weapons and stances
-
Fast multi-hit weapons (like duals, tonfa, or similarly rapid options) tend to build elemental status faster, letting you trigger and refresh Confusion more reliably.
-
Weapons with innate elemental damage or simple access to elemental skills reduce how many dedicated slots you need to spend on status buildup.
-
Since Nioh 3 pushes you to swap between Samurai and Ninja styles on the fly, you can dedicate one style more to safe status buildup and the other to heavy burst during Confusion windows.
Skills, Ninja, and Onmyo
-
Reserve at least one or two Ninja skills or Onmyo spells specifically for “backup elements” that only come out when you are going for Confusion, not for general poking.
-
Mix short-cooldown tools (like basic shuriken or shots) with slower but stronger options (like high-tier elemental arts) so you can adapt to how long a fight is lasting.
-
If a skill both applies an element and positions you safely (for example, gap-closers or evasive slashes), they are ideal Confusion tools because they also help you avoid retaliation during setup.
Gear and passives
-
Effects that increase status buildup (for example “Elemental Ailment Accumulation” type bonuses) accelerate how quickly you can reach the multiple ailments needed for Confusion.
-
Effects that increase damage against afflicted targets (e.g., “Damage vs Saturated Enemy”) stack extremely well once Confusion is active and should be prioritized if they fit your kit.
-
Ki management bonuses—faster Ki recovery, lower Ki consumption—are indirectly crucial, because maintaining pressure during Confusion requires you to stay aggressive without gassing out.
Confusion damage in Nioh 3 takes what the series has always done with status effects and pushes it into a central, scaling mechanic: the more ailments you stack on an enemy, the more your damage and control snowball. Even at level 1, Confusion grants a big spike in damage taken and harsh Ki penalties; at higher levels it turns many bosses into punching bags for the duration of the debuff.