- What to know
- What Etchspace Salvage actually is
- Unlock requirements and access location
- Core mechanics of Etchspace Salvage
- Why Aberrant Zone 3 matters
- How to reach Aberrant Zone 3
- What changes inside Aberrant Zone 3
- Exploration strategy for Zone 3
- Extraction timing and survival discipline
- Etchspace Salvage = power, combat, and explosives
What to know
- Etchspace Salvage is a replayable extraction-style exploration mode
- Aberrant Zone 3 is one of the highest-risk areas available early
- Derangement Acceleration constantly escalates danger
- Efficient routing and timely extraction matter more than combat
In Arknights Endfield, Etchspace Salvage represents a major shift from traditional quest-driven gameplay. Instead of scripted objectives, this mode challenges you with time pressure, environmental risk, and decision-making under escalation. Among its layers, Aberrant Zone 3 stands out as a high-risk, high-reward exploration segment that tests whether you truly understand how Salvage works.
This guide focuses on Etchspace Salvage as a system, then drills down into Aberrant Zone 3, explaining how to reach it, what to expect inside, and how to survive long enough to extract with meaningful rewards.
What Etchspace Salvage actually is
Etchspace Salvage is not a standard storyline mission. It is a repeatable exploration and extraction protocol, designed around risk escalation rather than narrative beats. Each run places you in a controlled but unstable environment where Derangement Acceleration steadily increases, amplifying enemy strength, hazards, and pressure.
You are not expected to clear everything. Instead, you must set goals, gather resources, manage risk, and extract before conditions collapse. Staying too long is not bravery — it is failure.
Unlock requirements and access location
Before Etchspace Salvage becomes available, you must meet specific progression thresholds.
| Requirement | Details |
|---|---|
| Authority Level | 25 |
| Main quest progress | Chapter 1 – Process 3 |
| Introductory step | Talk to Aquito |
| Entry location | Etchspace Salvage Room, OMV Dijiang |
Once unlocked, head to OMV Dijiang and enter the Etchspace Salvage Room. There, you interact with Aquito, the NPC responsible for initiating salvage runs and explaining the mechanics.

Core mechanics of Etchspace Salvage
Before every run, you are prompted to set operational goals. These can include material targets, time efficiency, or exploration depth. These goals are not mandatory objectives, but they shape how much risk you should tolerate.

The defining mechanic is Derangement Acceleration. This value rises continuously as the run progresses, increasing:
- Enemy density and aggression
- Aberrant abilities and durability
- Environmental hazards and debuffs
There is no way to stop Derangement — only to outrun it.
Why Aberrant Zone 3 matters
Aberrant Zone 3 represents a transition point in Etchspace Salvage. Earlier zones allow slower exploration and experimentation. Zone 3, however, assumes that you understand when to fight and when to avoid, how to route efficiently, and how to extract before thresholds turn lethal.
The rewards improve, but so does the punishment for hesitation.
How to reach Aberrant Zone 3
Reaching Zone 3 is not automatic. It requires deliberate traversal through Zone 2 and attention to environmental cues.
Step 1: Move upward from the Zone 2 entry point
After entering Aberrant Zone 2, look around the starting area for a staircase leading to an upper level. This staircase is the only intended route forward, so do not waste time exploring dead ends at ground level.

Step 2: Follow the staircase and suspended platform path
Climb the stairs and continue forward until the environment transitions into suspended platforms. These platforms act as a traversal checkpoint and confirm you are on the correct route toward the deeper zone.

Step 3: Deal with enemies blocking the path
Along the suspended platforms, you will encounter aberrant enemies. You can either defeat them quickly or dodge past them, depending on your build and current Derangement Acceleration. Clearing only what blocks movement is usually the safest option.

Step 4: Locate the elevator
At the end of the suspended platform path, you will reach an elevator structure. This is a mandatory transition point — you cannot reach Zone 3 without using it.

Interact with the elevator to proceed.

Step 5: Descend to the B1 floor
Inside the elevator, select the B1 floor. Once you arrive, you will notice a clear shift in layout and lighting, signaling you are entering a higher-risk section of the salvage area.

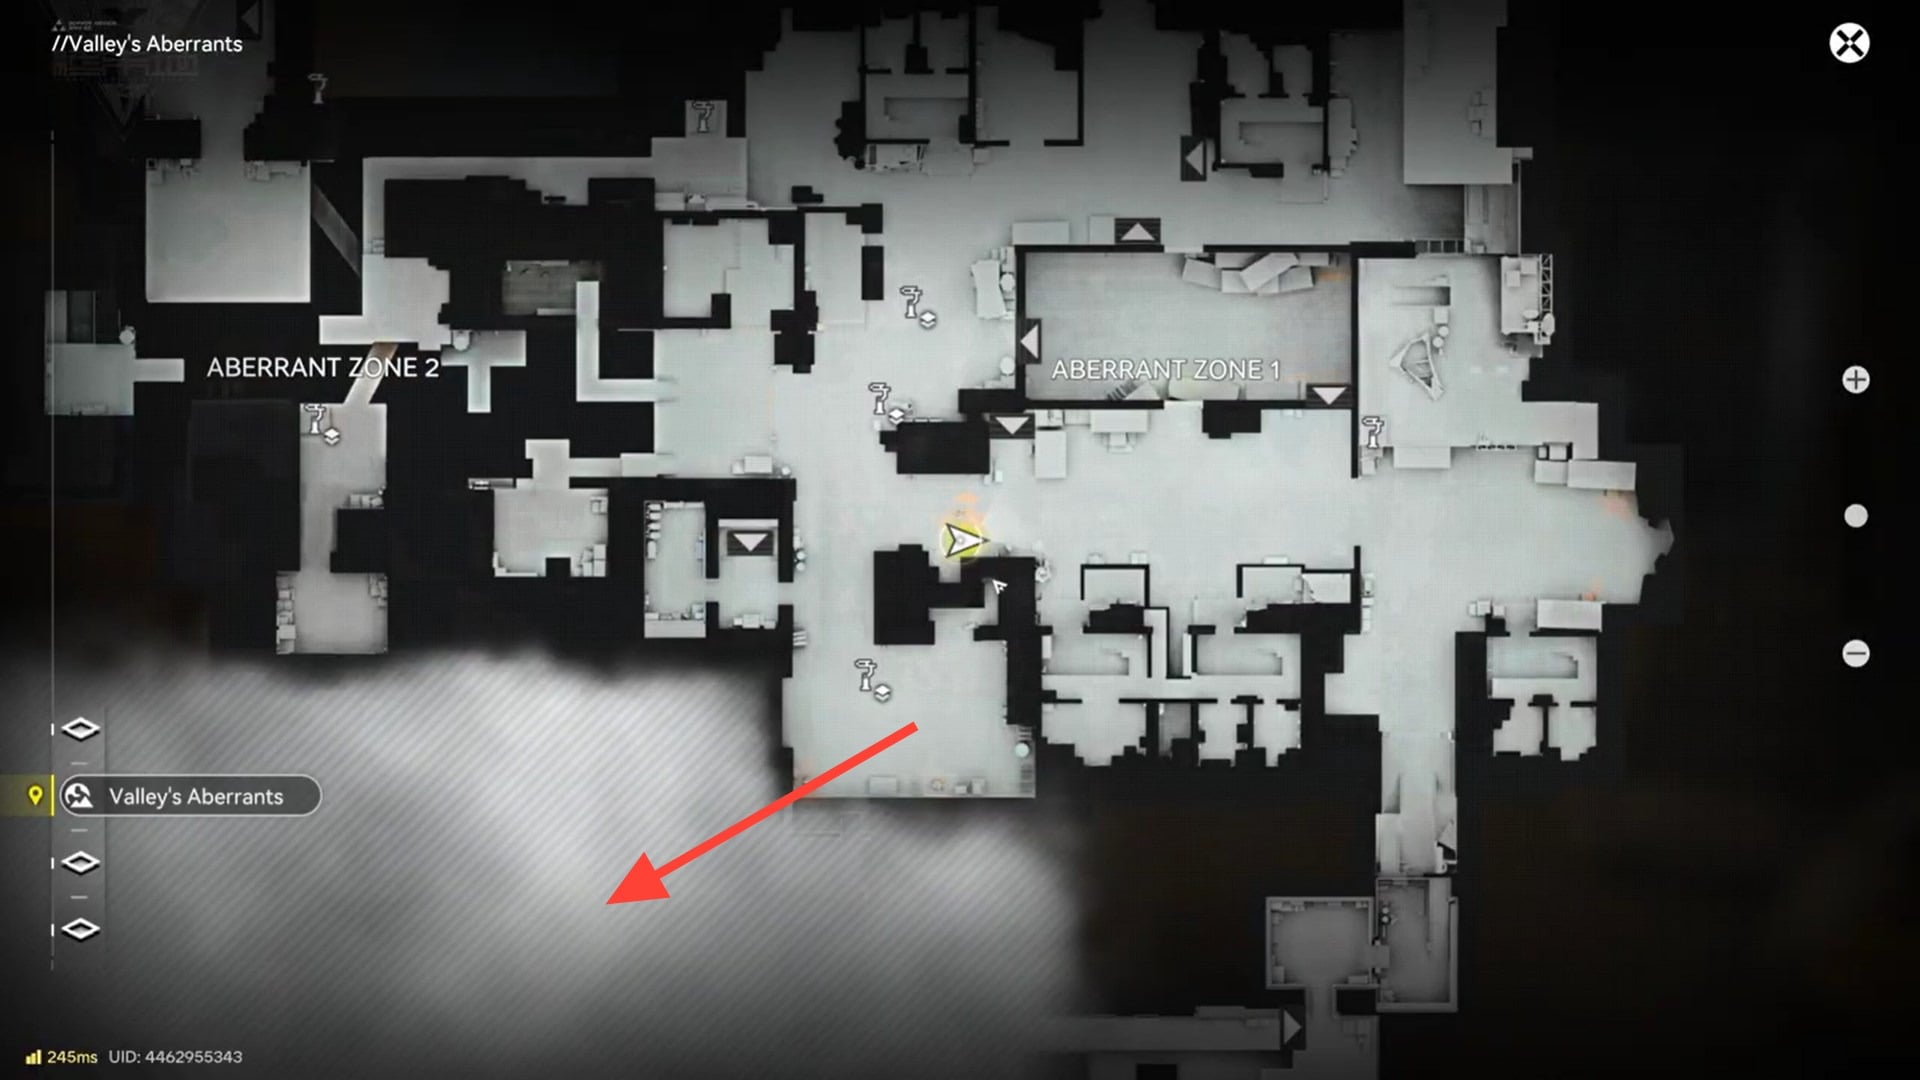
Step 6: Follow the directional arrows on the walls
From the B1 landing area, follow the arrows painted or illuminated on the walls. These arrows guide you through narrow corridors and prevent unnecessary detours that waste time and increase Derangement.

Step 7: Cross the bridge
The arrows will lead you to a bridge connecting two structural sections. Cross it carefully, as enemies may patrol nearby. This bridge is a final traversal checkpoint before Zone 3 access.

Step 8: Open the red gate to Aberrant Zone 3
At the end of the bridge, you will see a red gate. This gate marks the entrance to Aberrant Zone 3.

Interact with the gate to open it and officially enter Zone 3, where enemy density and environmental pressure increase significantly.
What changes inside Aberrant Zone 3
Inside Zone 3, several shifts occur almost immediately. Aberrants become more aggressive, corrupted fauna appear more frequently, and environmental pressure ramps faster due to sustained Derangement Acceleration.

Enemy encounters are less forgiving, but still not mandatory. Many sections allow avoidance through vertical movement or timing, which is often safer than direct engagement.
Loot density improves, but so does risk per minute. Staying longer than planned is the most common cause of failed runs.
Exploration strategy for Zone 3
The key to Zone 3 is selective engagement. Fighting everything is inefficient and dangerous. Instead, prioritize:
- Clearing enemies blocking traversal
- Skipping isolated aberrants guarding low-value loot
- Maintaining clear escape routes
Mobility and spatial awareness matter more than raw damage output.
Extraction timing and survival discipline
Extraction is not optional — it is the real objective. Once your operational goals are met or Derangement approaches critical thresholds, extraction should be triggered immediately. Lingering in Zone 3 almost guarantees overlapping enemy spawns, status hazards stacking faster than recovery, and forced combat during retreat. A successful run is defined by what you extract with, not how much you explored.
Etchspace Salvage = power, combat, and explosives
Aberrant Zone 3 is not meant to be comfortable. It is designed to push players into making hard choices under pressure. If you treat it like a normal exploration zone, it will overwhelm you. If you treat it like an extraction operation, it becomes one of the most rewarding experiences in Arknights: Endfield.
Unlike traditional zones, Etchspace Salvage does not reward brute force. Strong builds help, but planning determines success. Efficient routing, controlled engagement, and disciplined extraction outperform reckless clearing every time.
Zone 3 exists to reinforce that lesson. Understand the systems, respect Derangement Acceleration, and extract with purpose — that is how Etchspace Salvage is meant to be played.