- What to know
- Commonly listed furnace recipe
- Smelting: what goes where
- What each fuel tends to be best for
- Furnace role in early progression and crafting loops
- Materials and prerequisites for crafting a furnace
- Tool readiness: what makes gathering faster
- How to craft a furnace at a workbench
- How to use a furnace: smelting interface and workflow
- Core smelting routine
- Fuel strategy: logs vs sticks vs charcoal
- How to set up a smelting corner that saves time
- How to plan ore runs around furnace capacity
- Troubleshooting common furnace problems
- Advanced habits: turning the furnace into a progression engine
- Steady smelting, faster upgrades
What to know
- Furnace crafting commonly requires 6 tree trunks (logs) and 6 stones, crafted from the workbench crafting menu.
- Smelting needs two things: fuel and an input item (typically ore), which converts into an output item (typically ingots/bars).
- Logs are widely considered efficient and easy to mass-farm early; charcoal is a popular longer-running option once production is set up.
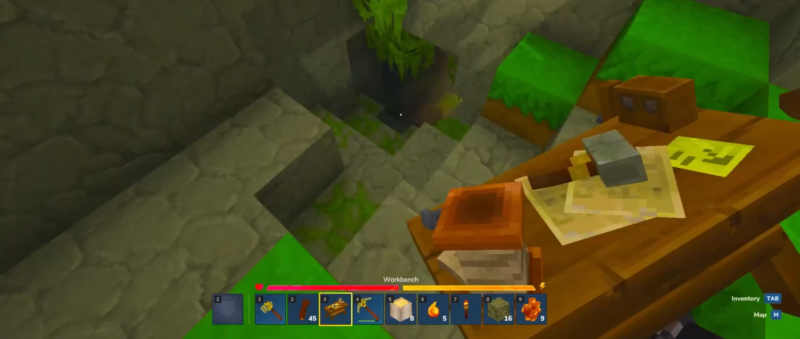
- A practical base layout places the furnace beside the workbench to reduce back-and-forth while processing large ore hauls.
Progression in Hytale tends to accelerate the moment a furnace is running reliably. Mining becomes immediately more valuable because raw ore can be converted into ingots that feed tools, weapons, armor, and many workbench recipes. A furnace also encourages better base routines: stockpiling fuel, batching ore smelts, and keeping crafting stations clustered so upgrades happen faster and with less downtime.
Commonly listed furnace recipe
| Ingredient | Quantity | Notes on sourcing |
|---|---|---|
| Tree trunks / logs | 6 | Harvested from any trees; efficiency improves with an axe/hatchet. |
| Stone | 6 | Mined from surface rocks or underground stone nodes; efficiency improves with a pickaxe. |
Smelting: what goes where
| Furnace slot | What it accepts | Examples |
|---|---|---|
| Fuel | Burnable items | Logs, sticks, charcoal, and other burnables depending on current game rules and updates |
| Input | Smeltable resources | Copper ore, iron ore, and higher-tier ores found deeper underground |
| Output | Finished materials | Copper ingots, iron ingots, and other refined bars/ingots |
What each fuel tends to be best for
| Fuel | Strength | Best use case | Tradeoffs |
|---|---|---|---|
| Sticks | Easy to craft quickly | Jump-starting smelting when there is no prepared fuel stock | Burns faster; requires more frequent refills |
| Logs | Very common, strong early | Bulk smelting early because trees are abundant | Competes with building needs if a large base is being constructed |
| Charcoal | Often treated as a “better” long-session fuel | Longer smelting sessions with fewer interruptions | Requires smelting wood to build a charcoal reserve |
Furnace role in early progression and crafting loops
A furnace sits at the center of the “mine → refine → craft → upgrade” loop. Early exploration frequently produces copper and iron ore, but those materials do not become truly useful until smelted into ingots or bars. Once ingots exist, crafting options open up rapidly, and resource collection becomes more intentional: instead of gathering everything randomly, the focus shifts to targeted ore trips supported by planned fuel supplies.
A typical early loop looks like this:
- Gather basic tools to mine and cut wood efficiently.
- Collect stone and logs to establish core stations.
- Craft and place a furnace near the workbench.
- Smelt early ores into ingots.
- Spend ingots on stronger gear and upgrades, enabling deeper mining runs and safer exploration.
This loop repeats across the game’s tiers. The furnace is not just a “nice-to-have” station; it is the bridge between resource discovery and real crafting power.
Materials and prerequisites for crafting a furnace
Most current community and guide references agree on a simple furnace recipe that is accessible very early.
Because the furnace is crafted through the workbench interface, a workbench is also a practical prerequisite. If a base is being set up from scratch, a workbench is usually placed first, then the furnace is crafted immediately afterward.
Tool readiness: what makes gathering faster
While it’s possible to gather materials slowly without dedicated tools, the early pace improves dramatically when there is at least:
- A cutting tool for wood (hatchet/axe)
- A mining tool for stone and ore (pickaxe)
This matters because the furnace recipe relies on both wood and stone, and a furnace is typically built right before or right after the first serious mining trip for copper or iron.
How to craft a furnace at a workbench

Crafting is straightforward once the workbench is placed. The key is to gather the correct quantities first, then craft from the correct section of the workbench interface.
Step 1
Collect 6 tree trunks (logs). A short run around the spawn area usually provides enough trees to complete this quickly.
Step 2
Collect 6 stone. Surface rocks may be enough, but mining a small exposed stone patch is often faster, especially with a basic pickaxe.
Step 3
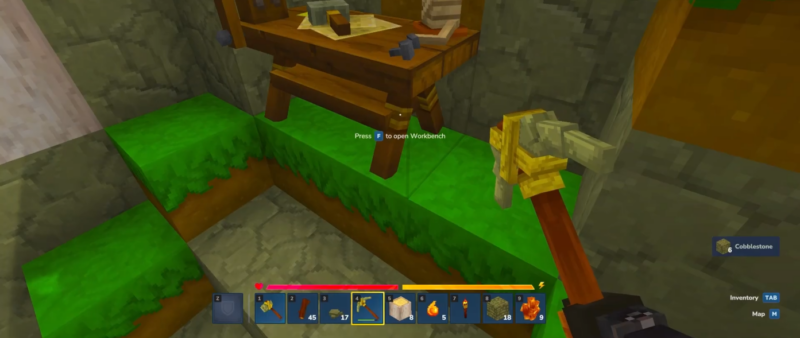
Place a workbench in a safe area that can serve as the first base. This location should be close to storage and have enough space for multiple stations.
Step 4
Interact with the workbench to open the crafting menu, then look under the crafting options where the furnace is listed.
Step 5
Craft the furnace and move it into inventory.
Step 6
Place the furnace beside the workbench. This placement reduces travel time during the first smelting sessions when fuel and ore management requires frequent interaction.
How to use a furnace: smelting interface and workflow
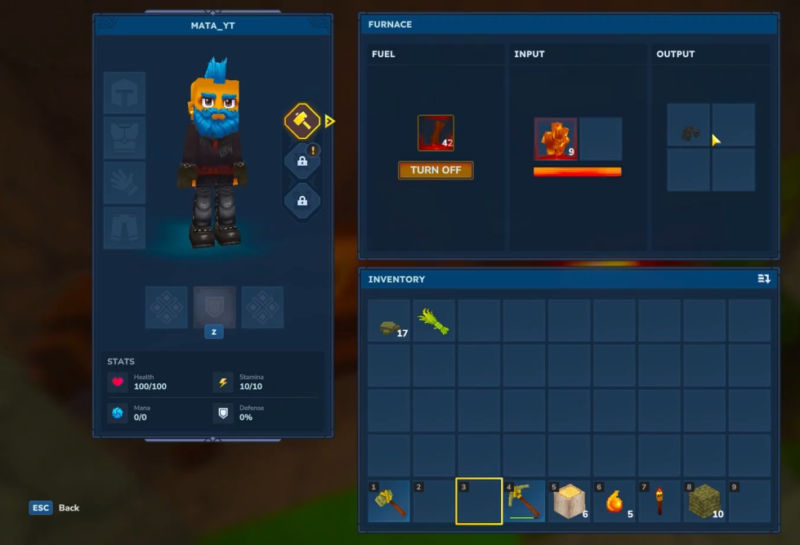
Using the furnace is a repeatable process built around three slots or areas: fuel, input, and output. The furnace consumes fuel while converting the input item into the output item over time.
Core smelting routine
Step 1
Open the furnace interface and confirm there is enough space in inventory for outputs. Long smelts can overflow storage if outputs are ignored.
Step 2
Place fuel into the fuel slot. Early on, logs or sticks are the simplest choices because they require no processing.
Step 3
Place ore into the input slot (or slots). If multiple input slots exist at the furnace’s level, queueing multiple stacks reduces babysitting.
Step 4
Start the smelt if the furnace requires an activation action. Some interfaces include a clear “turn on” or “start” control.
Step 5
Wait for the conversion to finish, then move ingots from the output slot into inventory or storage.
Step 6
Repeat in batches. Large ore hauls are best processed in one or two long sessions rather than constant small smelts.
Fuel strategy: logs vs sticks vs charcoal
Fuel management is where most early furnace inefficiency happens. The furnace can be built quickly, but keeping it running through a large ore haul requires planning.
A practical approach that scales well
A reliable strategy is to start with sticks or spare logs to begin smelting, then transition into a charcoal pipeline. Charcoal becomes valuable because it reduces how often the furnace needs refueling, which matters during multi-stack ore processing.
A simple scalable pattern is:
- Use sticks to start the first smelts (especially when returning from the first ore trip).
- Feed logs into the furnace when wood supply is plentiful.
- Convert a portion of logs into charcoal during downtime so a reserve exists for future trips.
- Keep a dedicated storage container for fuel near the furnace.
This keeps the furnace from becoming a stop-and-go station and turns it into an always-ready production block.
How to create a charcoal supply line
Charcoal is typically produced by smelting wood in the furnace. That means the furnace can “bootstrap” its own better fuel: begin with simple fuel, smelt wood, then use charcoal to run longer sessions.
Step 1
Collect a large batch of logs beyond immediate building needs. A good early target is enough to cover both smelting fuel and future tool crafting.
Step 2
Place a small starter fuel supply into the furnace (often sticks or spare logs).
Step 3
Smelt logs (or the appropriate wood item in the current build) to generate charcoal.
Step 4
Move charcoal into a dedicated fuel storage container beside the furnace.
Step 5
Use charcoal for the next large ore run, then replenish the charcoal bin after each mining trip.
This turns fuel into a predictable resource instead of a constant interruption.
How to set up a smelting corner that saves time
Efficient base layout matters more than it seems because smelting often happens alongside crafting, storage management, and tool upgrades.
Recommended station cluster
- Workbench: crafting recipes, station progression, and early tool creation.
- Furnace: ore processing, charcoal creation, ingot production.
- Storage containers: one for fuel, one for raw ore, one for ingots.
- Optional lighting: keeping the area safe and visible during night cycles.
Why this layout works
A furnace encourages frequent transfers: ore to input, fuel to fuel slot, ingots to storage, then ingots to workbench crafting. If storage is far away, time is lost repeatedly. A tight “crafting triangle” reduces that friction and makes progression feel smooth.
How to plan ore runs around furnace capacity
Many players mine ore in bursts, but furnace time can become the limiting factor if ore is gathered faster than it can be processed. Planning around the furnace avoids stockpiling too much ore and running out of fuel.
A balanced early plan
- First mining trip: gather enough copper (or the first available ore tier) to craft essential upgrades.
- First smelt: process the ore immediately, focusing on tool upgrades first.
- Second mining trip: go deeper with improved tools, gather iron (or next-tier) and more stone.
- Second smelt: process the new ore while simultaneously converting spare logs into charcoal.
Batch size guidance
A practical batch approach is:
- Smelt one full ore stack at a time if fuel is limited.
- Smelt multiple stacks if a charcoal reserve exists.
- Always keep extra fuel on hand before starting a long run; under-fueling is the most common reason smelting stops halfway.
Troubleshooting common furnace problems
Even when the recipe and steps are correct, a few issues tend to repeat.
The furnace stops mid-smelt
Typical causes:
- Fuel ran out.
- Fuel was insufficient for the queued ore amount.
- The wrong item type was placed as fuel in the current build.
Fix:
- Add more fuel, preferably a higher-duration option like charcoal if available.
- Smelt in smaller batches until fuel reserves improve.
Ore goes in but nothing happens
Typical causes:
- Smelt hasn’t been started if an activation control exists.
- Fuel is missing.
- Input item is not smeltable in the current furnace tier or game version.
Fix:
- Confirm fuel is loaded.
- Confirm the furnace is active/on.
- Test with a known smeltable ore such as copper or iron.
Output slot fills and blocks production
Typical causes:
- Leaving the furnace unattended while output accumulates.
- Limited inventory space.
Fix:
- Empty output into a storage container nearby.
- Keep a dedicated “ingots” container to prevent clutter.
Advanced habits: turning the furnace into a progression engine
Once the furnace is a permanent base fixture, its role expands beyond “smelt ore sometimes.” It becomes a production engine that supports exploration, crafting, and upgrades.
Habits that improve long-term efficiency
- Maintain a fuel reserve: a container of charcoal (or preferred fuel) prevents downtime after long trips.
- Sort materials: separate raw ore from refined ingots so crafting remains fast.
- Smelt while crafting: run the furnace during workbench crafting sessions so time is never wasted.
- Build redundancy later: when resources allow, more than one furnace can reduce bottlenecks in high-volume refining phases.
A simple “always ready” checklist
- Fuel container stocked.
- Ore container stocked.
- Output cleared after each session.
- Furnace placed near workbench and storage.
When these are consistent, smelting becomes a background task instead of an activity that must be constantly monitored.
Steady smelting, faster upgrades
A furnace is one of the earliest stations that meaningfully accelerates progress in Hytale because it converts raw ore into crafting-ready ingots. When fuel is treated as a planned resource—rather than an afterthought—smelting becomes consistent, upgrades arrive faster, and mining runs become safer and more rewarding.