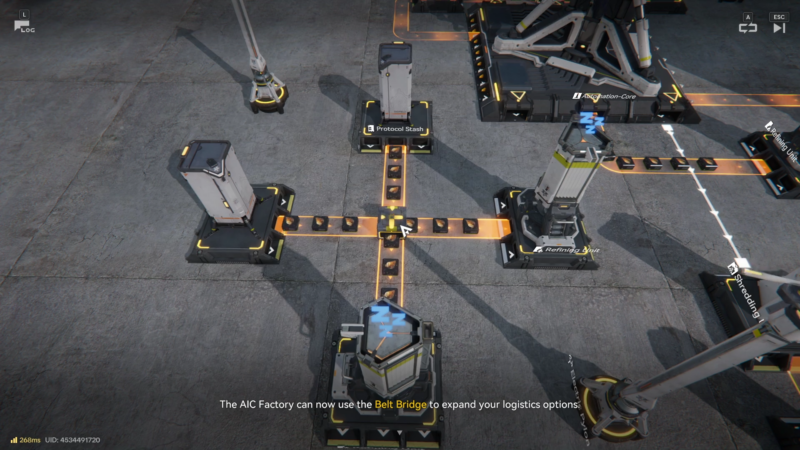
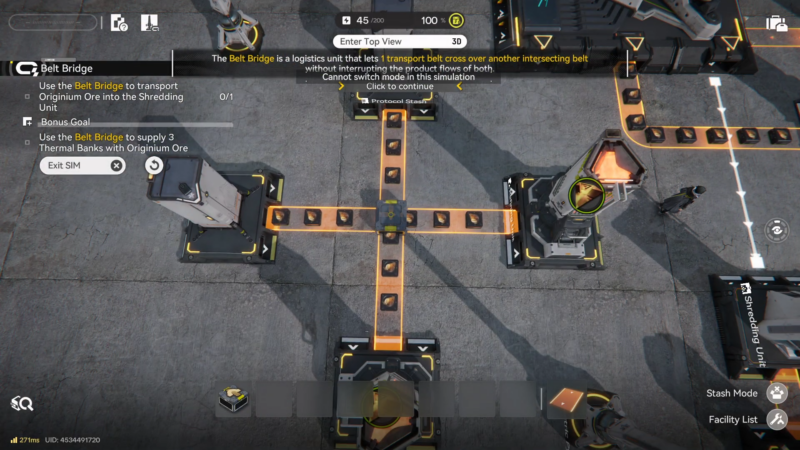
Belt Bridge Blueprint Simulation in Arknights: Endfield is a factory tutorial that teaches you how to route conveyor belts so one belt can cross another cleanly, without merging item flow or blocking throughput.
- What to know
- What the Belt Bridge is (and what it is not)
- Where to unlock it in the AIC Plan
- How to clear the Belt Bridge Blueprint Simulation
- How to complete the puzzle-style layout
- How to use Belt Bridges in real base layouts (so the tutorial actually pays off)
- How to troubleshoot common Belt Bridge simulation mistakes
- Turning a “tutorial tool” into a core logistics skill
What to know
- Belt Bridges are unlocked by researching the “Belt Bridging” node in the AIC Plan (tech tree), under Logistics.
- A Belt Bridge lets one transport belt cross over another intersecting belt without interfering with either belt’s product flow.
- This tool becomes important once your base grows and belt paths start overlapping, because it prevents accidental intersections and messy reroutes.
- The game’s Simulation tutorials are designed to teach these logistics tools step-by-step and often pair naturally with the Blueprint system.
After you understand bridges, you’ll stop treating belt crossings as a “layout failure” and start using them intentionally to keep production lines short, organized, and scalable.
What the Belt Bridge is (and what it is not)
A Belt Bridge is a logistics structure that creates a true crossing: one belt passes over another at a planned intersection point.
It is not:
- A splitter (it doesn’t branch one belt into multiple outputs).
- A converger (it doesn’t merge multiple belts into one).
- A normal belt intersection (it shouldn’t mix items from two lines).
The key idea is separation: both belts keep doing their own job even though they occupy the same crossing area.
Where to unlock it in the AIC Plan
To use Belt Bridges at all, you first need the relevant AIC Plan research.
In the Basic AIC Factory Plan’s Logistics progression, Belt Bridging sits alongside other belt-management tech:
| Logistics research | Unlock | When you typically need it |
|---|---|---|
| Logistics I | Transport belts | The moment you start moving items between facilities. |
| Belt Splitting | Splitter | When one input needs to feed two (or more) destinations. |
| Belt Bridging | Belt Bridge | When two belt routes must cross without mixing. |
| Belt Converging | Converger | When multiple outputs need to be consolidated to one belt. |
If your Belt Bridge simulation is locked, that usually means the tech node isn’t researched yet or the simulation terminal hasn’t been accessed/unlocked for your current progression.
How to clear the Belt Bridge Blueprint Simulation
The most common reason people fail this simulation is placing belts as if a crossing is allowed by default, then trying to “fix it” afterward. The tutorial generally expects you to plan the crossing, stop before you create an interference point, then place the bridge as the crossing solution.
How to complete the puzzle-style layout
Step 1

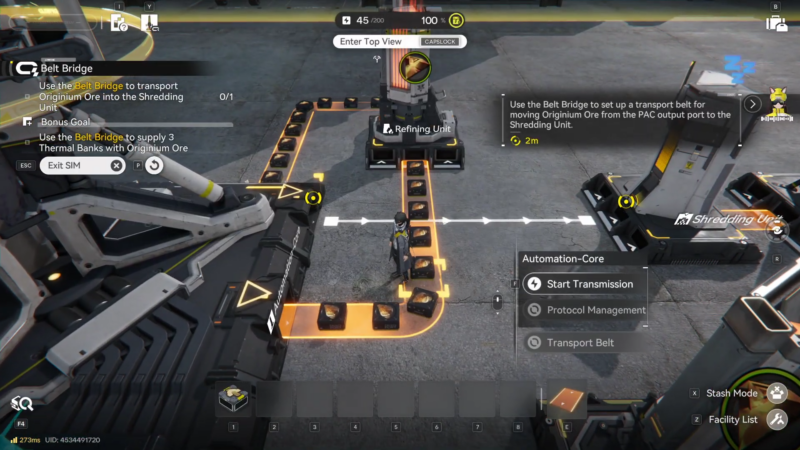
Look at the required start and end points for both lines (source output to destination input). You’re identifying two independent routes that must both be valid at the same time.
Step 2
Build the first belt route toward the crossing zone, keeping it simple and straight if possible. This gives you one “anchor” line to cross over/under.
Step 3
Build the second belt route toward the same crossing zone, but stop just before it would create an intersection that mixes flows or blocks placement.
Step 4
Select the Belt Bridge and place it at the intended crossing so the “bridge belt” passes over the other belt. The moment this is correct, you should visually recognize that it’s a crossing, not a junction.
Step 5
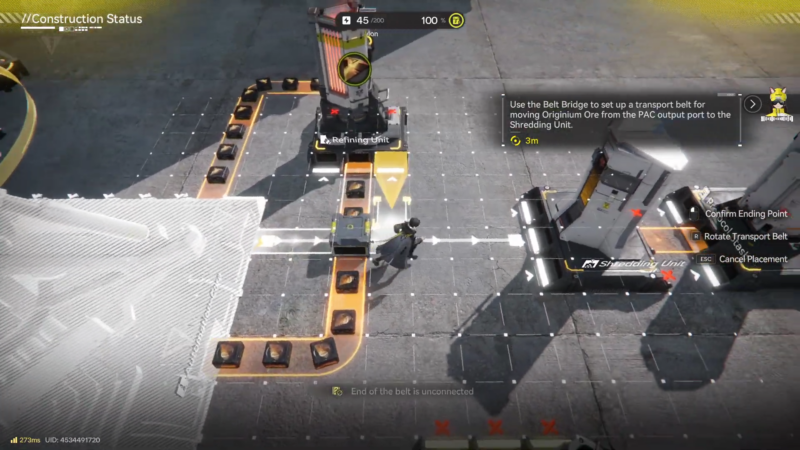
Finish both belt routes from the crossing area to their final inputs. Don’t assume the bridge magically completes the entire path—treat it as just the crossing segment.
Step 6
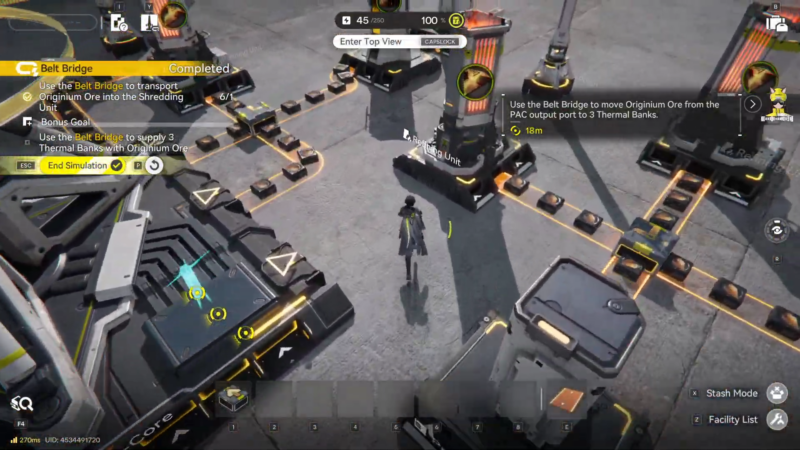
Run the simulation check and watch item movement on both lines. You’re looking for:
- Both belts moving simultaneously.
- No items jumping to the wrong line.
- No deadlocks/jams at the crossing.
If something fails, delete only the segments around the crossing first (not the whole build), then re-place the bridge and reconnect cleanly.
How to use Belt Bridges in real base layouts (so the tutorial actually pays off)
Once you leave the simulation, Belt Bridges are most valuable in these situations:
- Compact factories: When you’re packing multiple processing chains into a tight footprint, crossings become inevitable.
- “Bus” style logistics: If you run long belt corridors (main lines) and branch off to machines, bridges help you cross the corridor without disturbing it.
- Retrofit upgrades: When you expand an existing line and don’t want to tear everything down, a bridge can solve a new crossing requirement with minimal rebuild.
A good rule you can follow: if two belts should remain logically separate (different products, different destinations), prefer a bridge over an intersection or accidental merge.
How to troubleshoot common Belt Bridge simulation mistakes
Here are the failure patterns that show up most often:
- The belts merge instead of crossing: You used a normal belt connection where the bridge should be, or you connected the wrong endpoints.
- The bridge won’t place: Usually there isn’t enough valid space at the intended crossing tile, or you tried to place it before the belts were routed in a compatible way.
- Items reach the crossing but stop: One side after the crossing is missing a final segment, is facing the wrong direction, or is not properly connected to an input port.
- The wrong item arrives at a machine: You created a junction somewhere, so the simulation treats it as shared flow.
When debugging, isolate the crossing: delete and rebuild just the crossing and the two-to-four belt segments immediately adjacent to it.
Turning a “tutorial tool” into a core logistics skill
Clearing Belt Bridge Blueprint Simulation is really about learning one scalable habit: plan belt crossings deliberately so separate lines stay separate. Once you do, you’ll be able to expand complex production lines without constant rerouting or accidental mixing.