- What to know
- Building the Outposts: Location
-
How to build the Outpost
- Step 1: Reach the marked build site and trigger the mission dialogue
- Step 2: Clear the first Landbreaker group
- Step 3: Place the Sub-PAC to establish the outpost’s core
- Step 4: Identify the correct Sub-PAC output port
- Step 5: Connect a belt from the Sub-PAC output to the Refining Unit input
- Step 6: Complete the return path by connecting the Refining Unit output back to the Sub-PAC input
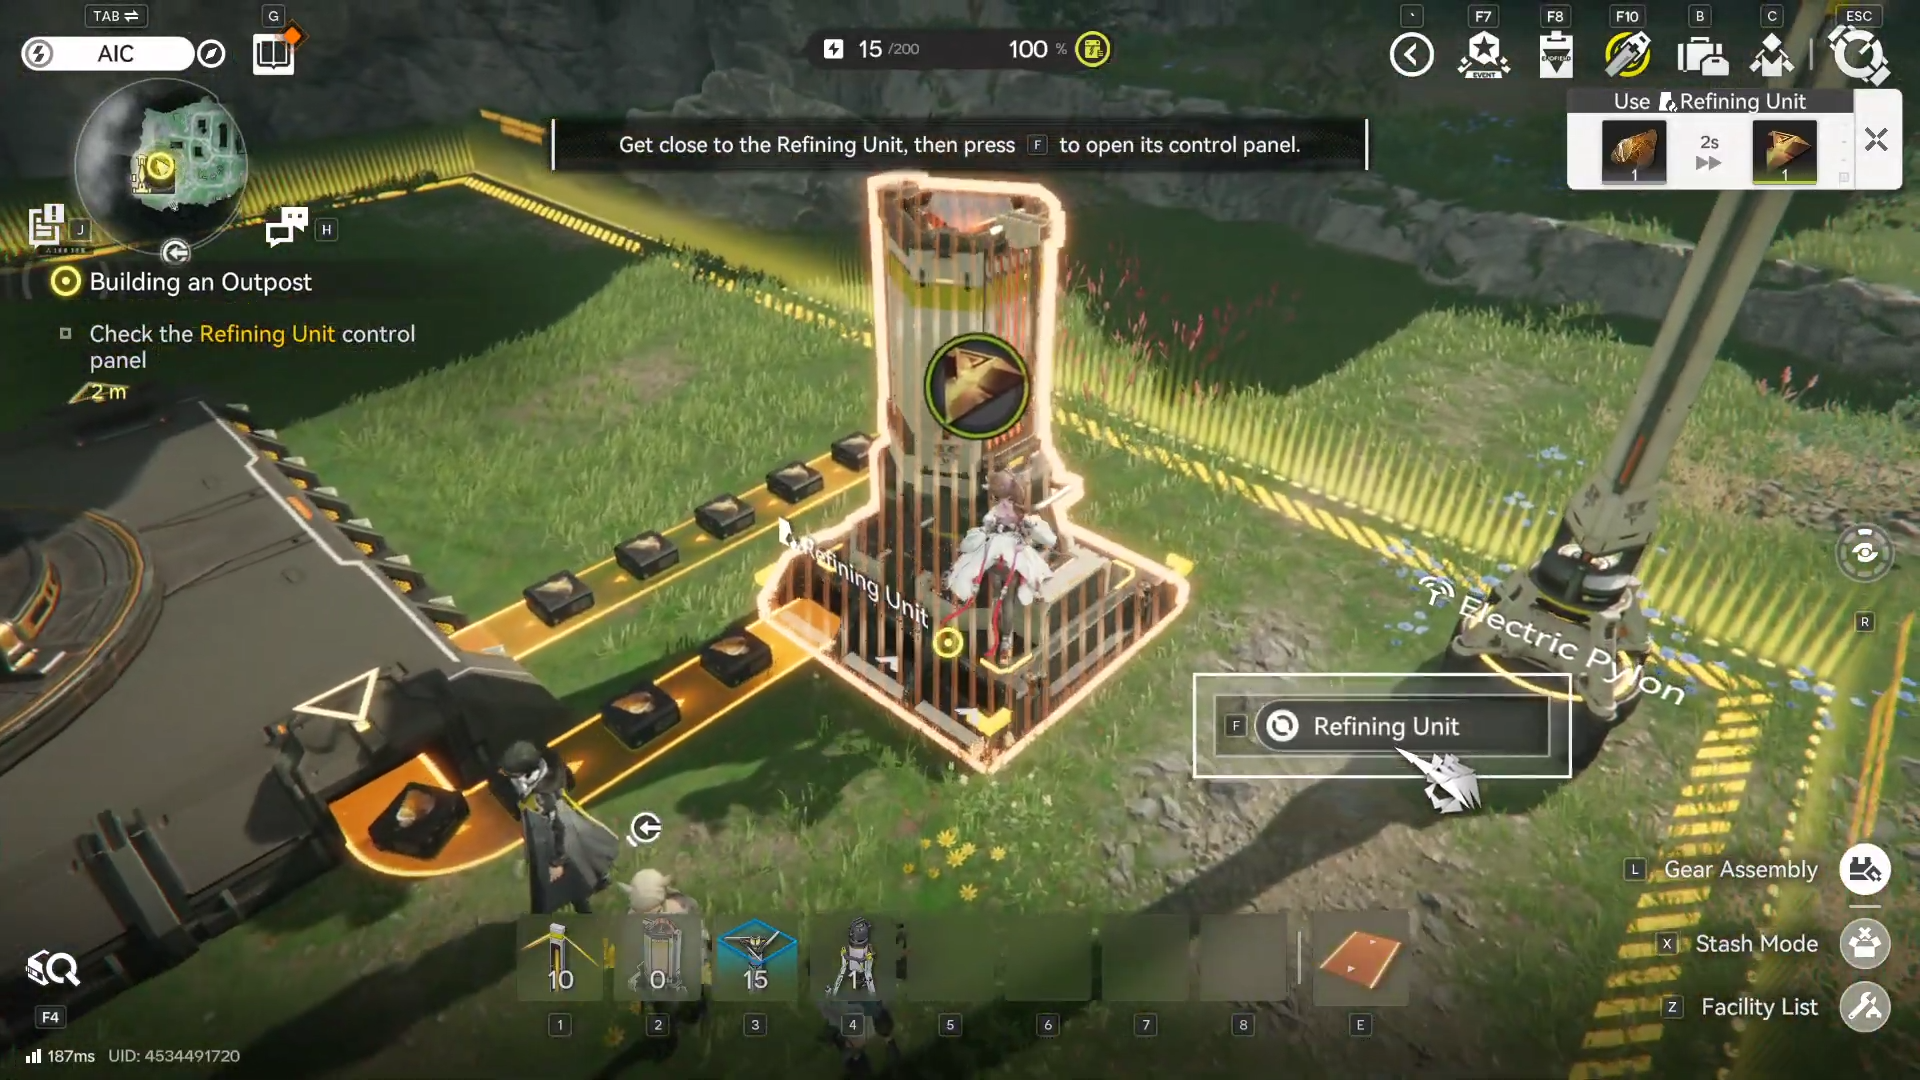
- Step 7: Confirm operation at the Refining Unit control panel
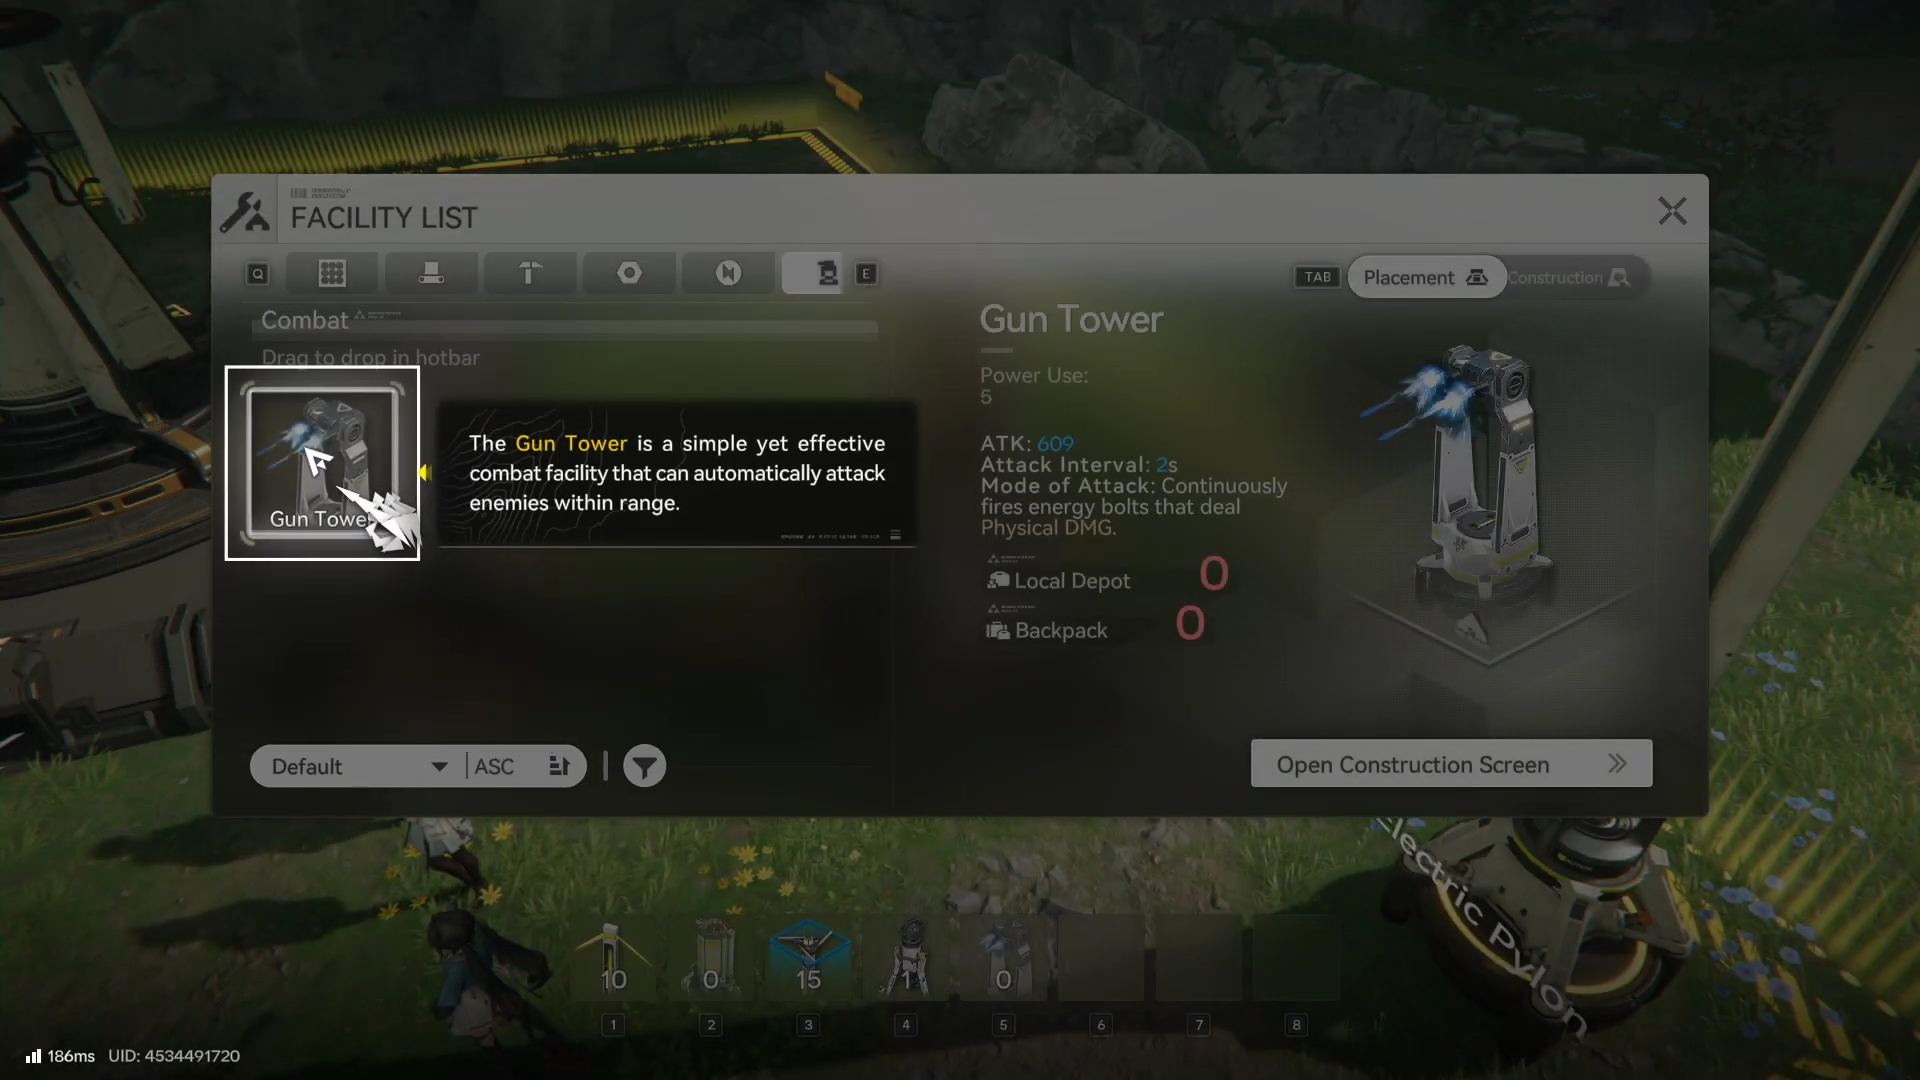
- Step 8: Construct Gun Towers using the Facility List and put them in your backpack
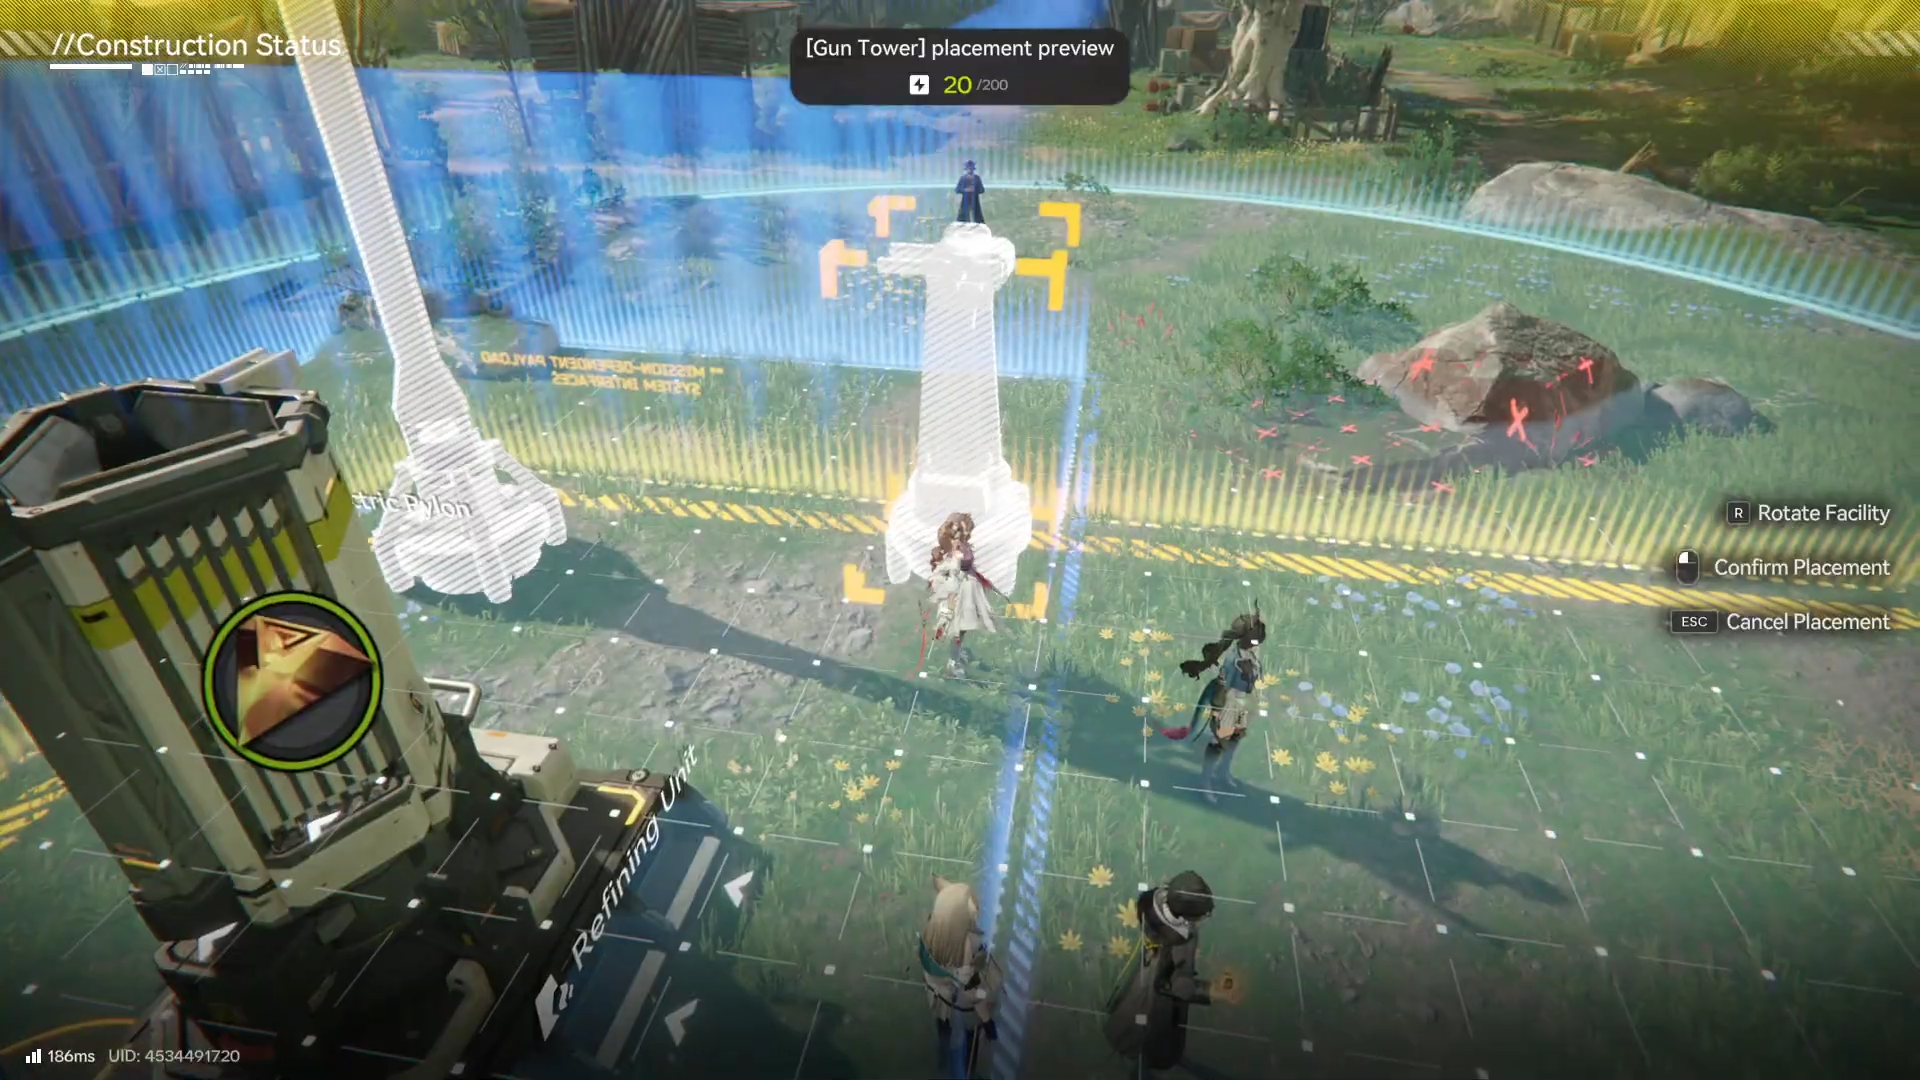
- Step 9: Deploy Gun Towers at the marked locations
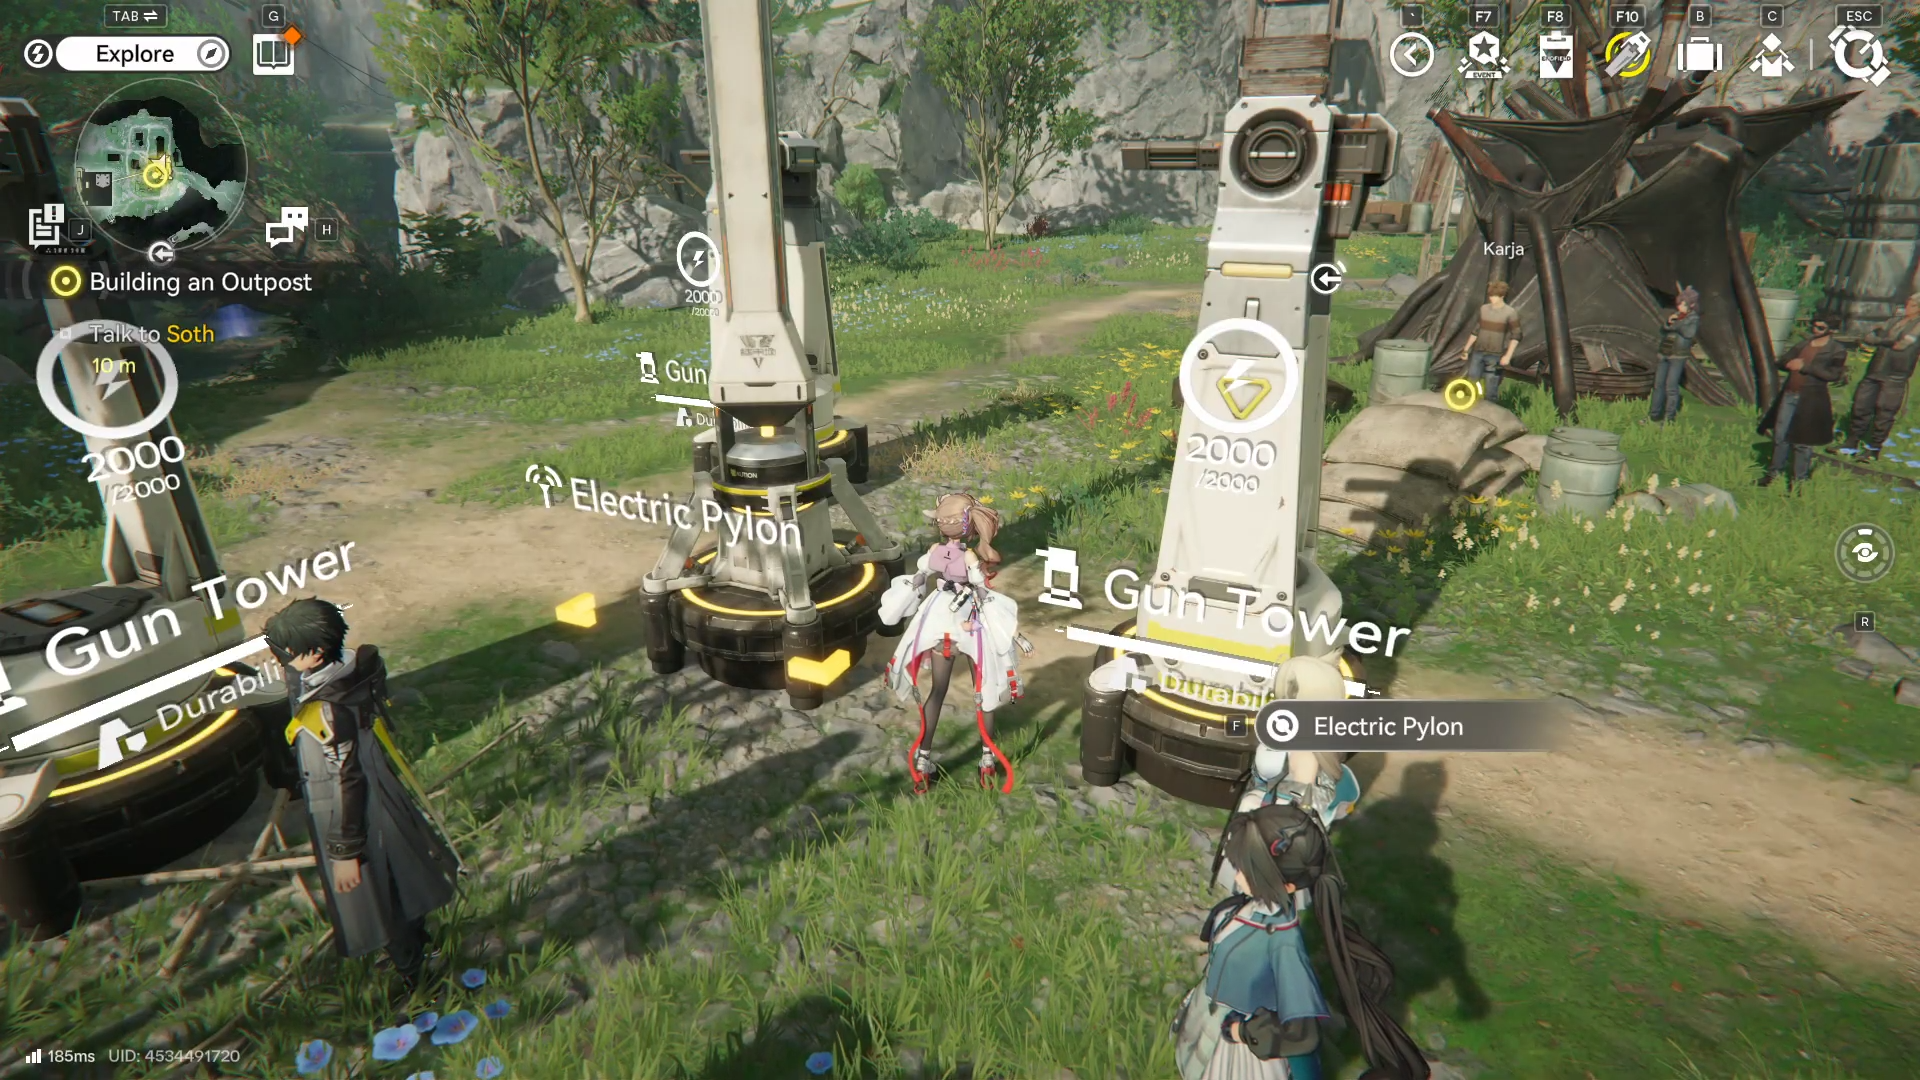
- Step 10: Power the towers with an Electric Pylon and transmit power from the Sub-PAC
- Step 11: Let the outpost prove itself in the next Landbreaker attack
- Step 12: Follow Daniel and enter the Protocol Space
- Rewards
- The building logic you’re learning here (power, ports, and production chains)
- Common build issues to avoid
What to know
- The quest is a hands-on tutorial for outpost automation: Sub-PAC placement, belt routing, and facility connections.
- You’ll connect specific input/output ports between the Sub-PAC and a Refining Unit so materials flow automatically.
- You’ll also build and deploy Gun Towers, then power them with an Electric Pylon fed by the Sub-PAC.
- Outposts matter long-term because they generate passive progress through automated supply orders and rewards.
After you clear the initial combat and reach the marked build area, “Building an Outpost” mission is really about learning the “factory sim” layer that Arknights: Endfield expects you to use going forward. If you treat it like a miniature base setup—power first, logistics second, defense last—you’ll finish faster.
| Part of the outpost | What you do | What “done” looks like |
|---|---|---|
| Site kickoff | Go to the marked location and talk to Soth | Objective advances to combat/build steps |
| Threat clear | Defeat Landbreakers | Build zone becomes safe enough to work |
| Outpost core | Place the Sub-PAC | Sub-PAC is down and available as a power source |
| Logistics loop | Connect Sub-PAC and Refining Unit with belts using the correct ports | Ore/materials can move through the chain without manual hauling |
| Automation check | Inspect the Refining Unit control panel | Unit is recognized/operational for the quest step |
| Defense setup | Construct and deploy Gun Towers | Towers are placed at marked spots and ready for power |
| Power delivery | Place an Electric Pylon and transmit power from Sub-PAC | Towers receive power via the pylon’s wireless coverage |
| Live test | Use towers to defeat an attacking wave | Attack is repelled and the mission continues |
| Wrap-up | Follow Daniel and enter Protocol Space | Quest chain progresses into the next area |
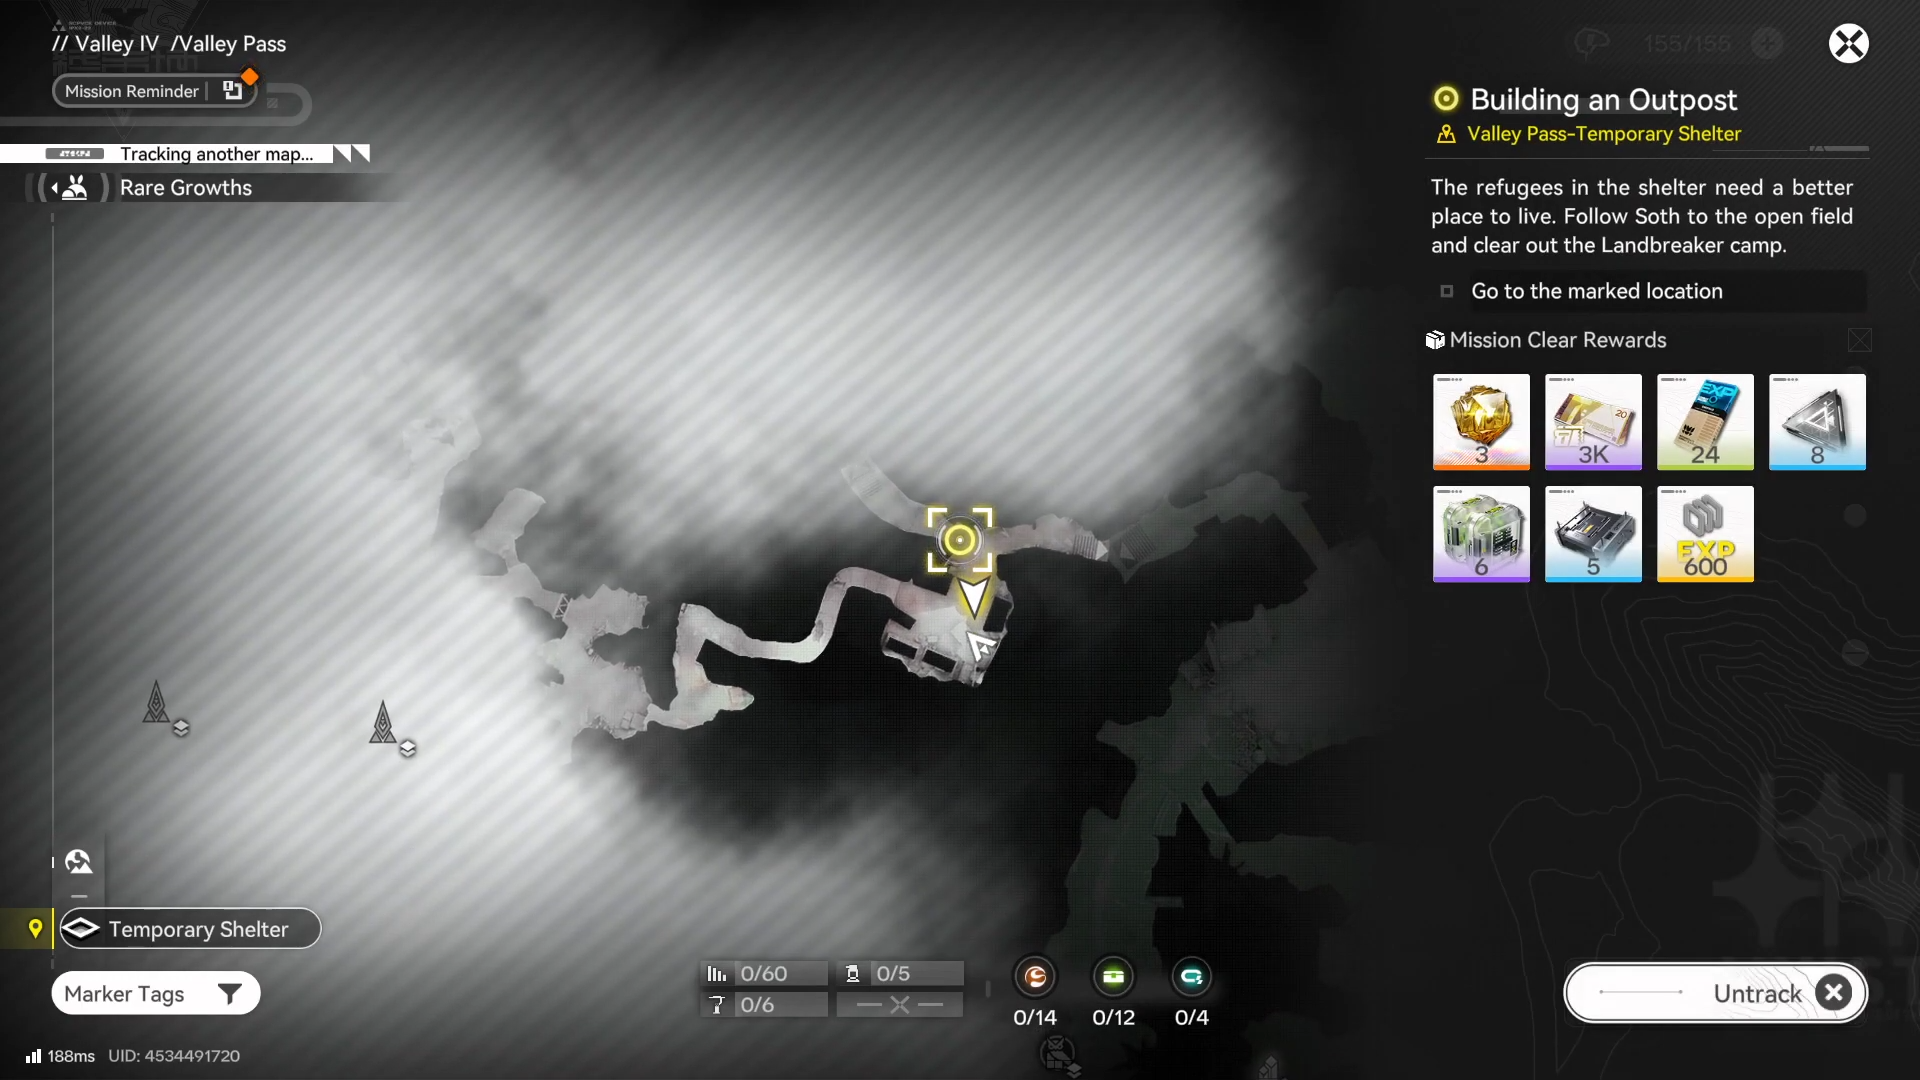
Building the Outposts: Location
This quest takes you from a combat encounter into a fixed build zone, then onward to an underground ventilation shaft and the Protocol Space as the next destination.
Outposts aren’t one-off set pieces: they’re designed to extend your automated network into new regions, with a Sub-PAC powering local operations and supporting ongoing management.
How to build the Outpost
Below is the same quest flow, but written the way you’ll actually execute it in-game—keeping the focus on what the mission is checking for at each step.
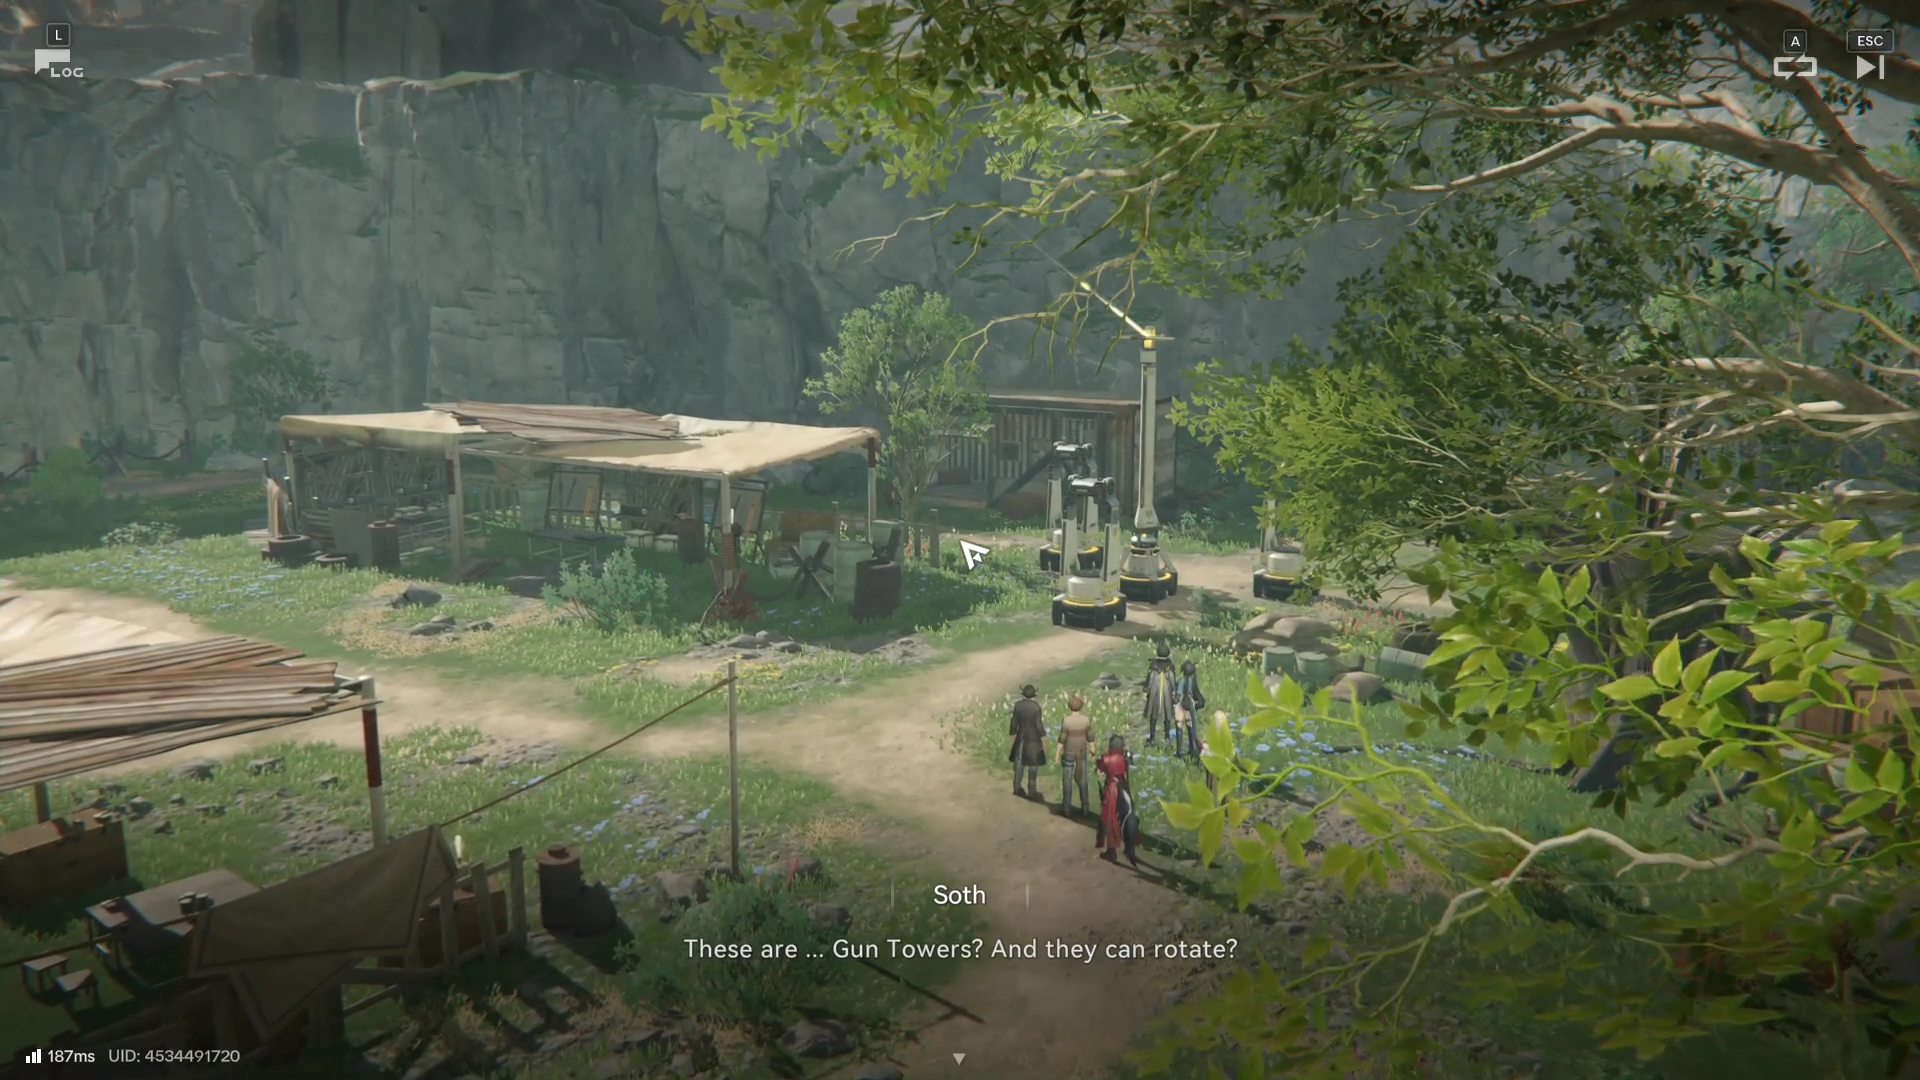
Step 1: Reach the marked build site and trigger the mission dialogue
Head to the objective marker, then speak with Soth when prompted so the quest can “unlock” the outpost tutorial segment. If the marker is visible but nothing progresses, make sure you’re inside the correct interaction radius and that the dialogue fully completes.

Step 2: Clear the first Landbreaker group
Defeat the Landbreakers near the build area to stop interruptions while you’re placing structures and lining up belts. This is also the game’s way of making sure you understand the outpost is meant to be defended, not just built.

Step 3: Place the Sub-PAC to establish the outpost’s core
Place the Sub-PAC at the indicated location; it functions as the local hub for the outpost (and a power source you can extend). In Endfield’s power model, you don’t get “global power everywhere”—you need a powered source (like a PAC/Sub-PAC) and then build outward using relay infrastructure and pylons as needed.

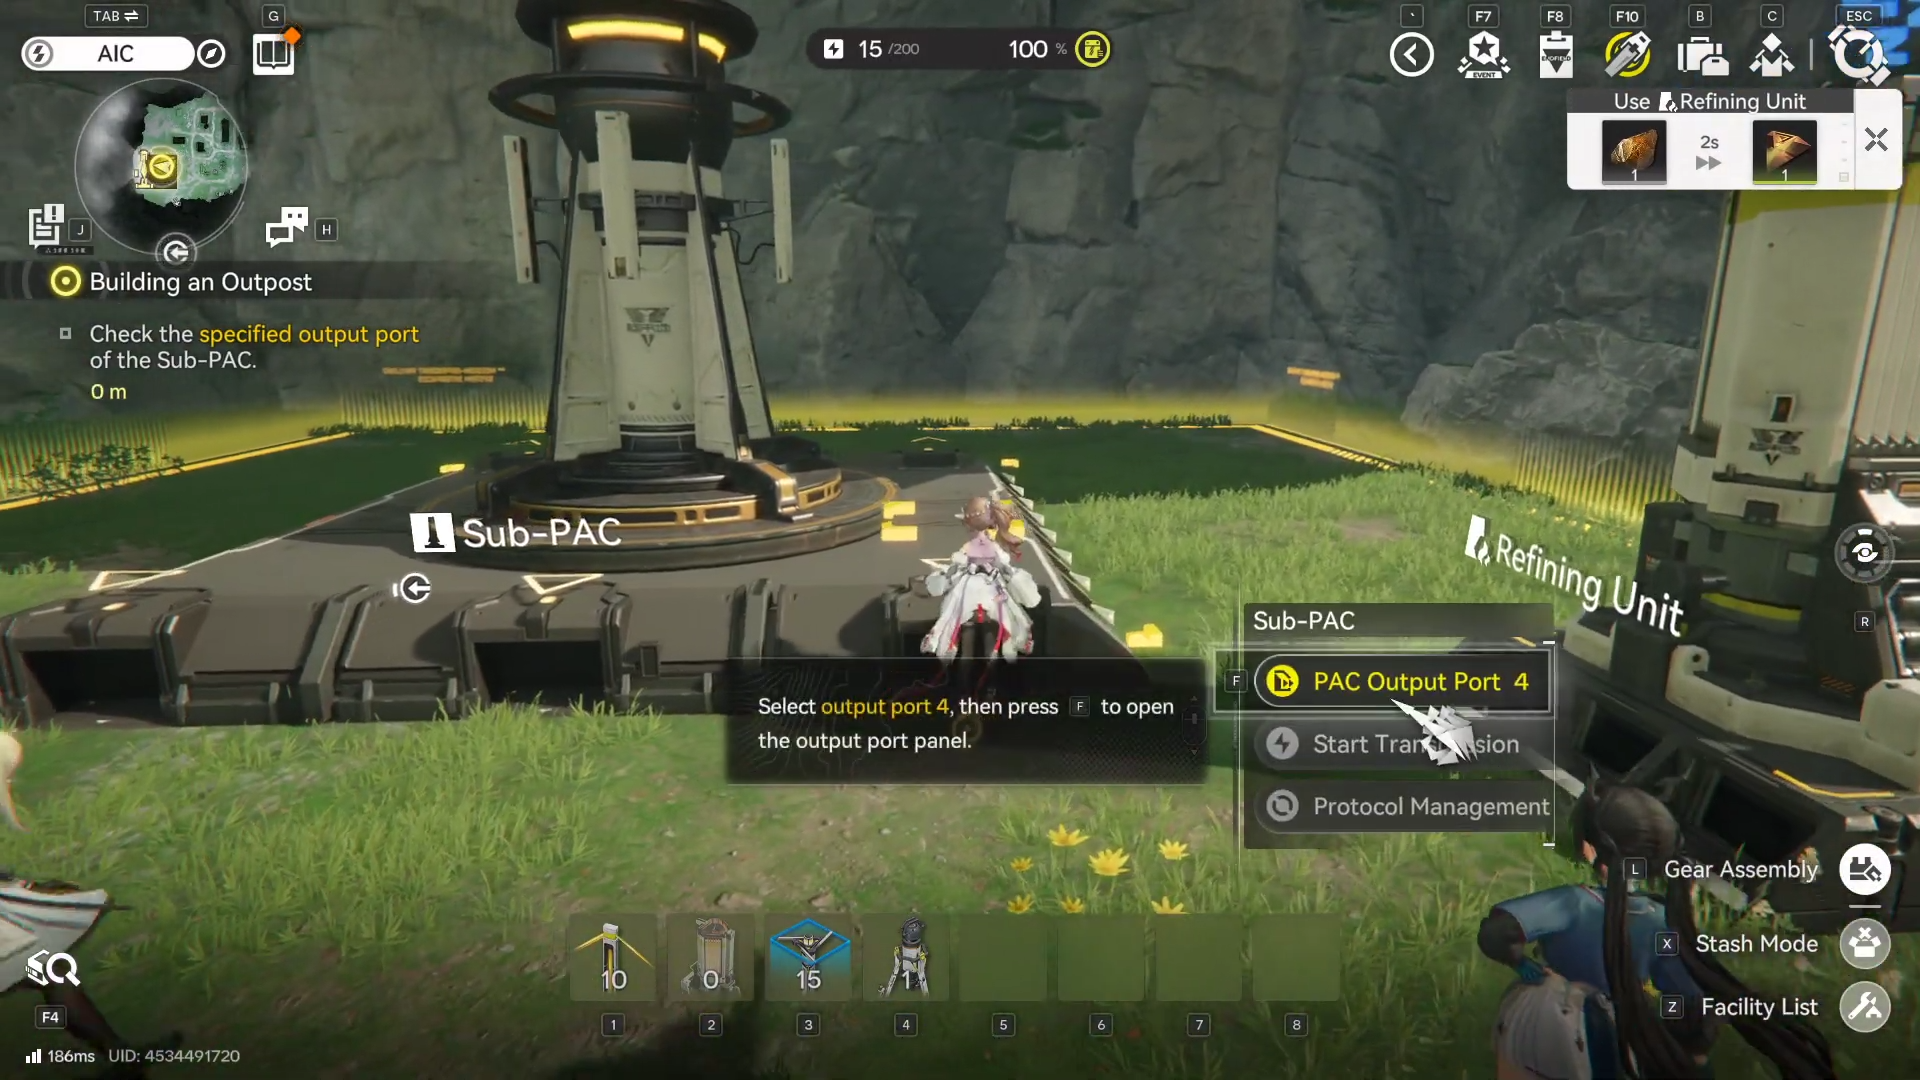
Step 4: Identify the correct Sub-PAC output port
The mission explicitly tells you to check a specified Sub-PAC output port, so rotate your view and confirm you’re working from the right connector. If you connect a belt to the wrong side, the visuals may still look “connected,” but the objective won’t advance because the game is validating the port.
Step 5: Connect a belt from the Sub-PAC output to the Refining Unit input
Run a conveyor belt from the Sub-PAC’s required output port to the Refining Unit’s input port. Think of belts as your outpost’s bloodstream: every facility is defined by its inputs and outputs, and your job is to keep the flow unbroken.
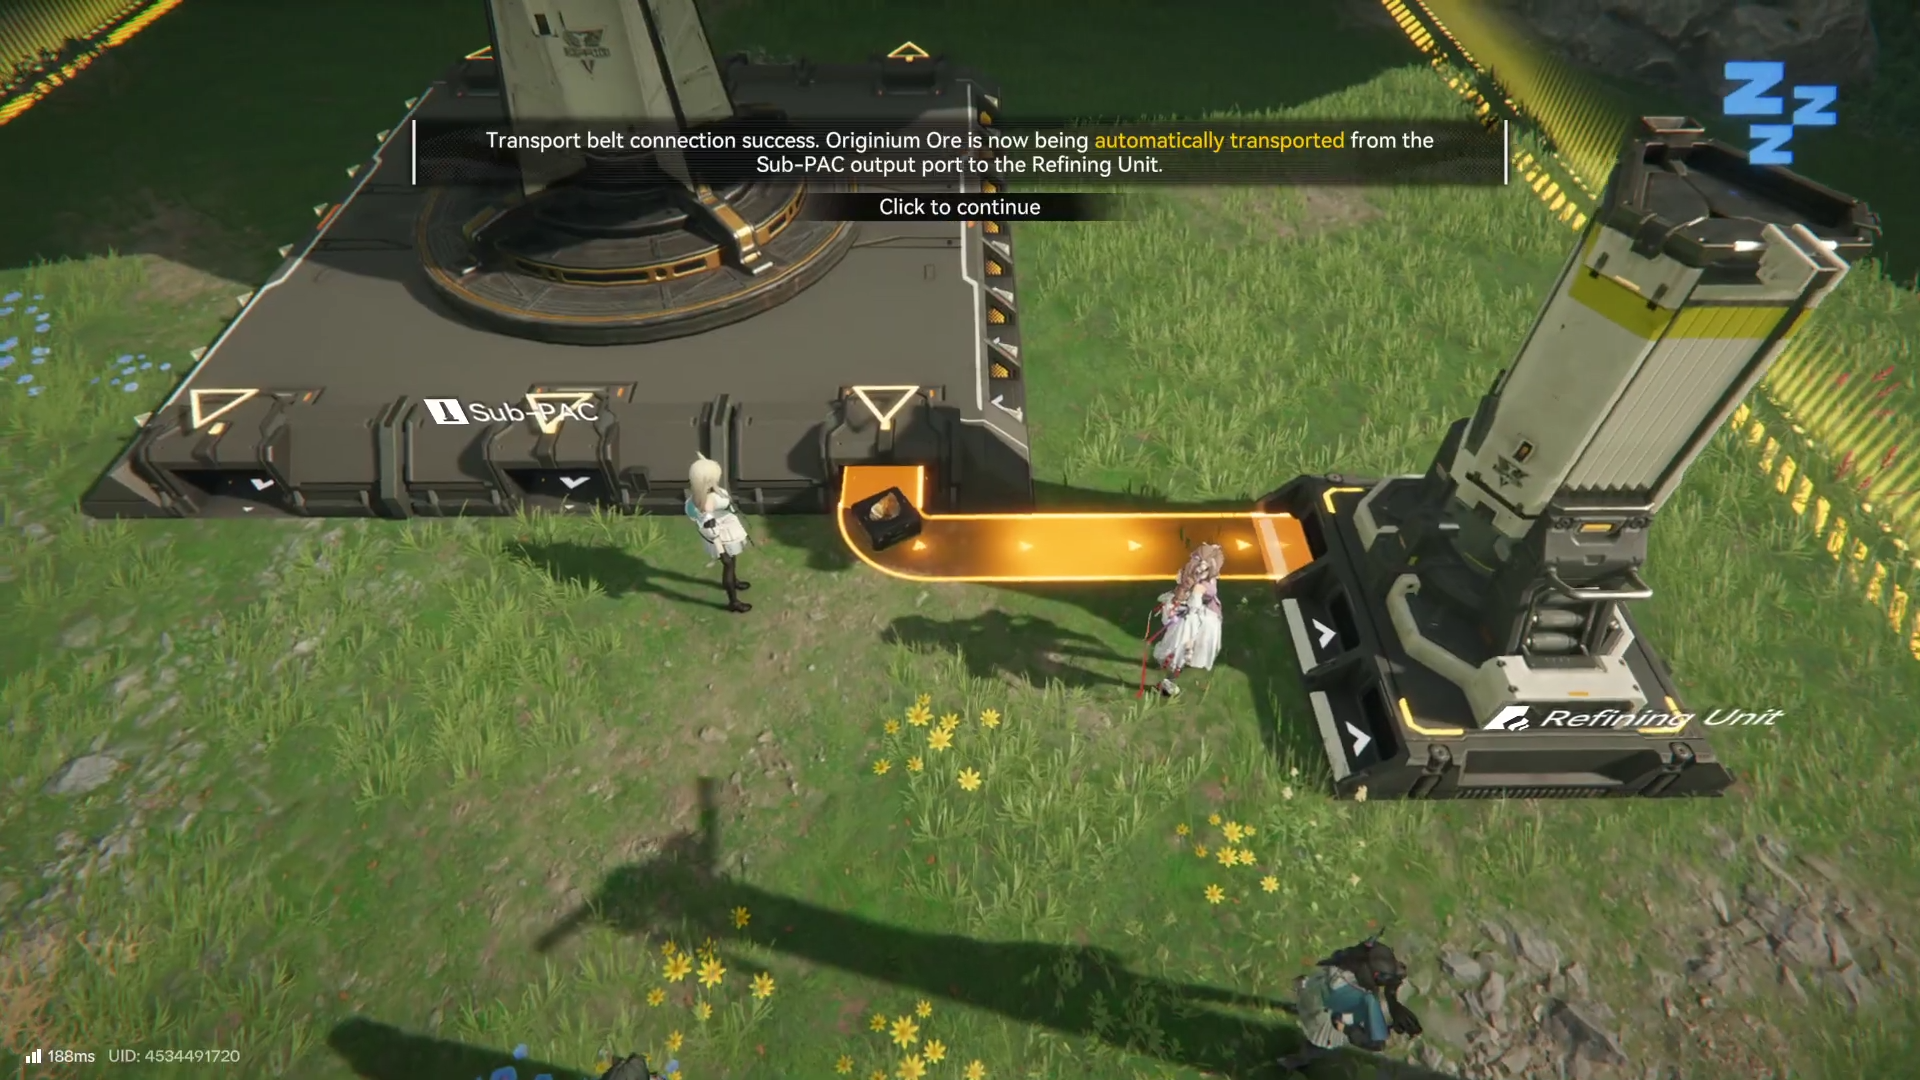
Step 6: Complete the return path by connecting the Refining Unit output back to the Sub-PAC input
After ore goes into the Refining Unit, its processed output must go somewhere, and the quest directs you to connect the Refining Unit output to a Sub-PAC input.
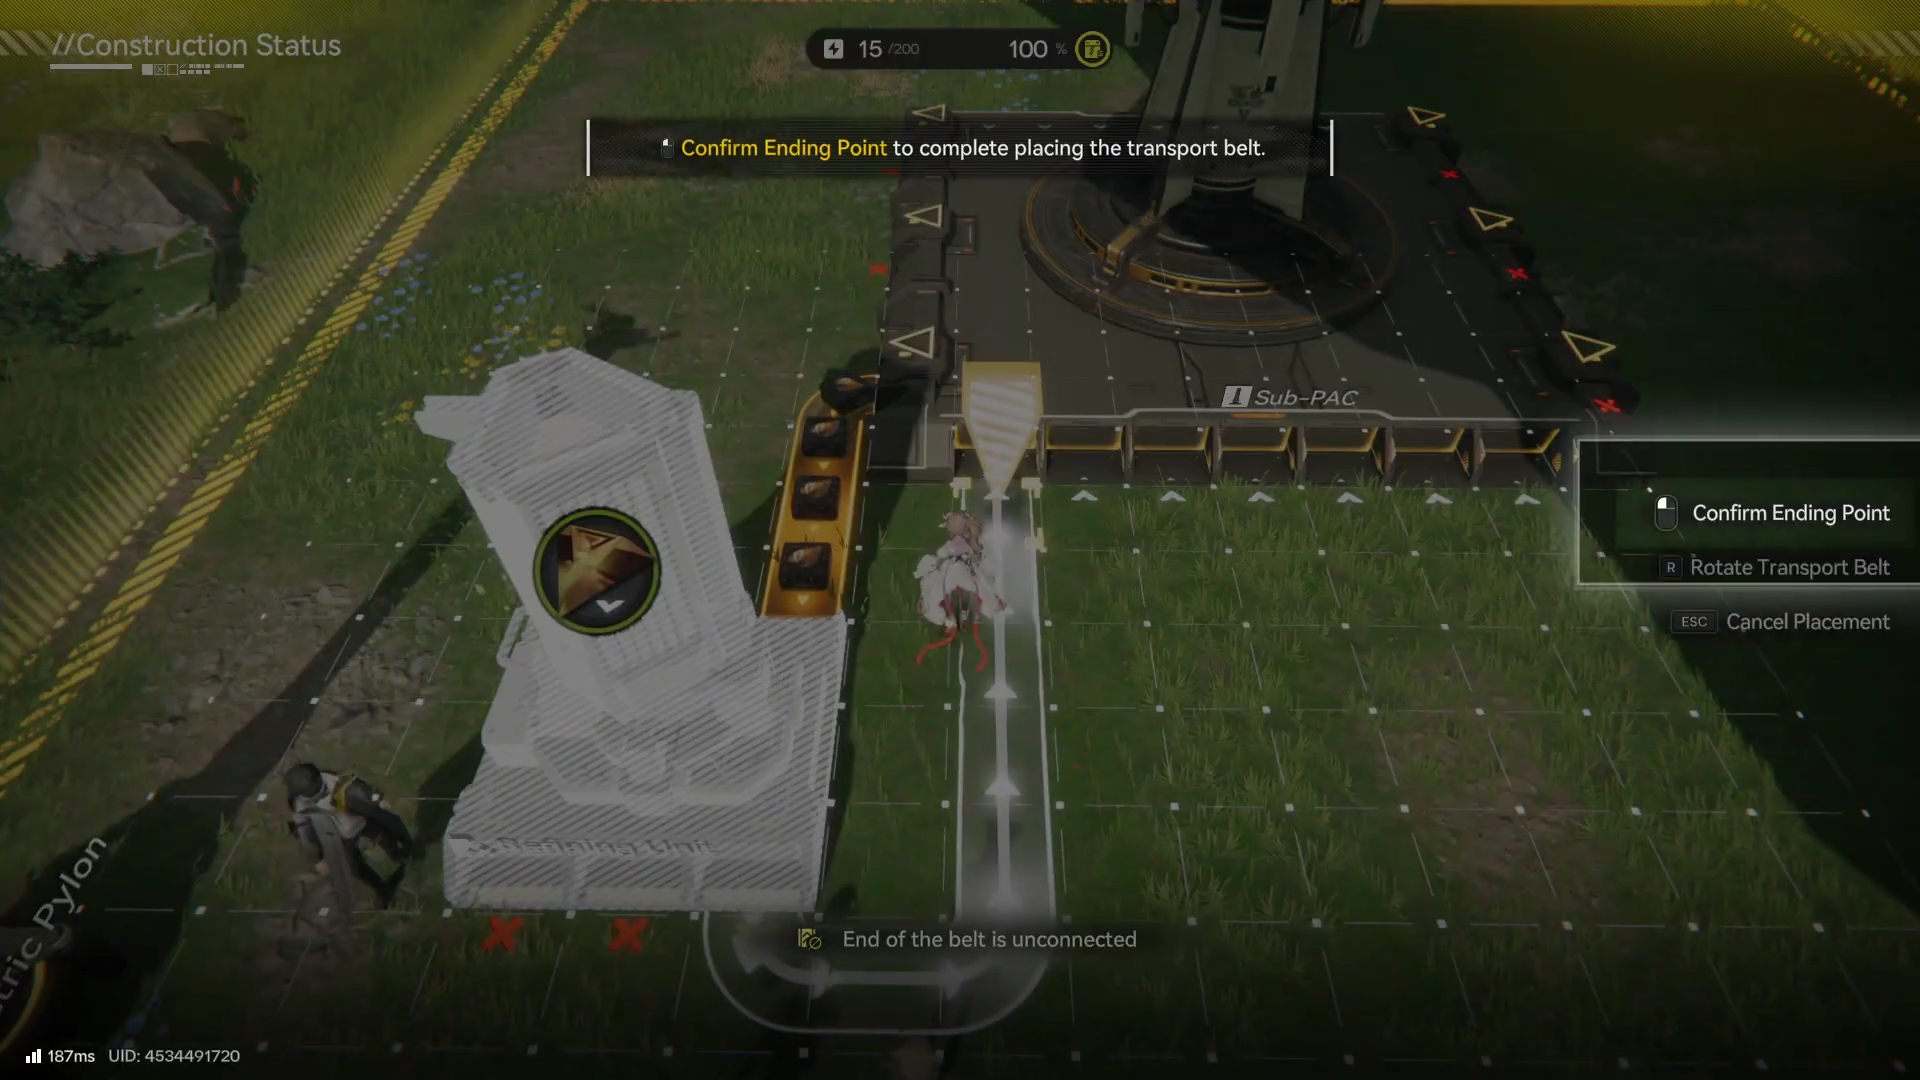
Once this loop is complete, you’ve built the simplest possible production chain: extract/receive → refine → return to storage/hub.
Step 7: Confirm operation at the Refining Unit control panel
Interact with the Refining Unit control panel when the objective calls for it. This step usually acts like a “sanity check” that the unit exists, is connected, and is recognized by the tutorial sequence.
Step 8: Construct Gun Towers using the Facility List and put them in your backpack
Open the Facility List when prompted and construct the Gun Towers so they become placeable items in your inventory/backpack. This is also your first taste of how base/outpost building ties into combat support, not just crafting.
Step 9: Deploy Gun Towers at the marked locations
Place the Gun Towers exactly on the marked spots; the quest step is positional and will not always accept “close enough.” If placement feels fussy, adjust your angle and distance until the placement preview snaps properly.
Step 10: Power the towers with an Electric Pylon and transmit power from the Sub-PAC
Place an Electric Pylon so it can power the Gun Towers wirelessly, then transmit power from the Sub-PAC to the pylon as instructed. In Endfield’s system, pylons distribute power locally while relay structures extend power across distance—so the pylon is the “last hop” that makes your combat facilities actually run.

Step 11: Let the outpost prove itself in the next Landbreaker attack
After talking to Soth again, use your newly powered Gun Towers to help defeat the attacking Landbreakers. This is the mission’s practical test that your defenses are not only placed, but also powered correctly.
Step 12: Follow Daniel and enter the Protocol Space
When the outpost segment is complete, follow Daniel to the underground ventilation shaft and enter the Protocol Space to continue the main mission line. This effectively closes the tutorial loop: build, connect, power, defend, then move on.

Rewards
- Origeometry – x3
- T-Creds – x3000
- Intermediate Combat Records – x24
- Protodisks – x8
- Arms INSP Sets – x6
- Cast Die – x5
- Operational XP – 600
The building logic you’re learning here (power, ports, and production chains)
Endfield’s factory layer is built around a simple rule: facilities have input/output ports, and conveyors move items between those ports in a chain. Power is physical too—your Sub-PAC is a source, relay structures extend reach, and Electric Pylons distribute power in an area to nearby facilities like towers.
Common build issues to avoid
- Wrong port selection: the quest explicitly checks a specific Sub-PAC output, so “any connection” may not pass the objective.
- Missing the return route: if refined output doesn’t route back into the Sub-PAC input, the chain is incomplete for the tutorial.
- Unpowered defenses: Gun Towers may be placed correctly but won’t function until powered through the Electric Pylon transmission step.
Treat the mission as your template for every future outpost: place the hub, connect the logistics, verify the facility, then power and defend. Once this clicks, you’ll spend less time babysitting resources and more time pushing exploration and combat, because the factory/outpost network is meant to run continuously in the background.