
- What to know
- How medicine efficiency works mechanically
- #1 Shrine Kodama Blessings provide the strongest foundation
- #2 Accessories and passive bonuses amplify recovery
- #3 Onmyo Magic synergy enhances temporary healing power
- The hidden factor: status effects and healing penalties
- Carry capacity versus efficiency
- How these methods stack together
- Why medicine efficiency matters in high-level play
- Maximizing medicine efficiency in Nioh 3
What to know
- The fastest boost comes from Kodama Blessings at shrines.
- Accessories and Prestige bonuses directly increase Elixir healing.
- Certain Onmyo Magic buffs temporarily amplify recovery effects.
- All healing modifiers stack, creating powerful sustain builds.
In Nioh 3, survival is often determined by how efficiently you manage Elixirs. Raw damage helps end fights faster, but improved healing efficiency gives you room for mistakes, especially in extended encounters against high-damage bosses.
Medicine efficiency does not increase how many Elixirs you carry by default. Instead, it increases how much health each Elixir restores, which effectively multiplies your sustain potential.
How medicine efficiency works mechanically
By default, an Elixir restores a fixed percentage of your maximum health. When you increase medicine efficiency, that percentage rises, meaning each use restores significantly more HP.
| Healing Source | Default Behavior | With Efficiency Boost |
|---|---|---|
| Elixir | Fixed base recovery | Higher HP restored per use |
| Shrine Refill | Restores up to regional cap | No change in amount, but higher value per use |
| Drop Rate | Standard | Can improve via Kodama Blessings |
Efficiency changes the value of each Elixir, not the cap.
#1 Shrine Kodama Blessings provide the strongest foundation
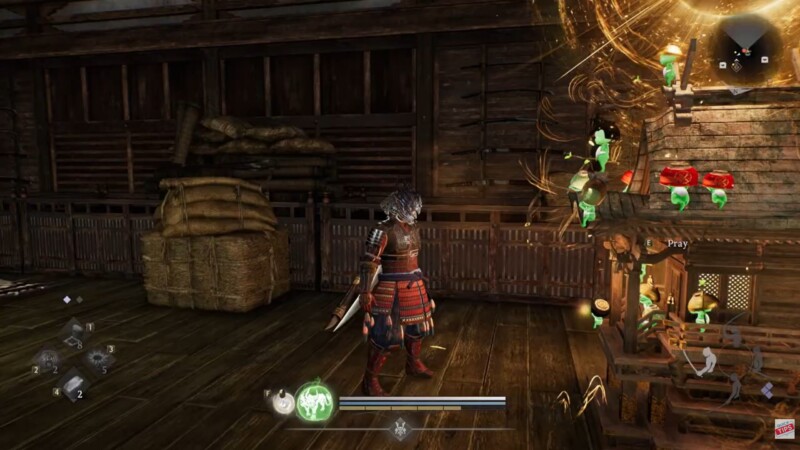
The most reliable and accessible way to increase medicine efficiency is through Kodama Blessings. These are activated at shrines after rescuing Kodama spirits scattered throughout each region.
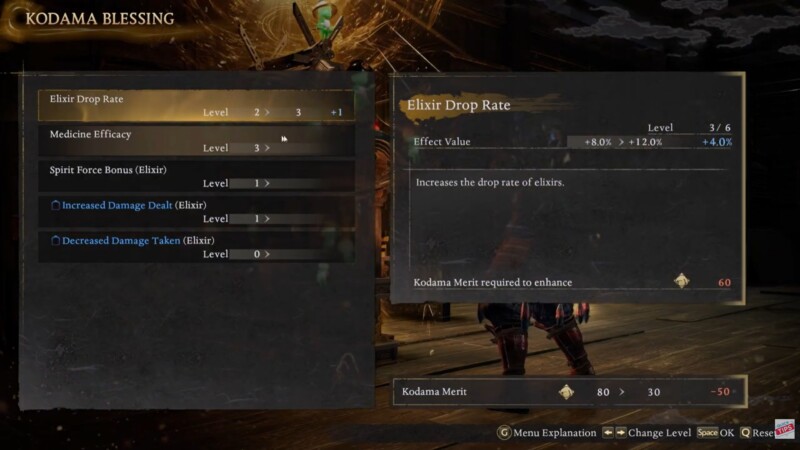
To activate them, pray at a shrine by holding the interact key, enter the Blessing menu, and select Kodama Blessings. Using accumulated Kodama Merit allows you to increase medicine efficiency.
| Shrine Interaction | Result |
|---|---|
| Pray at Shrine | Access Blessing Menu |
| Select Kodama Blessings | Unlock healing buffs |
| Spend Kodama Merit | Increase medicine efficiency |
Community testing and player reports confirm that higher Kodama counts significantly improve both Elixir healing output and Elixir drop rates. The drop rate improvement indirectly boosts sustain by ensuring you replenish stock more frequently during missions.
The more Kodama you rescue in a region, the stronger your shrine-based healing potential becomes. This makes exploration directly tied to survivability.
#2 Accessories and passive bonuses amplify recovery
Beyond shrine blessings, gear plays a major role in increasing medicine efficiency.
Certain accessories, including items similar to the Medicine Case, roll modifiers that directly boost Elixir healing amount. These bonuses stack with Kodama Blessings, creating noticeable healing jumps per use.
| Modifier Type | Effect |
|---|---|
| Elixir Healing Bonus | Increases HP restored per use |
| Recovery Effect Up | Boosts total recovery |
| Status Resistance Synergy | Prevents healing penalties |
In addition to gear affixes, long-term progression unlocks Prestige bonuses that further enhance Elixir effectiveness. These percentage-based increases may appear small individually, but when combined with shrine blessings and accessory modifiers, the total boost becomes significant.
Players on community forums consistently report that stacking accessory bonuses with Kodama Blessings can push Elixir recovery to near full-health levels on mid-health builds.
#3 Onmyo Magic synergy enhances temporary healing power
For players running hybrid or magic-based builds, Onmyo Magic offers situational healing amplification.
Certain support buffs temporarily increase recovery effects, including Elixir healing. While not permanent, these buffs can dramatically increase survivability during boss encounters.
| Buff Type | Effect Duration | Impact |
|---|---|---|
| Recovery Boost | Temporary | Significant healing amplification |
| Cure Acceleration | Temporary | Faster HP restoration |
| Stacking Potential | Yes | Works with Blessings and Gear |
These buffs stack with shrine and accessory bonuses, allowing for peak sustain moments during difficult fights.
Although primarily used by magic-focused players, even melee builds benefit from carrying at least one recovery amplification talisman for emergency situations.
Not all conditions allow full healing. Certain status ailments, particularly Stench, reduce the effectiveness of Elixirs until cured. This means even high-efficiency builds may see reduced recovery if afflicted.
Managing status ailments is therefore indirectly part of maximizing medicine efficiency.
| Status Effect | Impact on Healing |
|---|---|
| Stench | Reduces Elixir effectiveness |
| Poison | Does not reduce healing but drains HP |
| Shock | No direct impact on healing |
Clearing Stench quickly ensures your efficiency modifiers operate at full value.
Carry capacity versus efficiency
While increasing medicine efficiency improves per-use healing, increasing Elixir capacity improves overall mission endurance. Kodama saved in each region also increase shrine refill amounts, ensuring you start missions with more Elixirs.
However, the carry cap remains limited, meaning improving efficiency provides more long-term value in difficult content than simply carrying more.
| Factor | Efficiency | Capacity |
|---|---|---|
| Healing Per Use | Increases | No change |
| Total Uses | No change | Increases |
| Best for Bosses | Yes | Yes |
| Best for Long Missions | Yes | Yes |
The most optimized builds balance both.

How these methods stack together
The strongest healing setups combine all three primary methods.
| Source | Stackable? | Contribution |
|---|---|---|
| Kodama Blessings | Yes | Base efficiency boost |
| Accessory Bonuses | Yes | Additional percentage increase |
| Prestige Perks | Yes | Passive multiplier |
| Onmyo Buffs | Yes (temporary) | Burst healing amplification |
When combined, these modifiers significantly outperform base healing.
Players who invest in shrine blessings, equip healing-focused accessories, and activate recovery buffs during boss phases consistently report much higher survival margins in late-game content.
Why medicine efficiency matters in high-level play
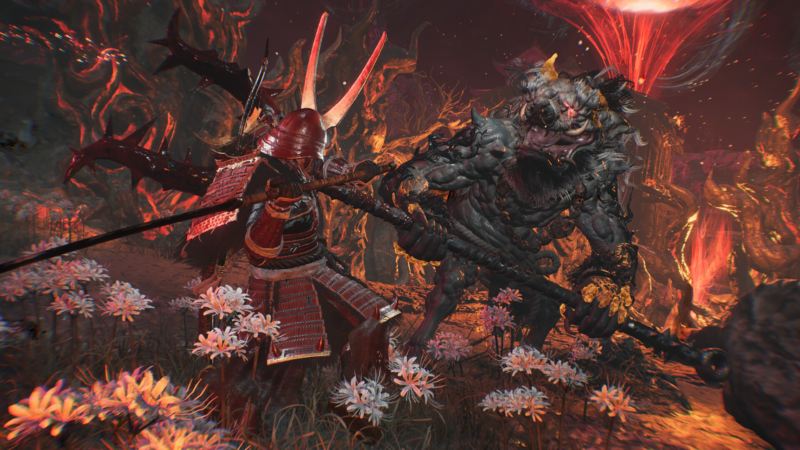
Late-game enemies deal heavy burst damage, and extended encounters often punish mistakes. High medicine efficiency allows you to recover large portions of health instantly, preserving Ki and reducing panic healing.
For aggressive melee builds, improved Elixir recovery reduces downtime between engagements. For magic builds, it compensates for lighter armor scaling.
In short, medicine efficiency multiplies survivability without altering combat style.
Maximizing medicine efficiency in Nioh 3
To increase medicine efficiency in Nioh 3, begin at shrines by activating Kodama Blessings, stack Elixir healing bonuses on accessories, invest in Prestige perks, and optionally enhance recovery through Onmyo Magic buffs. Avoid healing-reducing status effects like Stench to maintain peak output.
When these systems are layered properly, each Elixir becomes dramatically more valuable, allowing you to survive tougher encounters with fewer resources.
If you prioritize exploration for Kodama and optimize your gear rolls, medicine efficiency becomes one of the strongest defensive investments in the game.