Windows 11 has had its fair share of issues with modern games but a recent error with Valorant seems to have everyone stumped. Are you facing an error called VAN 1067? Then this is an issue with Windows 11’s requirements for TPM 2.0 and Secure Boot. Here’s how you can fix this issue on your PC.
How to fix VAN 1067 error for Valorant

You can use the following known fixes to try and get Valorant working on your PC again.
This issue also seems to stem from Secure Boot keys that sometimes go undetected/unrecognized by Valorant while on other systems, BIOS updates fail to save changes.
Either way, you can use the following fixes to fix the error on your system depending on your setup.
Fix #1: Ensure Windows 11 compatibility: Enable Secure boot and TPM 2.0
Firstly we recommend you run the PC Health Check app from Microsoft to determine your compatibility with Windows 11. This error occurs in Valorant when the game is unable to detect TPM 2.0 or Secure Boot or both on your system. Running the PC Health Check app will help you determine if everything is set up properly on your system and identify misbehaving features that you can then rectify. If you are missing TPM 2.0 or Secure Boot, then sadly there’s not much you’ll be able to do in this case. However, if you have all the necessary components, then you can continue with this guide and try one of the fixes mentioned below instead.
Here’s how to run the PC Health Check app and find if your PC is compatible with Windows 11.
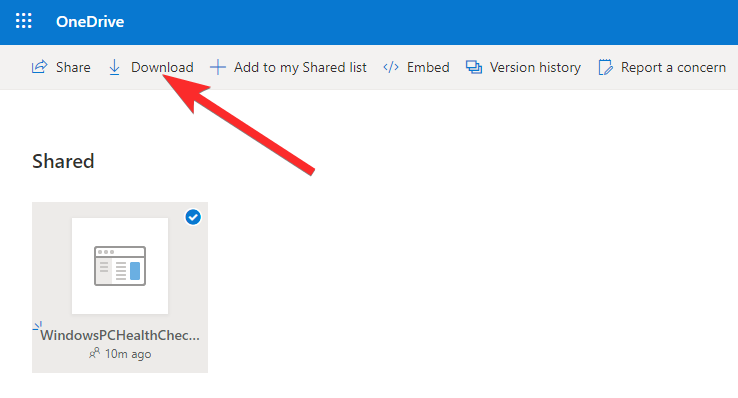
Now, first of all, download the Windows 11 PC Health Check app from here. It will automatically start downloading, but if it doesn’t, click the Download button in the top left.
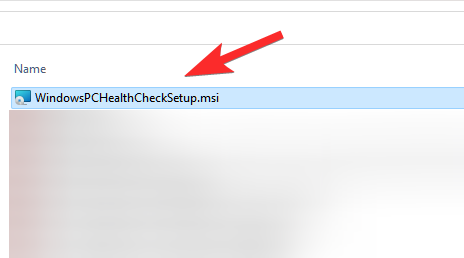
Double click on the downloaded file to run the PC Health Check app on your PC.
Click the “Check now” button.
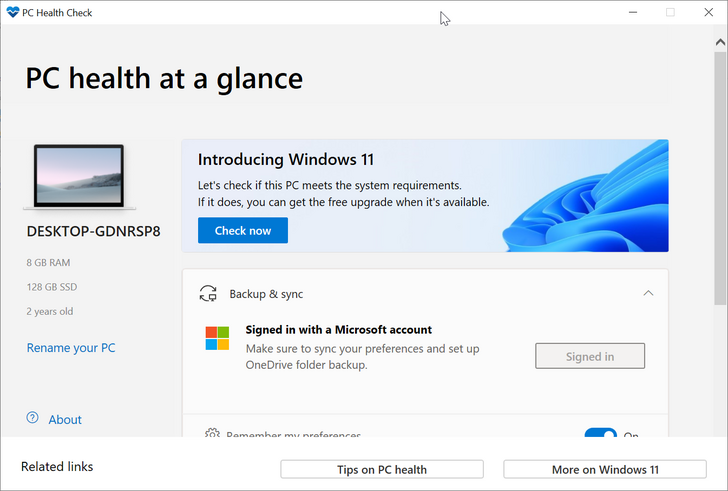
If your PC is compatible with Windows 11, you will get this screen:

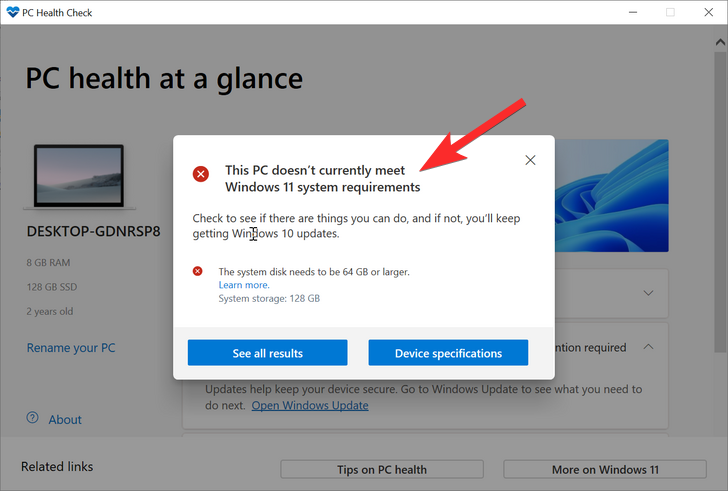
However, if your PC is NOT compatible with Windows 11, you will get this screen:
Fix #2: Select Windows UEFI in BIOS

Do you have a Gigabyte motherboard? Then you likely need to select ‘Windows UEFI’ in the ‘OS Type’ value in your BIOS menu. Usually, this value will be set to ‘Other OS’ as older BIOS versions cannot correctly detect Windows 11. Once you have selected Windows UEFI in your BIOS menu, Valorant should be back up and running on your system again as usual. Even if you do not have a Gigabyte motherboard, we recommend you still go into your BIOS and ensure that your system is using a modern UEFI interface.
Fix #3: Reset Secure Boot Keys in BIOS

This is another known fix that seems to fix issues with most systems. Secure Boot keys help define and verify signatures for various devices and software components on your systems. These keys can be easily reset from the BIOS for a fresh start. Old Windows 10 Secure Boot keys seem to be the cause of the VAN 1067 error on some systems hence you should immediately go reset them in your BIOS menu. If you are a new user unfamiliar with the BIOS then we recommend that you proceed with caution and do not perform any unintended changes in the BIOS.
Fix #4: Disable CSM

If your motherboard has CSM capability then we recommend you disable it on your system. Chances are that you have already done this while installing Windows 11 but on some motherboards, this change can get reverted when performing major OS updates. You should disable CSM in your BIOS menu at the earliest to get Valorant back up and running on your system again. You can use our comprehensive guide to disable CSM on your system.
Read: How to Disable CSM to install Windows 11
Fix #5: Reset BIOS/UEFI settings
If by this point your issue hasn’t been resolved, then we recommend you reset your BIOS and start from scratch. Many users reported that secure boot, TPM, or UEFI changes weren’t being saved in the BIOS due to a weird bug that can thankfully be solved with a BIOS reset. A BIOS reset is completely safe and you won’t lose any data in the process.
How to reset BIOS settings
On different PCs, the UI to reset the BIOS settings will be different. We are using an example of Asus PCs below, one each for UEFI mode and legacy mode. Not only the BIOS/UEFI UI but also the method to boot into the BIOS/UEFI will be different.
First, access the BIOS/UEFI screen by pressing the correct key when the device is restarting. Usually, any of these keys should work: F2, Esc, Del, F12. Search on your motherboard maker’s website to find which key works for your PC. And of course, Google is your best friend.
On BIOS/UEFI screen find the option to reset the BIOS/UEFI settings.
For Asus PC with UEFI, simply pressing the F9 key on the UEFI screen would do the job.

The same goes for the Advanced Mode of the UEFI screen for Asus PCs. Pressing the F9 key for the “Optimized Defaults” option will reset the BIOS/UEFI settings to default.

What to do after resetting BIOS?
Once you have reset your BIOS, simply boot into Windows, wait for a little, and then restart back into the BIOS menu.
You now need to make the following changes, save them and boot into Windows.
- Enable TPM if disabled
- Reset Secure Boot Keys
- Disable CSM or Enable UEFI or both depending on your motherboard.
Now save all the changes, reboot your system and boot back into the BIOS menu. Here, enable Secure Boot for your system finally and save your changes. Once you boot into Windows 11, try playing Valorant now and you should no longer get the VAN 1067 error on your system.
Fix #6: Close Discord
Discord seems to be another culprit that is causing issues for some users. If you are someone who uses Discord while playing Valorant then it is likely the culprit if your issue isn’t solved by now. We recommend you close all instances of Discord, disable auto-start for Discord and then restart your system. If Discord was causing the VAN 1067 error on your system then it should now be fixed.
To close the Discord app completely, first, click the upward arrow for “Show hidden icons” on the right side of the taskbar.
Now, click right-click on Discord’s icon, and select Quit Discord.

Fix #7: Install latest Windows Updates

A few users have managed to iron out Windows bugs with recent Windows updates which seem to have fixed the VAN 1067 error for them. If you are still facing this error and are unable to play the game then updating Windows is worth a shot. Simply head to Settings > Windows Update > Check for updates and download and install all the available Windows updates for your system.
We hope you were able to get rid of the VAN 1067 error using the fixes above. If you have any suggestions, feel free to drop them in the comments section below.
Related:
- How to Use Rufus to Disable TPM and Secure Boot in Bootable Windows 11 USB Drive
- How to Download and Install Official Windows 11 ISO
- Will Windows 11 Support More Processors?
- How to Disable VBS on Windows 11 and Does it Help?
- How to Use Windows 11 Installation Assistant to Upgrade From Windows 10


I Have the same error after checking my pc (enabled secure boot and TPM 2.0 )
but I still getting the same error? any help please?
me 2 everything should be fine but it still has that error
me too everything is okay but still have same error
If you are using a gigabyte motherboard you need to ensure secure boot is enabled AND active. To activate it change the boot type to custom, reset to factory keys, change back to default and exit WITHOUT SAVING. Open up the system information tab to ensure secure boot is on. I have a prebuilt PC and this worked for me. For whatever reason secure boot was selected but inactive by default.
I am not responsible for any wack things you do to your pc while messing around in the BIOS. This worked for me after 2 hours of jumping through hoops so I just want to spread that around.
Fix#3 did the trick thanks